Manage Storage
The Storage tab on the GPU Virtual Machine page lets you manage the full lifecycle of your Block Storage volumes within the current Organization and Workspace. You can view, create, resize, upgrade the storage tier, attach or detach volumes, and delete volumes.
To open it, go to GPU Virtual Machine → Storage. You can also view the volumes attached to a single VM on the Storage tab of that VM's details page.
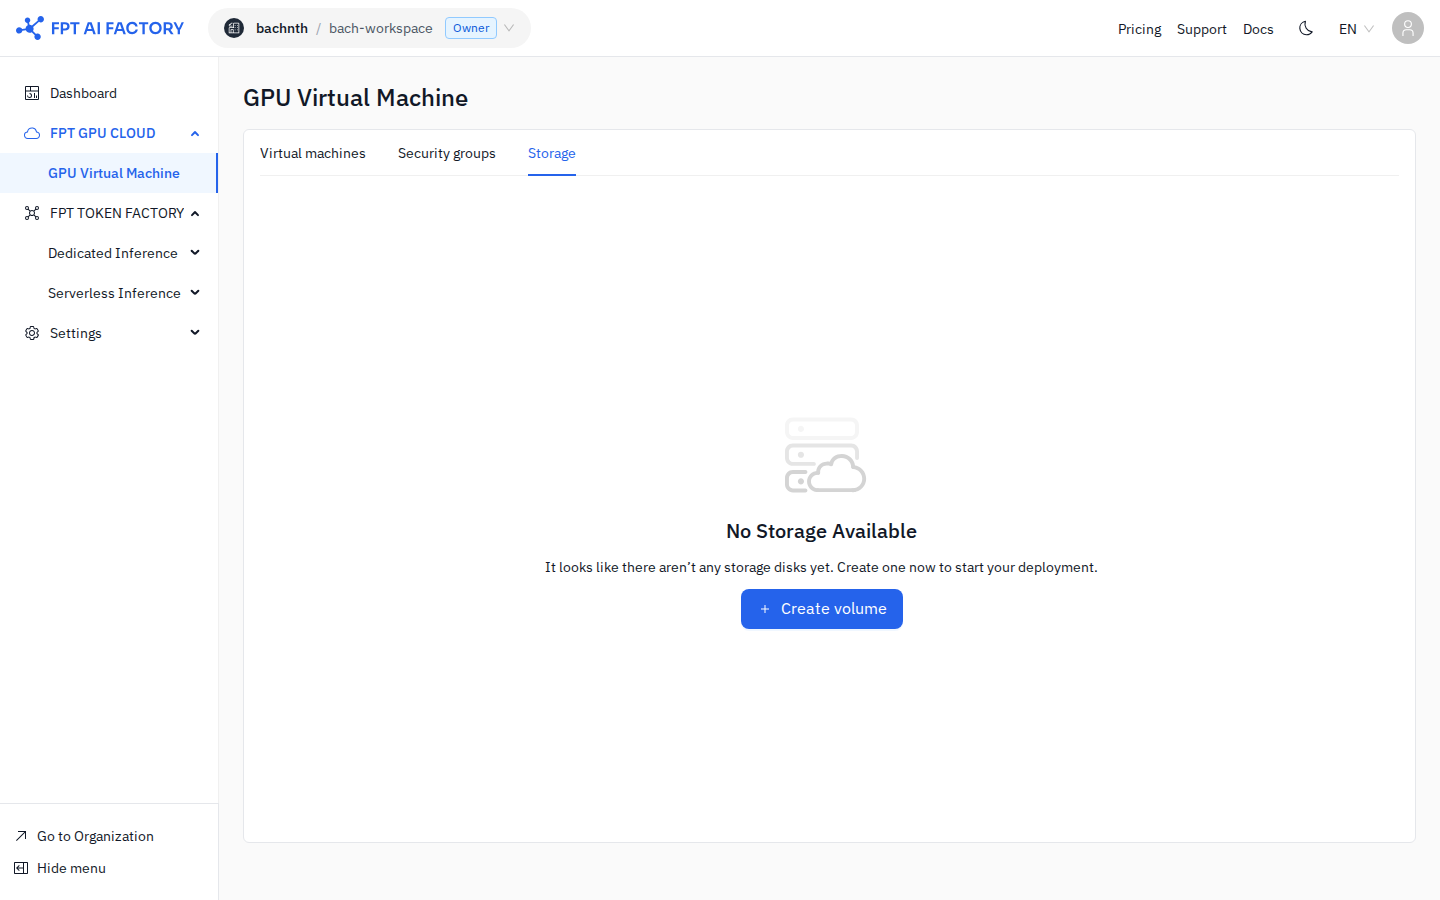
You can only create Data volumes here. A Boot volume is created automatically when you create a VM and is shown as read only.
1. View the volume list
The volume list loads every volume in your Workspace and updates in real time. You can search by name and filter by region.
The table shows the following columns.
| Column | Description |
|---|---|
| Name | The volume identifier. |
| Volume type | A badge showing Boot volume or Data volume. |
| Storage tier | The IOPS-based storage tier applied to the volume — Standard or Premium. |
| Capacity (GB) | The size of the volume. |
| Attached to | The VM name, shown as a badge. Click it to open the VM details page in a new browser tab. Empty if the volume is not attached. |
| Status | A badge showing Creating, Attached, Detached, Deleting, or Error. |
| Last modified at | The date and time in your local time zone, in the format YYYY-MM-DD HH:mm:ss. |
| Actions | A dropdown with the actions available for that row. |
The available actions depend on the volume type, storage tier, and status.
| Action | Available for |
|---|---|
| Edit size (increase only) | Boot or Data volume, any tier other than NVMe, status Attached or Detached. |
| Edit tier (Standard → Premium only) | Boot or Data volume, any tier other than NVMe, status Attached or Detached. |
| Attach to VM | Data volume, any tier other than NVMe, status Detached. |
| Detach | Data volume, any tier other than NVMe, status Attached. |
| Delete | Data volume, any tier other than NVMe, status Detached or Error. |
2. Create a volume
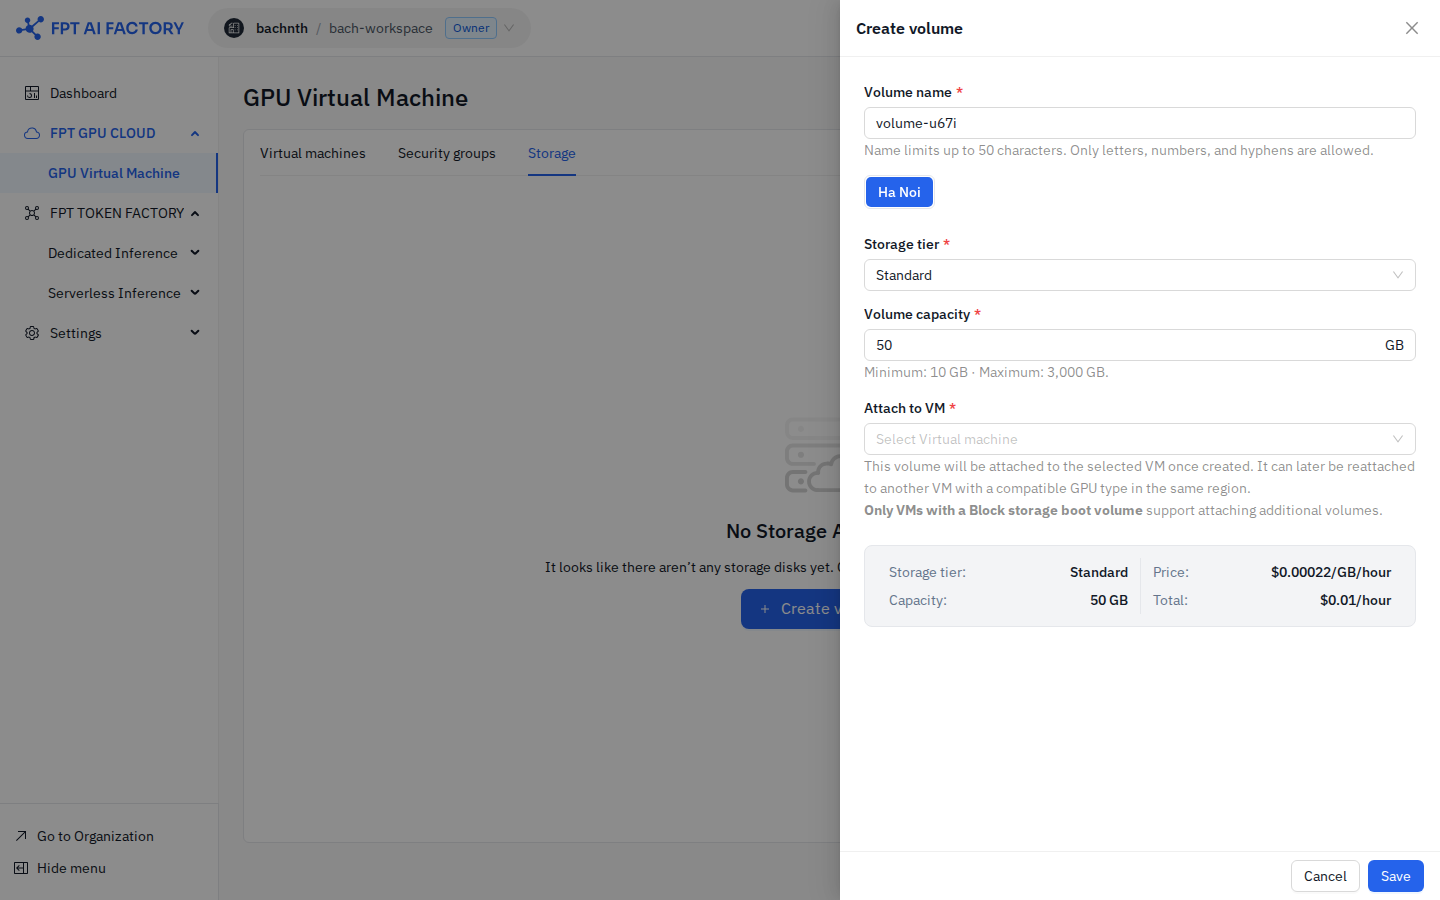
- Click + Create Volume.
- Enter a Volume name. The default is
volume-<4 random characters>. Names must be unique within the project and region, use only letters, numbers, and hyphens, and be at most 50 characters. - Select a Region. The default is Hanoi. If you open this from a VM's Storage tab, only the VM's region is available.
- Confirm the Volume type. Only Data volume can be created here.
- Select a Storage tier — Standard or Premium.
- Enter a Capacity (GB). The minimum is 10 GB and the maximum is 3,000 GB.
- Optionally select a VM under Attach to VM. The VM must be in the same region as the volume. You can leave this blank and attach the volume later.
- Review the estimated cost, then click Create volume.
A success toast appears and the new volume is added to the top of the list.
You can create up to 20 data volumes per Organization.
3. Edit the size
You can only increase a volume's size. Decreasing the size is never allowed, to protect data integrity. Resizing applies to Boot and Data volumes on a tier other than NVMe.
- Open the volume's Actions menu and select Edit size.
- The modal shows the current size and tier. Enter a New size that is greater than the current size, up to 3,000 GB.
- Review the new price, then click Save.
When the resize succeeds, a confirmation appears with guidance on how to extend the file system. You can extend the volume without rebooting, or reboot the VM to apply the new size automatically.
4. Upgrade the storage tier
You can upgrade the storage tier from Standard to Premium. This applies to Data volumes.
- Open the volume's Actions menu and select Edit tier.
- Select Premium.
- Click Apply.
The new tier must be different from the current tier. If you select the same tier, the Apply button stays disabled.
5. Attach a volume to a VM
You can attach a Data volume that is in the Detached state. Attaching is a hot operation — you do not need to stop the VM.
- Open the volume's Actions menu and select Attach to VM.
- In the modal, the volume name is shown as read only. Under Attached VM, choose a VM. Only VMs in the same region as the volume, in the Running or Stopped state, are listed.
- Click Attach.
The status changes to Attached.
6. Detach a volume from a VM
You can detach a Data volume that is Attached. Detaching is a hot operation — the VM does not need to be stopped and the data is not affected.
- Open the volume's Actions menu and select Detach.
- In the confirmation modal, check the volume name and VM name, then click Detach.
The status changes to Detached and the Attached to column is cleared.
Boot volumes cannot be detached. The action is disabled with the tooltip: "Boot volumes cannot be detached."
7. Delete a volume
You can delete a Data volume that is Detached. This is a destructive action and cannot be undone.
- Open the volume's Actions menu and select Delete.
- In the warning modal, type
deleteto confirm. The button is enabled only when the text matches exactly. - Click Delete volume.
A success toast appears and the volume is removed from the list.
This action cannot be undone. All data on the volume is permanently deleted.
Attached volumes and Boot volumes cannot be deleted. The delete option is disabled, and for an attached volume the tooltip reads: "Please detach the volume from the VM before deleting."
What's next
- Create a GPU VM — choose Block Storage and add a boot or data volume when you create a VM.
- Manage GPU VMs — power on, power off, reboot, and delete your VM.