Workspaces
Workspaces are isolated environments for teams or projects within your Organization. Each Workspace has its own Services, Quota, Policies, and Member list.
The Organization Owner can create, edit, or delete any Workspace. Workspace Admins can edit their own Workspace from within Workspace settings.
To open the Workspaces list: click Go to Organization at the bottom of the left sidebar, then select Workspaces in the Settings menu.
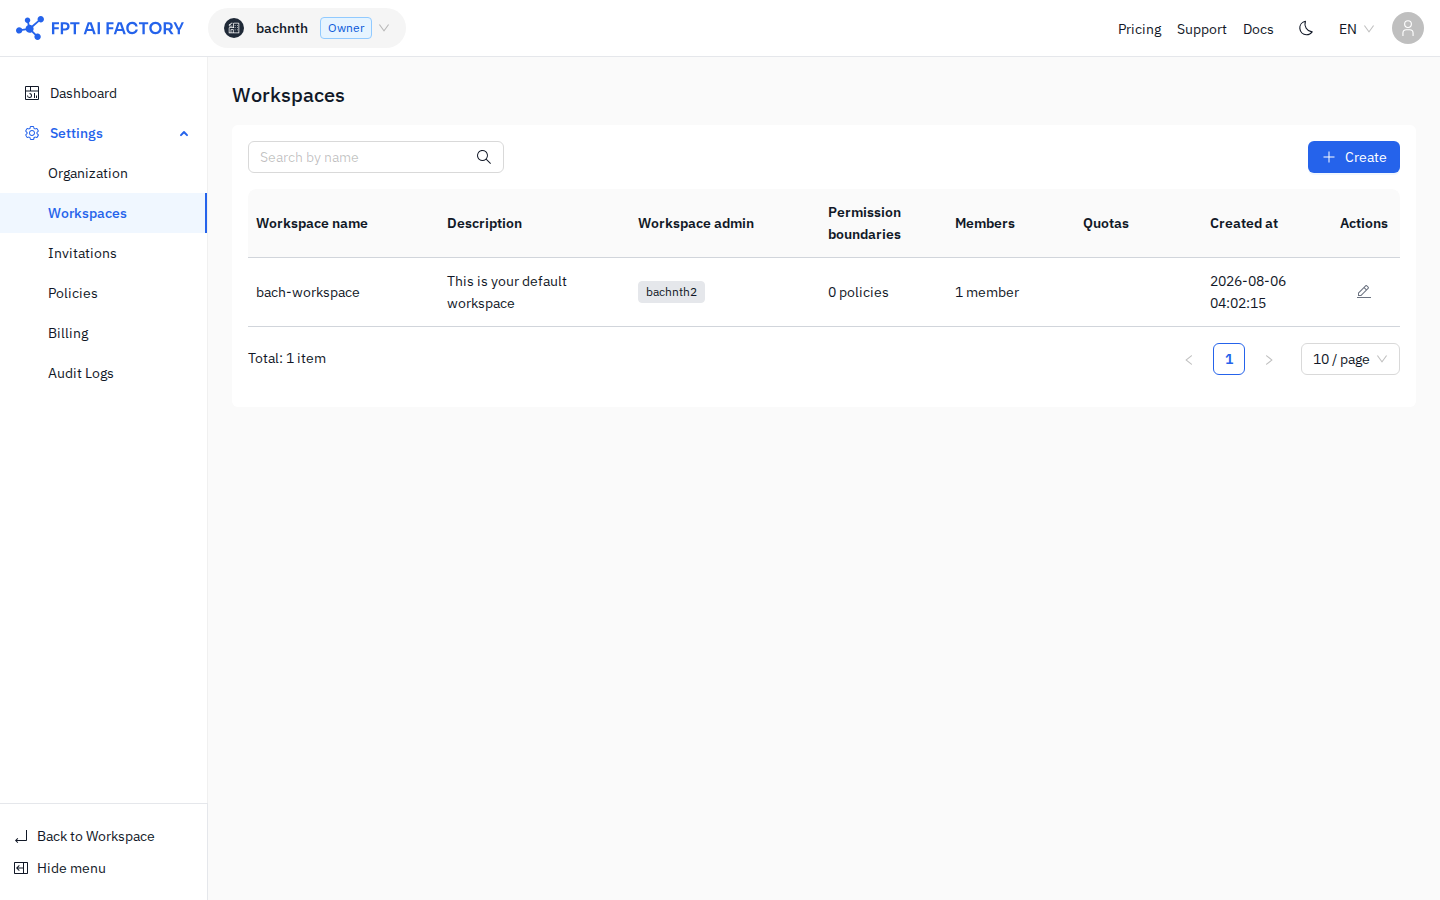
Workspace list
The list shows all Workspaces in your Organization with the following columns:
| Column | Description |
|---|---|
| Workspace name | Name of the Workspace |
| Description | Workspace description |
| Workspace admin | The assigned Workspace admin |
| Permission boundaries | Number of Policies attached to this Workspace |
| Members | Total member count |
| Quotas | Configured budget limit; blank if no quota is set |
| Created at | Creation date and time |
| Actions | Edit (pencil) icon |
Use the search box to filter by workspace name. Click + Create to create a new Workspace.
Create a workspace
-
Click + Create on the Workspaces page.
-
Fill in the General information section:
Field Rules Workspace name Required. Allowed characters: A–Z, a–z, 0–9, -,_. No spaces.Description Optional. Maximum 100 characters. Workspace admin Required. Select the admin for this Workspace. -
Click Save to save General information.
Edit a workspace
There are two ways to reach the edit page depending on your role:
- Organization Owner — click the Edit (pencil) icon on a workspace row in Settings → Workspaces.
- Workspace Admin — click Settings in the Workspace sidebar, then select Workspace.
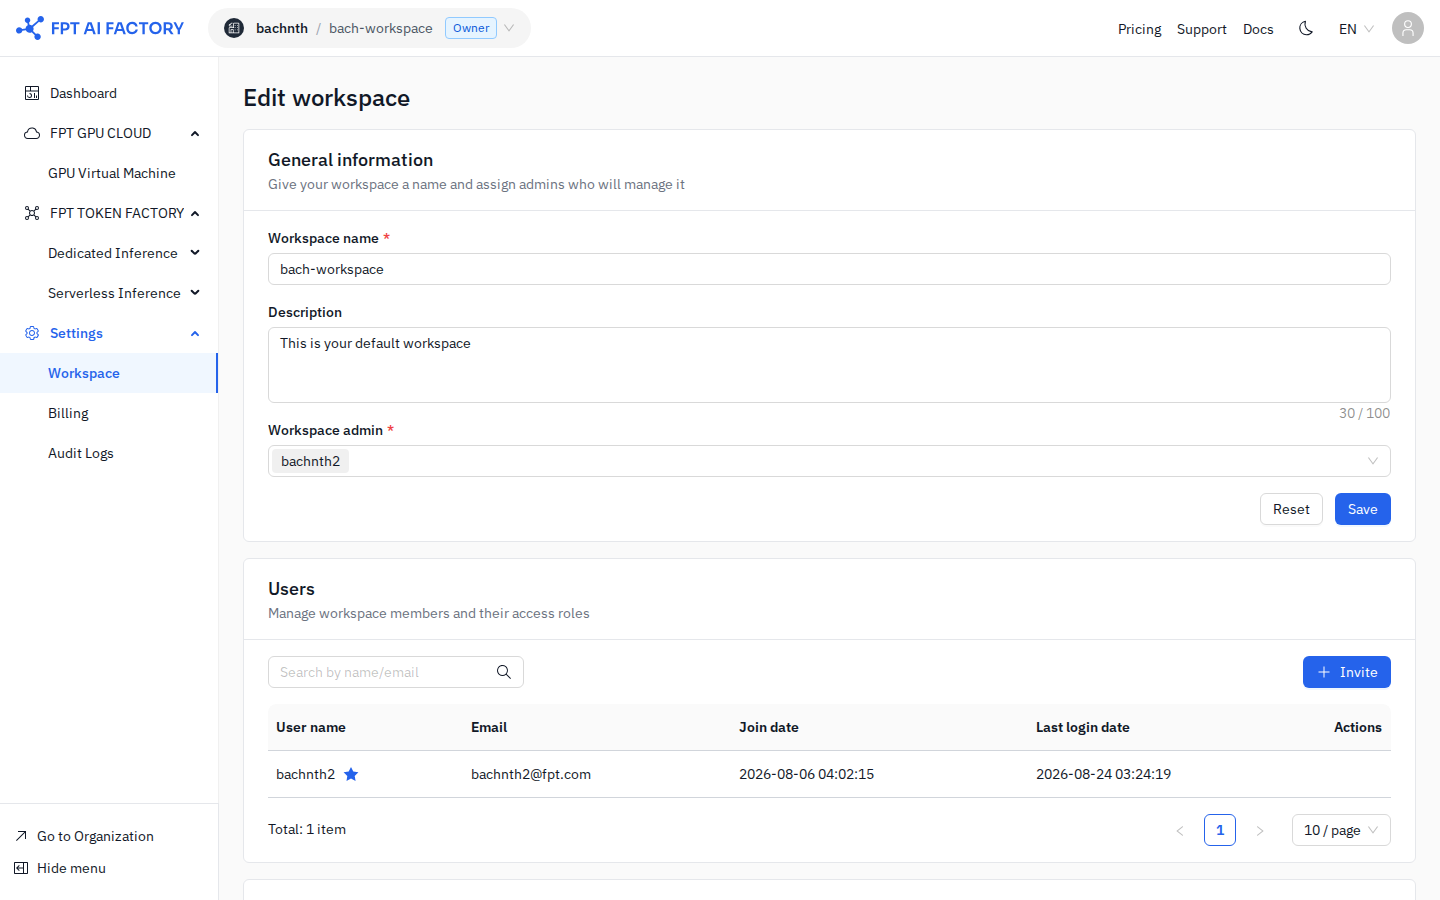
The edit page is divided into sections. Each section saves independently — click Save within each section before moving on.
General information
Update the Workspace name, description, or Workspace admin, then click Save.
Users
The Users section manages who has access to this Workspace.
| Column | Description |
|---|---|
| User name | Member's username. The Workspace admin is marked with a star icon. |
| Member's email address | |
| Join date | Date the member joined this Workspace |
| Last login date | Most recent login time |
| Actions | Remove the member from this Workspace |
Click + Invite to invite a new user by email. Invited users receive a notification and must accept before they appear as active members.
Use the search box to filter by name or email.
What's next
- Organization — set the Organization-level quota that constrains all Workspaces.
- Quotas — how quota hierarchy, period rules, and conflict warnings work.
- Policies — create policies before assigning them to Workspaces.
- Invitations — view pending invitations across organizations.