Create a New VM from Restore Points
FPT Backup supports not only restoring a VM from a Restore Point but also creating a new VM with data taken from a Restore Point. The newly created VM will have disk data identical to the original VM at the time the Restore Point was created, while allowing customization of RAM, CPU, and Network configuration. This makes it easy to quickly and simply create multiple secondary VMs from a primary VM.
Step 1: Open the Backups tab of the VM
- In the menu, select Compute Engine > Instances.
- Select the VM you want to clone.
- Open the Backups tab.
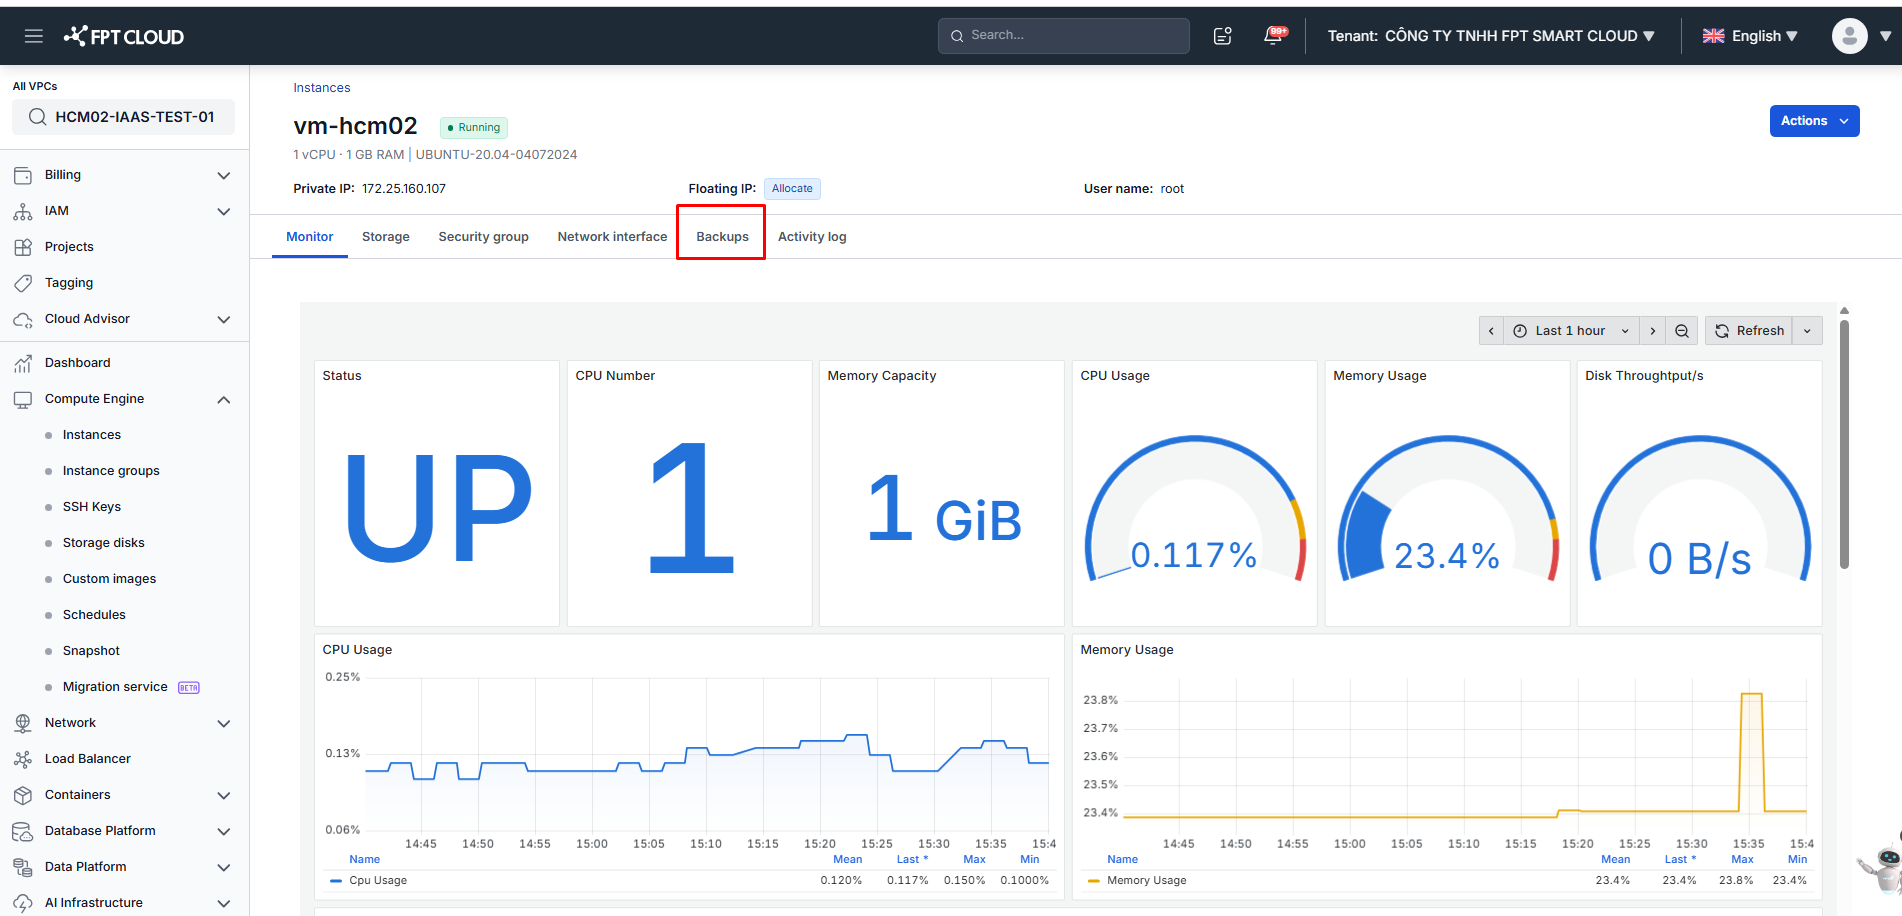
A banner shows when the next backup run is scheduled. To manage or edit the backup job itself, go to Backup & Recovery.
Step 2: Select a Restore Point
The Restore Points table lists every restore point created by the backup job, with its Date, Size, and Type (Full or Incremental).
In the Action menu of the restore point you want to use, select Restore Keep.
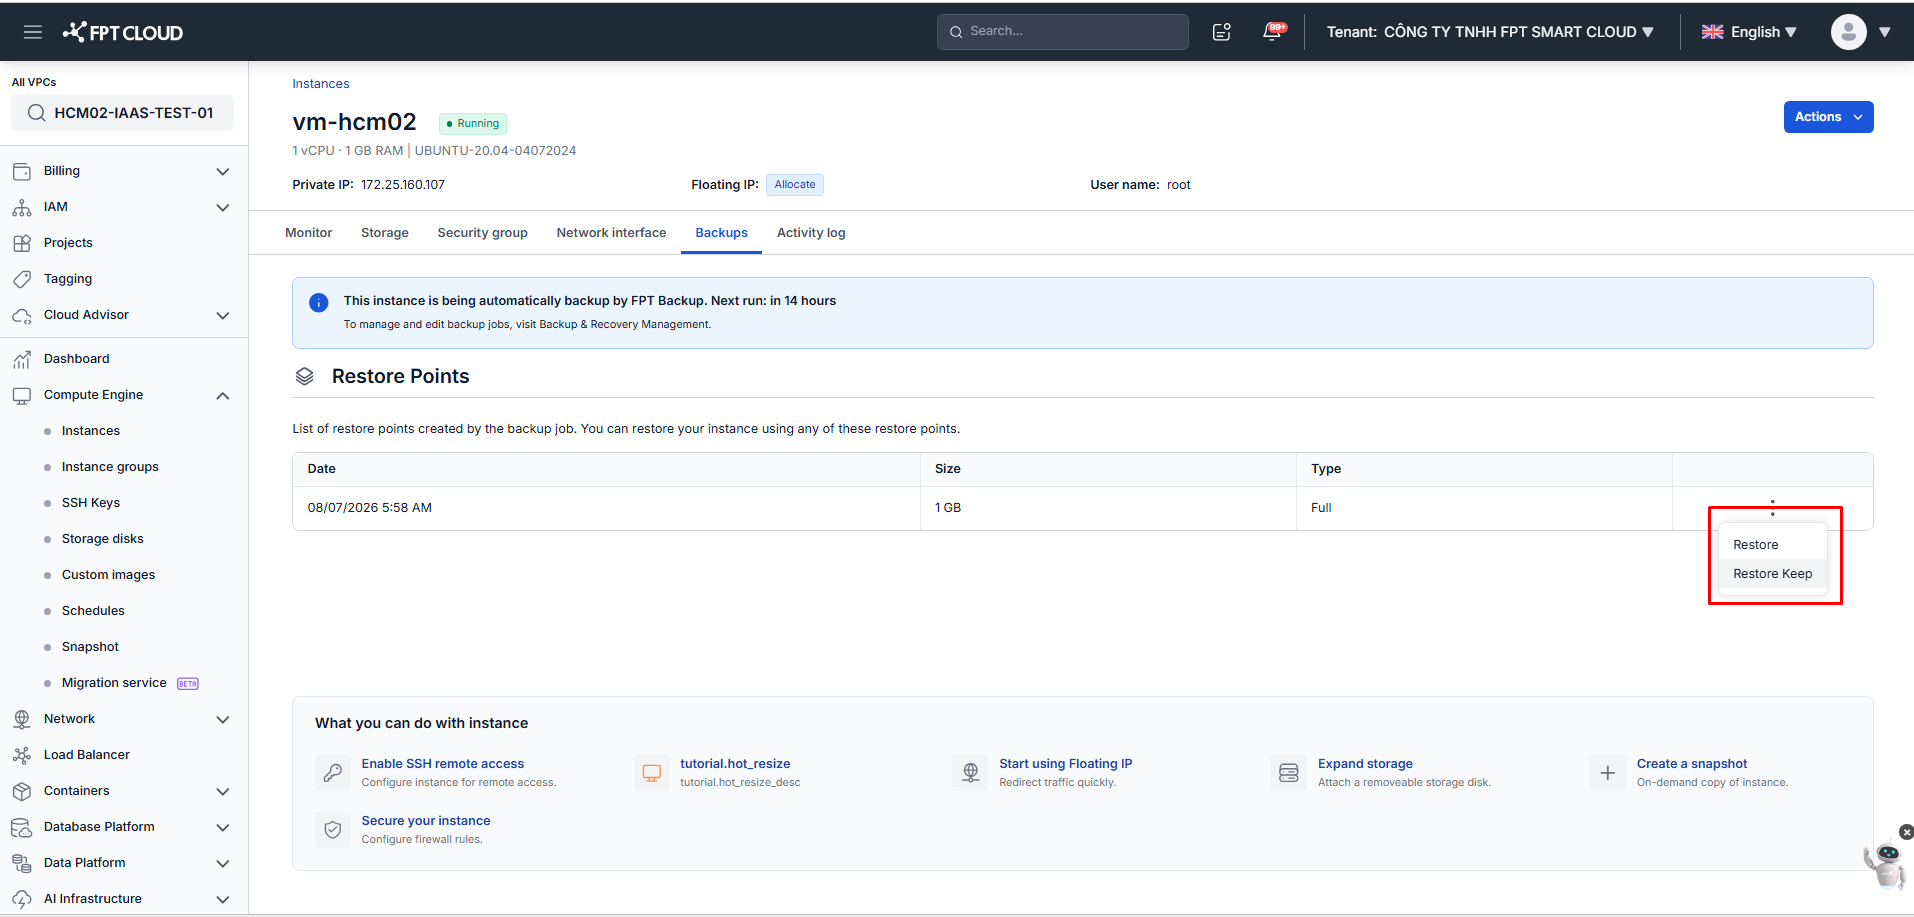
Restore overwrites the current VM with the restore point. Restore Keep leaves the current VM untouched and creates a new VM instead — see Restore a VM from Restore Points for the former.
Step 3: Configure the new VM
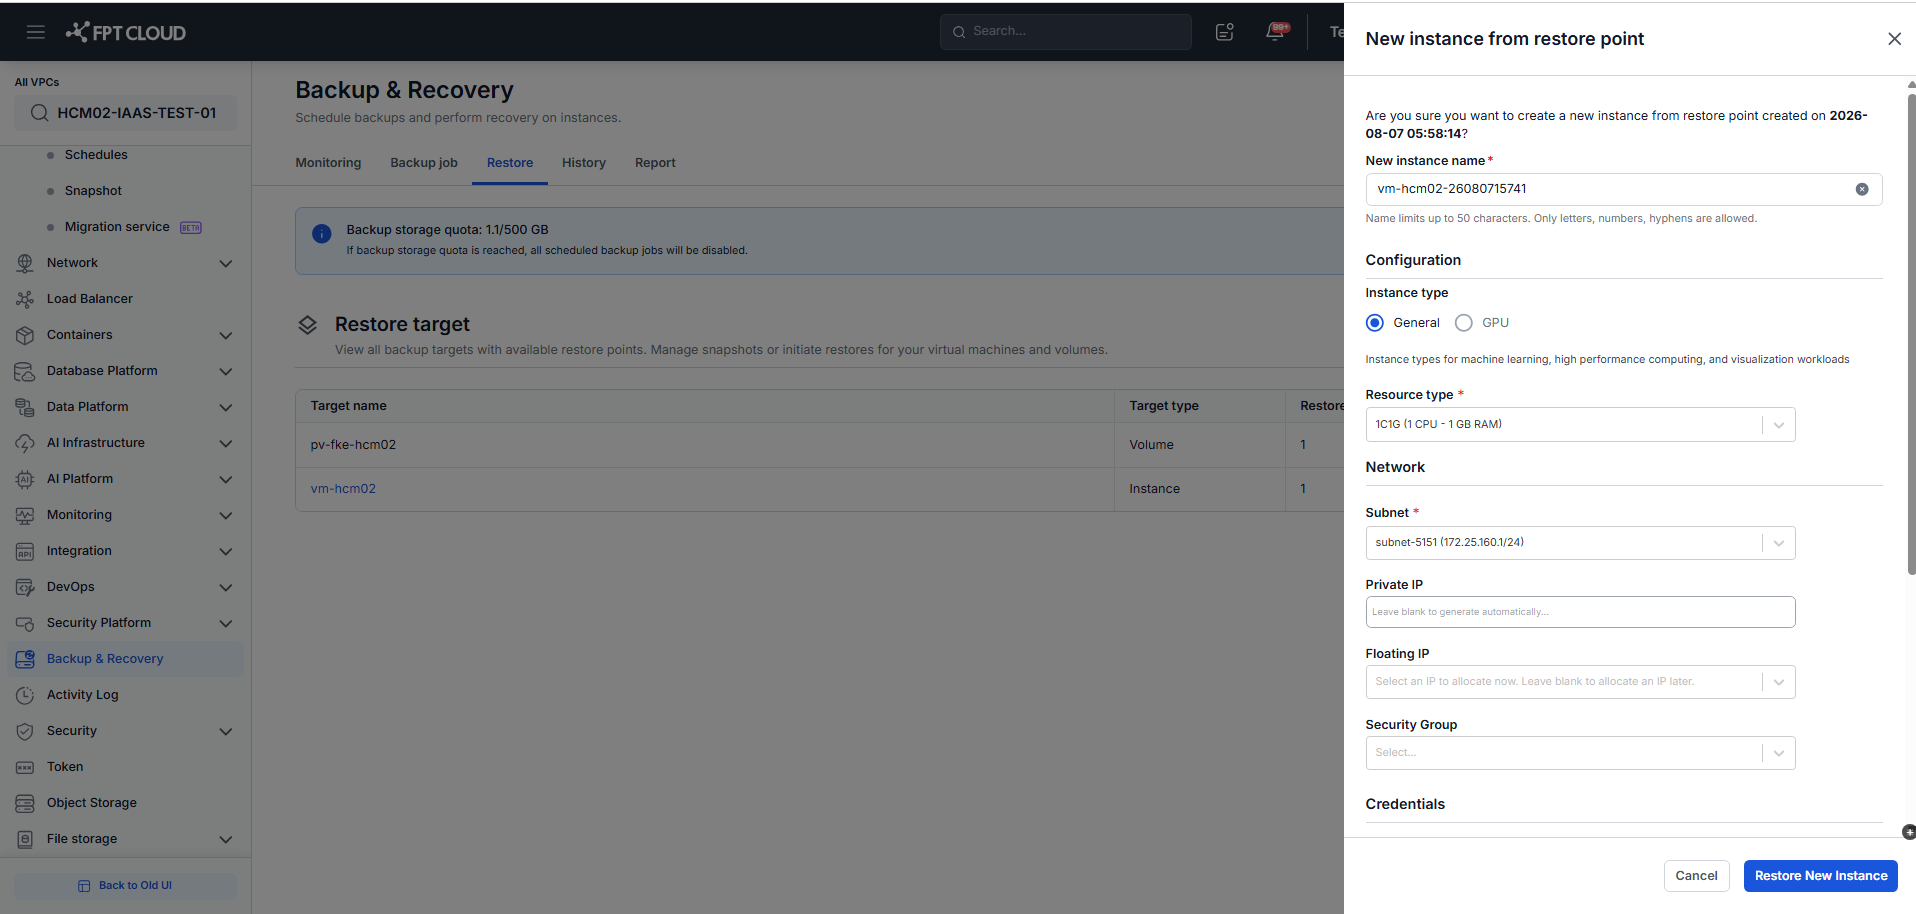
A panel named New instance from restore point appears. Configure the new VM — name, instance type, resource package, network, and the restore point to use as the data source.
Step 4: Create the new VM
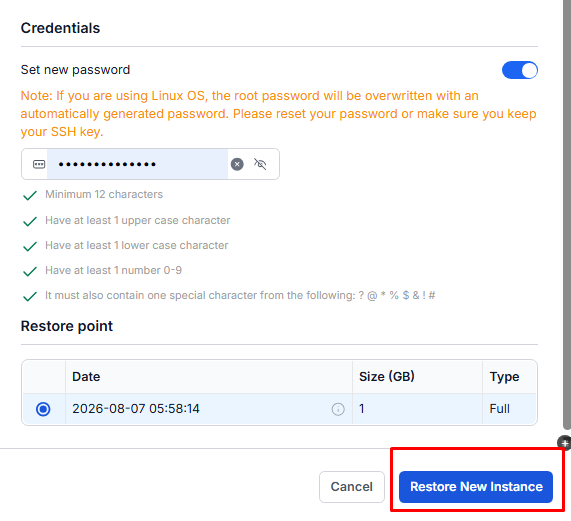
Click Restore New Instance to start creating the VM.
Important Notes
- New VM configuration: After creation, you can customize the RAM, CPU, and Network of the new VM as needed.
- Completion time: The process of creating a VM from a Restore Point typically takes a few minutes to a few hours, depending on the data volume.
A static IP configured inside the OS is restored exactly as on the original VM. The Private IP and Floating IP are yours to choose in the New instance from restore point screen (Step 3).