Manage Backup Jobs
FPT Backup uses the Backup Job concept to manage, monitor, and coordinate backup tasks for resources that need protection (e.g., VMs, volumes).
When you create a Backup Job, you configure:
- Backup scenario (daily / weekly / monthly)
- Backup method (Full / Incremental)
- Backup targets (list of VMs / Volumes)
- Notification recipients (email)
Once successfully created, the Backup Job will run fully automatically according to the configured schedule. Each run creates a new restore point and stores it in a separate storage partition in the same region as your VPC.
This increases data security in the event that production resources are attacked or encounter an incident.
1. Create a new Backup Job
Step 1: Open the Backup Job creation screen
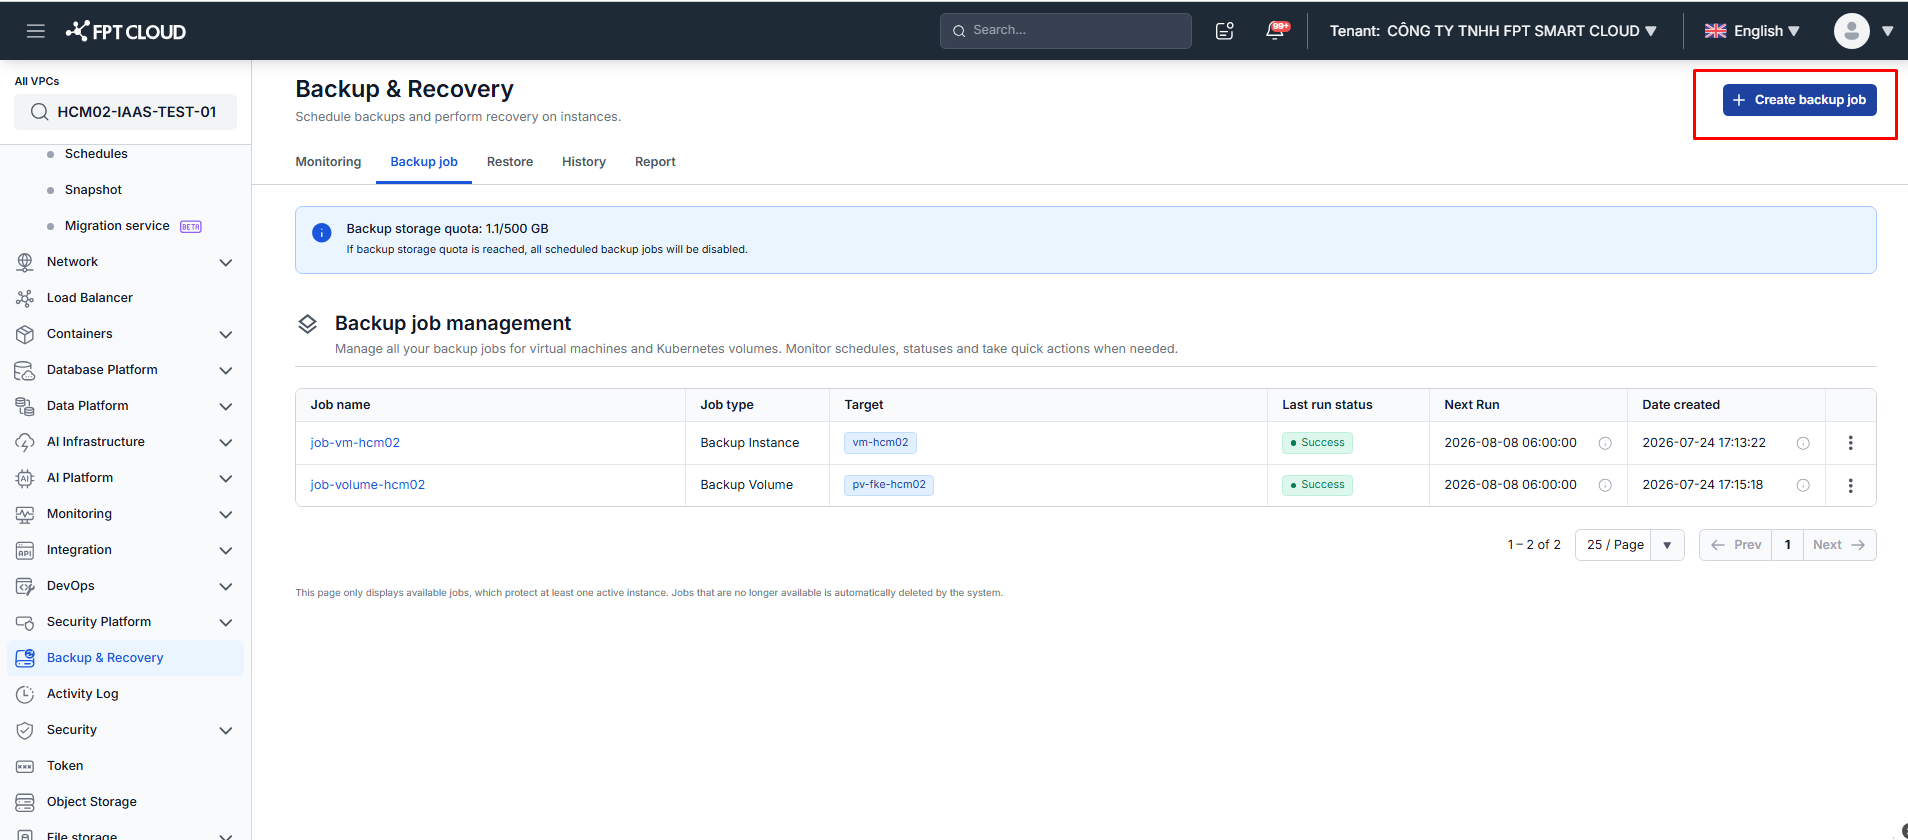
On the FPT Cloud Portal, go to Backup & Recovery, open the Backup job tab, then click Create backup job.
Step 2: Configure Backup Job information
The Create new backup job form is divided into three sections.
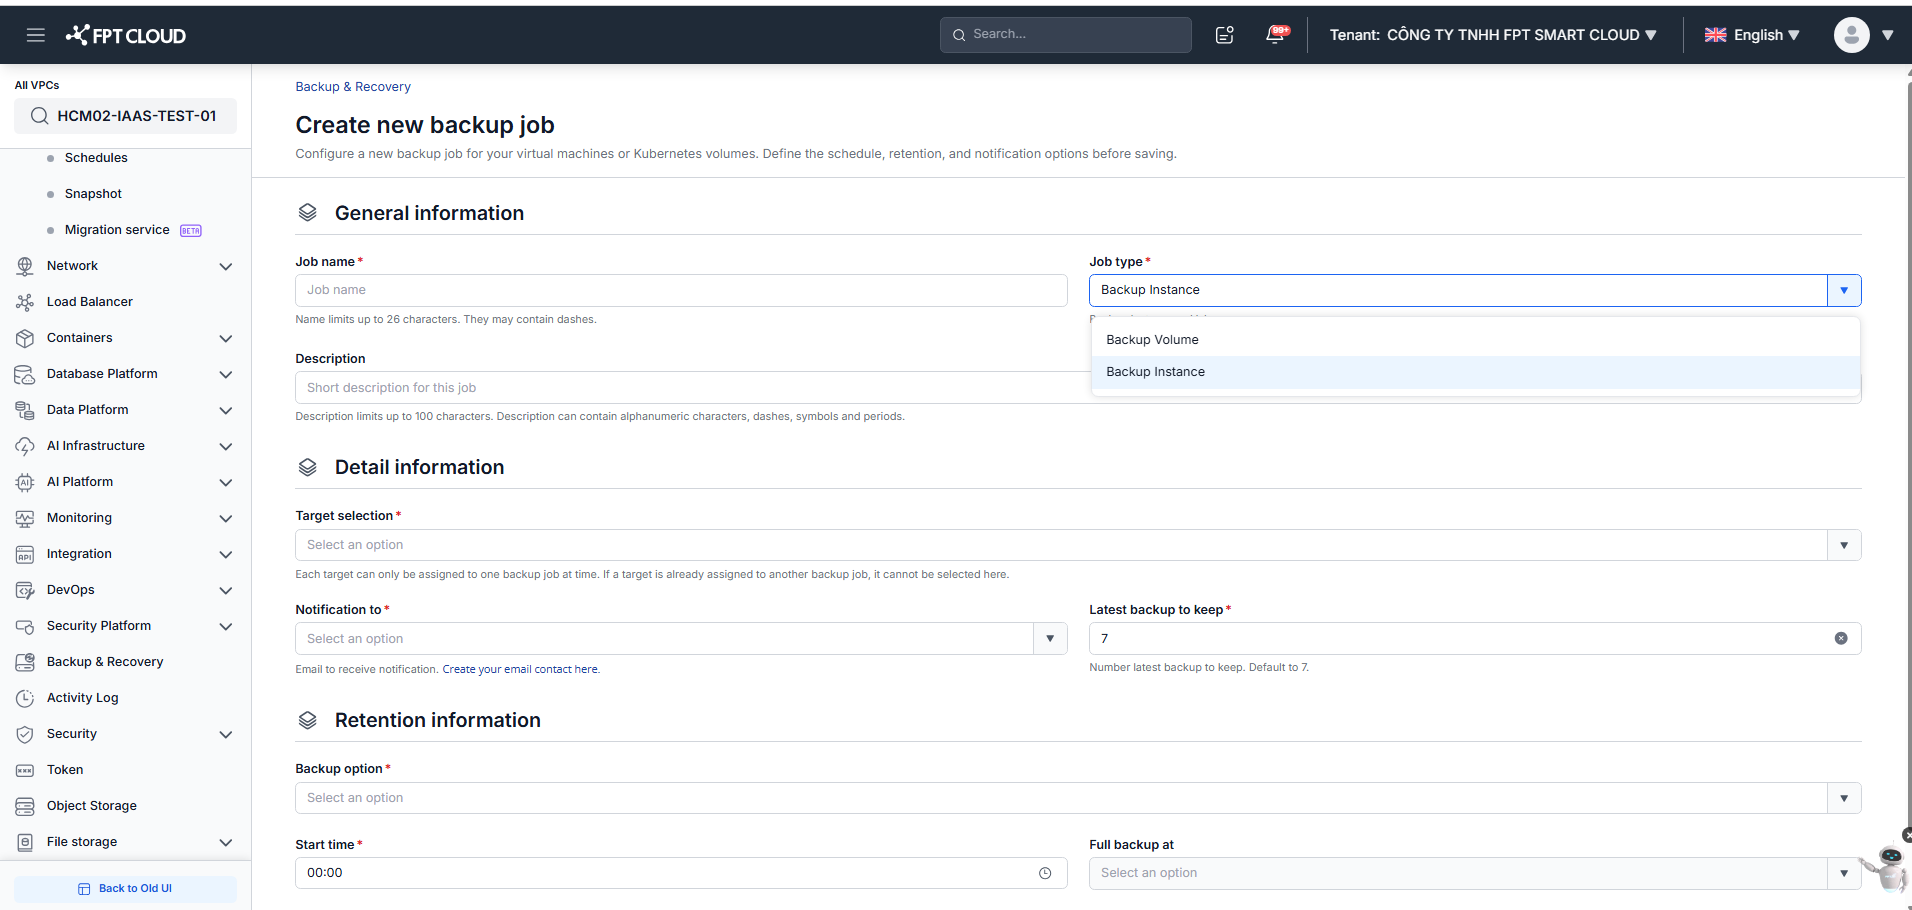
General information
| Field | Description |
|---|---|
| Job name (required) | Name of the Backup Job, unique within the VPC. Up to 26 characters; may contain dashes. Should be easy to understand and associated with the system or environment (e.g., prod-web-01-daily). |
| Job type (required) | Backup Instance to protect VMs, or Backup Volume to protect volumes. For Backup Volume, only volumes whose name starts with the prefix pv-fke are supported. |
| Description (optional) | Brief description of the purpose or scope of protection. Up to 100 characters. |
Detail information
| Field | Description |
|---|---|
| Target selection (required) | Select the VMs or volumes in the VPC to apply the Backup Job. A Backup Job can be linked to multiple targets, but one target can only be linked to one Backup Job. For Backup Volume, only volumes whose name starts with the prefix pv-fke are supported. |
| Notification to (required) | Select notification recipients via Email. You can create a new contact by clicking the "Create your email contact here" link on the FPT Portal. |
| Latest backup to keep (required) | Maximum number of restore points to retain, default is 7. When this number is exceeded, the system automatically deletes the oldest backups. |
Retention information
| Field | Description |
|---|---|
| Backup option (required) | Select a quick backup scenario — see the options below. |
| Start time (required) | Time to run within the day (00:00-23:59). |
| Full backup at | Only enabled when Weekly/Monthly active full is selected. Select the day to run a full backup. |
Available backup options:
- Daily full backup: Full backup every day.
- Daily incremental, Weekly active full: First backup is full, subsequent backups within the week are incremental, and a full backup is created at the end of the week.
- Daily incremental, Monthly active full: First backup is full, subsequent backups within the month are incremental, and a full backup is created at the end of the month.
Step 3: Create the Backup Job
Click Create. The Backup Job is created in Initiated status and runs automatically at the configured time, creating the first restore point.
To run it immediately without waiting for the schedule, use the Start function (see section 4).
2. Edit a Backup Job
Step 1: In the Backup job tab, click the Job name of the job you want to edit.
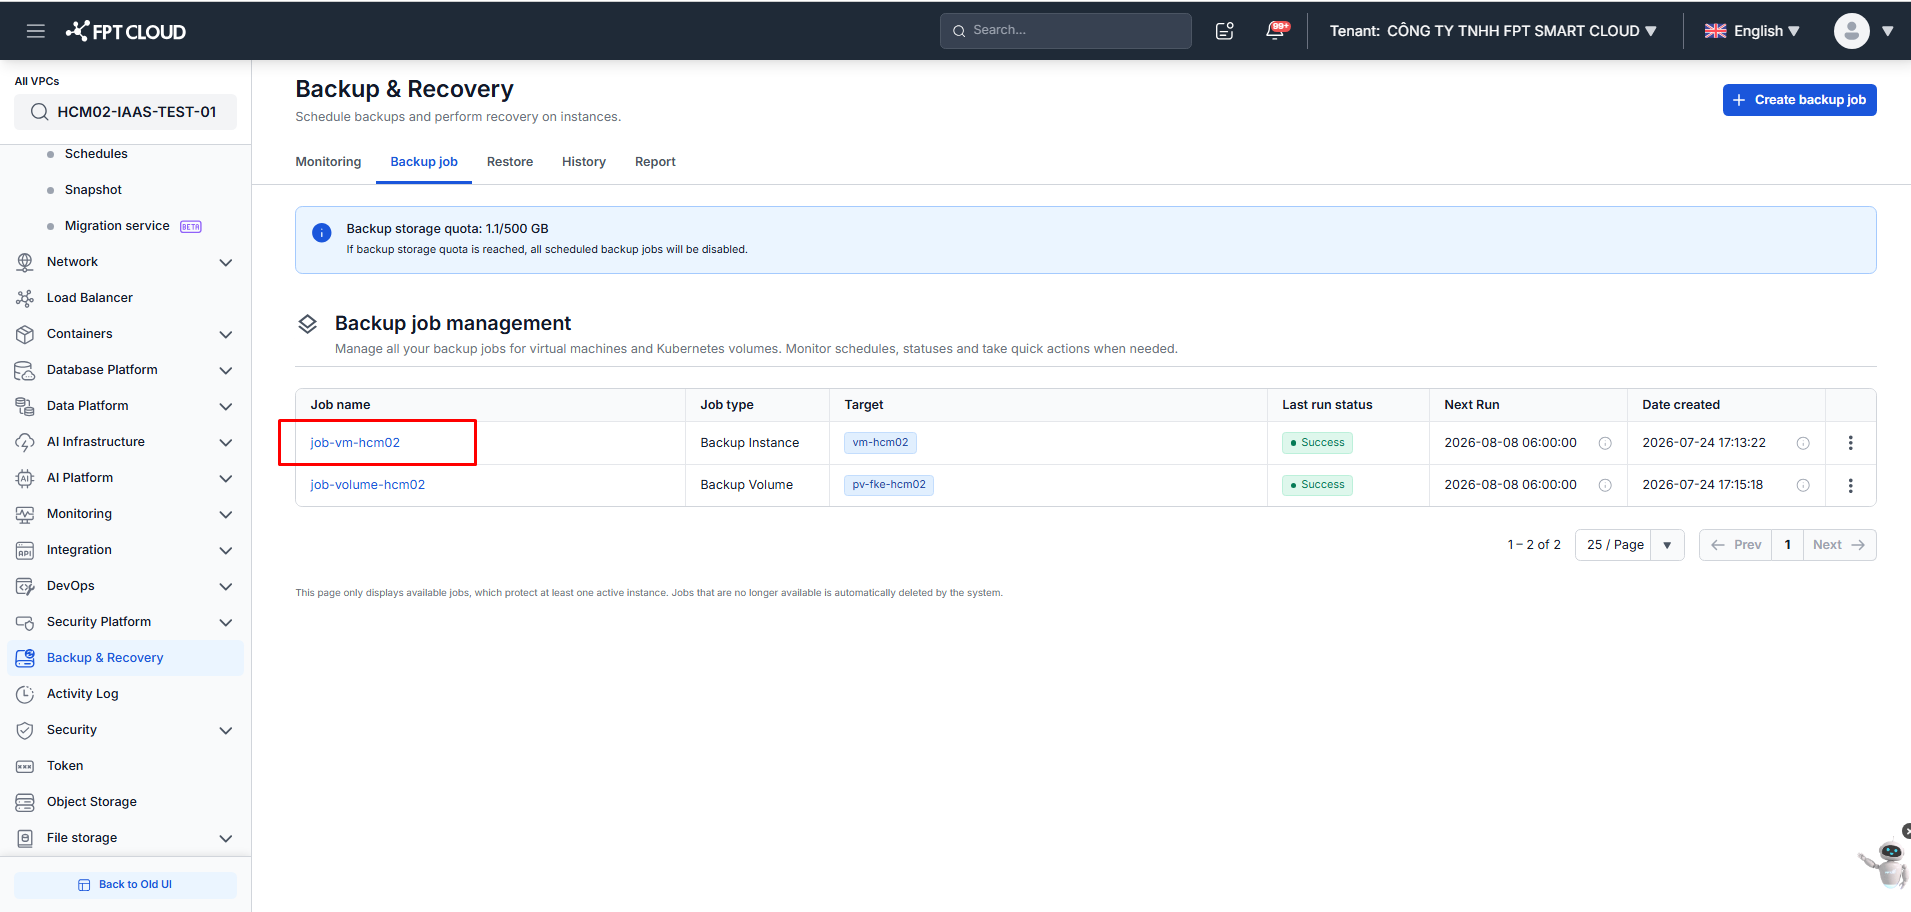
Step 2: The Update backup job screen opens with the current configuration. You can change the Description, Target selection, Notification to, Latest backup to keep, and the whole Retention information section.
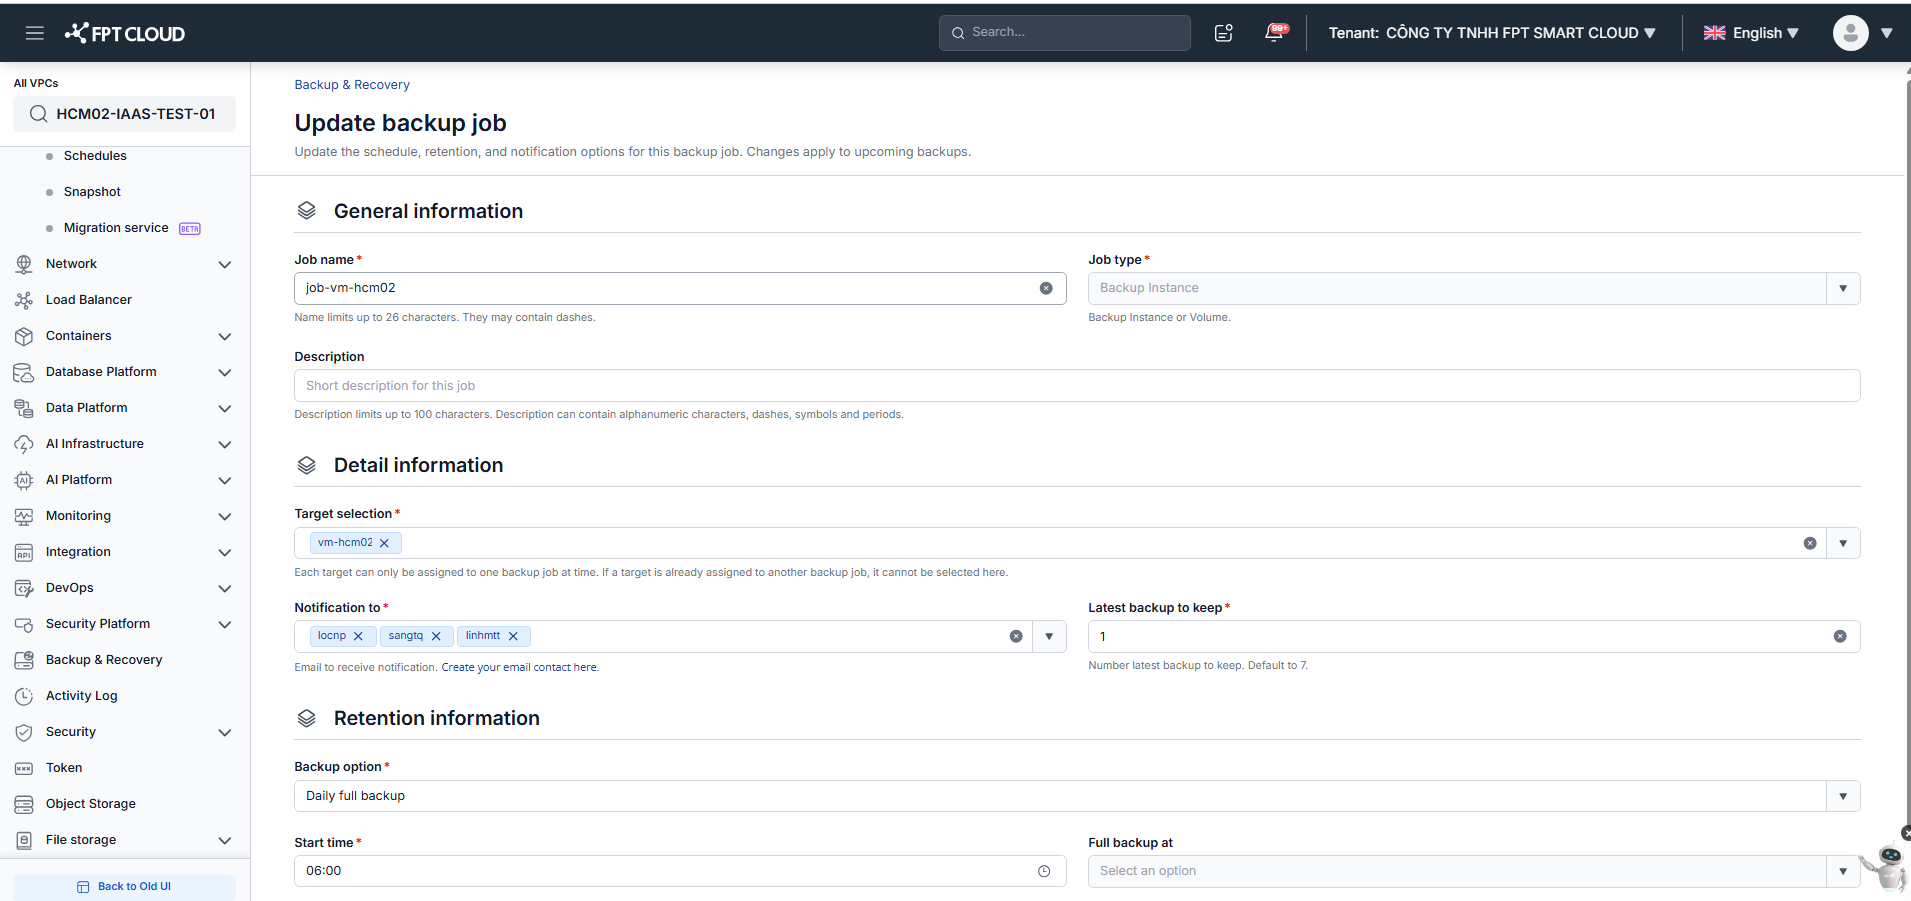
Job name and Job type cannot be changed after creation. Changes apply to upcoming backups only.
3. View the list of current Backup Jobs
To view the list of all Backup Jobs in the system, go to Backup & Recovery and open the Backup job tab.
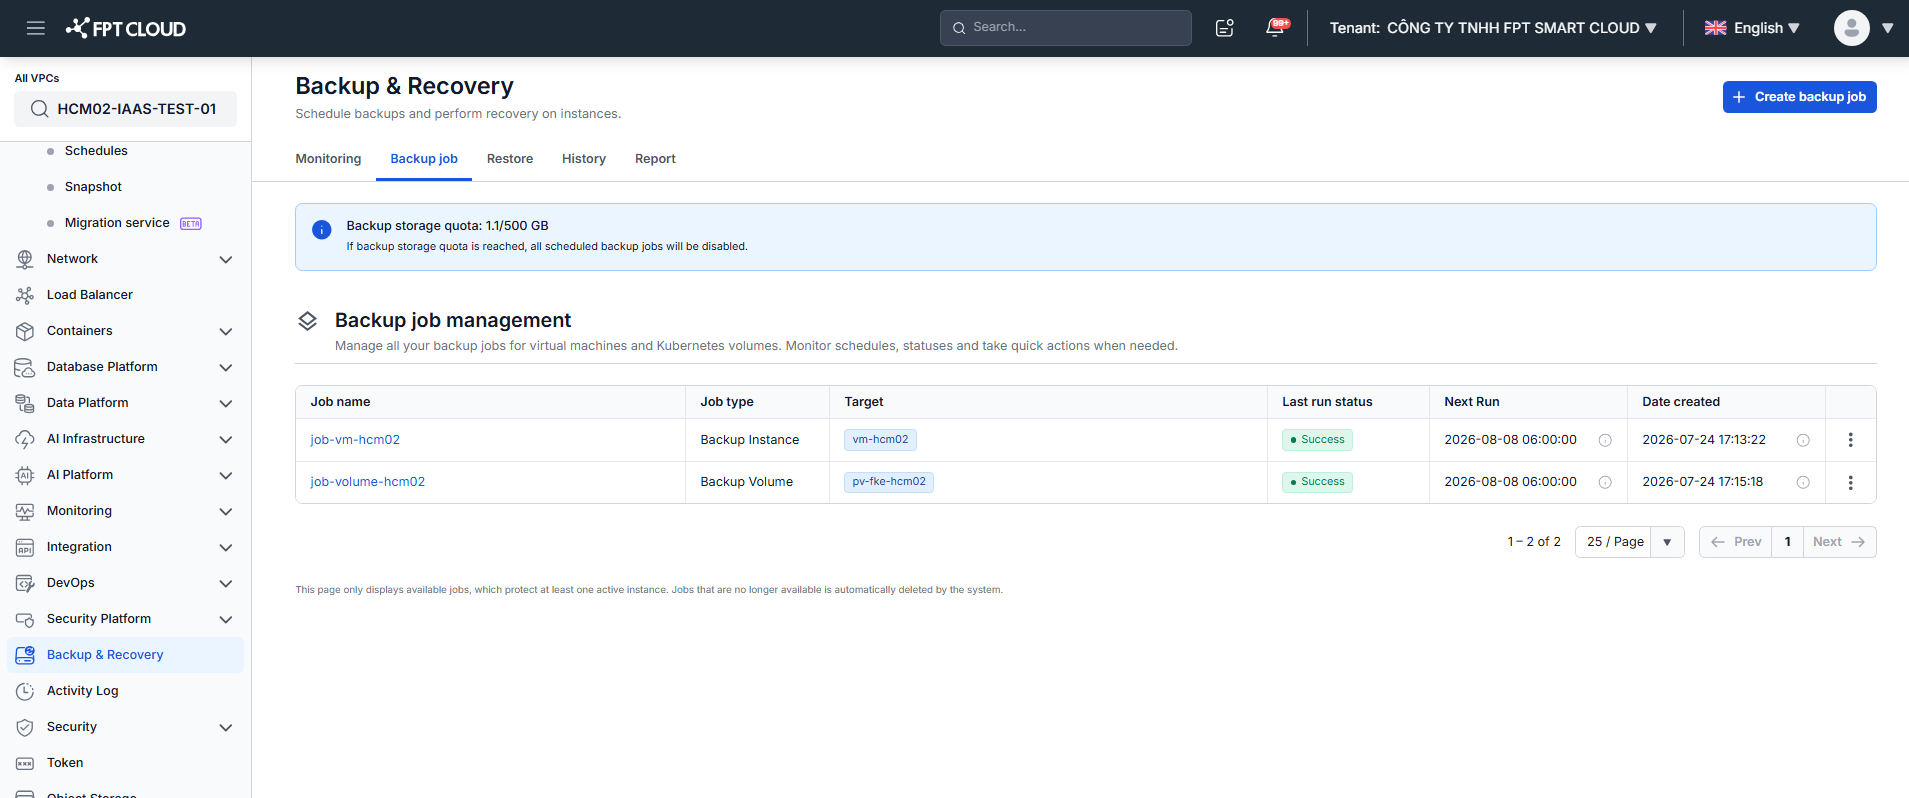
The Backup job management table shows:
| Column | Description |
|---|---|
| Job name | Name of the Backup Job. Click it to open the Update screen. |
| Job type | Backup Instance or Backup Volume. |
| Target | The VMs or volumes linked to the job. |
| Last run status | Result of the most recent run — Initiated (created, waiting for the first run), Success, Fail (resource, network, or configuration issue), or Pending (temporarily suspended). |
| Next Run | Next scheduled run, or Disable if the job is disabled. |
| Date created | When the job was created. |
In the Action menu of each row you can Start, Enable, Disable, or Delete the job.
This page only displays jobs that protect at least one active instance. Jobs that are no longer available are automatically deleted by the system.
4. Manually start a Backup Job
By default, each Backup Job will automatically run at the configured time. However, in many situations (e.g., before a system upgrade), you may want to run a backup immediately.
Step 1: Go to Backup & Recovery and open the Backup job tab.
Step 2: In the row of the Backup Job to run, in the Action menu, select Start.
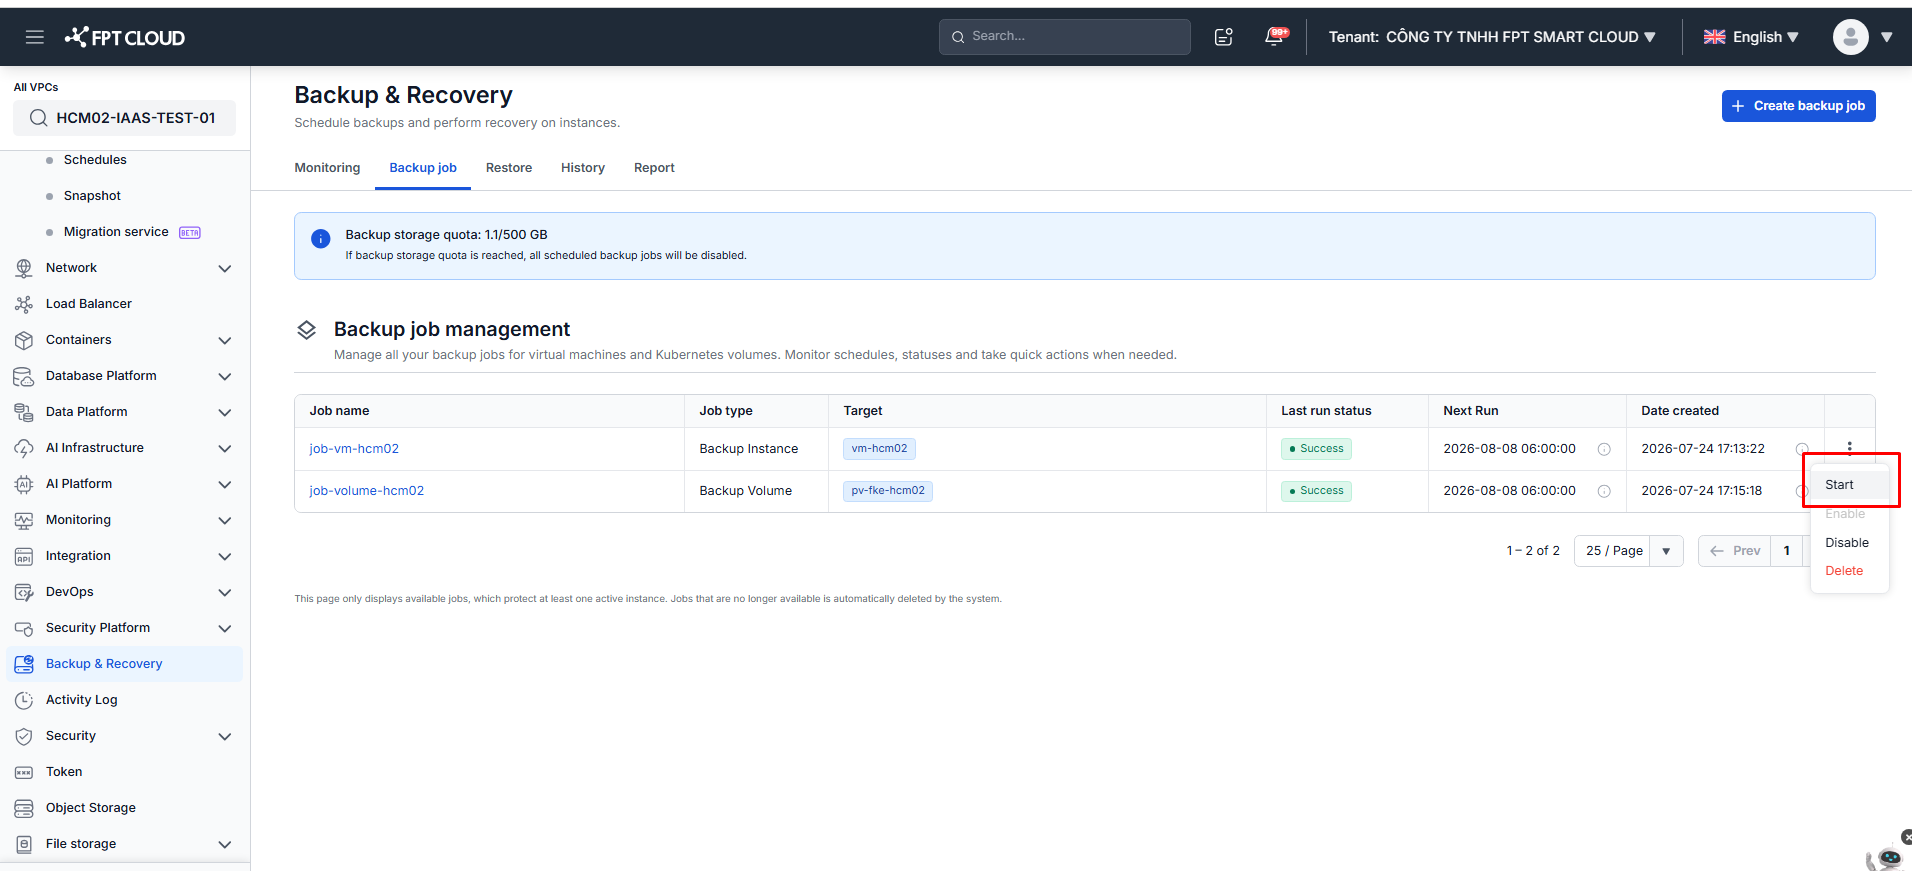
Step 3: A confirmation dialog will appear. Select Start to proceed with running the job.
After submitting the request, the system will:
- Check resource conditions
- Confirm the current status
- Begin performing the backup on the VMs linked to the job
Progress will be updated directly on the Backup job tab.
5. Enable / Disable Backup Job
Disable Backup Job
If you temporarily do not want to continue automatic backups, you can Disable the Backup Job. When disabled:
- The system stops creating new restore points
- Old restore points are retained
- The corresponding target is temporarily not protected going forward
- The Next Run column shows Disable instead of a scheduled time
Steps:
- Go to Backup & Recovery and open the Backup job tab.
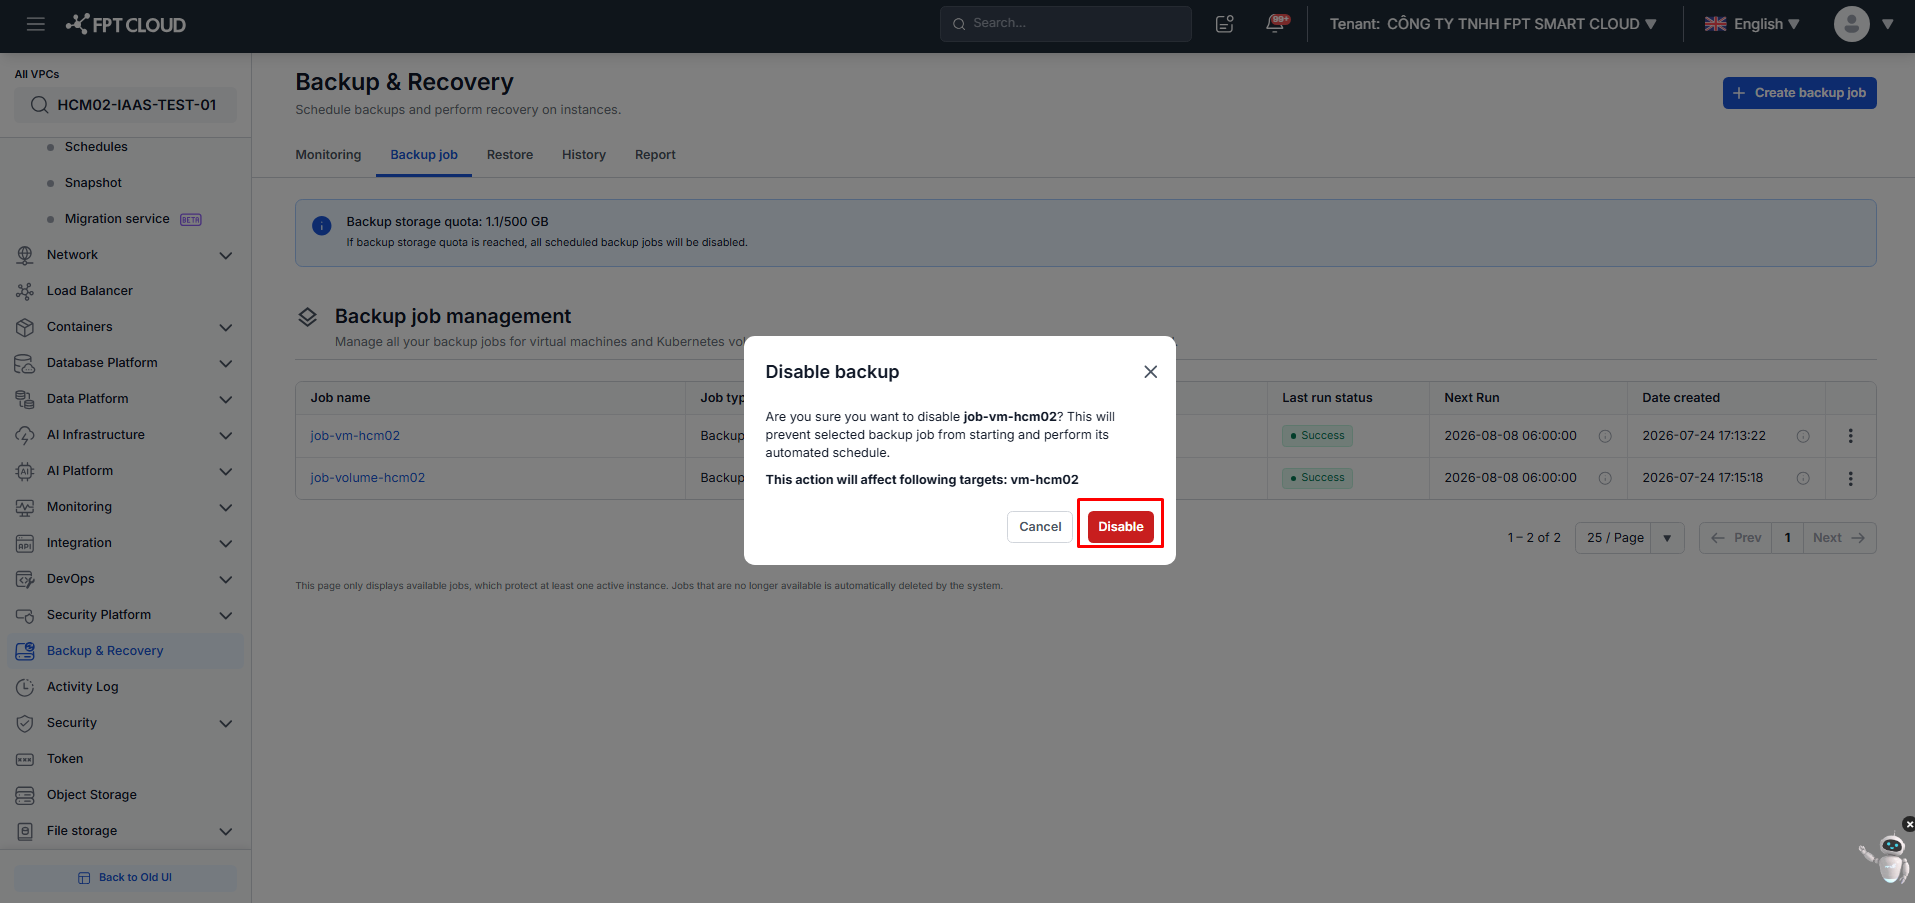
- For the job to pause, select Disable in the Action menu.
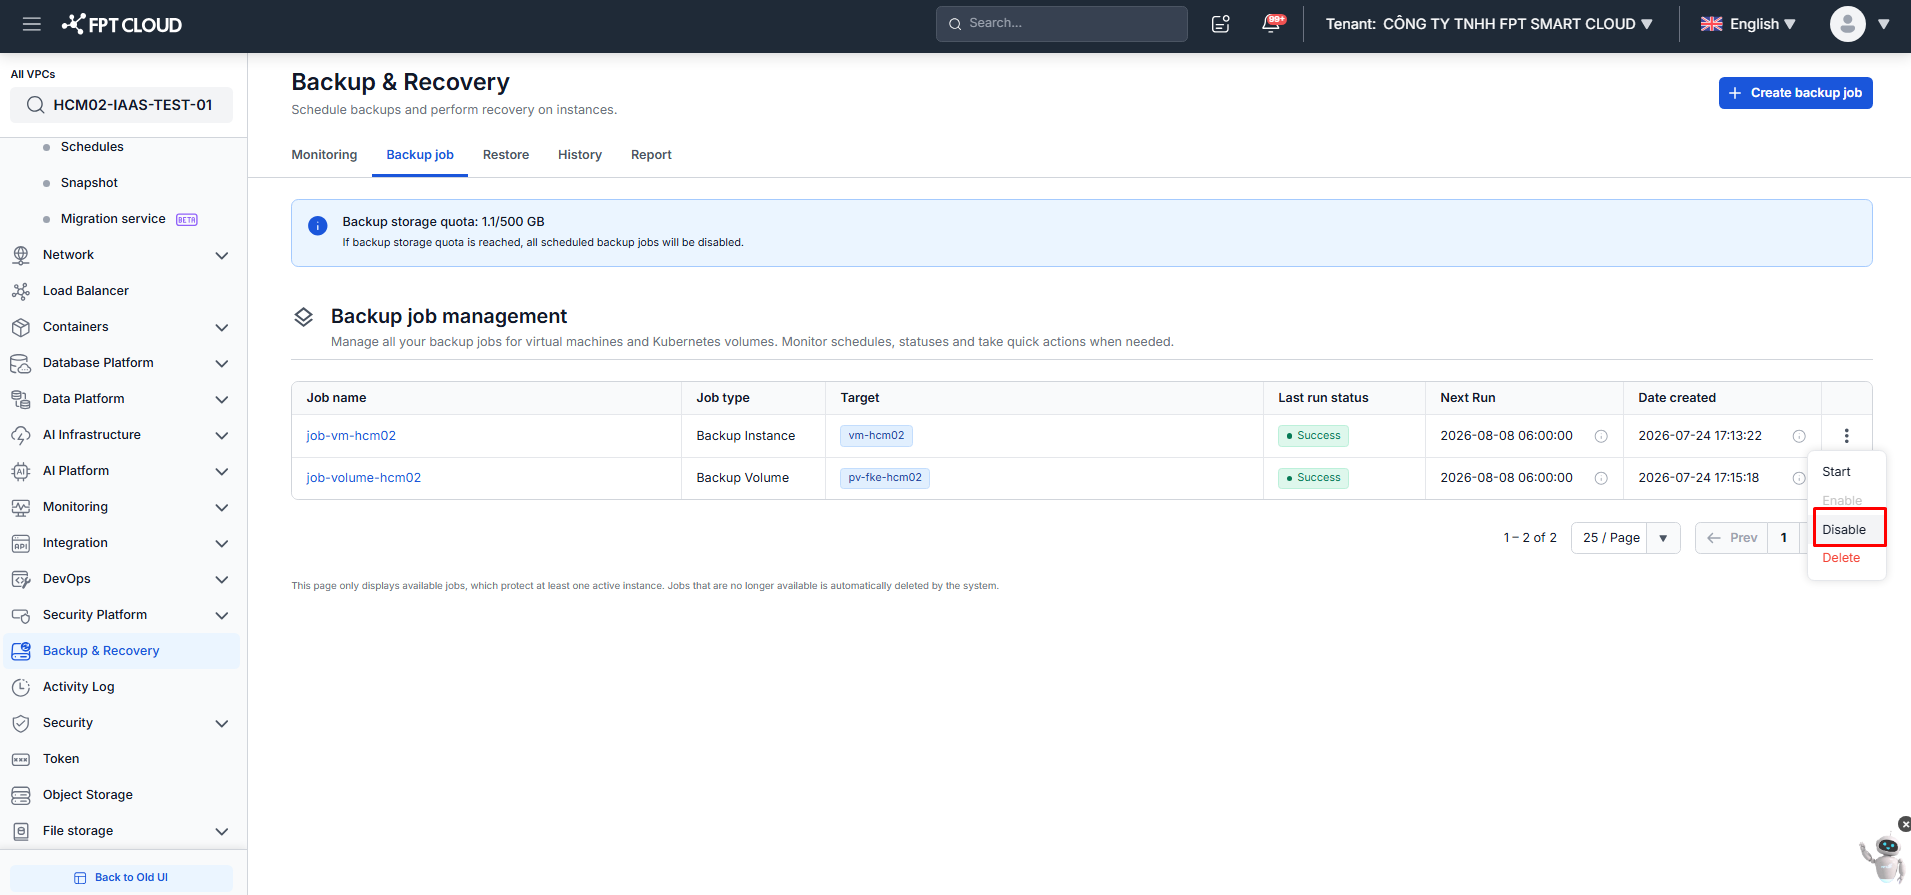
- The Disable backup dialog lists the targets that will be affected. Select Disable to confirm.
Enable Backup Job
To re-enable a paused job:
- Go to Backup & Recovery and open the Backup job tab.
- For the job to re-enable, select Enable in the Action menu.
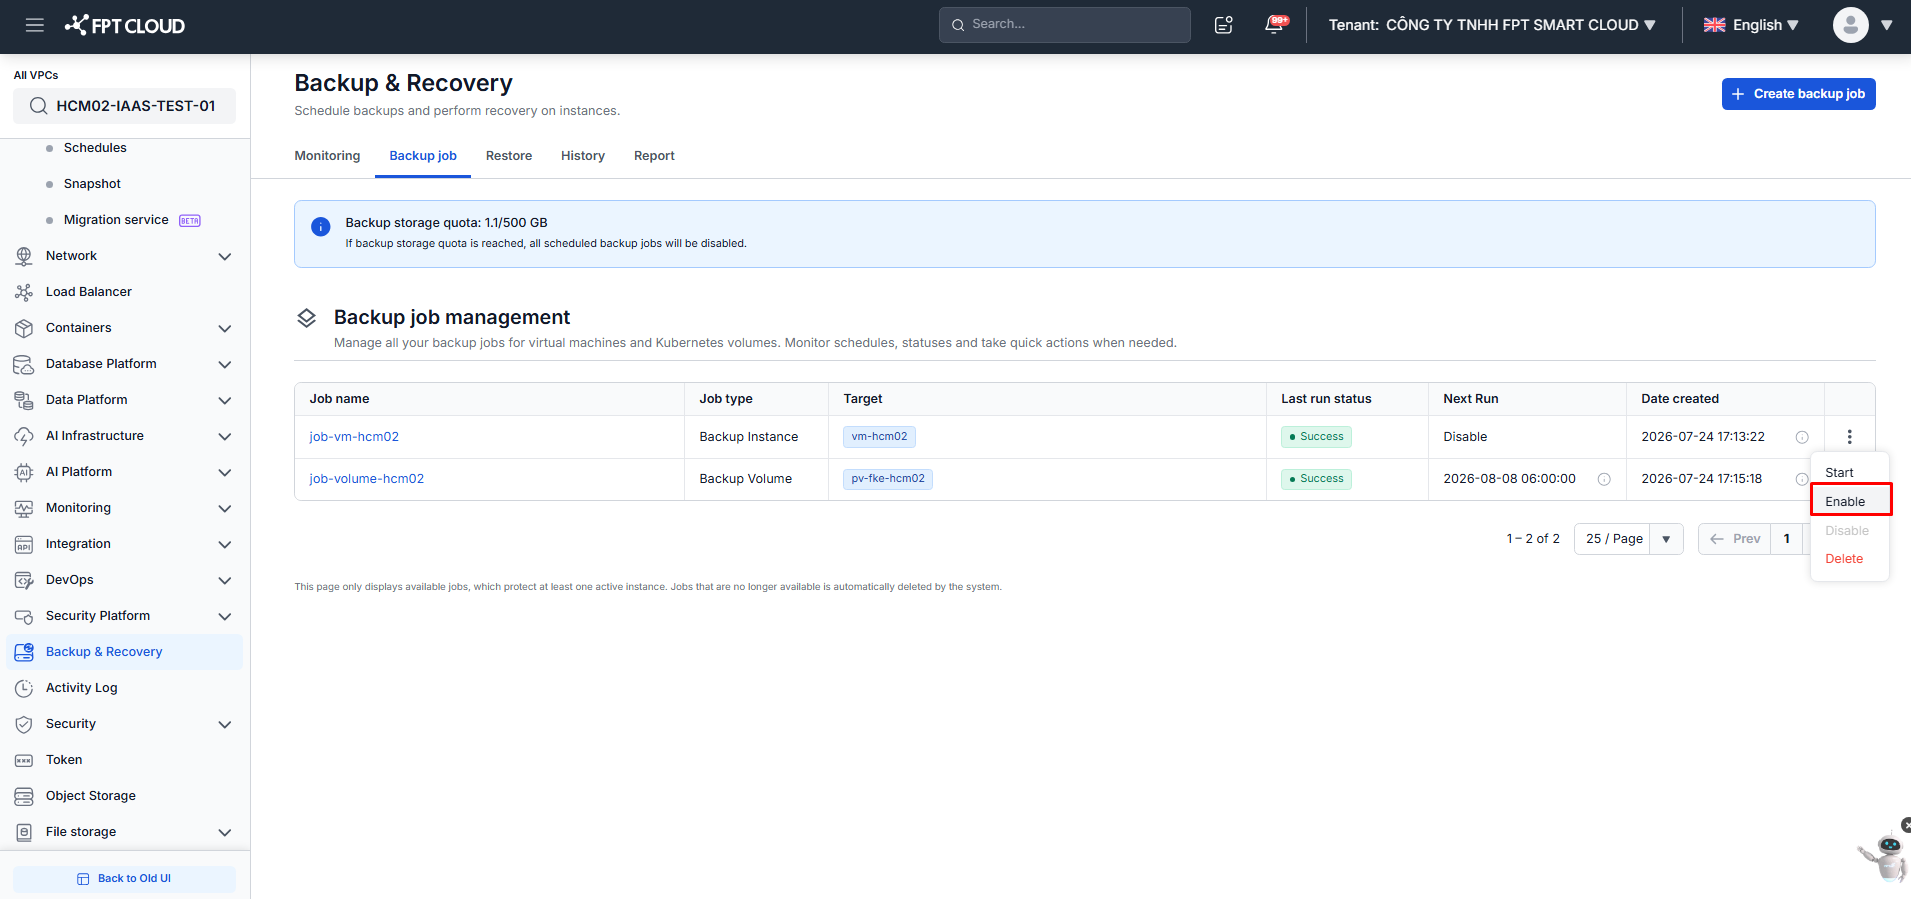
From the moment it is enabled, the job will continue running according to the configured schedule, creating new restore points.
6. Delete a Backup Job
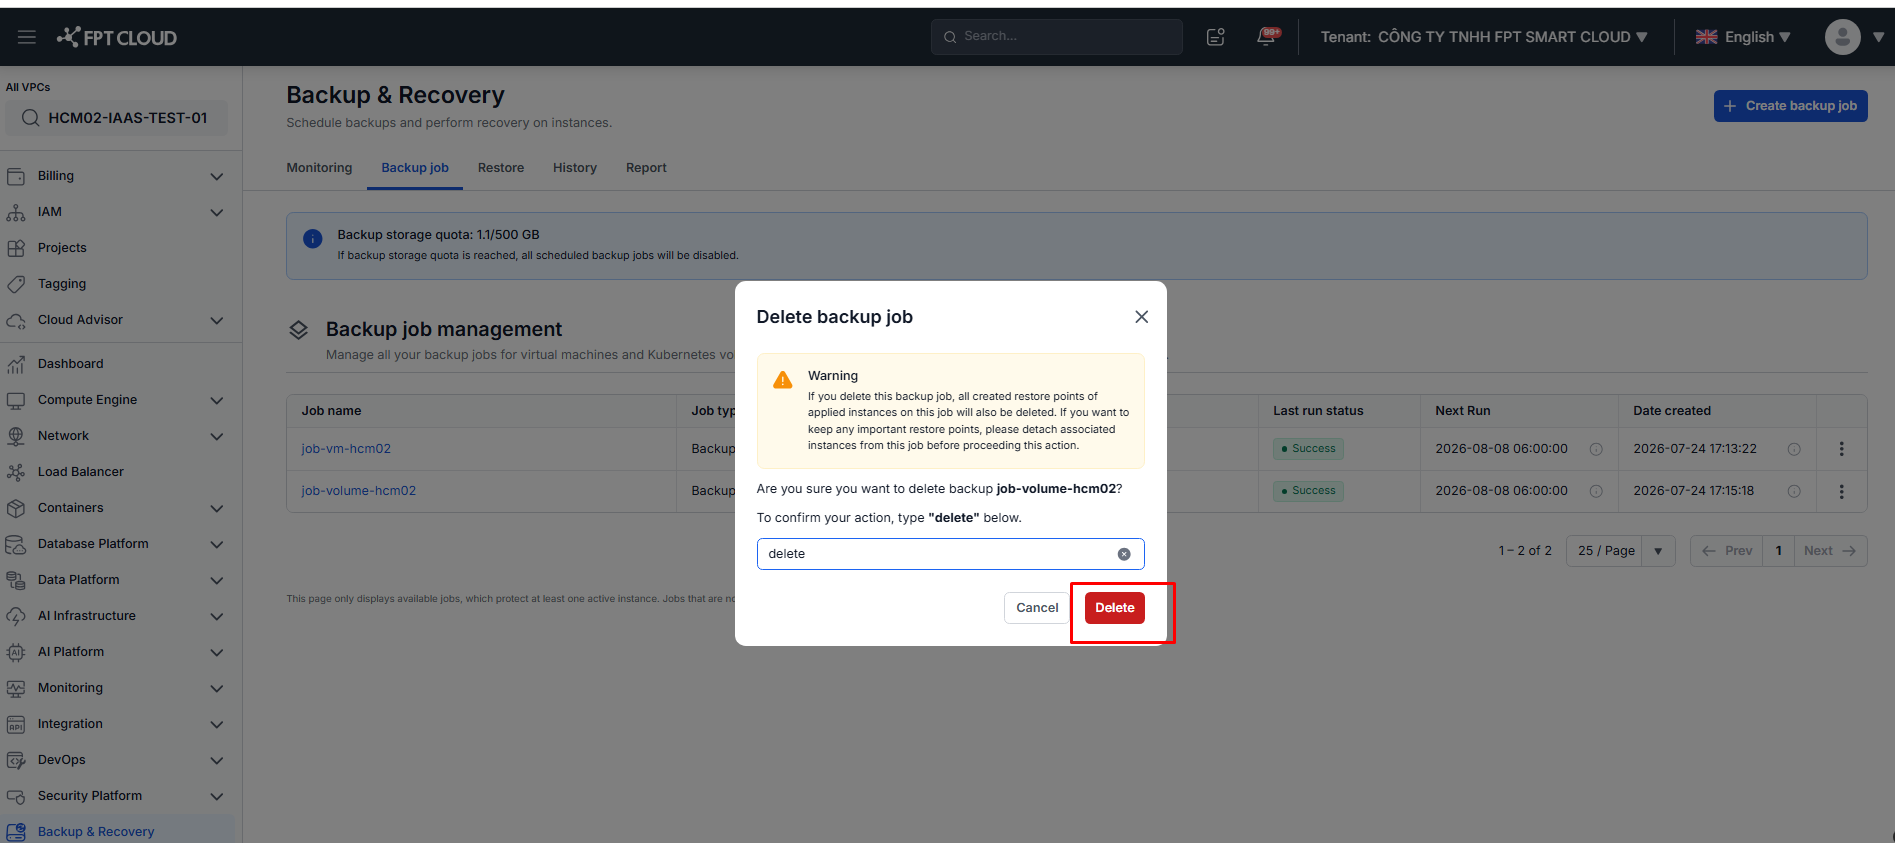
In FPT Backup, deleting a Backup Job means you no longer need to protect the virtual machines in that job.
Important warning: Performing a Delete Backup Job will:
- Permanently stop all future automatic backups
- Delete all restore points created previously
- Deleted restore points cannot be recovered
From that point on, the VMs in the job will no longer be protected by FPT Backup.
If there is an important VM whose restore points you still want to keep, detach that VM from the Backup Job first.
How to delete a Backup Job
Step 1: Go to Backup & Recovery and open the Backup job tab.
Step 2: For the job to delete, in the Action menu, select Delete.
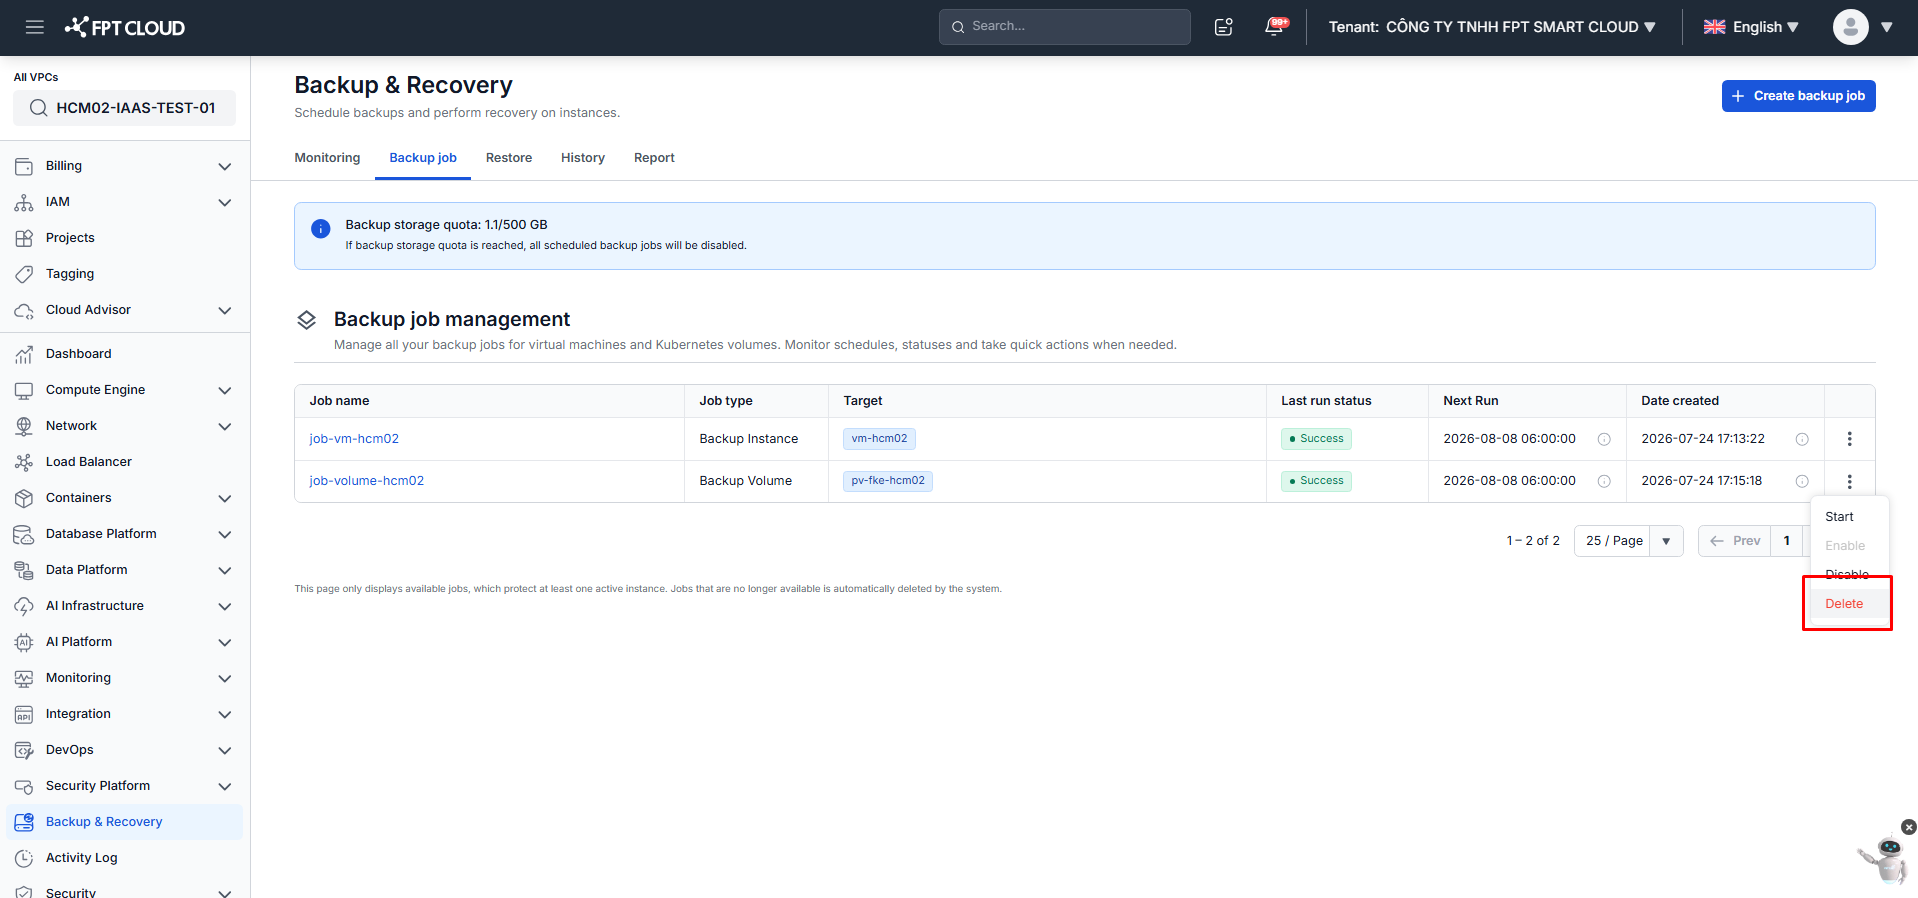
Step 3: The Delete backup job dialog warns that all restore points of the applied instances will also be deleted. Type delete into the confirmation field, then click Delete.