Restore Keep a VM from Restore Points
Overview
Restore Keep creates a brand new VM from a restore point. The running VM is not touched, and the new VM has the same disk data as the original had at the time the restore point was created.
Use it when you need a copy of the data — for testing, investigation, or building a secondary VM — rather than rolling back the running VM. To overwrite the running VM instead, see Restore a VM from Restore Points.
Steps
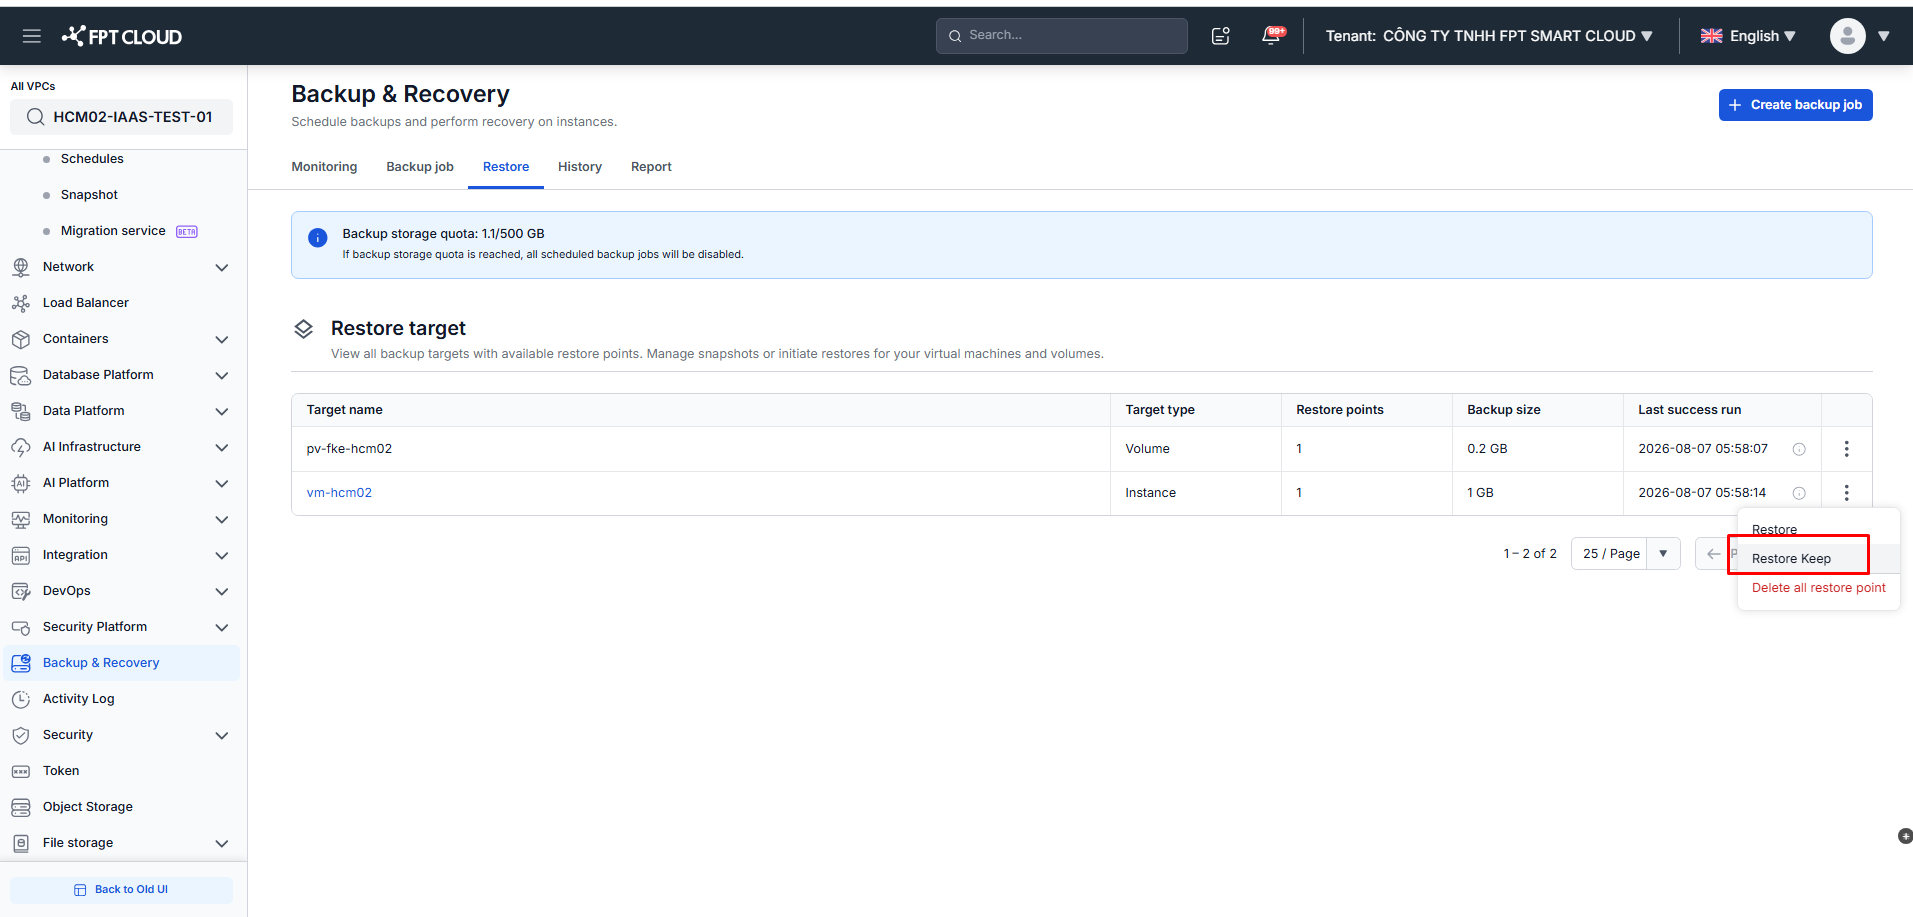
Step 1: In the menu, select Backup & Recovery. Open the Restore tab. In the Action column of the VM, select Restore Keep.
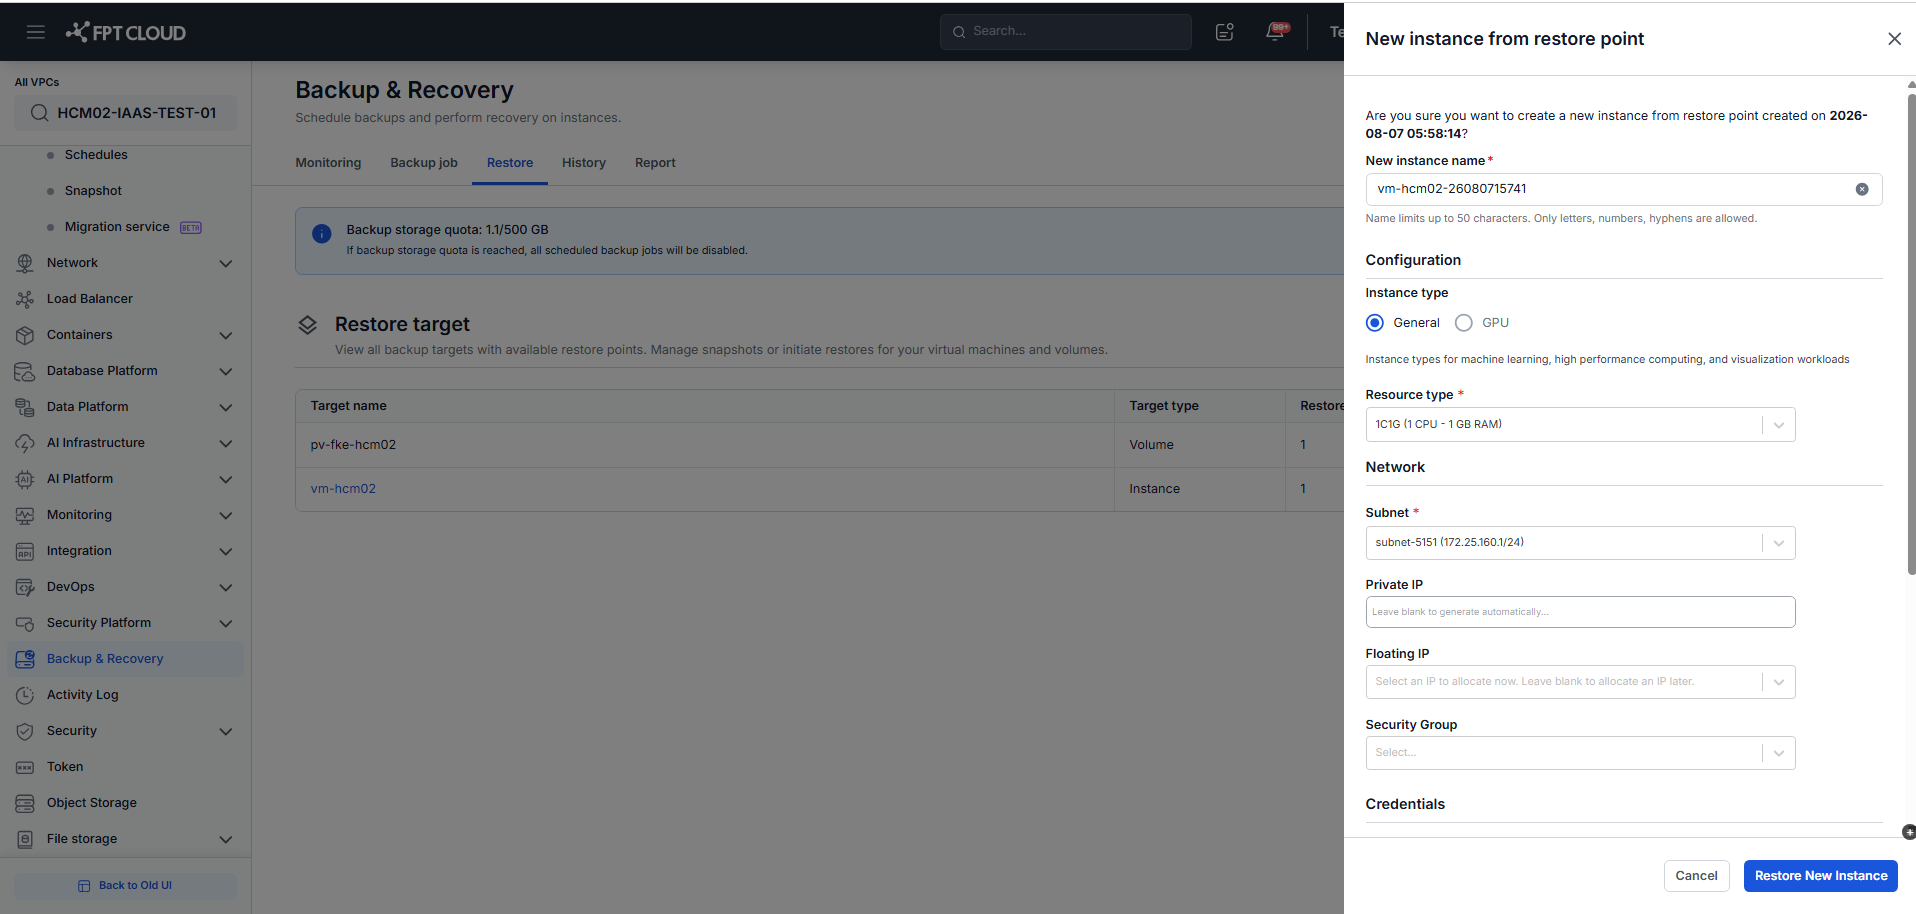
Step 2: The New instance from restore point panel appears. Configure the new VM — name, instance type, resource package, network, and the restore point to use as the data source.
Step 3: Click Restore New Instance to start creating the VM.
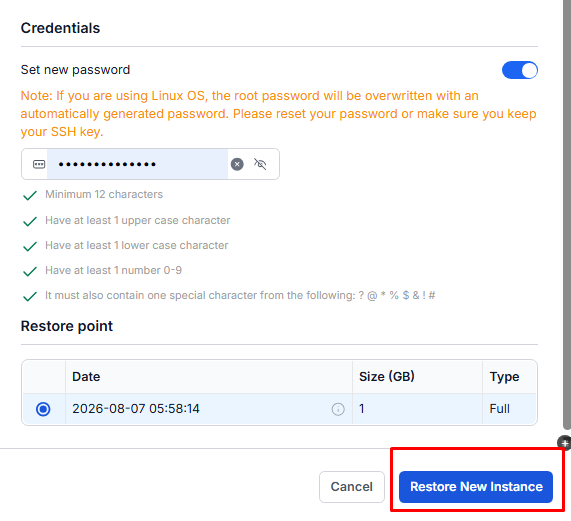
If you turn on Set new password, the administrator password of the VM is overwritten with the password you enter.
The password must be at least 12 characters and contain an upper case letter, a lower case letter, a number, and one special character from ? @ * % $ & ! #.
Important Notes
- The running VM is not modified — Restore Keep only creates a new VM.
- Creating a VM from a Restore Point typically takes a few minutes to a few hours, depending on the data volume.
A static IP configured inside the OS is restored exactly as on the original VM. The Private IP and Floating IP are yours to choose in the New instance from restore point screen (Step 2). Please review your network configuration before performing the restore.
See also
- Restore a VM from Restore Points
- Create a New VM from Restore Points — the same action started from the instance detail page.
- Delete Restore Point