Guide: Delete a Custom Image
This guide describes how to delete a General Image or ISO Image when it is no longer needed.
Before You Begin
- The image to be deleted must be in Active status (not currently uploading or being used to create an Instance).
Warning: Deleting an image is irreversible. After deletion, you cannot create new Instances from this image. Instances that were already created from the image continue to operate normally.
Delete a General Image
-
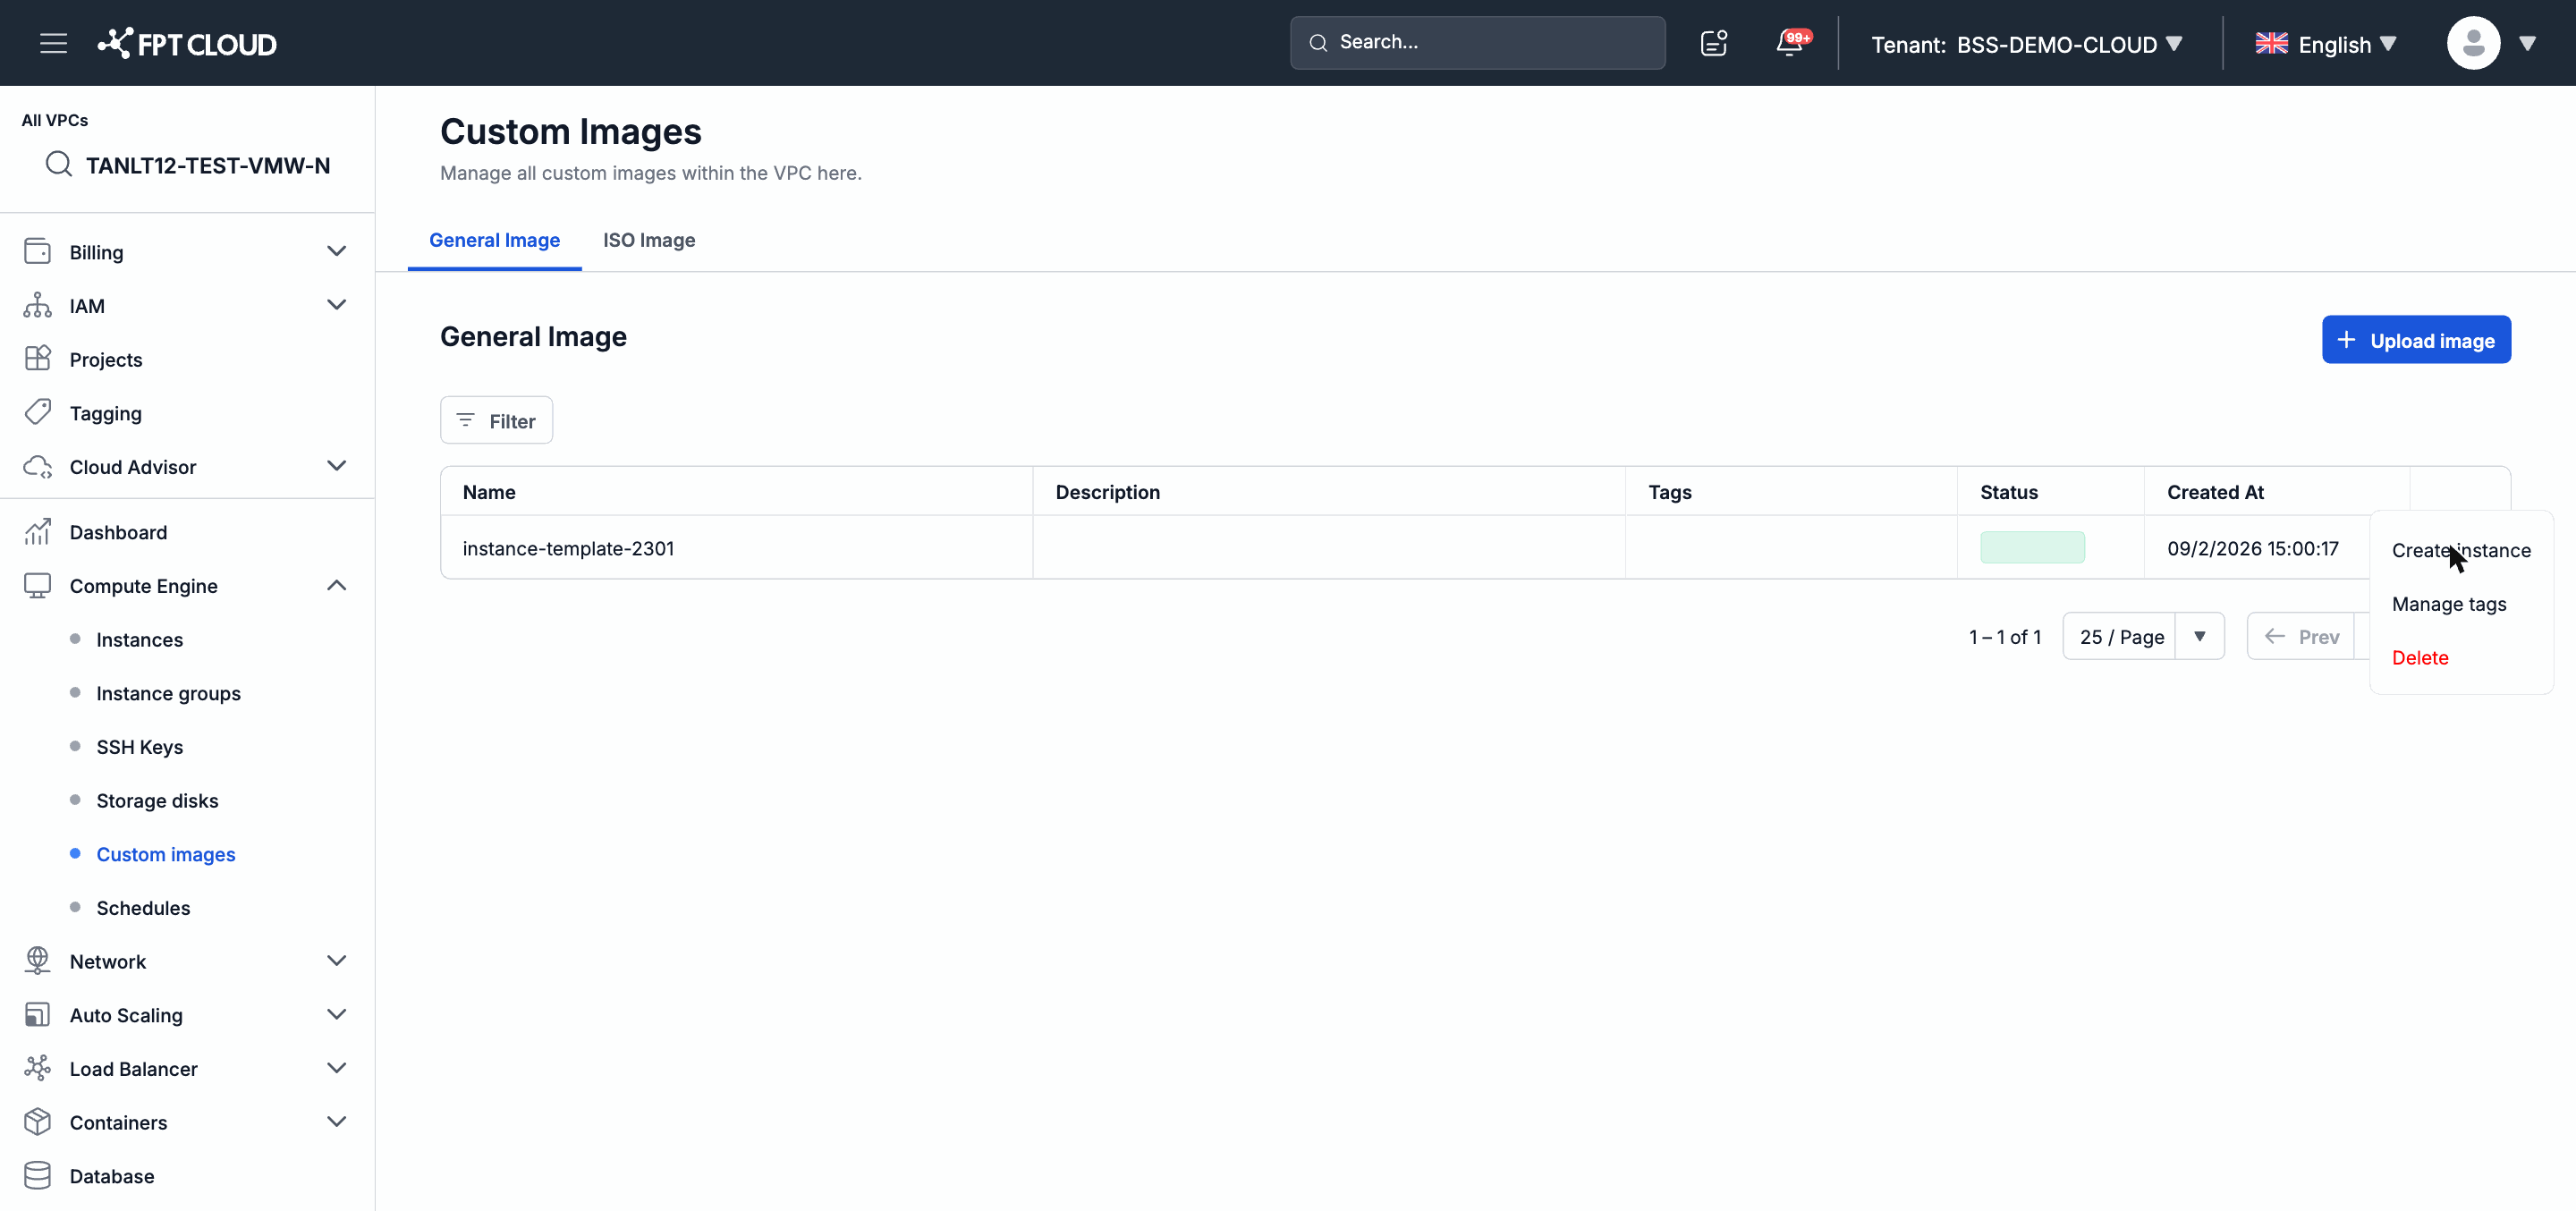
In the left navigation bar, select Compute Engine → Custom images.
-
Ensure the General Image tab is selected.
-
Find the image to delete, then click the action menu icon (⋮) at the end of the row.
-
Select Delete from the menu.
-
Confirm the operation in the dialog.
-
The image disappears from the list after successful deletion.
Delete an ISO Image
-
Select the ISO Image tab on the Custom images page.
-
Find the ISO to delete, then click the action menu icon (⋮).
-
Select Delete and confirm in the dialog.
Note: If the Delete option is disabled, the image may be in Uploading status — wait for the upload to complete or cancel the upload first.