Manage Network Interface (NIC)
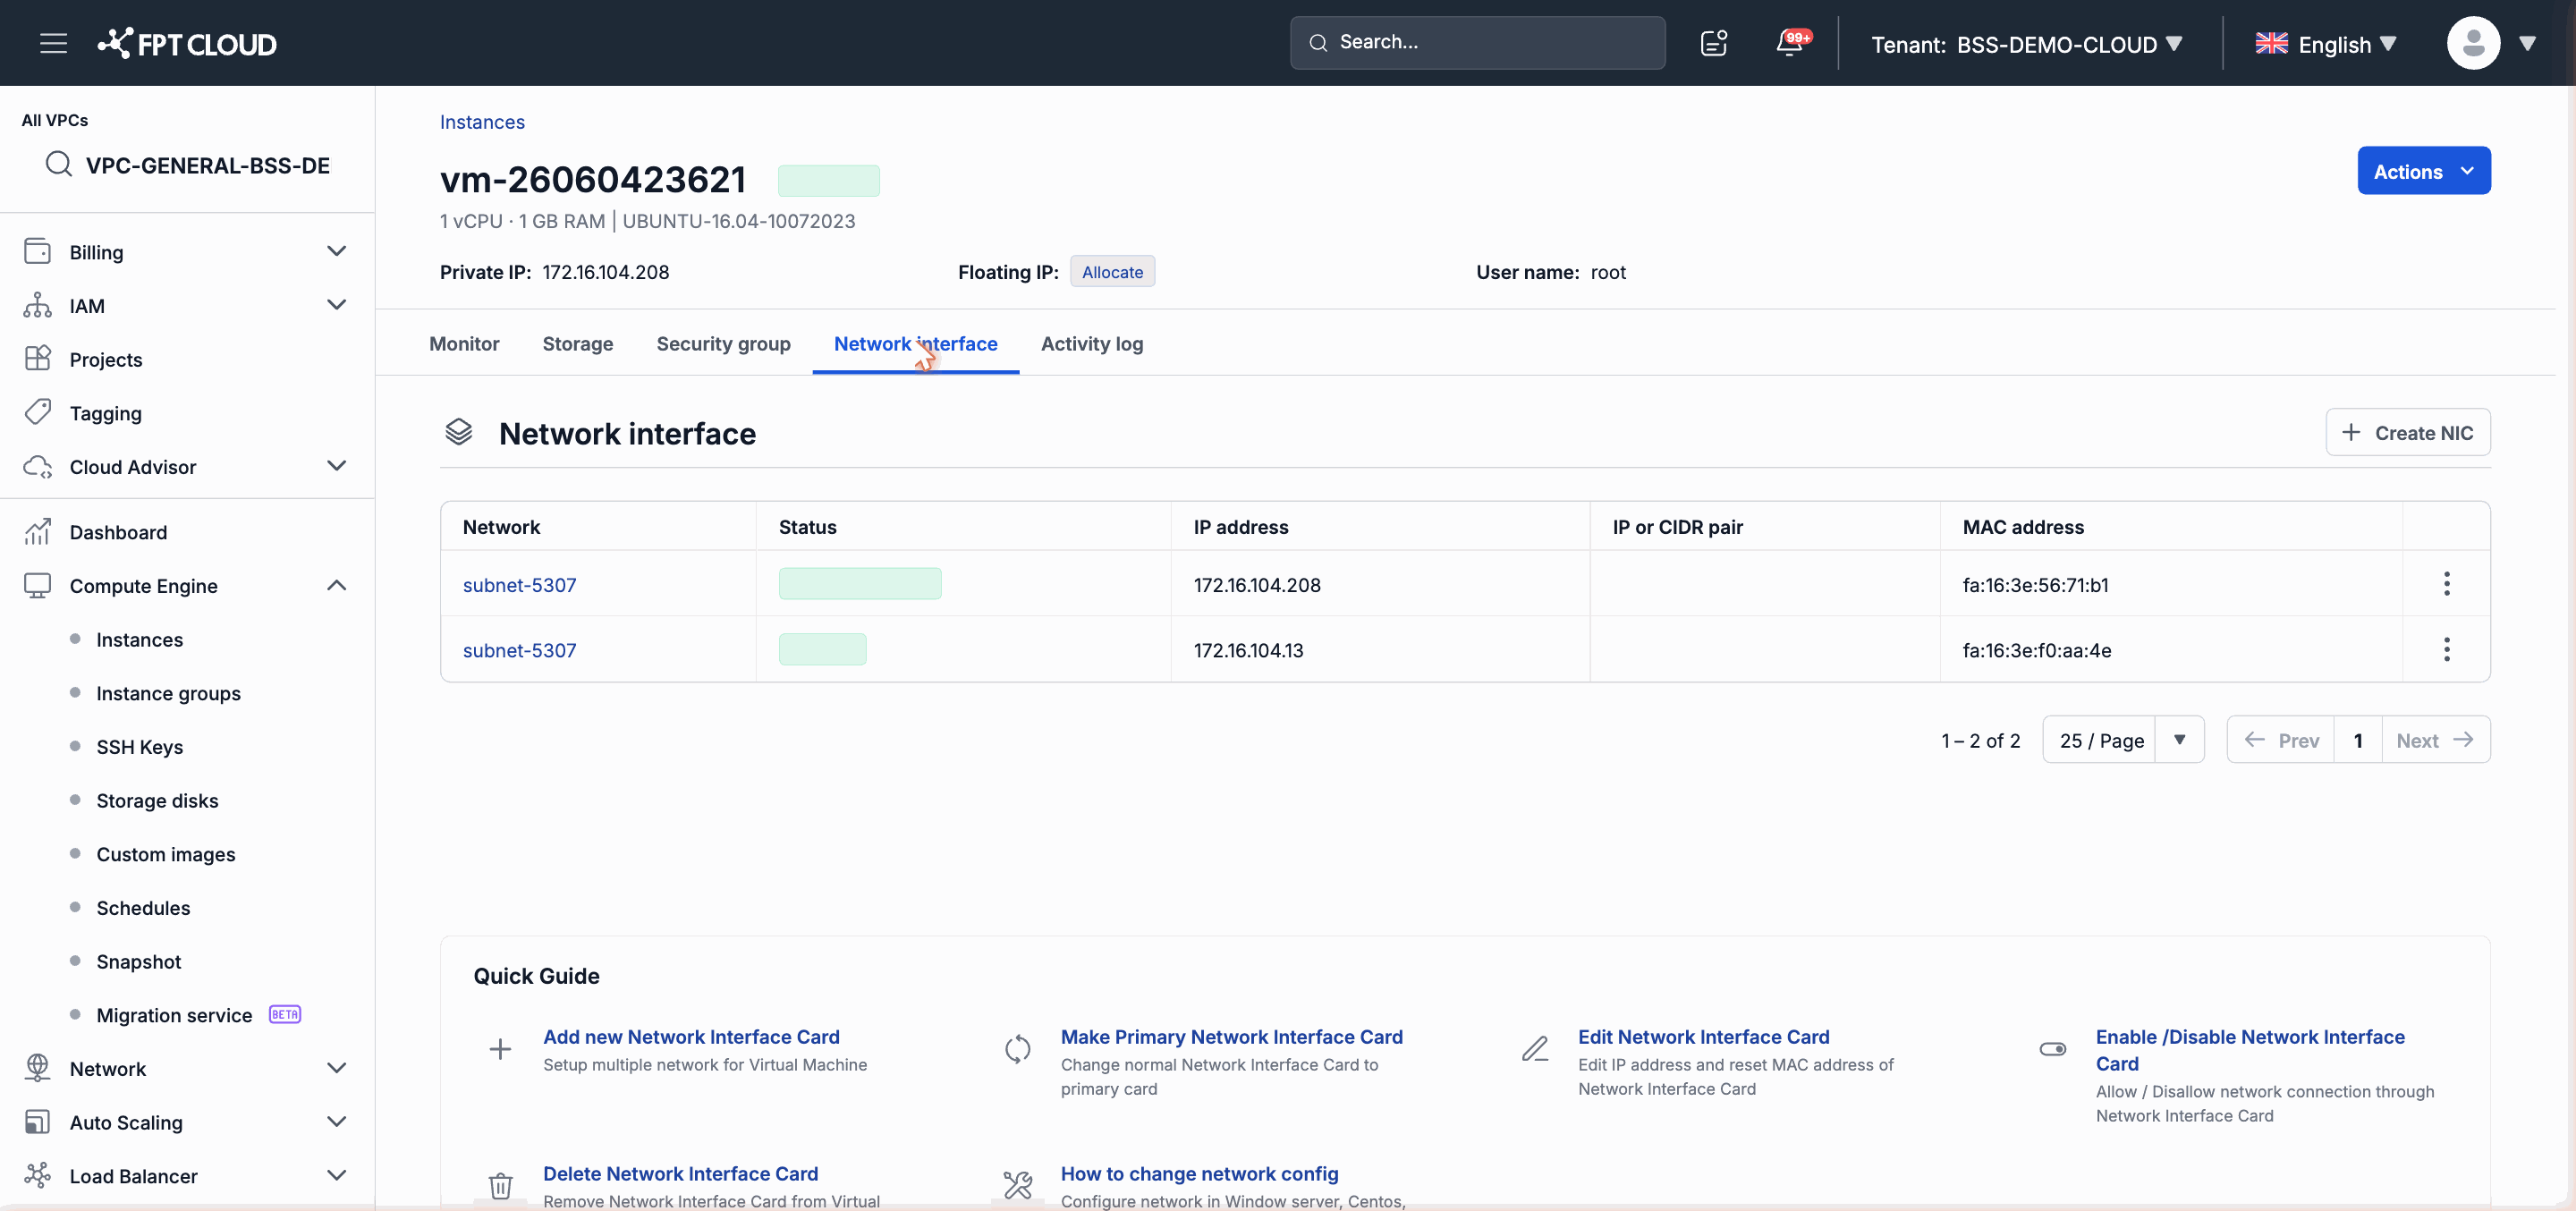
The Network Interface tab on the Instance detail page lets you view and manage all NICs attached to the Instance. You can add a new NIC, set the primary NIC, edit the IP or MAC address, enable/disable a NIC, and delete NICs that are no longer needed.
Note: The operations available on each NIC depend on the VPC type the Instance belongs to (Specific VPC or General VPC).
View the NIC List
- Go to the Instance detail page.
- Select the Network Interface tab.
The list displays all NICs currently attached to the Instance:
| Column | Description |
|---|---|
| Index | NIC order (0, 1, 2...) |
| IP Address | IP assigned to the NIC |
| MAC Address | MAC address of the NIC |
| Subnet | The Subnet the NIC belongs to |
| Status | Connected or Disabled |
| Primary | Marks the NIC currently designated as primary |
Add a NIC
An Instance supports a maximum of 10 NICs. You can add a NIC while the Instance is running or stopped.
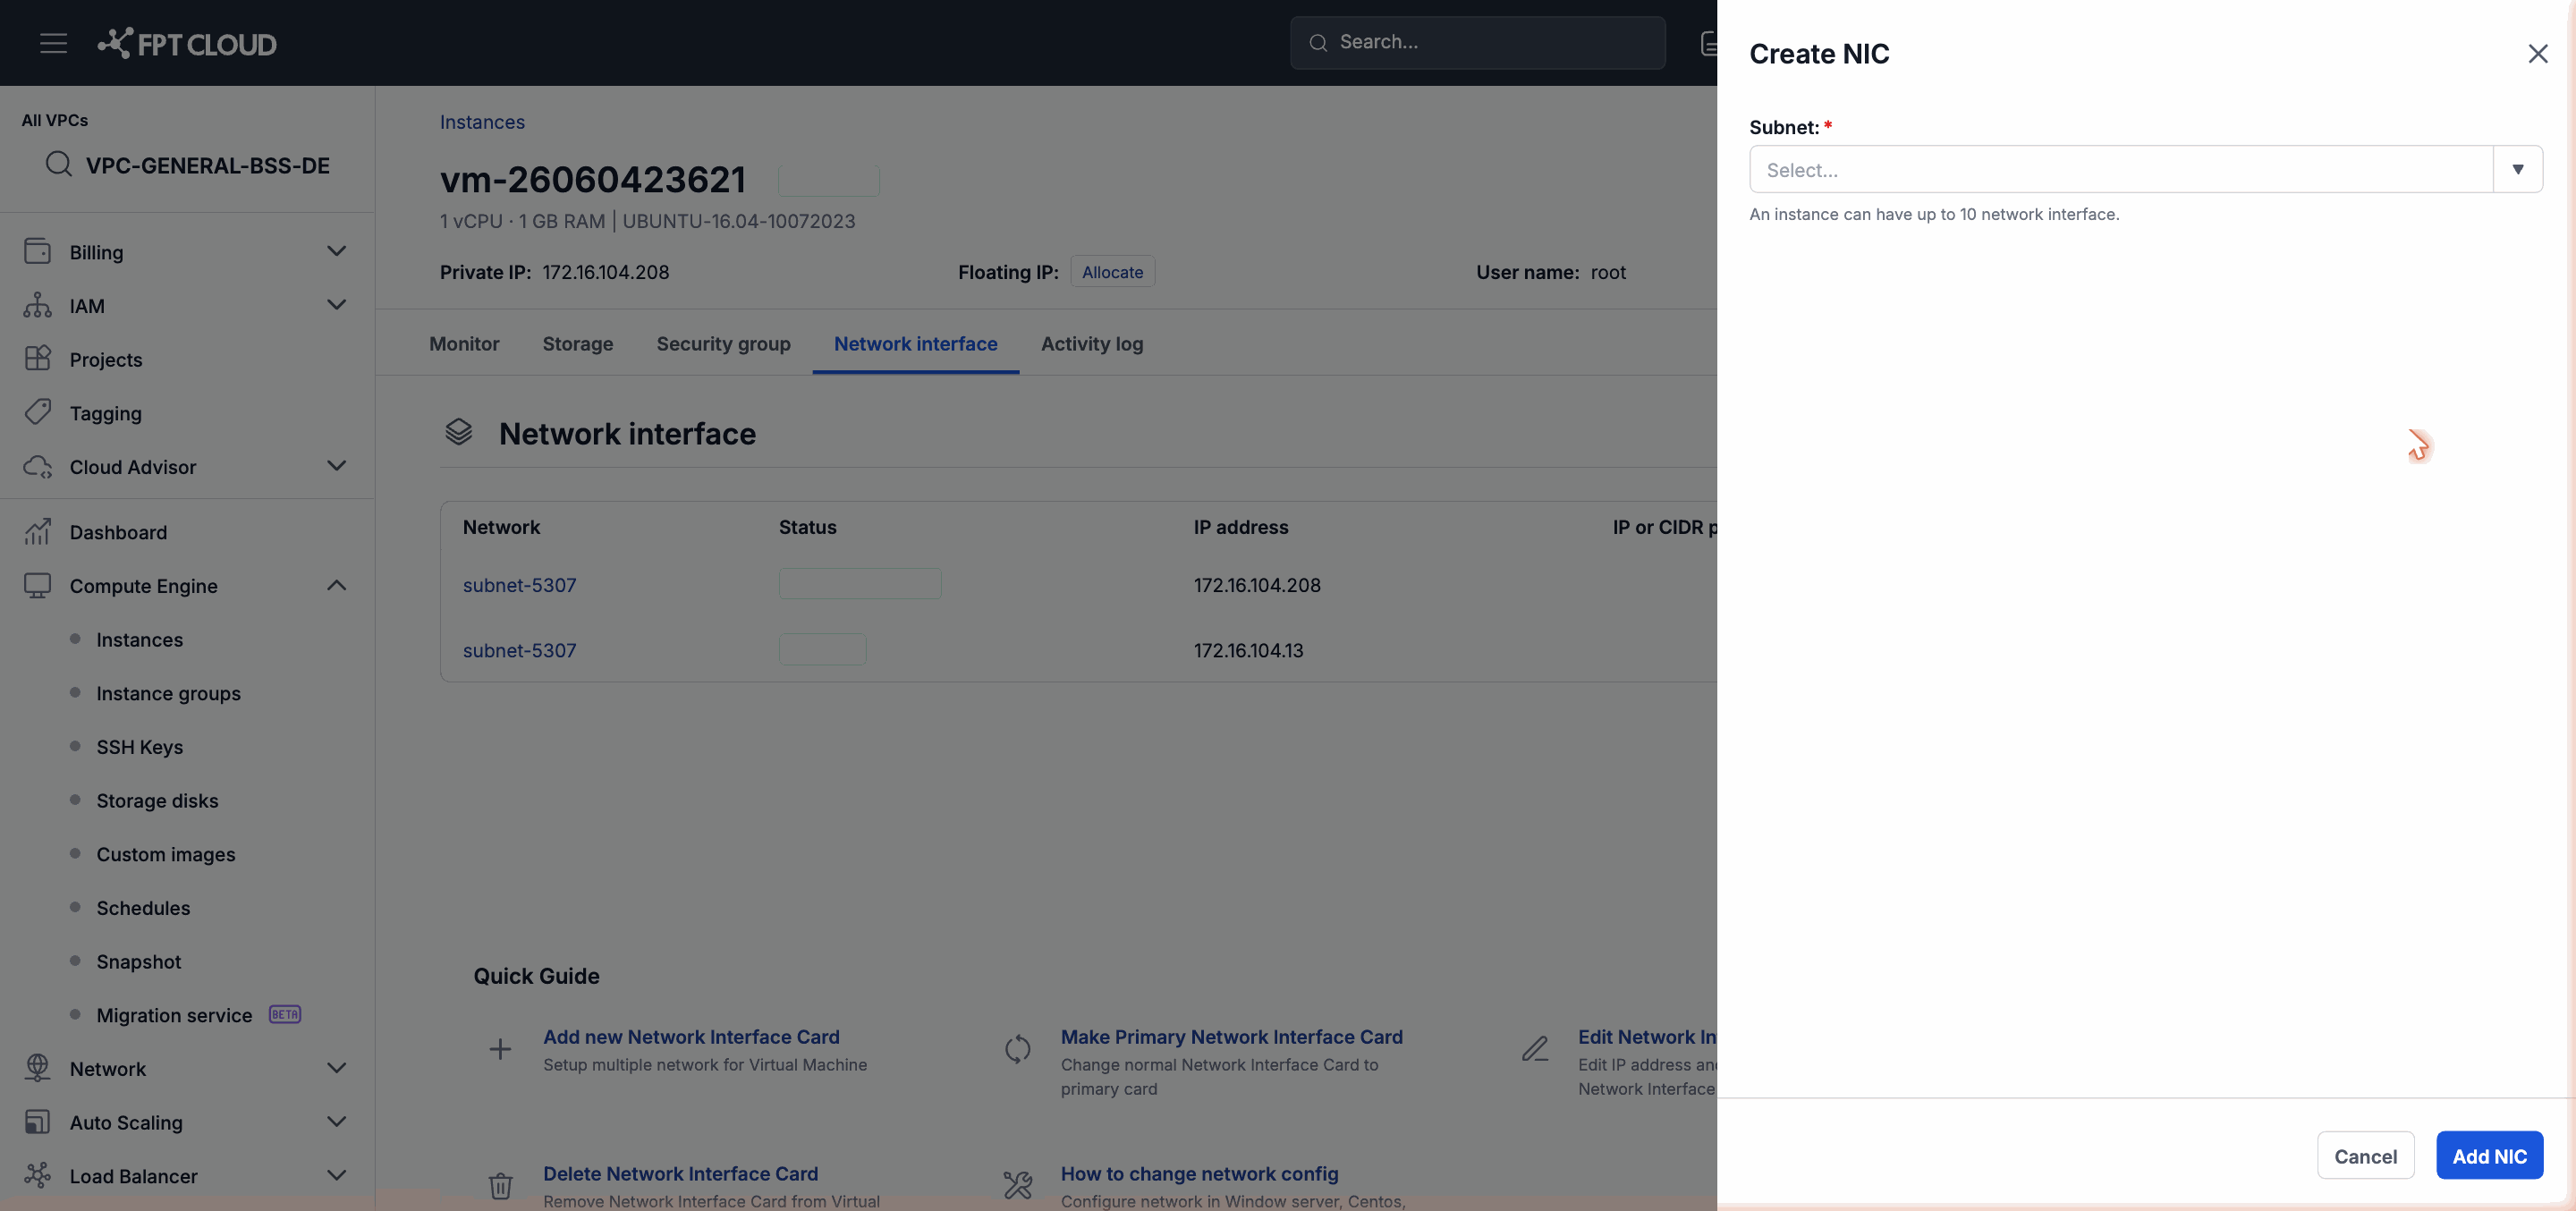
- In the Network Interface tab, click Add NIC.
- Select the Subnet to attach the NIC to.
- Depending on the VPC type:
- Specific VPC: select the IP mode — Manual (enter IP manually) or DHCP (IP assigned automatically).
- General VPC: the IP is assigned automatically; you do not need to select an IP mode.
- Click Confirm.
Note: Each Instance supports a maximum of 10 NICs. If the Instance already has 10 NICs, the Add NIC option will not be available.
Set the Primary NIC
The primary NIC is the default NIC for the Instance's outbound traffic. An Instance has only one primary NIC at any given time.
- In the Network Interface tab, find the NIC you want to set as primary.
- Open the action menu for that NIC and select Set Primary.
- Confirm the operation.
The selected NIC is now marked as primary. The previous primary NIC is automatically demoted.
Per-NIC Operations (Specific VPC)
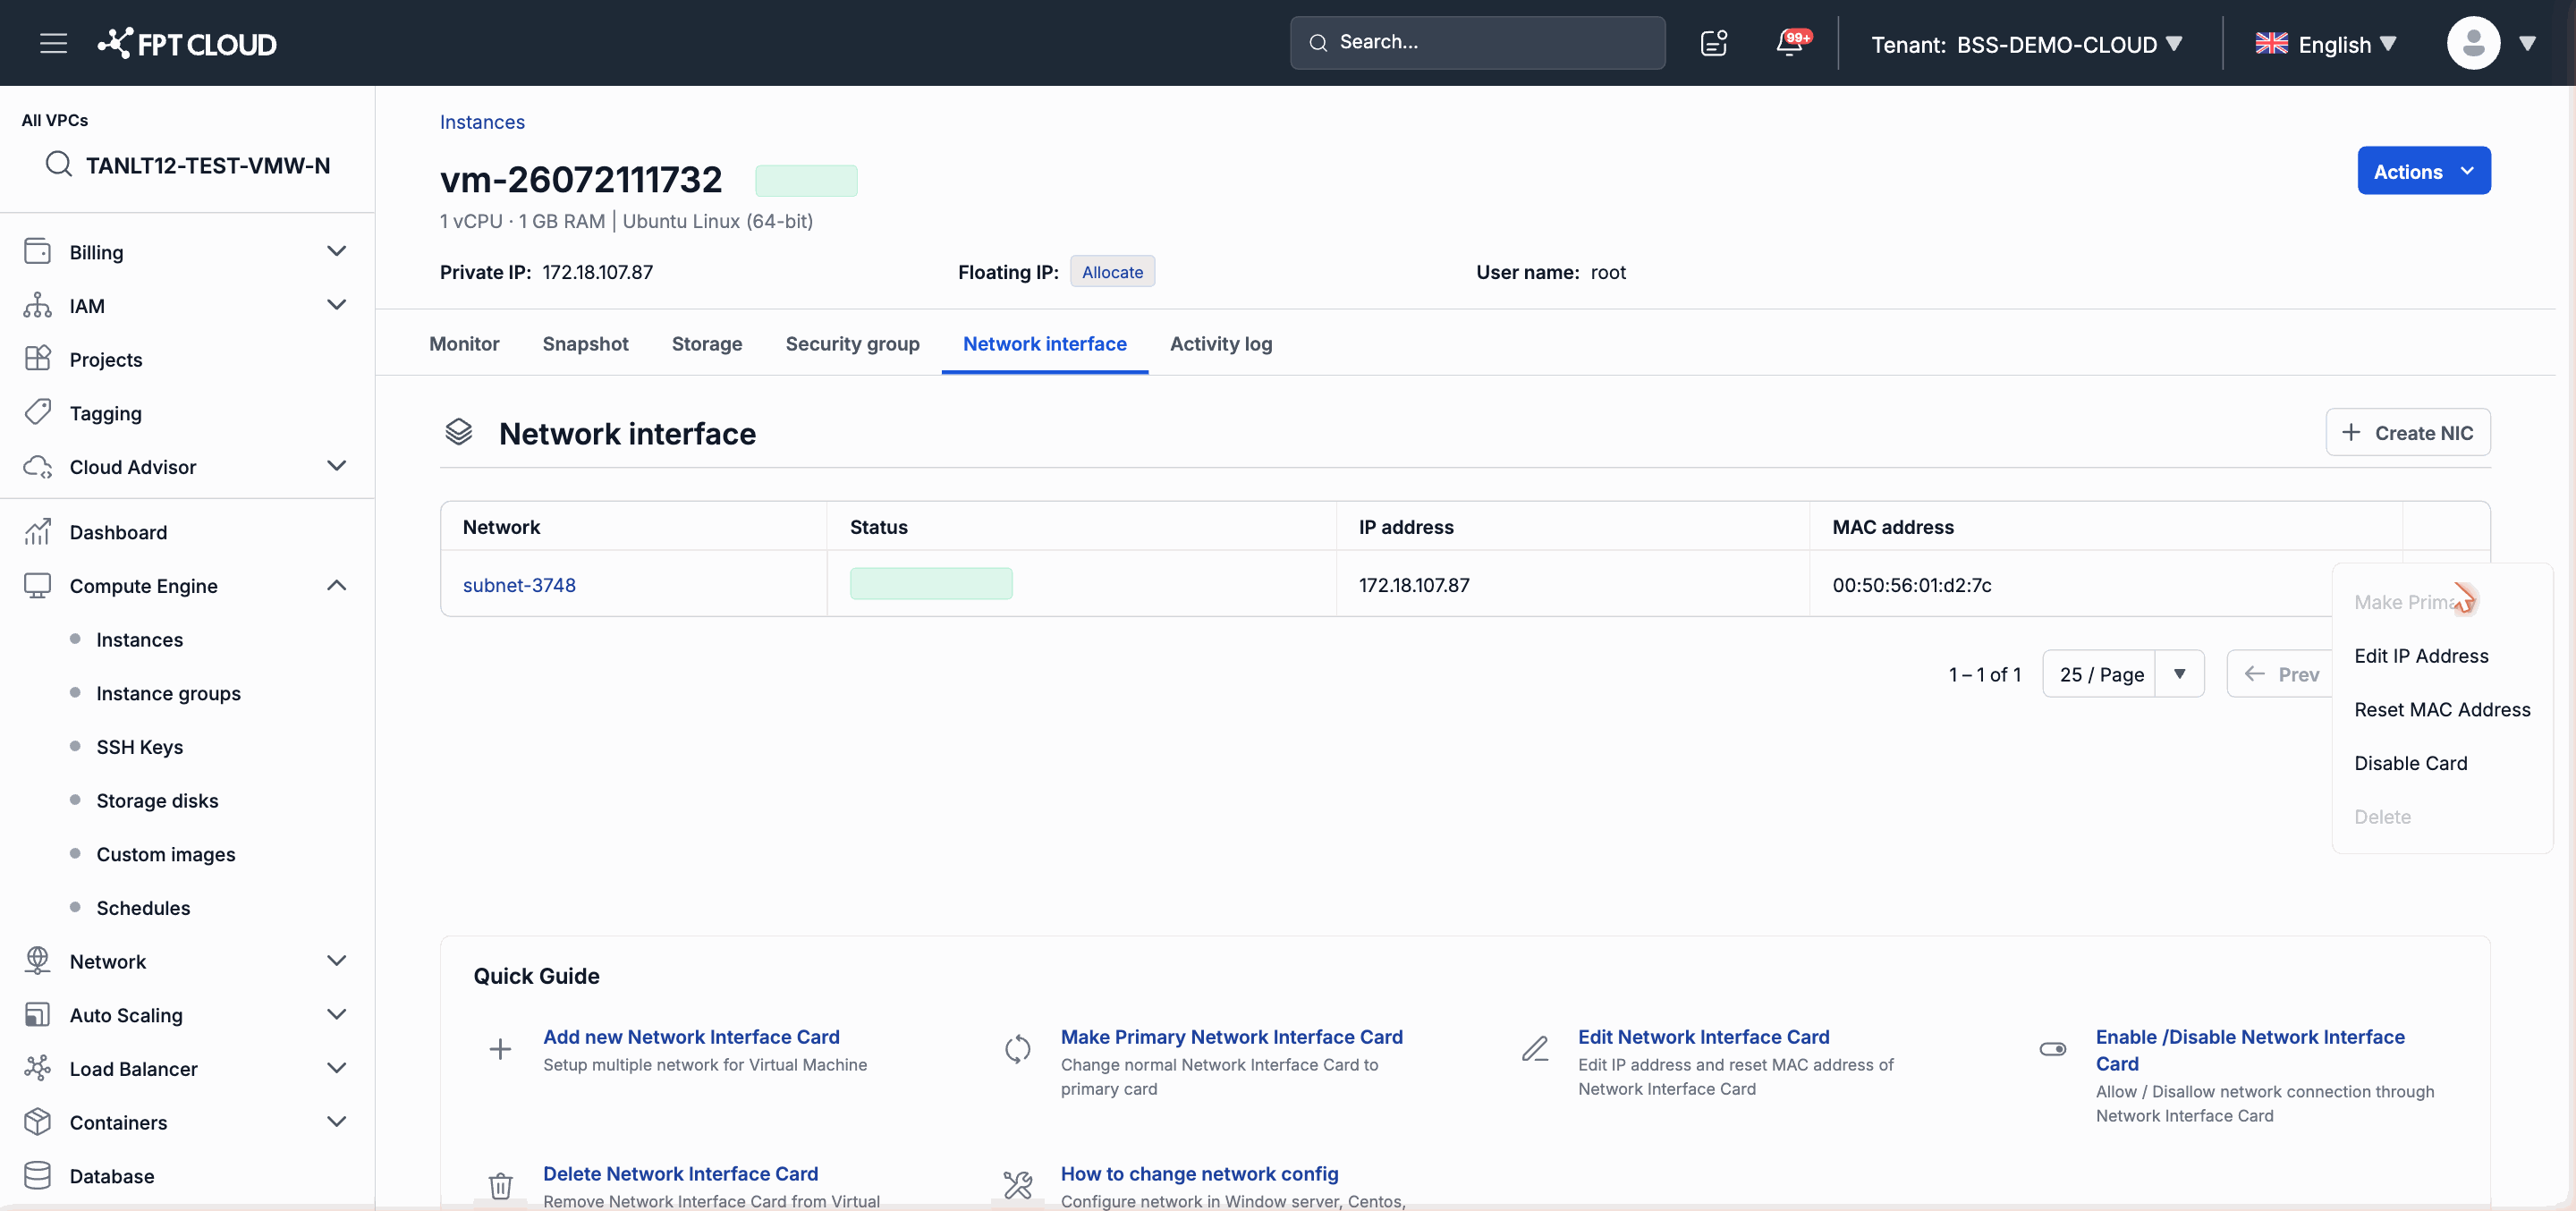
In Specific VPC, you have more detailed management options for each NIC:
Edit IP Address: Change the IP address assigned to the NIC. This is useful when you need to assign a different static IP to the NIC.
Reset MAC Address: Generate a new MAC address for the NIC. Use this when you need to change the MAC due to a conflict or application requirement.
Disable/Enable NIC: Turn off or turn on the NIC without deleting it. A Disabled NIC still exists but does not send or receive network traffic.
Delete NIC: Remove the NIC from the Instance and delete it permanently.
Note: You cannot delete the primary NIC. If you want to delete the NIC that is currently primary, first designate another NIC as primary, then delete the old one.
Per-NIC Operations (General VPC)
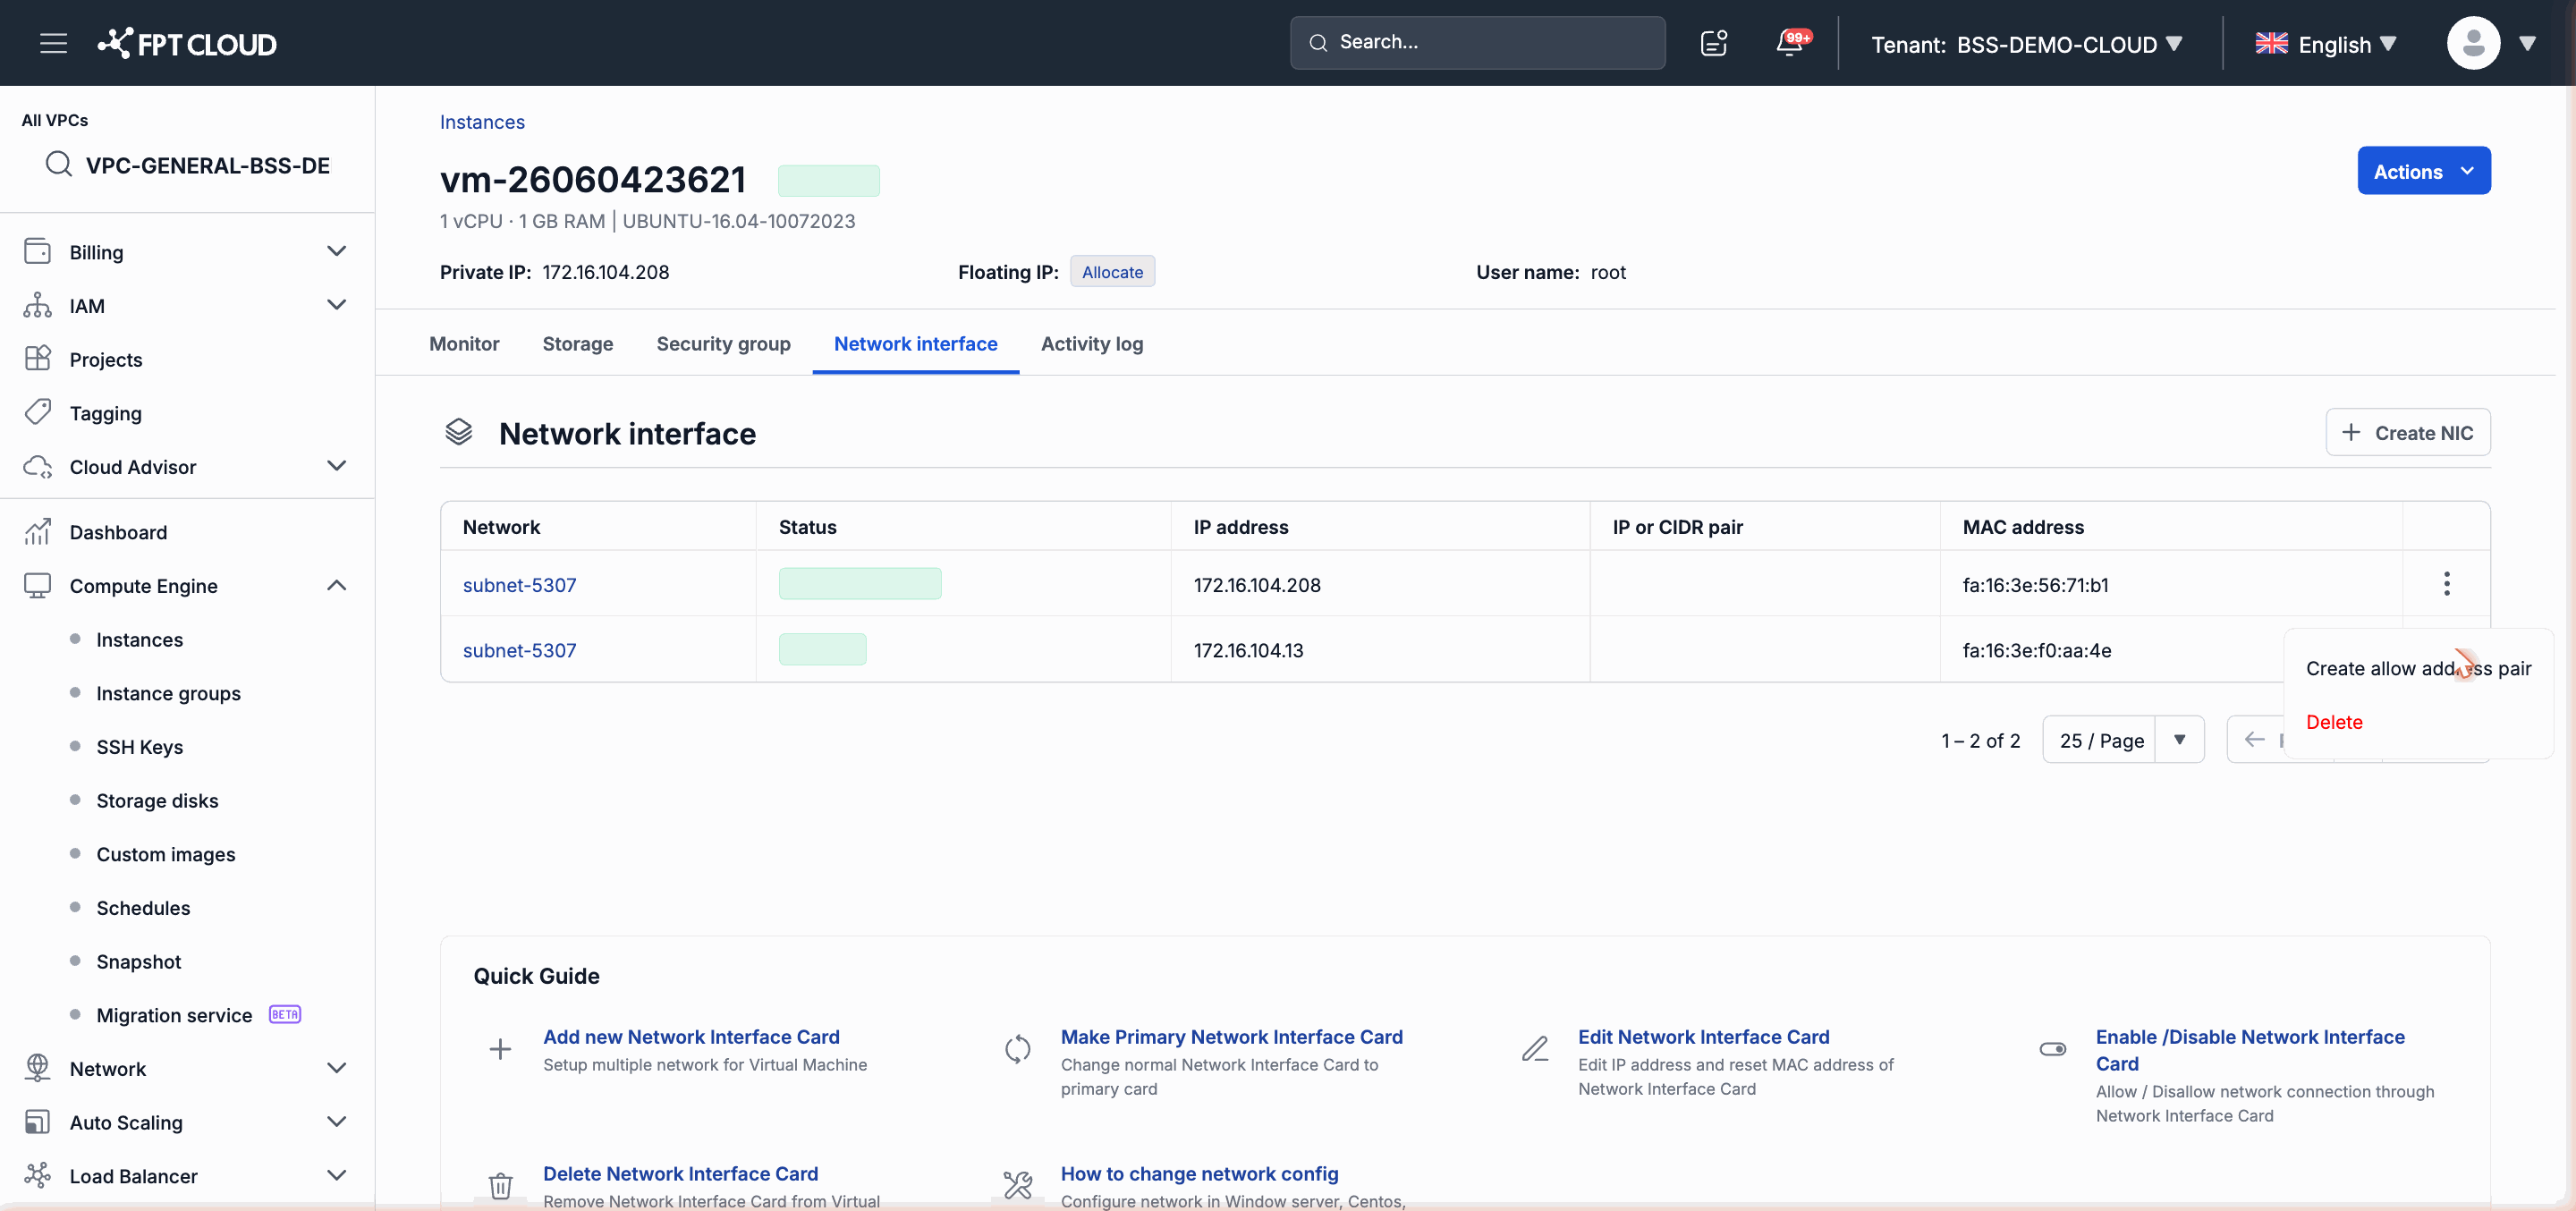
In General VPC, you have the following options:
Create Allowed Address Pair: Allow the NIC to receive traffic for an additional IP or MAC address beyond its assigned address. This feature is useful when running a Virtual IP (VIP) or configuring High Availability (HA) on the Instance.
Steps to create an Allowed Address Pair:
- Open the NIC's action menu.
- Select Add Allowed Address Pair.
- Enter the IP address (and optionally MAC) you want to allow.
- Click Confirm.
Delete Allowed Address Pair: Remove an Allowed Address Pair when it is no longer needed.
Delete NIC: Remove the NIC from the Instance.
Note: You cannot delete the primary NIC. Designate another NIC as primary before deleting the current one.
Enable a NIC After Cloning
When you create a new Instance using the Clone feature, all NICs on the cloned Instance will be in Disabled state by default. You need to enable the NIC manually before the cloned Instance can connect to the network.
- Go to the detail page of the cloned Instance.
- Select the Network Interface tab.
- Find the NIC in Disabled status.
- Open the action menu and select Enable.
- Repeat for any remaining NICs if needed.
Important: The cloned Instance has different IP and MAC addresses from the original Instance. After enabling the NIC, check the network configuration inside the cloned Instance's operating system to ensure the network functions correctly.
Floating IP (Reference)
A Floating IP is a public IP address that can be attached to or detached from an Instance to allow access from the internet. Floating IPs are managed in a separate module — not in the Network Interface tab.
For Specific VPC: You can access the Allocate IP Address function directly from the Instance action menu.
See the full guide on allocating and attaching Floating IPs in the Manage Floating IP documentation.