Resize an Instance
Resize allows you to change the Flavor of an Instance — that is, adjust the number of vCPUs and the amount of RAM without recreating the Instance from scratch. All existing data and configuration on the Instance is preserved.
When to Resize
Scale up (increase configuration): When your Instance is consistently running at high resource utilization — applications are slow, CPU or RAM are approaching their limits — switch to a larger Flavor to handle the load.
Scale down (decrease configuration): When the Instance is using fewer resources than allocated and you want to reduce costs, switch to a smaller Flavor that better matches actual usage.
Note: Resize only changes the Flavor (vCPU and RAM). Disk capacity does not change when resizing — to change disk capacity, use the disk edit feature in the Storage Disk tab.
Prerequisites Before Resizing
Before performing a resize, ensure:
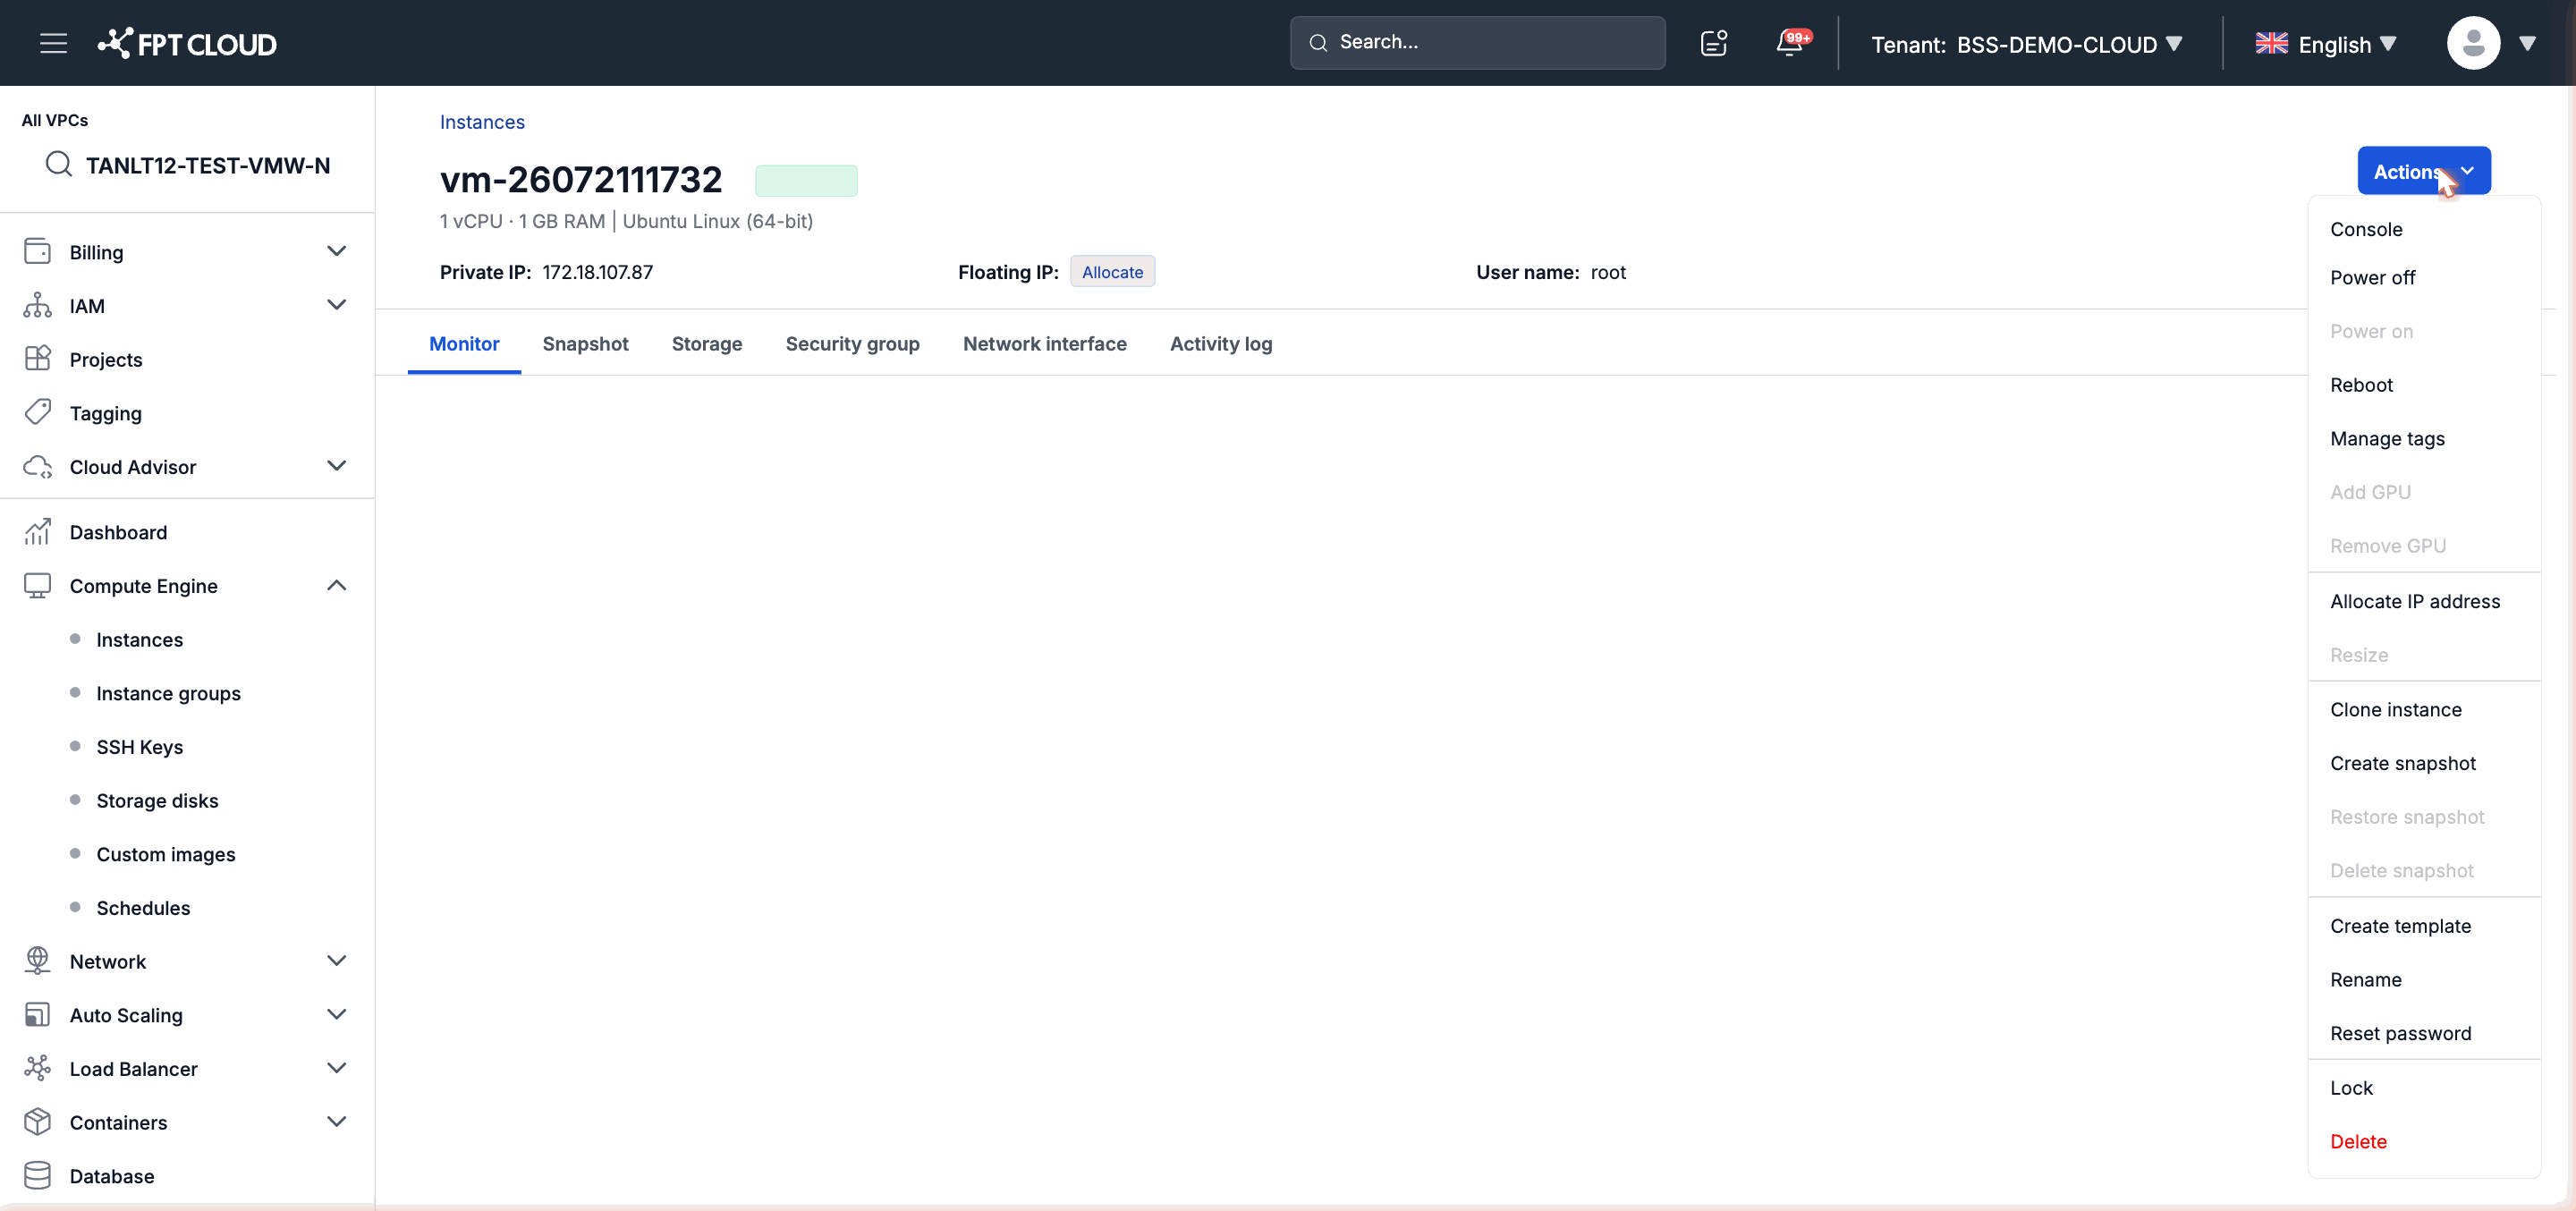
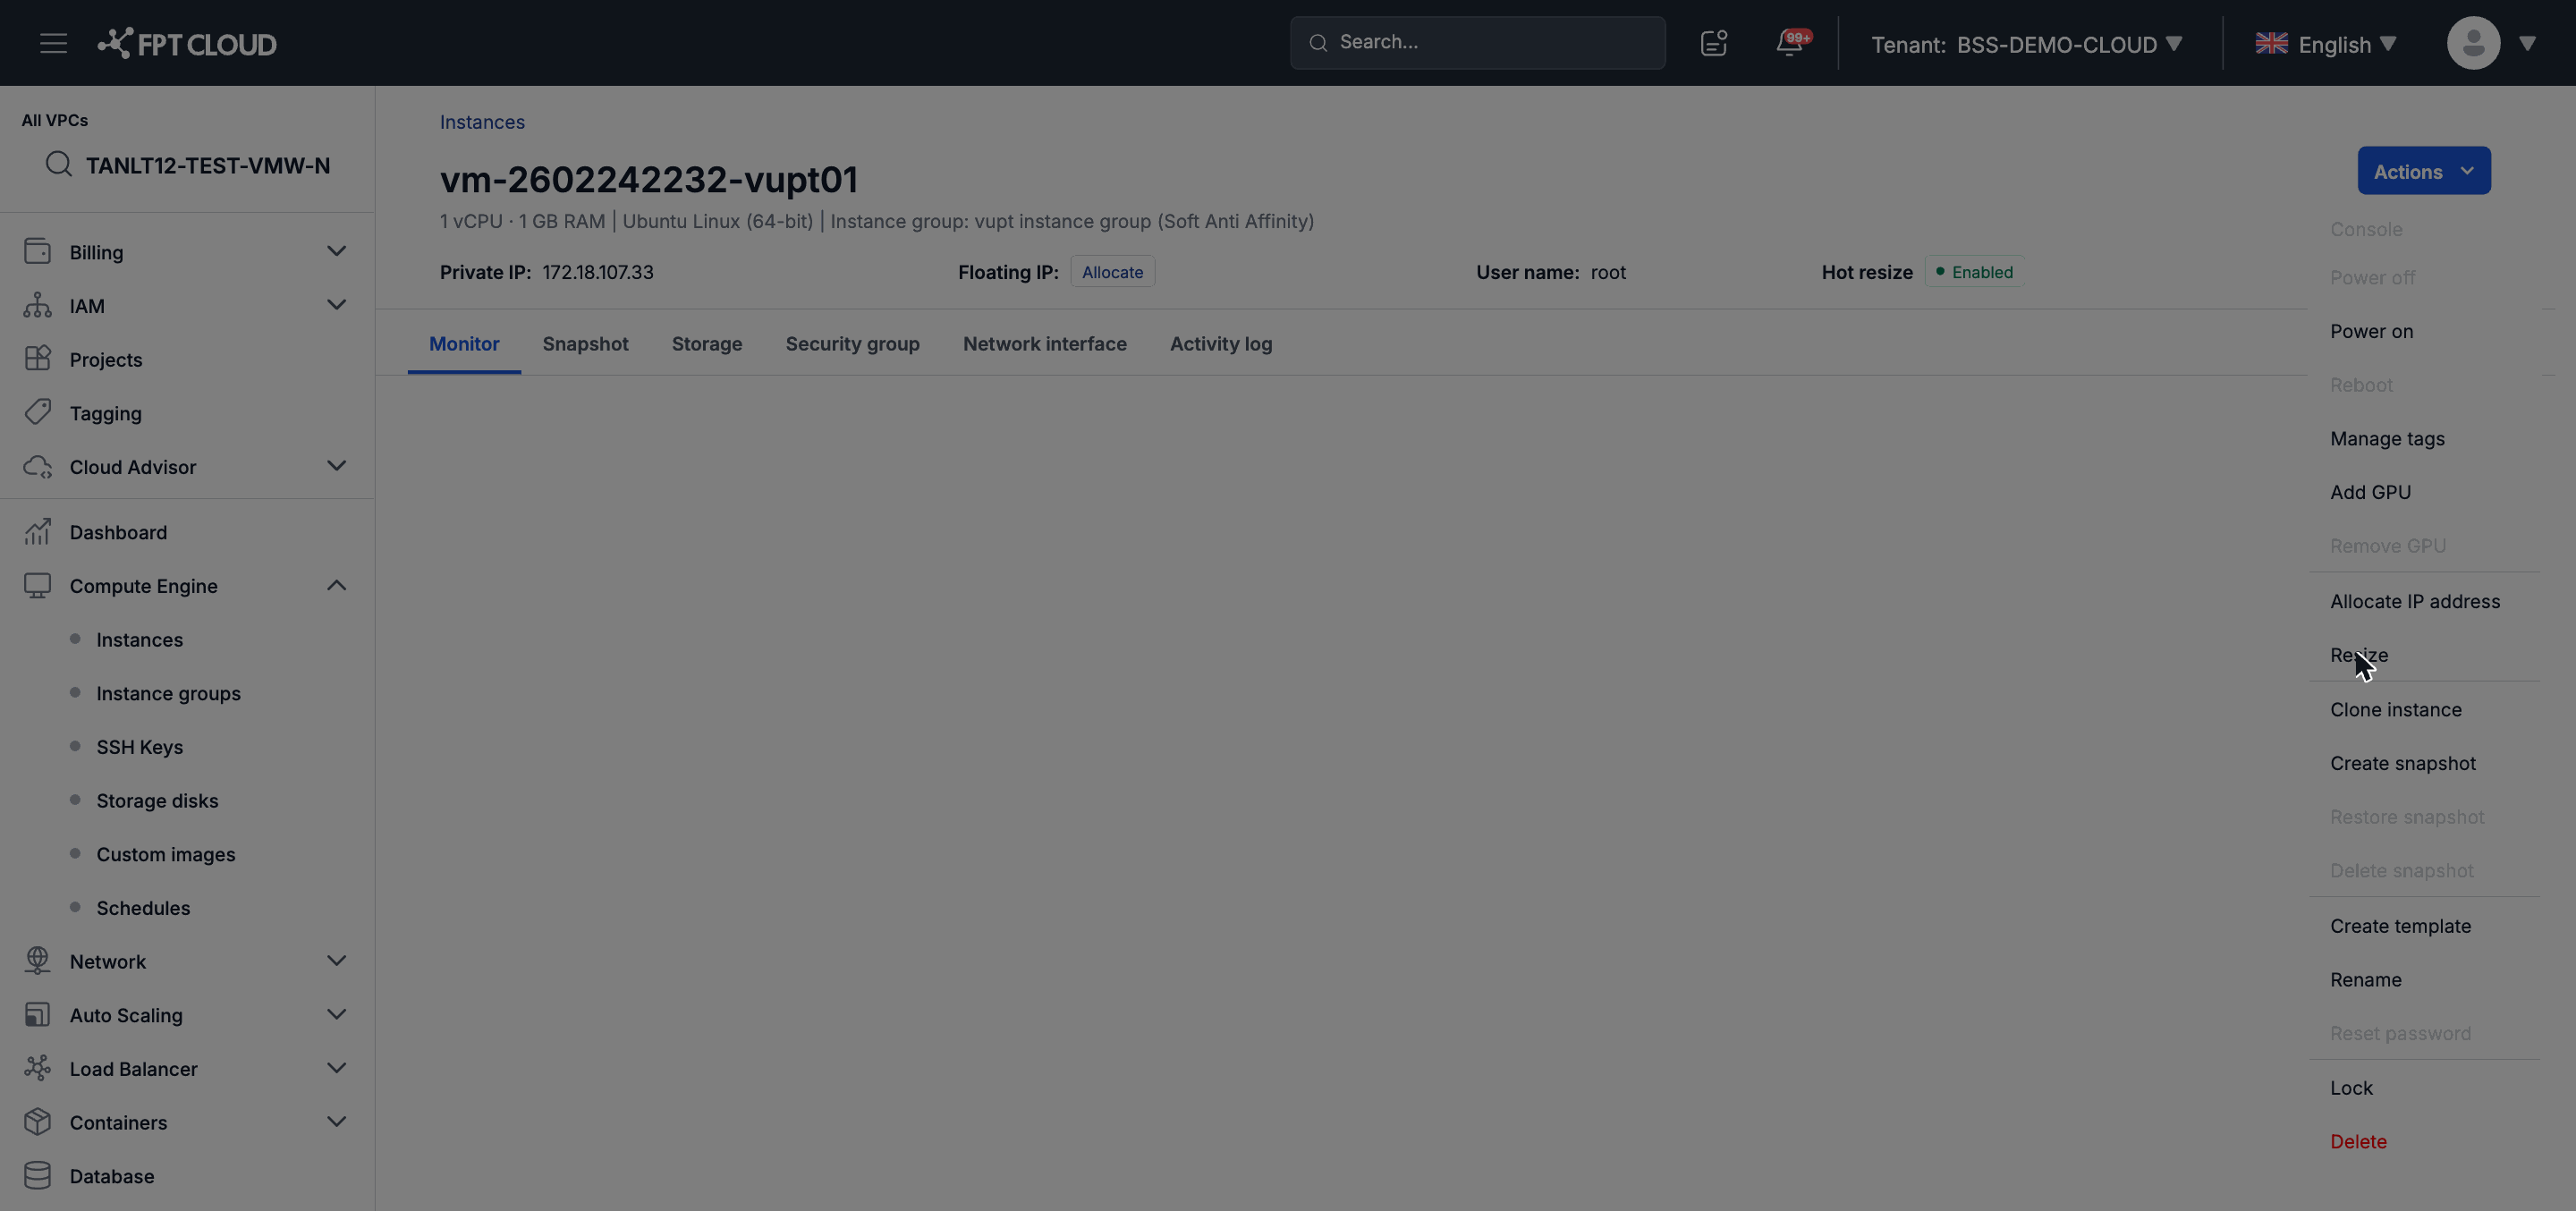
- The Instance must be in Stopped state. Resizing is not possible while the Instance is running.
- If the Instance currently has a GPU attached: you must remove the GPU from the Instance before resizing. See the GPU Management guide.
Steps to Resize
Step 1: Power Off the Instance
If the Instance is running, you need to power it off before resizing.
- In the Instance list or detail page, open the Instance's action menu.
- Select Power Off.
- Confirm the operation. Wait until the Instance status changes to Stopped.
Note: Power Off shuts down the Instance through the normal shutdown sequence. If you need to shut down immediately, use Hard Power Off — but note that this method may affect unsaved data on the Instance.
Step 2: Open the Resize Function
You can access Resize from two locations:
From the Instance list page:
- Find the Instance to resize in the list.
- Open the action menu (three-dot icon or Actions column).
- Select Resize.
From the Instance detail page:
- Go to the Instance detail page.
- Open the action menu in the top-right corner.
- Select Resize.
Step 3: Select the New Flavor
The system displays the list of available Flavors. Each Flavor represents a specific set of vCPU and RAM configuration.
- Review the Instance's current Flavor configuration.
- Select the new Flavor that meets your needs.
- Compare the vCPU and RAM specifications between the current and new Flavor before confirming.
Note: The Flavor list displays pre-defined options provided by the system. Some environments may support additional custom Flavors — contact the operations team if you need a configuration outside the list.
Step 4: Confirm the Resize
- Review the selected Flavor.
- Click Confirm to begin the resize process.
- The Instance status changes to Resizing during the process.
- After completion, the Instance returns to Stopped state with the new Flavor.
Note: After the resize completes, you need to manually power the Instance back on by selecting Power On from the action menu. The Instance does not restart automatically.
Verify the Result
After the Instance has been powered back on, you can confirm the resize was successful by:
- Viewing the Flavor information on the Instance detail page — the vCPU and RAM counts should match the Flavor you selected.
- Logging in to the Instance and checking resources using system tools such as
lscpu,free -h(Linux) or Task Manager (Windows).
Common Errors
| Situation | Cause | Resolution |
|---|---|---|
| Resize option is grayed out (disabled) | Instance is not in Stopped state | Power off the Instance first |
| Resize not available when GPU is attached | Instance currently has a GPU attached | Remove the GPU first, then resize |
| Resize fails | Insufficient resources on the host | Retry later or contact support |