Manage Storage Disk
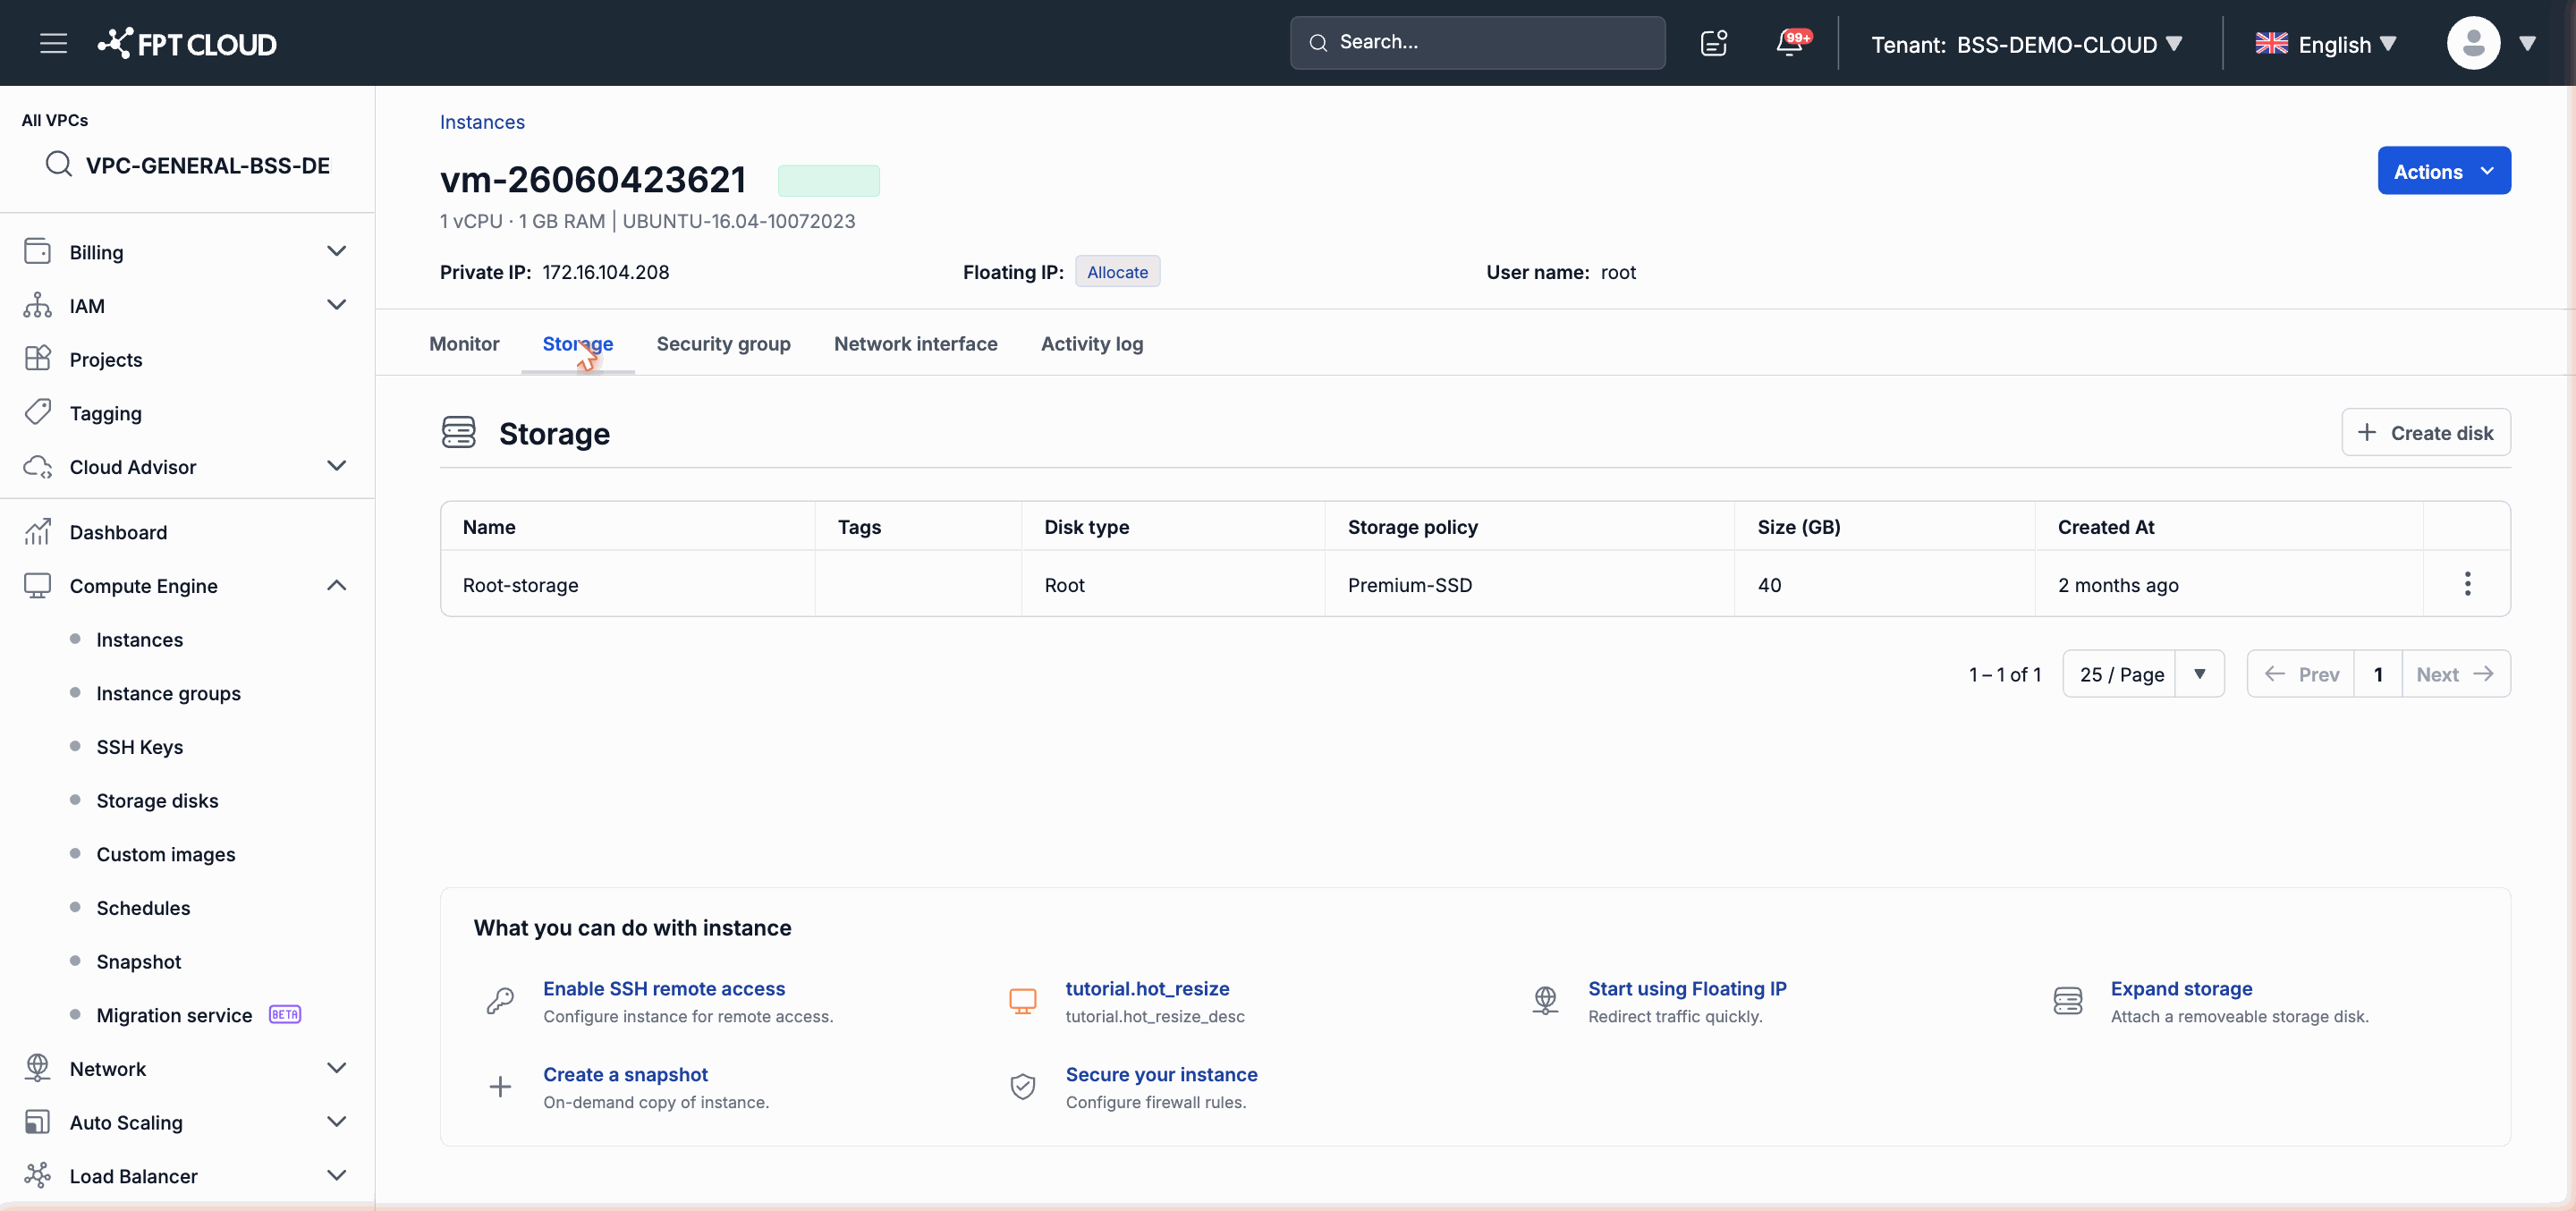
The Storage Disk tab on the Instance detail page lets you view and manage all disks attached to the Instance, including: adding new disks, editing disk information, deleting disks, creating Snapshots, and attaching Tags.
Note: Some features are only available depending on the VPC type the Instance belongs to. Specific VPC and General VPC have different options — see the details in each section below.
View the Disk List
- Go to the Instance detail page.
- Select the Storage Disk tab.
The list displays all disks currently attached to the Instance with the following information:
| Column | Description |
|---|---|
| Name | Disk name |
| Type | Root, Local (Specific VPC) or External (General VPC) |
| Storage Policy | The storage policy currently applied |
| Capacity | Disk size (GB) |
| Actions | Operations available on the disk |
Add a New Disk
You can add a disk to an Instance while it is running or stopped.
- In the Storage Disk tab, click Add disk.
- Select the appropriate Storage Policy.
- Enter the disk capacity (GB).
- Click Confirm.
After adding, the new disk appears in the list. You need to go into the Instance's operating system to mount and use this disk.
Edit a Disk
- In the Storage Disk tab, find the disk to edit.
- Click the Edit icon (or select Edit from the action menu).
- Change the necessary fields:
- Disk name: change the display name.
- Storage Policy: change the storage policy.
- Capacity (GB): increase the disk size.
- Click Save to apply the changes.
Note: Disk capacity can only be increased, not decreased. After successfully increasing the capacity, you need to go into the Instance's operating system to expand the corresponding partition.
Delete a Disk
You can delete a disk even while the Instance is running.
Warning: Deleting a disk will permanently erase all data on that disk. This operation cannot be undone. Back up your data before deleting.
Note: The root disk cannot be deleted.
For Specific VPC: You can delete local disks. The root disk can only be edited, not deleted.
For General VPC: You can delete external disks. The root disk cannot be deleted.
Steps to delete a disk:
- In the Storage Disk tab, find the disk to delete.
- Open the action menu and select Delete.
- Read the warning and confirm the operation.
Create a Snapshot for a Disk (General VPC)
Note: This feature is only available in General VPC.
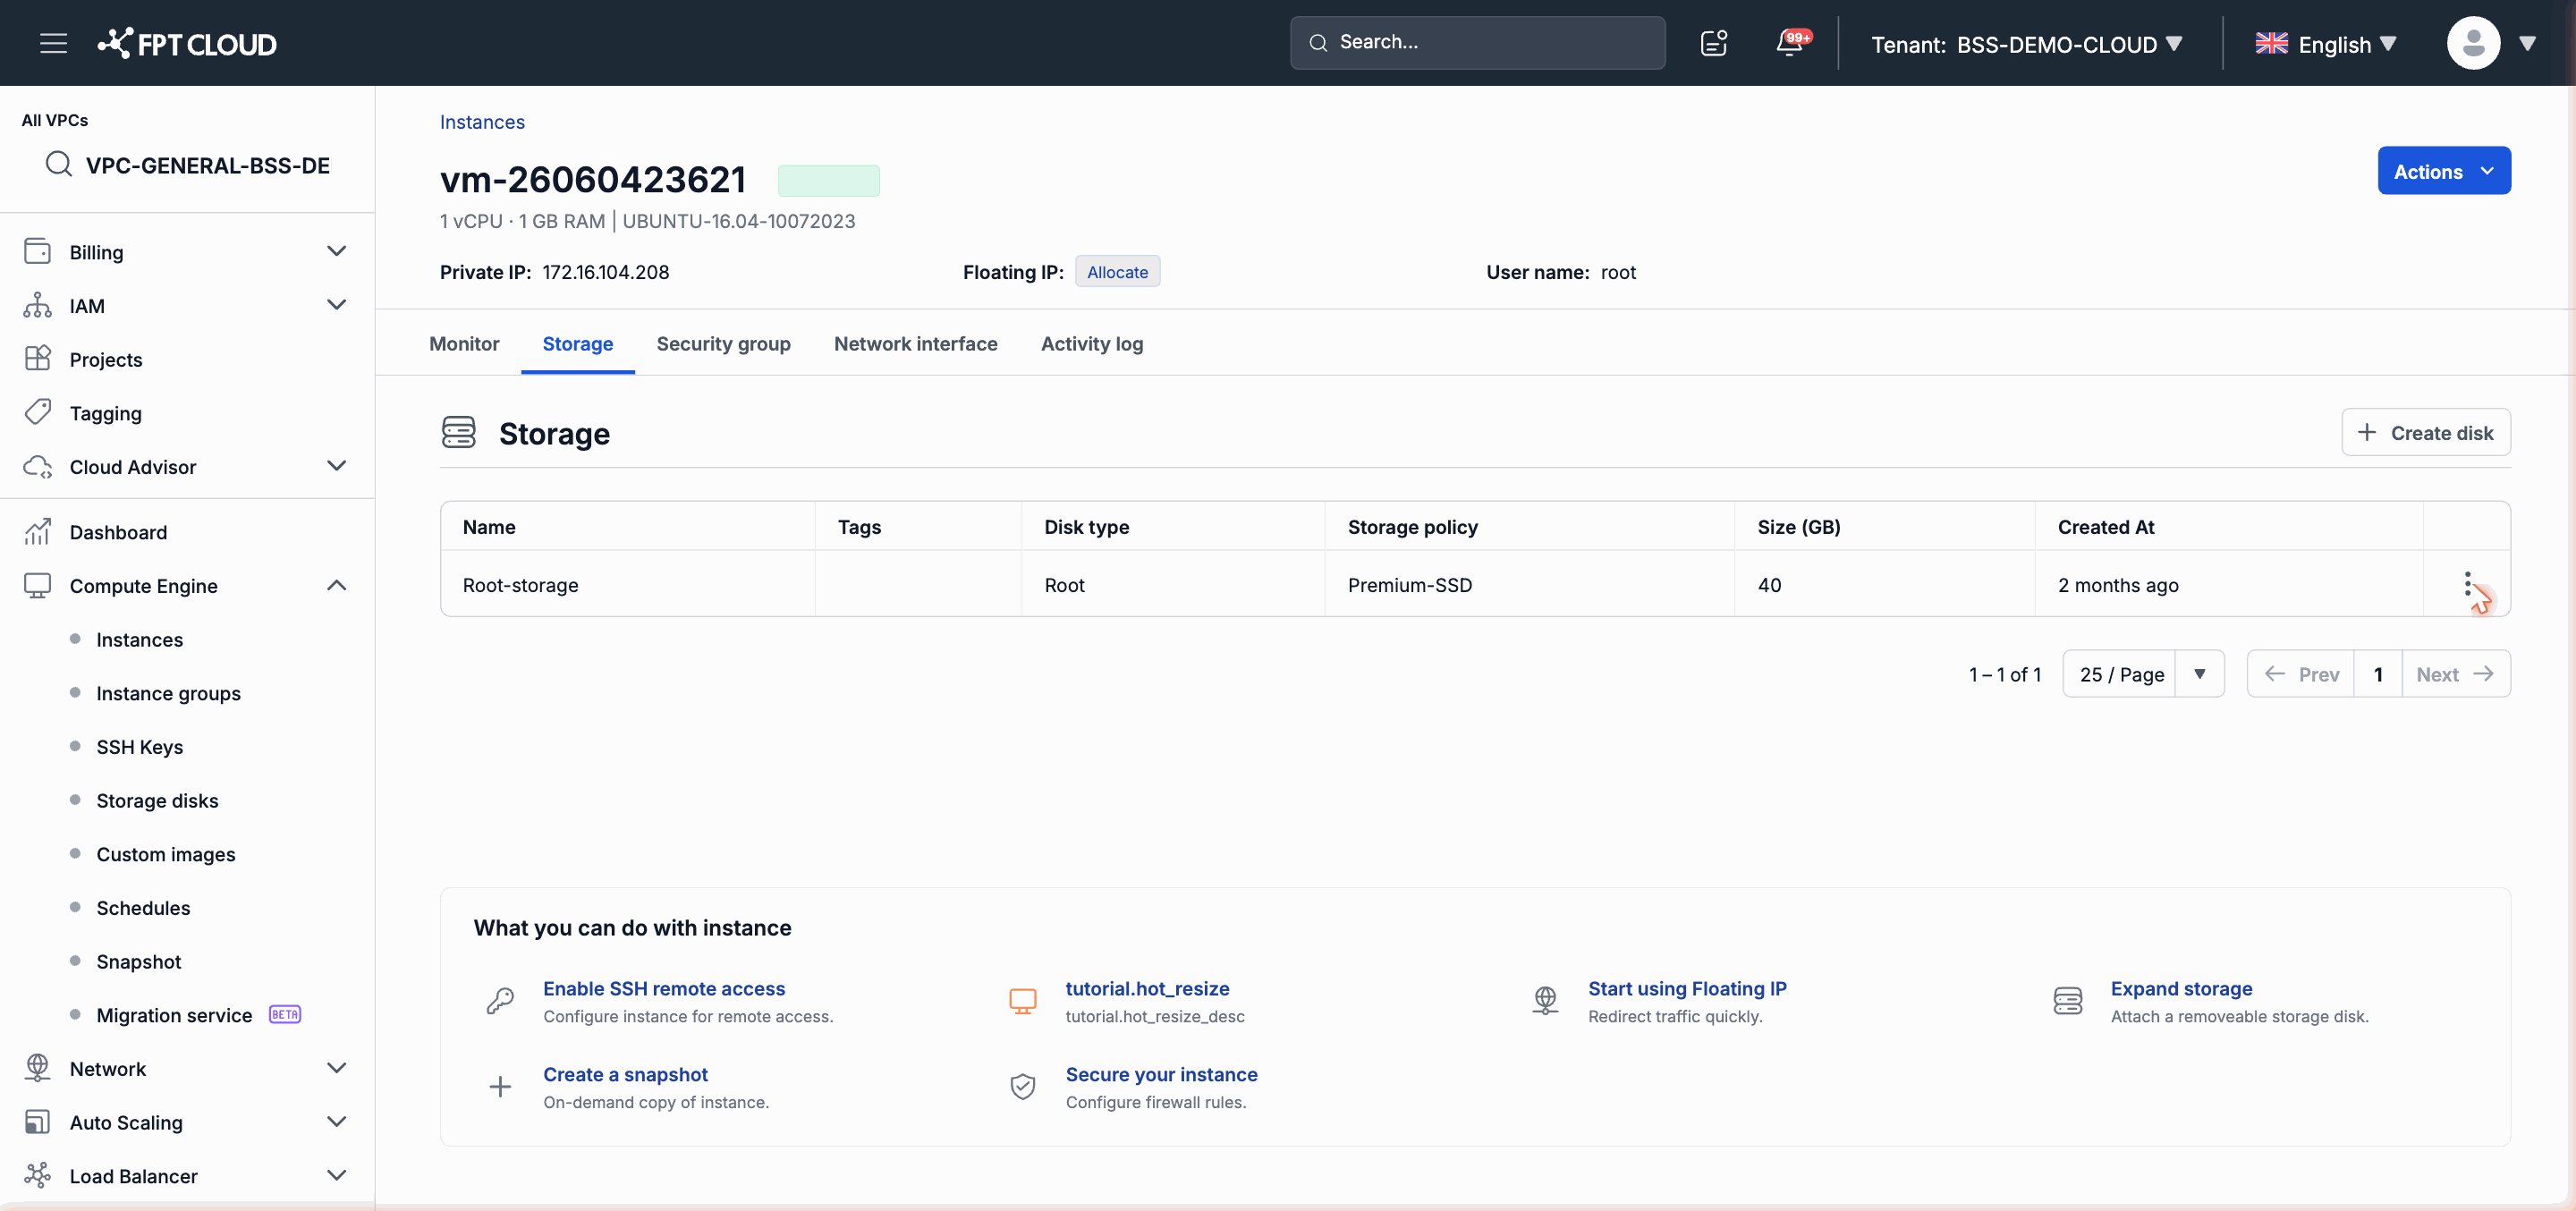
You can create a Snapshot for an external disk or a root disk directly from the Storage Disk tab.
- In the Storage Disk tab, find the disk to snapshot (root or external disk).
- Open the action menu and select Create Snapshot.
- Enter a name for the Snapshot.
- Click Confirm.
Snapshots are created asynchronously. After completion, you can view the Snapshot in the system's Snapshot management section.
Note: A disk Snapshot created from the Storage Disk tab is different from a full Instance Snapshot (FR-38). A disk Snapshot only saves the state of a specific disk.
Attach Tags to the Root Disk (General VPC)
Note: This feature is only available for the root disk in General VPC.
You can attach Tags to the root disk for classification, search, and resource management purposes.
- In the Storage Disk tab, find the root disk.
- Open the action menu and select Manage Tags.
- Add or remove Tags as needed.
- Click Save to apply.
See the Tag management guide for more information on organizing and using Tags.