Create Your First Instance
This guide helps you launch a new Instance on the FPT Cloud Customer Portal in approximately 10 minutes.
Before You Begin
- Your FPT Cloud account has been activated and has access to at least one VPC.
- The VPC already has a Subnet configured.
- You have sufficient vCPU and RAM quota for the Flavor you plan to select.
- You have identified the Image you want to use (for example: Ubuntu 22.04 LTS).
Steps
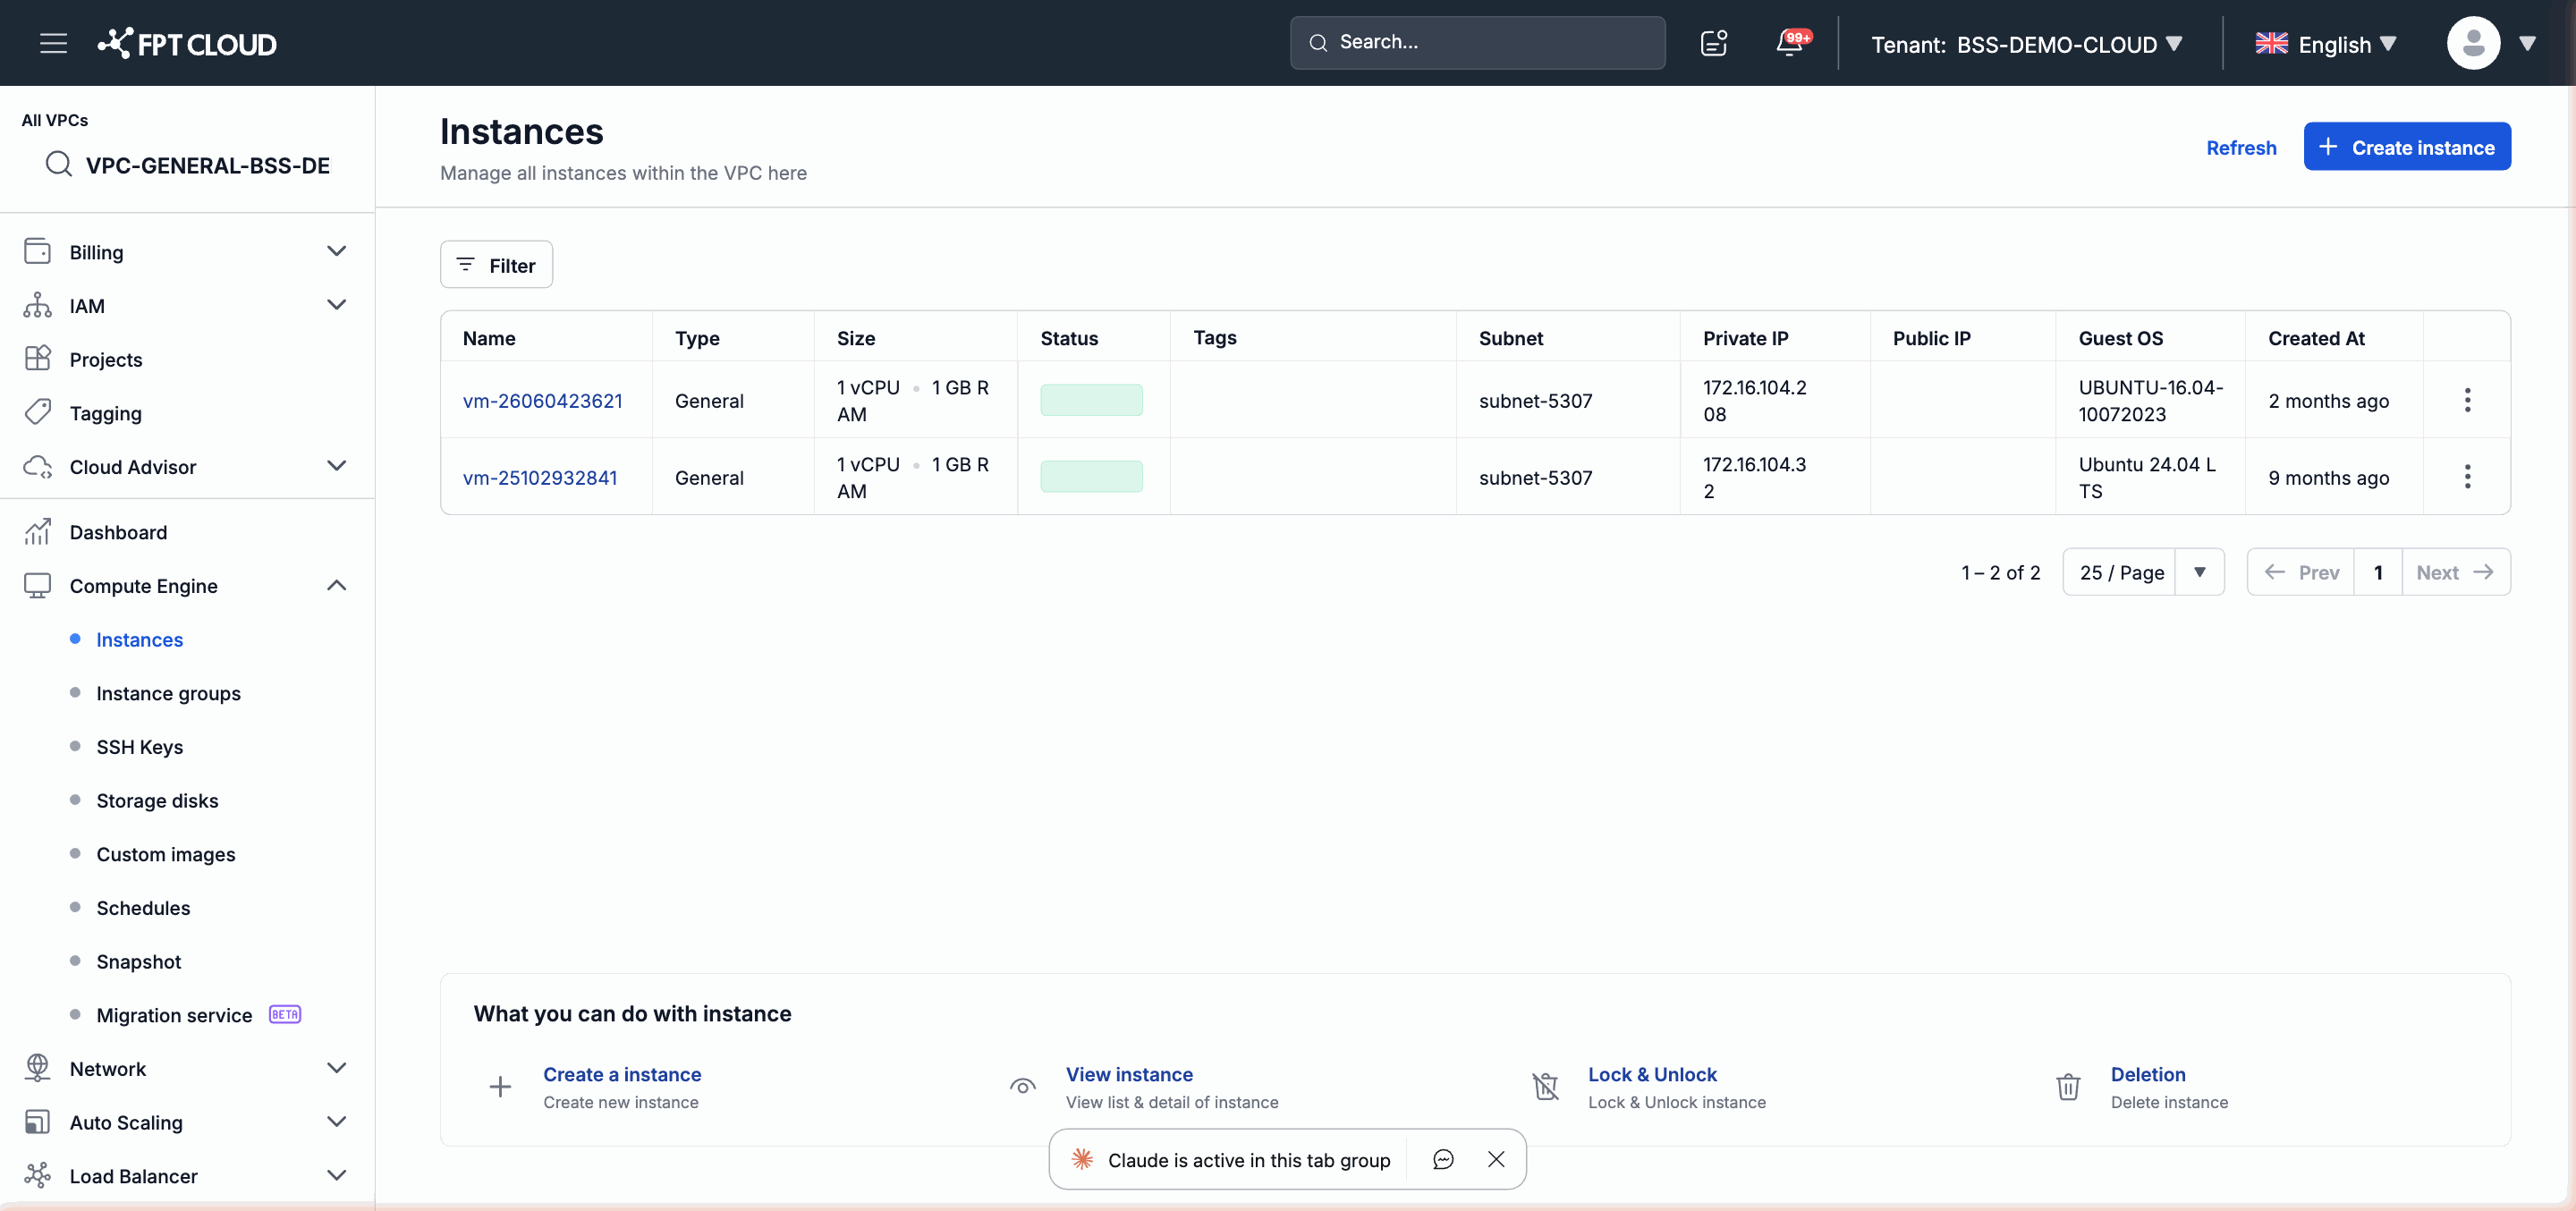
1. Open the Instance Creation Flow
On the FPT Cloud Console, select the VPC where you want to create the Instance, then go to Compute → Instance. Click Create Instance in the top-right corner of the screen.
2. Basic Configuration (Section: Configuration)
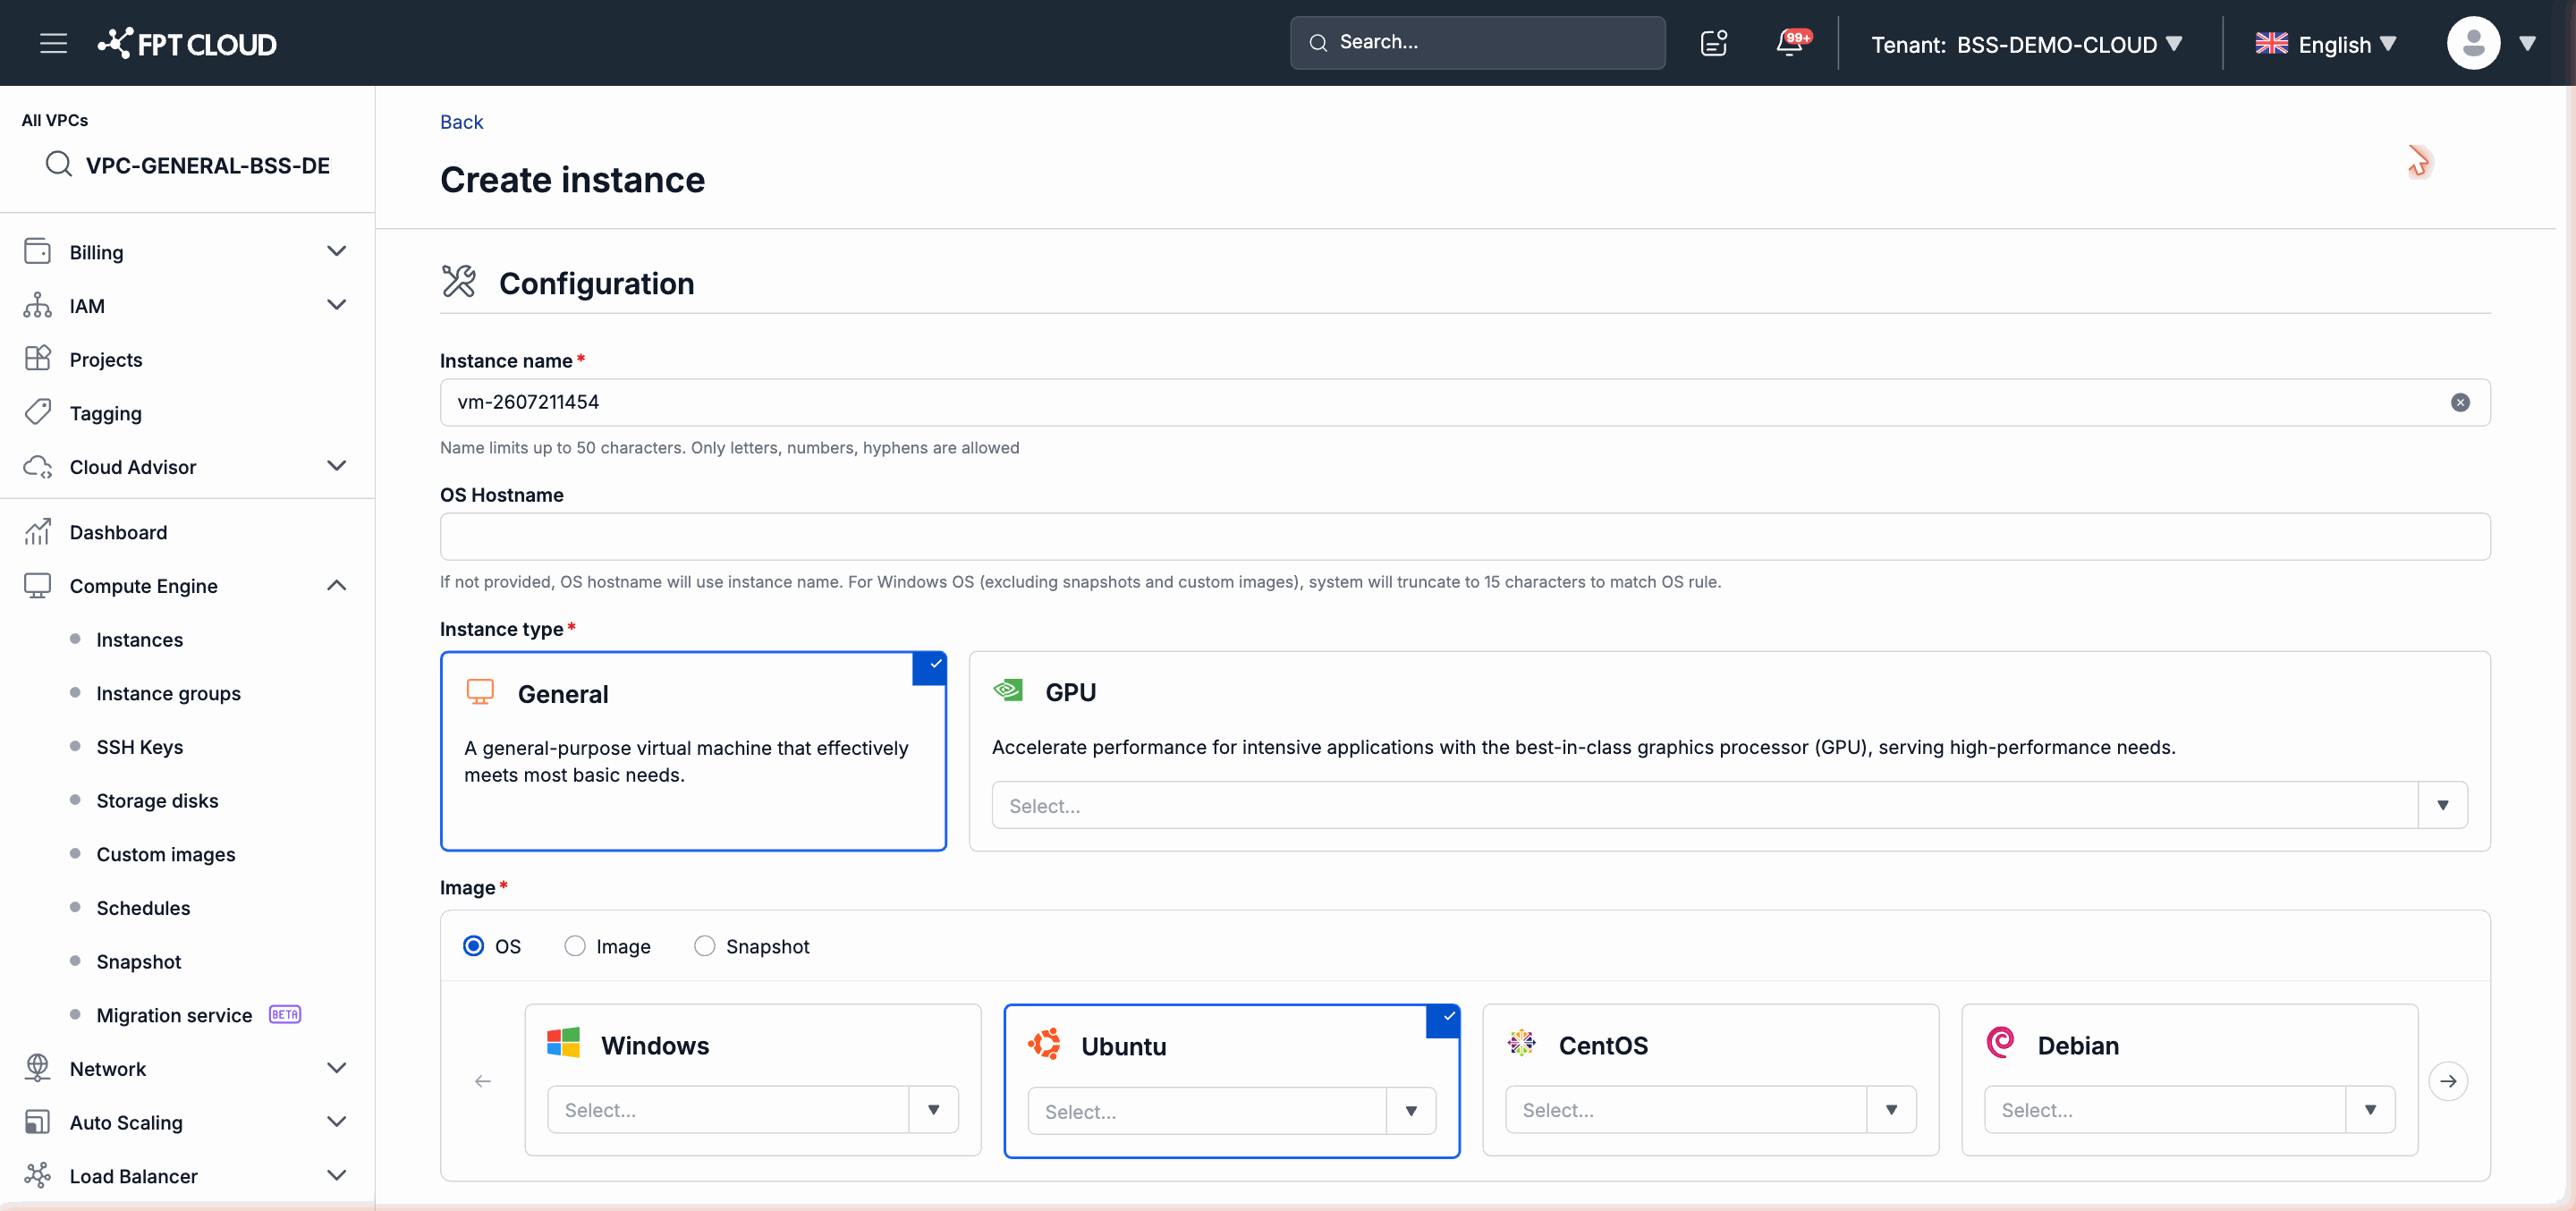
Fill in the following information in the Configuration section:
- Instance type: select general.
- Image: select the OS tab, then find and choose the Image you want (for example: Ubuntu 22.04 LTS).
- Flavor: select an appropriate Flavor from the list of available templates.
- Instance Name: enter an identifier name, for example
my-first-instance. The name must be unique within the VPC. - OS Hostname: enter the hostname for the operating system inside the Instance (can match the Instance Name).
3. Storage Configuration (Section: Storage Disk)
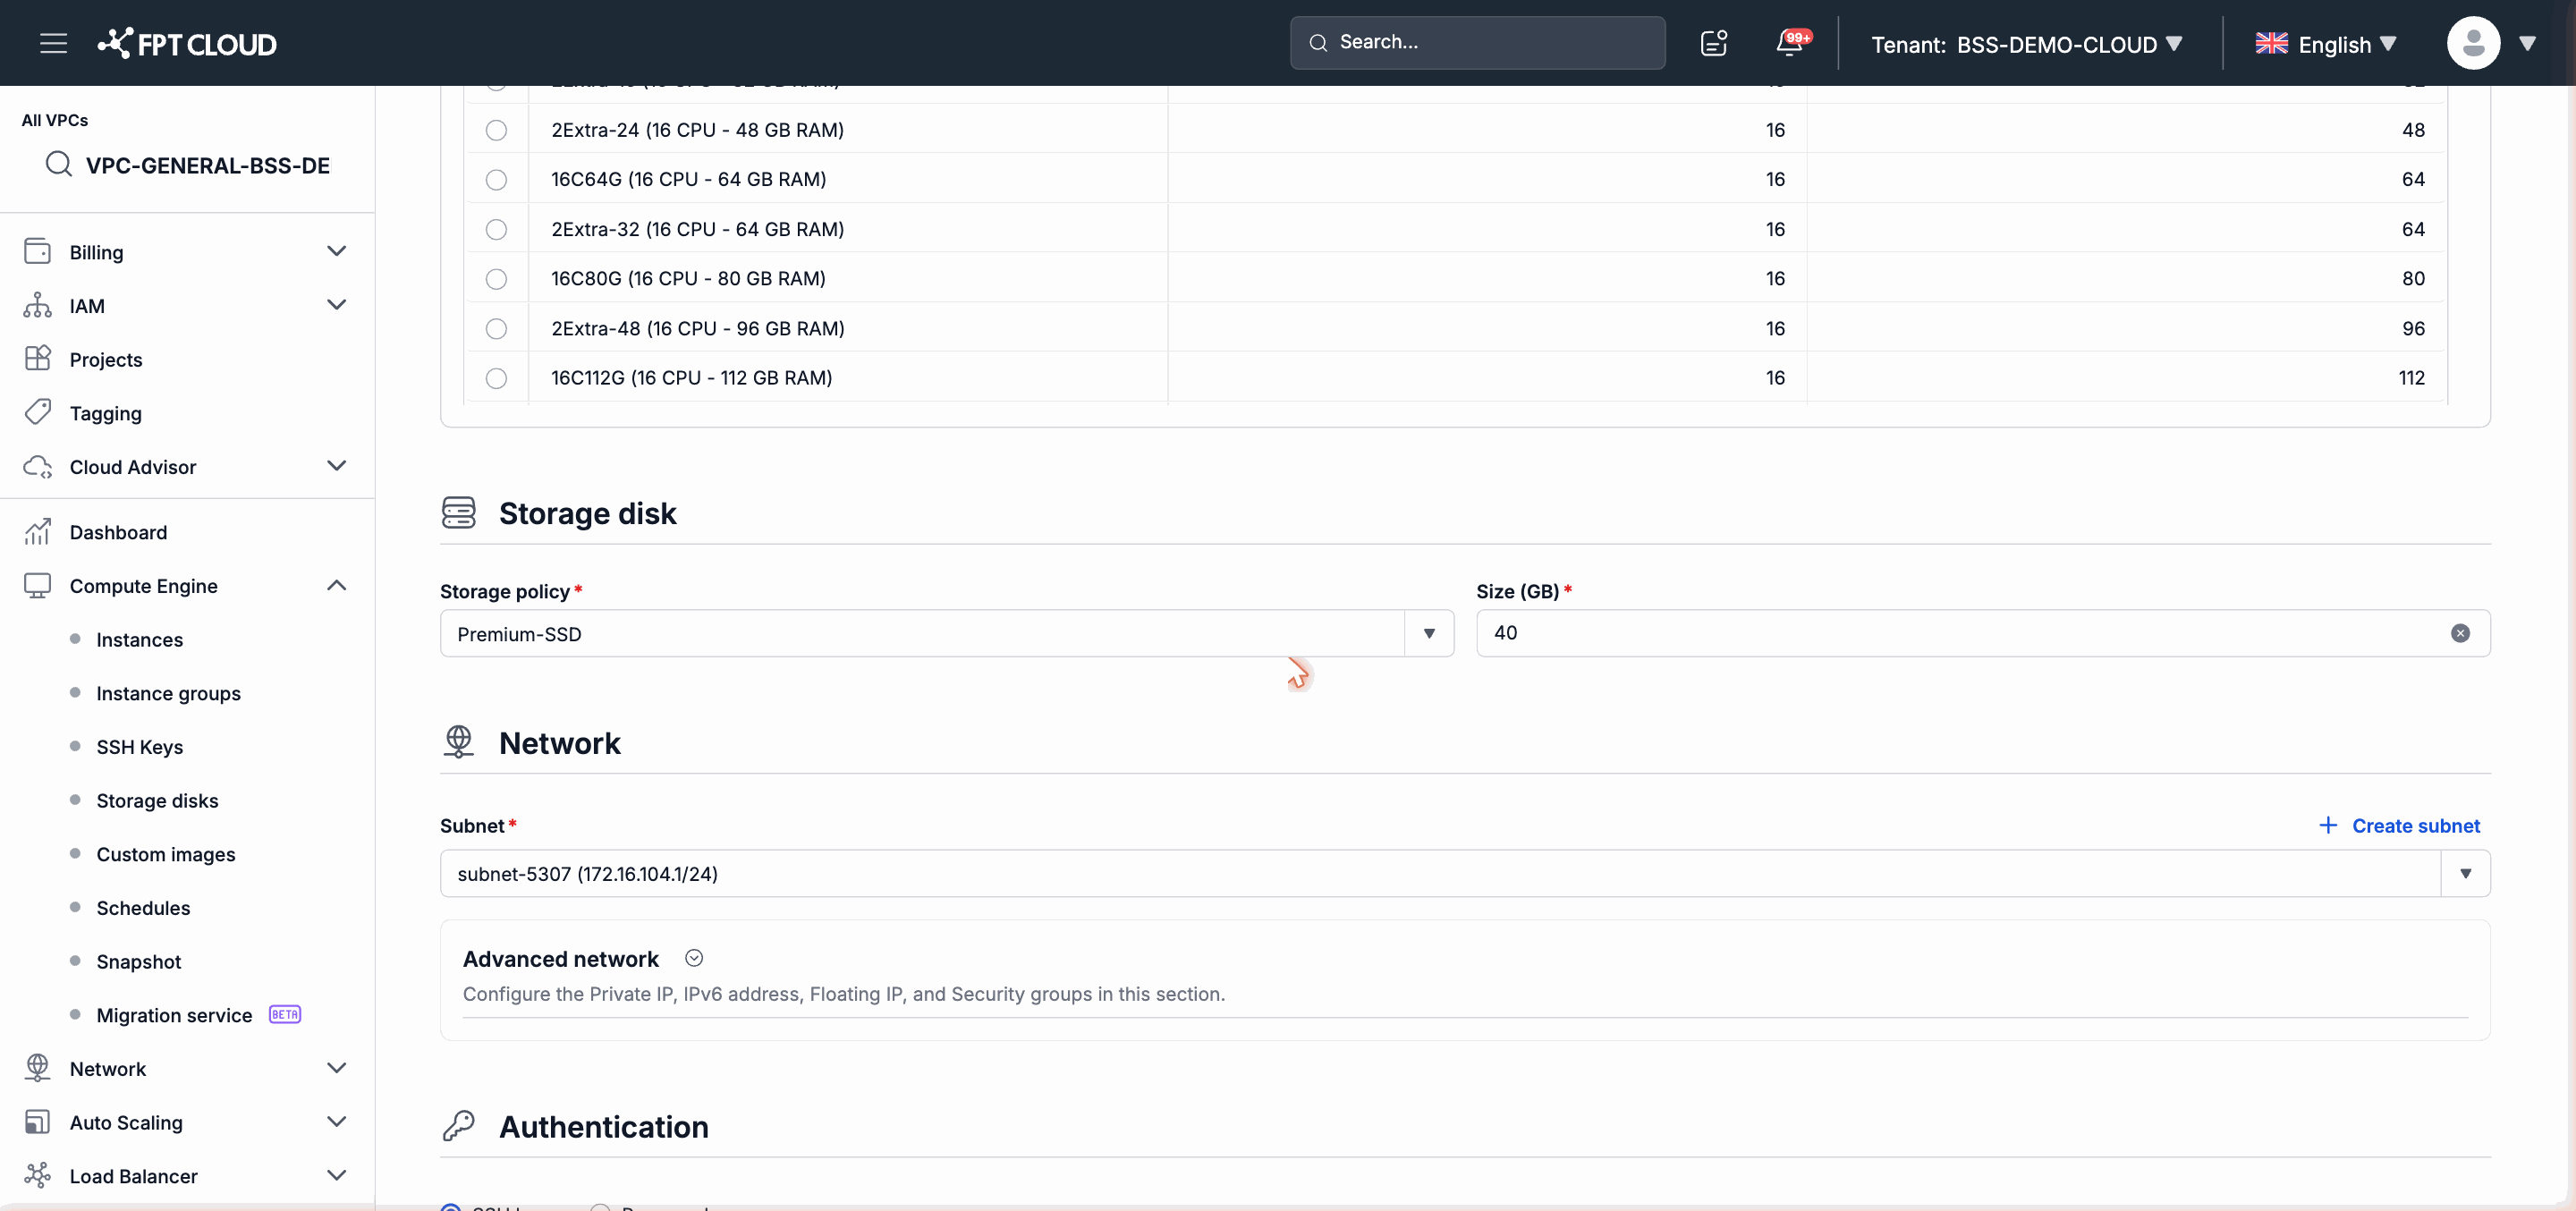
- Storage policy: select Standard.
- Capacity: enter the disk capacity, for example 40 GB.
4. Network Configuration (Section: Network)
- Subnet: select the Subnet you have prepared.
- Private IP: leave blank — the system will automatically assign an IP from the Subnet range.
- Security Group: select the default Security Group.
5. Authentication Configuration (Section: Authentication)
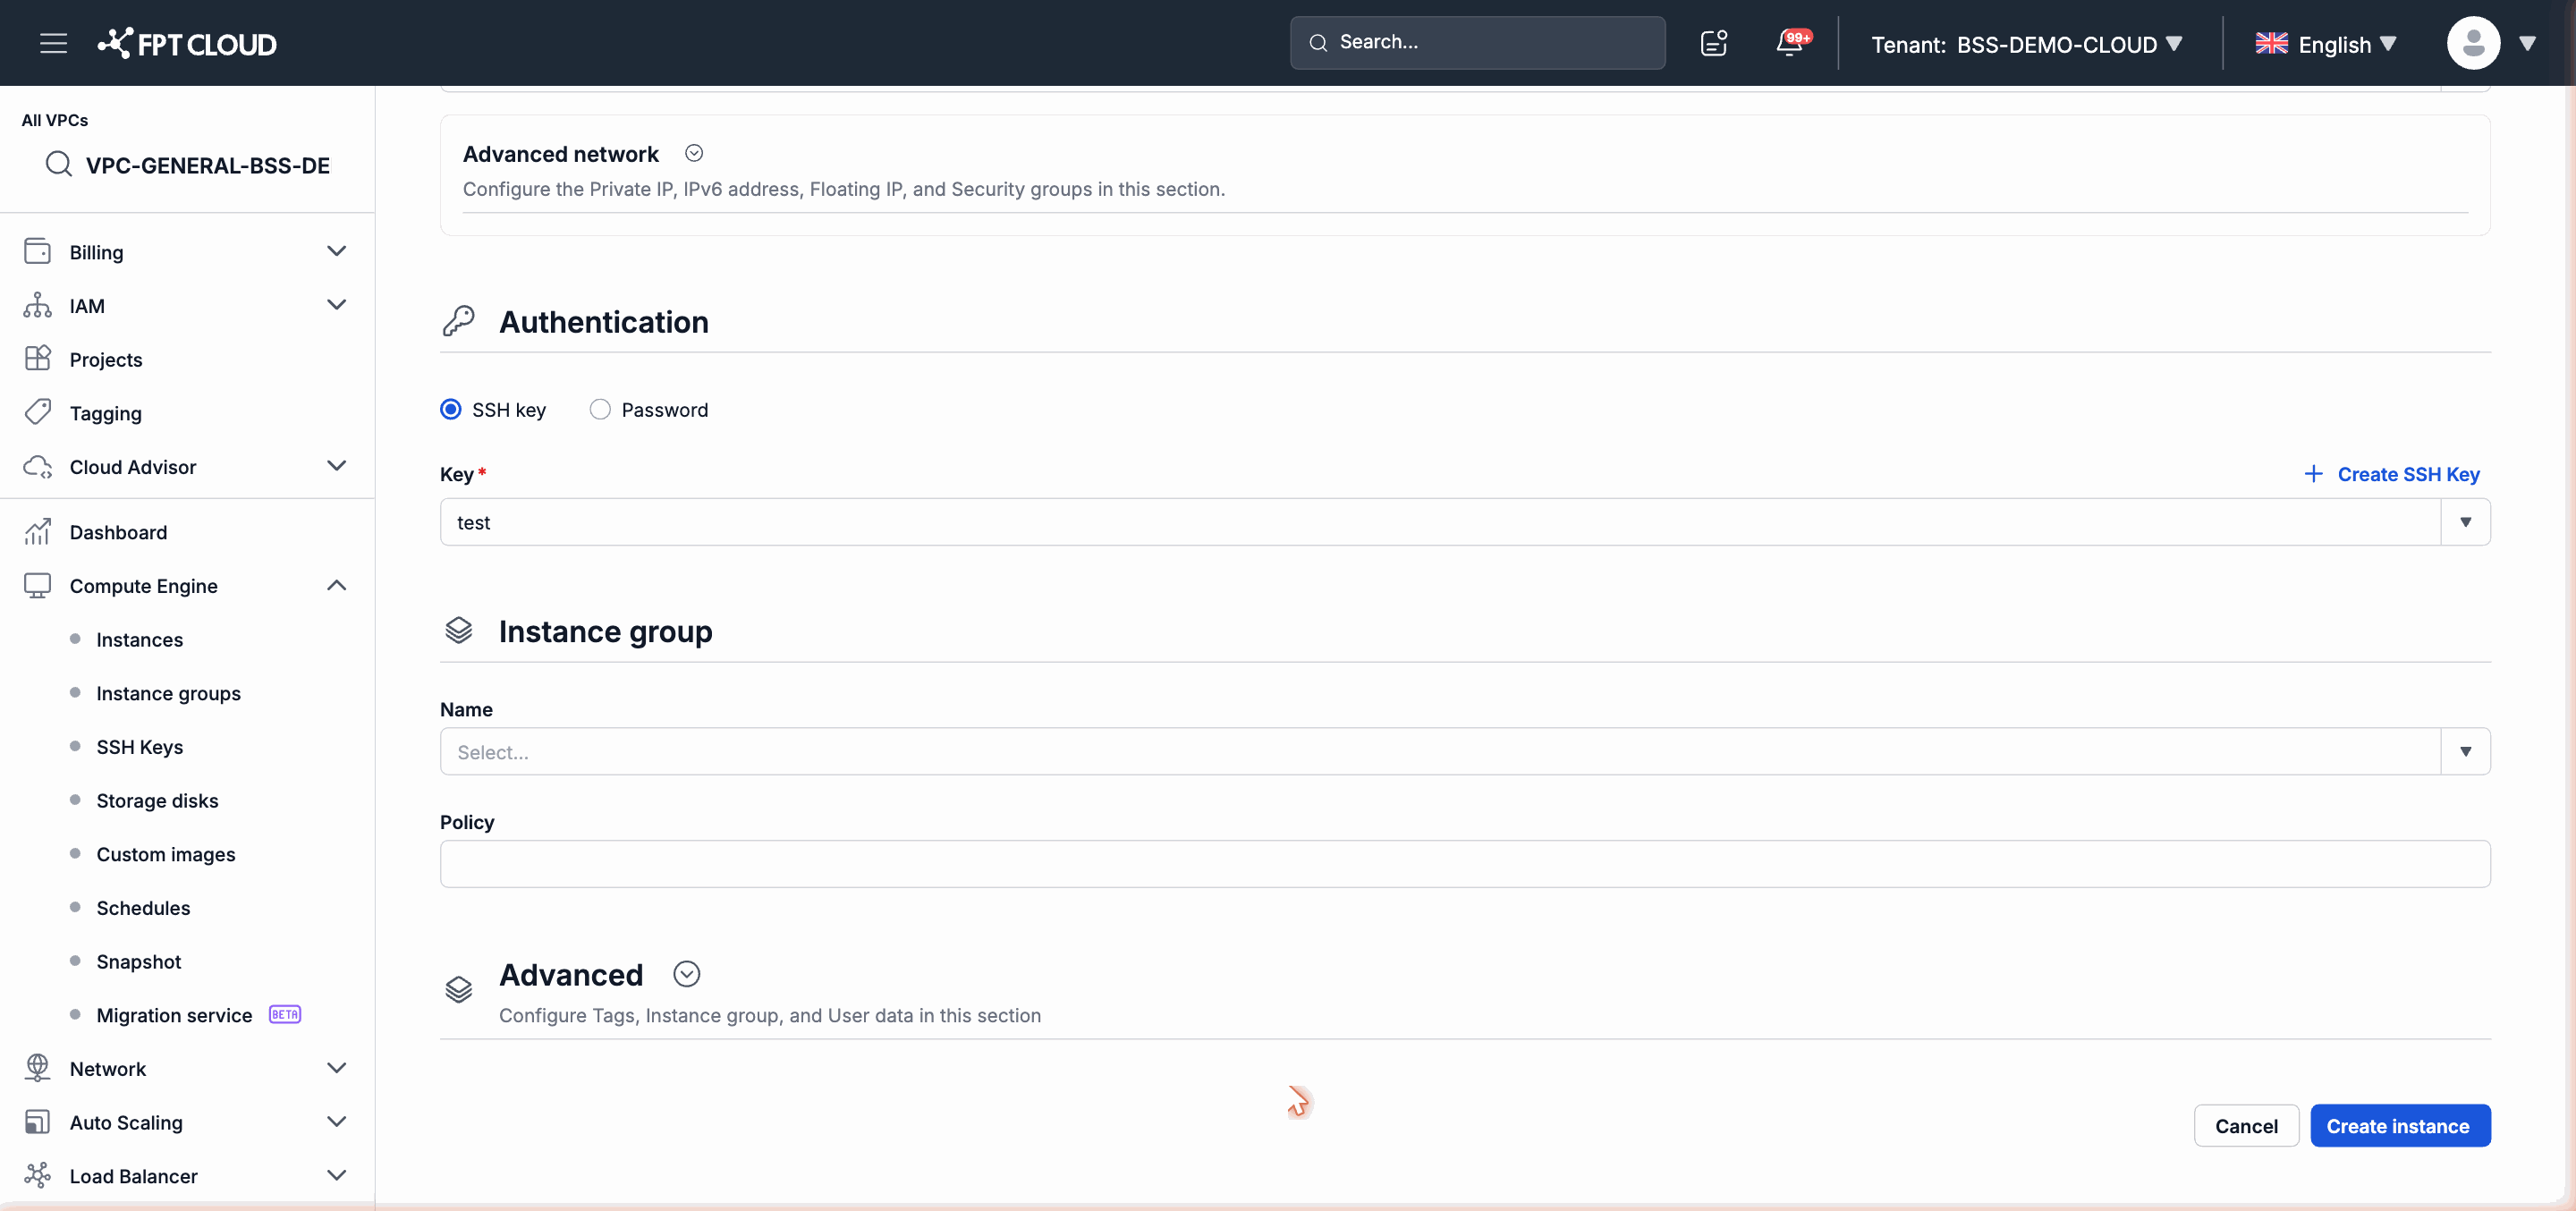
Select Password or SSH key:
- If you select Password: the system displays the password after the Instance is created successfully. Save it immediately — this password is not shown again.
- If you select SSH key: select an SSH key already registered in your account.
Note: For production environments, SSH key is recommended over Password.
6. Skip the Optional Sections
The Instance Group and Advanced sections (Tags, User Data) are optional. You can skip them on your first creation and configure them after the Instance is running.
7. Create the Instance
Review the information in the Review & Confirm section, then click Create. The Instance immediately appears in the list with the status CREATING. After a few minutes, the status changes to Running once the infrastructure confirms completion.
Note: Provisioning time depends on the Image and Flavor selected. The process typically completes within 5 minutes.
Next Steps
The Instance is running — you can connect to it right away. See Access Instance via Console to open a terminal directly from your browser, or refer to Manage Instance Power State to learn how to Reboot, Power Off, and Power On an Instance.