Clone an Instance
Clone is a feature that lets you create a new Instance with the same configuration as an existing one within the same VPC. Instead of reinstalling and reconfiguring from scratch, you can replicate a running Instance to quickly have a new environment with the same setup.
Note: The Clone feature only applies to Instances in Specific VPC.
When to Use Clone
- Create a staging or dev environment from a copy of the production environment
- Test configuration changes without affecting the original Instance
- Quickly scale out an Instance that already has software and settings pre-installed
- Alternative to creating a Template when the goal is a single copy, not repeated reuse
Before You Begin
- The Instance to be cloned must belong to Specific VPC.
- The Instance must not have any additional Storage Disk attached (other than the root disk). If it does, you need to detach that disk before cloning.
- Prepare a name for the new Instance and know which Subnet to attach to (if you want to configure networking immediately).
Step 1 — Detach Disks (if any)
If the original Instance has Storage Disk attached, you must detach it first.
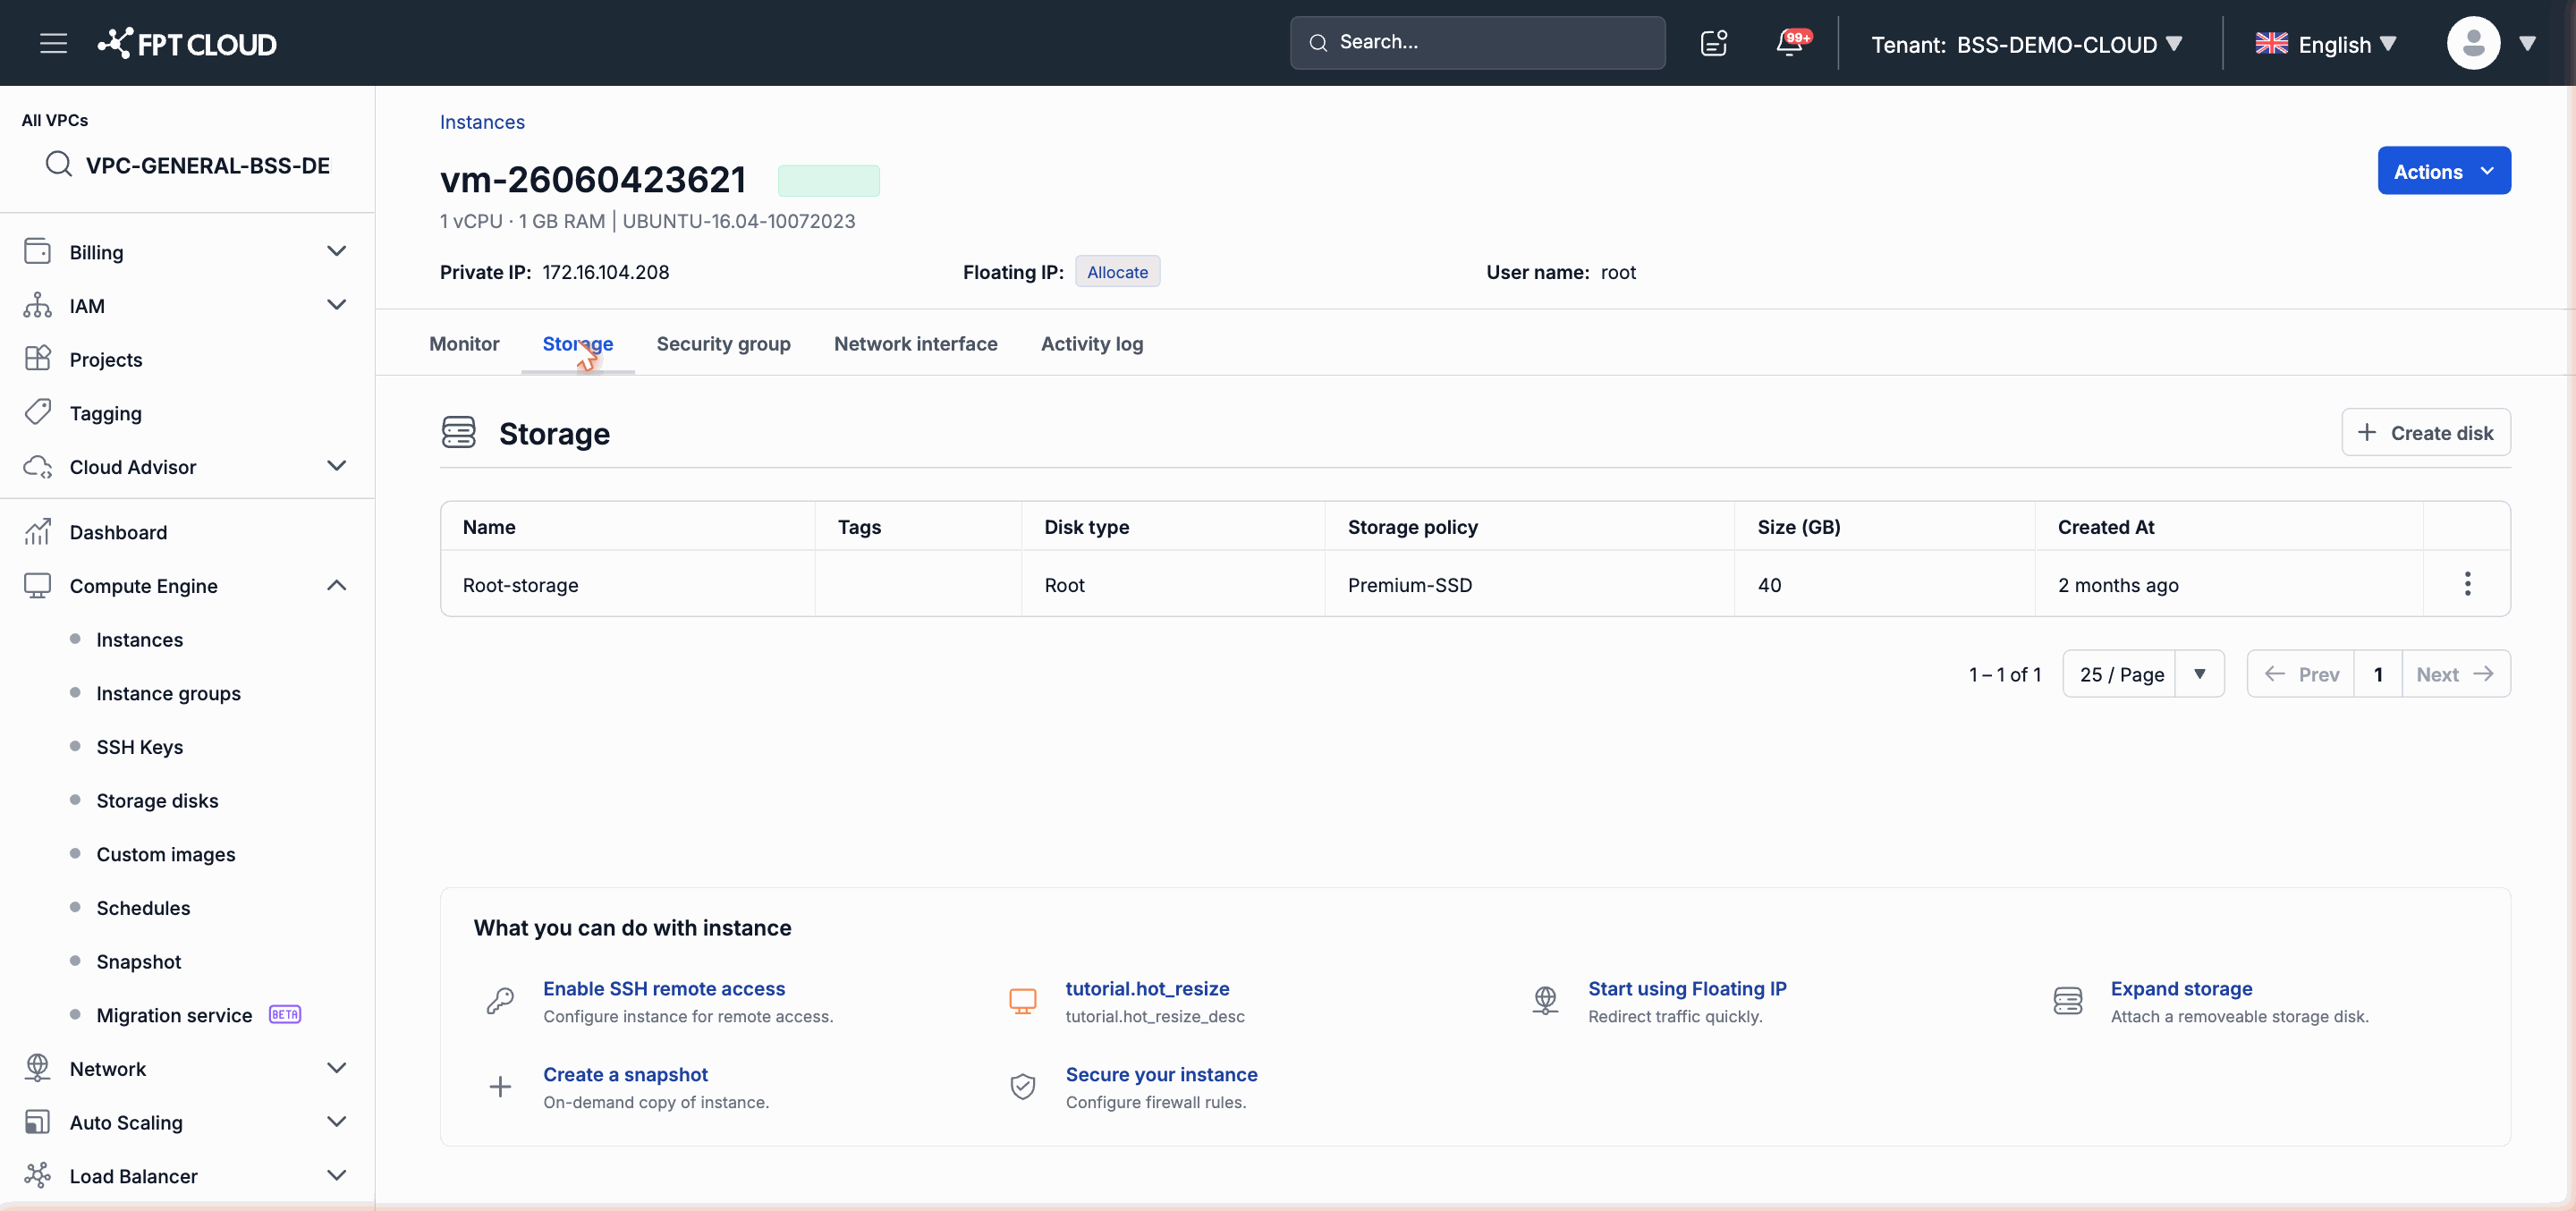
- Open the detail page of the original Instance.
- Select the Storage Disk tab.
- For each Storage Disk in the list (not the root disk), click Detach to disconnect the disk from the Instance without deleting its data.
- Wait until the Storage Disk list shows no disks other than the root disk.
Important: The system rejects a clone request if the Instance still has Storage Disk attached. The root disk does not need to be detached.
Step 2 — Open the Clone Feature
You can start cloning from two locations:
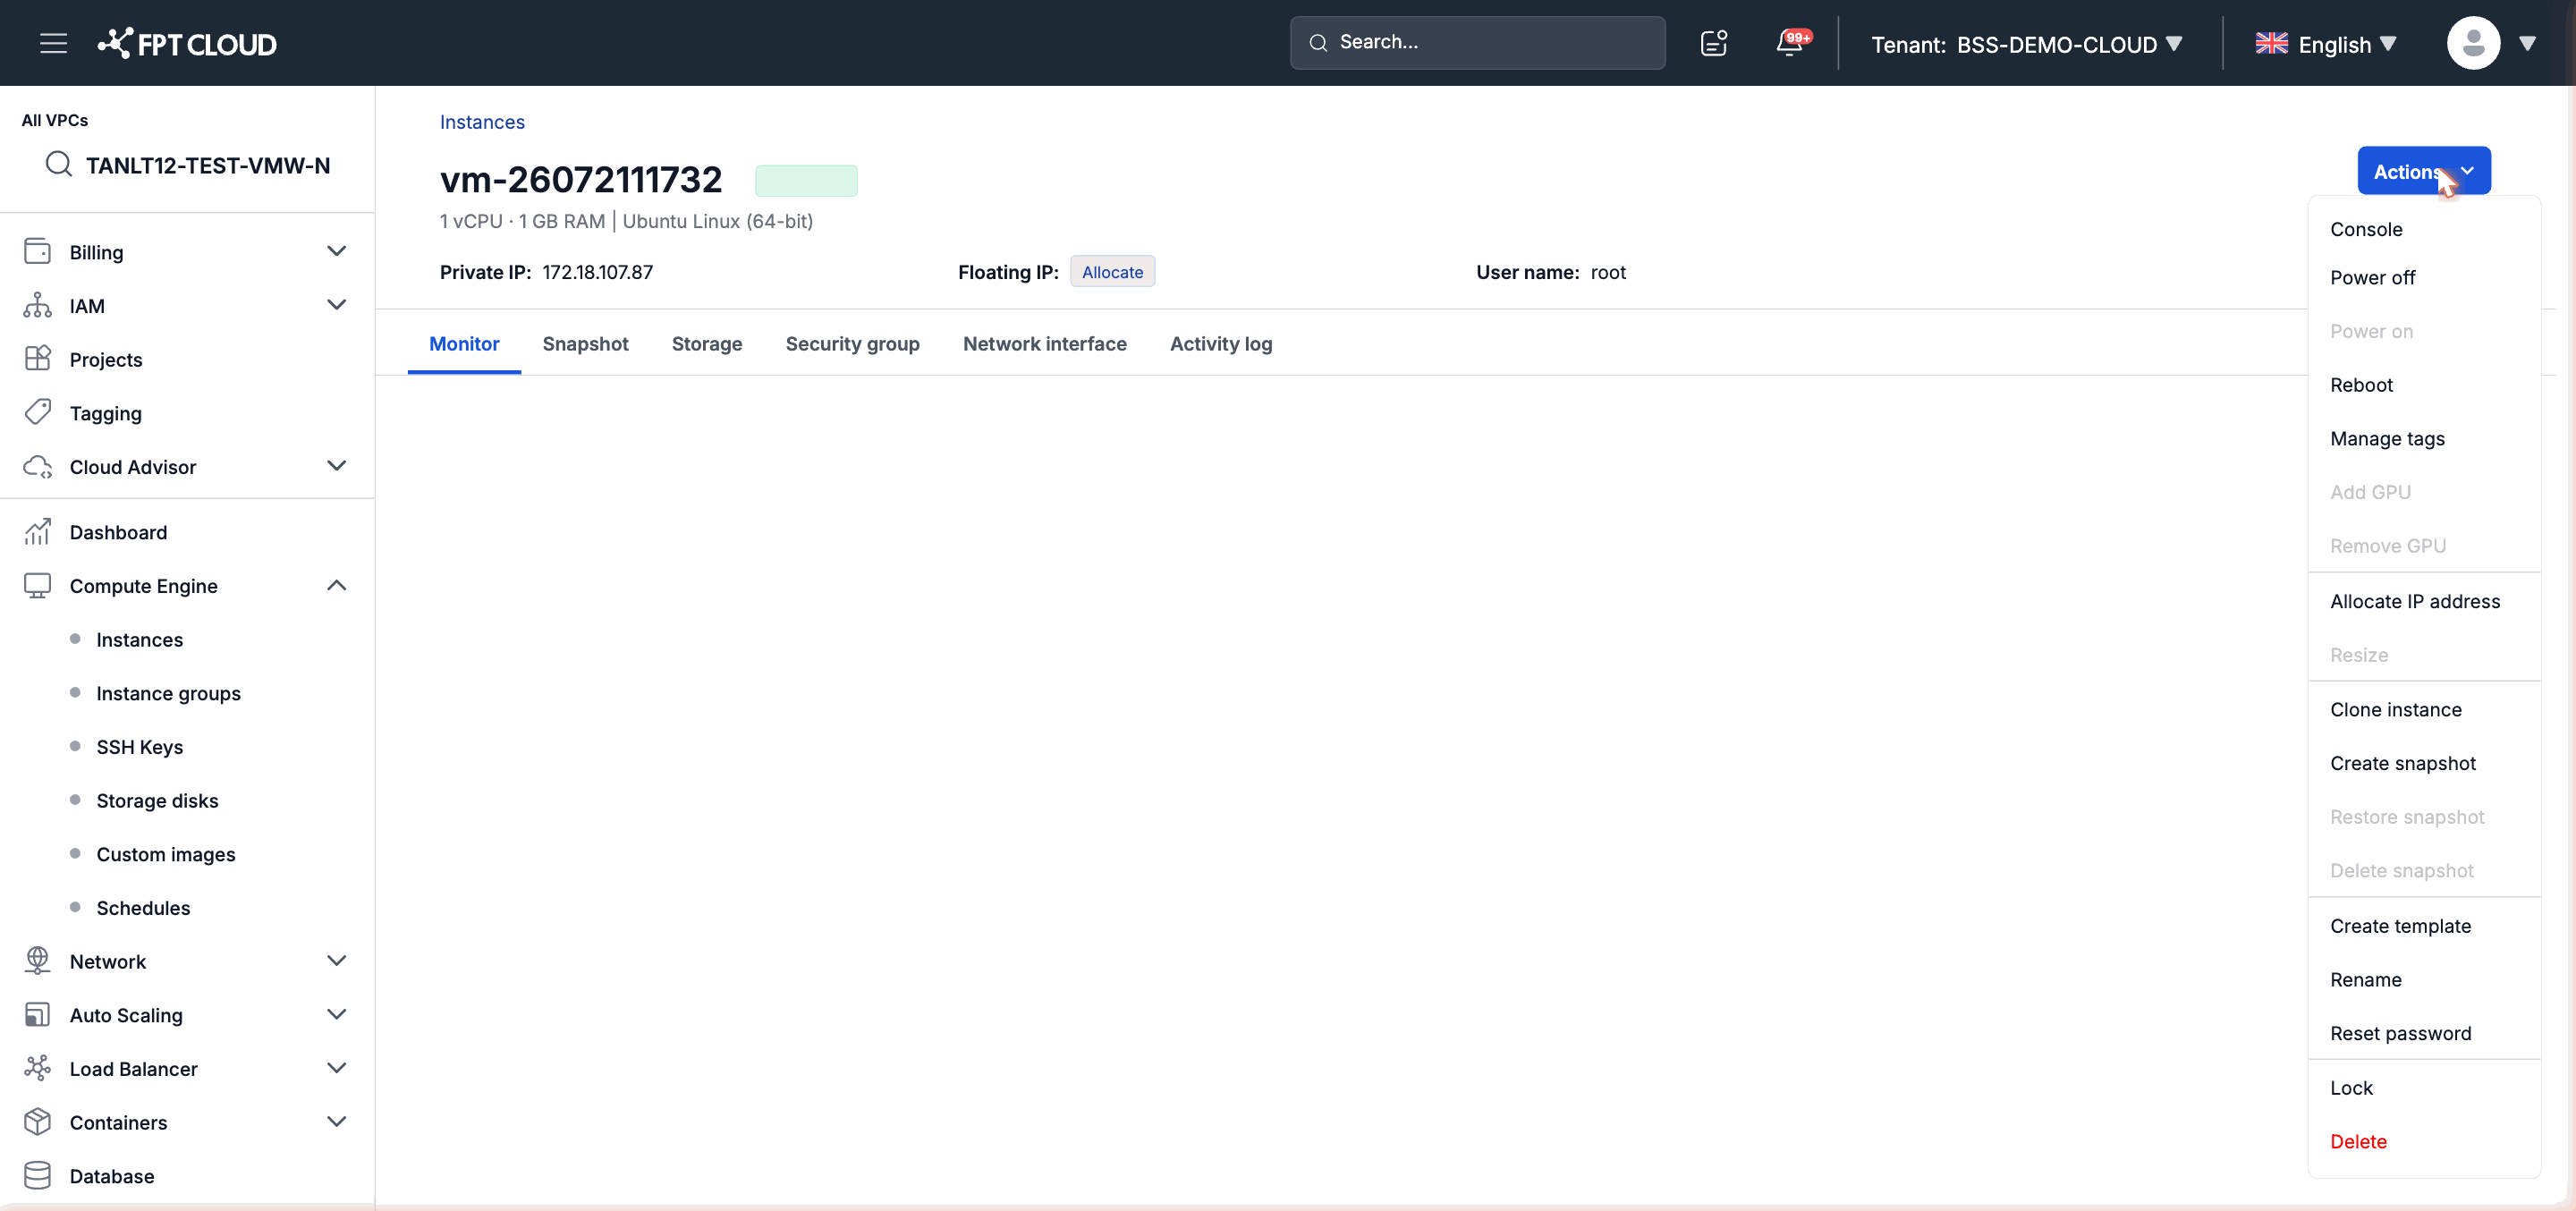
- From the Instance list: click the action icon (...) next to the Instance to clone, then select Clone Instance.
- From the Instance detail page: click the action menu in the top-right corner, then select Clone Instance.
Step 3 — Configure the Clone
The Clone Instance dialog appears. Fill in the following information:
| Field | Required | Description |
|---|---|---|
| New Instance Name | Yes | The identifier name for the created Instance |
| Storage Policy | Yes | The storage policy for the root disk of the new Instance |
| Subnet | No | The Subnet to attach the NIC to. Leave blank to configure networking later |
| Private IP | No | A static IP address within the Subnet. Leave blank for automatic assignment |
| Power on after clone | No | Check this box if you want the Instance to start automatically after creation |
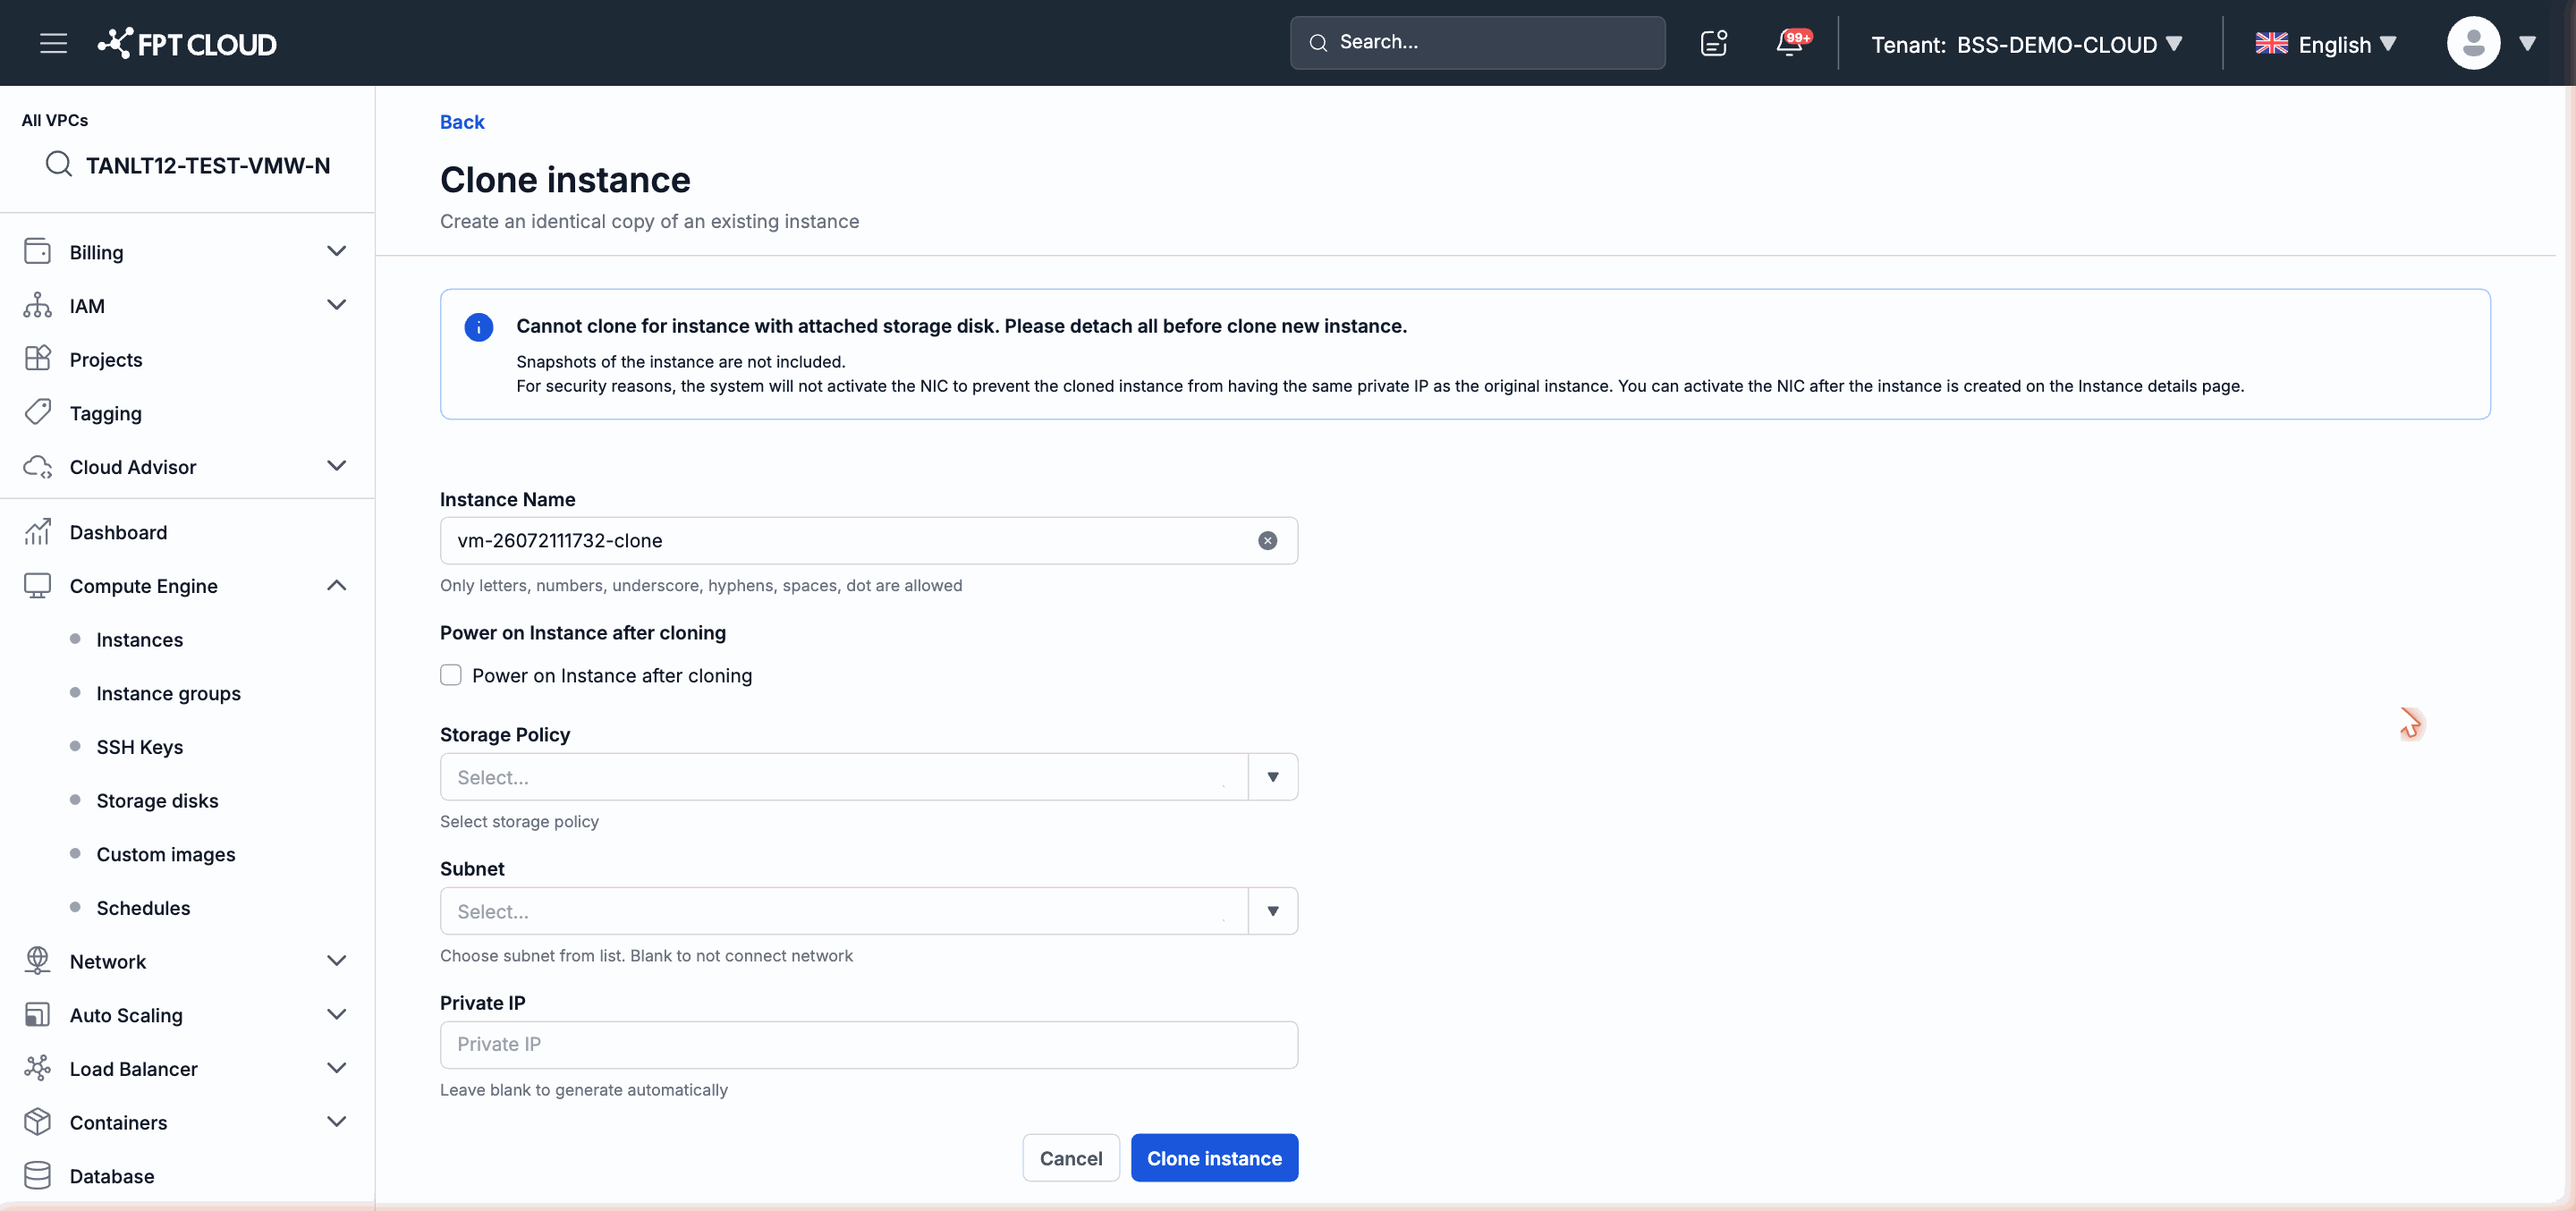
Note: Leave the Subnet field blank if you want to configure networking after the Instance is created. Snapshots from the original Instance will not be copied to the new Instance.
Step 4 — Confirm and Wait
- Review the information you have entered.
- Click Confirm to begin the clone process.
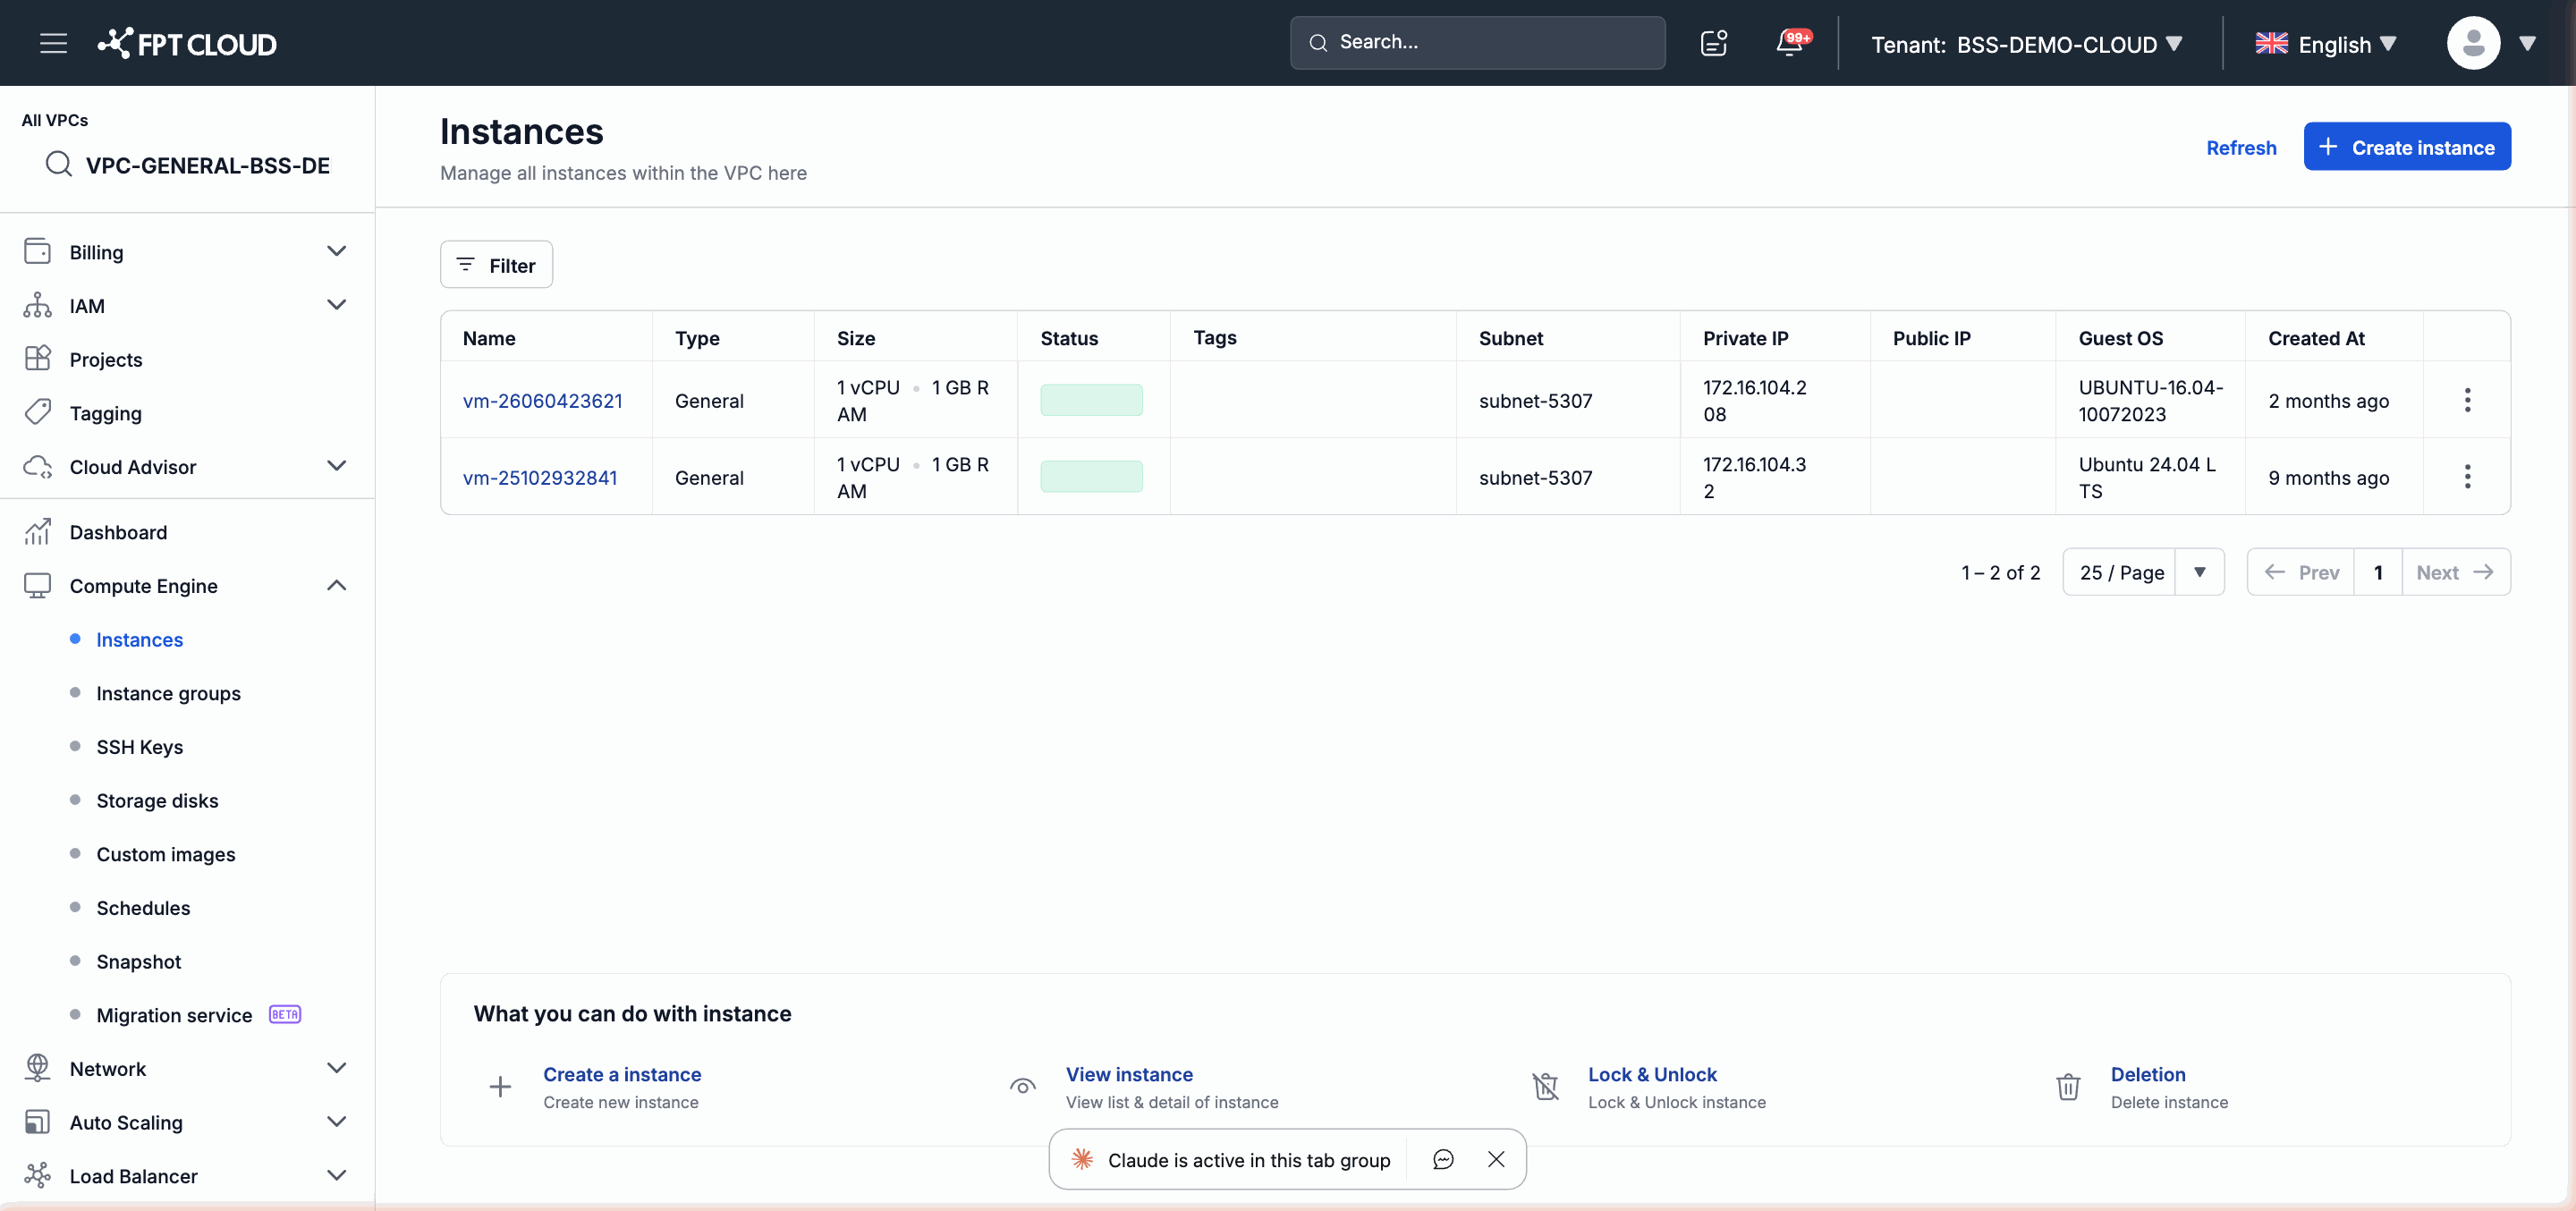
The new Instance will appear in the list with the status CREATING. The clone process runs asynchronously — the completion time depends on the size of the original Instance's root disk. You can refresh the page to track progress.
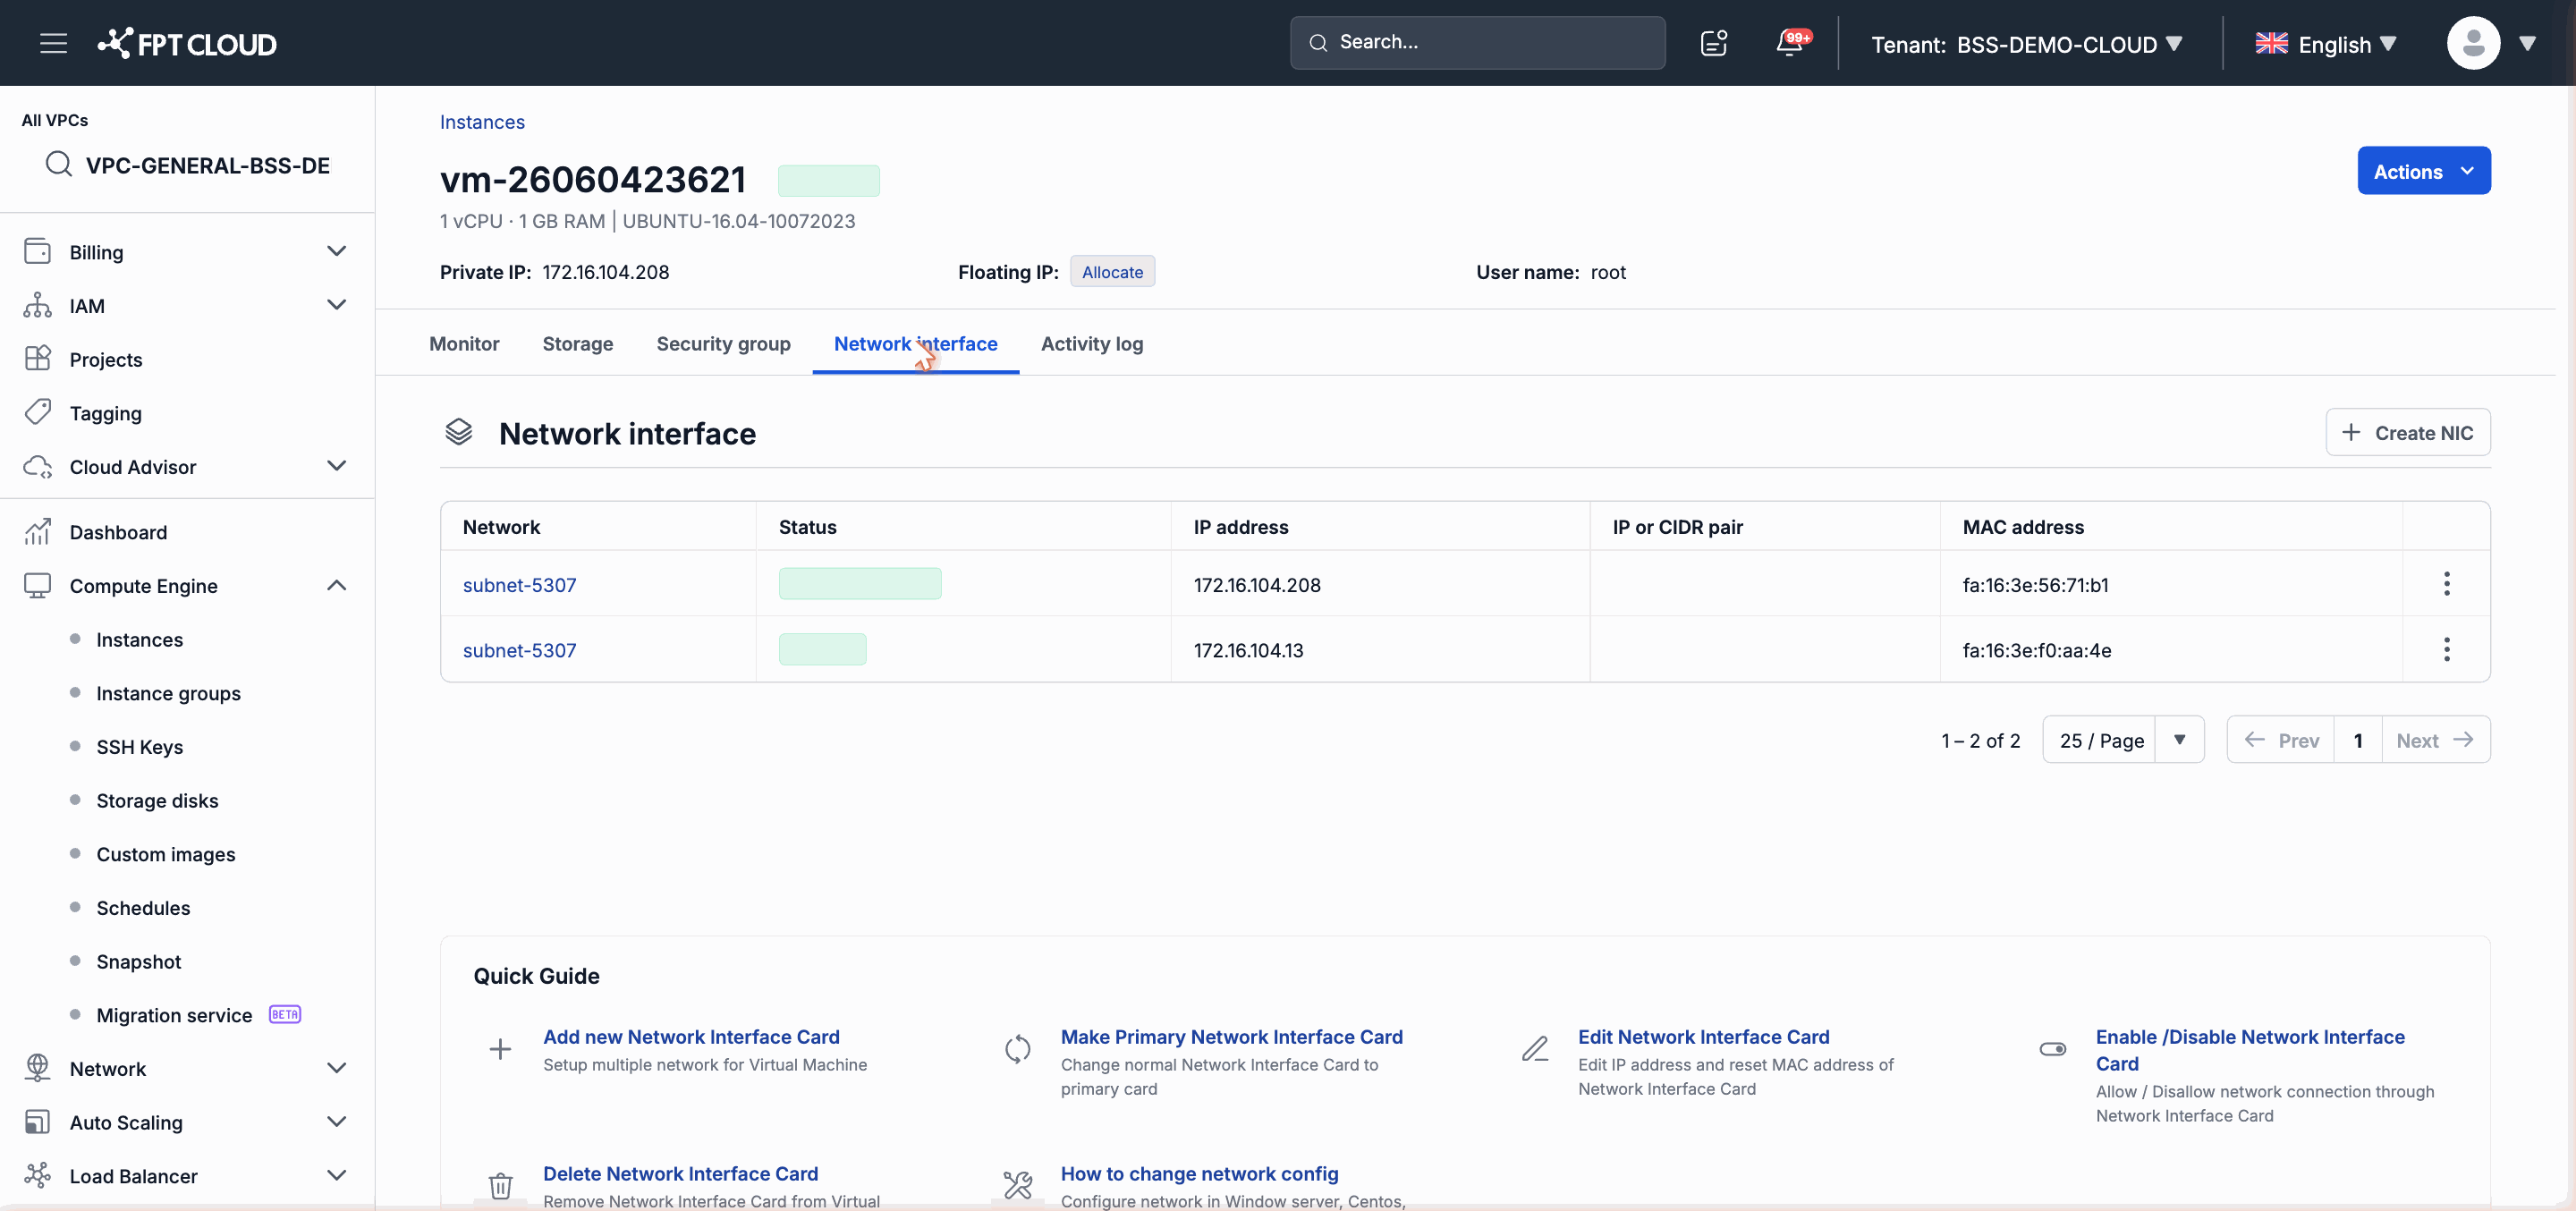
Step 5 — Enable the NIC After Cloning
This is an important step you must perform after the clone completes.
After the new Instance transitions to Running or Stopped status, its NIC will be in a disabled state. You need to enable it manually so the Instance can connect to the network.
- Click the name of the new Instance to open its detail page.
- Select the Network Interface tab.
- Find the NIC that is in Disabled status.
- Click Enable to activate the NIC.
Important: The NIC of a cloned Instance is disabled after creation to avoid IP conflicts with the original Instance. You must enable it manually from the Network Interface tab before the Instance can communicate over the network.
Result
After completing the steps above, you will have:
- A new Instance with the same Flavor configuration, operating system, and root disk data as the original Instance.
- A NIC enabled with its own IP address (not conflicting with the original Instance).
- Two Instances operating independently in the same VPC.
Next Steps
- Configure additional NIC settings: see Manage Network Interface.
- Attach a Storage Disk to the new Instance if needed: see the Storage Disk management guide.
- Start using the new Instance via Console or SSH.