Create a New Instance — Full Tutorial
This tutorial walks you through every step of the FPT Cloud Customer Portal Instance creation wizard, explaining the purpose of each field and how to make the right choice. Estimated time: 20–30 minutes (including reading and hands-on practice).
Objectives
After completing this tutorial, you will be able to:
- Create a new Instance using the 7-section wizard on the Customer Portal.
- Distinguish how the VPC type affects which options appear in the wizard.
- Choose an appropriate Image and Flavor for your actual needs.
- Configure the Network correctly, including Subnet, Private IP, and Security Group.
- Understand the purpose of optional sections such as Instance Group, Tags, and User Data.
Before You Begin
- Your FPT Cloud account has been activated and you can log in to the Customer Portal.
- At least one VPC with a configured Subnet already exists.
- Sufficient vCPU, RAM, and Storage quota is available for the planned Instance.
- If you want to use an SSH key for authentication, the key has already been registered under Key Pairs in your account.
- You have identified the intended use of the Instance (web server, database, testing…) in order to choose an appropriate Flavor and Image.
Step 1 — Open the Instance List Page
Log in to the FPT Cloud Customer Portal. From the overview screen, select the VPC where you want to deploy the Instance, then navigate to Compute → Instance.
The Instance list page displays all existing Instances in that VPC. Click Create Instance in the top-right corner to open the wizard.
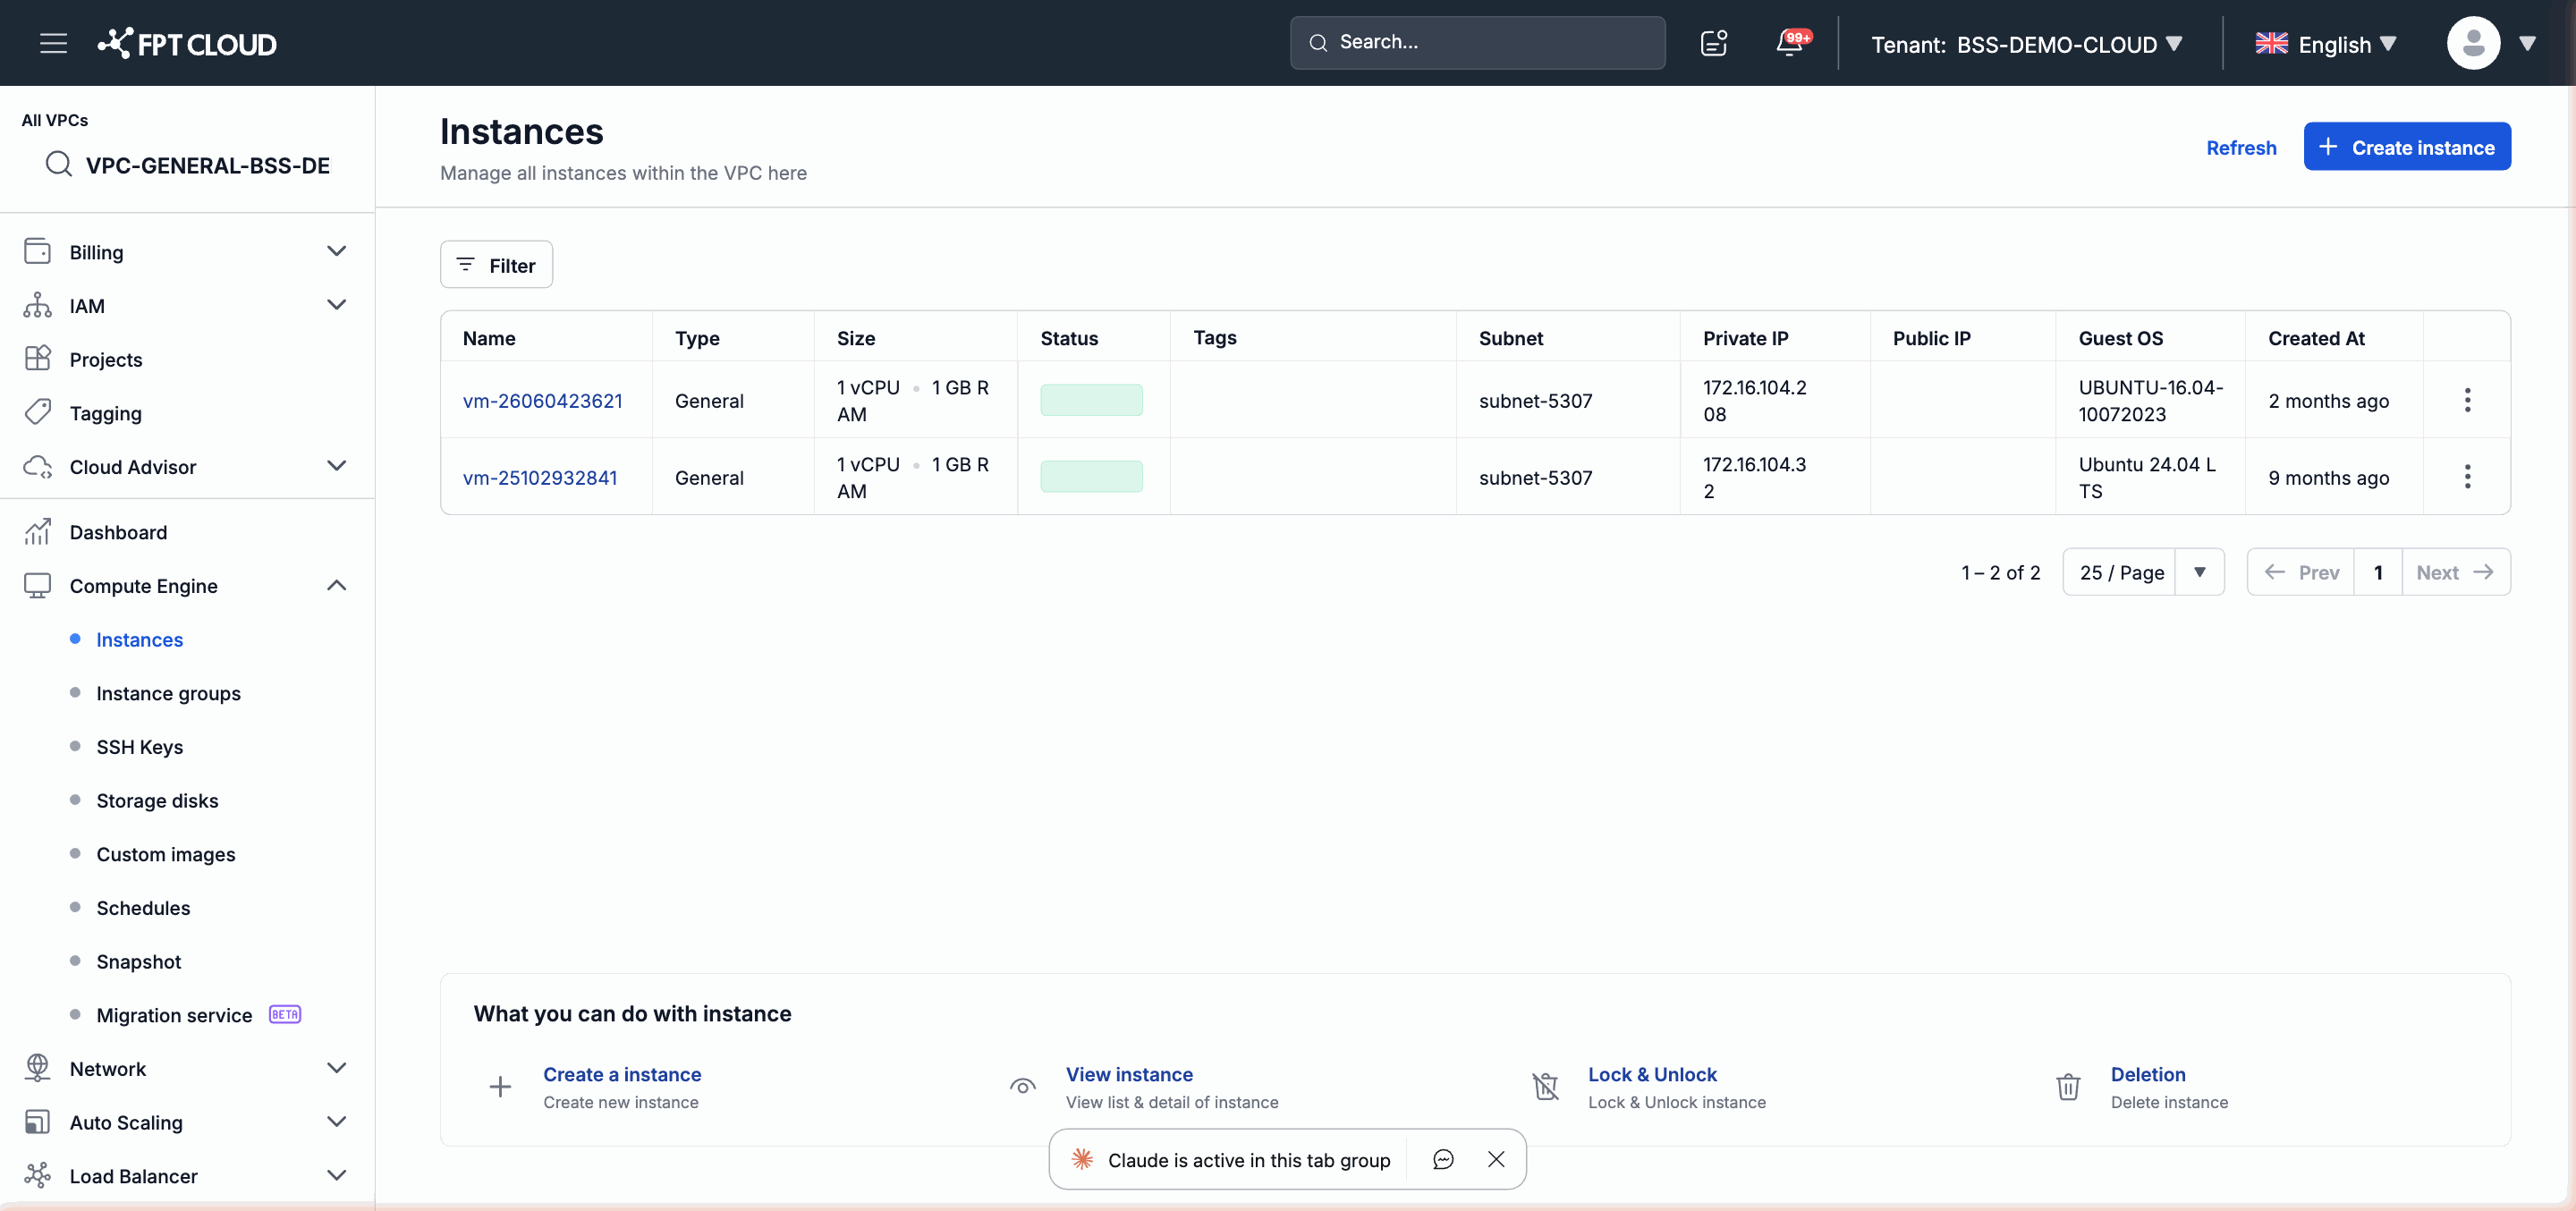
The Instance creation wizard consists of 7 sections presented in order from top to bottom. Fill in each section in sequence and confirm at the final step.
Step 2 — Section Configuration
This section defines the core components of the Instance: resource type, operating system, hardware configuration, and identifier name.
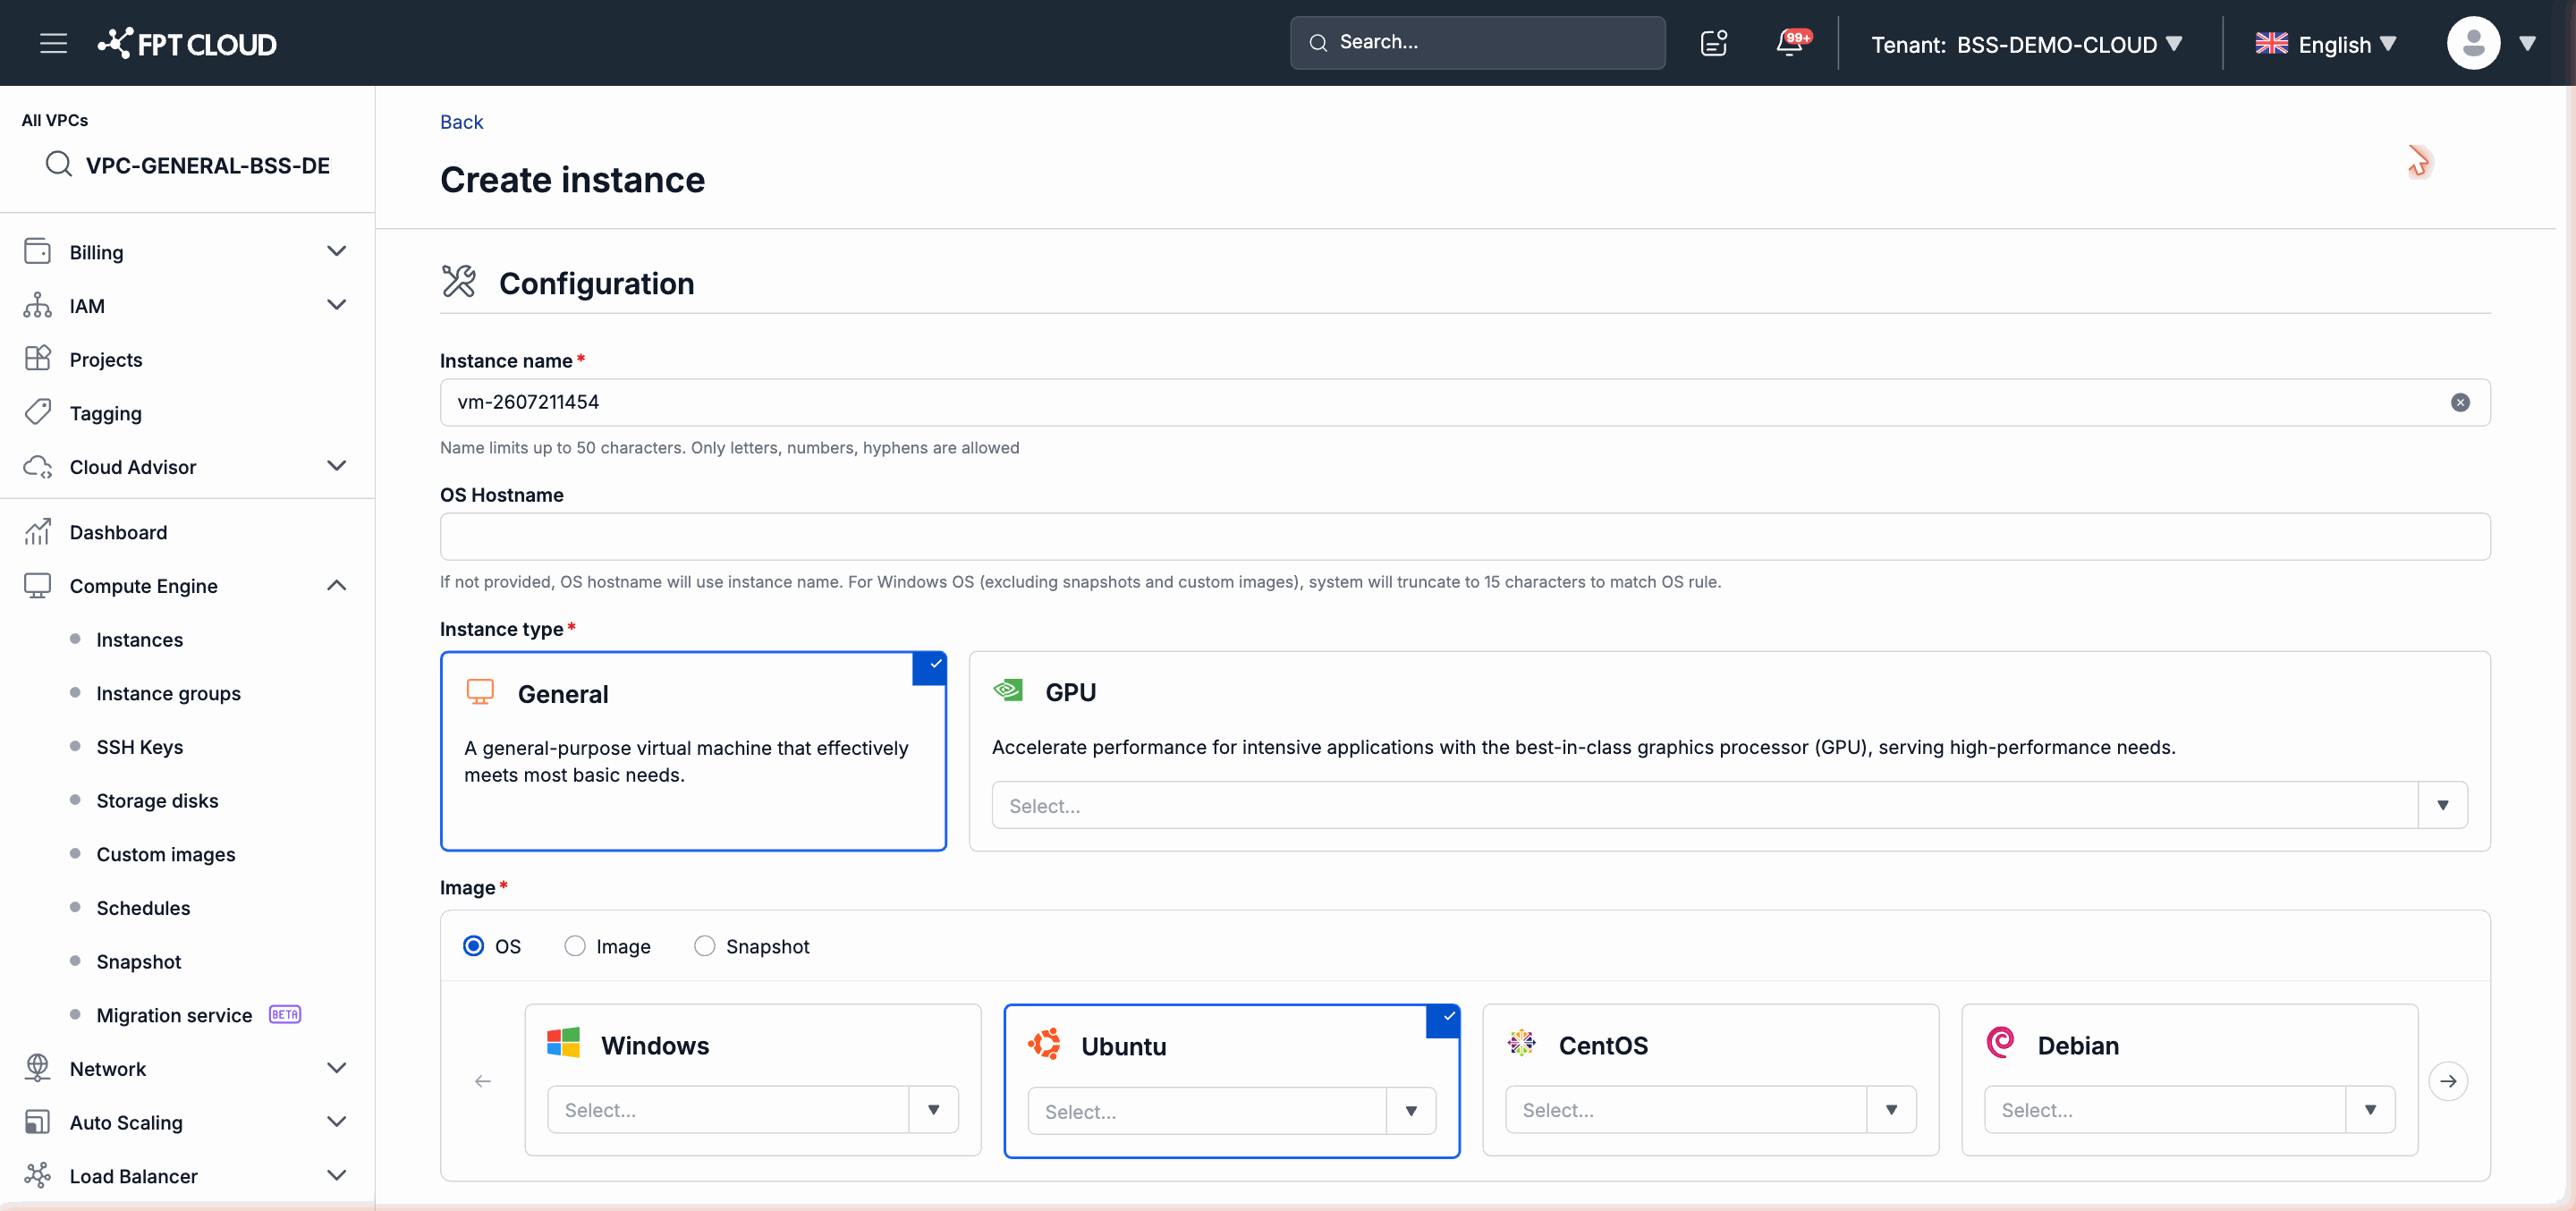
Zone (if available)
Some VPCs allow you to select a Zone to distribute resources across physical locations. If this field appears, choose the Zone that best meets your latency or distribution policy requirements.
Instance type
| Type | When to use |
|---|---|
| general | Typical workloads: web servers, applications, databases |
| gpu | Graphics processing, AI/ML, rendering — only available in Specific VPC |
Note: The GPU instance type is only available in Specific VPC. If you are creating an Instance in a General VPC, this option does not appear.
Image
An Image is the operating system image used to initialize the disk for the Instance. Available Image types differ depending on the VPC platform:
In Specific VPC:
| Image Type | Description |
|---|---|
| OS | Standard OS images provided by FPT Cloud (Ubuntu, CentOS, Windows Server…) |
| Custom | Custom images that you or your organization have uploaded previously |
| ISO | ISO files for manual OS installation |
In General VPC:
| Image Type | Description |
|---|---|
| OS | Standard OS images provided by FPT Cloud |
| Custom | Custom images uploaded previously |
| Snapshot | A disk state snapshot taken from an existing Instance |
| NAT Instance | A dedicated image for configuring an Instance as a NAT gateway |
For most new use cases, select the OS tab and find the appropriate operating system.
Flavor
A Flavor determines the number of vCPUs and the amount of RAM for the Instance.
- Available templates: a list of pre-defined Flavors with common vCPU/RAM ratios. Suitable for the majority of use cases.
- Custom vCPU & RAM: allows you to enter the vCPU and RAM count based on specific requirements, without being constrained by template ratios.
Note: Choose a Custom Flavor when your application's technical requirements do not match any available template. Note that a Custom Flavor may affect cost predictability if hourly billing is applied.
Instance Name and OS Hostname
- Instance Name: the display name on the Portal, used to identify the Instance in the list. Must be unique within the VPC.
- OS Hostname: the hostname inside the Instance's operating system (for example: displayed in the terminal when you SSH in). It is common practice to set this to the same value as the Instance Name for easier management.
Step 3 — Section Storage Disk
This section configures the system disk (boot disk) of the Instance.
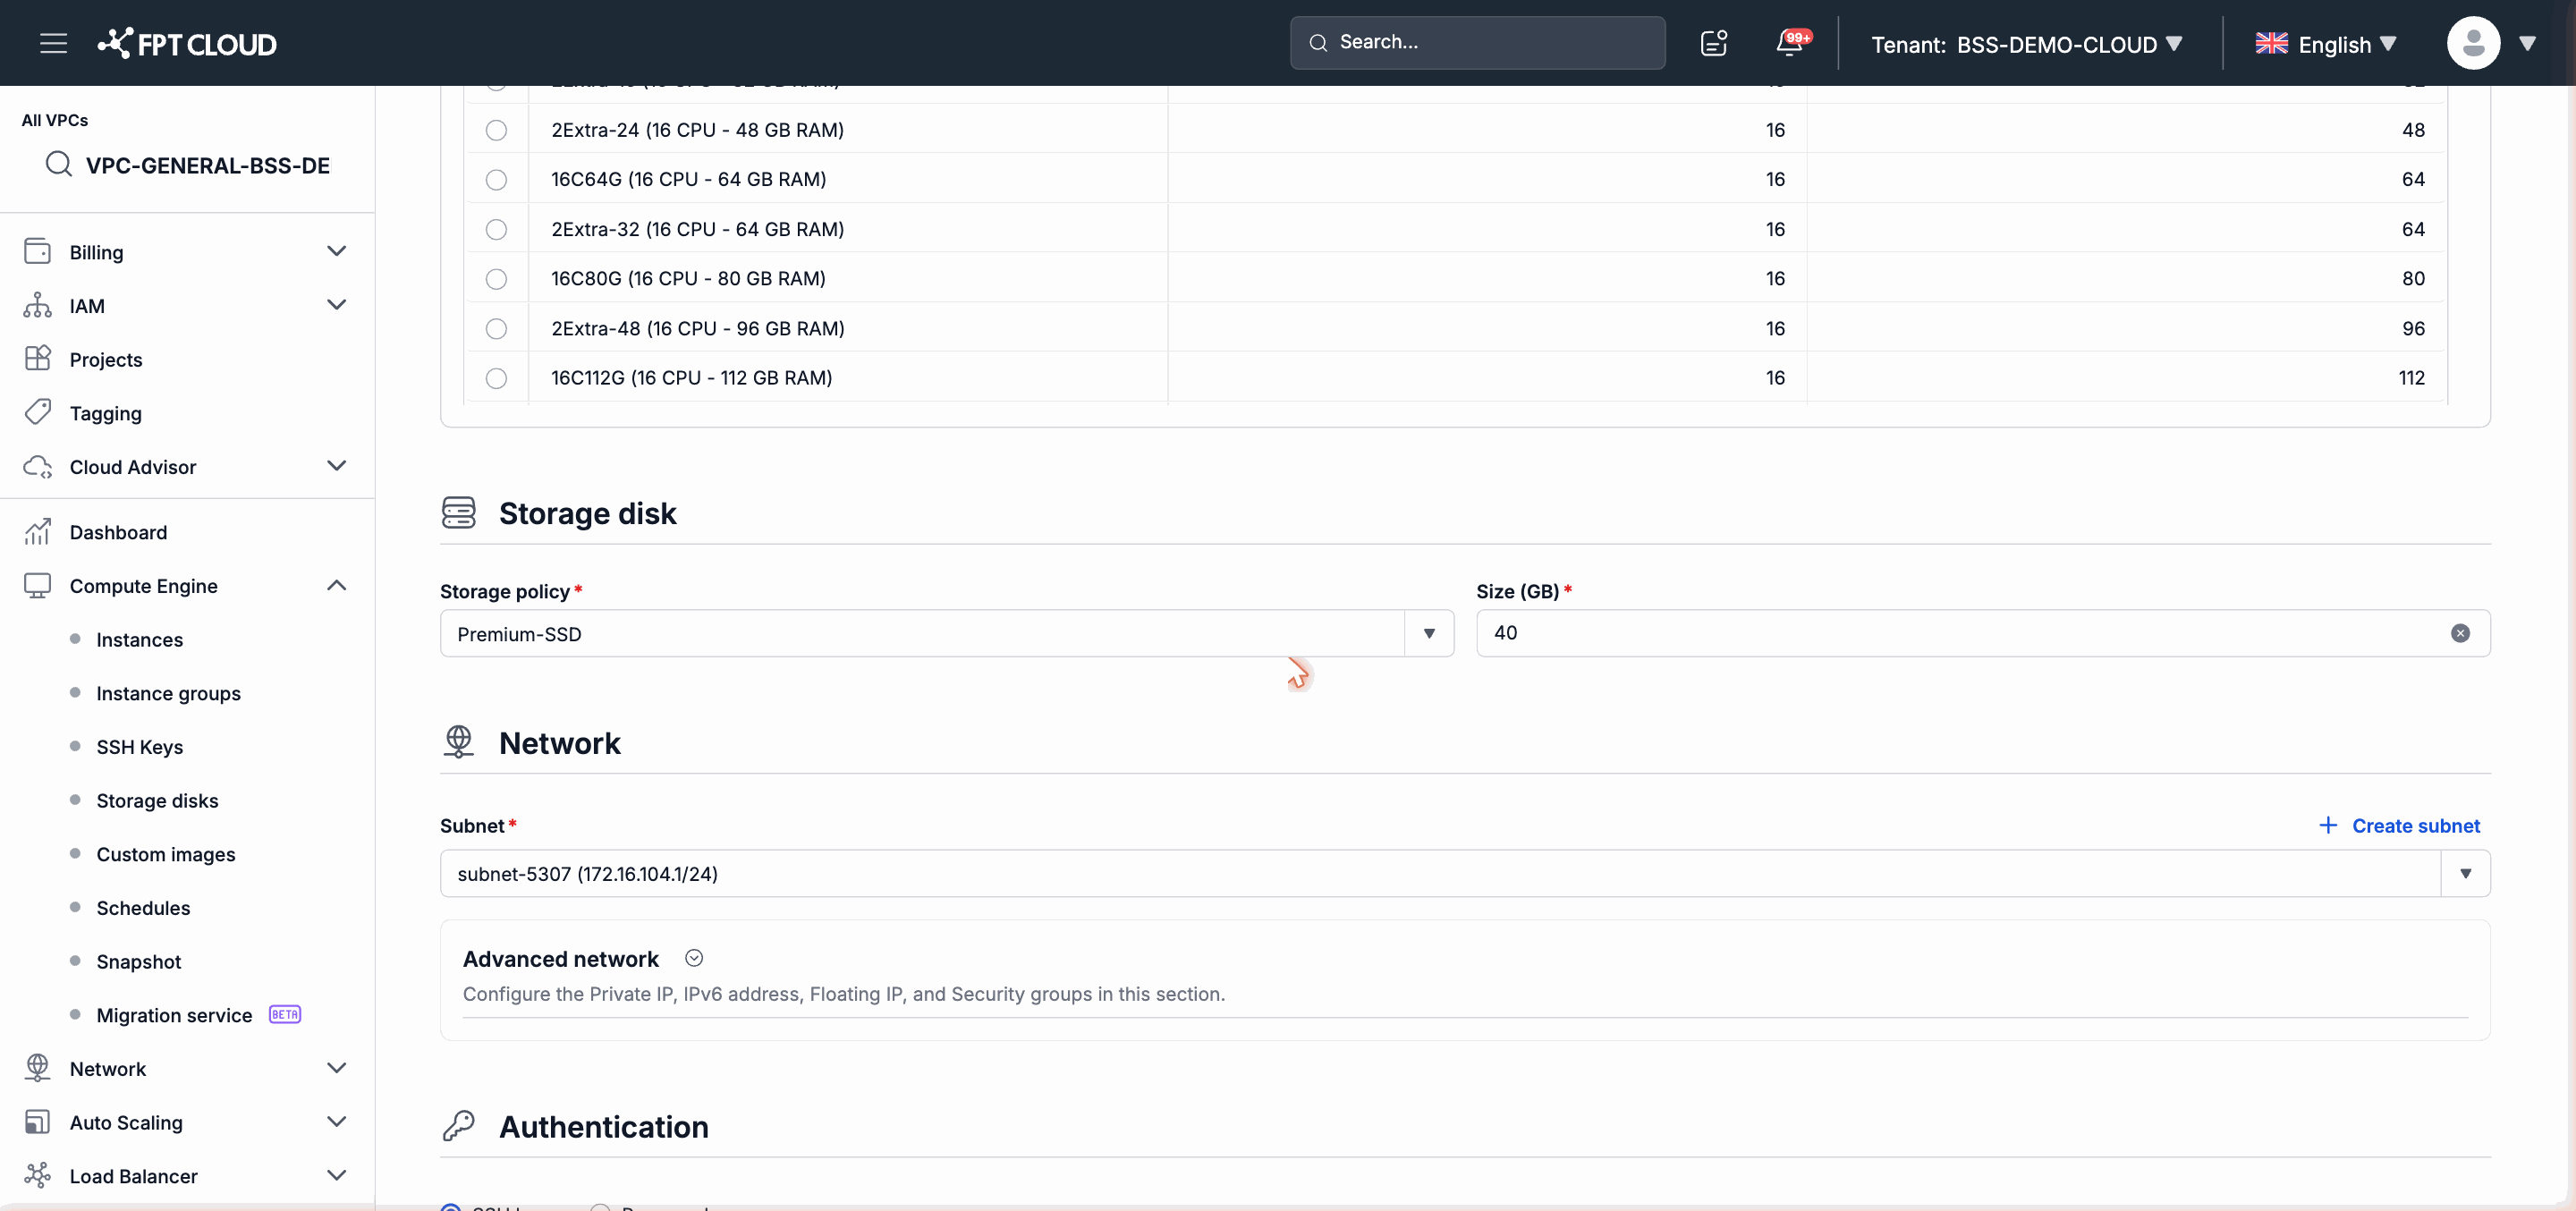
Storage policy
The storage policy determines the performance tier and storage policy:
- Standard: standard storage, suitable for most typical workloads.
- Other policies (if available on your VPC) will appear in the list with detailed descriptions.
Capacity
Enter the disk capacity in GB. The minimum capacity is determined by the Image selected in Step 2 — the portal will display the required minimum value.
Choose a capacity large enough to hold the operating system, applications, and anticipated data over the Instance's initial lifecycle. Storage Disk can be expanded after creation, but reducing capacity is not supported.
Step 4 — Section Network
This section connects the Instance to the VPC's network infrastructure.
Subnet
Select the Subnet that the Instance's NIC will be attached to. The Subnet determines the private IP range and internal routing rules for the Instance.
In Specific VPC, the portal additionally displays the gateway information for the selected Subnet so you can confirm the network configuration. In General VPC, gateway information is not shown in the wizard.
Note: In General VPC, the Network section does not display gateway information. This is expected — the gateway is still configured automatically according to the Subnet.
Private IP
- Leave blank: the system automatically assigns a Private IP from the Subnet's available range. This is the appropriate choice for most cases.
- Enter manually: only do this when you need the Instance to have a fixed IP address and you have confirmed that address is not already in use within the Subnet.
Security Group
A Security Group controls inbound and outbound network traffic for the Instance through pre-defined rules. Select one or more Security Groups from the list already created in the VPC.
If no suitable Security Group exists yet, you need to create one before continuing with the wizard. Security Groups can be added or changed after the Instance is running.
Floating IP (Specific VPC)
In Specific VPC, you can assign a Floating IP to give the Instance a public IP address accessible from outside. See the Floating IP documentation for more details on this configuration.
Step 5 — Section Authentication
This section determines how you log in to the operating system inside the Instance after it is provisioned.
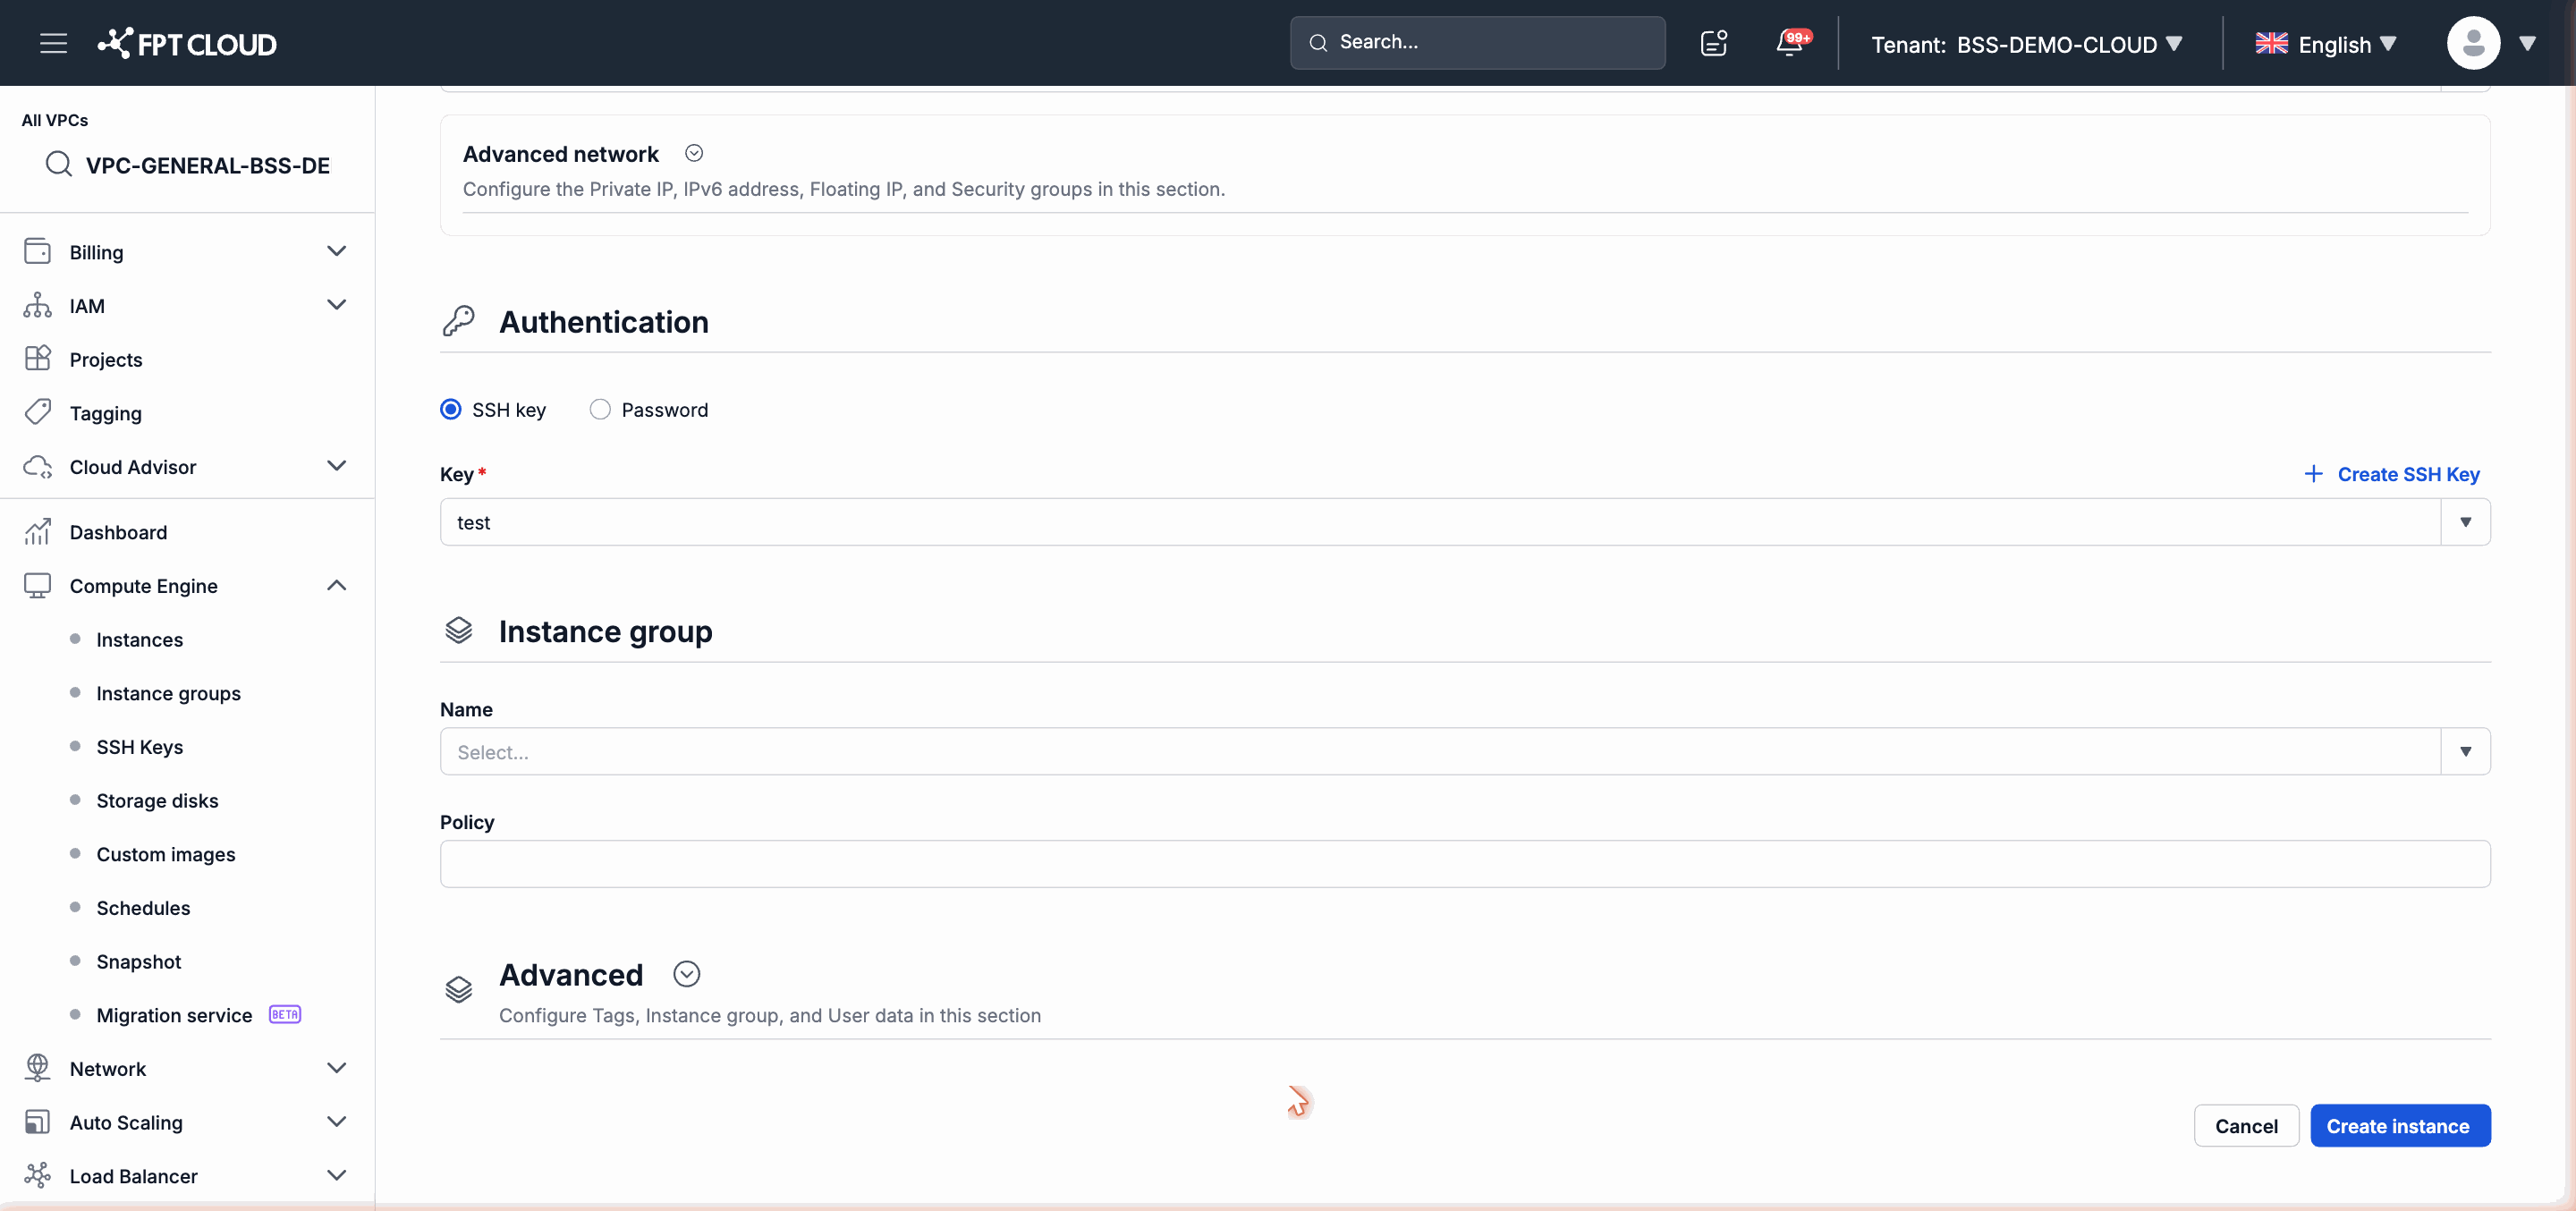
SSH key
Select an SSH key from the list of keys registered in your account. Once the Instance is running, use the corresponding private key to log in via SSH without a password.
SSH key is recommended for production environments because:
- There is no password to be brute-forced.
- It is easy to manage access for multiple users (add/remove keys in the
authorized_keysfile).
Password
The system generates a random password for the default account of the Image (for example: ubuntu on Ubuntu, root on CentOS). The password is displayed once on the screen after the Instance is created successfully.
Important: If you choose the Password method, copy and save the password immediately when the system displays it. After closing the notification, you cannot view this password again from the Portal.
Password is suitable for testing environments or when you need quick access without an SSH key set up.
Step 6 — Section Instance Group (Optional)
The Instance Group section allows you to assign the Instance to an existing VMGroup.
VMGroup applies an anti-affinity policy: the system will attempt to place Instances in the same group on different physical servers. This reduces the risk of losing all related Instances when a physical server fails.
If you have no resource distribution requirements, you can skip this section.
Step 7 — Section Advanced (Optional)
The Advanced section provides two advanced configuration features: Tags and User Data.
Tags
Tags are key-value labels used to classify and search for resources on the Portal (for example: environment=production, team=backend).
In the Advanced section, you select Tags from a pre-defined list to assign to the Instance. You can also tick a checkbox to apply the same set of Tags to the accompanying Storage Disk and Floating IP created alongside the Instance — useful when you want consistent labels across all related resources.
Tags are applied after the Instance provisioning process completes.
User Data
User Data is a cloud-init script that runs automatically when the Instance boots for the first time. Use this feature to automate initial configuration tasks instead of having to log in manually after the Instance is running.
Common use cases:
- Install packages (apt/yum install).
- Create users, configure additional SSH keys.
- Clone a repository and start an application.
- Write configuration files to the system.
#cloud-config
packages:
  - nginx
  - git
runcmd:
  - systemctl enable nginx
  - systemctl start nginx
Note: User Data only runs once at the Instance's first boot. If you need to run it again, you must intervene manually inside the operating system.
Step 8 — Review and Create
The wizard displays the Review & Confirm page summarizing all the configuration you have selected: Instance type, Image, Flavor, Storage, Network, Authentication, and advanced options.
Review the information:
- The Instance name and hostname are correct.
- The Flavor (vCPU/RAM) and Storage capacity match your requirements.
- The Subnet and Security Group are correctly selected.
- The authentication method has been configured.
After confirming, click Create. The system accepts the request and responds immediately — the Instance appears in the list with the status CREATING.
The provisioning process runs asynchronously on the infrastructure side. When the infrastructure confirms completion, the status automatically changes to Running. The typical time is 3–5 minutes, depending on the Image and Flavor configuration.
Verification
After the status changes to Running, click the Instance name to open the detail page. Here you can confirm:
- Private IP has been assigned (displayed in the Network tab or the overview section).
- Status is
Running. - Flavor and Image match what was selected in the wizard.
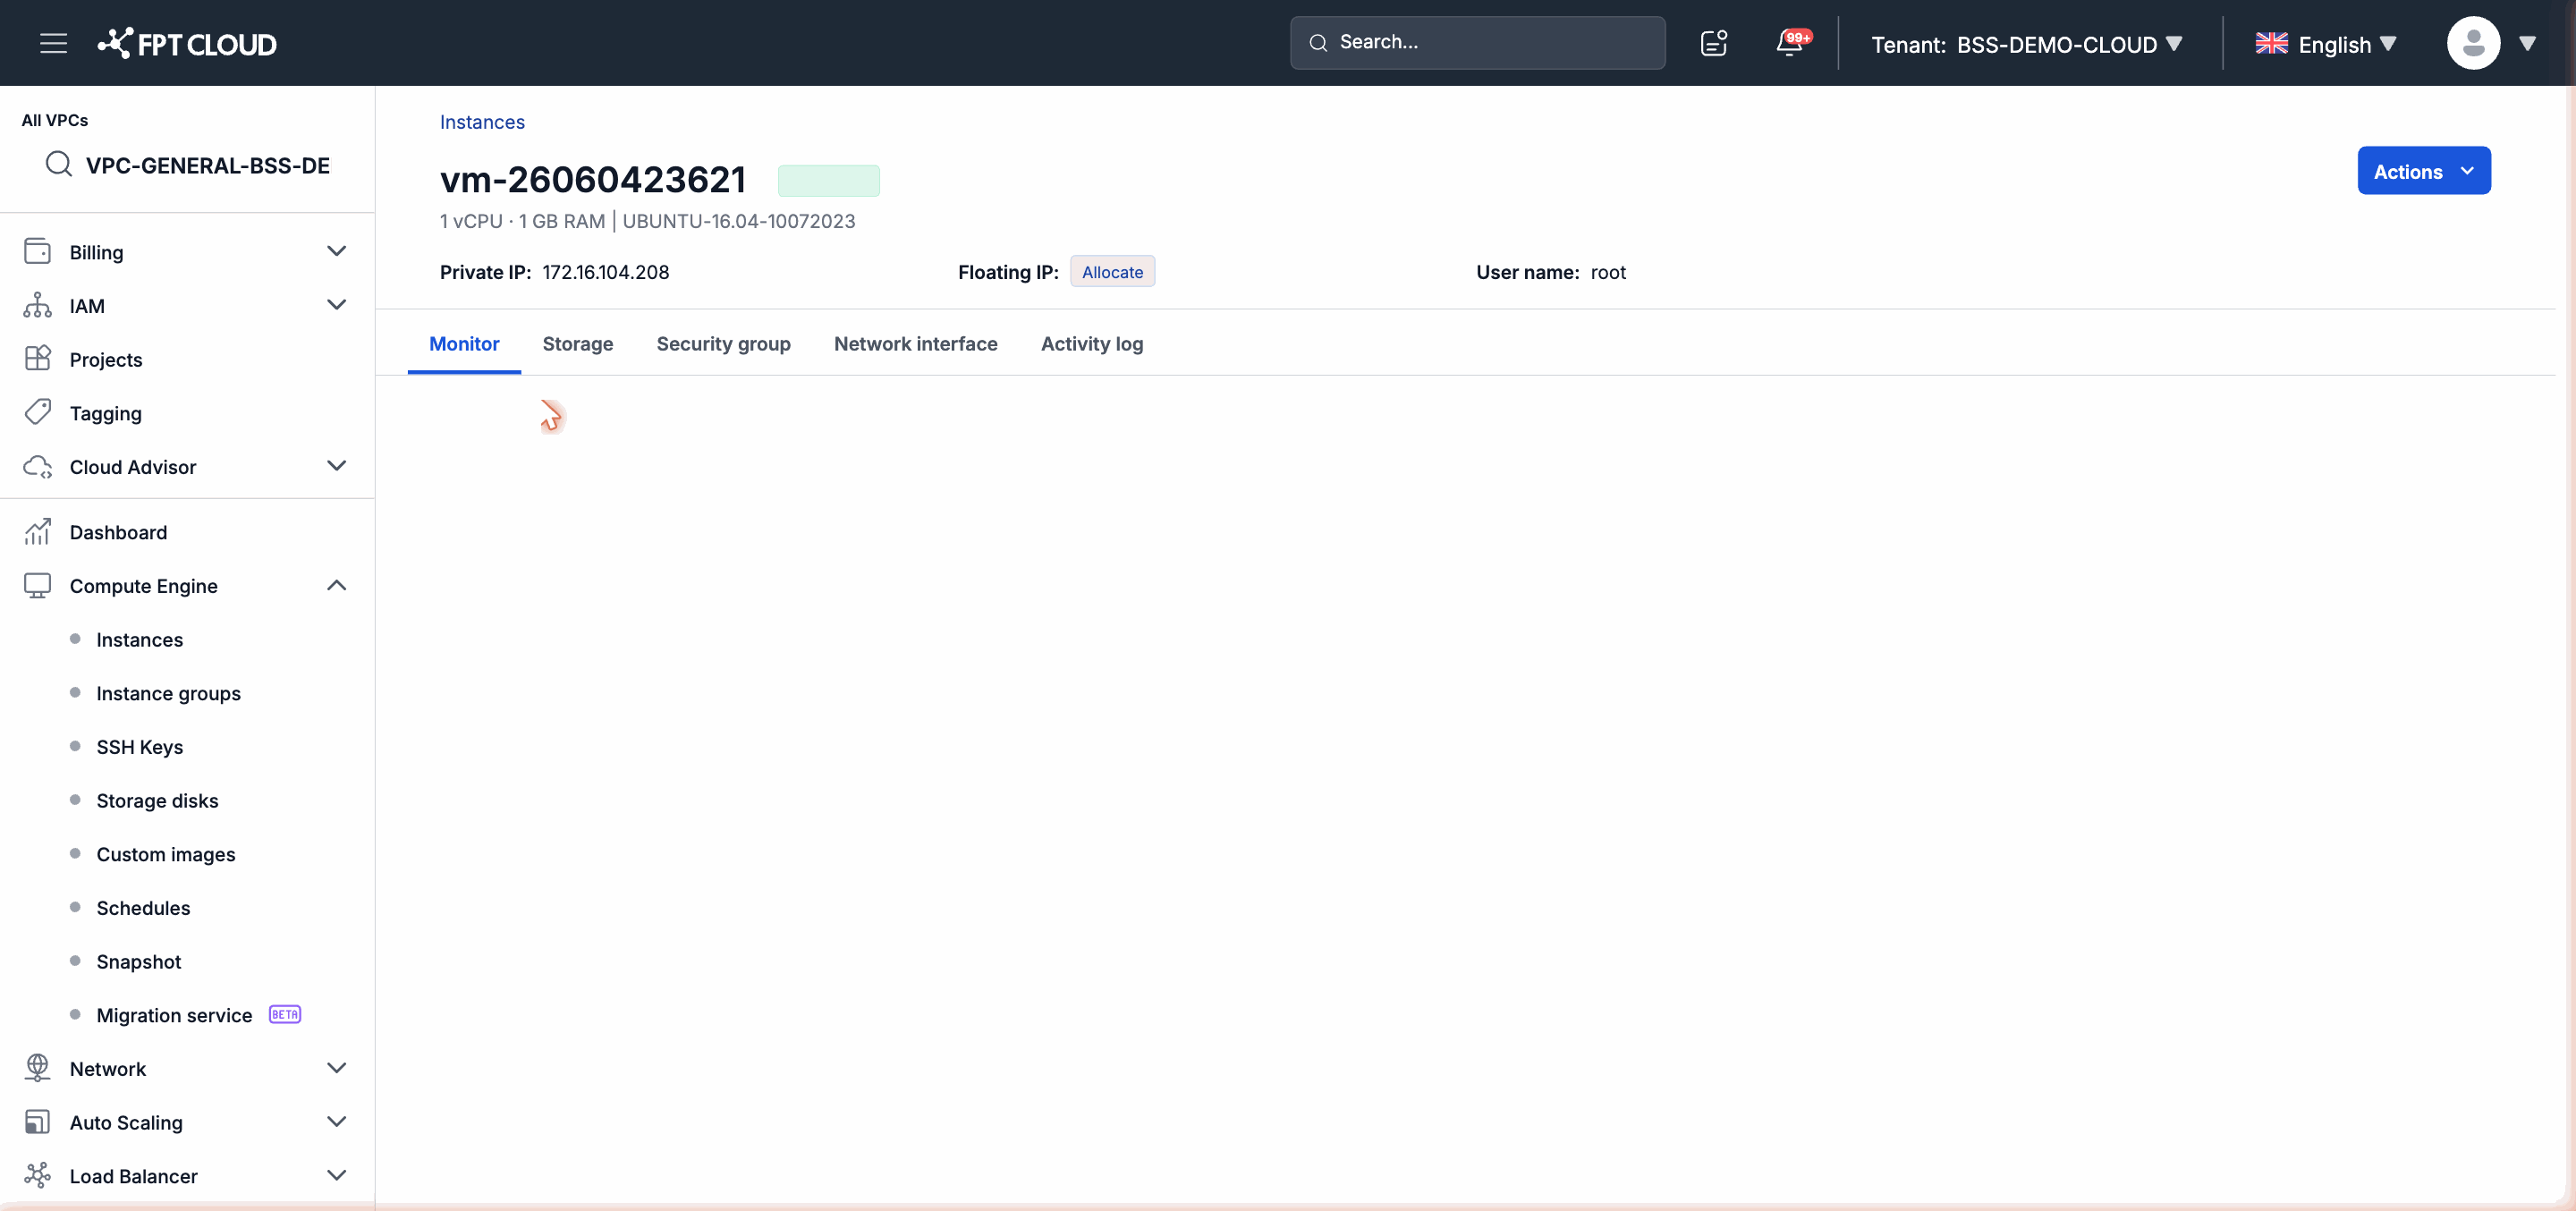
If the Instance is still in the CREATING state after more than 10 minutes, check the vCPU/RAM quota of the VPC and contact support if needed.
Your Instance is now ready. Continue with Access Instance via Console to connect directly from your browser, or read Manage Instance Power State to understand how to safely Reboot, Power Off, and Power On an Instance.