Guide — Create a Schedule
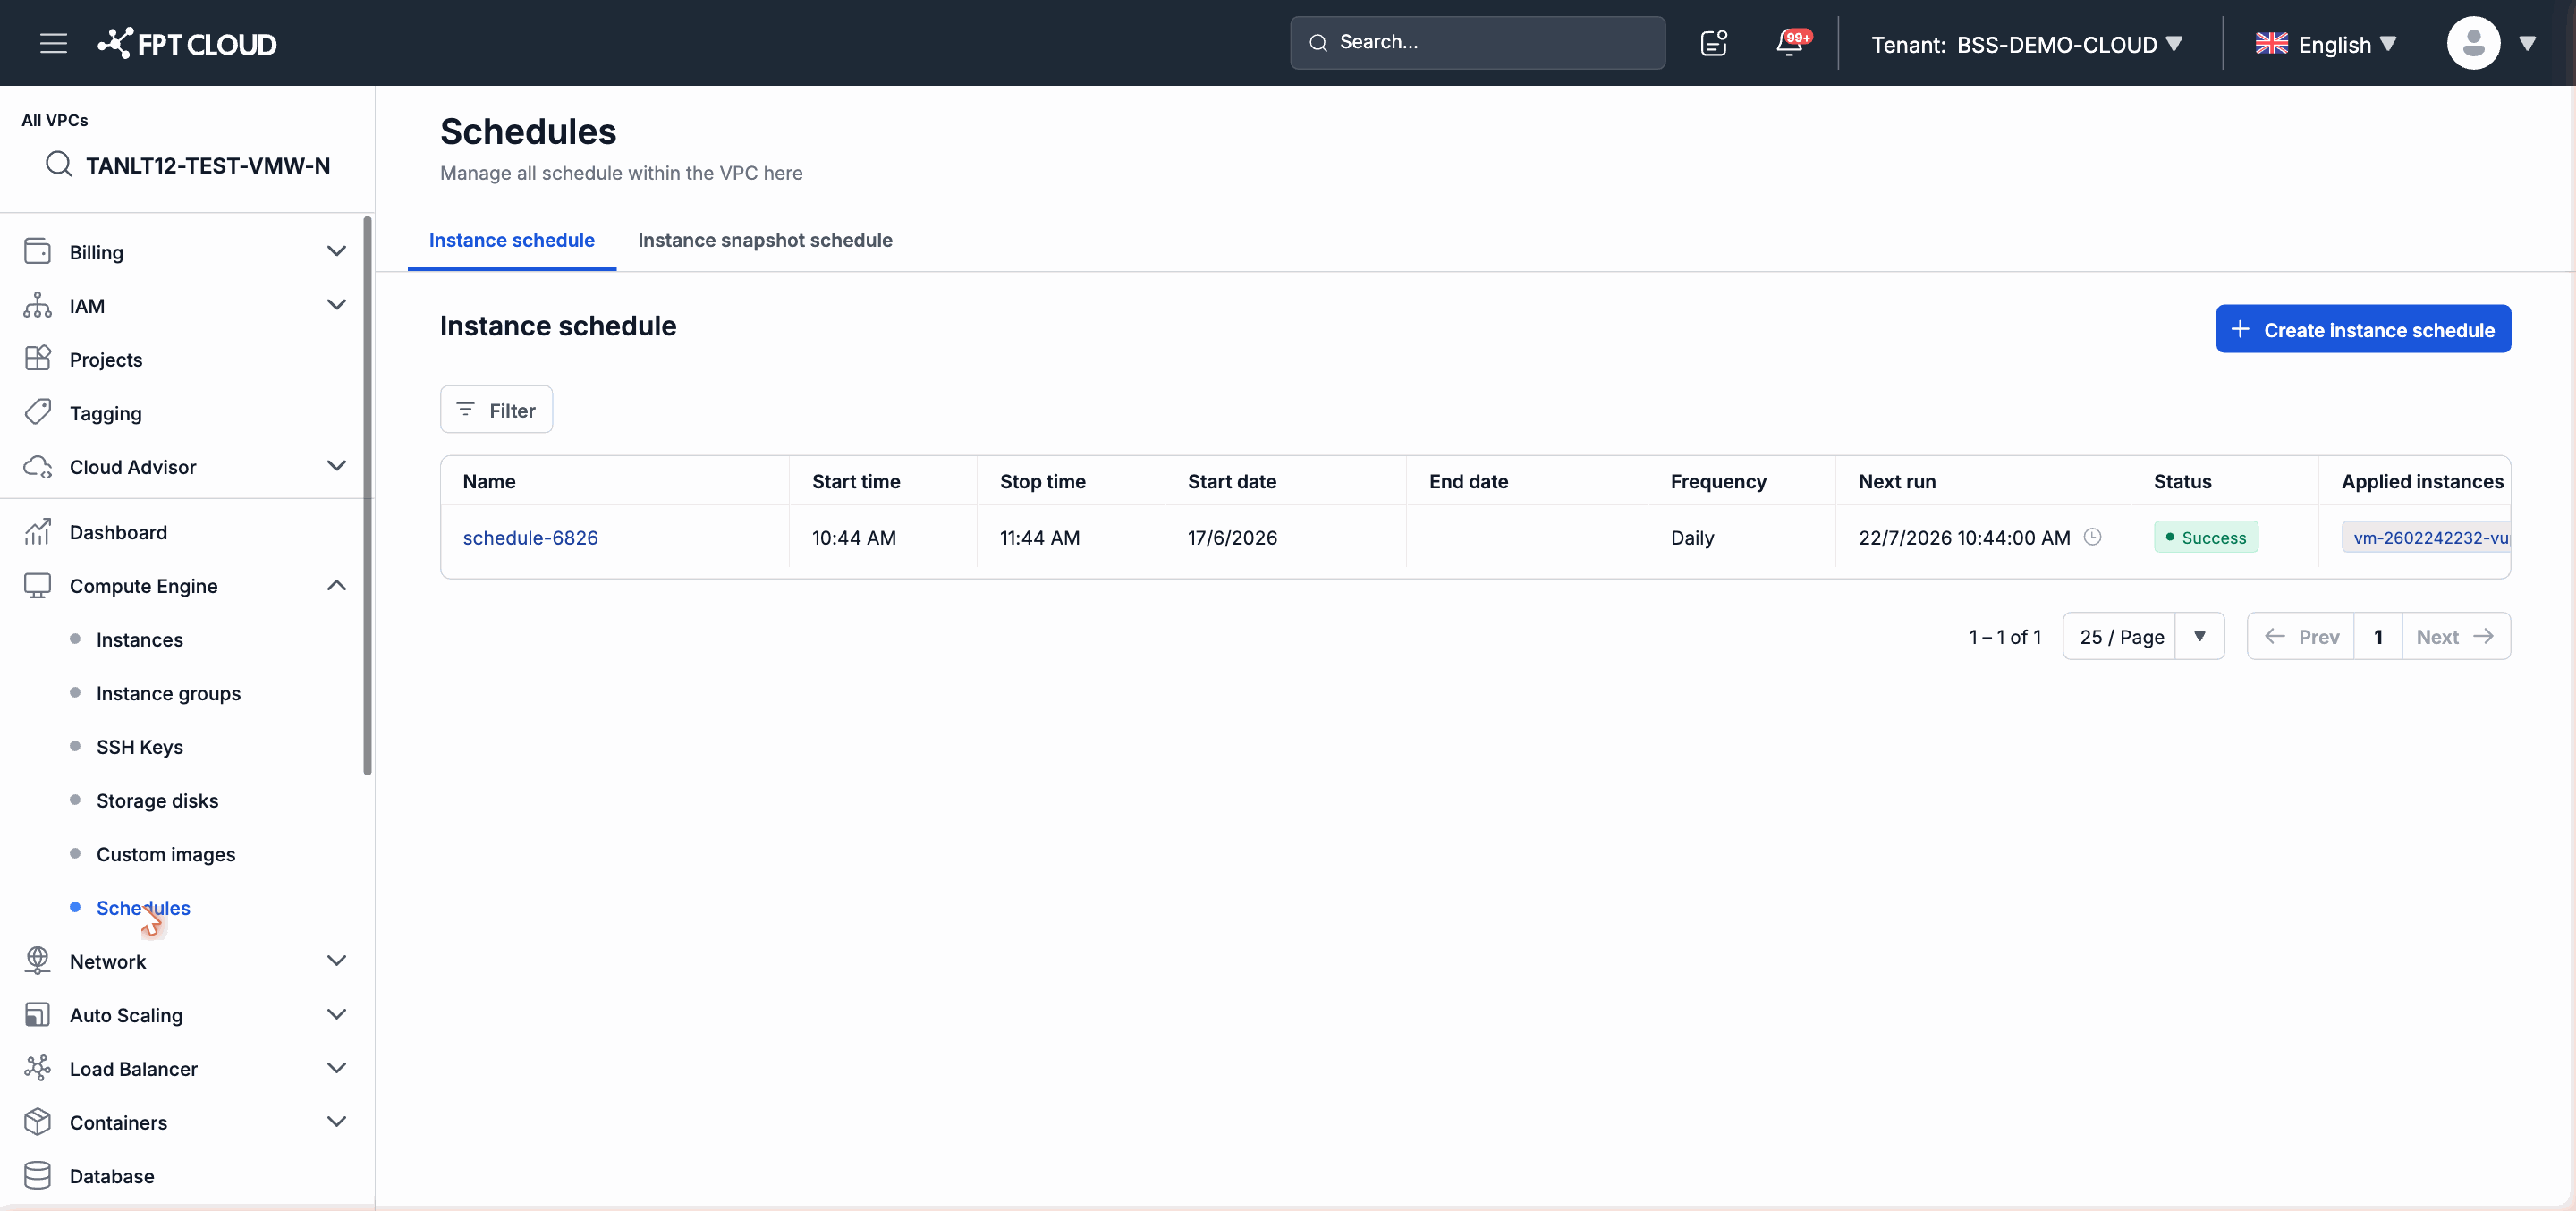
Schedules come in two types: Instance schedule (automatically start/stop an Instance) and Instance snapshot schedule (automatically take a snapshot). Each type has its own creation form in a separate tab within the Schedules menu.
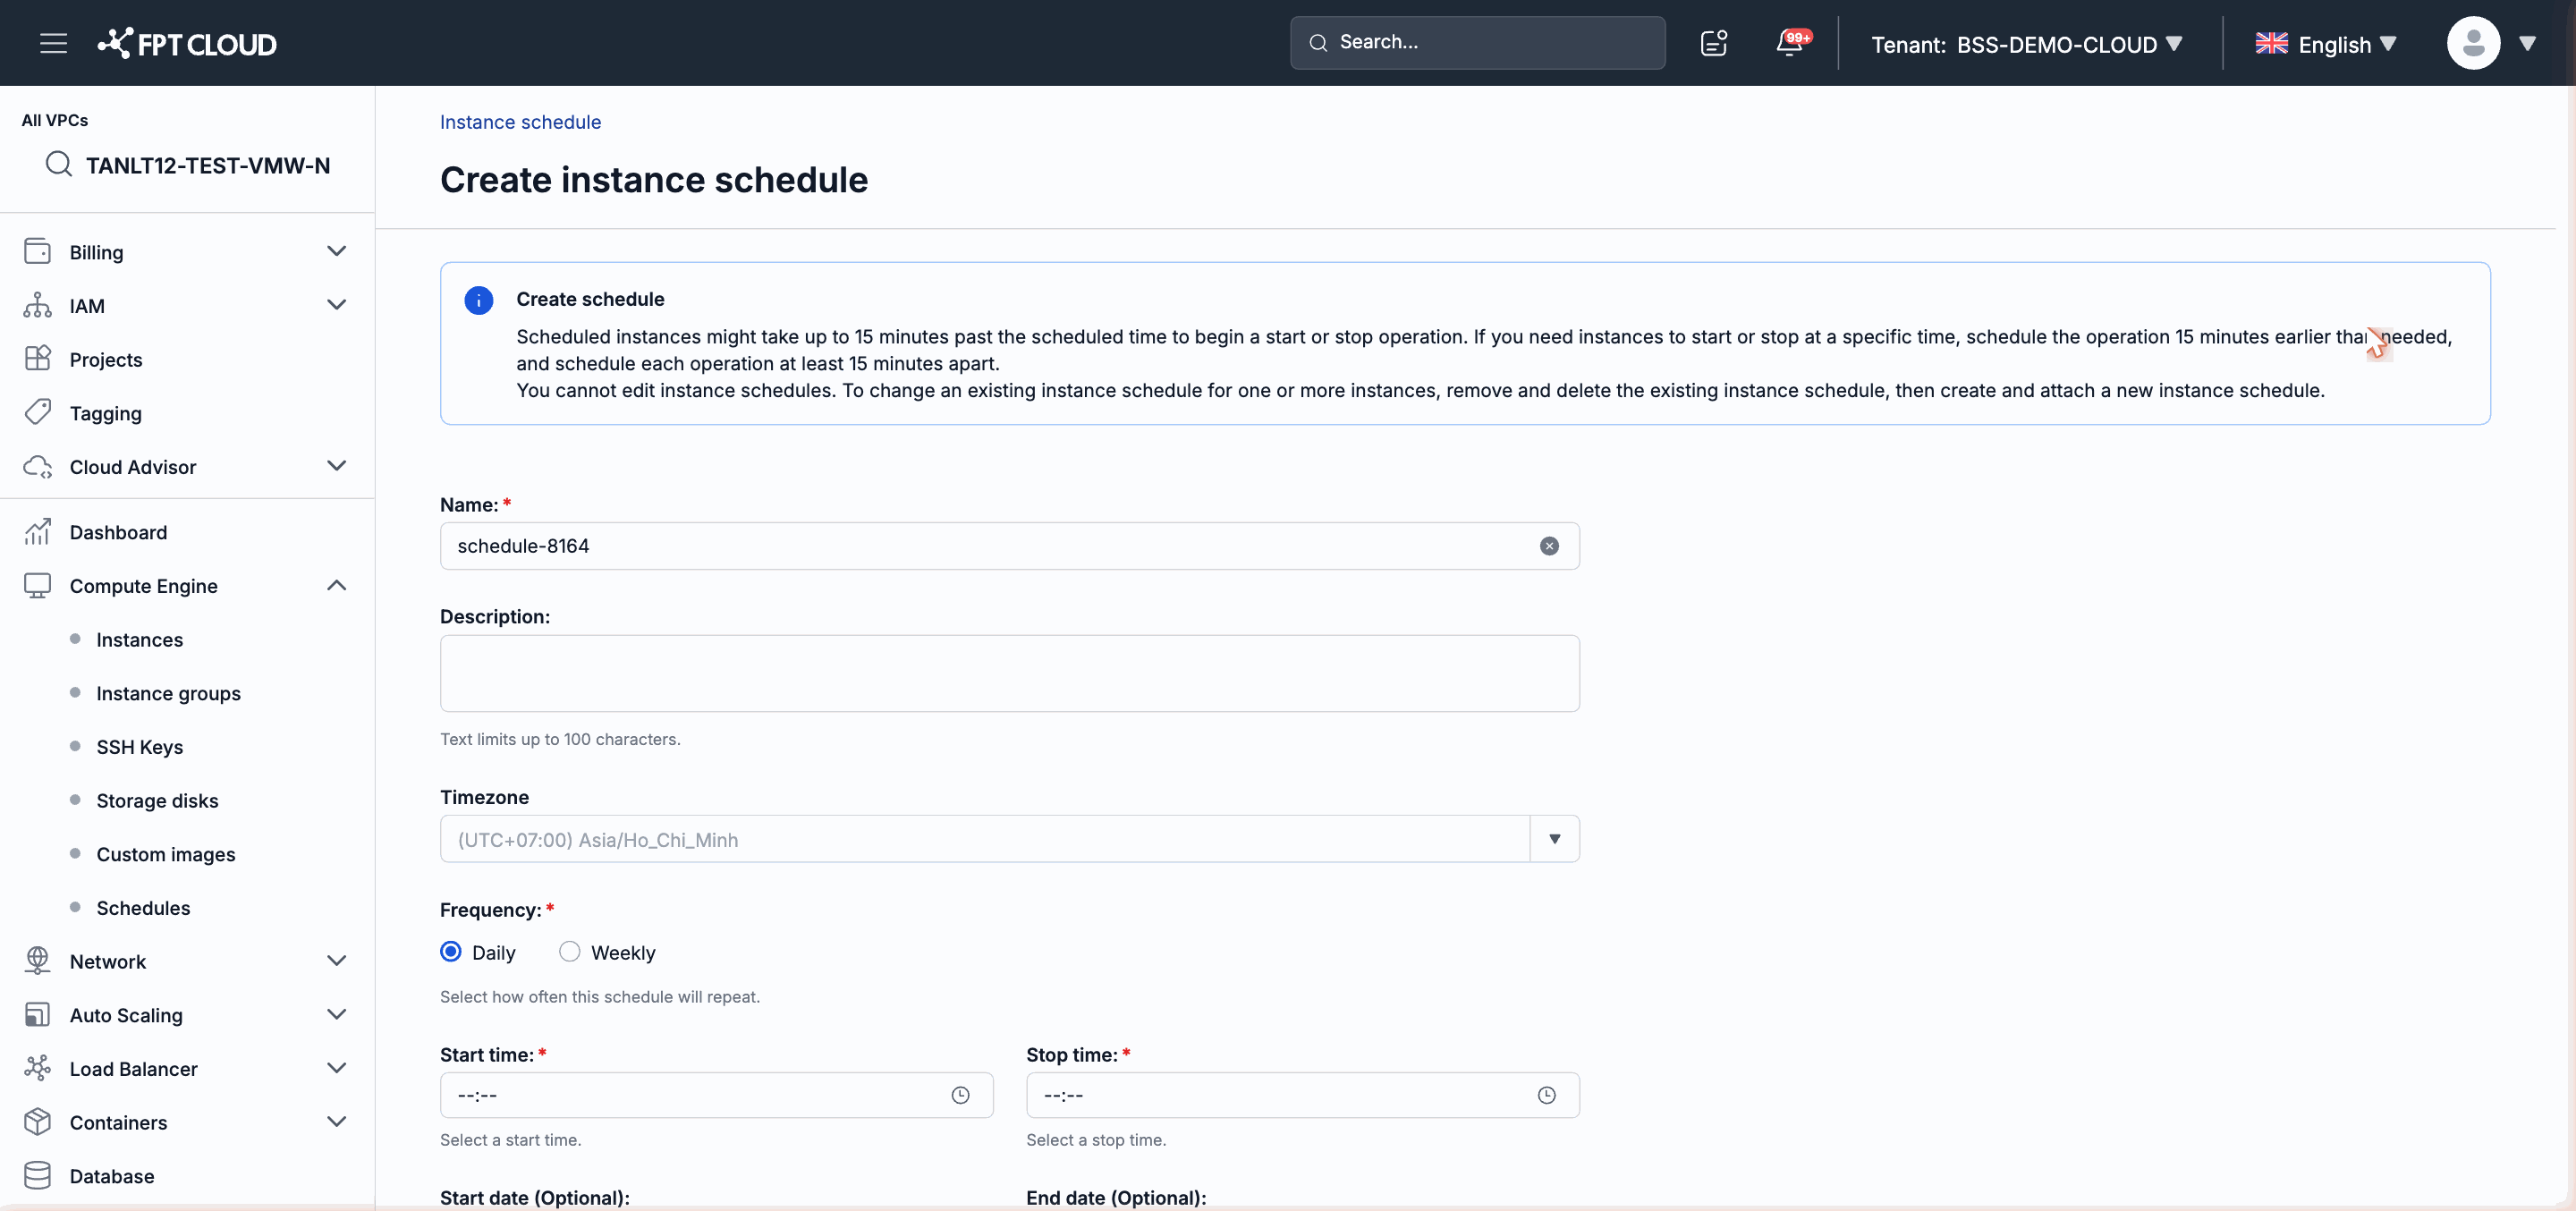
Note: An Instance schedule cannot be edited after creation. If you need to make changes, delete the current schedule and create a new one.
Note: Start/stop commands may execute up to 15 minutes later than the configured time. Set Start time and Stop time at least 15 minutes apart.
Steps
-
In the left navigation bar, select Compute Engine → Schedules.
-
Select the Instance schedule tab.
-
Click Create schedule (or the equivalent button to start creating a new schedule).
-
Fill in the Name field. The system suggests an auto-generated name (for example,
schedule-8164); you can keep it or enter a different one. -
Fill in the Description field (optional, maximum 100 characters).
-
Select a Timezone. The default is
UTC+7 Asia/Ho_Chi_Minh. -
Select a Frequency: Daily or Weekly.
- If you select Weekly, also select the days of the week to apply.
-
Set a Start time — the time the Instance will be started.
-
Set a Stop time — the time the Instance will be stopped. Must be at least 15 minutes after the Start time.
-
Set a Start date (optional) — the date the schedule takes effect.
-
Set an End date (optional) — the date the schedule expires. Leave blank for the schedule to run indefinitely.
-
Review the entire configuration, then click Create to confirm.
The new schedule appears in the list with Active status. To attach Instances to the schedule, see guide-manage.md.
Create an Instance Snapshot Schedule
An Instance snapshot schedule automatically takes snapshots for specified Instances on a recurring cycle.
Important: The snapshot time must be set at least 2 hours earlier than the time you want the snapshot taken, to give the system time to process it.
Step 1. From the sidebar, select Compute Engine → Schedules.
Step 2. Select the Instance snapshot schedule tab.
Step 3. Click + Create schedule.
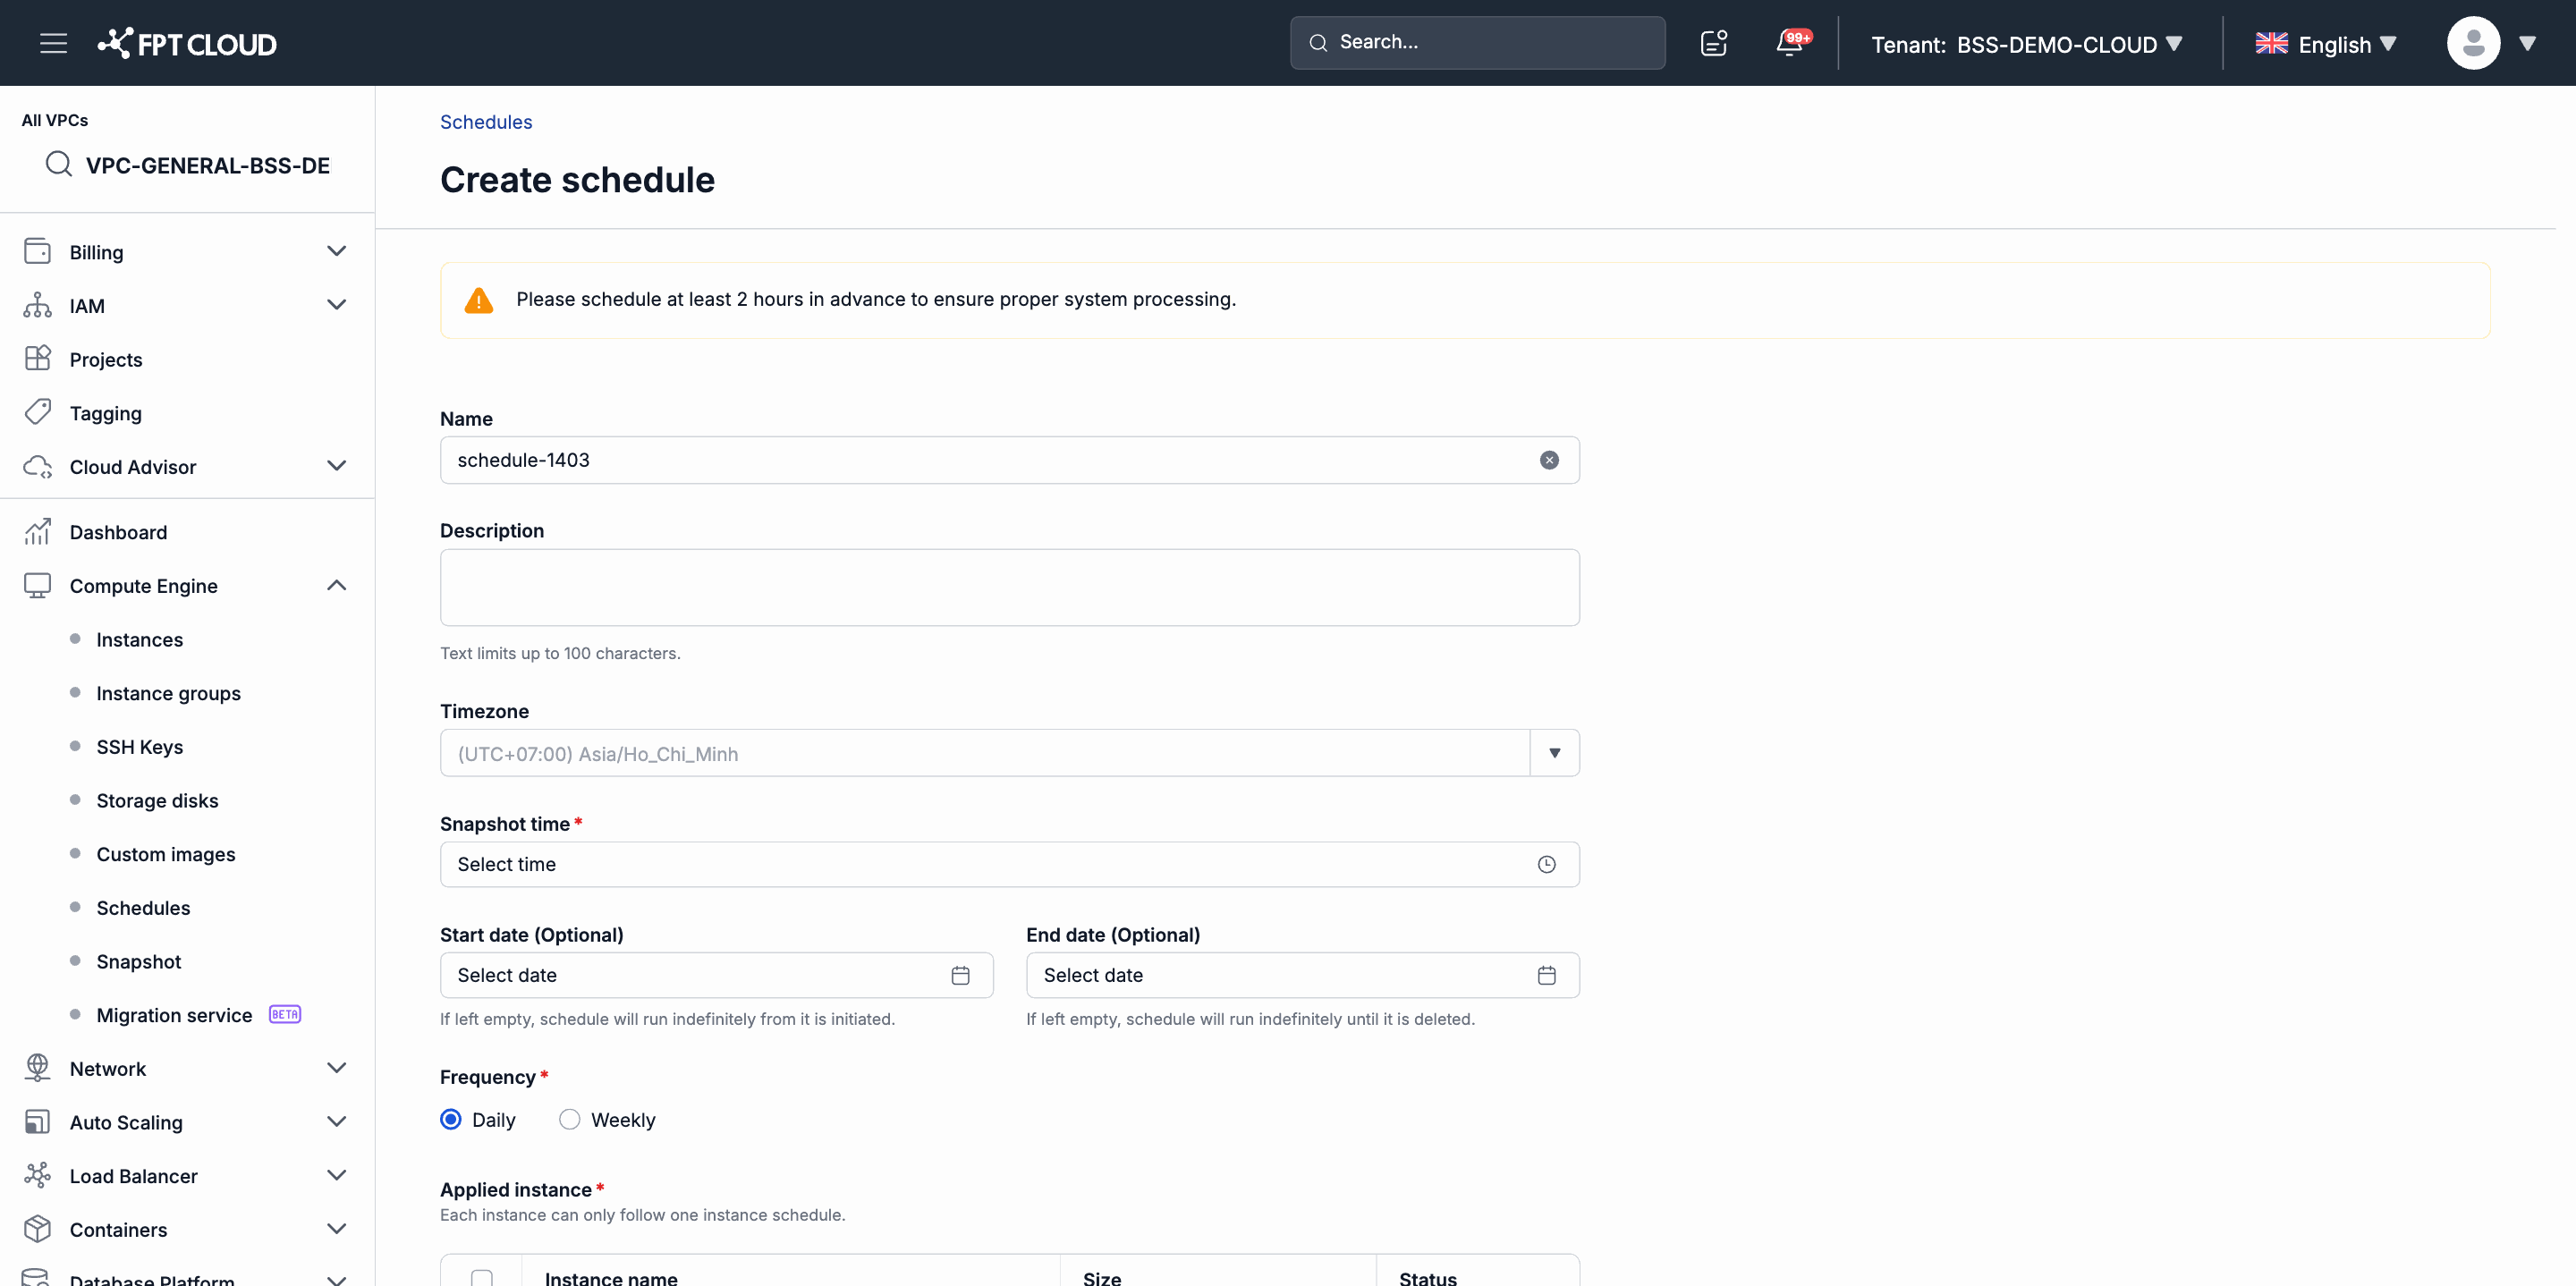
Step 4. Fill in the Name (the system suggests an auto-generated name).
Step 5. Fill in the Description (optional, maximum 100 characters).
Step 6. Select a Timezone (default UTC+7).
Step 7. Set the Snapshot time — the time the system will take the snapshot.
Step 8. Set the Start date and End date (optional). Leave Start date blank for the schedule to start immediately upon creation; leave End date blank to run indefinitely.
Step 9. Select a Frequency: Daily or Weekly.
Step 10. In the Applied instance section, select the Instances you want to automatically snapshot.
Note: Each Instance can only belong to one snapshot schedule. Instances already attached to another schedule will not appear in the selection list.
Step 11. Click Create schedule to confirm.