Guide — Manage Schedules
This guide describes how to view schedule details, monitor execution status per Instance, and delete a schedule when it is no longer needed.
View Schedule Details
-
In the left navigation bar, select Compute Engine → Schedules.
-
Select the Instance schedule tab.
-
Click the schedule name in the list to open the detail page.
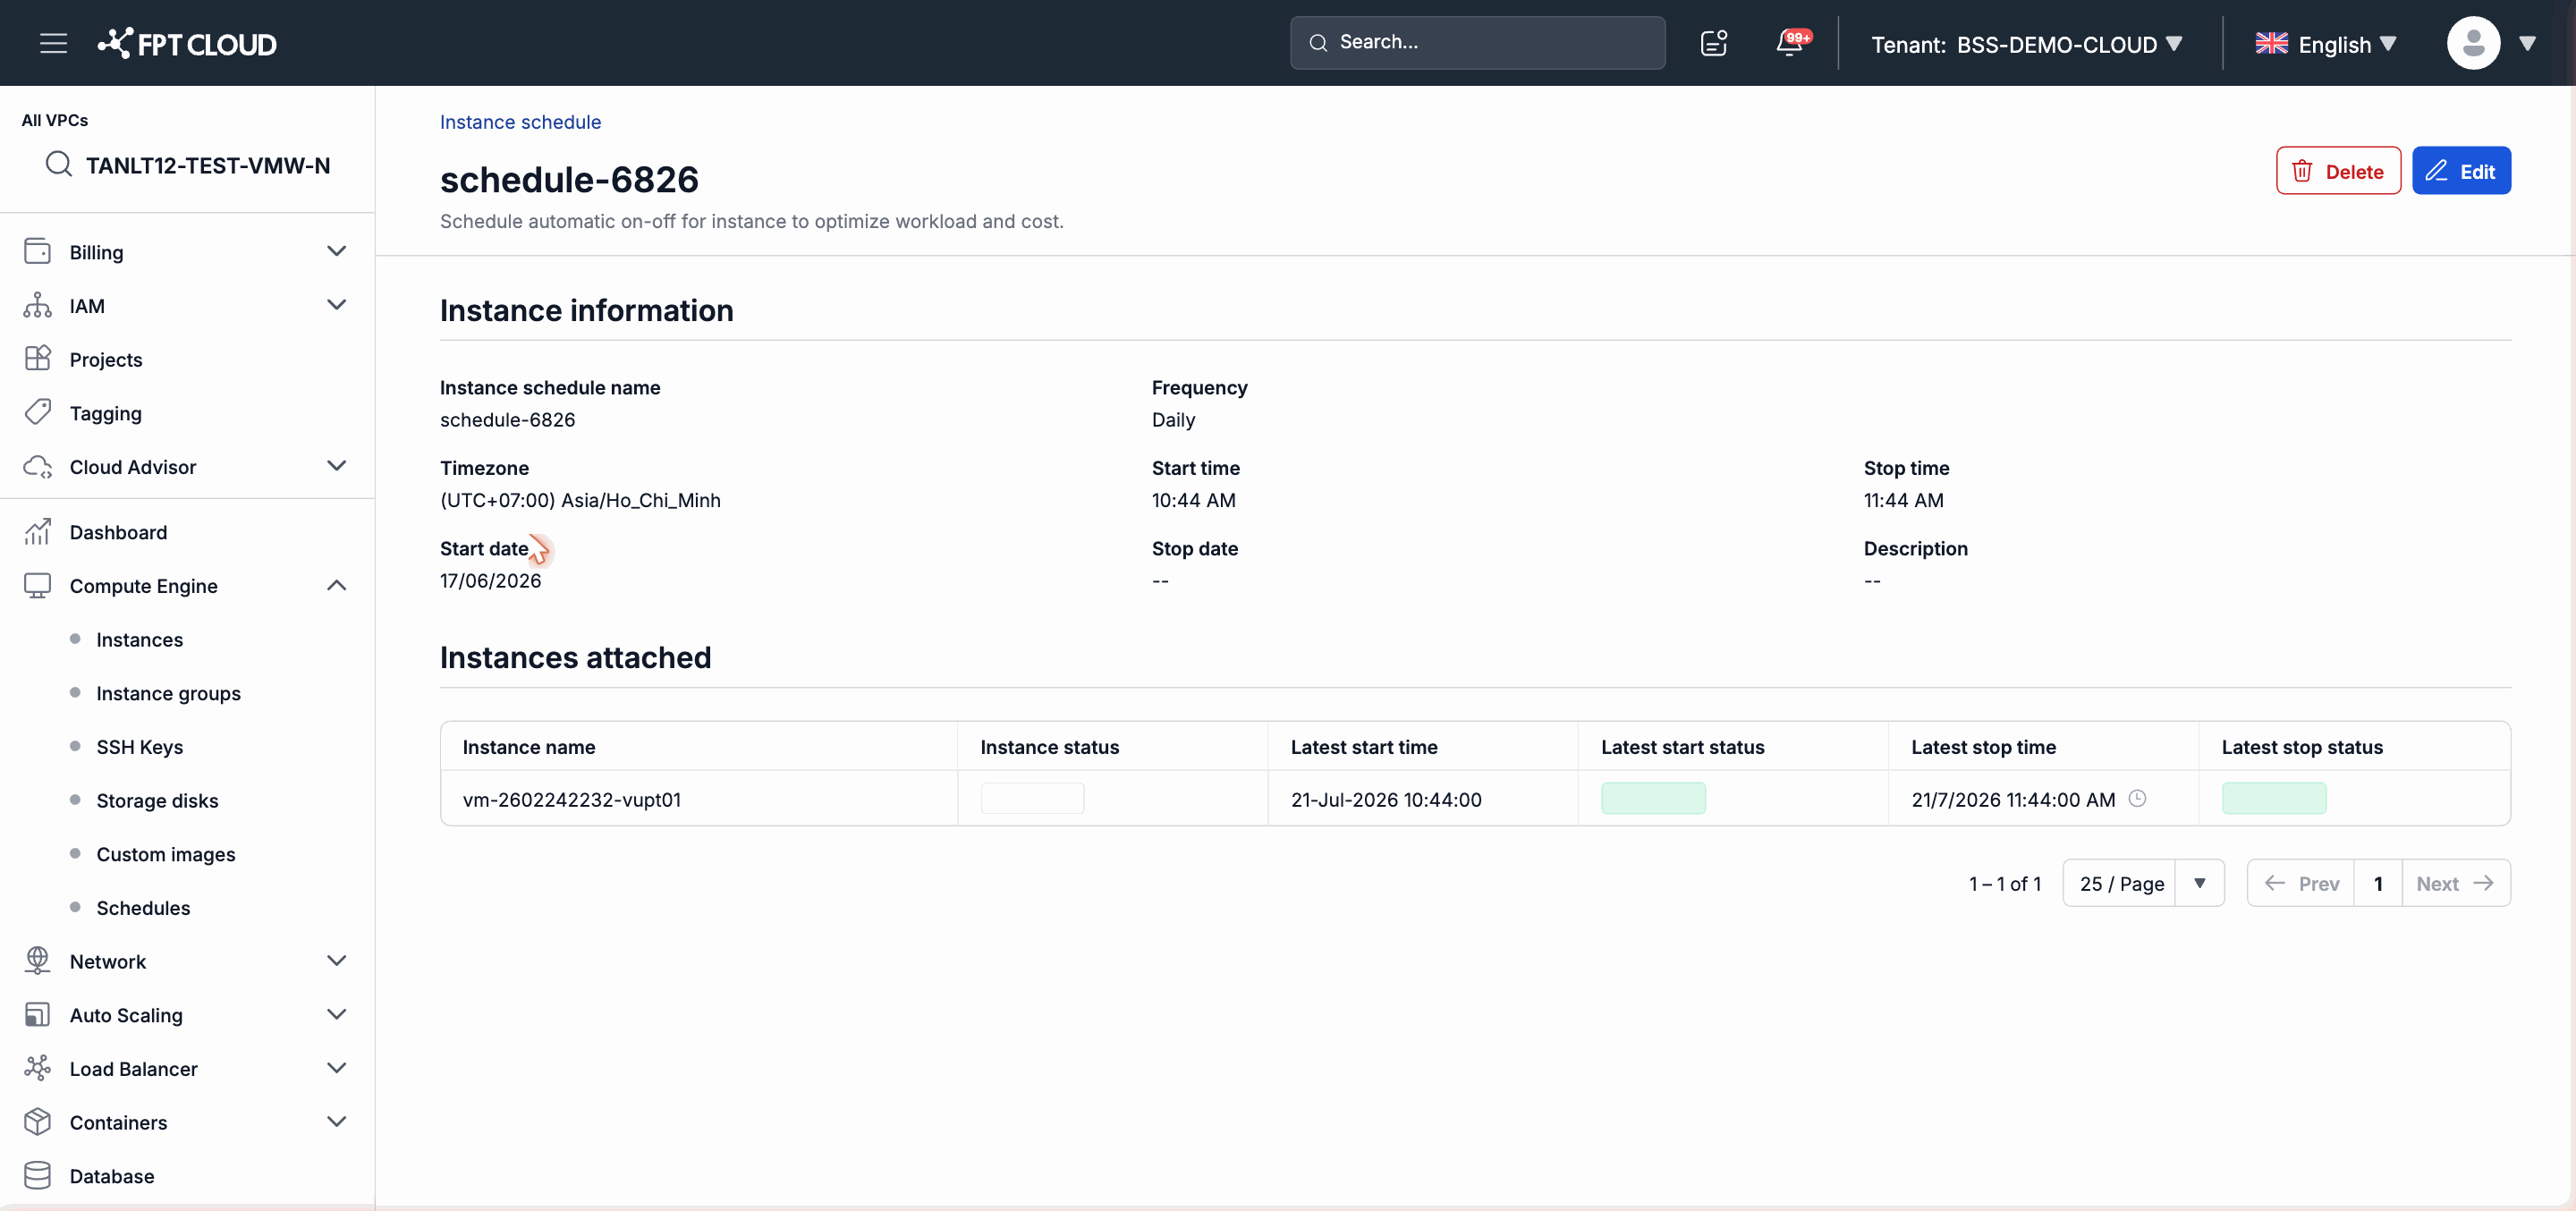
The detail page shows:
- Schedule configuration: Timezone, Frequency, Start time, Stop time, Start date, End date.
- The Instances attached table: the list of Instances attached to the schedule, along with each Instance's status and the result of the most recent start/stop action (success or failure).
Attach an Instance to a Schedule
Note: Attaching an Instance to a schedule is done from the Instance detail page (not from the Schedules page). See the Instance module documentation for instructions.
Monitor Execution Results
In the Instances attached table on the schedule detail page, each row shows:
| Column | Meaning |
|---|---|
| Instance | The name of the Instance the schedule applies to |
| Status | The current status of the Instance (Running, Stopped, ...) |
| Latest start | The time of the most recent start action and its result (Success / Failed) |
| Latest stop | The time of the most recent stop action and its result (Success / Failed) |
If an execution result is Failed, check the Instance status and refer to troubleshooting.md.
Delete a Schedule
Note: Deleting a schedule does not affect the current state of the Instance (a running Instance continues to run). The automatic start/stop schedule will simply stop executing.
- Open the detail page of the schedule you want to delete.
- Click Delete.
- Confirm the deletion in the confirmation dialog.
The deleted schedule will no longer appear in the list and will no longer issue start/stop commands to any Instance.
Change Schedule Configuration
Instance schedules do not support editing. To change the configuration (time, frequency, etc.):
- Delete the current schedule as described above.
- Create a new schedule with the desired configuration as described in guide-create.md.