Guide: Attach and Detach a Storage Disk
This guide describes how to attach a Storage Disk to an Instance and detach it when needed.
Before You Begin
- A disk to be attached must be in Available status.
- A disk to be detached must be in In-use status.
- The target Instance must belong to the same Project as the disk.
Attach a Disk to an Instance
-
In the left navigation bar, select Compute Engine → Storage disks.
-
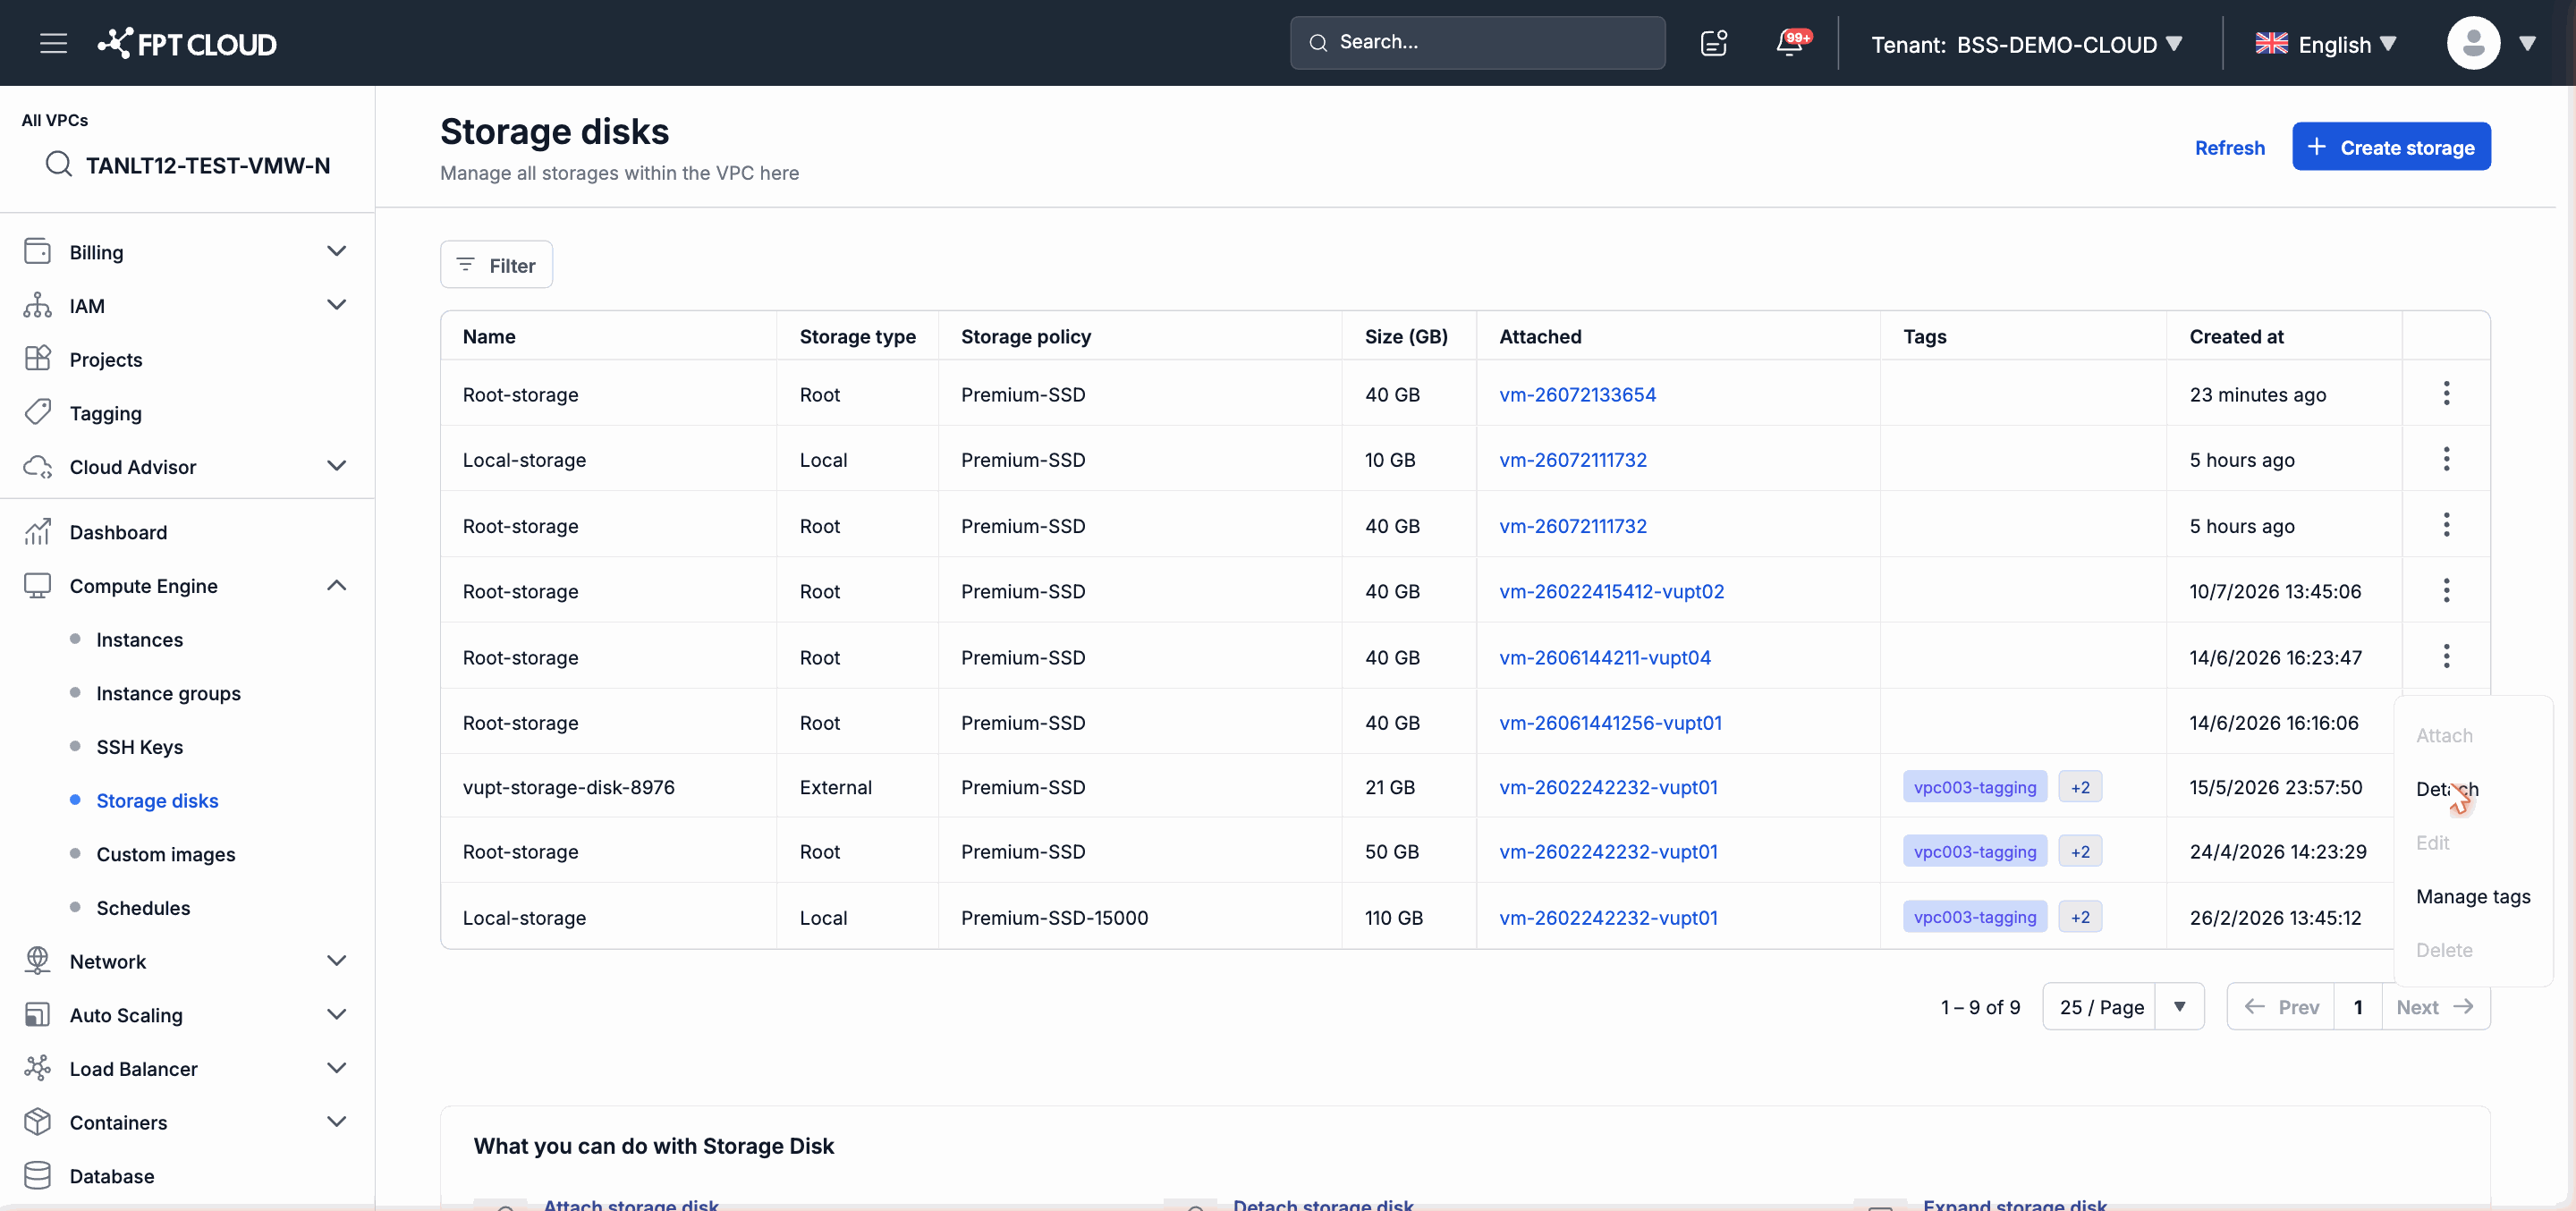
Find the disk you want to attach, then click the action menu icon (⋮) at the end of the row.
-
Select Attach from the menu.
-
In the dialog that appears, select the target Instance from the dropdown list.
-
Click Confirm to complete.
-
The disk status changes to In-use and the Attached Instance column displays the Instance name.
Note: Each disk can only be attached to one Instance at a time. If the disk is in In-use status, the Attach option is disabled — detach it first.
Detach a Disk From an Instance
-
In the Storage disks list, find the disk you want to detach, then click the action menu icon (⋮).
-
Select Detach from the menu.
-
Confirm the operation in the dialog.
-
The disk status returns to Available — the data on the disk is fully preserved.
Important: In the Instance's operating system, unmount the disk before detaching from the portal to avoid data loss. For example, on Linux:
sudo umount /dev/vdb.
Note: After a successful detach, you can attach this disk to any other Instance in the same Project.