Guide: Create a Storage Disk
This guide describes how to create a new Storage Disk and optionally attach it to an Instance immediately.
Before You Begin
- You are logged in to the FPT Cloud Portal.
- You are in a Project that belongs to a Specific VPC or a General VPC.
Steps
-
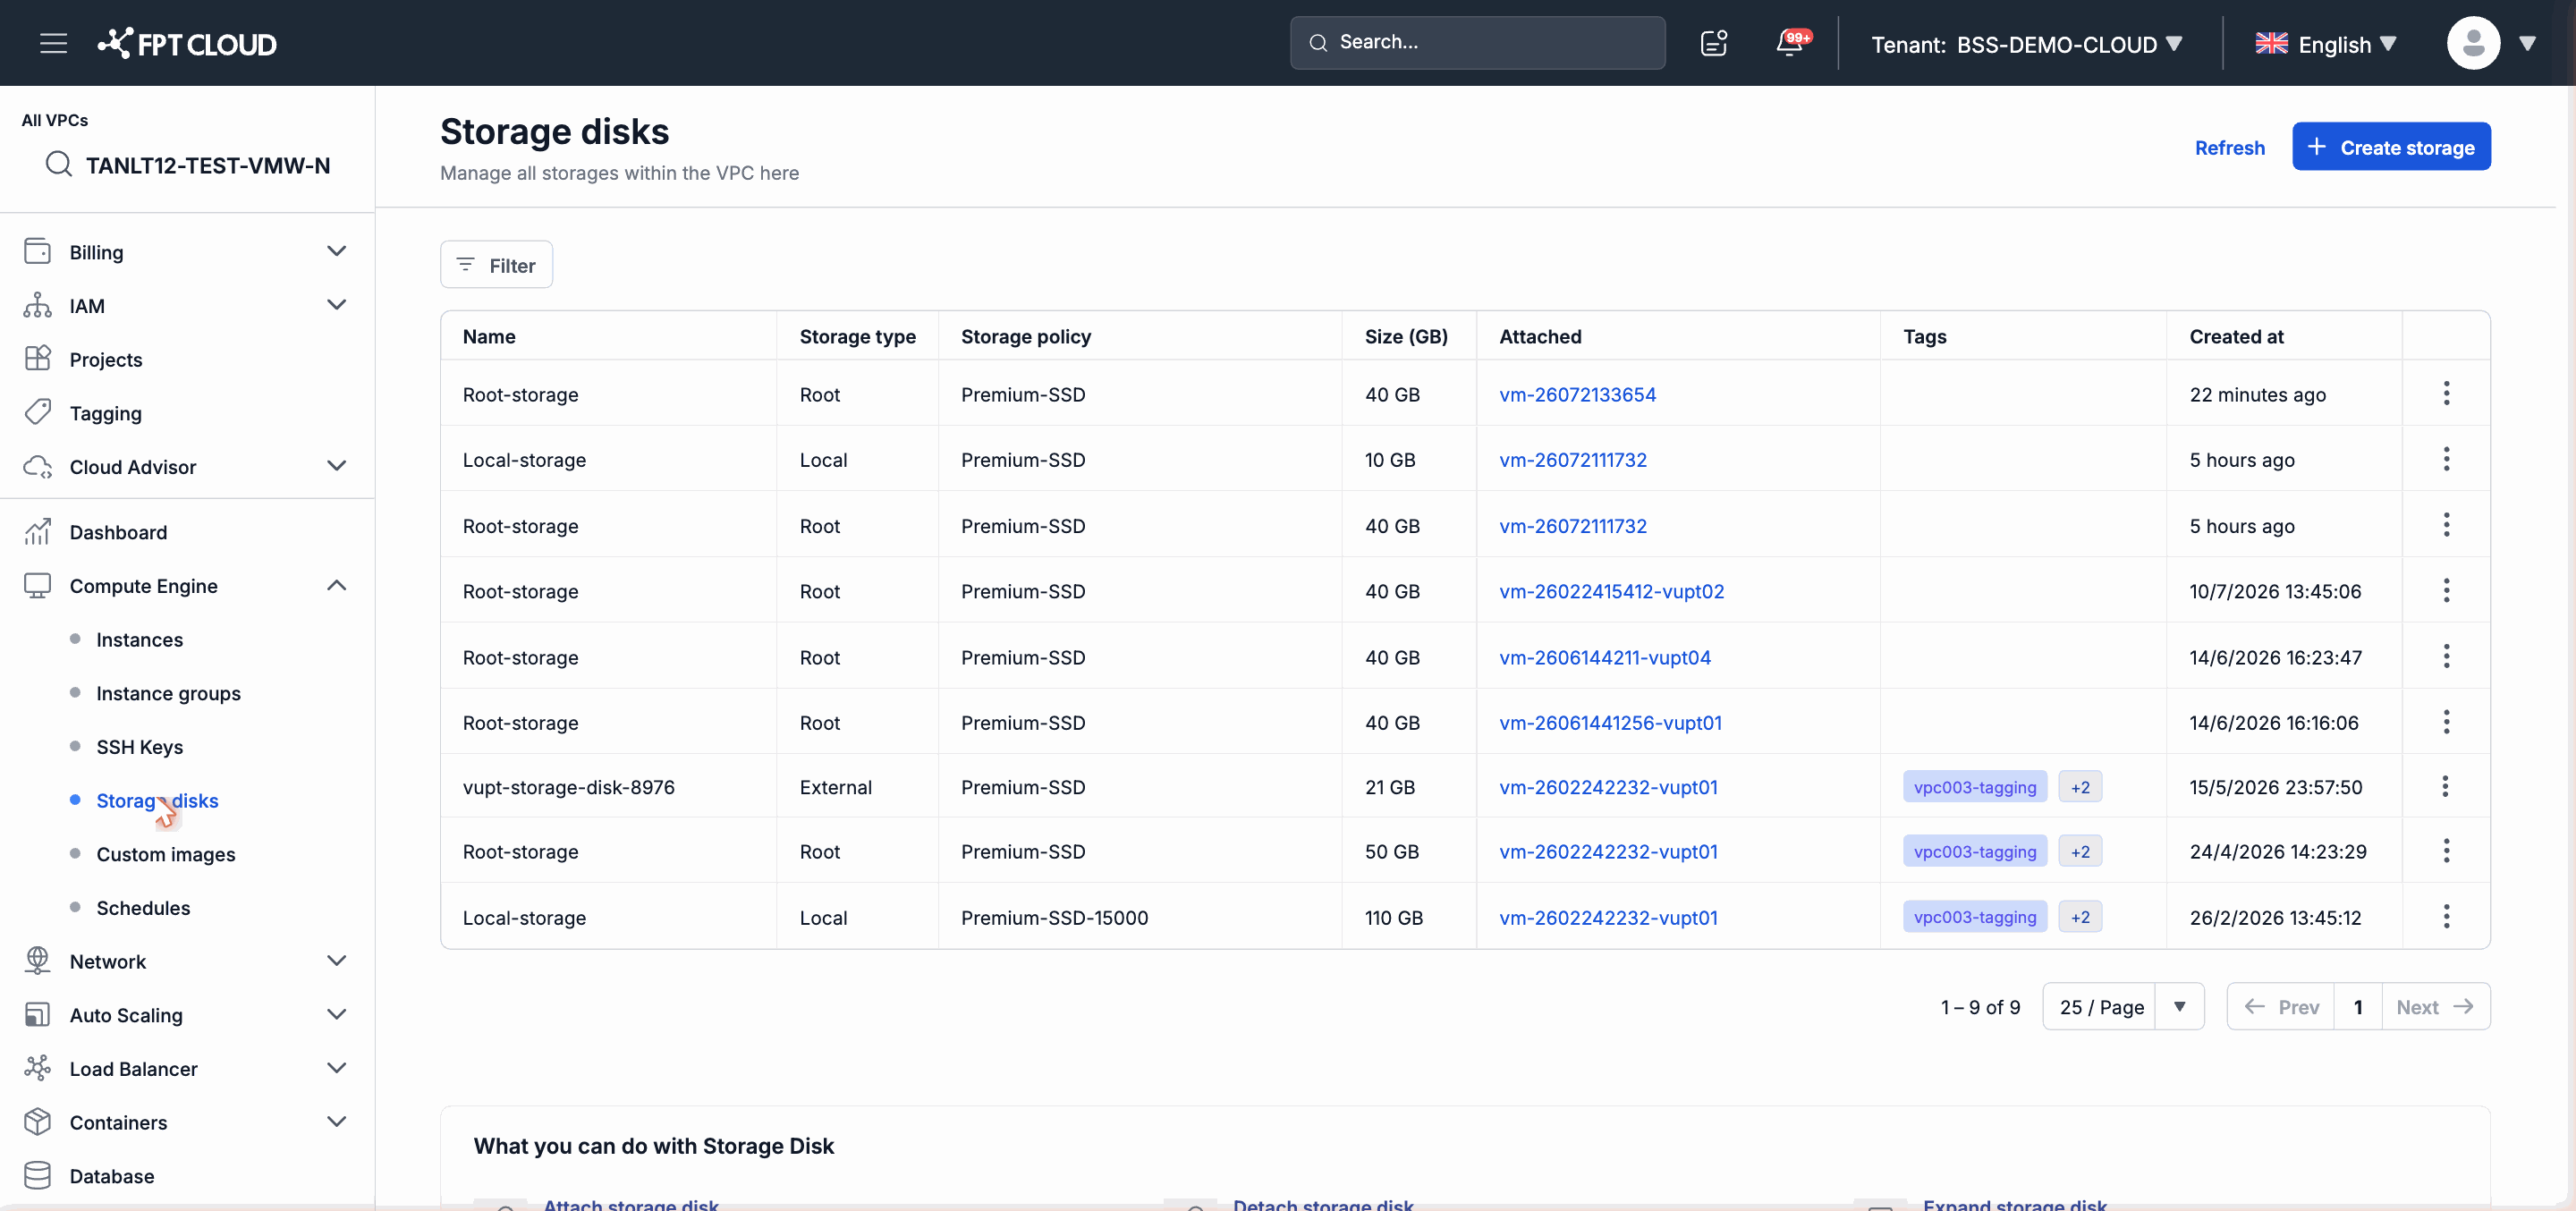
In the left navigation bar, select Compute Engine → Storage disks.
-
Click the Create button in the upper-right corner of the screen.
-
Fill in the form:
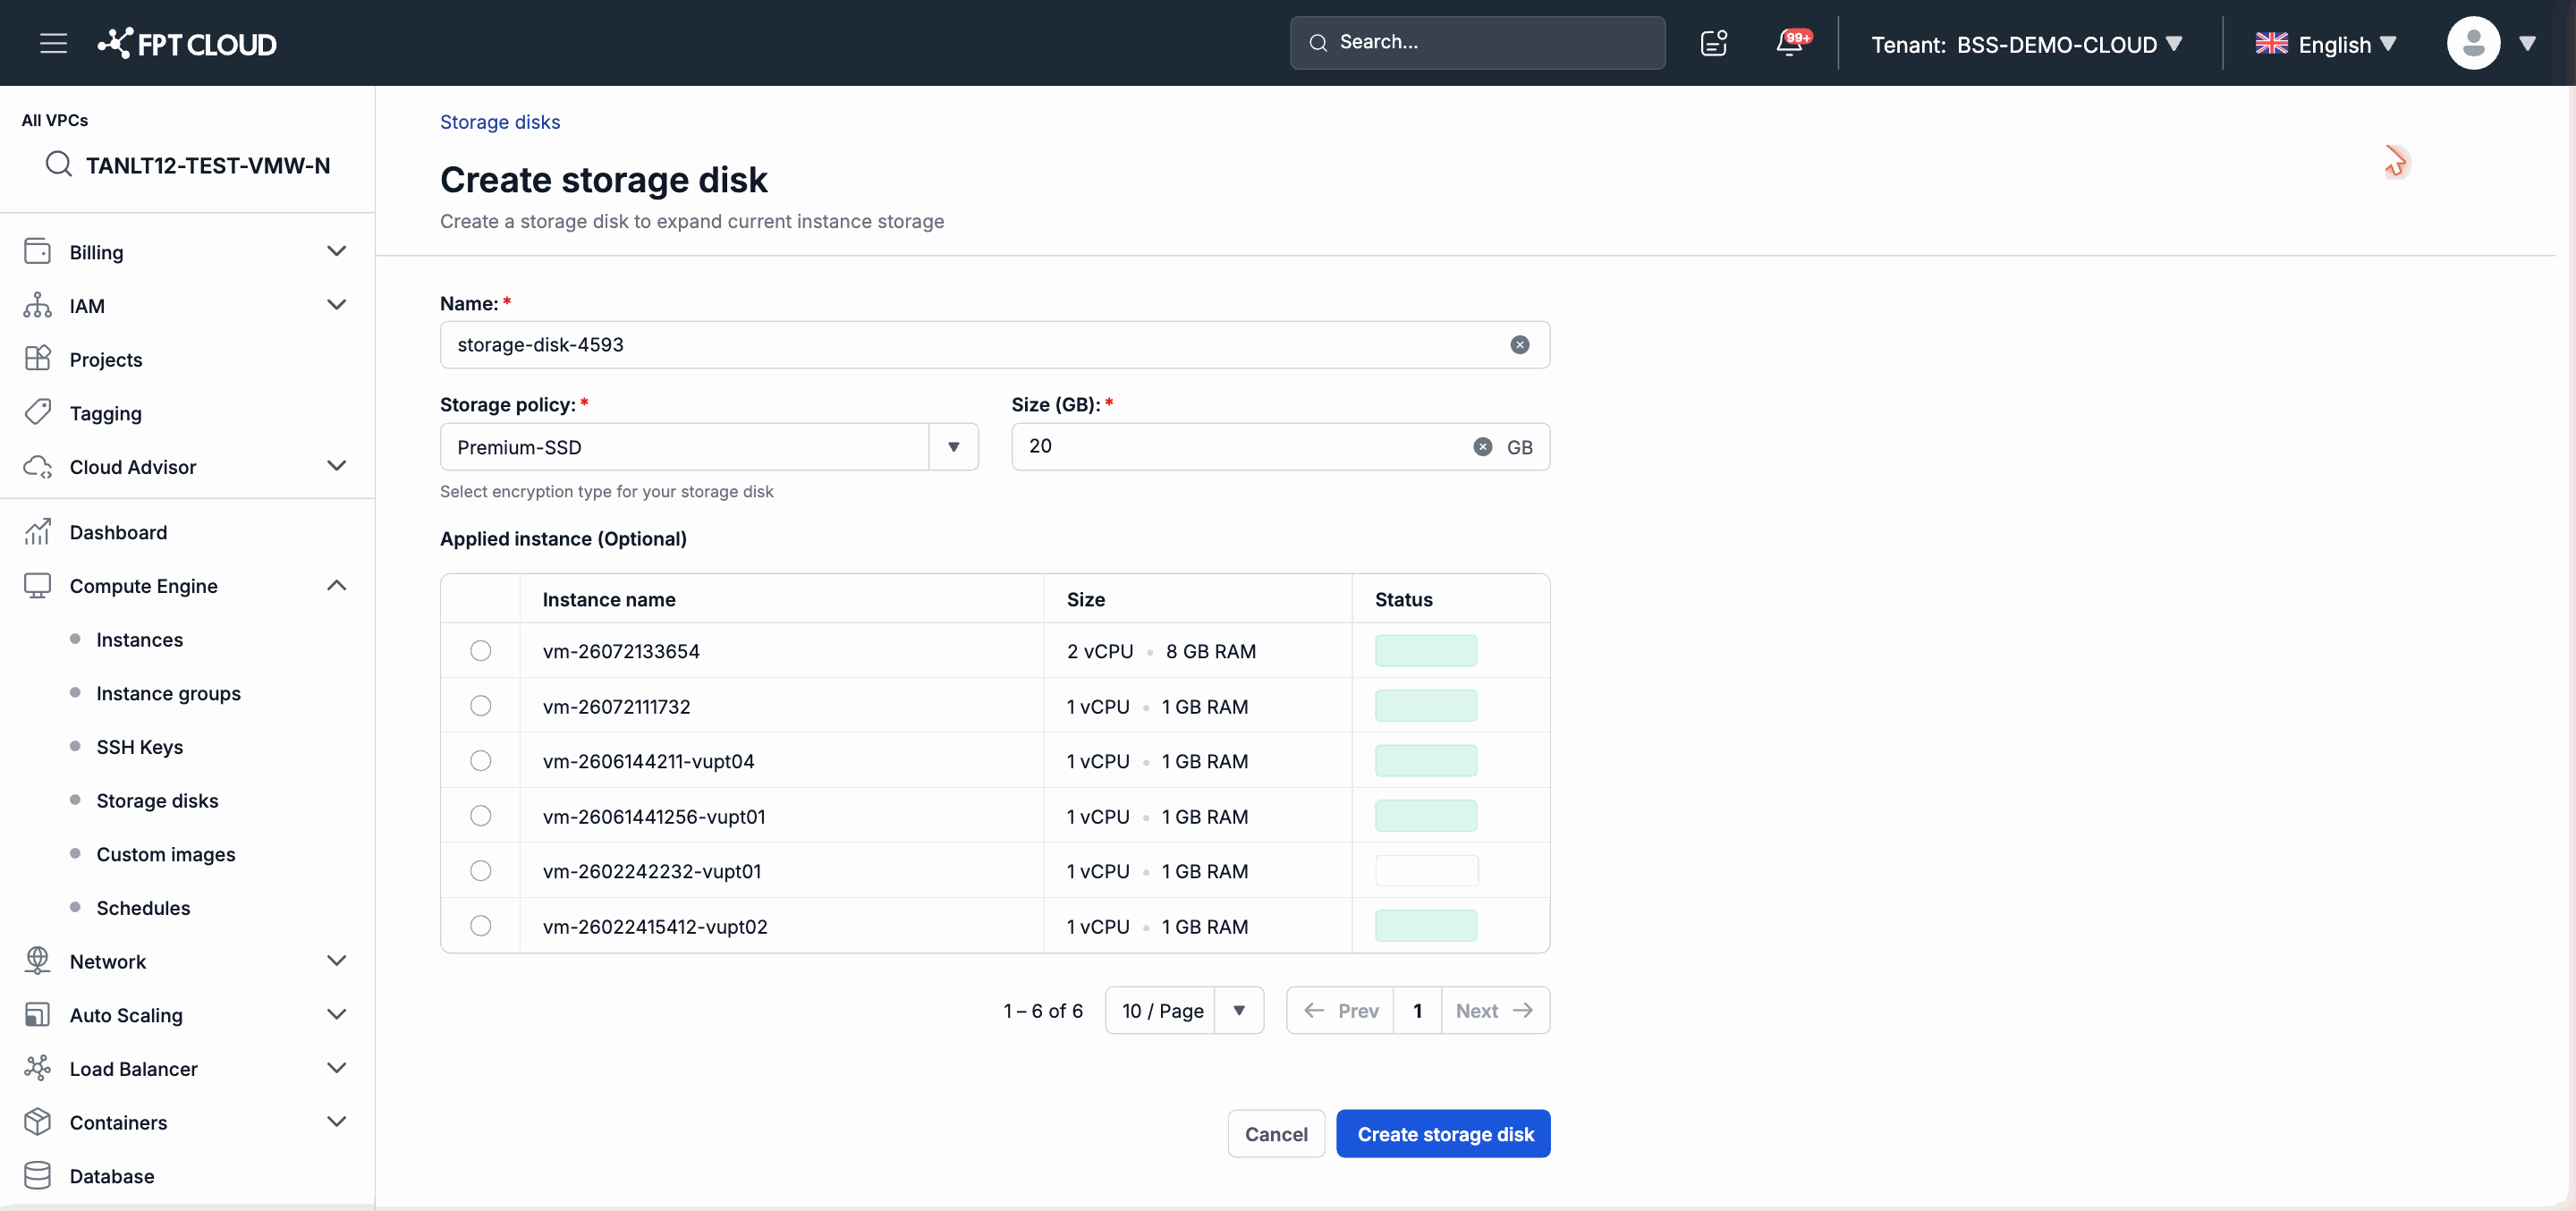
- Name — enter an identifier name for the disk (required).
- Storage type — select SSD or HDD based on your needs.
- Size (GB) — enter the desired capacity (positive integer).
- Instance (optional) — select an Instance to attach the disk to immediately after creation.
-
Click Confirm to complete.
-
The new disk appears in the list with the status Available (if no Instance was selected) or In-use (if an Instance was selected).
Note: The disk name must be unique within the Project. The minimum and maximum capacity depend on your quota configuration.
Note: After creation, you cannot reduce the disk capacity — you can only increase it using the Resize operation.