Guide: Create a VPC
This guide describes how to create a new VPC on FPT Cloud, including choosing the VPC type, filling in basic information, and optionally configuring a Subnet during creation.
Before You Begin
- You are logged in to the FPT Cloud Portal.
- You have permission to create a VPC in the target Project.
- You have determined the appropriate VPC type (General or Specific) — the VPC type cannot be changed after creation.
Steps
-
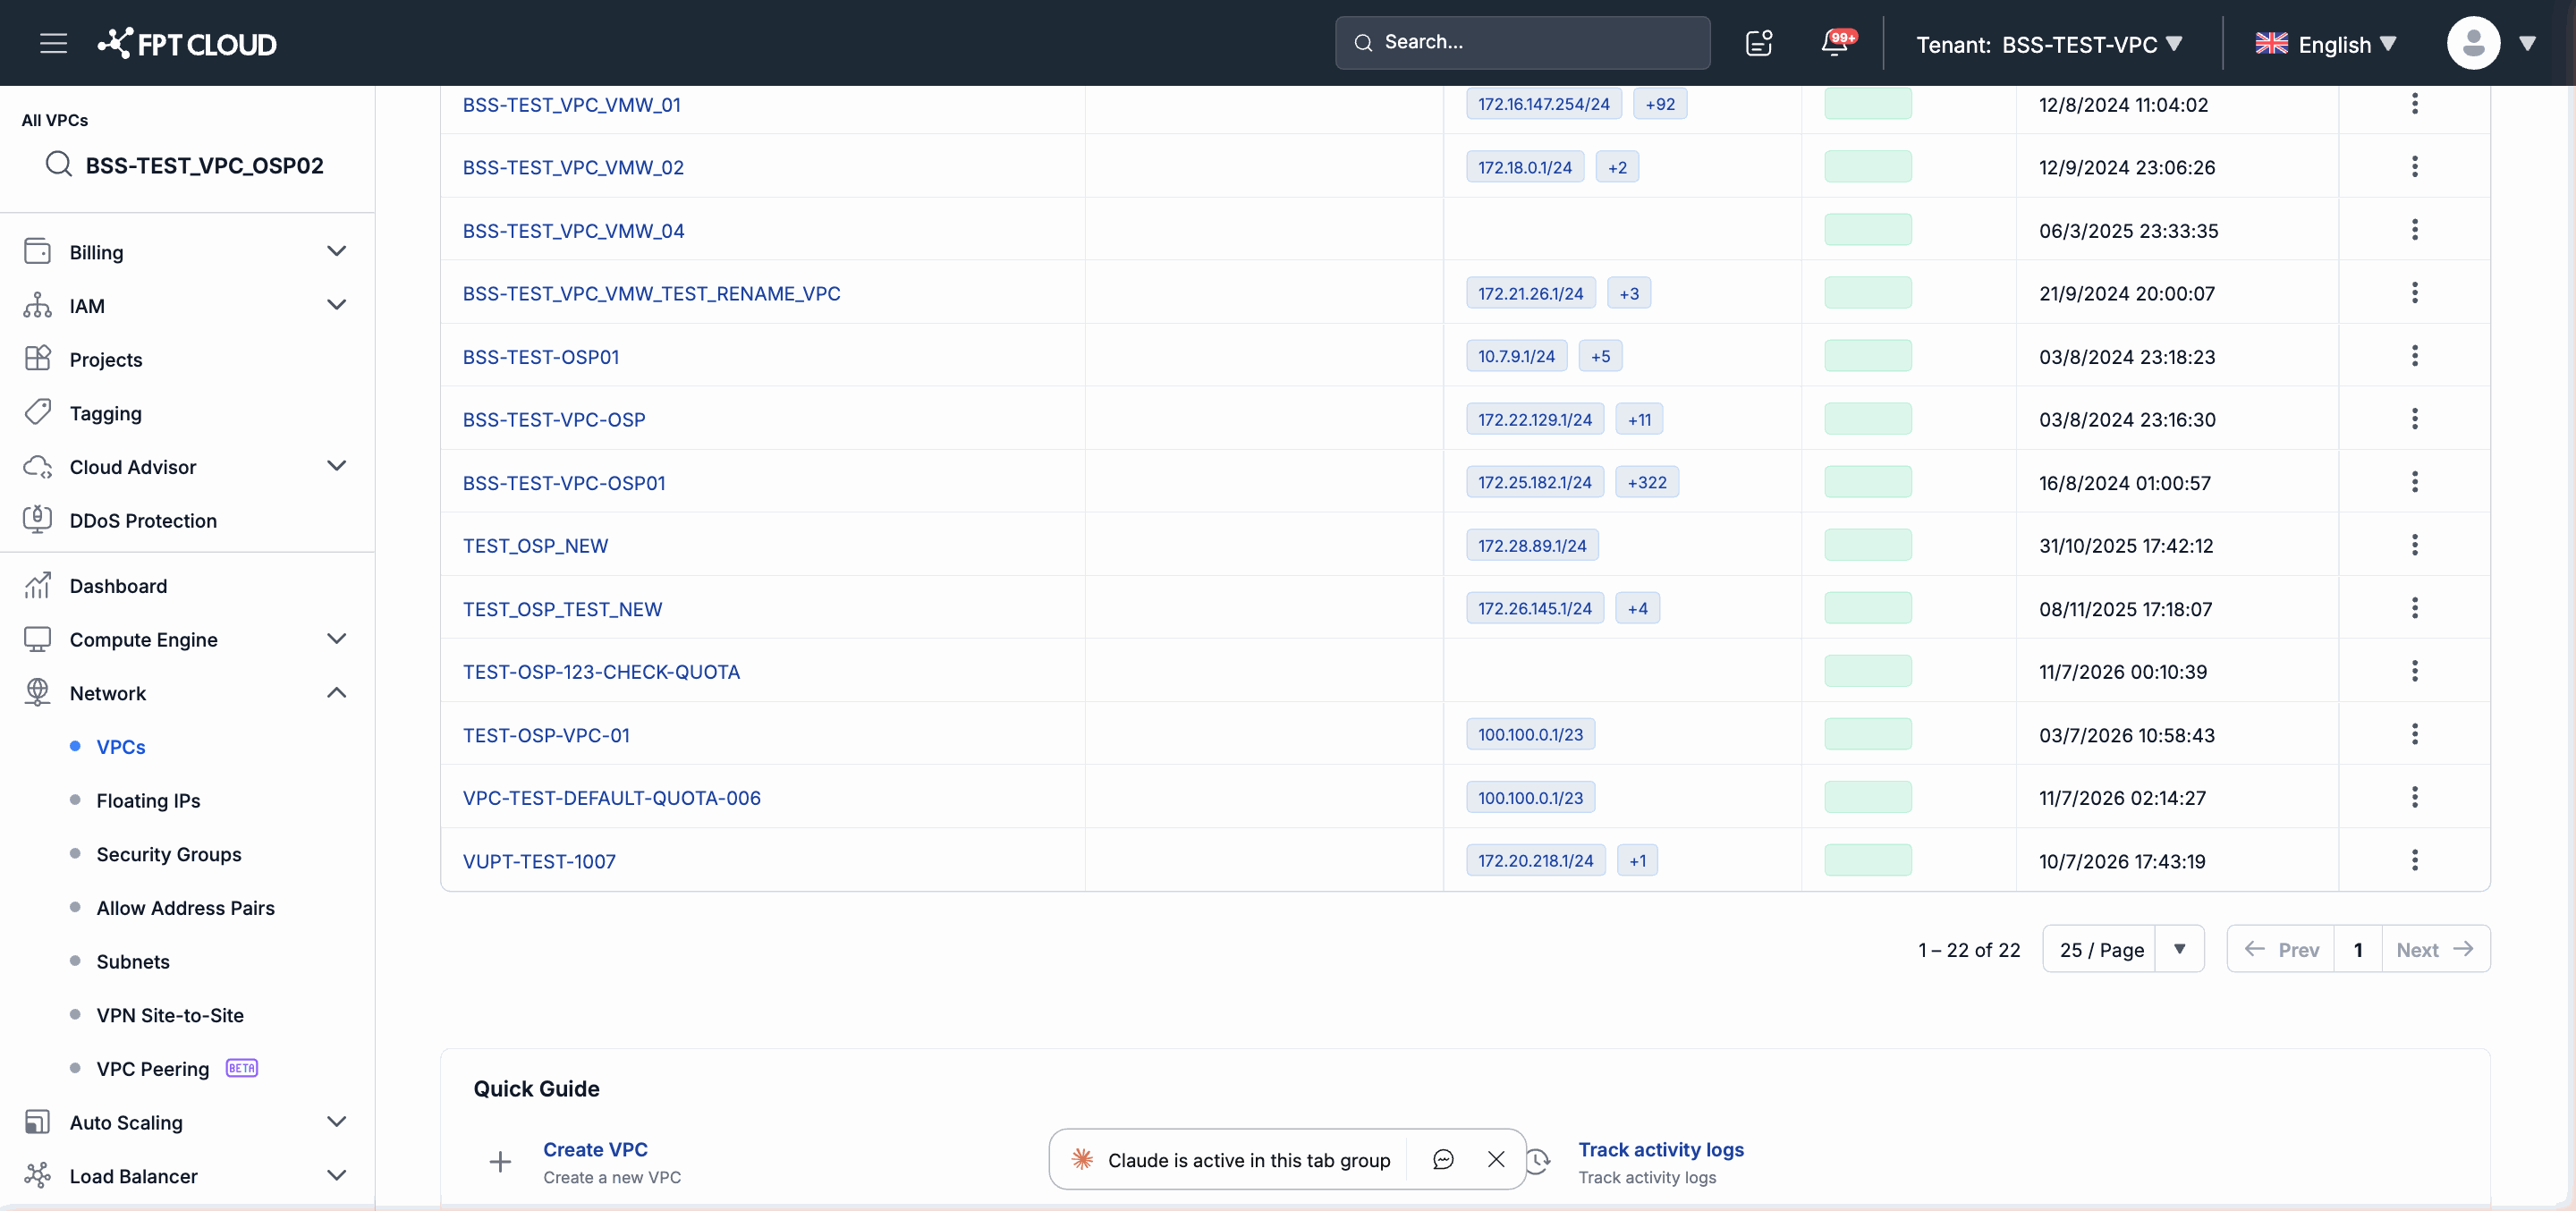
In the left navigation bar, select Network → VPC.
-
Click the Create VPC button in the upper-right corner of the screen.
-
In the VPC creation form, fill in the following information:
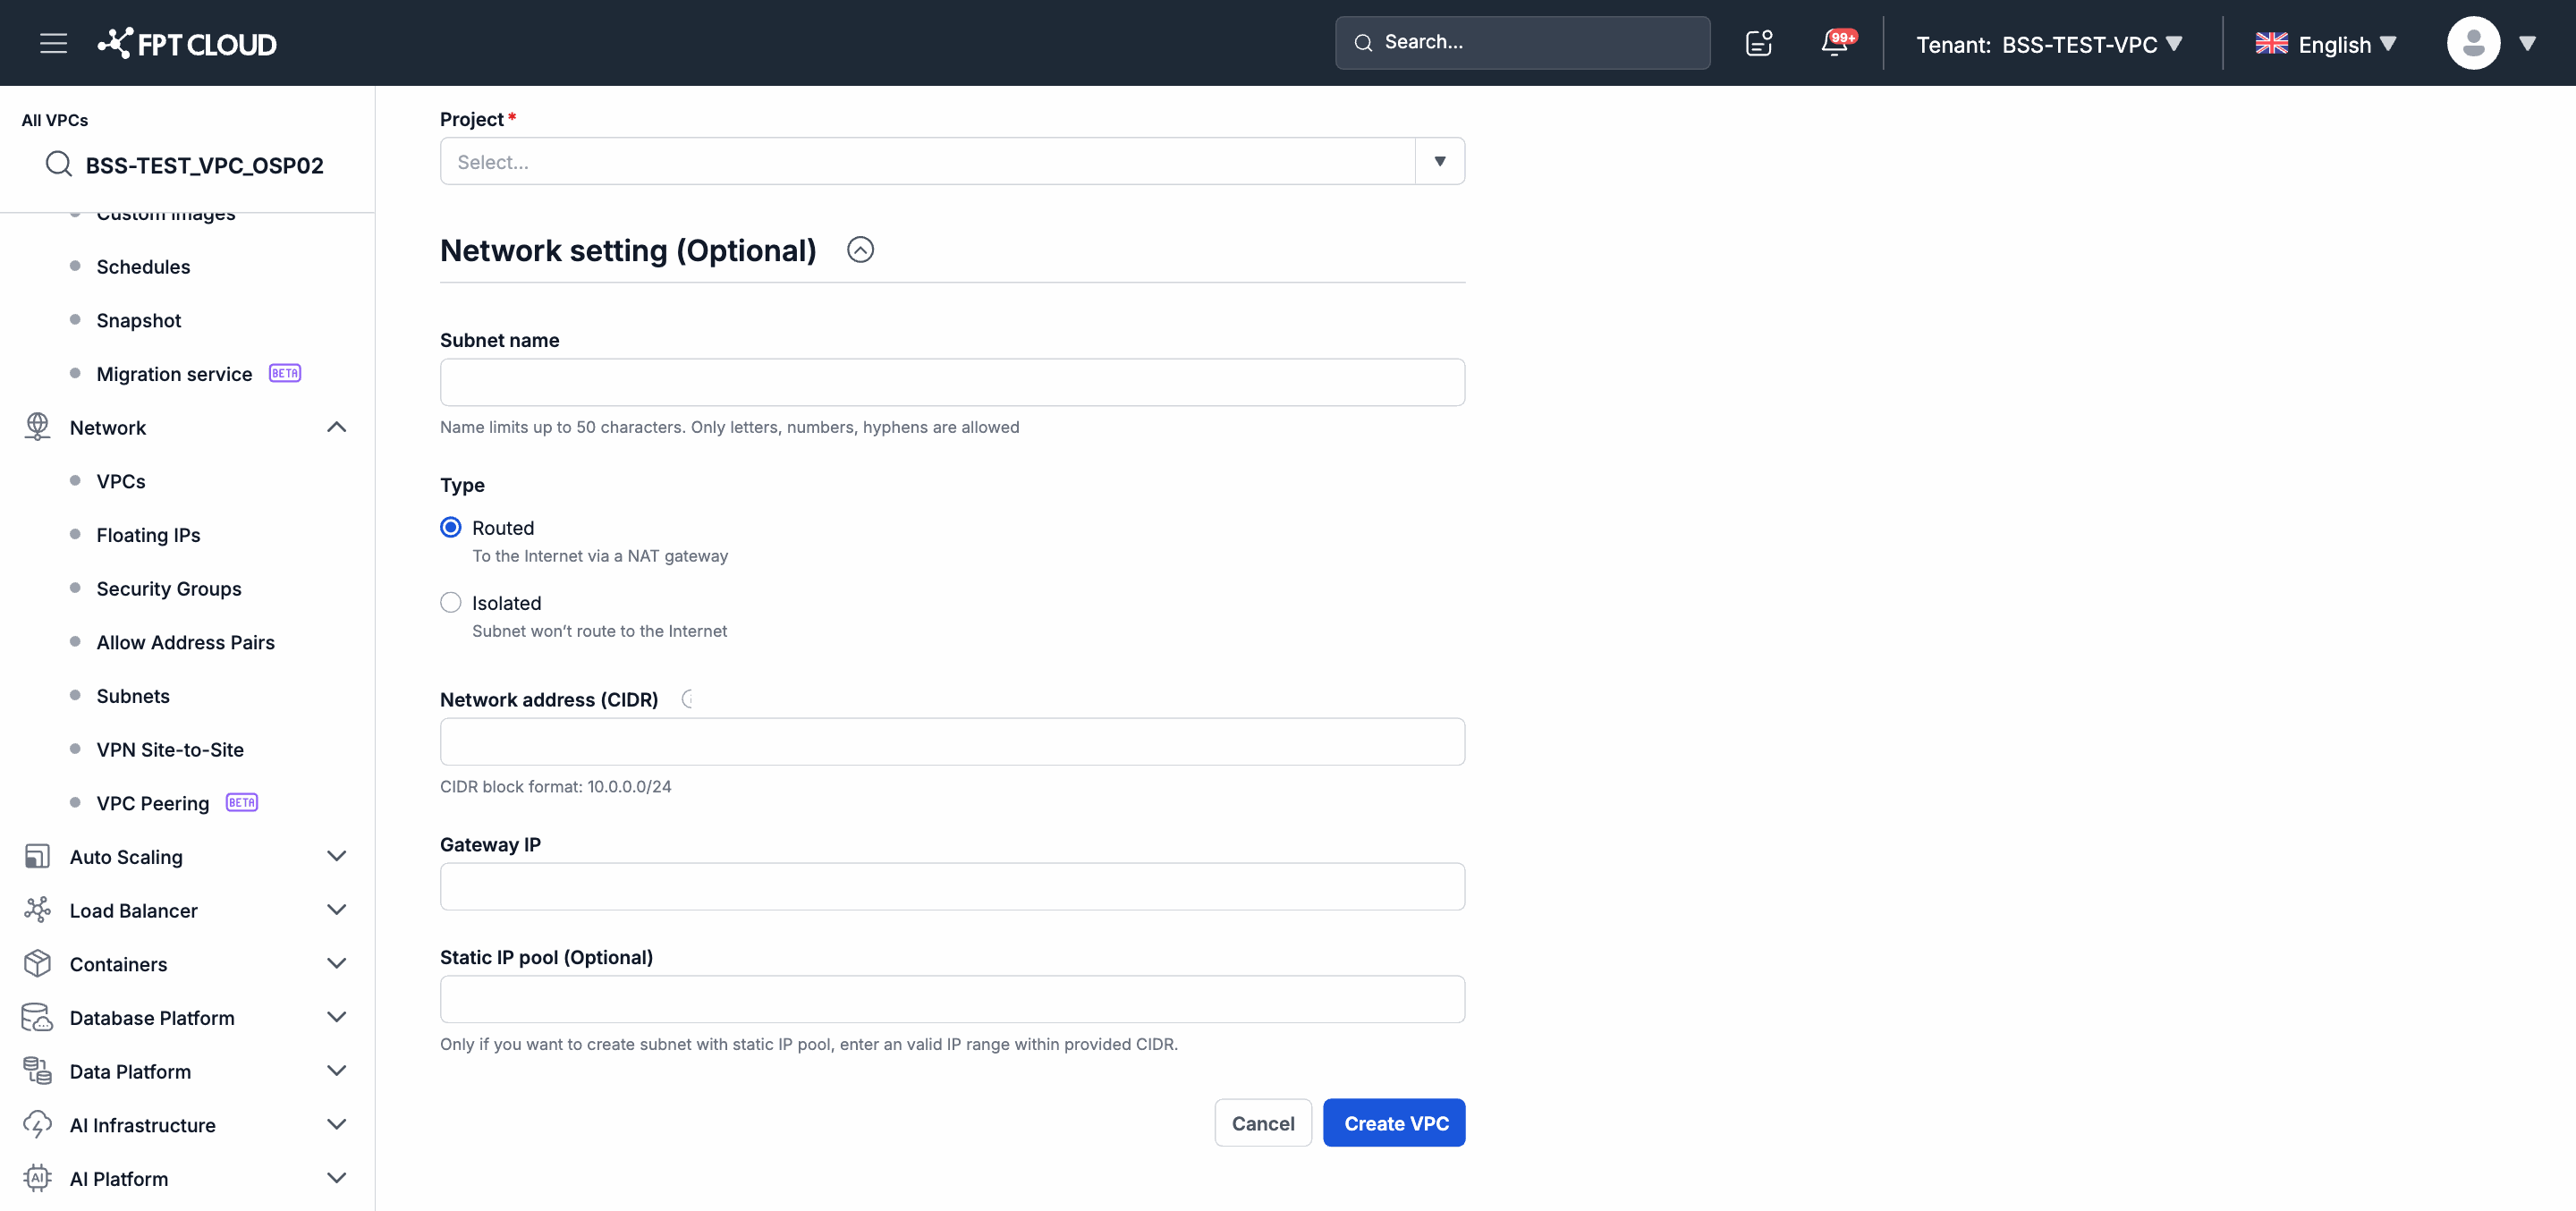
Main information:
- Type — select the VPC type:
- General: suitable for most standard workloads.
- Specific: suitable for workloads requiring dedicated resources or specialized network configuration.
- Name — enter an identifying name for the VPC (required).
- Owner — select the organization that owns the VPC (required).
- Project — select the Project the VPC will belong to (required).
Subnet configuration (optional):
If you want to initialize a Subnet during VPC creation, you can also fill in:
- CIDR — the IP address range of the Subnet in CIDR notation (e.g.,
192.168.1.0/24). - Subnet name — an identifying name for the Subnet.
Note: Skip the Subnet configuration section if you want to add a Subnet later. Subnets can be created and managed separately at Network → Subnets.
- Type — select the VPC type:
-
Click Confirm to complete.
-
The new VPC appears in the list with status Active.
Important: The VPC type (General or Specific) is fixed at creation time and cannot be changed afterward. If you need a different VPC type, you must create a new VPC and migrate your resources to it.