Back up and restore Kubernetes cluster configuration
Backup & Restore Configs backs up your cluster's Kubernetes configuration (manifests, RBAC, and CRDs) and restores it back into the same cluster.
Cluster configuration builds up complexity over time (namespaces, RBAC, CRDs, workload manifests), with no way to recover quickly if something is deleted by mistake, misconfigured, or drifts over time without a backup in place. Some organizations (banks, insurers, government agencies) also need to demonstrate configuration-recovery capability for compliance (ISO 27001, SOC 2, and similar).
With this feature, you can create an on-demand backup in one click before a risky change, restore it back into the same cluster after an incident, and review the details of every backup and restore you've run.
Scheduled backups (a recurring Backup Plan) aren't supported in the current version — every backup is on-demand, created manually.
Restoring into a different cluster isn't available yet in this beta — the restore form's Target cluster is locked to the cluster the backup came from. Cross-cluster restore may be added in a future release.
This feature backs up Kubernetes configuration only — it doesn't back up Persistent Volume data or the control plane/etcd. Persistent Volume backup and restore is a separate, existing feature under the Backup tab's Persistent Volume sub-tab.
Who should use this
| Role | When |
|---|---|
| Tenant DevOps Engineer / SRE | Day-to-day operations — back up before a risky change, restore after an accidental delete or misconfiguration |
| Compliance / Security Officer | Needs evidence of configuration change history and recovery capability for audits |
Create an on-demand backup
-
Open the backup form.
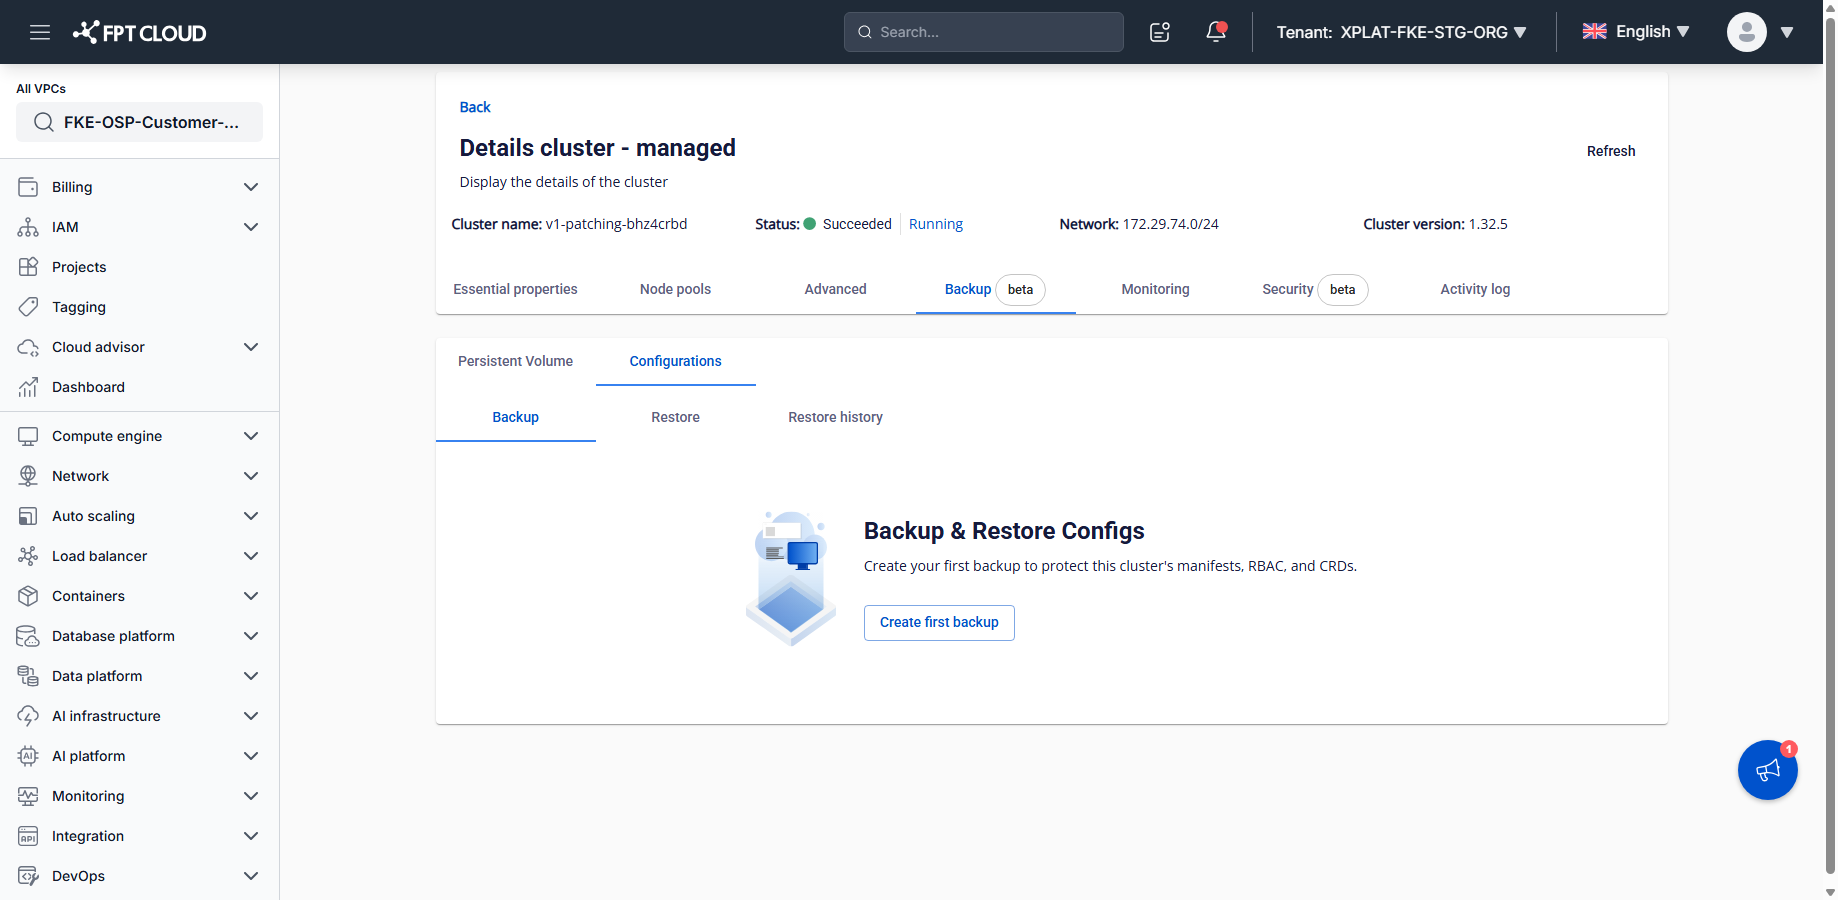
Go to Cluster detail for the cluster you want to back up, select the Backup tab, then the Configurations sub-tab (next to Persistent Volume). On the Backup sub-tab, select Create first backup (or Create Backup if a backup already exists).
-
Fill in the backup details.
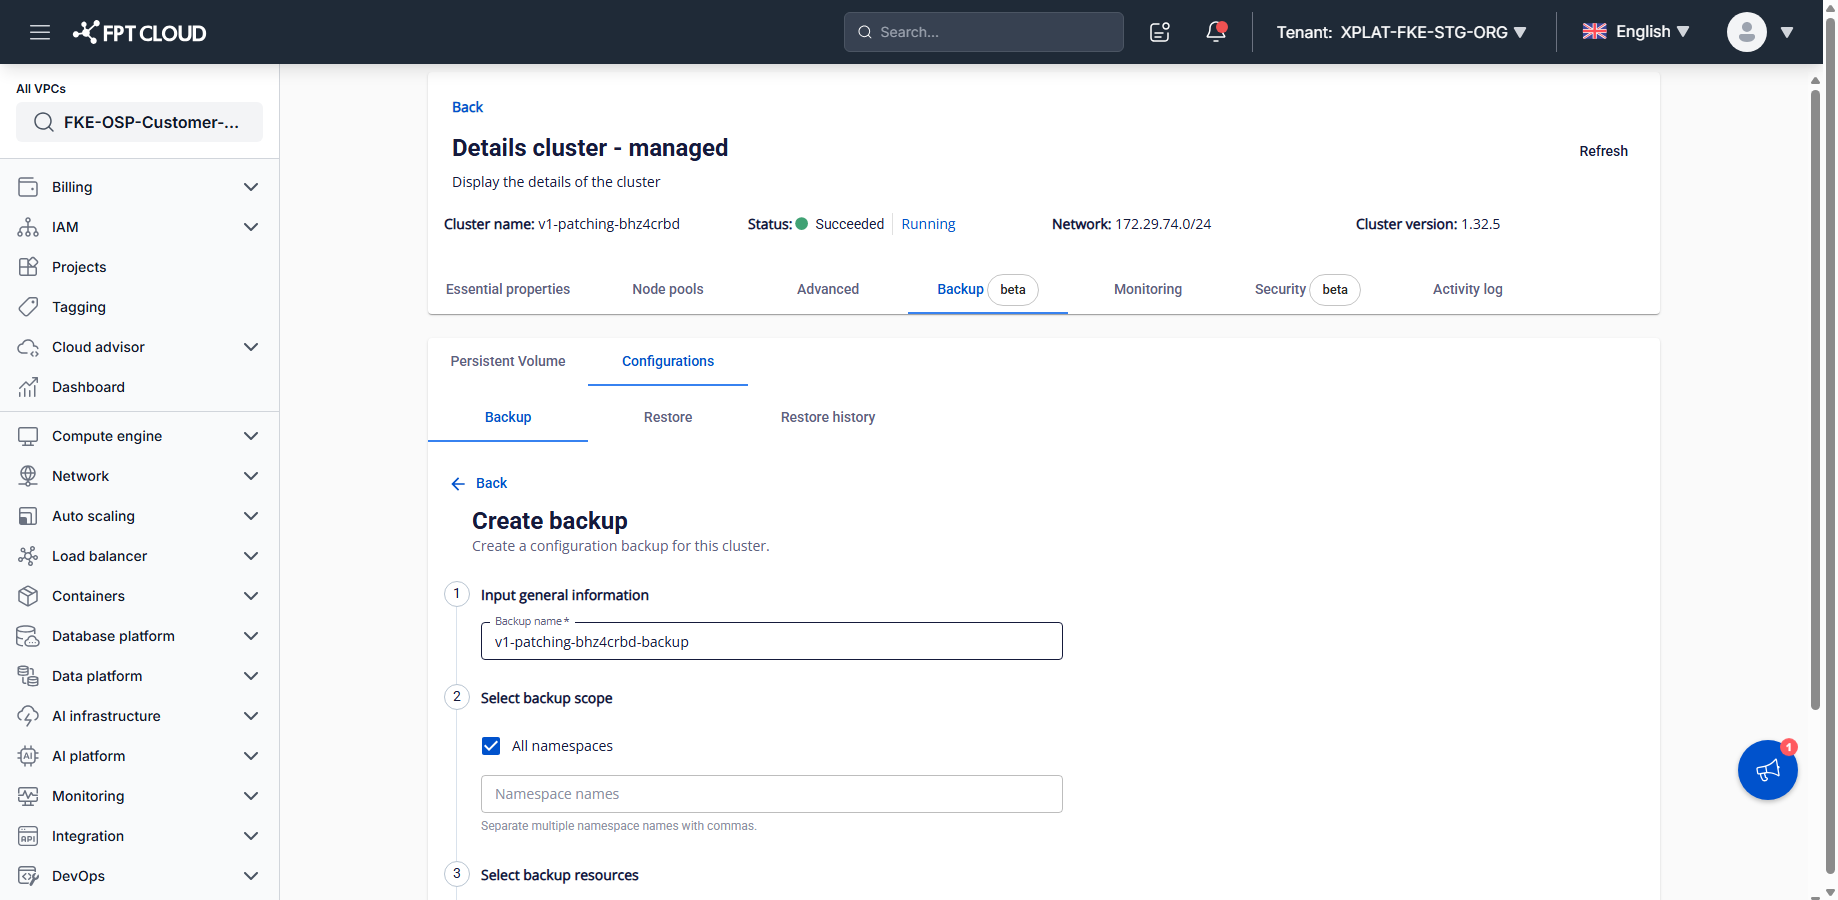
- 1. Input general information — Backup name (required): pre-filled as
{cluster-name}-backup; you can edit it. - 2. Select backup scope — All namespaces is checked by default and covers every namespace. Uncheck it to enable the Namespace names field, then enter the namespace names you want, separated by commas.
- 3. Select backup resources: Kubernetes resources is always on and can't be turned off; it captures all resource types (Deployments, Services, ConfigMaps, RBAC, CRDs, and similar) for the selected namespaces. Secrets (optional, off by default) additionally includes Secrets (keys, tokens, passwords) in the backup. A warning explains the risk, so only enable it when you actually need it.
- 1. Input general information — Backup name (required): pre-filled as
-
Select Create backup.
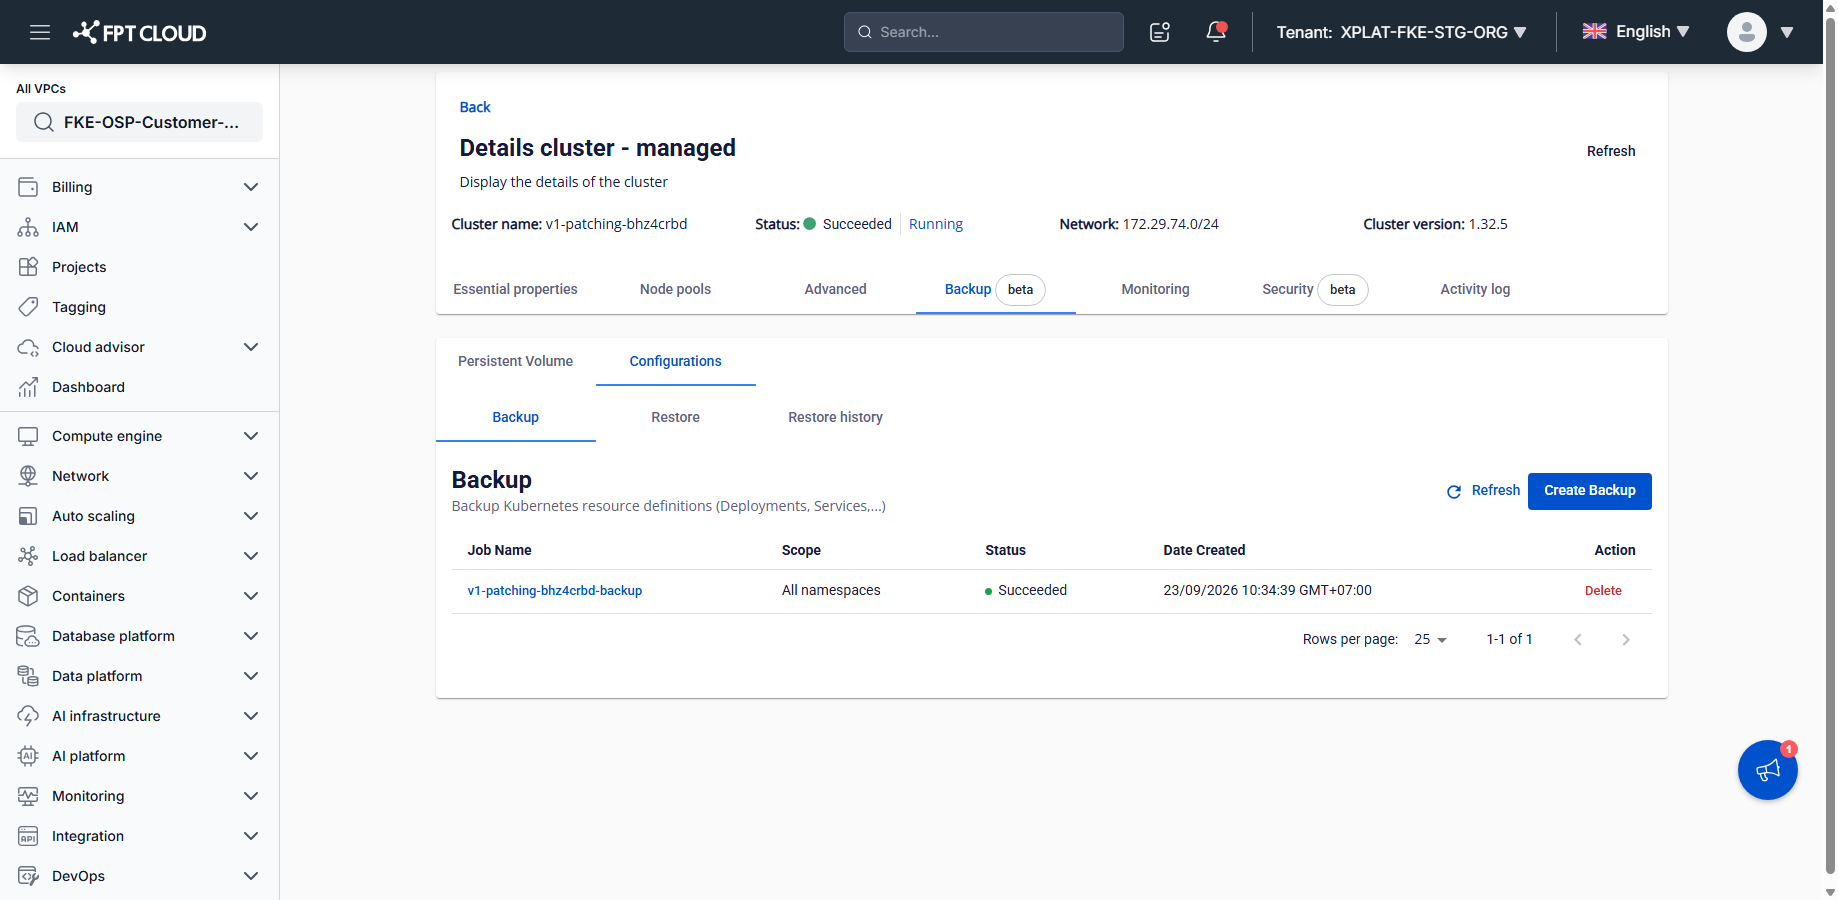
The Backups list shows the new backup, with status In Progress while it runs and Succeeded or Failed once it completes.
Restore from a backup
-
Open a backup's details, then select Restore from this backup — or go directly to the Restore sub-tab.
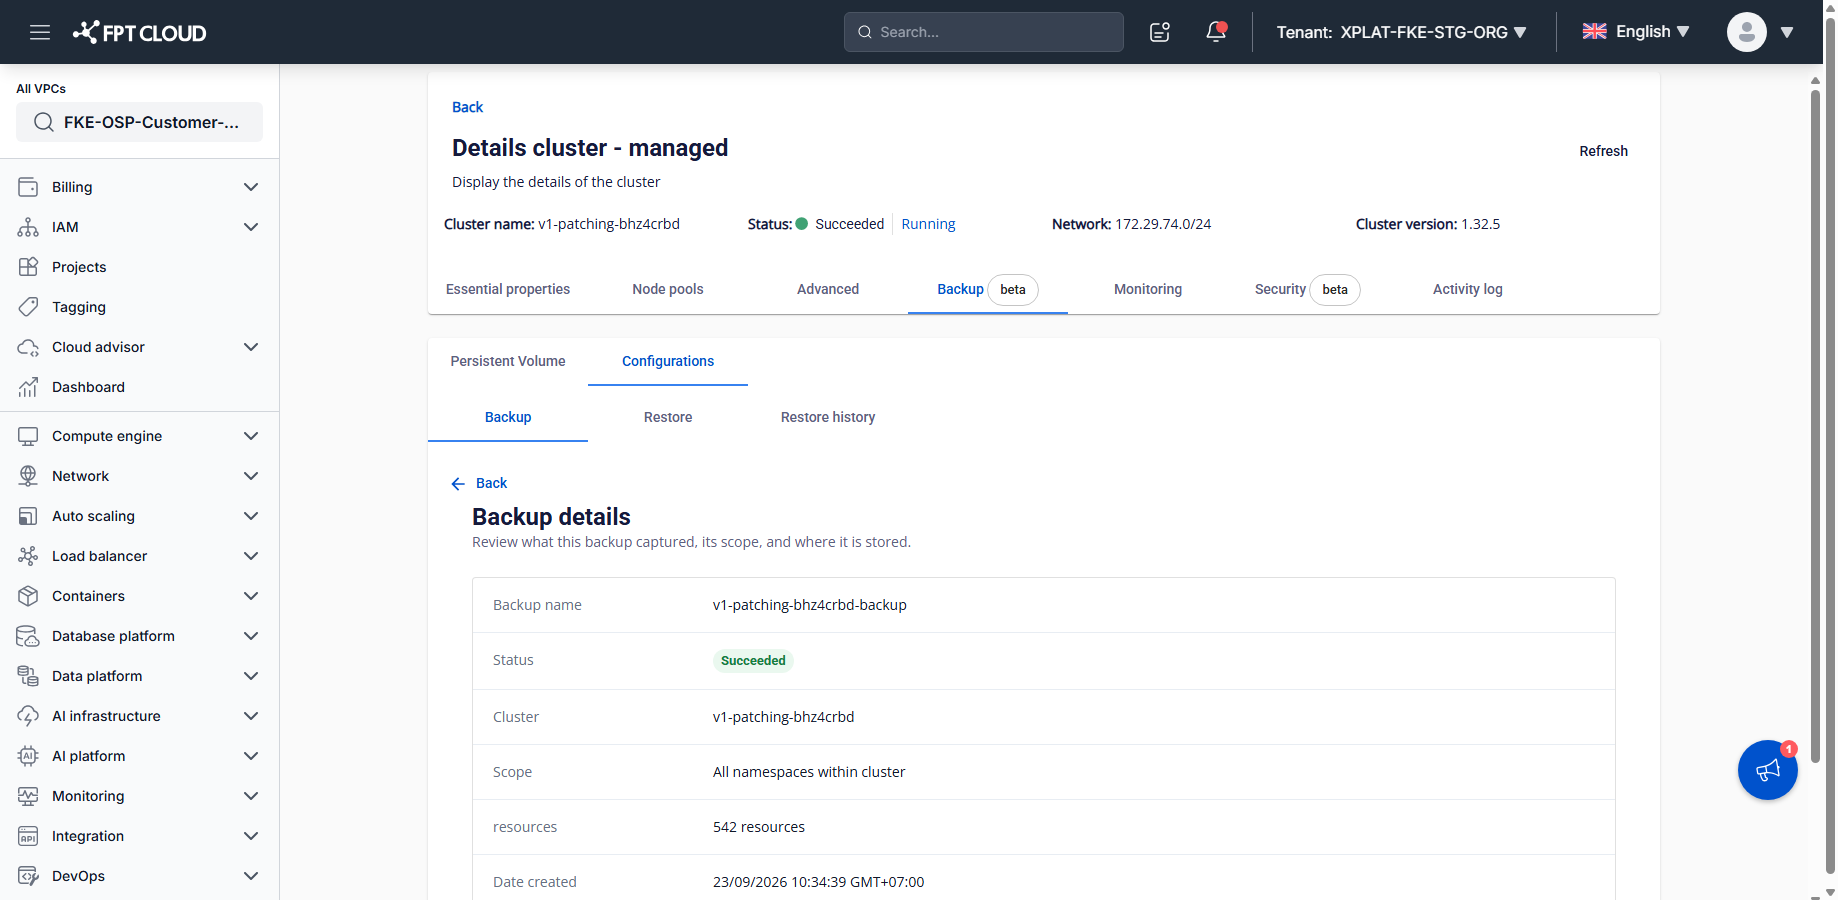
Selecting a backup's name (Job Name) from the Backups list opens this details panel, showing its name, status, cluster, scope, resource count, creation date, and which resource types it captured.
-
Fill in the restore details.
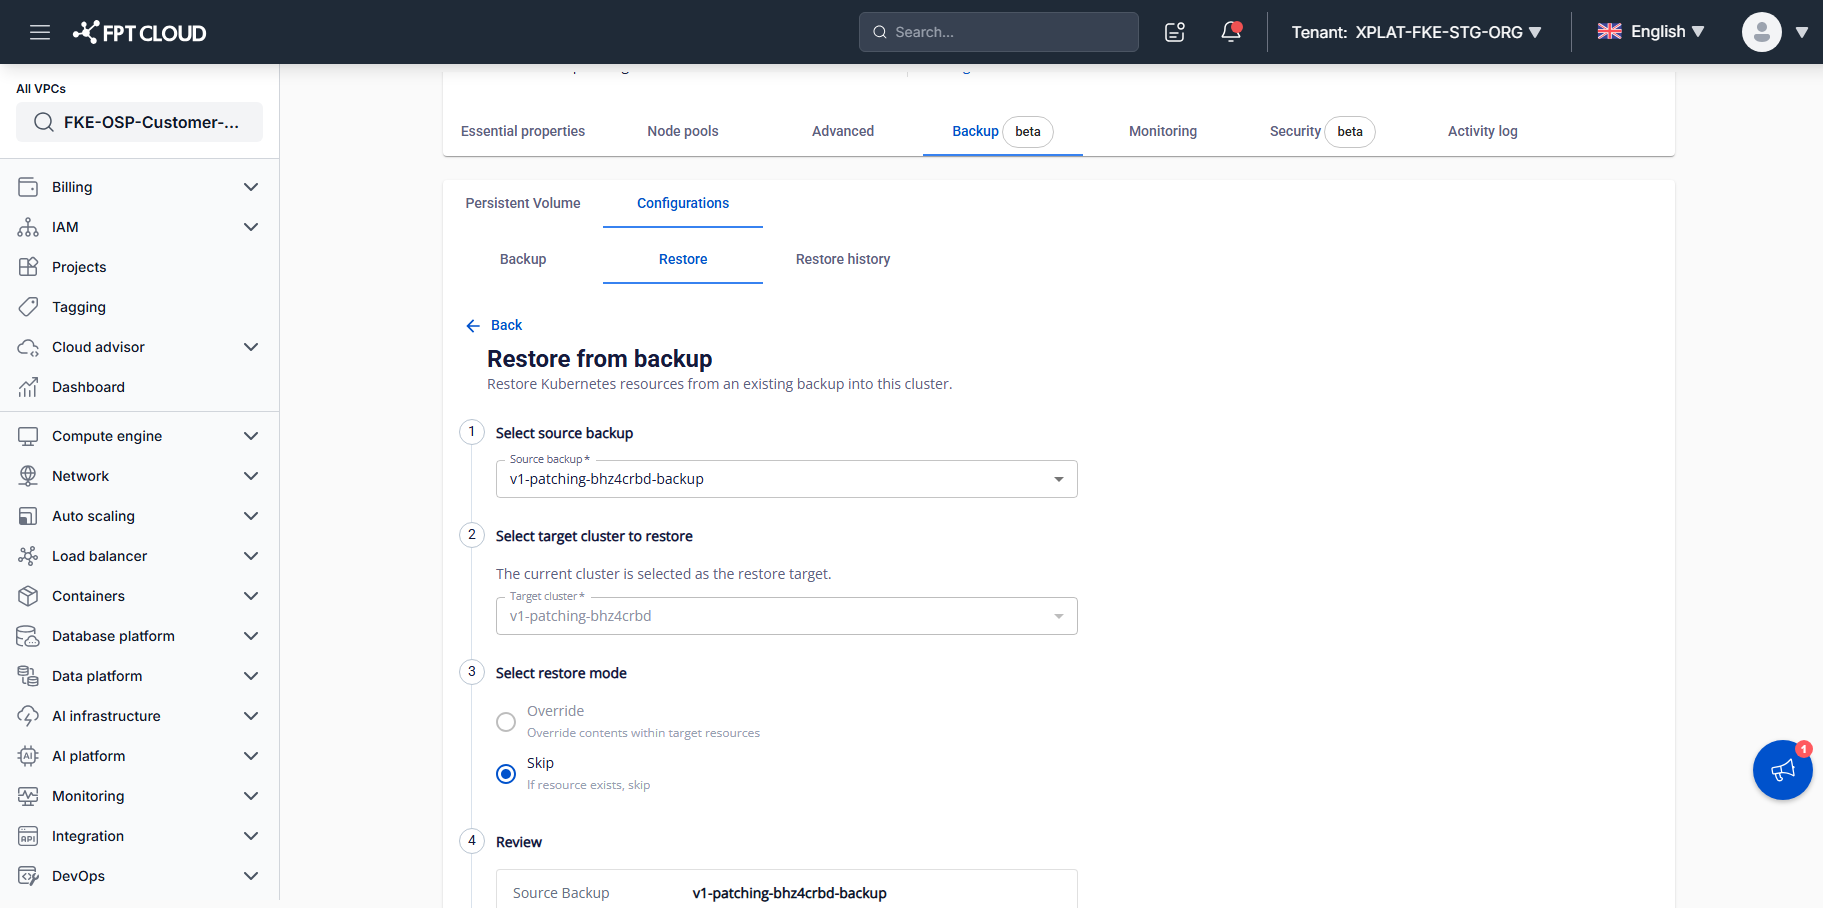
- 1. Select source backup — pre-filled if you started from a specific backup; otherwise choose one from the dropdown.
- 2. Select target cluster to restore — locked to the current cluster in this beta ("The current cluster is selected as the restore target.").
- 3. Select restore mode — Skip (if a resource already exists on the target, leave it unchanged) is the only mode currently available and is selected by default. Override (replace existing resources with the backup version) is shown but disabled in this beta.
- 4. Review: a read-only summary of the source backup, target cluster, restore scope, and conflict policy. Check it one last time before you select Restore.
-
Select Restore from backup.
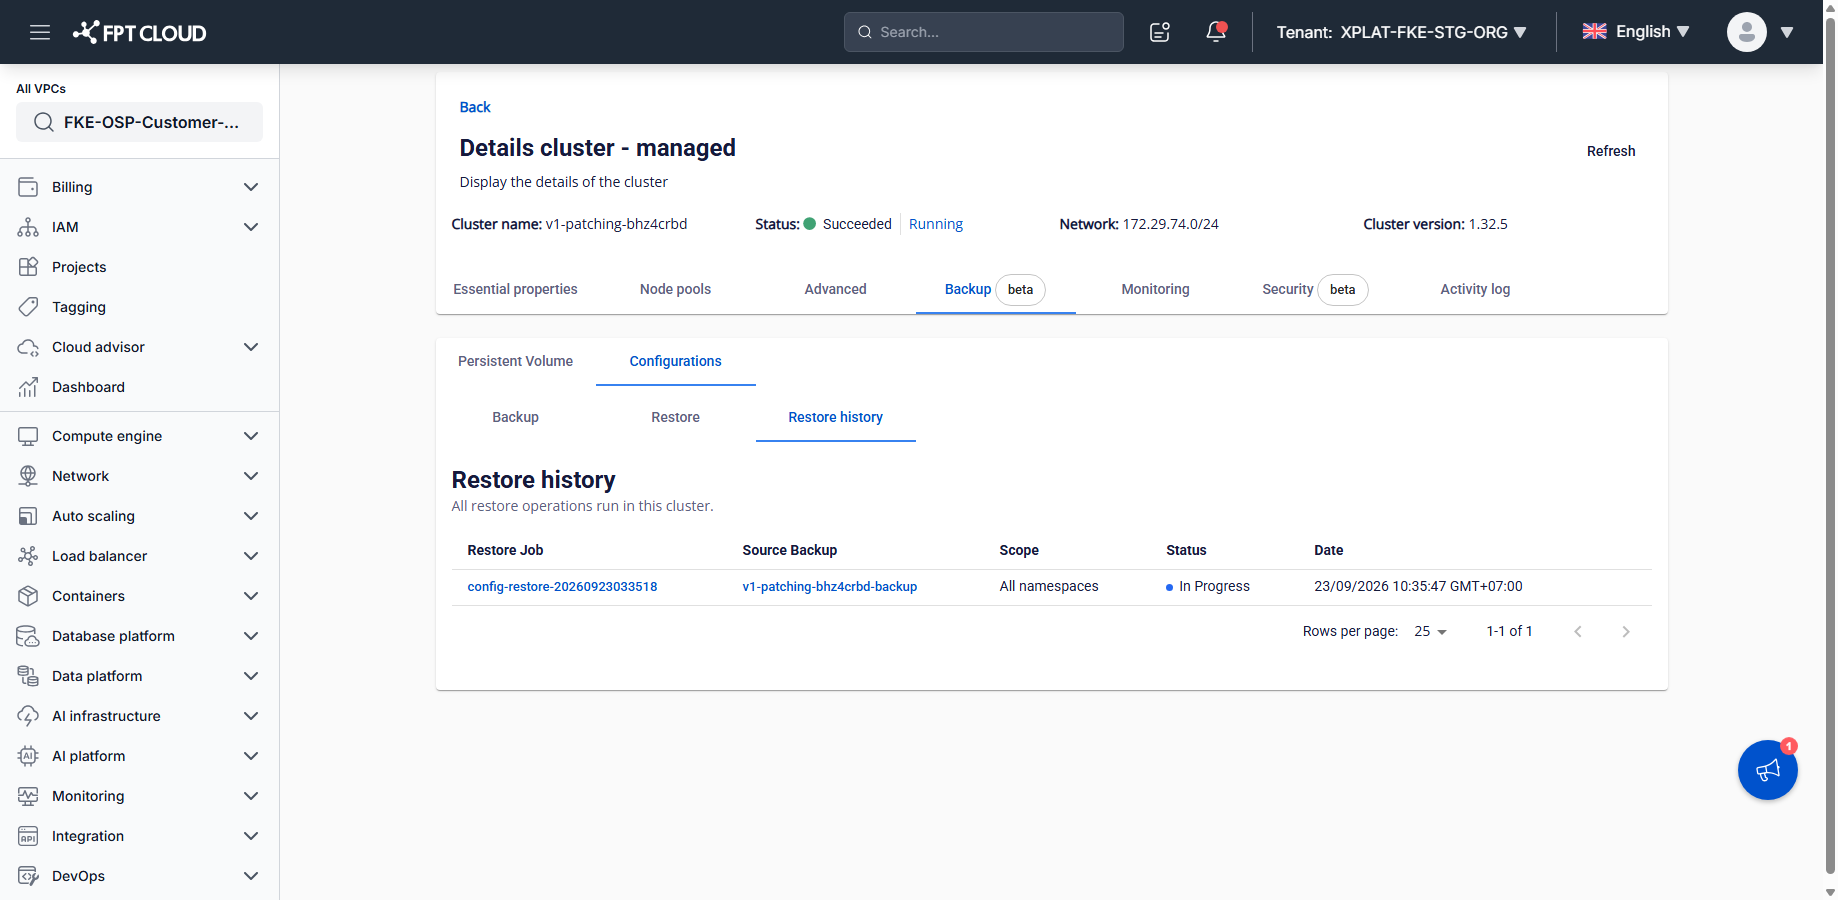
You're taken to the Restore history sub-tab, where the new restore job appears with status In Progress, then Succeeded or Failed.
-
Review the result.
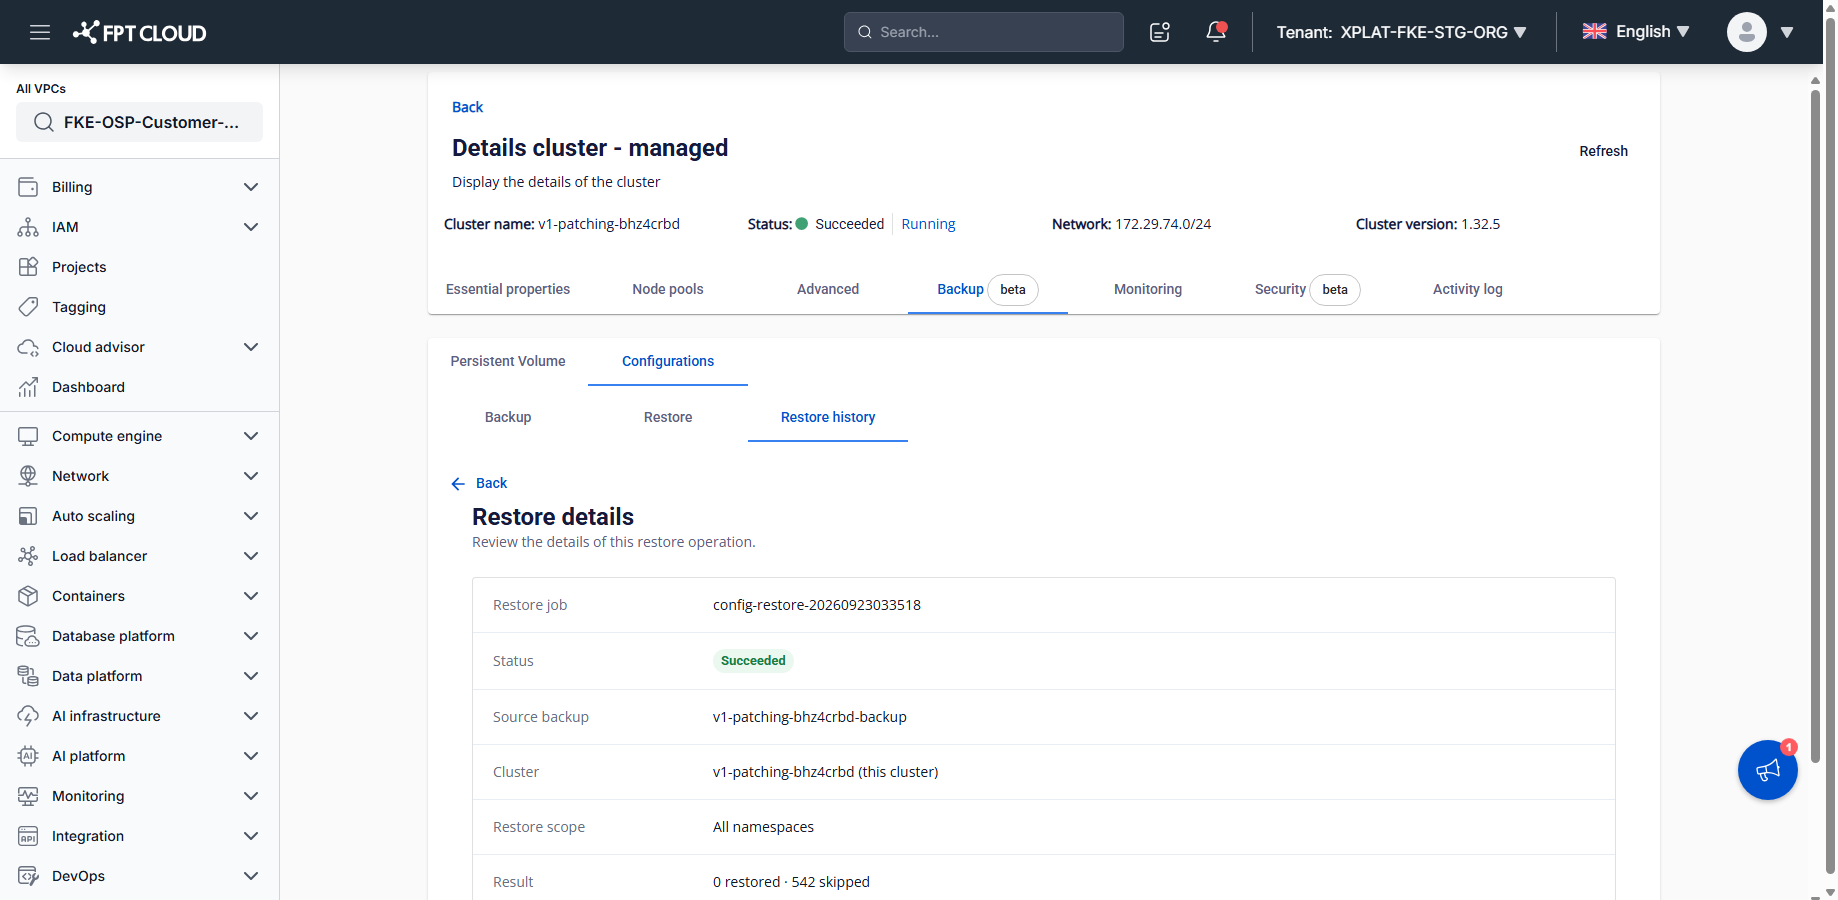
Select the restore job's name to open its details: source backup, target cluster, restore scope, a Result line with the count of resources restored and skipped (and failed, if any), and the date. With the default Skip mode, resources that already exist on the cluster count as skipped, not restored — this is expected, not an error.
View restore history
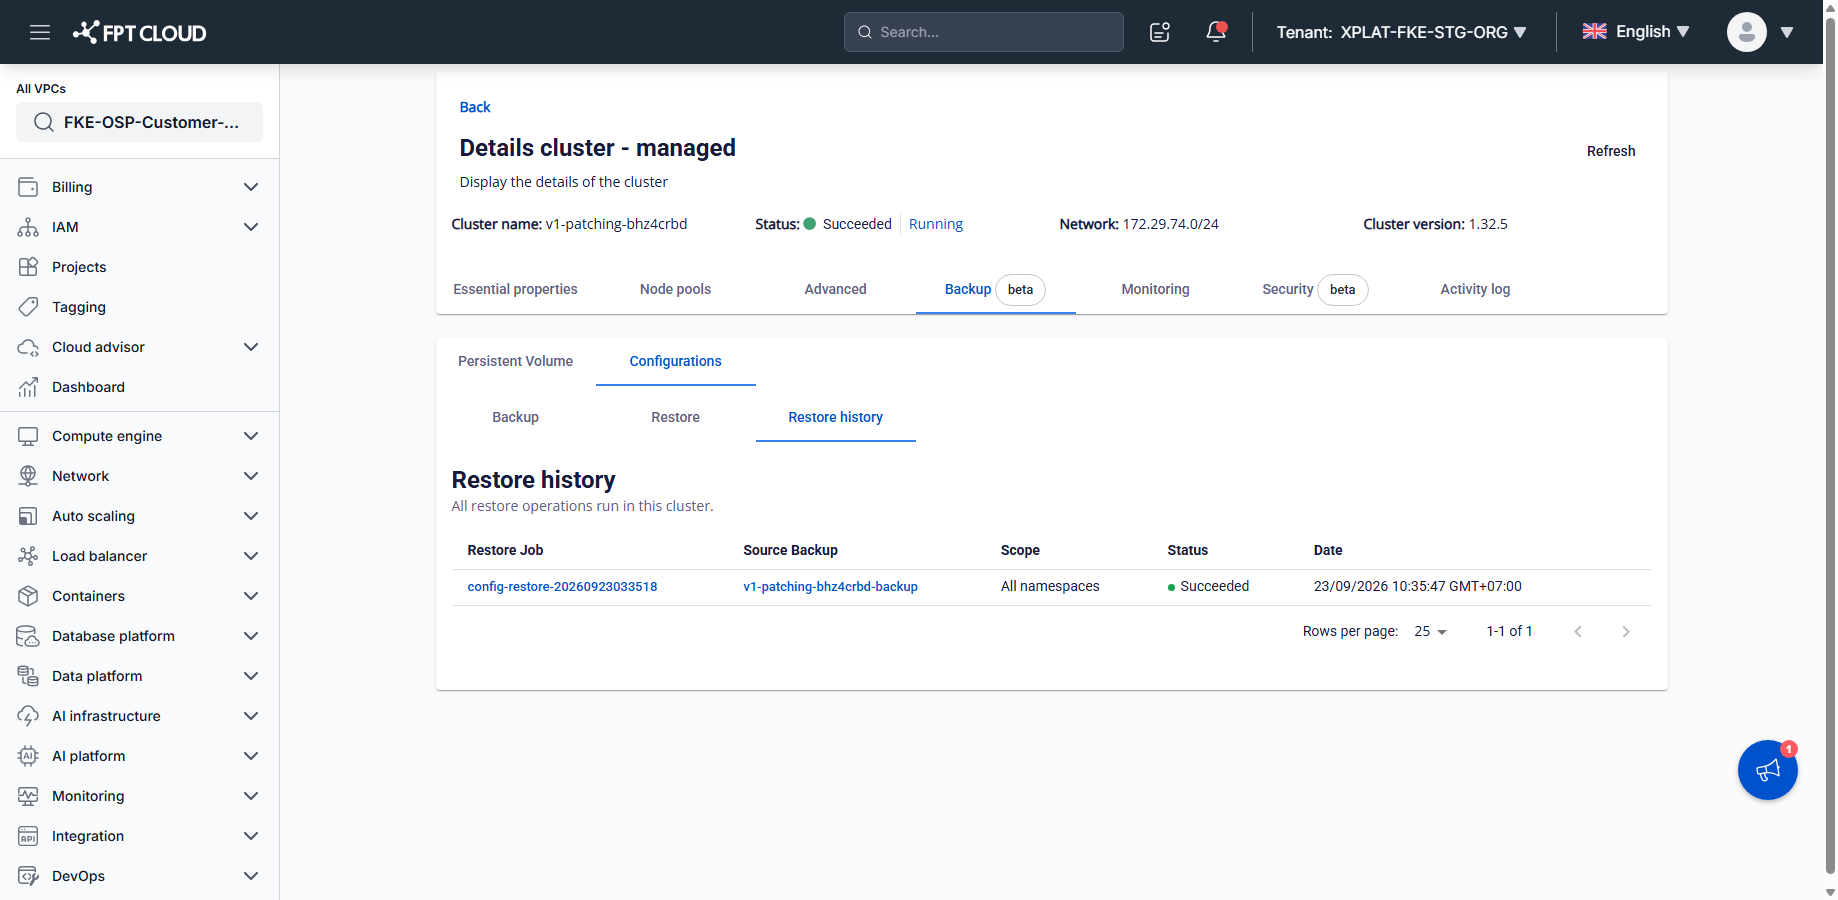
Open the Restore history sub-tab under Backup → Configurations. Each row shows the restore job name, source backup, scope, status (Succeeded/Failed/In Progress), and date. Select a row to see the read-only details of that restore.
Interface reference
Backup status
| Status | Meaning |
|---|---|
| In Progress | Backup running |
| Succeeded | Backup completed — can be used to restore |
| Failed | Backup failed |
Actions available by backup status
| Status | Restore | Delete |
|---|---|---|
| In Progress | Not available | Not available |
| Succeeded | Available | Available (deletes immediately, no confirmation) |
| Failed | Not available | Available (deletes immediately, no confirmation) |
Selecting Delete removes the backup immediately with no confirmation dialog — double-check before you select it.
Common issues
| Message / situation | Cause | Fix |
|---|---|---|
| Can't select a different target cluster on the restore form | Restoring into a different cluster isn't available yet in this beta | Restore into the same cluster the backup came from; watch for cross-cluster restore in a future release |
| Override mode can't be selected on the restore form | Override isn't available yet in this beta — only Skip works | Use Skip; if you need to replace existing resources, delete them manually first, then restore |
| Restore result shows resources "skipped" instead of "restored" | Restore mode is Skip (the only available mode), and those resources already existed on the cluster | This is expected behavior — the safe default. There's no Override option yet to replace them |
| No "Create Backup Schedule" or automatic scheduling option | Scheduled backup isn't implemented in the current version | Use on-demand backup for now; set a reminder for your team to back up on a regular cadence |
Tips
- Back up before any risky change (a large RBAC edit, bulk resource deletion, and similar) — it takes only seconds and can save significant time if something goes wrong.
- Test-restore periodically (quarterly is a reasonable cadence) — a backup that's never been restore-tested isn't guaranteed to work when you actually need it.
- Don't enable Secrets in a backup unless you need to — it reduces the risk of exposing sensitive information if the backup is accessed unexpectedly.
- Remember this backs up configuration, not data — use the Persistent Volume sub-tab under Backup for volume data.
- Cross-cluster restore isn't available yet — plan configuration migration between clusters manually until it ships.