Configure OIDC authentication for the cluster
Instead of sharing one admin kubeconfig (client certificate) across the whole team, you can connect a cluster to your company's existing Identity Provider (IdP) — Keycloak, Azure AD, Okta, or any standards-based OIDC provider. After you configure it, each team member logs in to the cluster with their own SSO account.
This feature only handles authentication (proving who a user is). You still configure authorization (what that user can do) yourself, using Kubernetes RBAC. See Log in to the cluster with SSO for RBAC examples. After you enable OIDC, a user who logs in successfully but has no RoleBinding gets 403 Forbidden on commands like kubectl get pods. This is expected behavior, not a configuration error.
The Cluster Admin who already holds the admin kubeconfig performs this configuration. Applying it does not restart the cluster or cause downtime, and you can update or remove the configuration at any time.
-
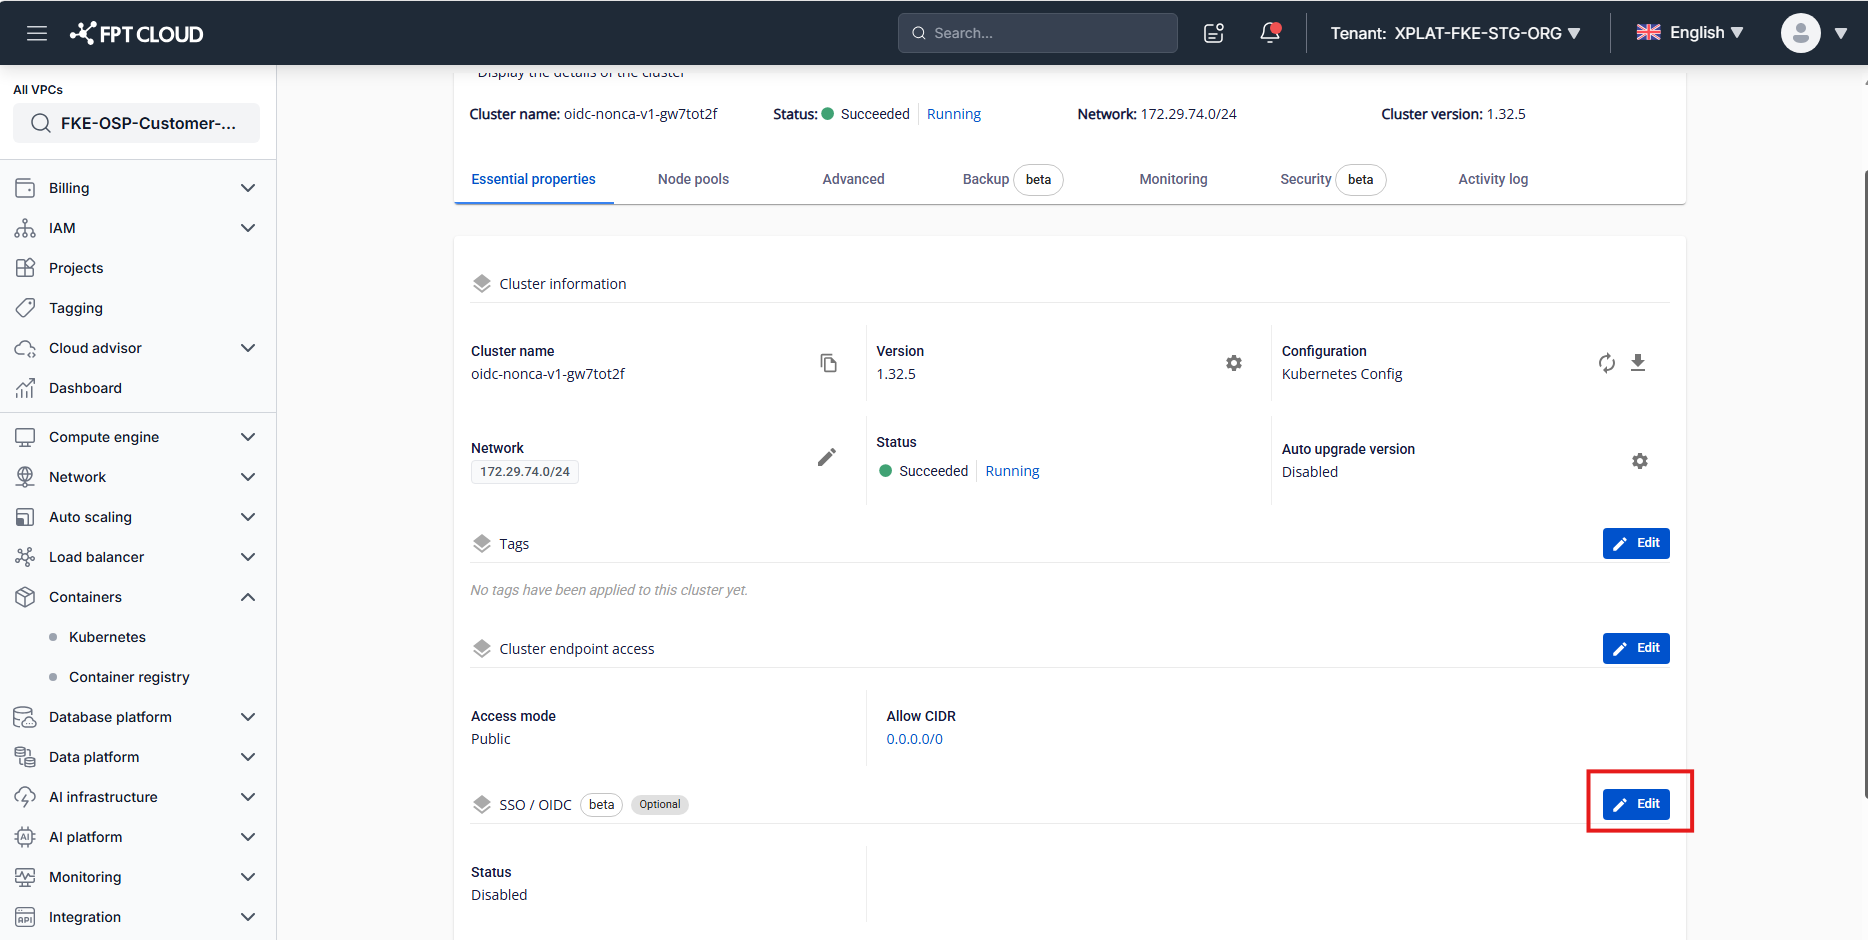
Open the SSO / OIDC section.
Go to Cluster Detail for the cluster you want to configure, scroll to the SSO / OIDC section under Cluster Endpoint Access (status shows Disabled until you configure it), then select Edit.
-
Enter the basic connection information.
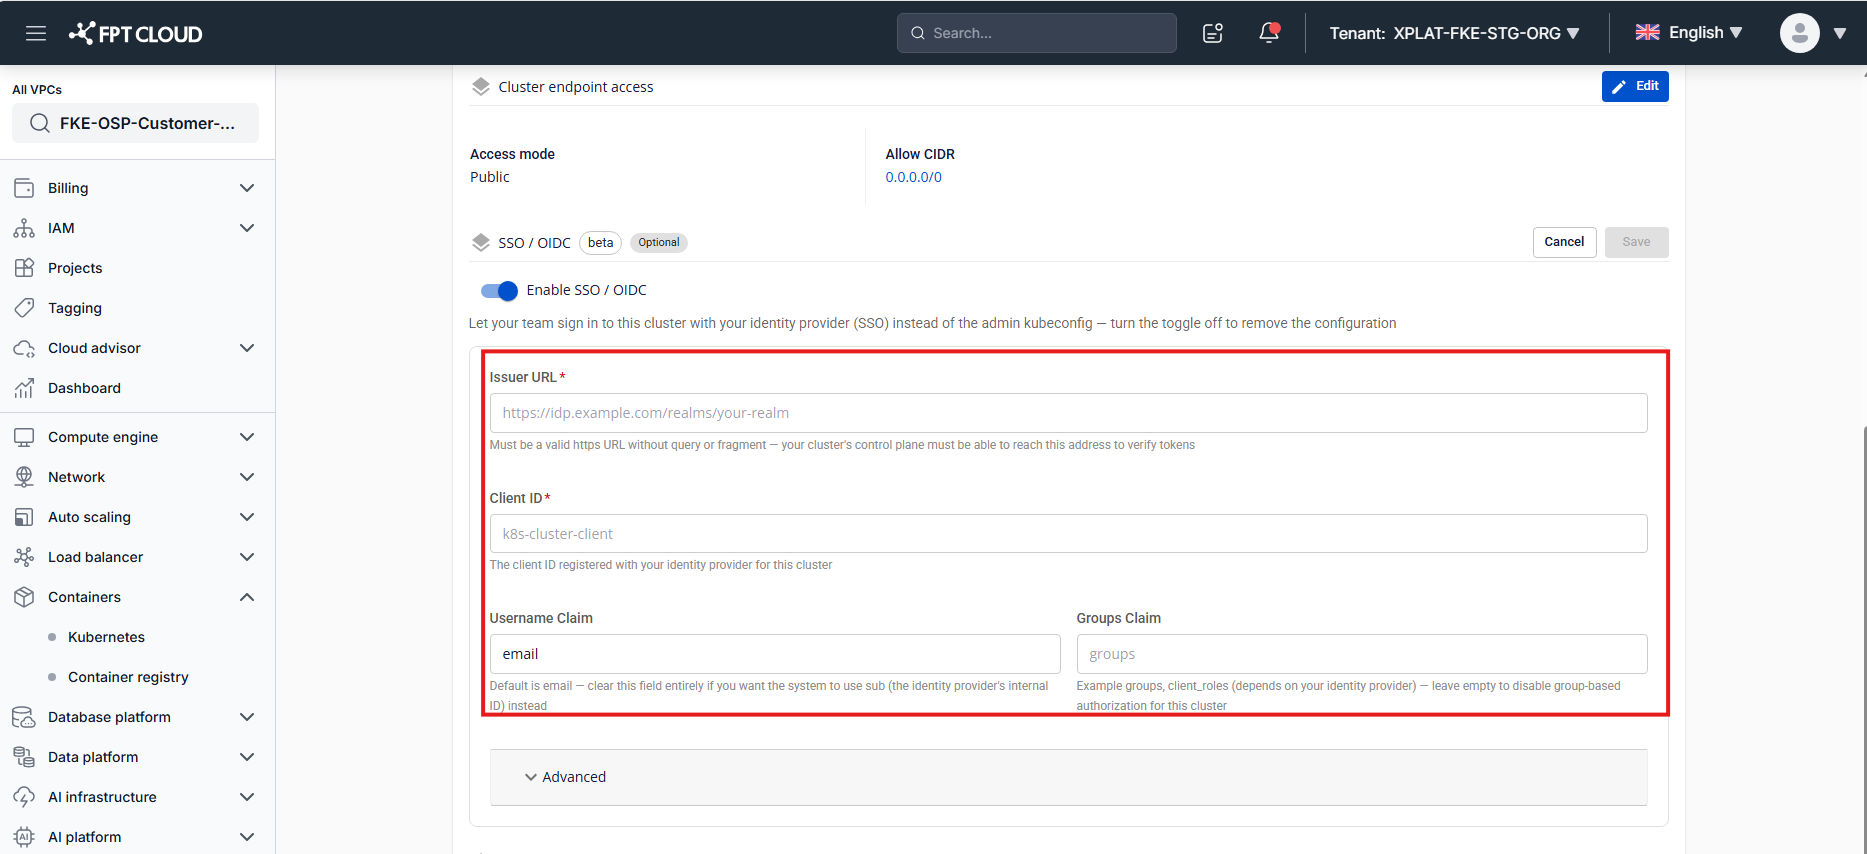
Selecting Edit opens the SSO / OIDC configuration form, with the Enable SSO / OIDC toggle OFF by default. Turn it ON (the fields below become active), then fill in:
- Issuer URL (required): the base address of your Identity Provider — where the cluster sends requests to verify login tokens. Enter the full URL starting with
https://, with no trailing?query string or#fragment. You usually copy this directly from your IdP's "Realm settings" or "OIDC discovery" page.- Keycloak:
https://keycloak.mycompany.com/realms/production - Azure AD:
https://login.microsoftonline.com/{tenant-id}/v2.0 - Okta:
https://mycompany.okta.com/oauth2/default
- Keycloak:
- Client ID (required): the identifier of the "application" (this cluster) registered on your IdP — for example in Keycloak, under Clients → Create client. Enter a single value; the system doesn't support multiple Client IDs for one cluster.
- Username Claim (optional): the field in the login token used as the Kubernetes username. This defaults to
email. Clear the field entirely if you want the system to fall back tosub(the IdP's internal ID, usually a hard-to-read UUID) instead. Pick a claim whose value stays stable over time — if a user's email changes, existing RBAC bindings for the old value stop matching. - Groups Claim (optional): the field in the token containing the list of groups a user belongs to, for assigning permissions by group instead of per user. Common values are
groups(Keycloak/Okta default) orclient_roles(Keycloak client roles). Leave empty to disable group-based authorization for this cluster.
 tip
The cluster's control plane needs a network path to the Issuer URL. If your IdP sits on an internal network, confirm the cluster can reach it before you save.
- Issuer URL (required): the base address of your Identity Provider — where the cluster sends requests to verify login tokens. Enter the full URL starting with
-
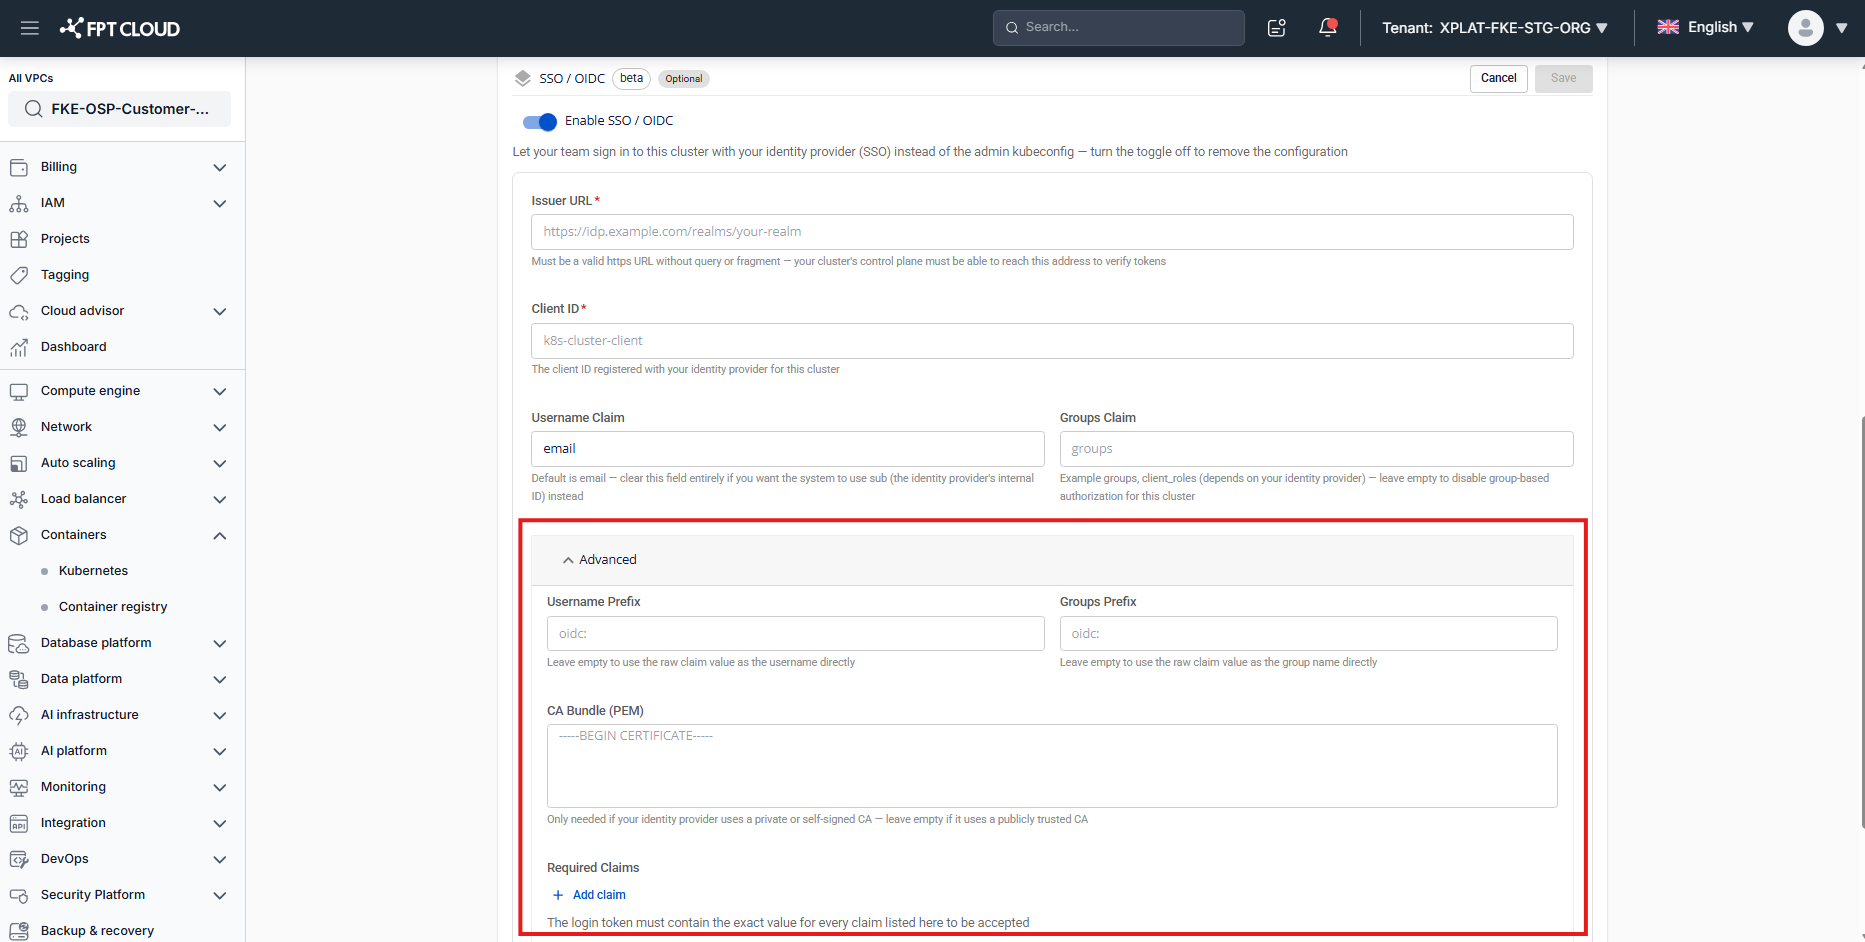
Configure advanced settings (optional).
The 4 fields below are optional and independent of each other — filling in one doesn't require filling in another.
- Username Prefix: a short string, usually ending in
:, automatically added in front of the Username Claim value when mapped into Kubernetes. For example,oidc:turnsemail = an.nguyen@mycompany.cominto the Kubernetes usernameoidc:an.nguyen@mycompany.com. This makes it easy to tell SSO users apart from system or other locally created users. It can't start withsystem:— that prefix is reserved for Kubernetes system groups. Leave empty and Kubernetes uses the raw claim value as the username, which risks colliding with another user. - Groups Prefix: the same idea as Username Prefix, applied to group names — for example
oidc:turns the groupplatform-adminsintooidc:platform-adminsin Kubernetes. The samesystem:restriction applies. - CA Bundle (PEM): the CA certificate the cluster uses to trust HTTPS connections to your IdP. Only needed when your IdP uses a self-signed certificate or an internal company CA — leave empty if it uses a public CA (Let's Encrypt, DigiCert, and similar). Paste the full contents of the
.pemor.crtfile, starting with-----BEGIN CERTIFICATE-----and ending with-----END CERTIFICATE-----, with a valid base64 body in between. - Required Claims: a list of conditions a login token must match to be accepted, even for a user who otherwise has a valid IdP account. Select + Add claim and fill in a Claim (the token field name) and Value (the value it must match) for each row — both fields are required per row, and you can't declare the same claim name on two different rows. For example, Claim
hdwith Valuemycompany.comonly allows Google Workspace accounts on themycompany.comdomain to log in, even if the IdP also serves personal Gmail accounts.
- Username Prefix: a short string, usually ending in
-
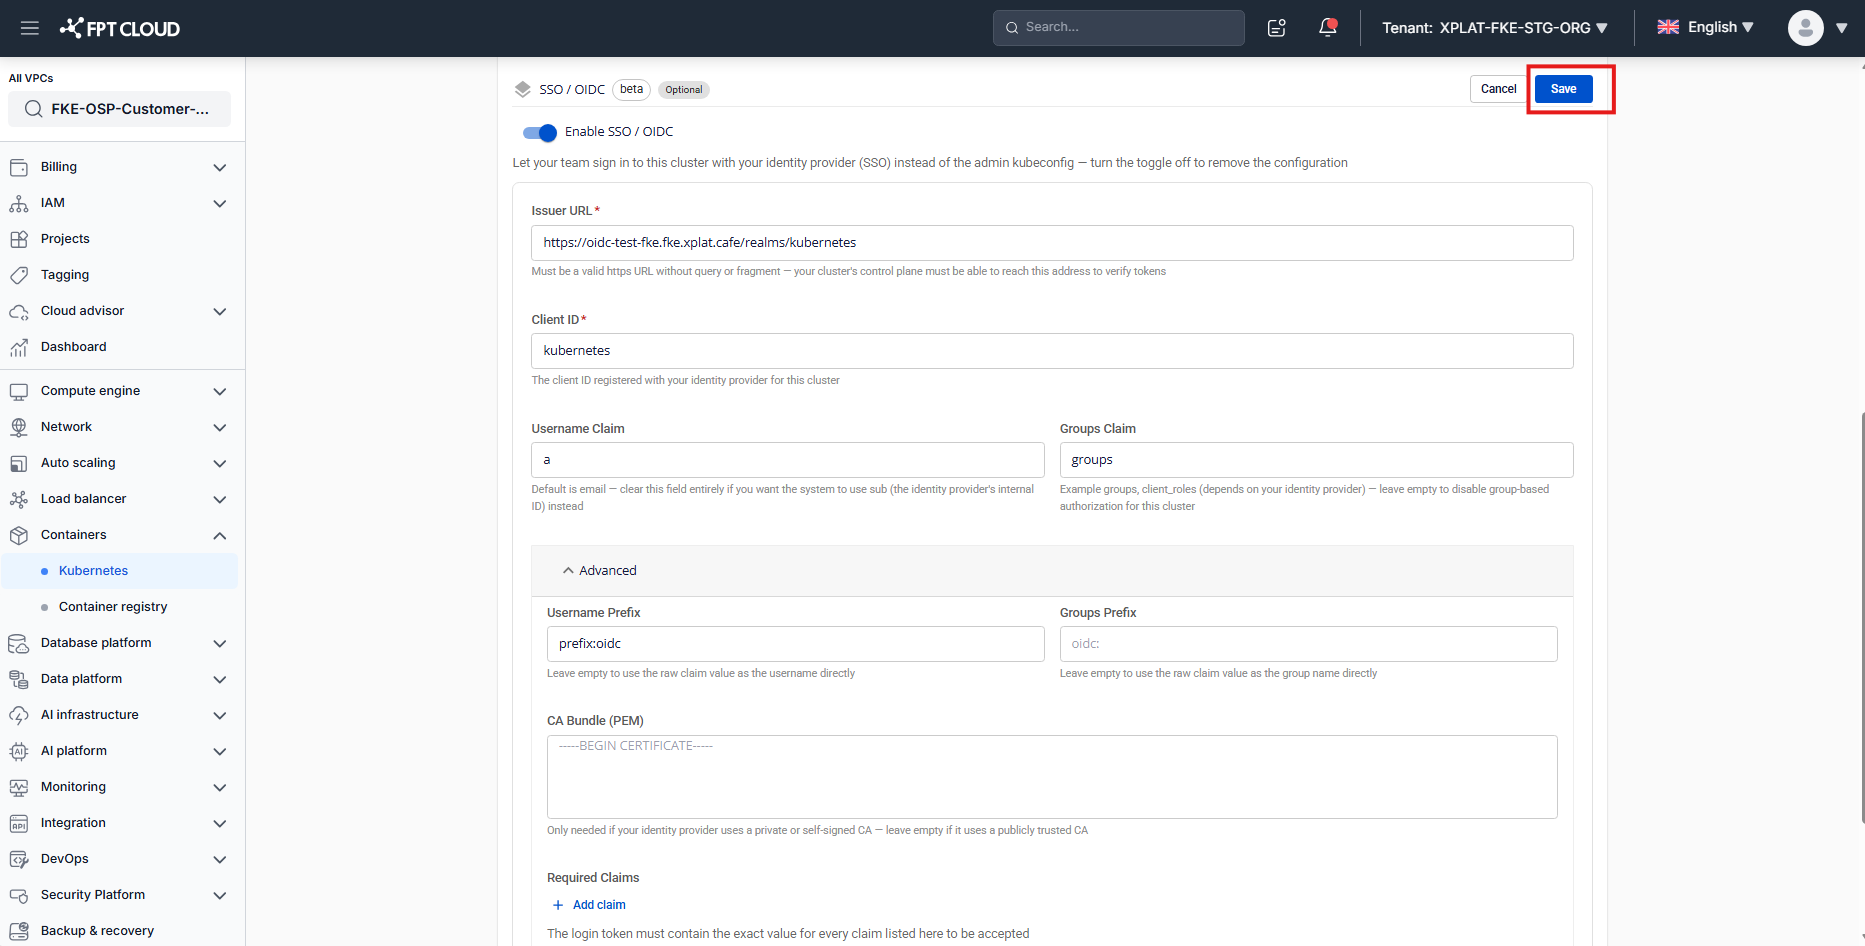
Select Save.
The cluster switches to Processing while the change is applied — track progress from the overall status at the top of the Cluster Detail page. Once the cluster returns to Succeeded/Running, the configuration is active.
Result
Your team can now get a kubeconfig that uses kubelogin/an OIDC plugin, and log in to the cluster with their own SSO account instead of the shared admin kubeconfig. You still need to create the matching RBAC bindings (RoleBinding/ClusterRoleBinding) for the resulting username or group (including any prefix you set above) using the admin kubeconfig. This step is not automated by the Portal.
See Log in to the cluster with SSO for the end-user setup steps and RBAC examples.
Update or remove the configuration
Select Edit on the SSO / OIDC section again at any time to change an existing configuration:
-
Update a value — change any field (for example, rotate the Issuer URL or Client ID after your IdP changes), then select Save.
-
Remove the configuration — turn the Enable SSO / OIDC toggle OFF, then select Save. A Remove SSO / OIDC configuration? dialog warns that all current OIDC login sessions stop working once the change applies (a few minutes) and that the admin kubeconfig (client certificate) isn't affected. Select Confirm removal to proceed, or Cancel to back out.
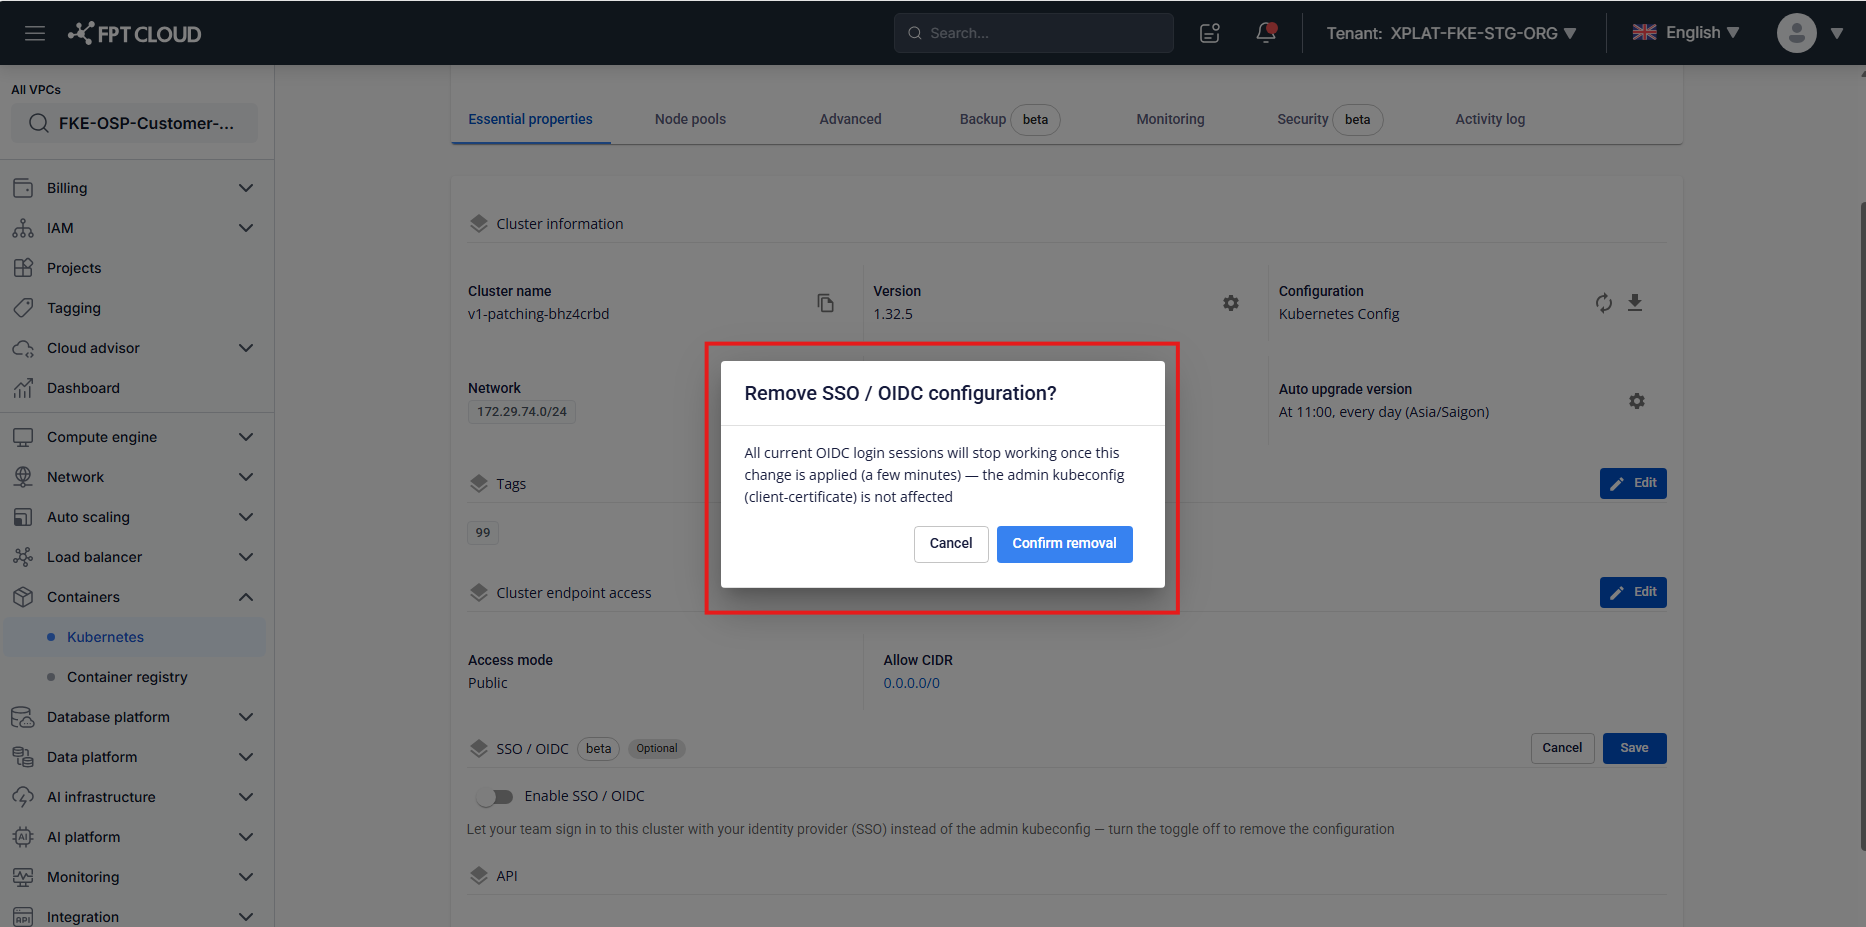
Removing the configuration doesn't affect the admin kubeconfig — you can always fall back to it.
Common issues
| Issue | Cause / fix |
|---|---|
| "This feature isn't available for your account yet" | Your account doesn't have the beta_user permission yet — contact the FKE team to register. |
| "This cluster is still processing" when you select Save or delete | The cluster is already applying another change — wait a few minutes and try again. |
| SSO login is rejected even though the configuration looks correct | Check that the RBAC binding matches the exact username/group (including any prefix) and that the token includes every Required Claim you configured. |
Can't enter a Prefix starting with system: | This is an intentional restriction — it prevents collisions with Kubernetes system groups, which could otherwise be used to escalate privileges. |
| A field (Issuer URL, CA Bundle, and similar) is invalid but no error message appears | Known limitation of the current beta — the field outlines in red without descriptive text. Double-check the required format: HTTPS with no query string or fragment for Issuer URL, valid PEM for CA Bundle. |
Tips
- Connect your IdP to a staging cluster first, before applying it to a production cluster the whole team depends on.
- Keep the admin kubeconfig as a fallback — it isn't affected by enabling or disabling OIDC.
- Use Required Claims to narrow who can log in — for example, only accept tokens with
hd = yourcompany.comto keep out accounts from outside your company on a shared IdP. - Set a clear Username Prefix (for example
oidc:) so SSO users are easy to tell apart from system users in logs and audits.