2.4 MySQL source connector
Use case: creating a connector where Type is source and Database is MySQL
Pre-condition: CDC service status is healthy
The MySQL source connector uses MySQL's binary log to perform CDC. However, MySQL is configured to purge binlogs after a period of time. Therefore, when the MySQL connector is initialized, it will perform an initial consistent snapshot before starting to read from the binlogs, to ensure the data is consistent.
Supported MySQL topologies
1. Standalone: binlogs must be enabled beforehand. 2. Primary and replica: Supports reading binlogs from one of the servers (if binlog is enabled), but the connector can only detect changes on that server. 3. High available.
Configuring MySQL
1. Create a MySQL user:
CREATE USER '<USERNAME>'@'%' IDENTIFIED BY '<PASSWORD>';
2. The MySQL source connector requires the following permissions
SHOW DATABASES: GLOBAL PRIVILEGES
SELECT: DATABASES PRIVILEGES
RELOAD: GLOBAL PRIVILEGES
REPLICATION SLAVE: GLOBAL PRIVILEGES
REPLICATION CLIENT: GLOBAL PRIVILEGES
Add permissions on the entire Database:
GRANT SELECT, RELOAD, SHOW DATABASES, REPLICATION SLAVE, REPLICATION CLIENT ON *.* TO '<USERNAME>'@'%';
 FLUSH PRIVILEGES;
Or on a specific database:
GRANT SHOW DATABSASES, RELOAD, REPLICATION SLAVE, REPLICATION CLIENT ON *.* TO '<USERNAME>'@'%';
 GRANT SELECT ON <DATABASE-NAME>.* TO '<USERNAME>'@'%';
 FLUSH PRIVILEGES;
3. Enable binlog:
For FPTCloud's service, you do not need to perform these tasks.
- Check whether binlog is already enabled:
- for MySQL 5.x
SELECT variable_value as "BINARY LOGGING STATUS (log-bin) ::"
 FROM information_schema.global_variables WHERE variable_name='log_bin';
- for MySQL 8.x
SELECT variable_value as "BINARY LOGGING STATUS (log-bin) ::"
 FROM performance_schema.global_variables WHERE variable_name='log_bin';
- Or:
SHOW GLOBAL VARIABLES LIKE "log_bin";
- If log_bin has the value OFF, change this value in the configuration file:
server-id = <CHANGE_ME> #result of query SHOW VARIABLES LIKE "server_id";
 log_bin = mysql-bin
 binlog_format = ROW
 binlog_row_image = FULL
 binlog_expire_logs_seconds = 864000
- Or:
SET @@global.binlog_format="ROW";
 SET @@global.binlog_row_image="FULL";
 SET @@global.binlog_expire_logs_seconds=864000;
4. Enable GTIDs:
For FPTCloud's service, you do not need to perform these tasks.
- Check whether gtid_mode is already enabled
SHOW GLOBAL VARIABLES LIKE "gtid_mode";
- Check whether enforce_gtid_consistency is already enabled
SHOW GLOBAL VARIABLES LIKE "enforce_gtid_consistency";
- If both gtid_mode and enforce_gtid_consistency have the value OFF, change this value in the configuration file:
gtid_mode = ON
 enforce_gtid_consistency = ON
- Or
SET @@global.gtid_mode="ON";
 SET @@global.enforce_gtid_consistency="ON";
5. Configure binlog_row_value_options to allow the connector to listen for UPDATE events:
For FPTCloud's service, you do not need to perform these tasks.
- Check the value of binlog_row_value_options
SHOW GLOBAL VARIABLES LIKE "binlog_row_value_options";
- Change the value of binlog_row_value_options to ""
SET @@global.binlog_row_value_options="" ;
Steps to create a connector
To create a connector, follow these steps:
Step 1: In the menu bar, select Data Platform > select Workspace Management > select Workspace name
Step 2: In the My services section, select CDC service
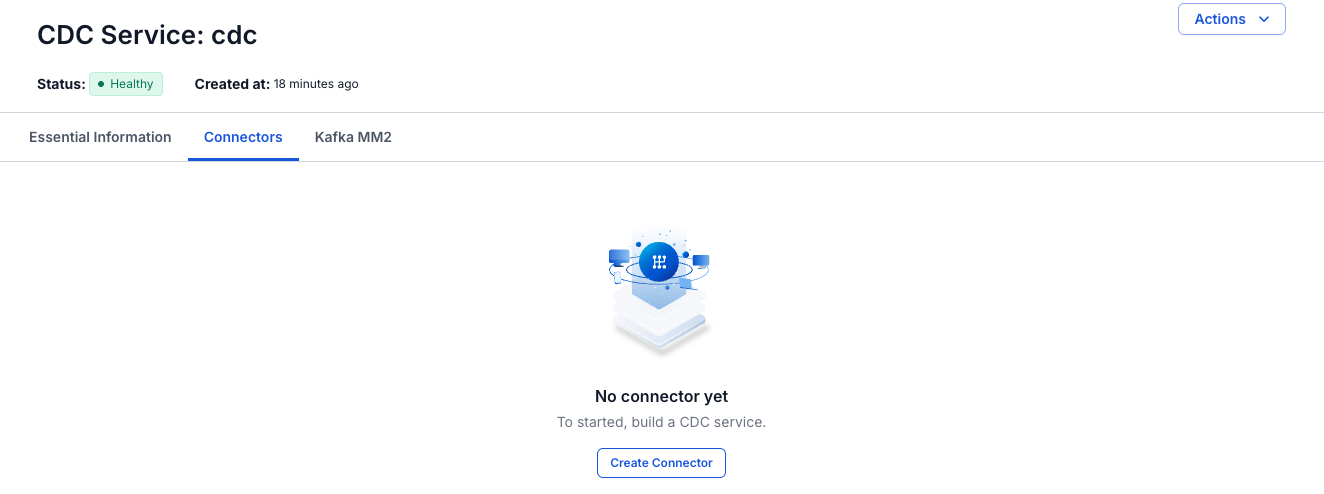
Step 3: On the CDC service detail screen > select the Connectors tab > click Create a connector
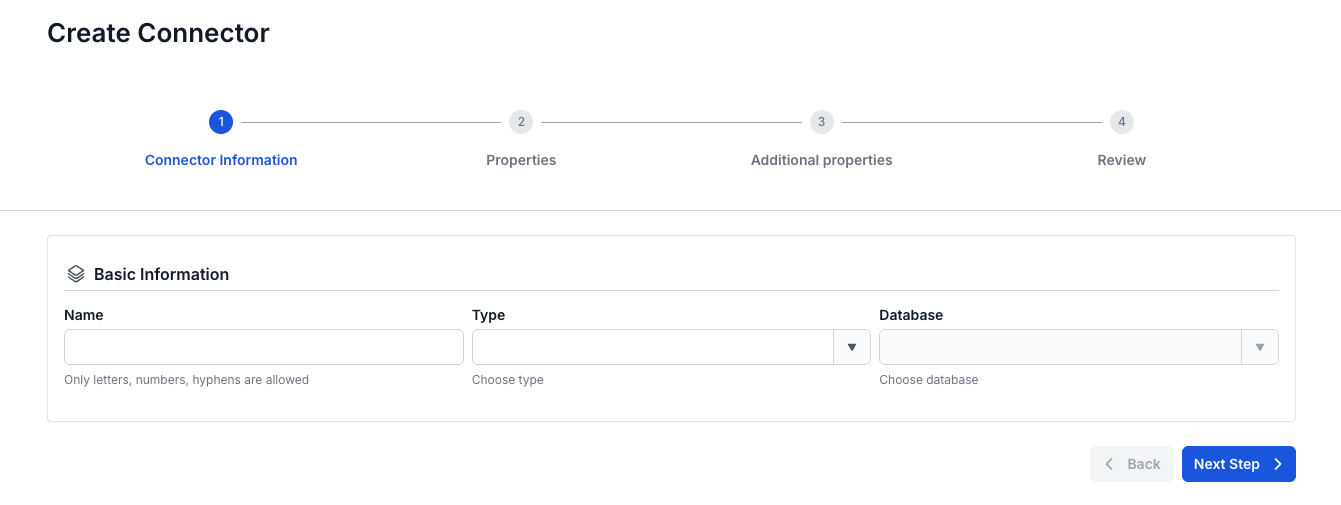
Step 4: Enter the information on the connector information screen:
- Name (required): connector name
Note: The connector name can contain lowercase letters a-z or digits 0-9. In particular, spaces are not allowed — you can replace spaces with "-".
- Type (required): select source
- Database (required): select MySQL
Step 5: Click Next to proceed to the Properties screen
Enter the Database information
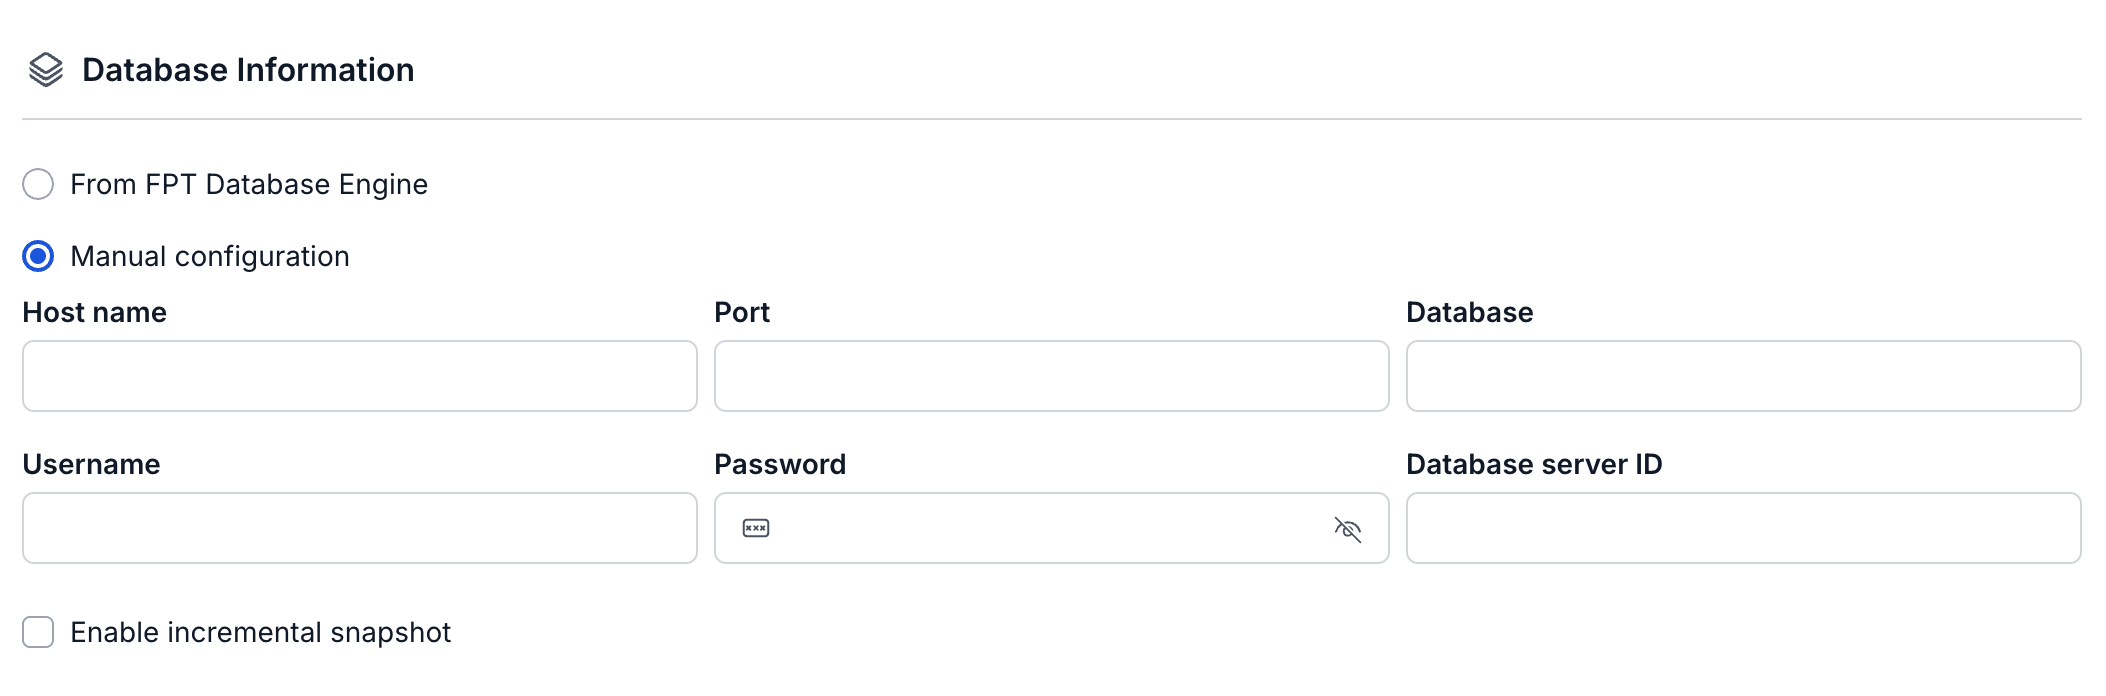
- If you select Manual configuration - fill in the following information:
- Host name (required): Hostname or IP of MySQL
- Port (required): MySQL server port, default:
6447. - Database name (required): The target database that the Connector will sink data into
- Username (required): Username used by the Connector
- Password (required): Password used by the Connector
- Database server ID (required): ID of the Database server Note: The Database server ID must be a number greater than 1000 and less than 9999.
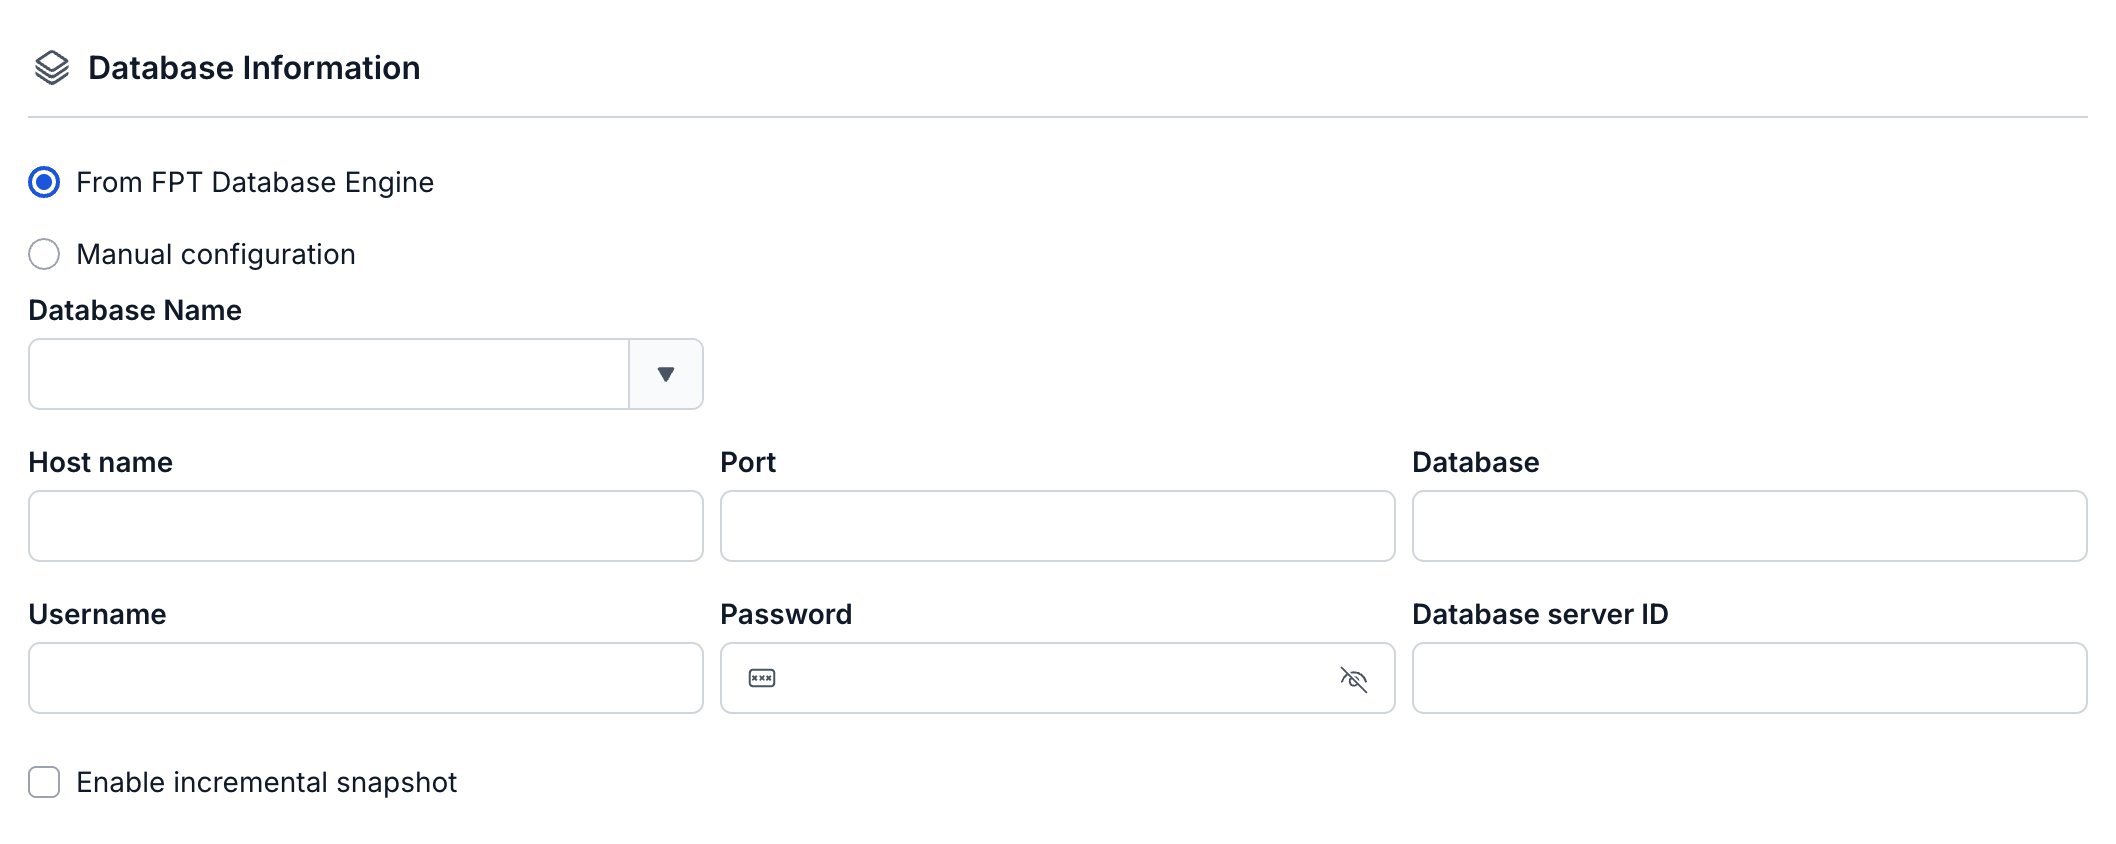
- If you select From Database Engine - fill in the following information:
- Database name (required): Database name
- Host name (required): Hostname or IP of MySQL
- Port (required): MySQL server port, default:
6447. - Database name (required): The target database that the Connector will sink data into
- Username (required): Username used by the Connector
- Password (required): Password used by the Connector
- Database server ID (required): ID of the Database server Note: The Database server ID must be a number greater than 1000 and less than 9999.
- Topic prefix (required): The list of topics the Connector will consume and sink data into the target database, separated by ","

- Enable incremental snapshot (optional): Checkbox to enable the incremental snapshot feature for the Connector
- Only displayed for source connectors: MySQL, MariaDB, PostgreSQL
- When this checkbox is checked and "Test connection" is clicked, the system will check:
- Whether the database has sufficient permissions to perform a snapshot (INSERT, CREATE TABLE permissions are required for PostgreSQL/MySQL)
- If the database lacks permissions, a detailed error message will be displayed
- If the database has sufficient permissions, "Test connection successfully" will be displayed
- After the Connector has been successfully created with this checkbox checked:
- The Connector will have incremental snapshot management functionality
- The List Connector screen will display a "Snapshot Status" column
- The following operations can be performed: Execute, Pause, Resume, Stop snapshot via the Actions menu
Click Test connection to verify the connection from the Workspace to the entered Database
Step 6: Click Next to proceed to the Additional Properties screen
Enter the following information:
-
Mode (required): The Connector's behavior; select one of the following modes:
- Initial (default): The Connector will snapshot all existing data in the tables, then continue to capture data changes on those tables
- Initial_only: The Connector will only snapshot all existing data in the tables, then will not listen for data change events on the tables
- Never: The Connector will not snapshot existing data in the tables, and will only listen for data change events on the tables

- Table (optional): the name of a table in the database connected in the previous screen
- Column (optional): the name of a data column you want to retrieve from the table

-
Heartbeat (optional): Configure the interval (in milliseconds) between heartbeat messages sent by the connector to maintain its running state and update the offset when there are no data changes from the source.
- Default value:
0 - Valid value range:
0-30000 - Only applies to the following Source Connectors: PostgreSQL, MariaDB, MySQL, and SQL Server.
- For PostgreSQL, you need to create the heartbeat table in the source database before using this feature.
- Examples:
0: No heartbeat is sent.1000: A heartbeat is sent every 1 second.5000: A heartbeat is sent every 5 seconds.
- Default value:

Step 7: Click Next to proceed to the Review screen
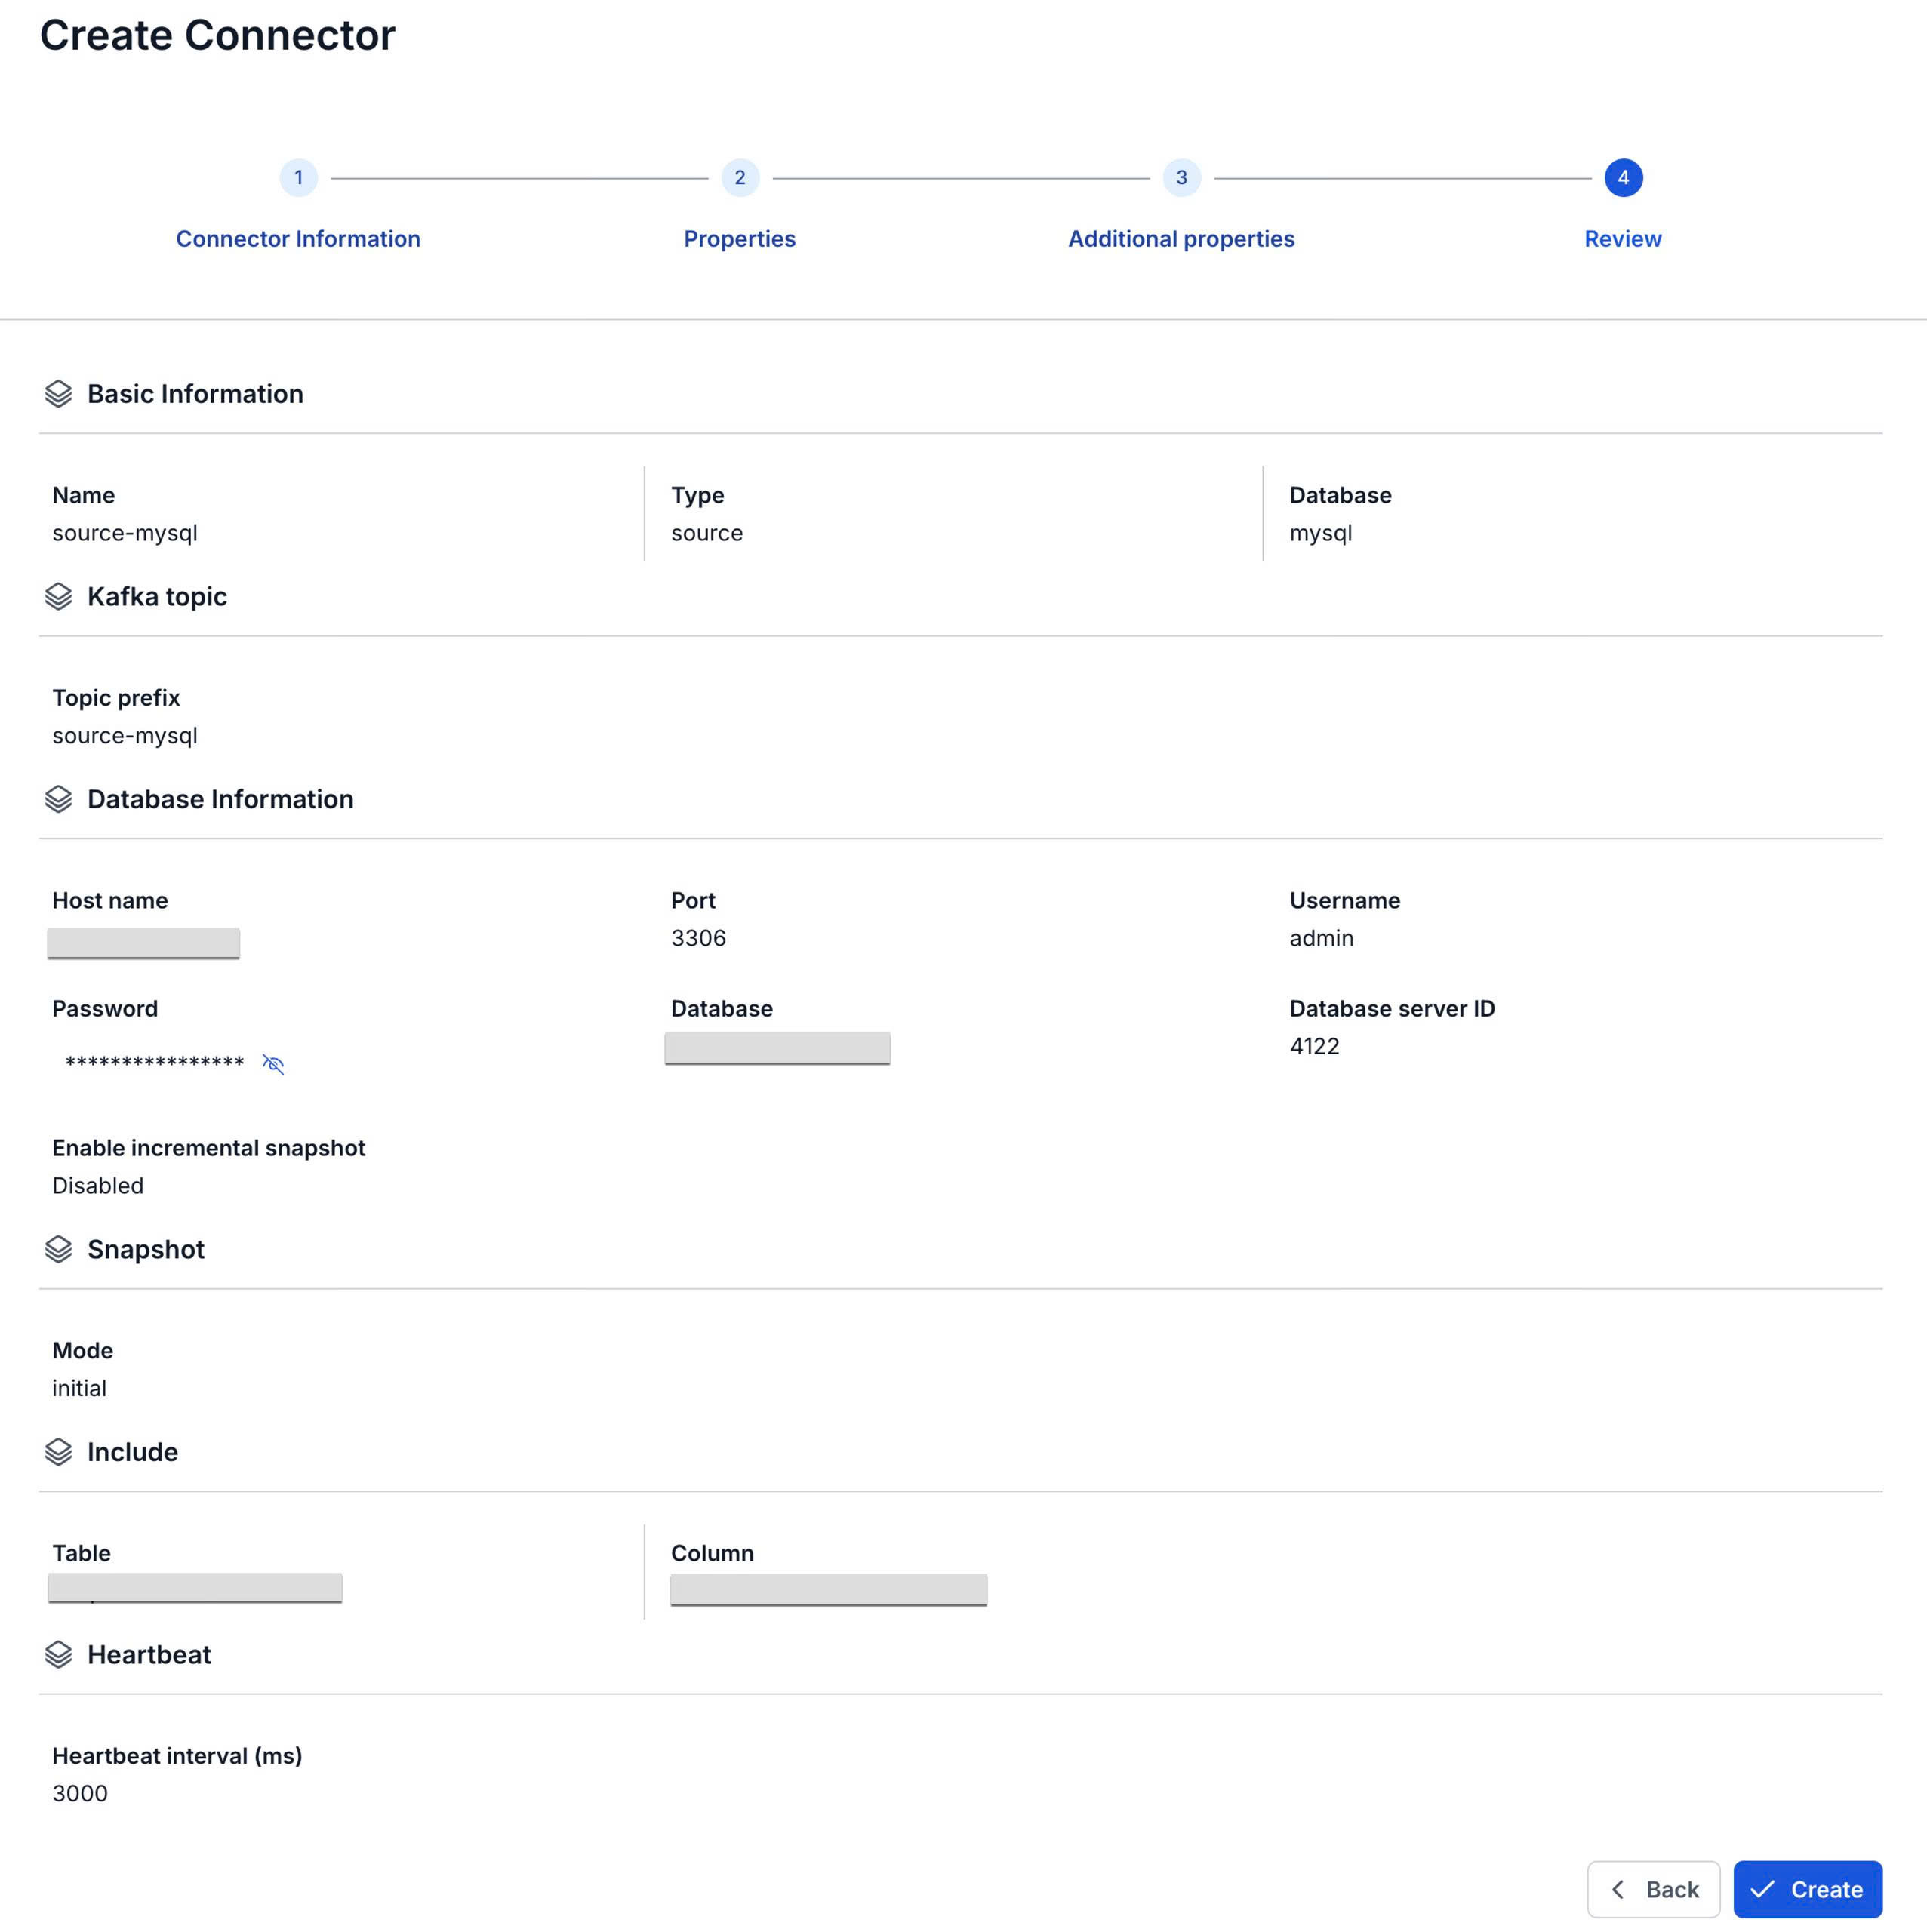
Step 8: Review the information, then click Create to finish creating the connector