2.9 PostgreSQL Sink Connector
Create a connector where Type is sink and Database is PostgreSQL
Pre-condition: CDC service status is healthy
Configuring PostgreSQL - Grant permissions on the schema
GRANT USAGE ON SCHEMA public TO username;
 GRANT CREATE ON SCHEMA public TO username;
Steps to create a connector:
Step 1: In the menu bar, select Data Platform > select Workspace Management > select Workspace name
Step 2: In the My services section, select CDC service
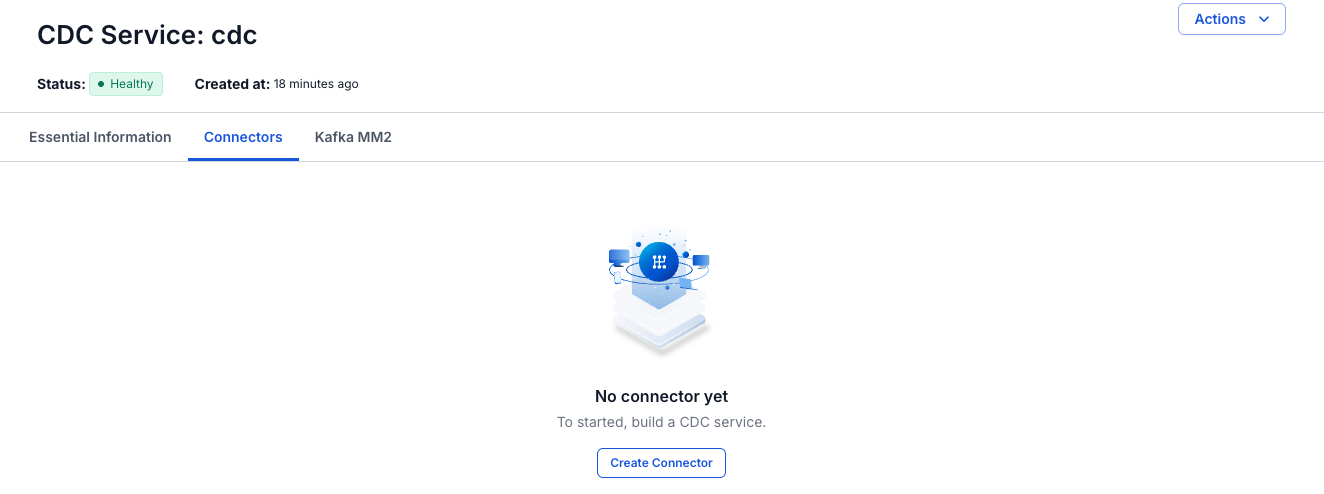
Step 3: On the CDC service detail screen > select the Connectors tab > click Create a connector
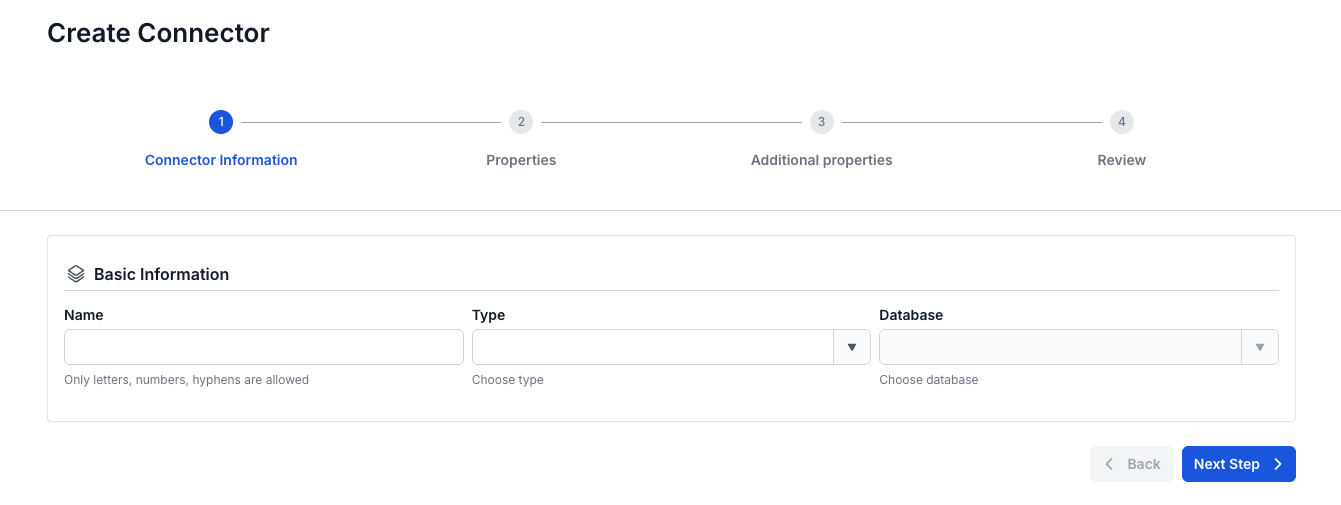
Step 4: Enter the information on the Connector Information screen:
- Name (required): connector name
Note: The connector name can contain lowercase letters a-z or digits 0-9. In particular, spaces are not allowed — you can replace spaces with "-".
- Type (required): select sink
- Database (required): select PostgreSQL
Step 5. Click Next to proceed to the Properties screen
Enter the information on the Properties screen
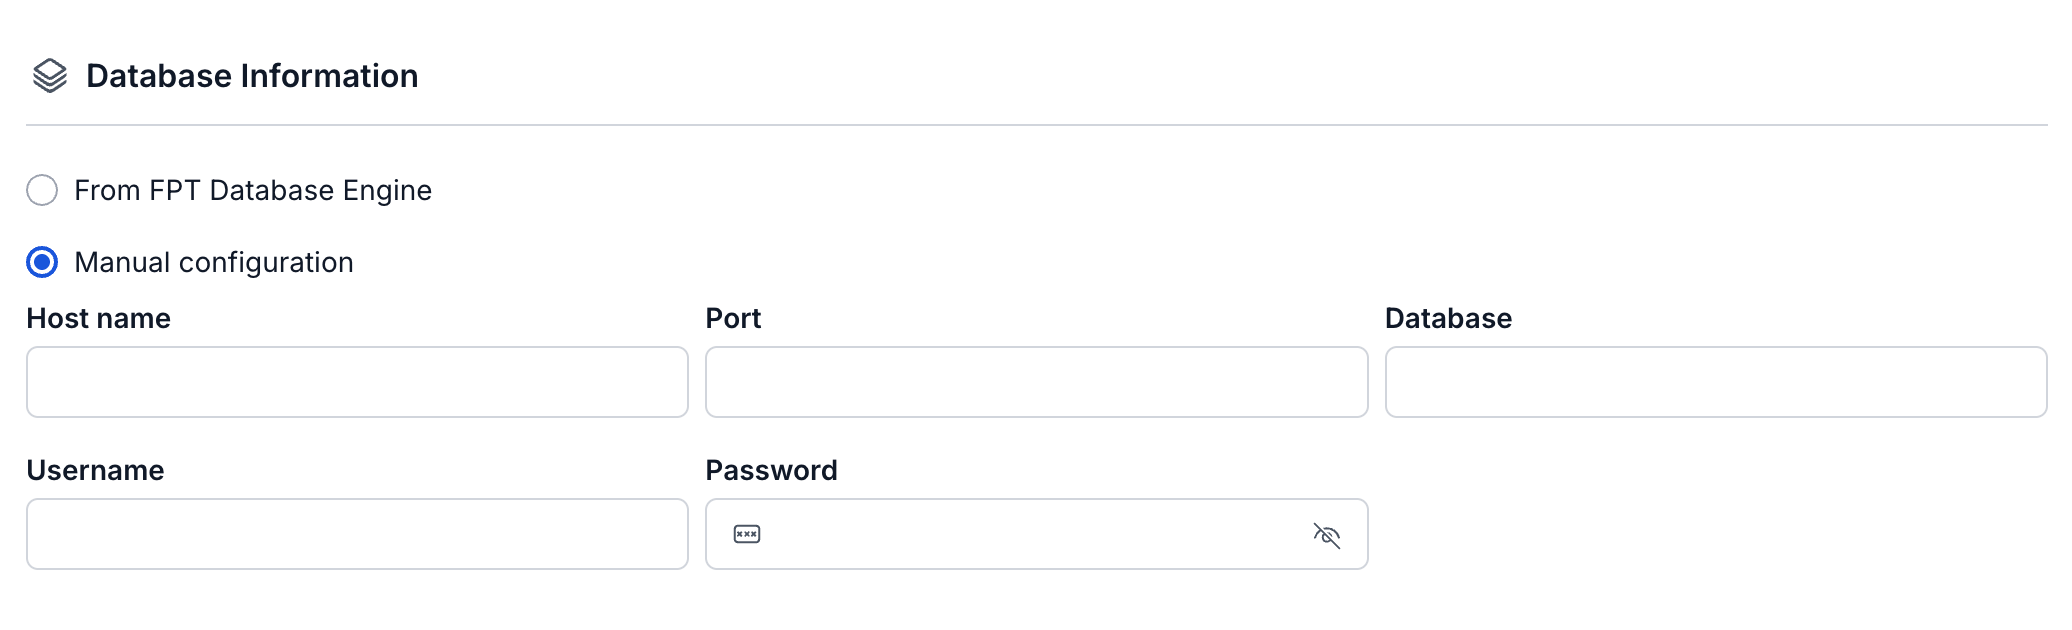
- If you select Manual configuration - fill in the following information:
- Database name (required): select the database
- Host Name (required): Hostname or IP of PostgreSQL
- Port ( required): PostgreSQL server port, default:
5432. - Database name (required): The target database that the Connector will sink data into
- Username (required): Username used by the Connector
- Password (required): Password used by the Connector
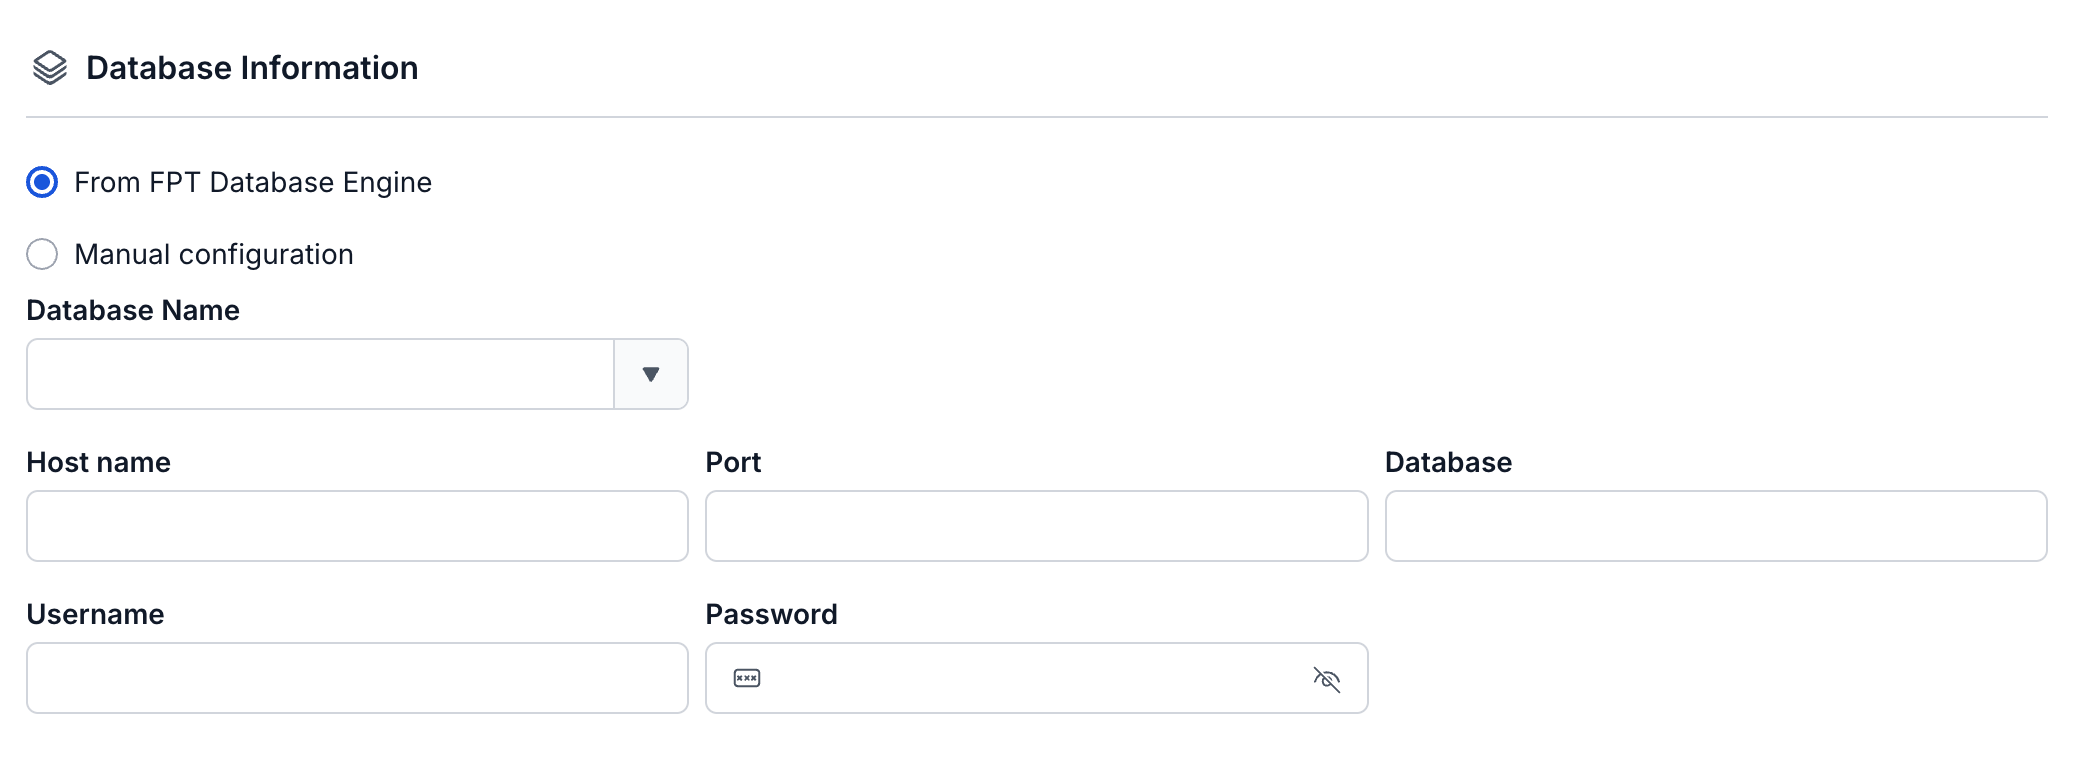
- If you select From Database Engine - fill in the following information:
- Host Name (required): Hostname or IP of PostgreSQL
- Port (required): PostgreSQL server port, default:
5432. - Database name (required): The target database that the Connector will sink data into
- Username (required): Username used by the Connector
- Password (required): Password used by the Connector
Click Test connection to verify the connection from the Workspace to the entered Database
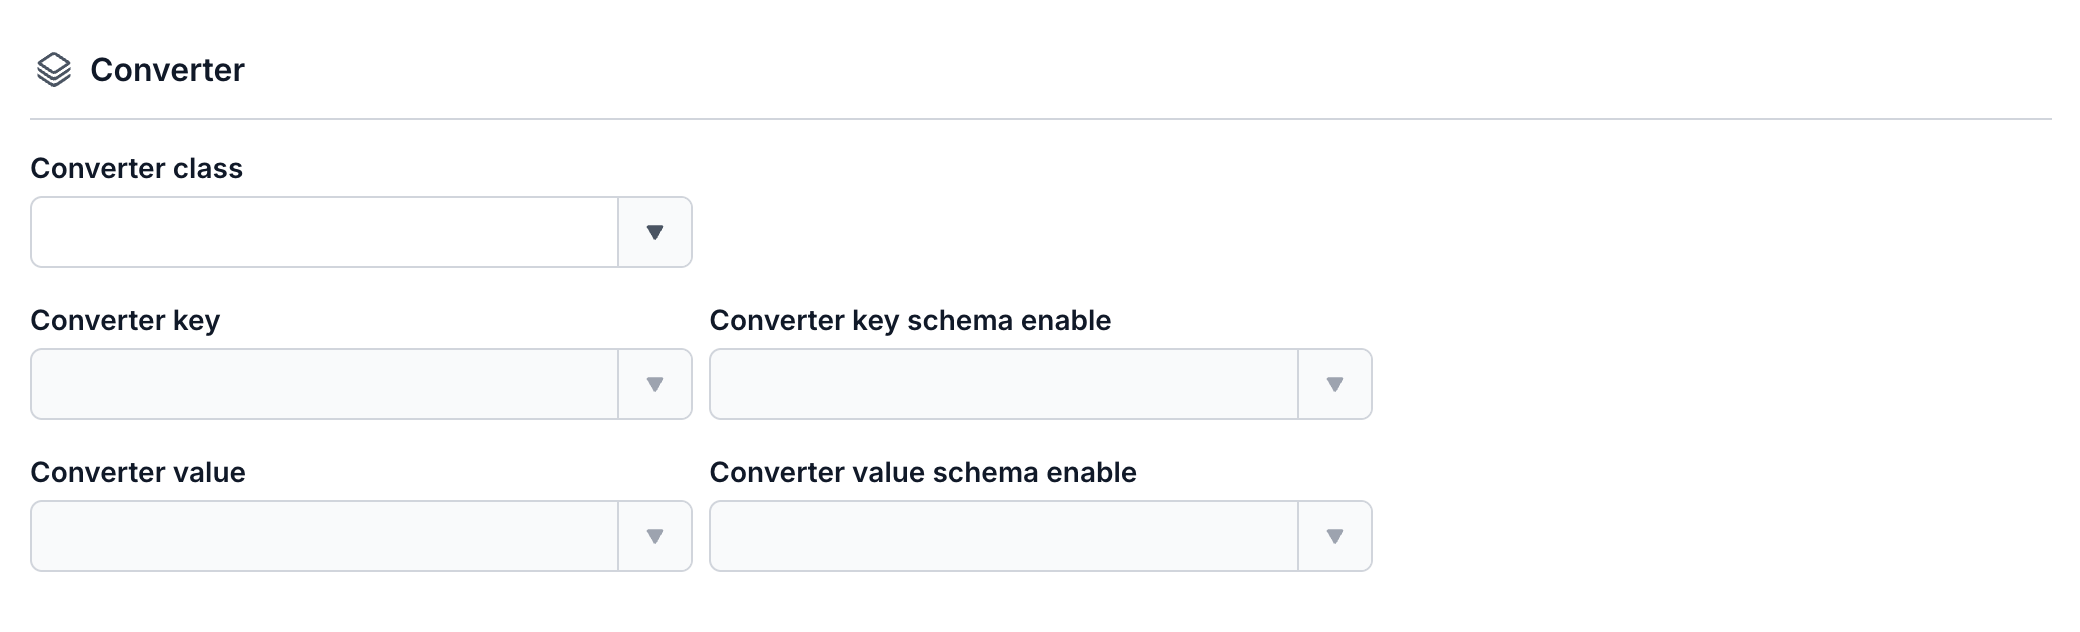
- Converter
- Converter key: select the key value for the converter
- Converter key schema enable: select whether or not to use a schema in the Converter key
- Converter value: select the value for the converter
- Converter value schema enable: select whether or not to use a schema in the Converter value
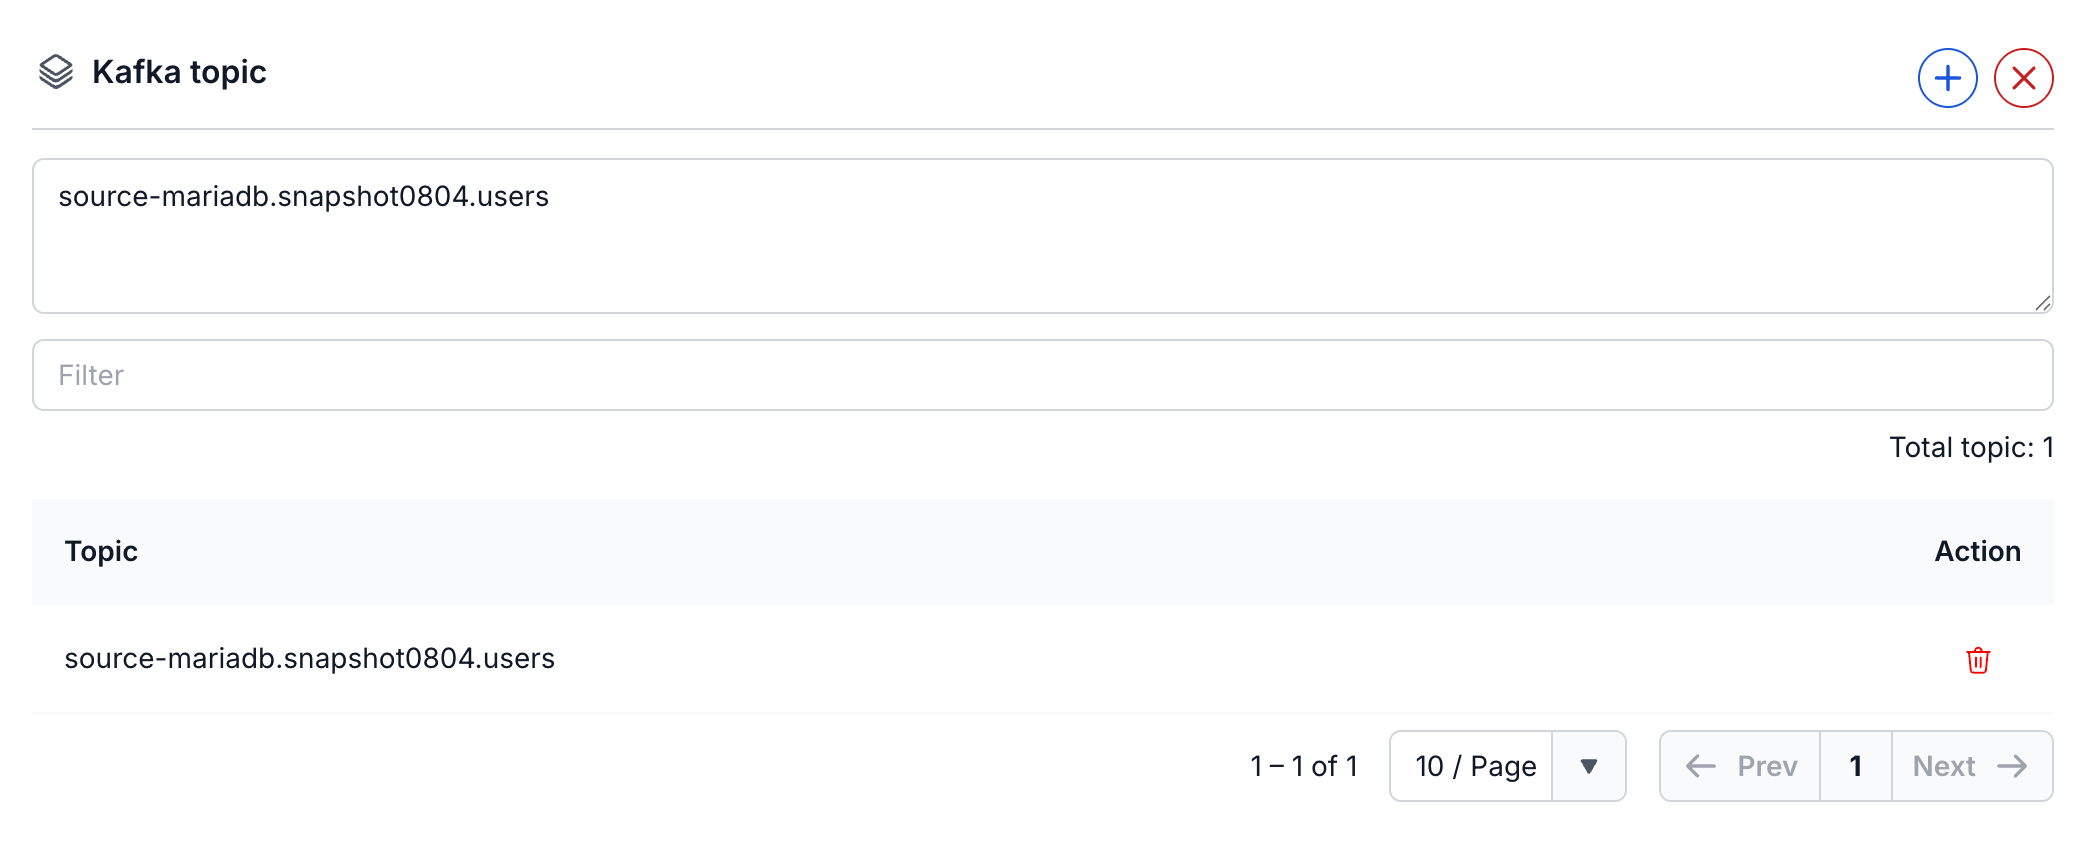
Kafka Topic: Displays the list of Kafka Topics that the CDC Service will listen to in order to receive change data from the Source Connector.
- Kafka topic: The list of topics configured for the CDC Service to subscribe to.
- Add (+): Add a new Kafka Topic to the list.
- Delete (×): Delete the entire configured Kafka Topic list.
- Topic: The Kafka Topic name that receives change data from the Source Connector.
- Action: Remove the corresponding Kafka Topic from the list.
- Filter: Search for a Kafka Topic by name.
- Note: Limited to a maximum of 100 topics
Step 6: Click Next to proceed to the Additional Properties screen
Enter the following information:
- Timezone: select the appropriate timezone for the data from the source database

- Type: select the source Database type

- Task max: the number of tasks processing together

- Schema: Schema name

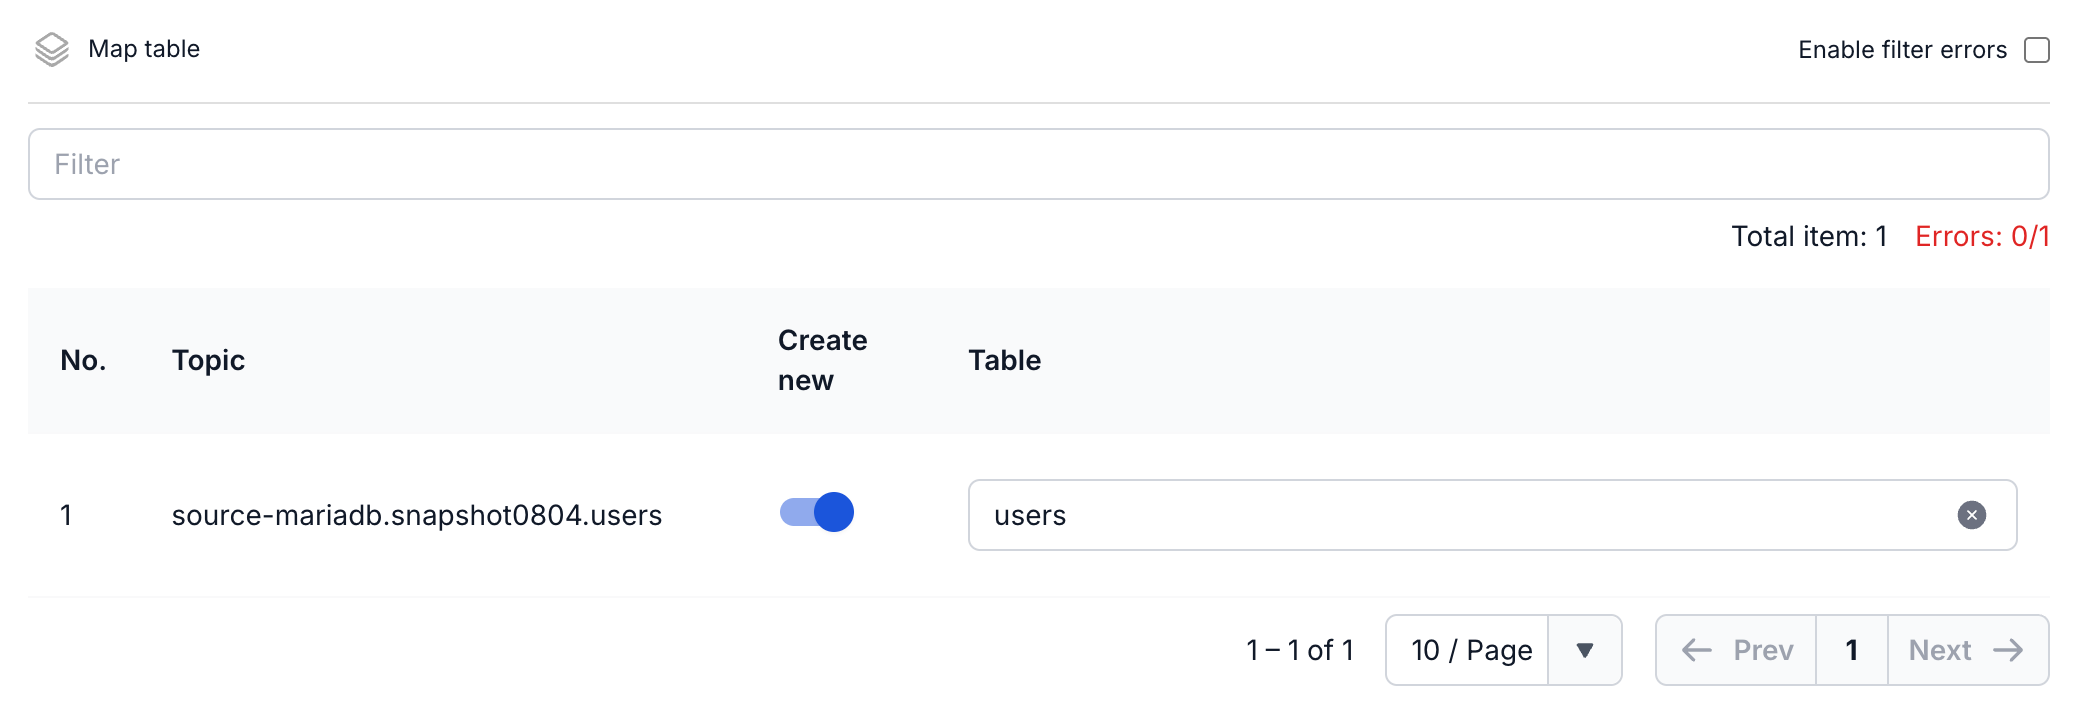
- Map table: Displays the mapping list between Kafka Topics and Tables on the target database.
- Topic: The Kafka Topic name containing change data from the Source Connector.
- Create new: Enable to create a new table on the target database if the table does not exist yet; disable to use an existing table.
- Table: The table name on the target database used to sync data from the corresponding Topic.
- Filter: Search by Topic name or Table name.
- Note: check Enable filter error to filter out table names that have errors
- Mode (required): The Connector's behavior when a message cannot be processed
- None: The Connector will skip messages that cannot be sinked into the database
- All: Failed messages will be sent to the specified topic

Step 7. Click Next to proceed to the Review screen
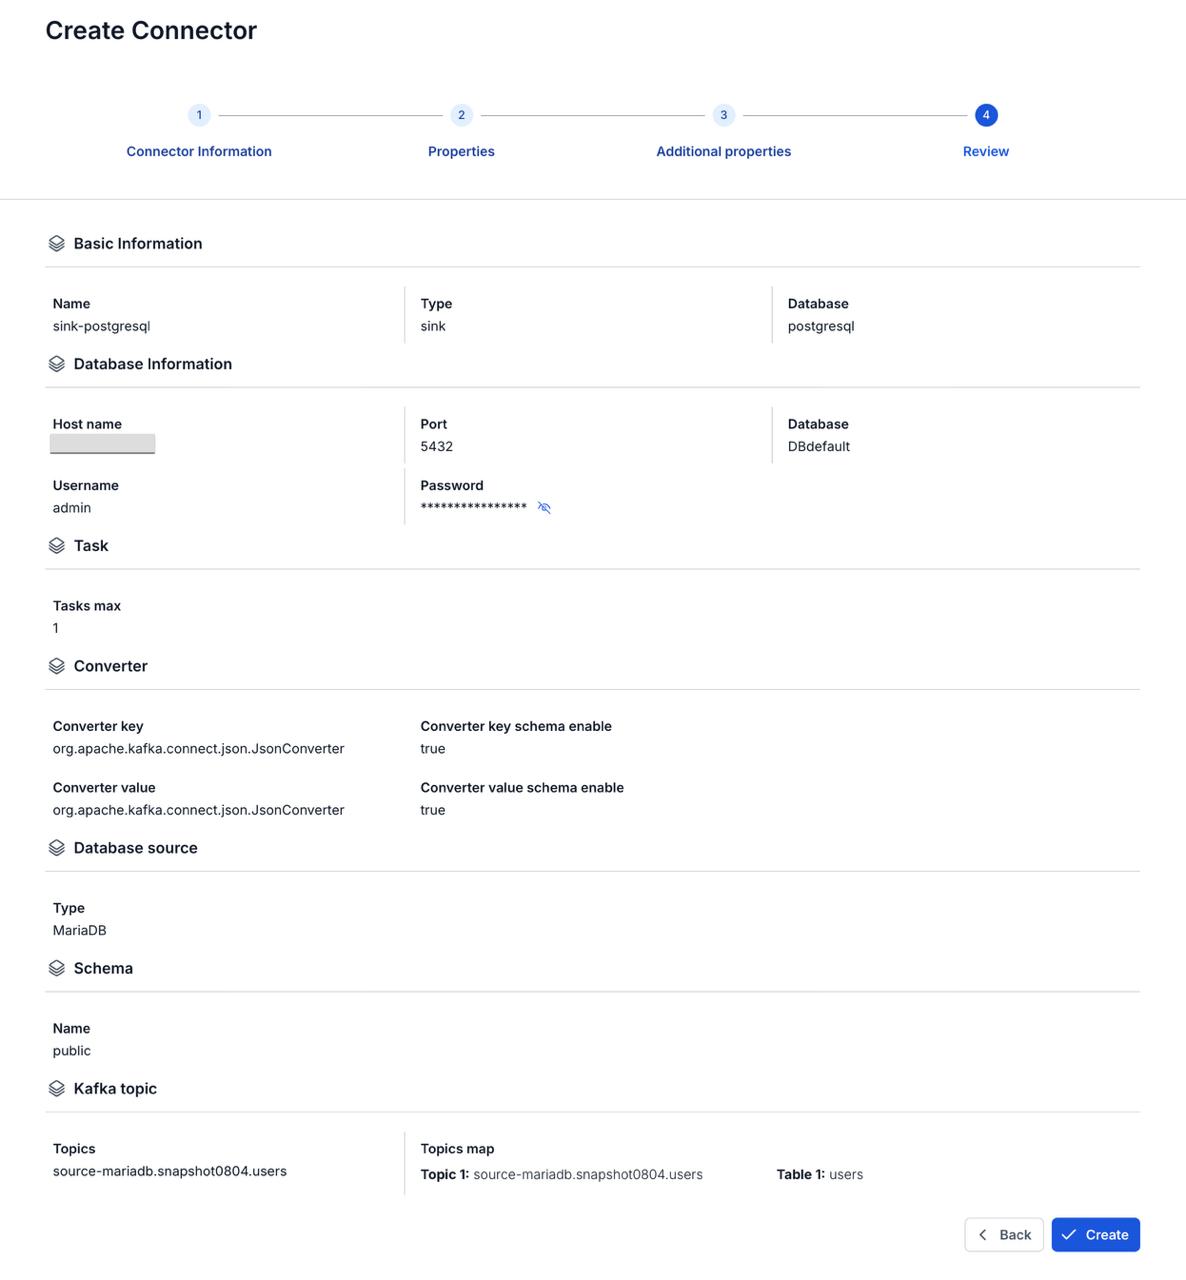
Step 8: Review the information and click the Create button to finish creating the connector.