2.20 Create Kafka source connector
Connect and ingest data from one or more Kafka topics of another Kafka cluster (which can be an external source or a different system).
Allows synchronizing and forwarding data between clusters.
Use case: creating a connector where Type is source and Database is Kafka
Pre-condition: CDC service status is Healthy
To create a connector, follow these steps:
Step 1: In the menu bar, select Data Platform > select Workspace Management > select Workspace name
Step 2: In the My services section, select CDC service
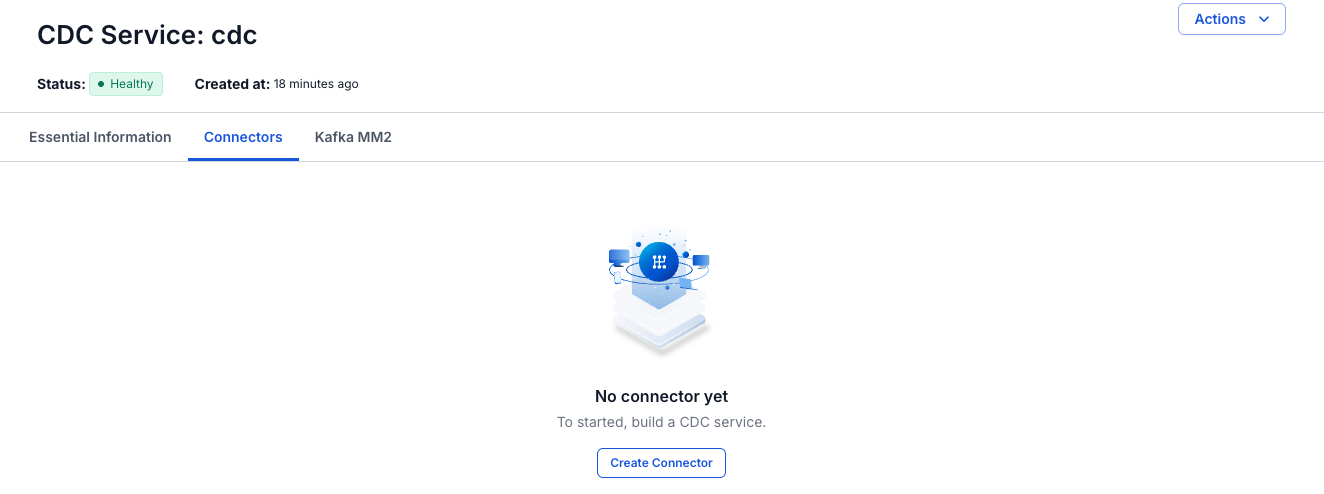
Step 3: On the CDC service detail screen > select the Connectors tab > click Create a connector
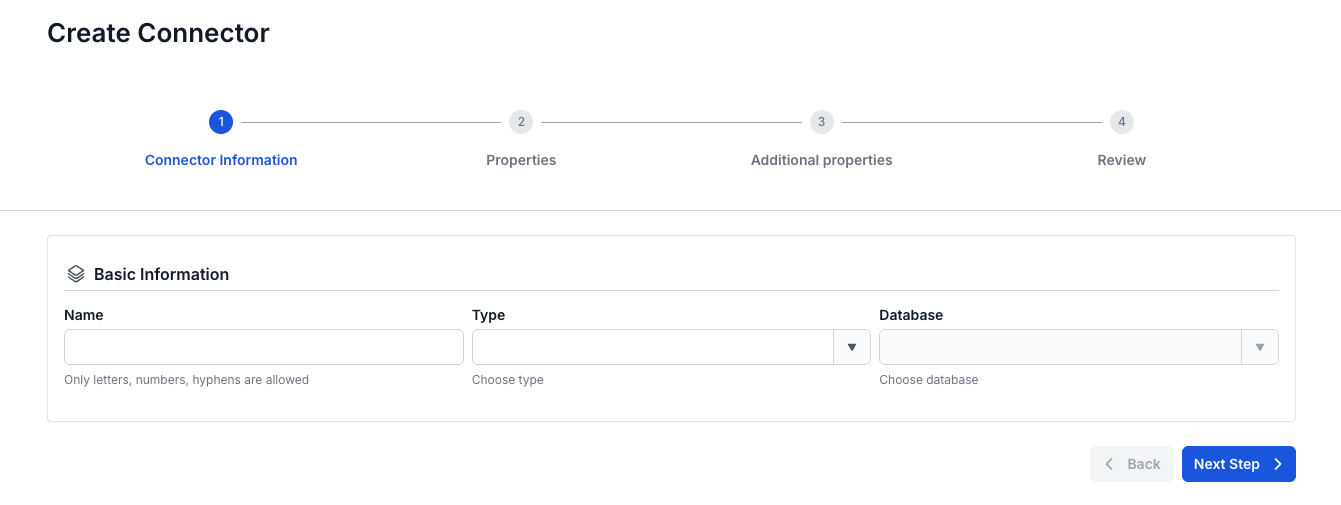
Step 4: Enter the information on the connector information screen:
- Name (required): connector name
Note: The connector name can contain lowercase letters a-z or digits 0-9. In particular, spaces are not allowed — you can replace spaces with "-".
- Type (required): select source
- Database (required): select Kafka
Step 5: Click Next to proceed to the Properties screen
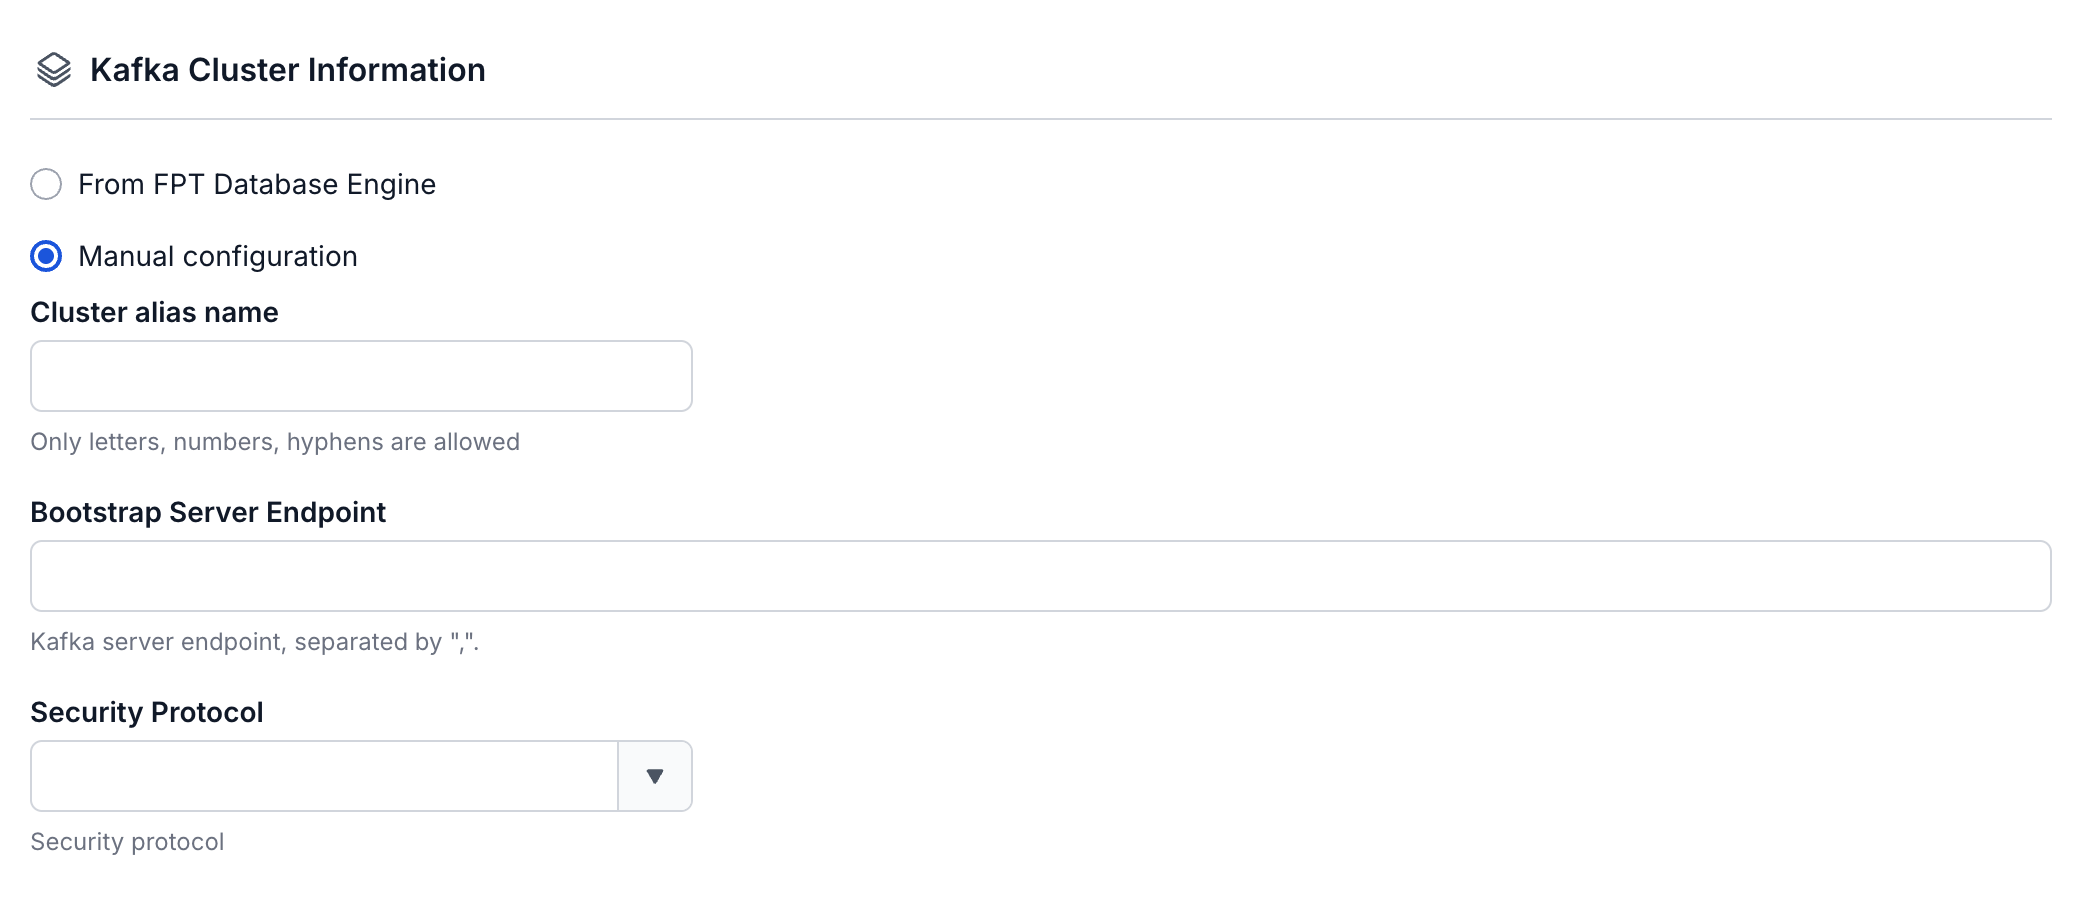
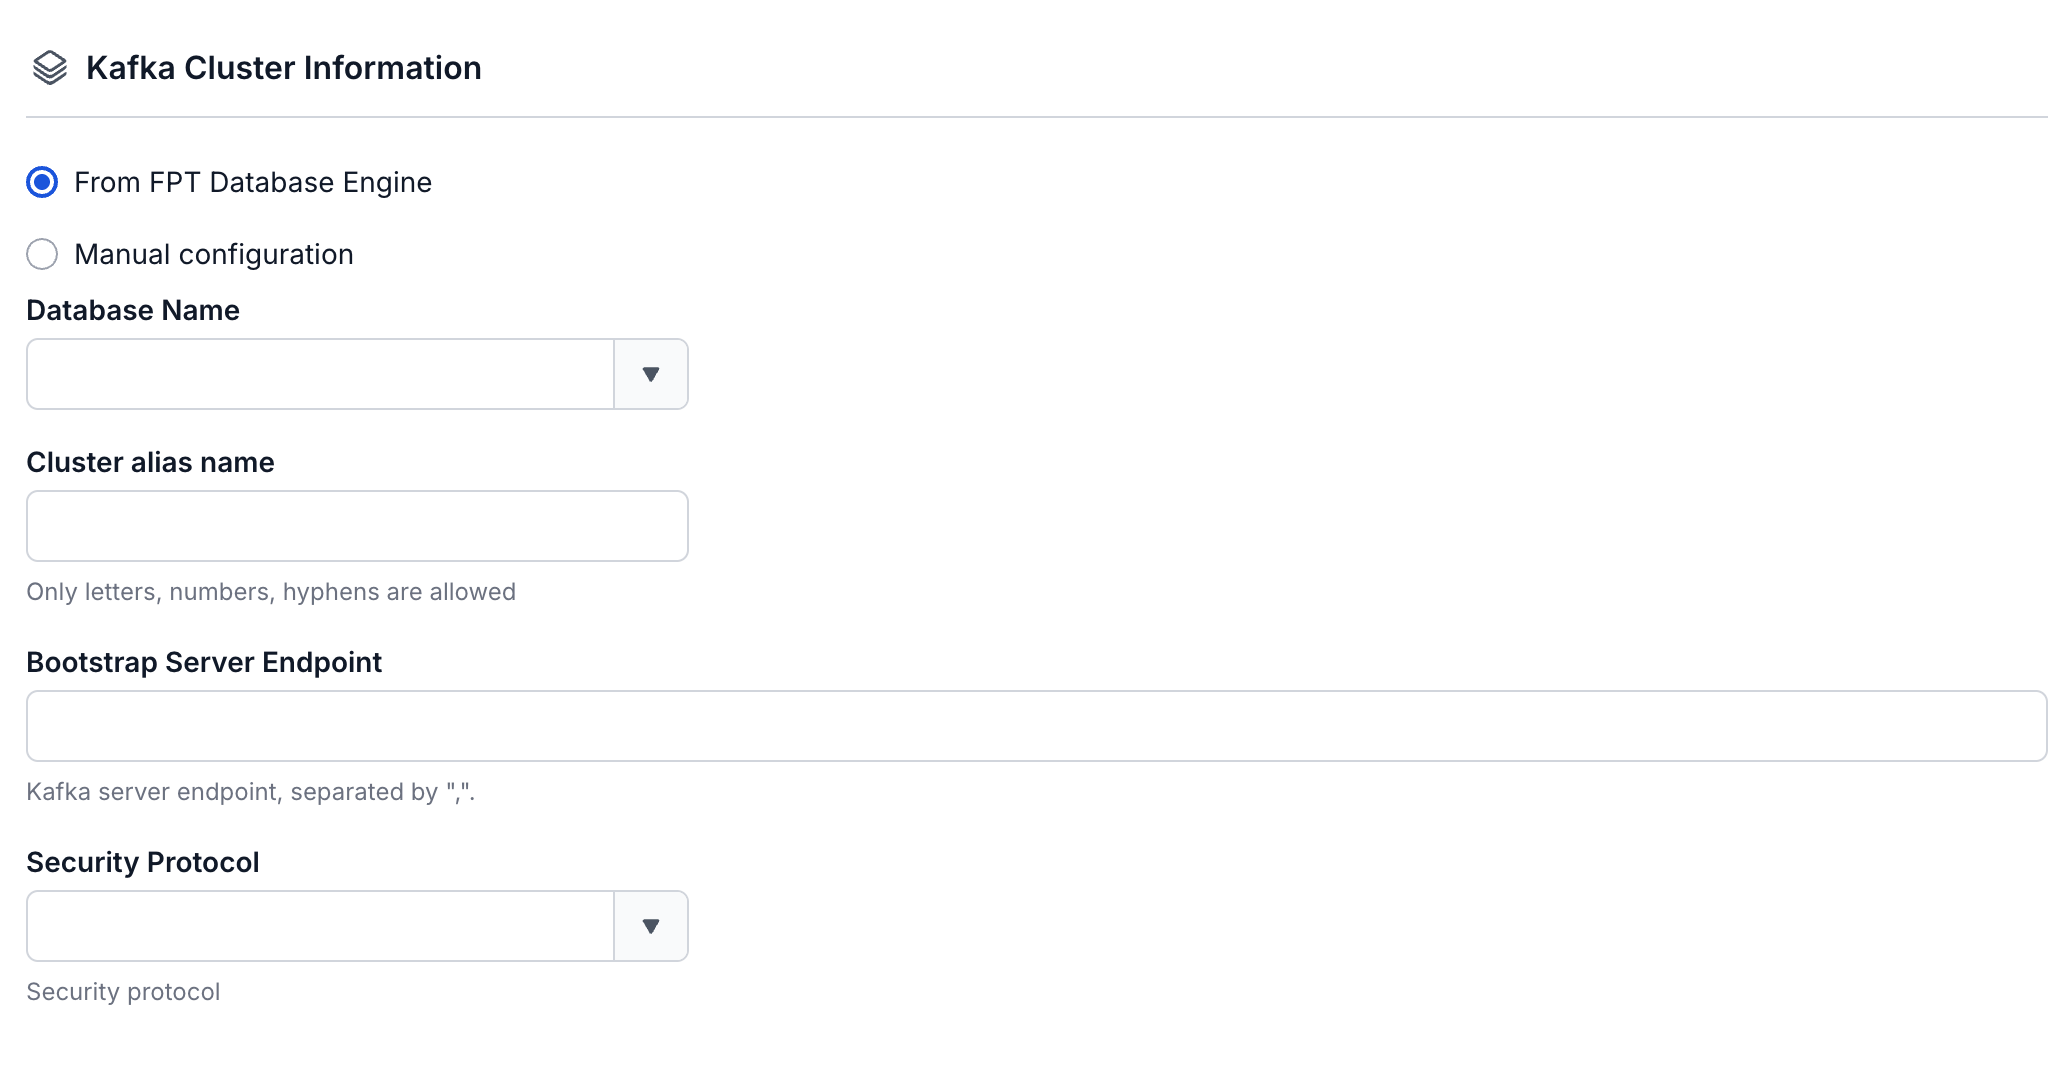
There are two options: From FPT Database Engine, Manual configuration
- If you select Manual configuration, enter and select the following information:
- Cluster alias name: The alias name representing the Kafka cluster, consisting only of letters, digits, and "-"; used as a prefix for topic names when replicating data.
- Bootstrap server endpoint: enter the Bootstrap server endpoint address
- Security protocol: select one of the following security protocols:
- SASL_PLAINTEXT: a simple authentication mechanism using a Username and password
- SASL Mechanism
- SASL Username
- SASL Password
- SASL_SSL: provides a comprehensive security layer for authentication and data encryption using a Username and password
- SASL Mechanism1
- SASL Username
- SASL Password
- PLAINTEXT: data is transmitted over the network without encryption, not recommended
- SSL: a network security protocol used to protect data as it is transmitted over the Internet
- If you select From FPT Database Engine, enter and select the following information:
- Database Name (required): select the Database
- Cluster alias name: The alias name representing the Kafka cluster, consisting only of letters, digits, and "-"; used as a prefix for topic names when replicating data.
- Bootstrap server endpoint: enter the Bootstrap server endpoint address
- Security protocol: select one of the following security protocols:
- SASL_PLAINTEXT: a simple authentication mechanism using a Username and password
- SASL Mechanism
- SASL Username
- SASL Password
- SASL_SSL: provides a comprehensive security layer for authentication and data encryption using a Username and password
- SASL Mechanism
- SASL Username
- SASL Password
- PLAINTEXT: data is transmitted over the network without encryption, not recommended
- SSL: a network security protocol used to protect data as it is transmitted over the Internet
Click Test Connection to check the connection from the Workspace to the Kafka Cluster
- Kafka topic Click the '+' to retrieve topic information Note: limited to a maximum of 100 topics
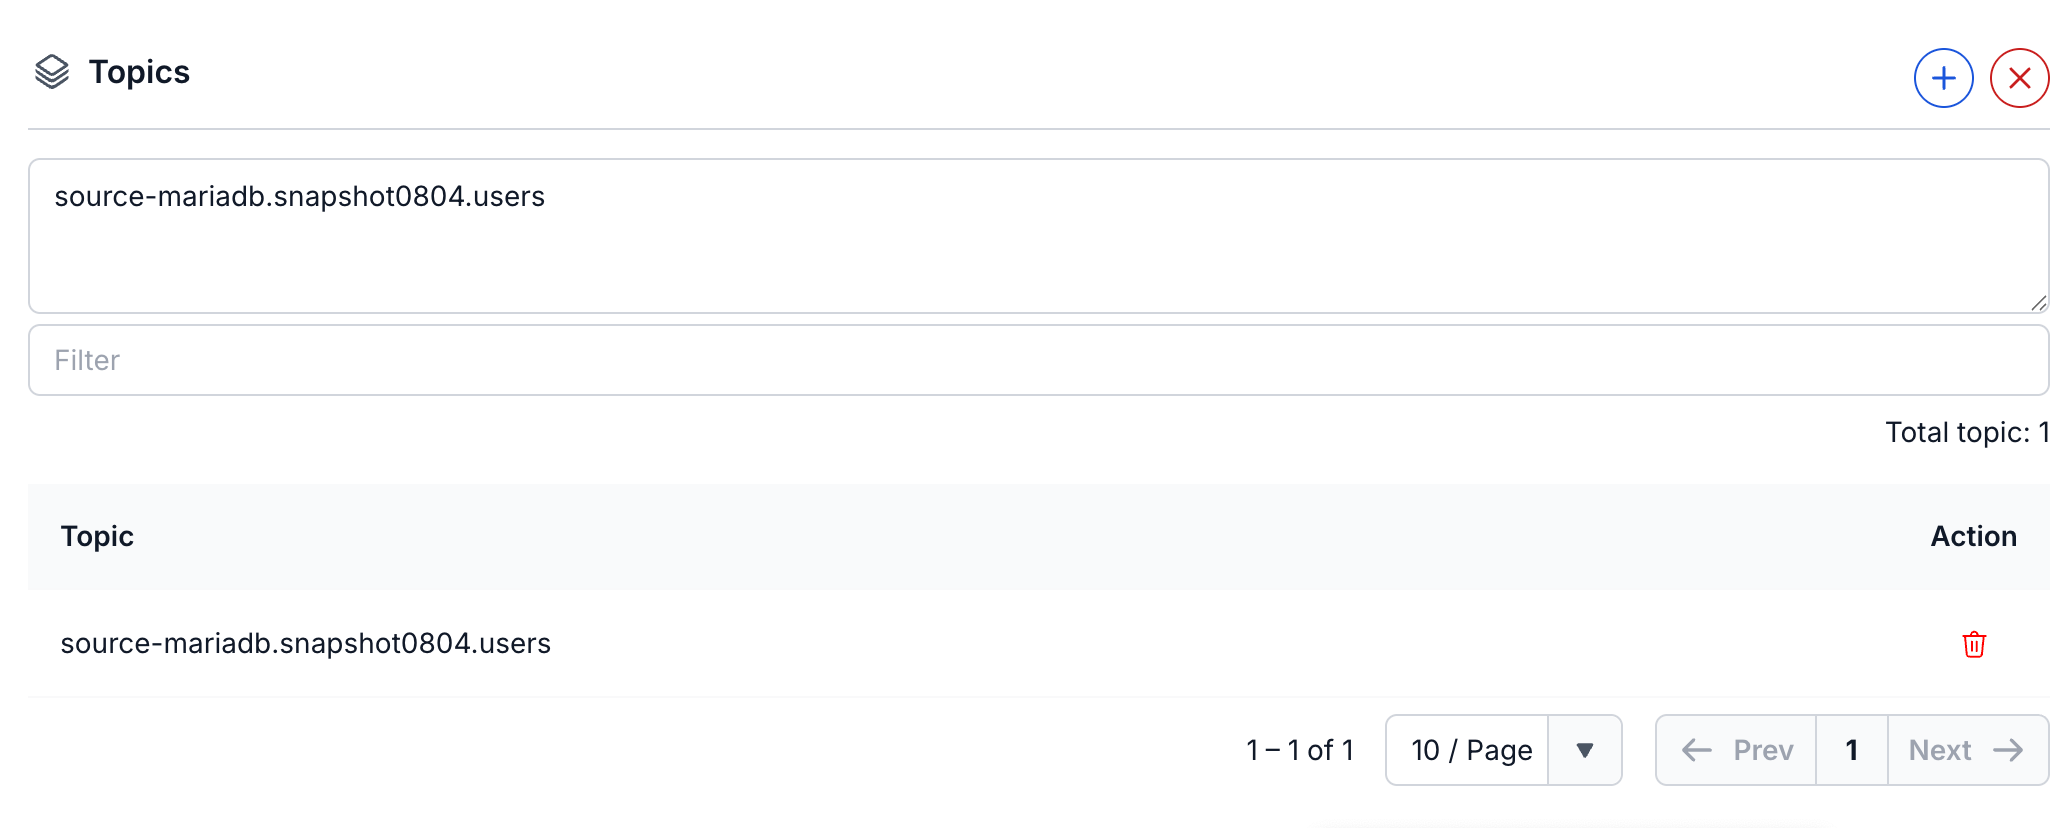
Step 6: Click Next to proceed to the Additional properties screen
Enter and select the following information:
- Task:
- Number of tasks: Enter the number of tasks for the connector. (This number is usually less than or equal to the number of partitions in the Kafka topic.)

- Replication:
- Replication policy: Select the policy to use when replicating topics.
-
DefaultReplicationPolicy: Adds the source cluster's alias prefix to the replicated topic name.
e.g.: topic-name becomes alias-name.topic-name
-
IdentityReplicationPolicy: Keeps the topic name unchanged.
e.g.: topic-name stays as topic-name
-
- Replication factor: Enter the number of replicas for each Kafka topic partition.
- Enter -1 if you want to use the broker's default replication factor.
- Replication policy: Select the policy to use when replicating topics.

Step 7: Click Next to proceed to the Review screen
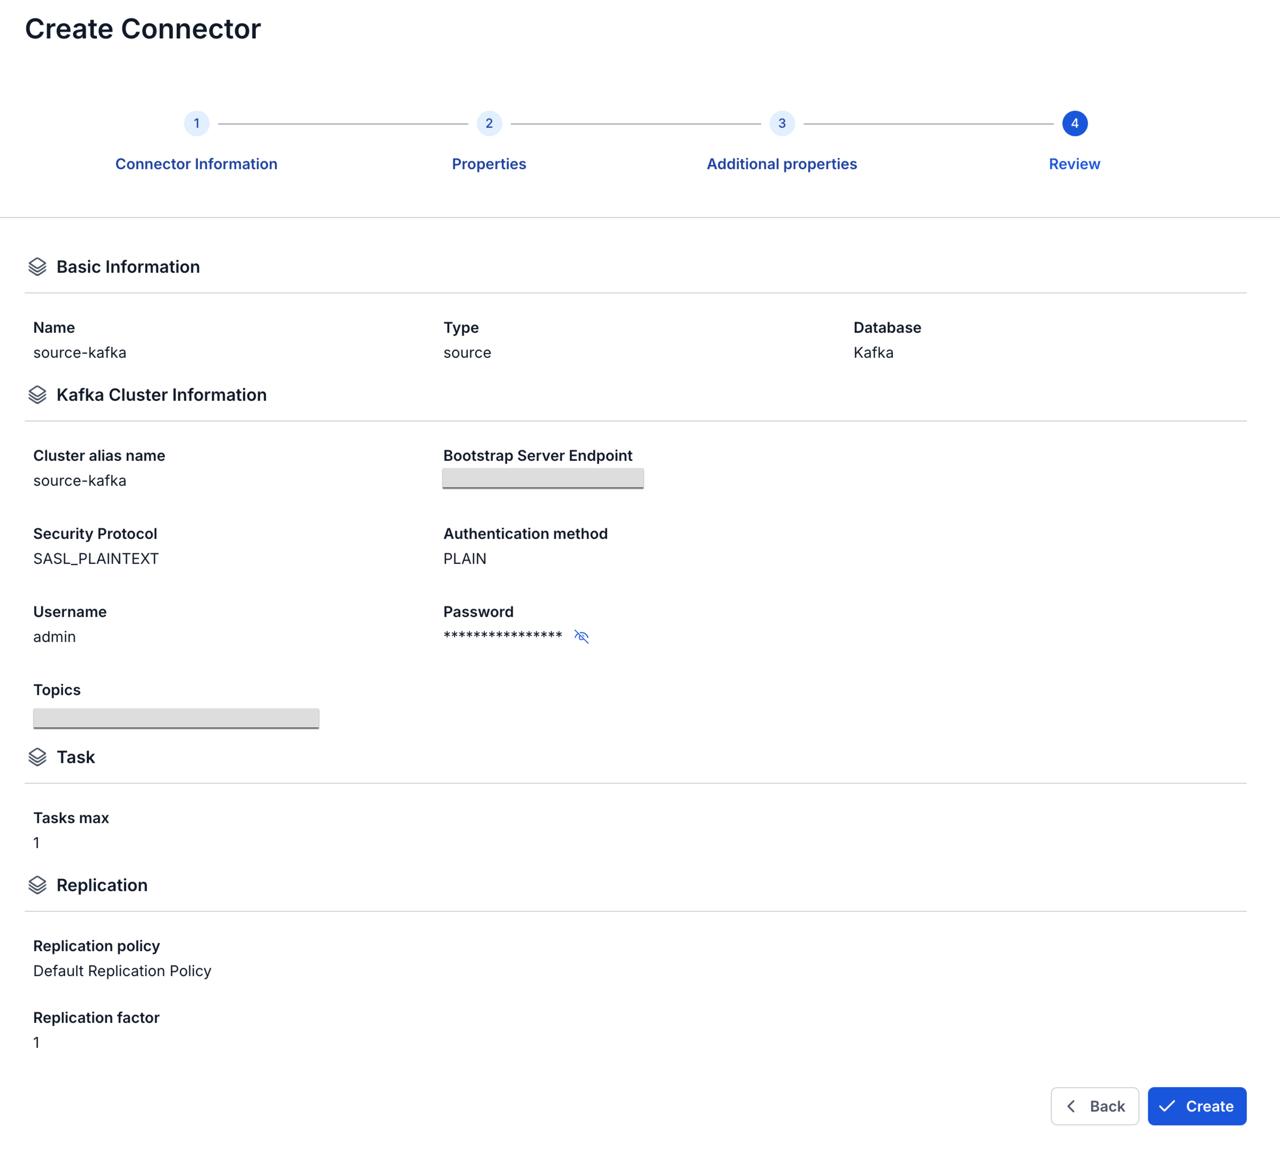
Step 8: Review the information and click the Create button to finish creating the connector.