2.21 Create S3 source connector
Connect to a data source consisting of files stored on Amazon S3 or S3-compatible storage (e.g., MinIO, FPT Object Storage, etc.).
Automatically read, scan, and ingest data from files (CSV, TSV, AVRO, XML, ...) in a bucket into a streaming system or data pipeline.
Use case: creating a connector where Type is source and Database is S3
Pre-condition: CDC service status is Healthy
To create a connector, follow these steps:
Step 1: In the menu bar, select Data Platform > select Workspace Management > select Workspace name
Step 2: In the My services section, select CDC service
Step 3: On the CDC service detail screen > select the Connectors tab > click Create a connector
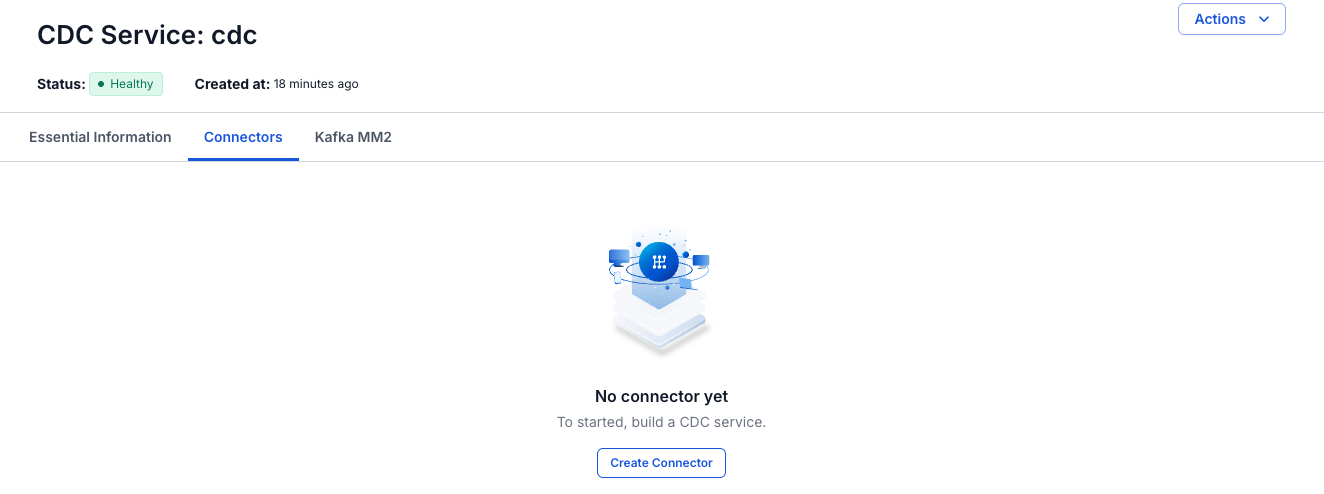
Step 4: Enter the information on the connector information screen:
- Name (required): connector name
Note: The connector name can contain lowercase letters a-z or digits 0-9. In particular, spaces are not allowed — you can replace spaces with "-".
- Type (required): select source
- Database (required): select S3
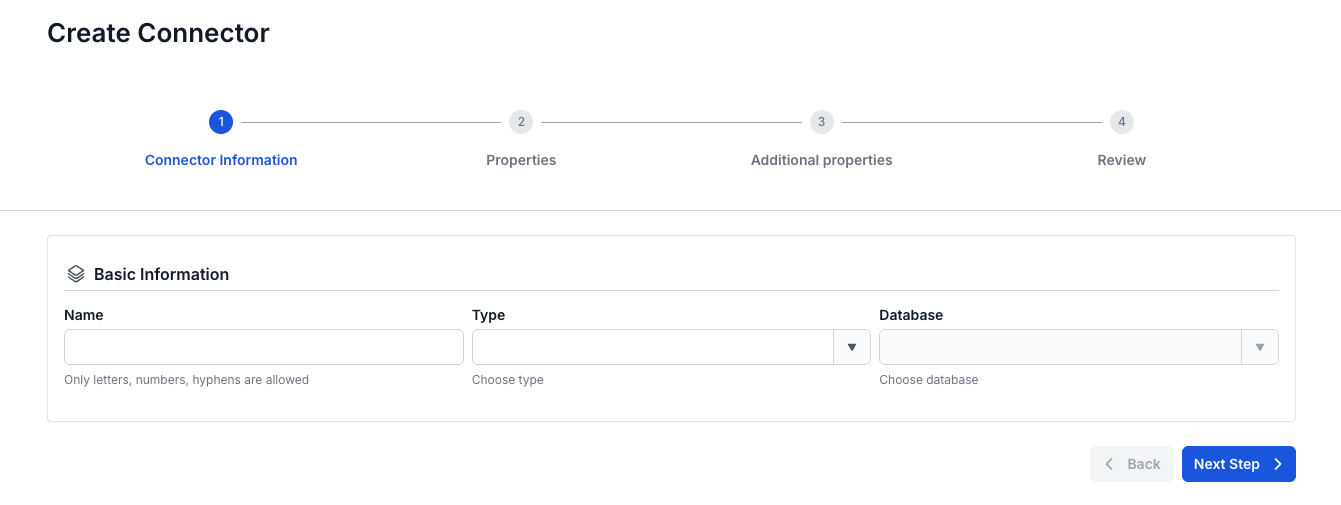
Step 5: Click Next to proceed to the Properties screen
Enter the information on the Properties screen:
- URL (required): access address
- Bucket name (required): bucket name
- Access key (required): access key
- Secret (required): access secret
- Path (required): directory containing the source files
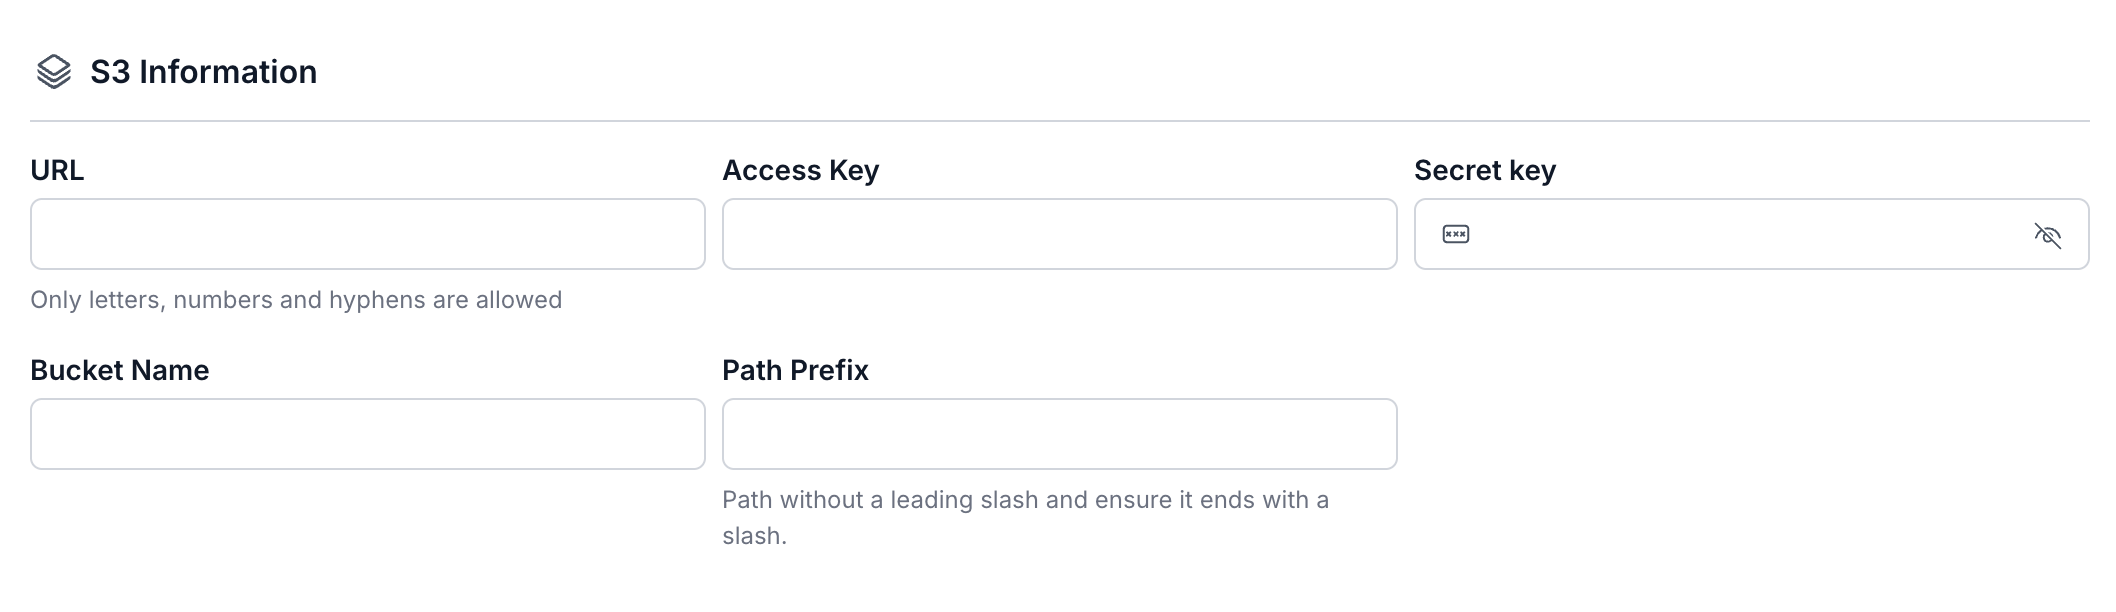
After entering the S3 Information completely, click Test connection to verify the connection from the Connector to the entered S3
- Topic prefix (required): When data changes, change events will be produced to Kafka topics

Step 6: Click Next to proceed to the Additional properties screen
Enter the information on the Additional properties screen:
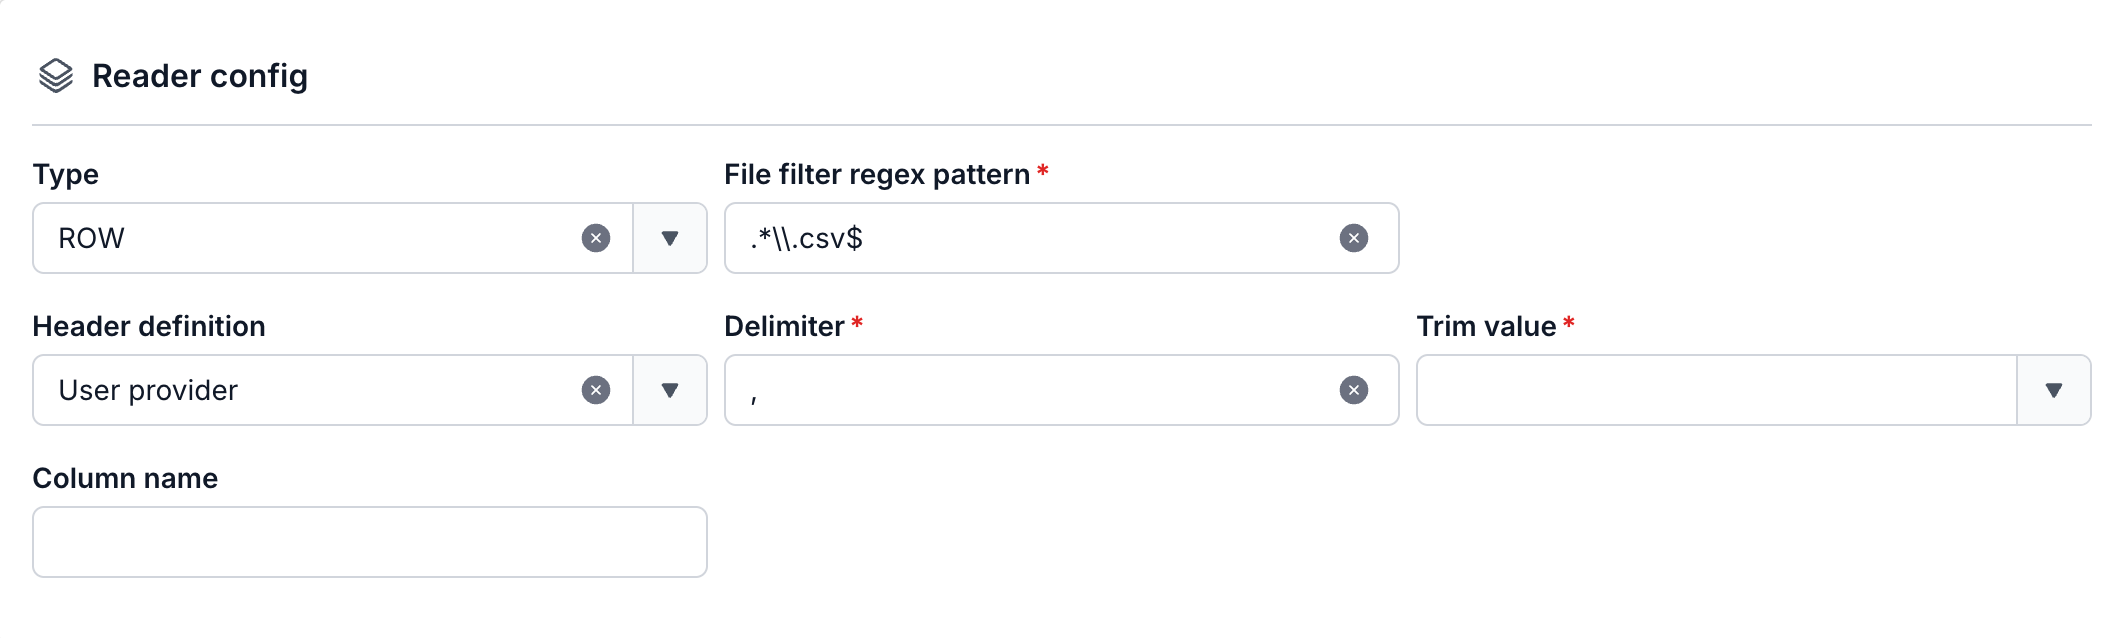
- Type (required): Select the file format the connector will read. Common options include: ROW (CSV, TSV), XML, Avro
- File filter regex pattern (required): Enter a regex expression to filter files by name when scanning the source (for example: .*.csv$ will only accept files ending with .csv).
- Header definition (required):
Select how to determine the column names for the input data.
- From file (required): Column names are taken from the first line of the file.
- Autogenerated (required): Column names are auto-generated (typically column1, column2, ...).
- User provided (required): You manually enter the list of column names in the "Column name" section below.
- Delimiter (required): The character used to separate columns. It defaults to a comma "," but you can change it to another character (e.g., tab, semicolon, etc.).
- Trim value (required): Select Yes/No to specify whether to trim extra whitespace at the start/end of each column's value.
- Column name (required):
- Only shown when Header definition = User provided
- Enter/create the list of data column names (each name separated by a comma or Enter; names can also be added individually using the "+" button or "Tag").
- Mode (required): Select the fault-tolerance mode when processing data.
- None: Do not skip errors; processing stops when an error occurs.
- All: Skip all errors and record them in the log.

Step 7: Click Next to proceed to the Review screen
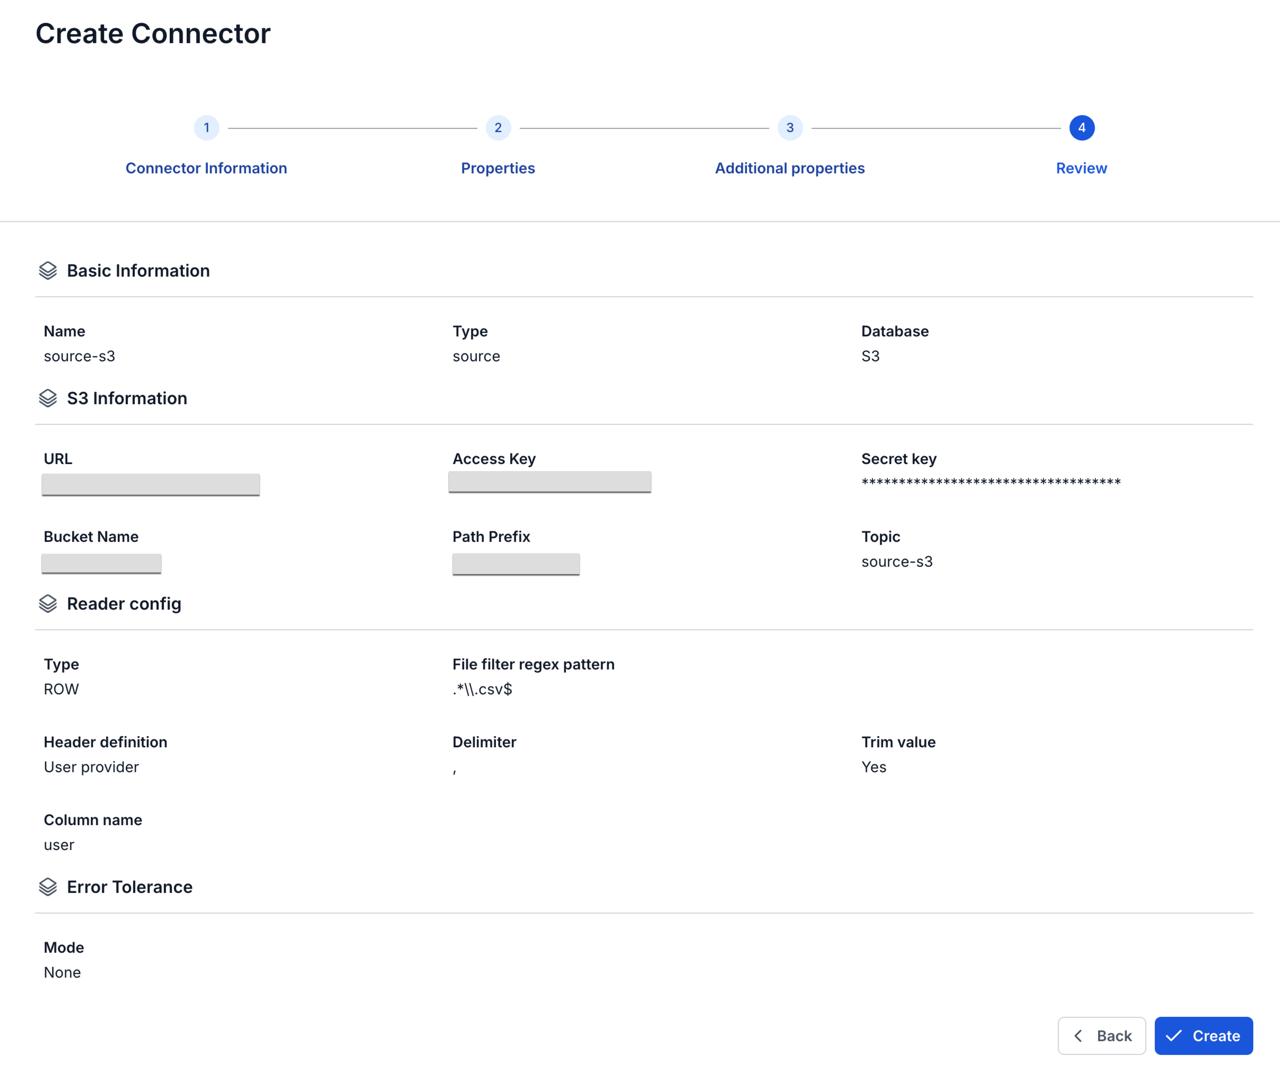
Step 8: Review the information and click the Create button to finish creating the connector.