Create Profile
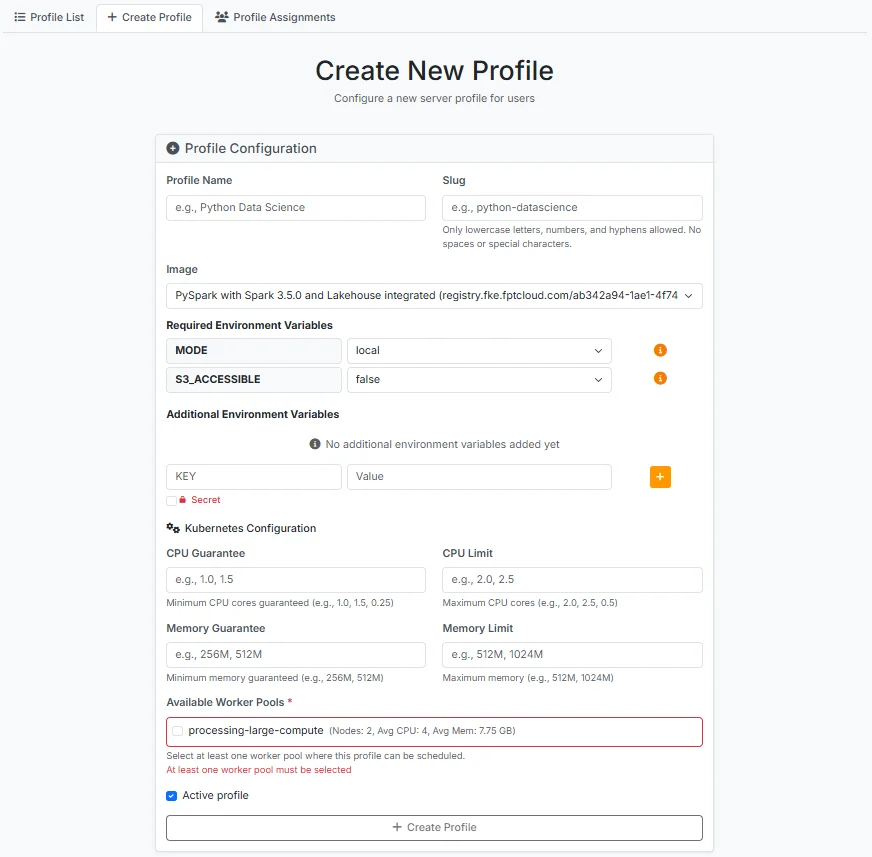
After logging into JupyterHub, a user with the Admin role selects the Service > Profile menu, then clicks the Create Profile tab
- Profile Name: profile name
- Slug: enter the name of the libraries to use when spawning the server
- Image: select the image to use when running the profile from the list
- MODE: select local
- S3_ACCESSIBLE: select false if not using S3, select true if using S3 and enter the following information
- S3_ENDPOINT: URL endpoint of the S3 service
- S3_ACCESS_KEY: Access key ID for authenticating with the S3 service
- S3_SECRET_KEY: Secret access key for authenticating with the S3 service
- LAKEHOUSE_ENABLED: select false if not using a lakehouse connection, select true if using lakehouse and enter the following information
- CATALOG_TYPE: The type of metadata catalog to use, select Hive or Nessie
- CATALOG_URI: The URI for connecting to the metadata catalog
- SPARK_WAREHOUSE_DIR: The warehouse directory path for Apache Spark
- Additional Environment Variables
- KEY: enter the environment variable name
- Value: enter the corresponding environment variable value
- CPU Guarantee: enter the guaranteed amount of CPU for the profile when it starts up
- CPU Limit: enter the maximum CPU threshold when using the profile
- Memory Guarantee: enter the guaranteed amount of RAM for the profile when it starts up
- Memory Limit: enter the maximum RAM threshold when using the profile
- Available Worker Pools: select from the Worker Pool list of the Processing service to choose the spawn environment for the profile
- Active profile: check this box so the profile is Active once created
After entering all the information, click Create Prolife to complete the creation
To ensure users have access to the lakehouse catalog, configure directory permissions on FPT Cloud Storage:
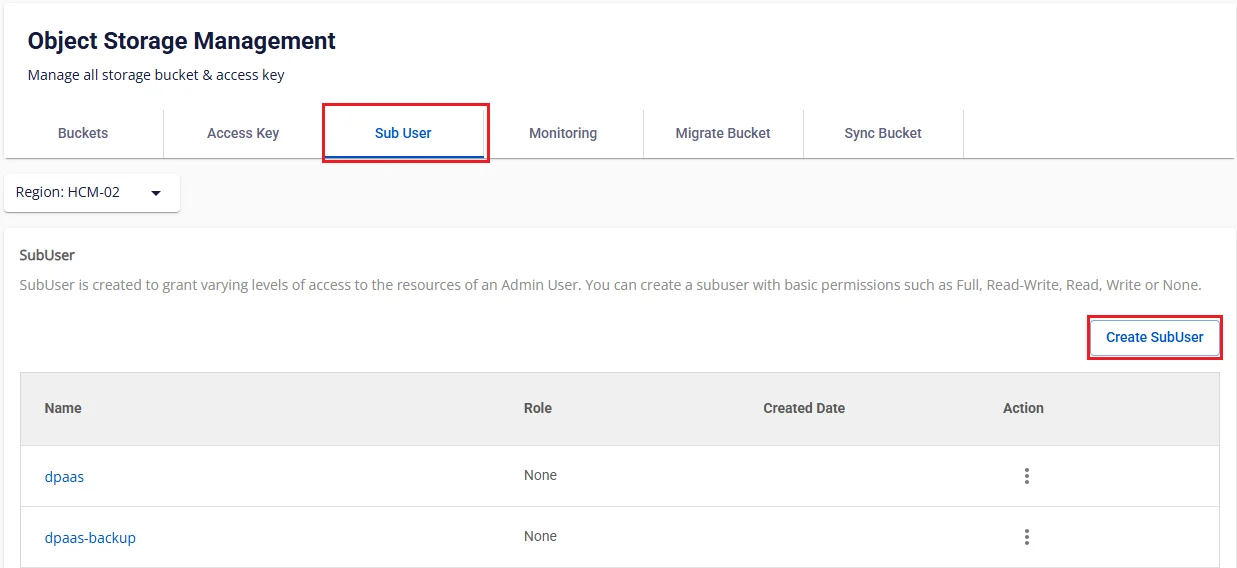
- Step 1. Go to https://console.fptcloud.com/, select the Object Storage menu
- Step 2. In the Object Storage Management interface, select the Sub user tab, click Create SubUser
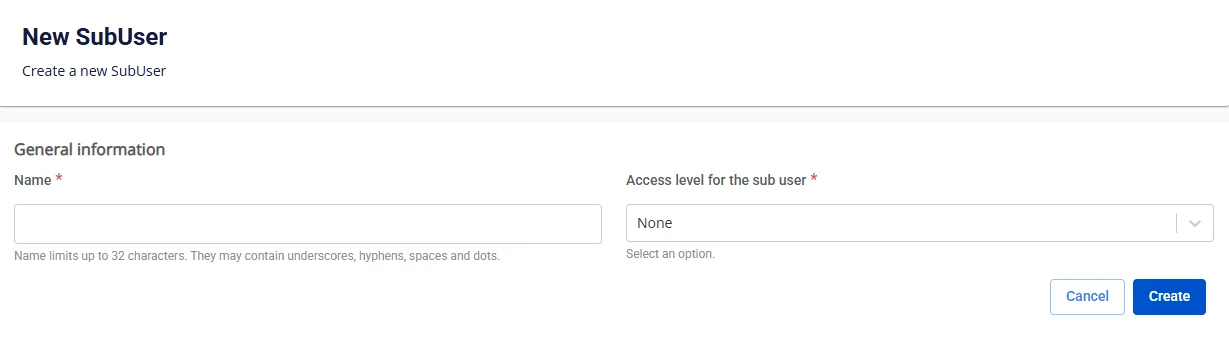
- Step 3. Enter the Name for the Subuser, and set Access level for sub user to Full
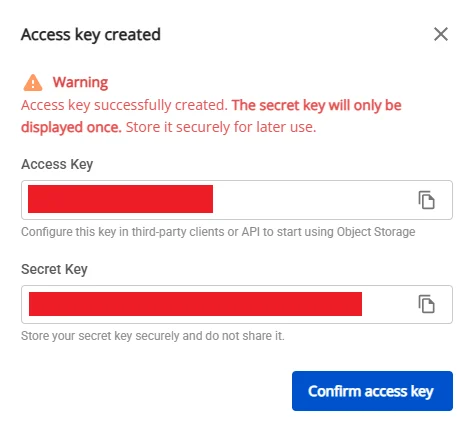
- Step 4. In the Sub User list, click to view the details, click Generate Key, then save the Access Key and Secret Key information
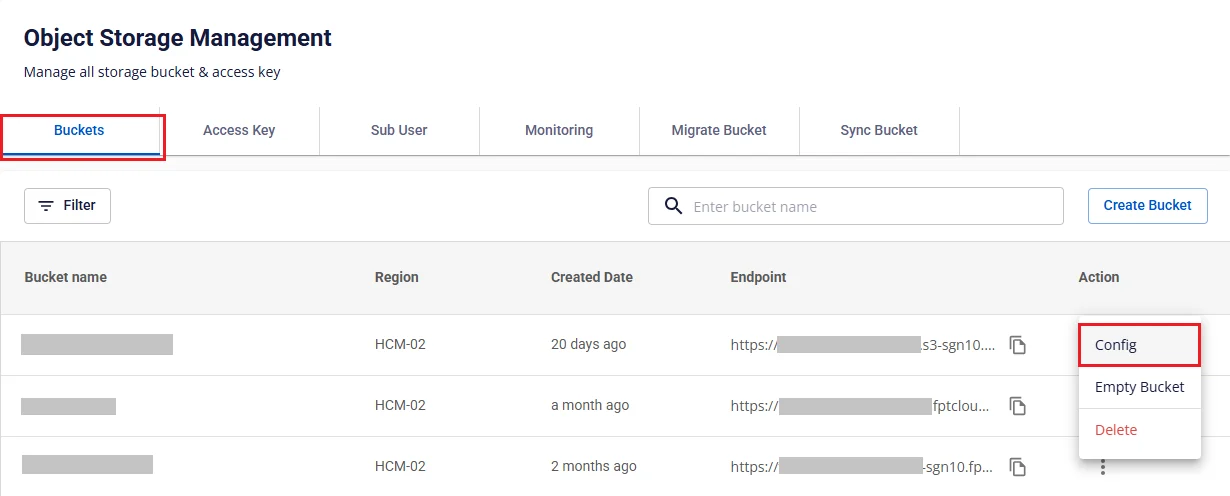
- Step 5. Return to the Object Storage Management interface, select the Buckets tab. On the bucket you want to grant permissions to the subuser, select Config under Action
- Step 6. In the bucket details interface, select the Bucket Plolicy tab, click Add Policy Statement
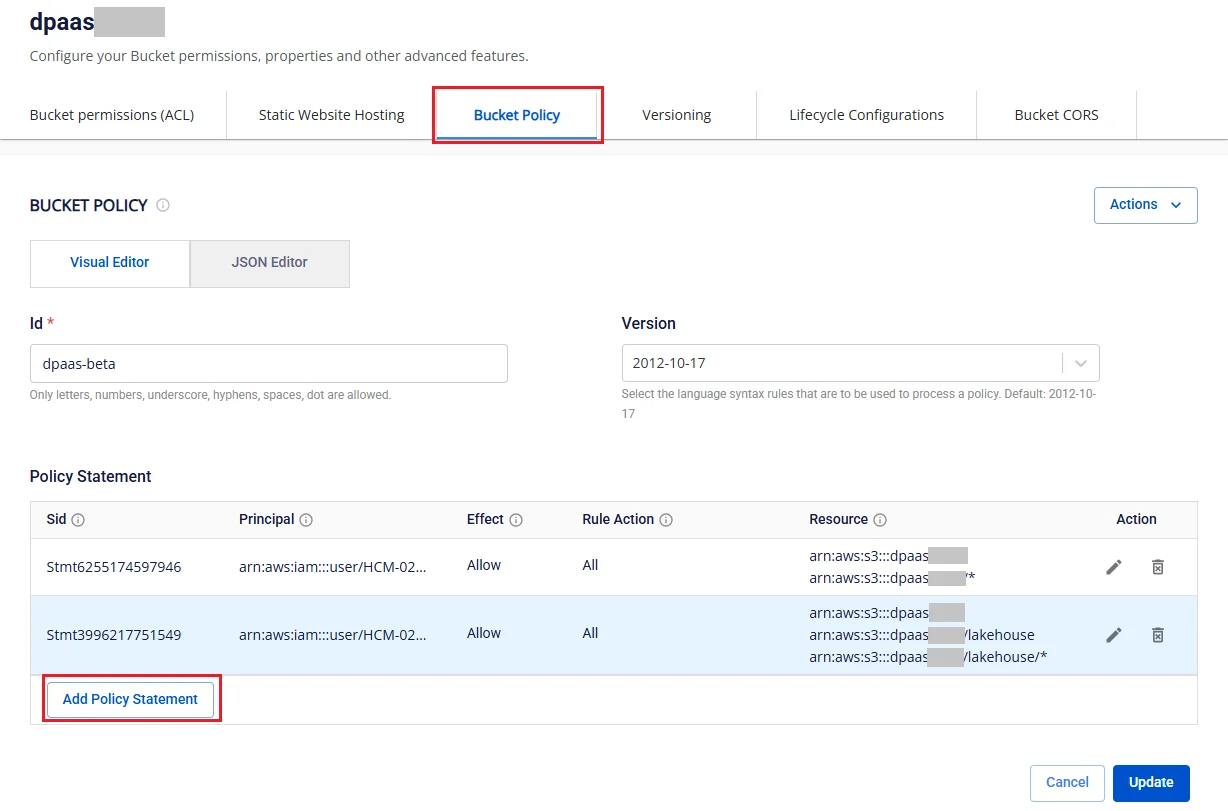
- Step 7. In the Add Policy Statement interface
- Sid: enter the statement ID
- Effect: select Allow
- Principal: select the list of subusers
- Action: check Action, check All S3 Actions (s3.)
- Resource (ARN): enter the resource information in the required format, pointing the subuser to exactly the folder containing the catalog they are permitted to access
Click Add to complete the Policy Statement configuration
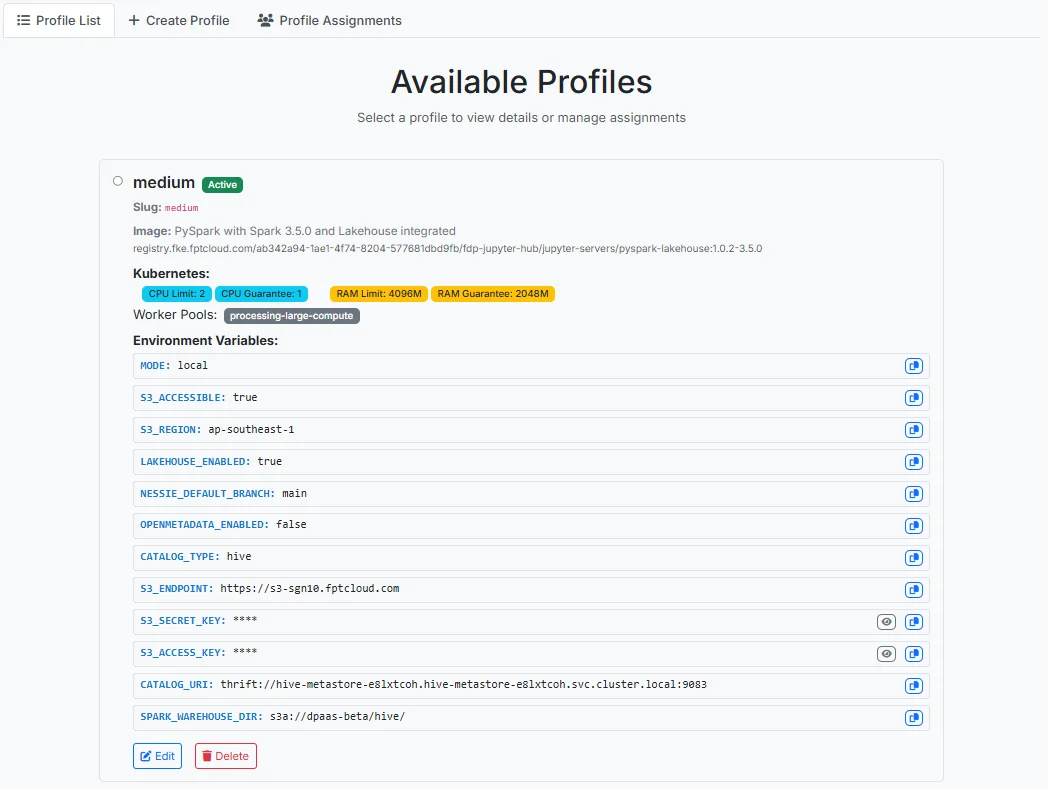
Once created, the profile information is displayed in the Profile List tab