Create Lakehouse
Lakehouse is a managed data platform service on FPT Cloud that combines scalable object storage, SQL analytics, governance, and metadata discovery.
To create a Lakehouse, follow these 5 steps:
Step 1. In the menu bar, select Data Platform > select Lakehouse
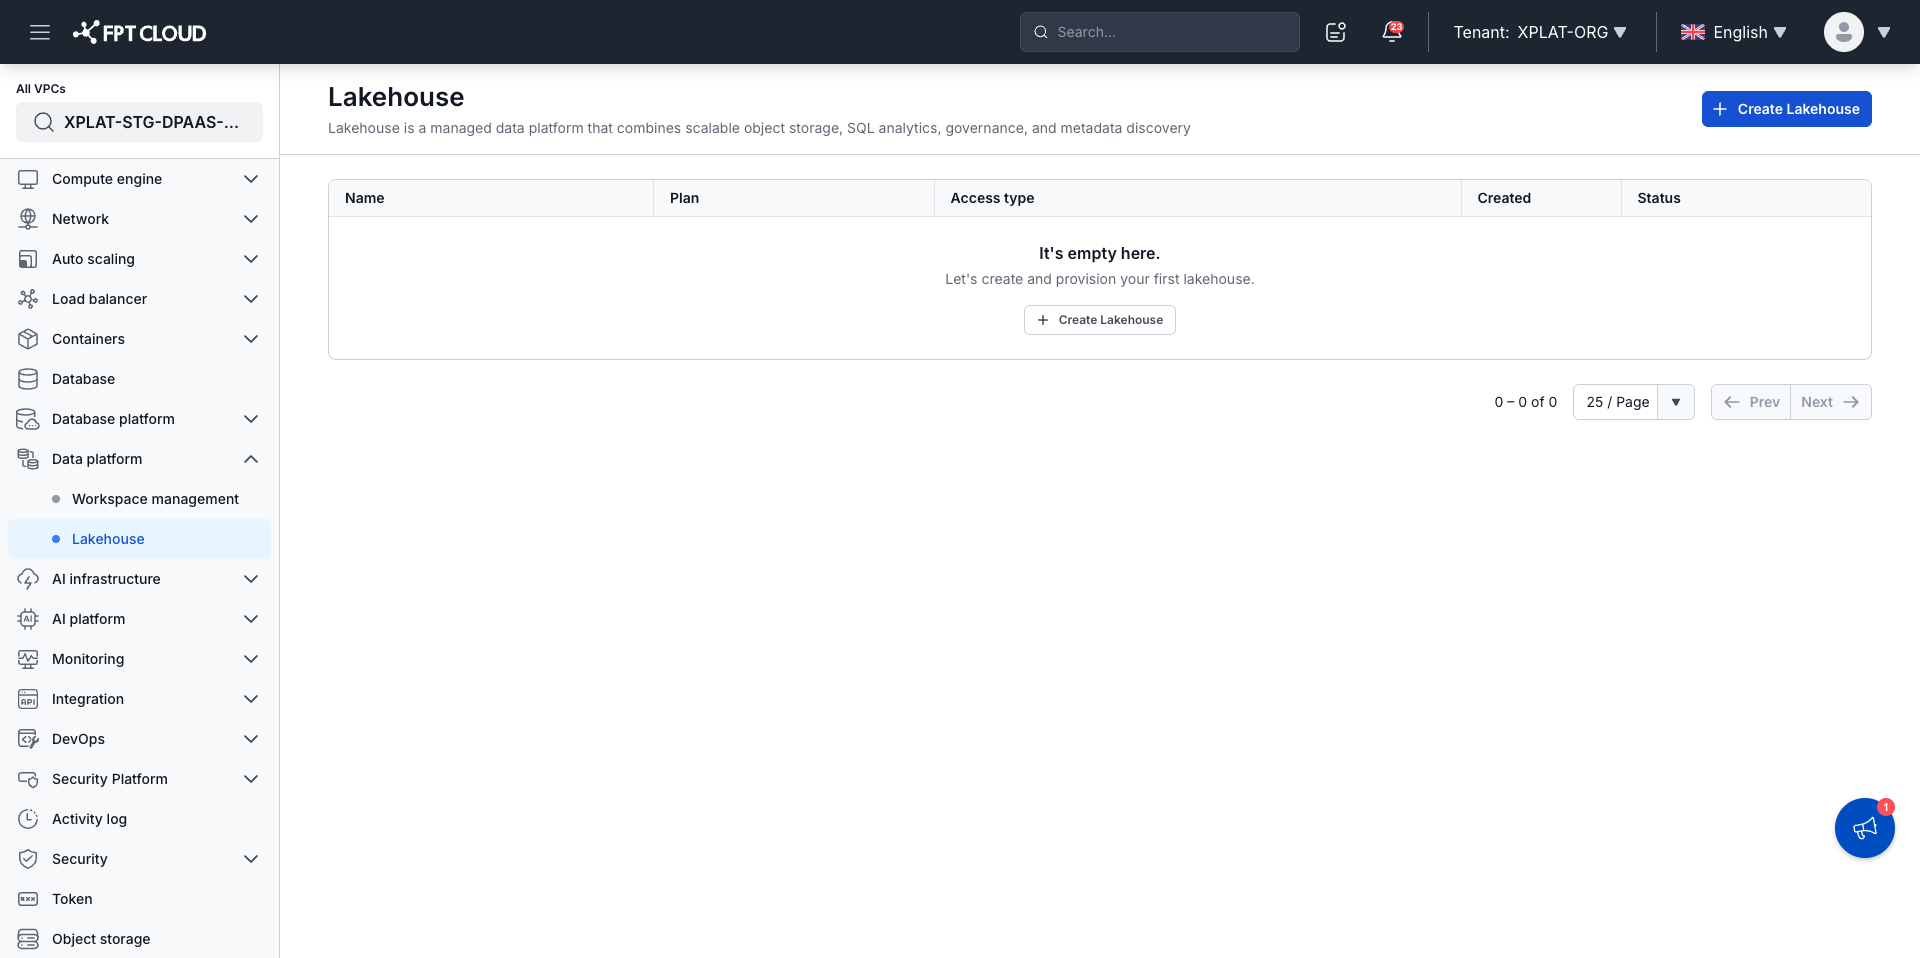
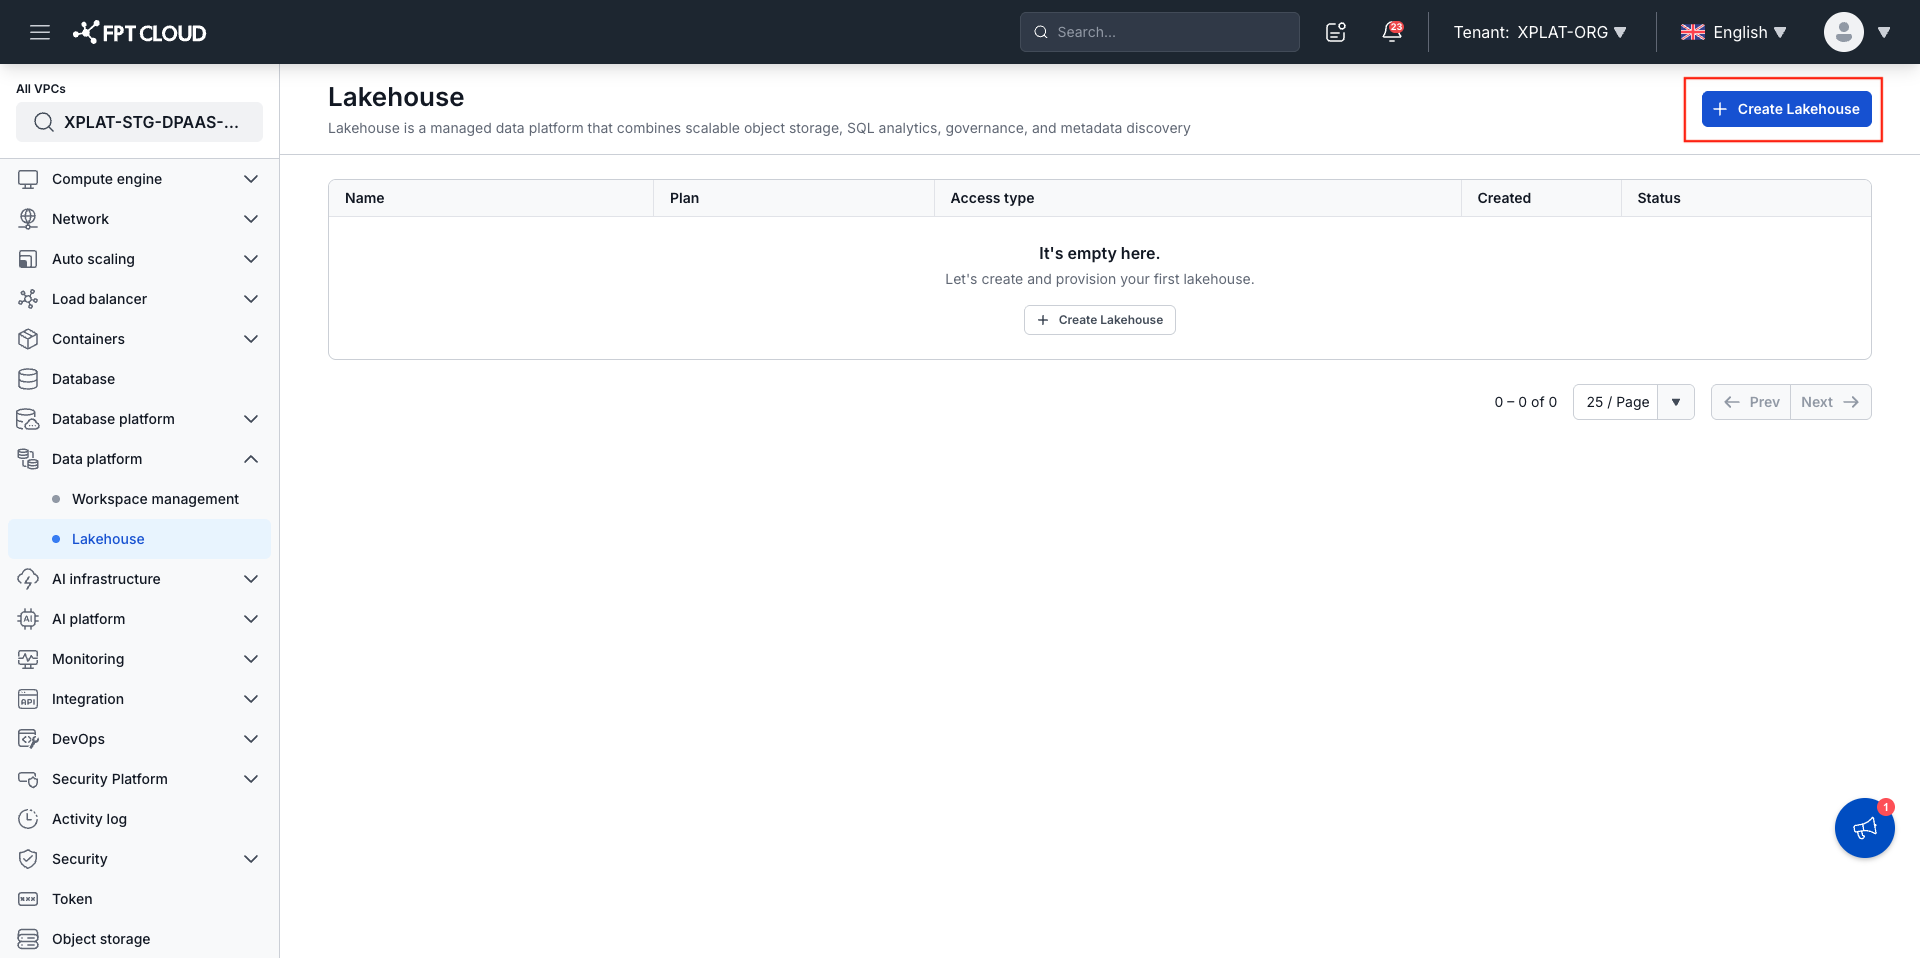
Step 2. In the Lakehouse listing, click Create Lakehouse > the Choose package screen appears
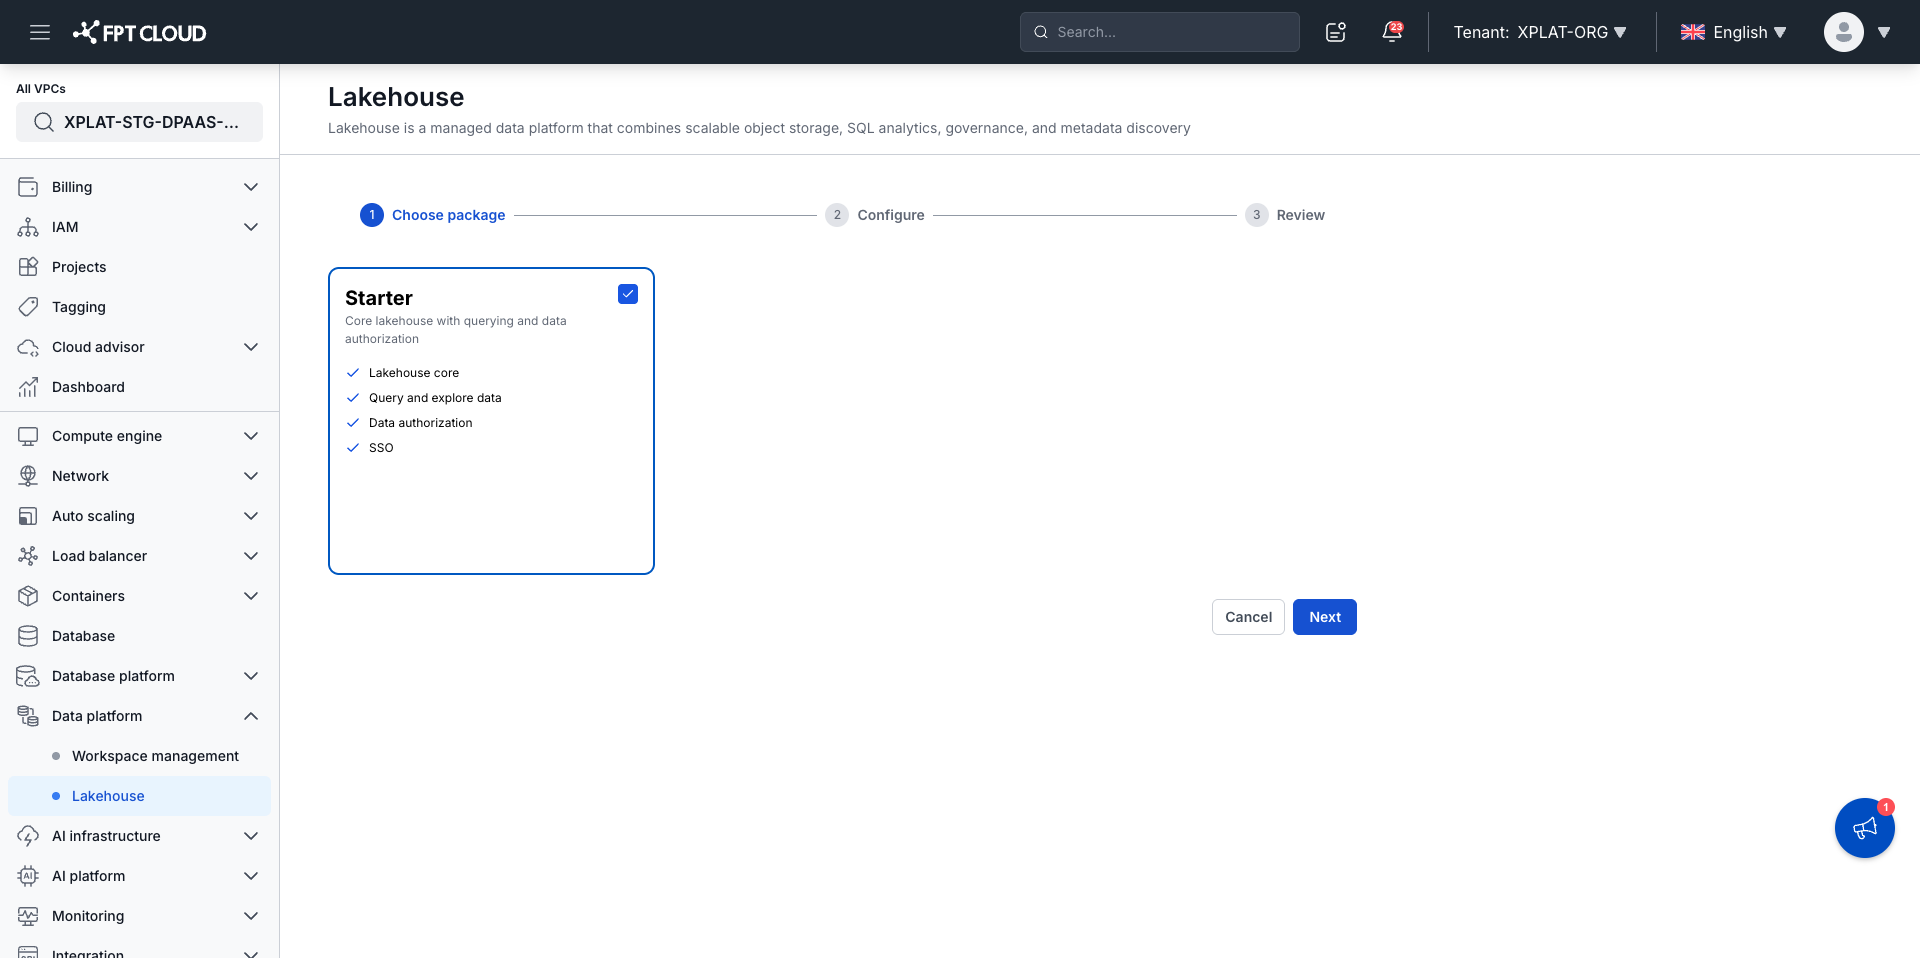
Step 3. Select the appropriate package:
| Package | Features | Best For |
|---|---|---|
| Starter | Lakehouse core — Query and explore data, Data authorization, SSO | Small workloads |
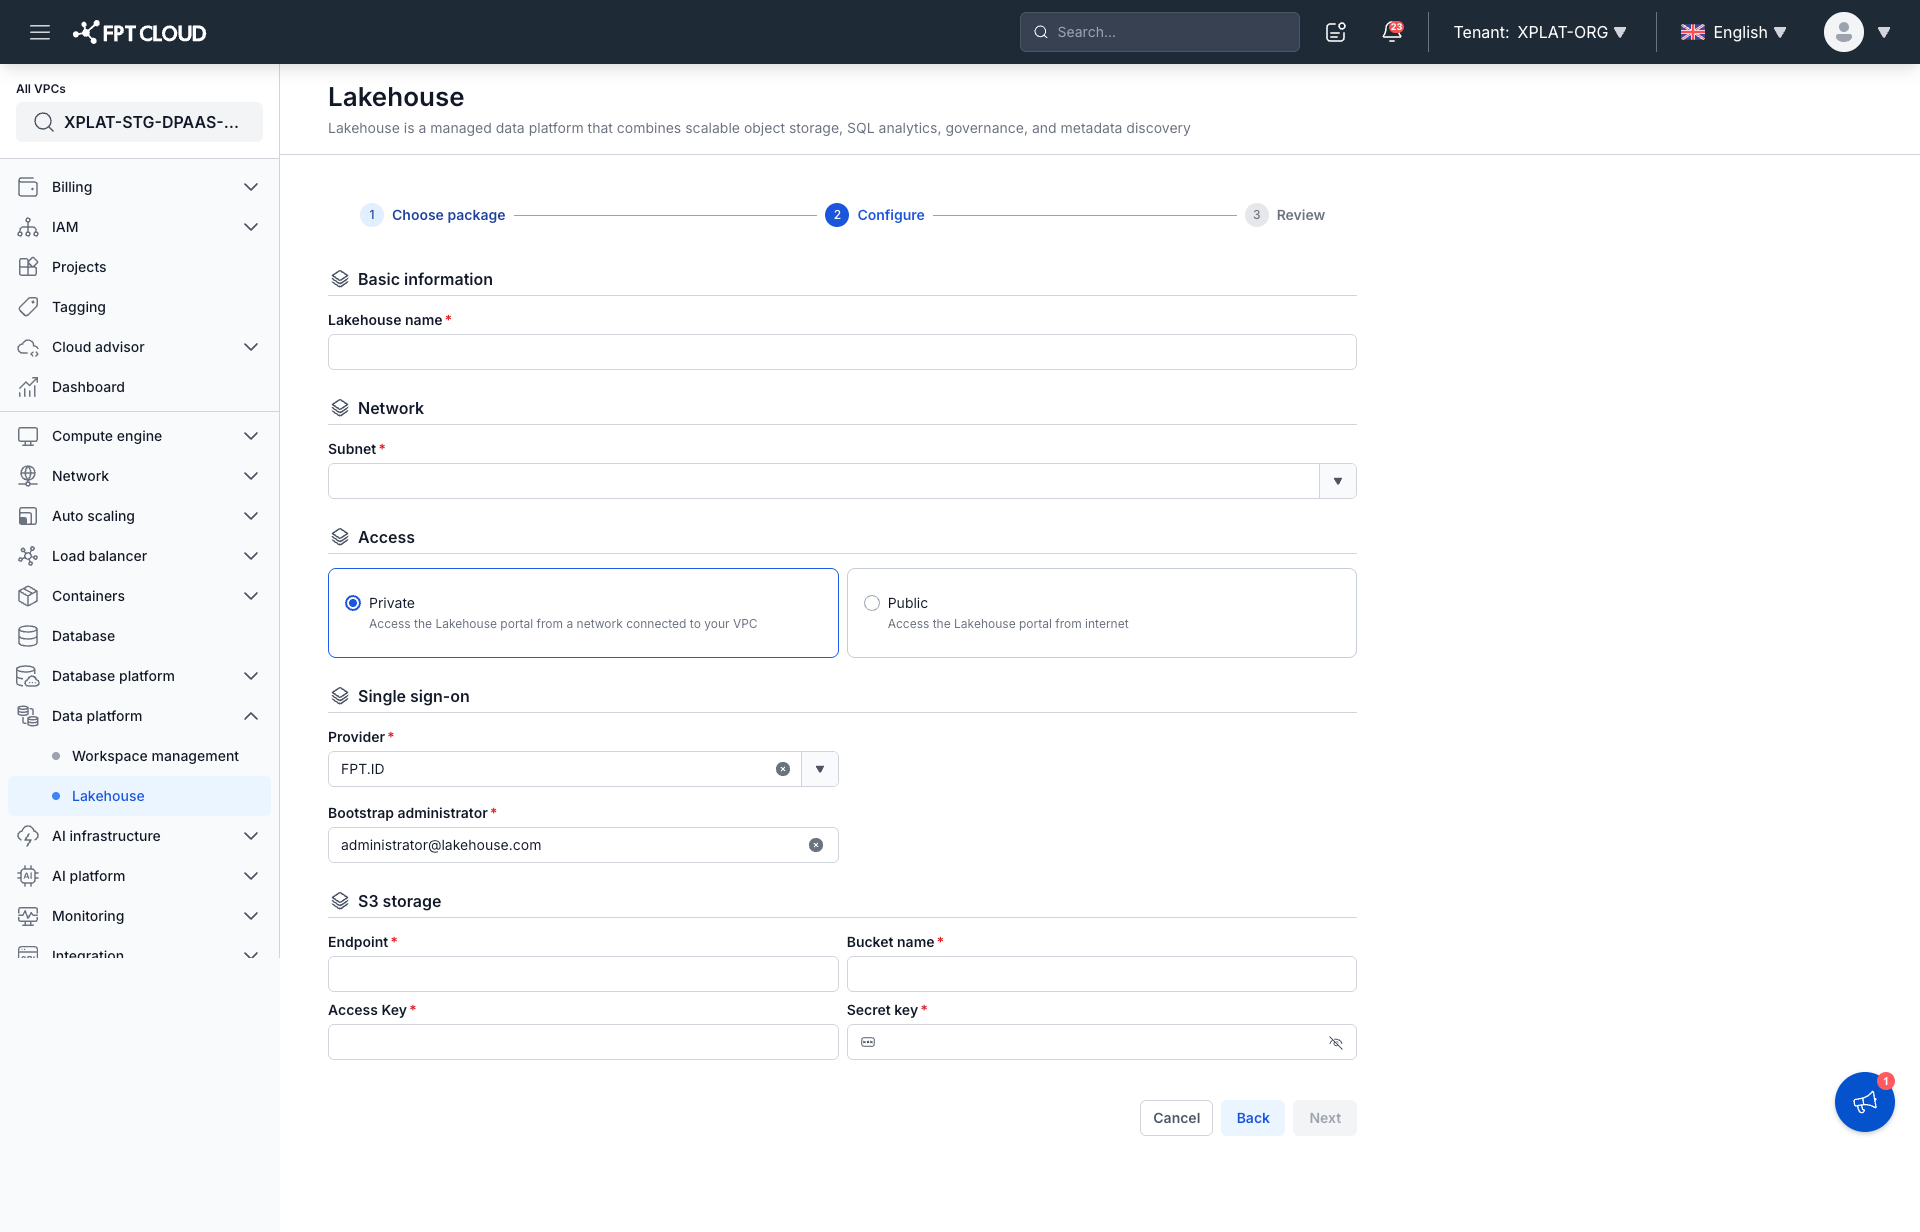
Step 4. Configure your Lakehouse:
Basic information
- Lakehouse name (required): The display name used to identify the Lakehouse in the listing and detail screen.
If the name already exists, the system displays the error "A Lakehouse with this name already exists. Choose a different name."
Network
- Subnet (required): Select 1 subnet within the current VPC.
The subnet must have an available Static Pool. Otherwise, the system displays "This subnet can't be used because it doesn't have an available Static Pool. Choose another subnet."
Access
Select one of two access modes:
| Mode | Description |
|---|---|
| Private (default) | Access the Lakehouse Portal from a network connected to your VPC |
| Public | Access the Lakehouse Portal from the internet — requires at least 1 available Public IP; quota is checked at the Review step |
Single sign-on
Select the Provider first — the corresponding fields will appear:
-
FPT.ID:
- Bootstrap administrator (required): Email of the first admin to log in to the Lakehouse after setup is complete
-
Google:
- Client ID (required): Client ID from the OAuth Client registered in Google Cloud Console
- Client secret (required): Corresponding Client Secret — masked by default, click the Show icon to reveal
- Bootstrap administrator (required): Email of the first admin to log in to the Lakehouse
- Redirect URI: Auto-generated by the system, read-only, with a Copy button — this value must be registered in your Google Cloud Console OAuth Client for SSO to work
S3 storage
Customers must bring their own pre-existing S3-compatible bucket (BYO) — the system does not create a new bucket.
| Field | Description |
|---|---|
| Endpoint (required) | S3 endpoint address, in full URL format https://<domain> |
| Bucket name (required) | Name of an existing bucket on the S3 system |
| Access key (required) | Access key used to authenticate bucket access |
| Secret key (required) | Corresponding secret key — masked by default, click Show to reveal. For security reasons, this value is not saved once you leave the form |
Click Next when all information is valid.
Step 5. On the Review screen, verify all details before creating:
- Package: The package configured for the Lakehouse
- Quota: CPU, RAM (GB), Load balancer, Disk (GB) — plus a Public IP row if Access = Public. Each row shows a checkmark (✓) for sufficient or (✕) for insufficient quota
If any quota row is insufficient (✕), the Create Lakehouse button will be locked until the configuration is adjusted.
- Basic information: Lakehouse name
- Network and access: Subnet, Access
- Single sign-on: Provider, Bootstrap administrator, Client ID (if Google) — Client secret is always masked
- S3 storage: Endpoint, Bucket name, Access key — Secret key is always masked
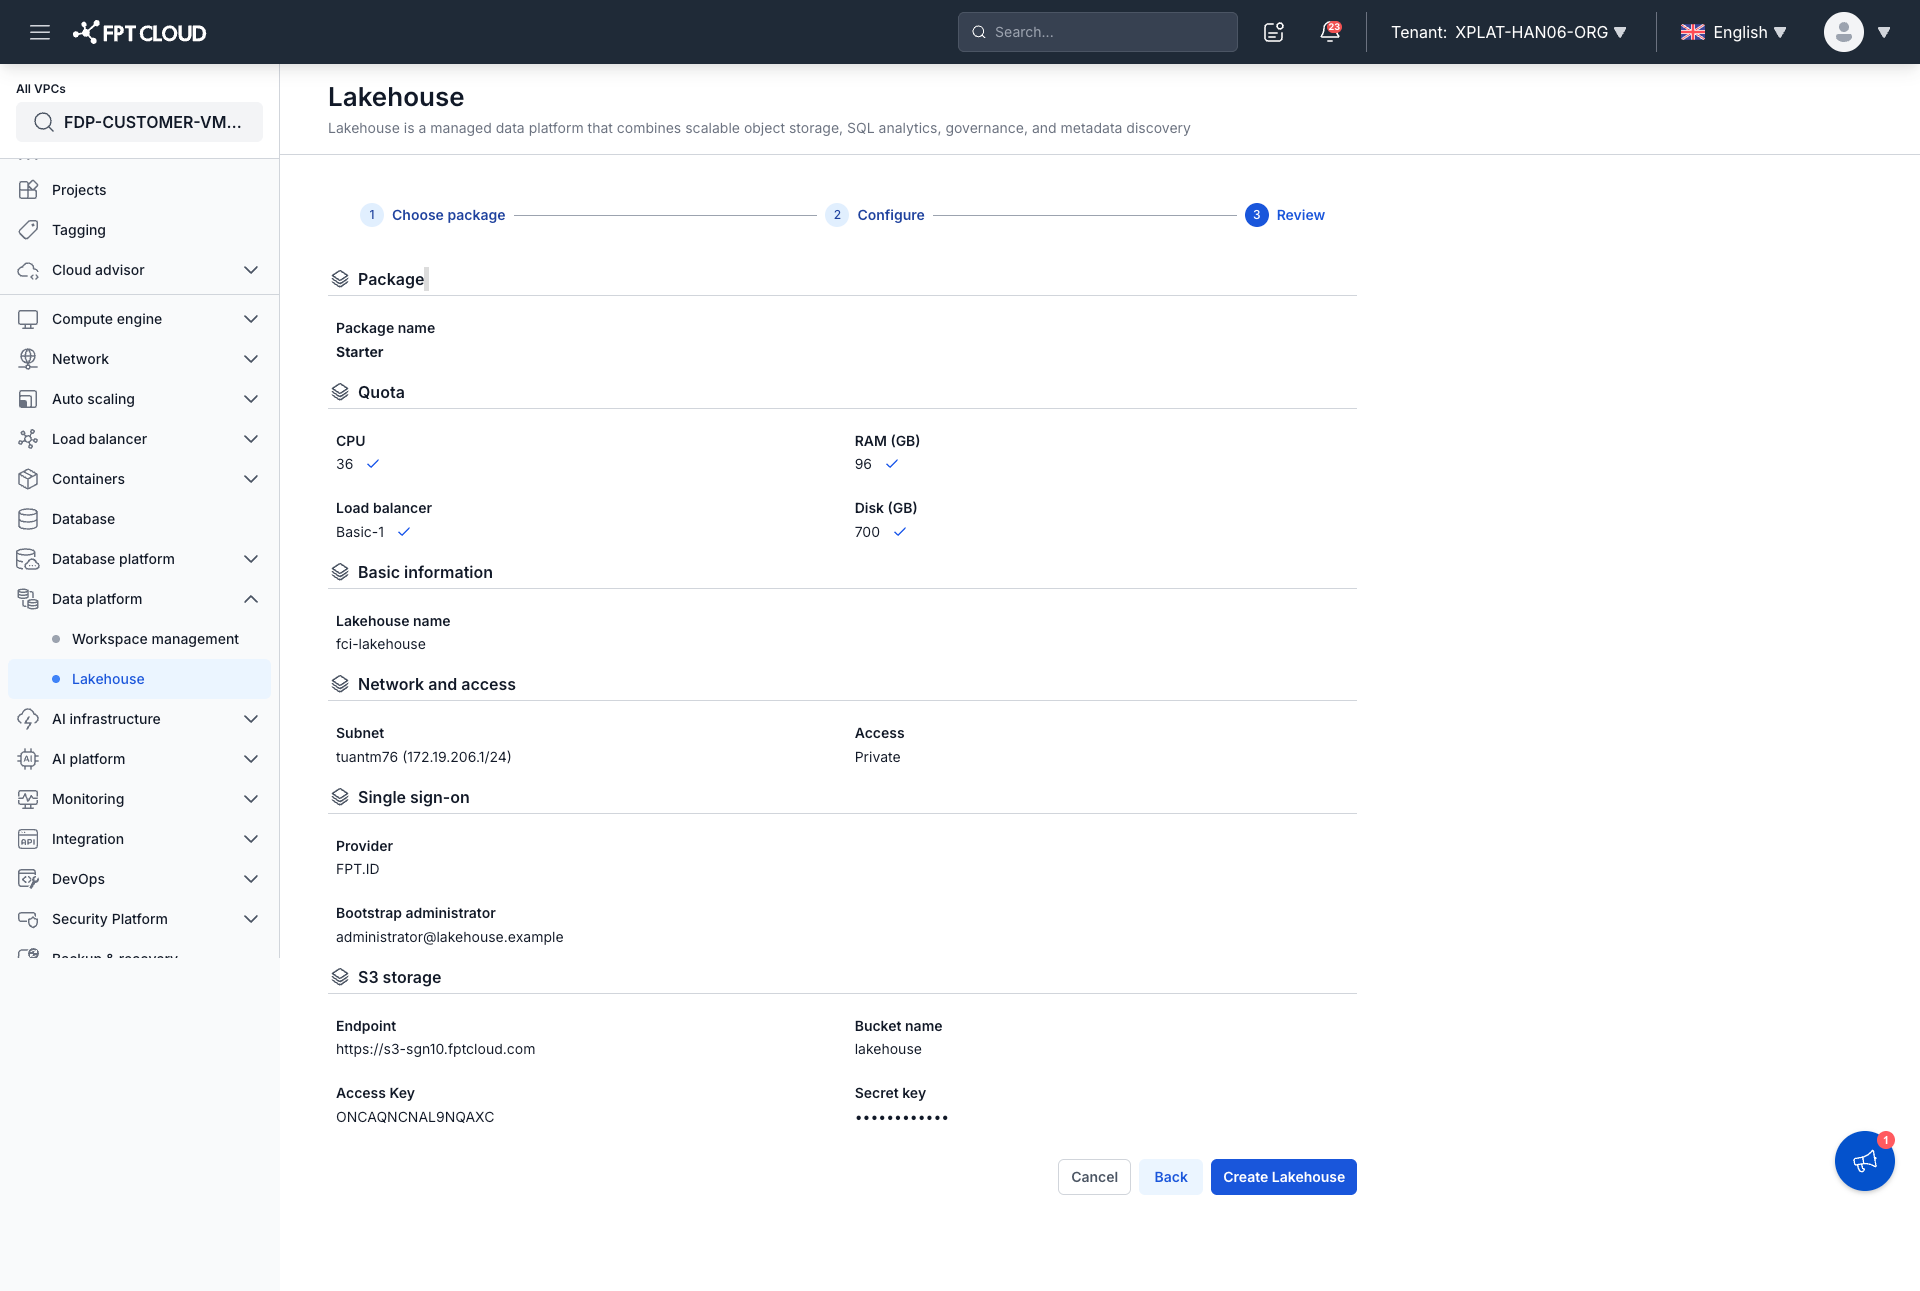
Click Create Lakehouse to finish.
Result: The Lakehouse is complete when its status progresses through all 4 stages:
Initializing → Preparing infrastructure → Setting up your Lakehouse → Completed
For details on monitoring status, see View Lakehouse Information.