Open Metadata Usage Guide
1. Create Service
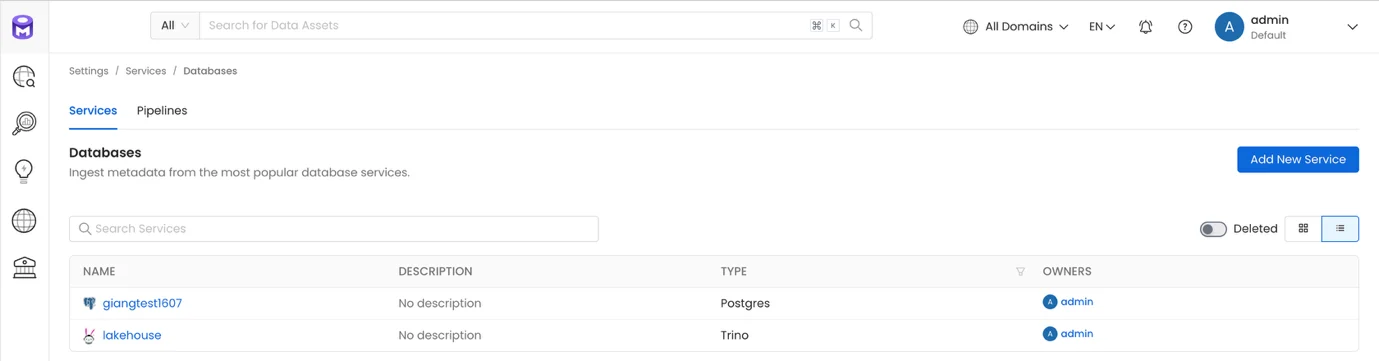
Step 1. Access Open Metadata, in the left menu select Settings > Services > Databases, then select Add New Service
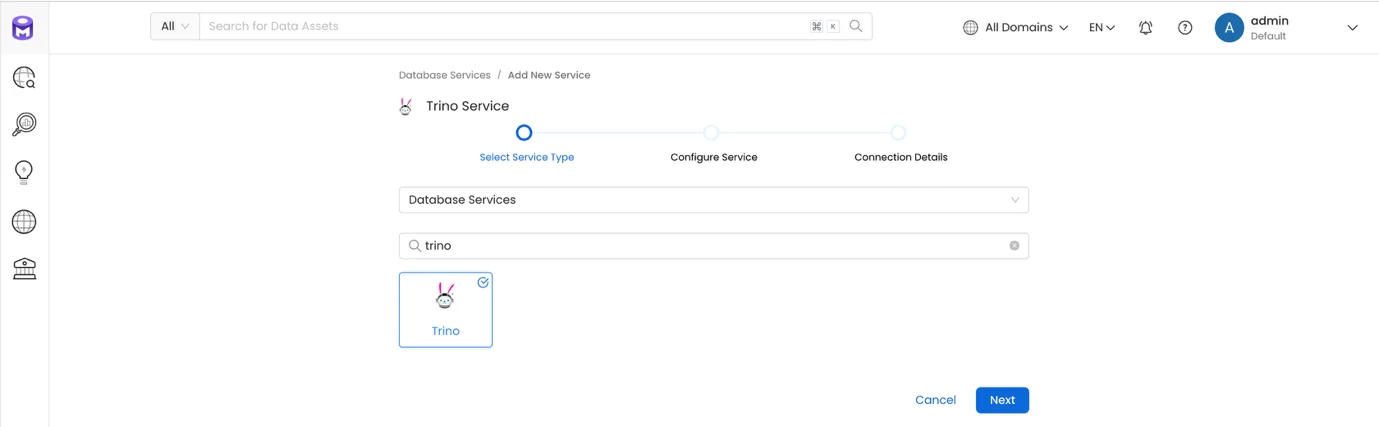
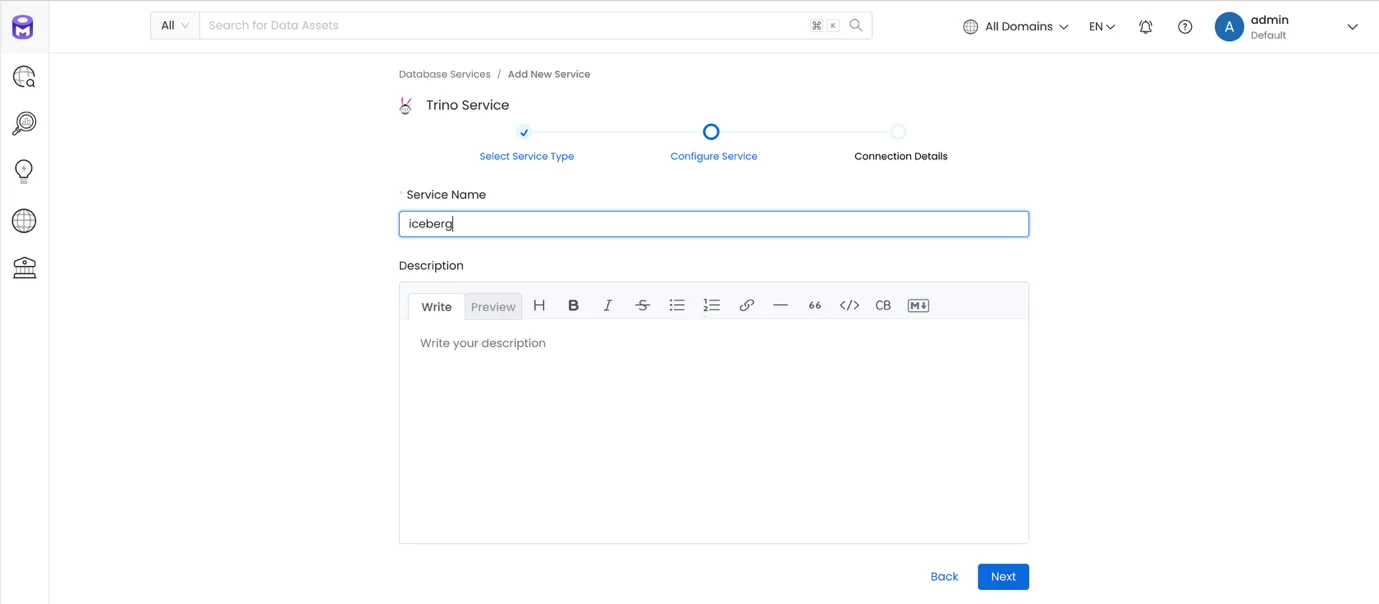
Step 2. Select Service Type Trino, then click Next
Step 3. Enter the following information
- Service name: service name
- Description: service description
Click Next
Step 4. Enter the Connection Details
- Username: account name
- Auth Configuration Type: select Basic Auth
- Host and Port: enter the Trino connection information
- Catalog (optional): enter the exact catalog to retrieve information from. If left blank, the system retrieves information from all Catalogs available through Trino
- DatabaseSchemas (optional): enter the exact schema to retrieve information from. If left blank, the system retrieves information from all Schemas available through Trino
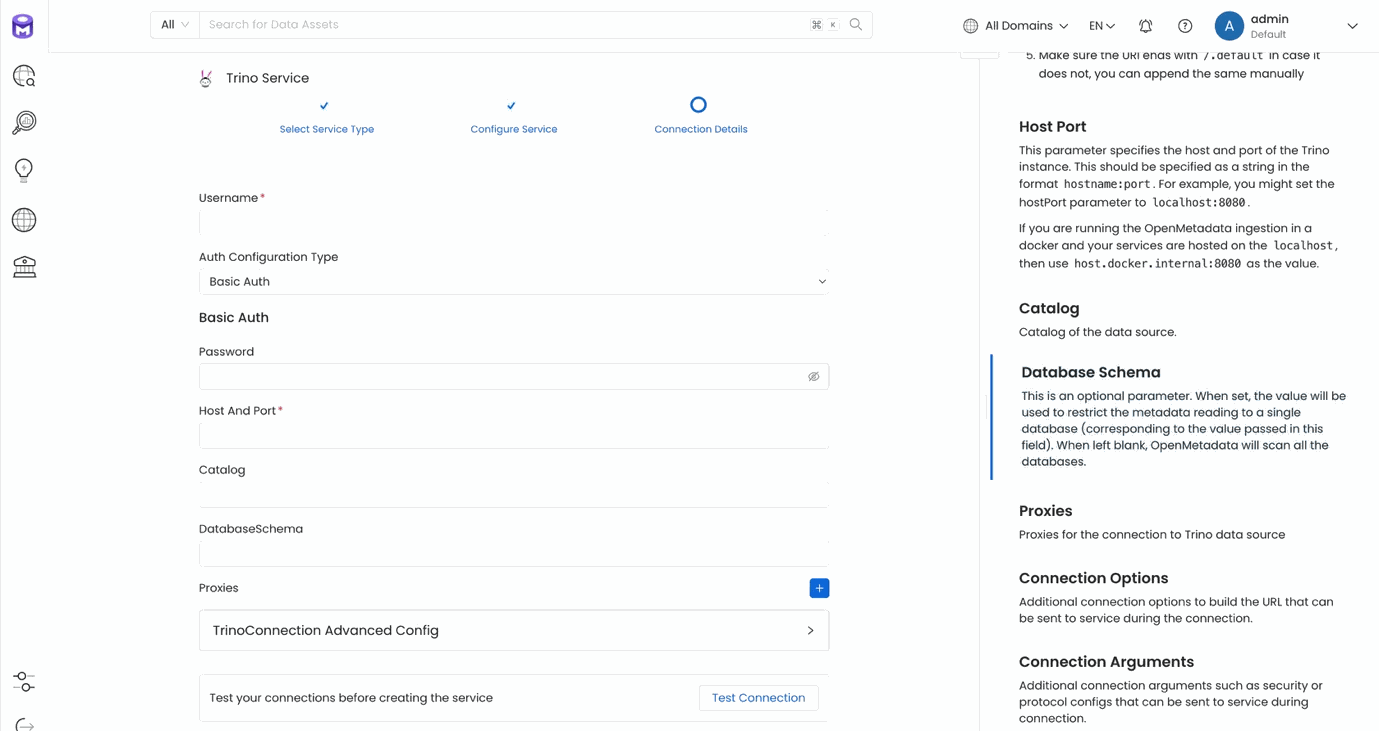
Click Test connection to verify the connection to Trino
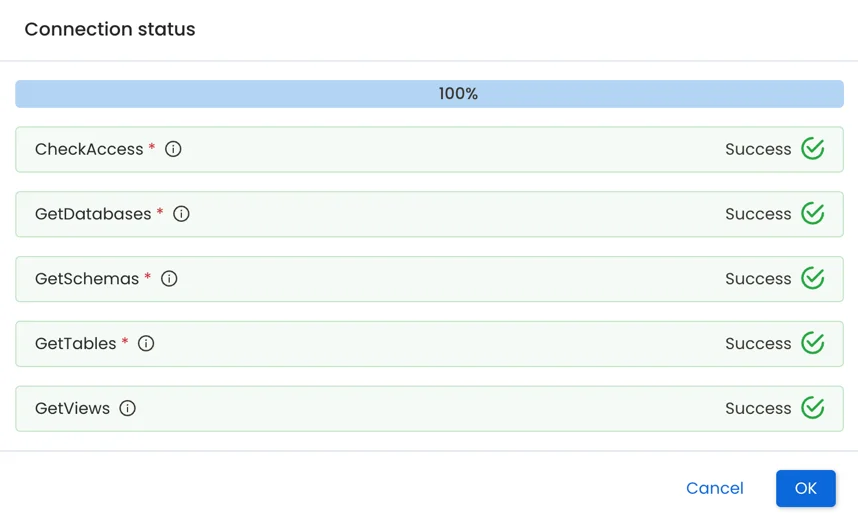
Step 5. Click Save to complete creating the Service
2. Configure Pipeline
Configure a Pipeline to pull data from the Service into Open Metadata
Step 1: On the list screen of the Service you just created, click to view its details
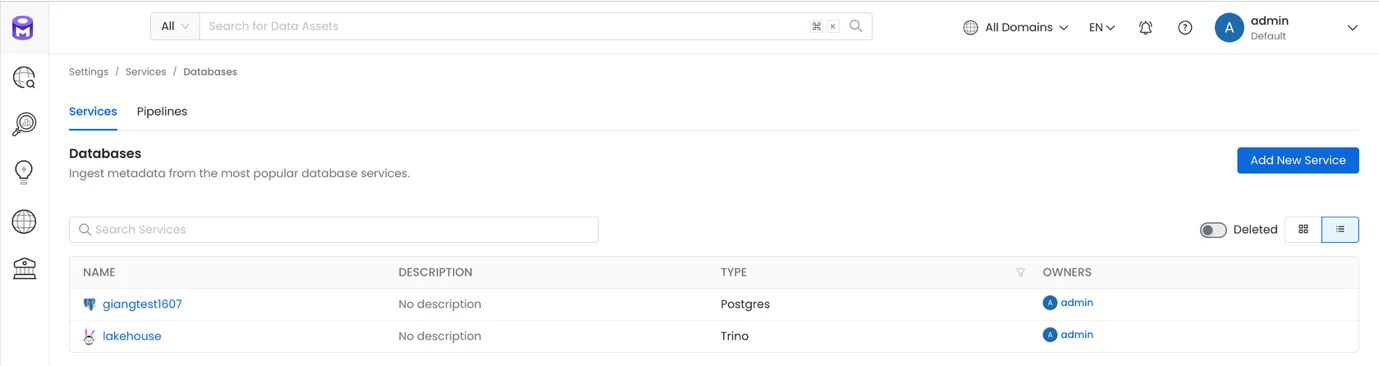
Step 2: On the Service detail screen, select the Ingestion tab, then click Add Ingestion > Add Metadata Ingestion
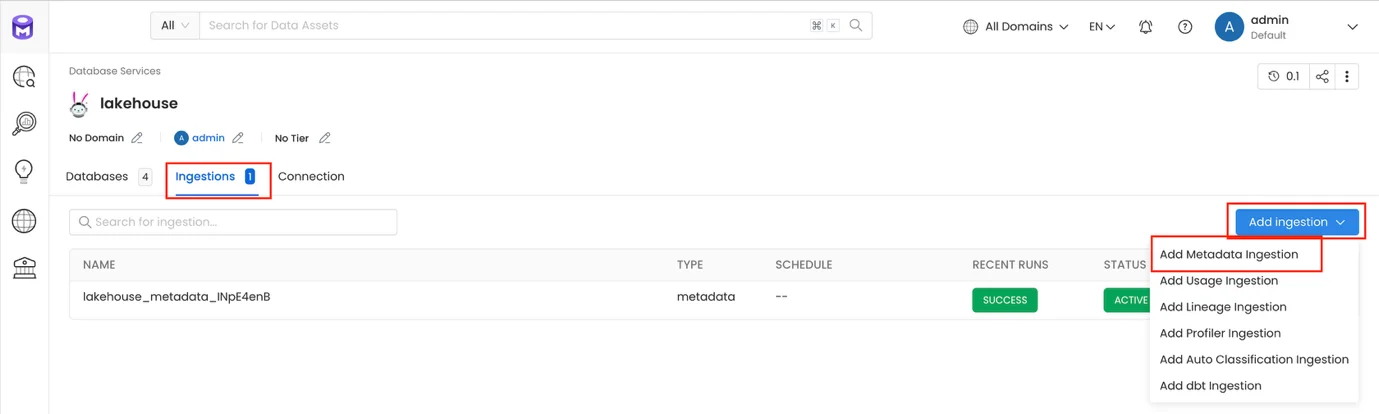
Step 3. On the Add Metadata Ingestion screen
- Name: Pipeline name
- Database Filter Pattern
- Includes: enter the databases to retrieve data from
- Exclude (optional): enter the databases to exclude from data retrieval
- Schema Filter Pattern
- Includes: enter the schemas to retrieve data from
- Exclude (optional): enter the schemas to exclude from data retrieval
- Table Filter Pattern
- Includes: enter the tables to retrieve data from
- Exclude (optional): enter the tables to exclude from data retrieval
Click Next
- Select Schedule to set up a recurring ingestion schedule
- Select On demand to run ingestion manually
- Number of retries: the number of retry attempts if ingestion fails
Click Add & Deploy to finish adding the Ingestion and deploy the Ingestion Job
3. Run the pipeline
Step 1: On the list screen of the Service you just created, click to view its details
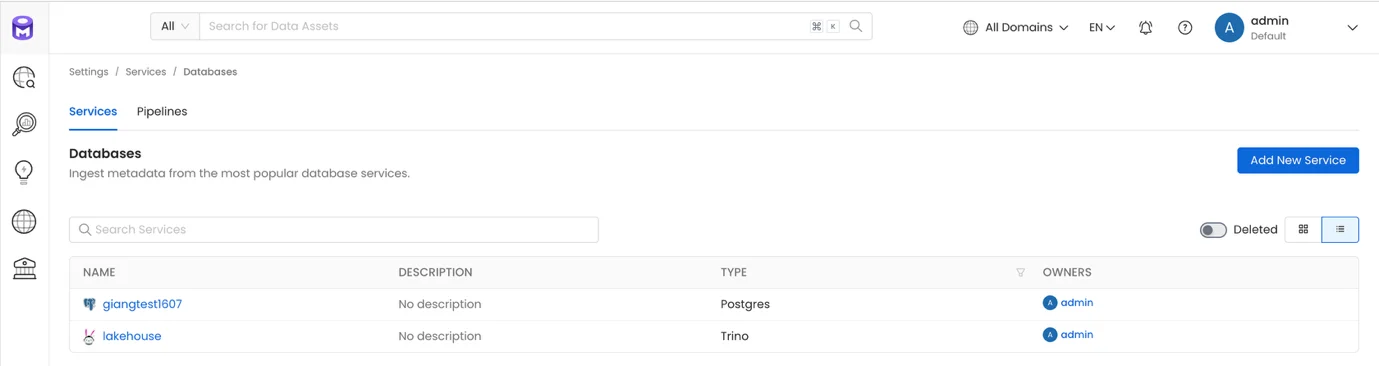
Step 2: On the Service detail screen, select the Ingestion tab
Step 3: On the pipeline you just created, click the Run action
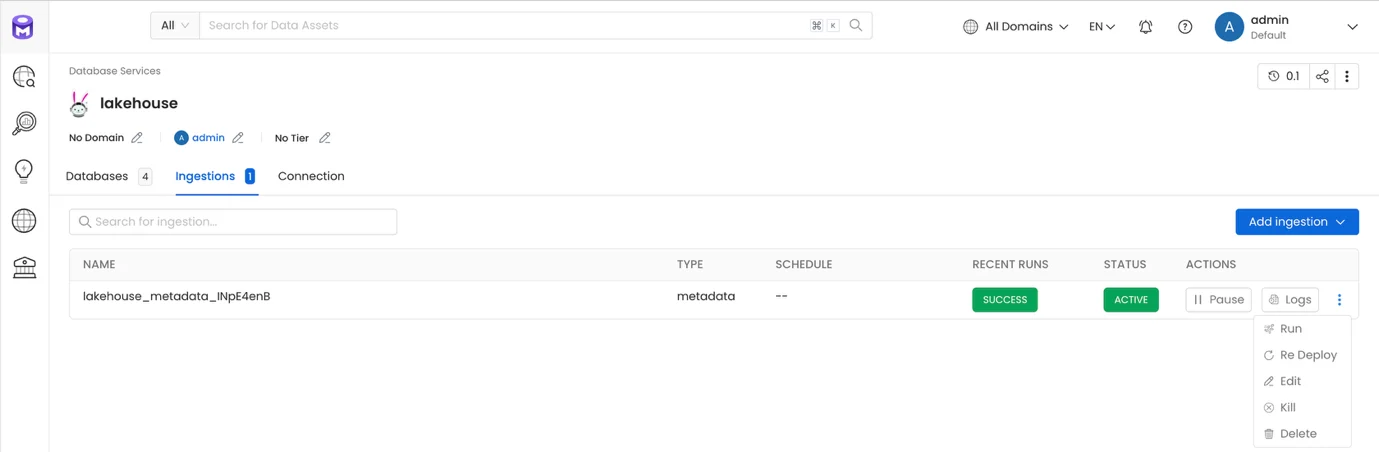
After clicking Run, the Ingestion Job is executed to pull Metadata into the system
If the Ingestion Job is scheduled, the Pipelines will be automatically executed at the configured time
4. Explore
After running the Ingestion, explore the data from the Explore menu
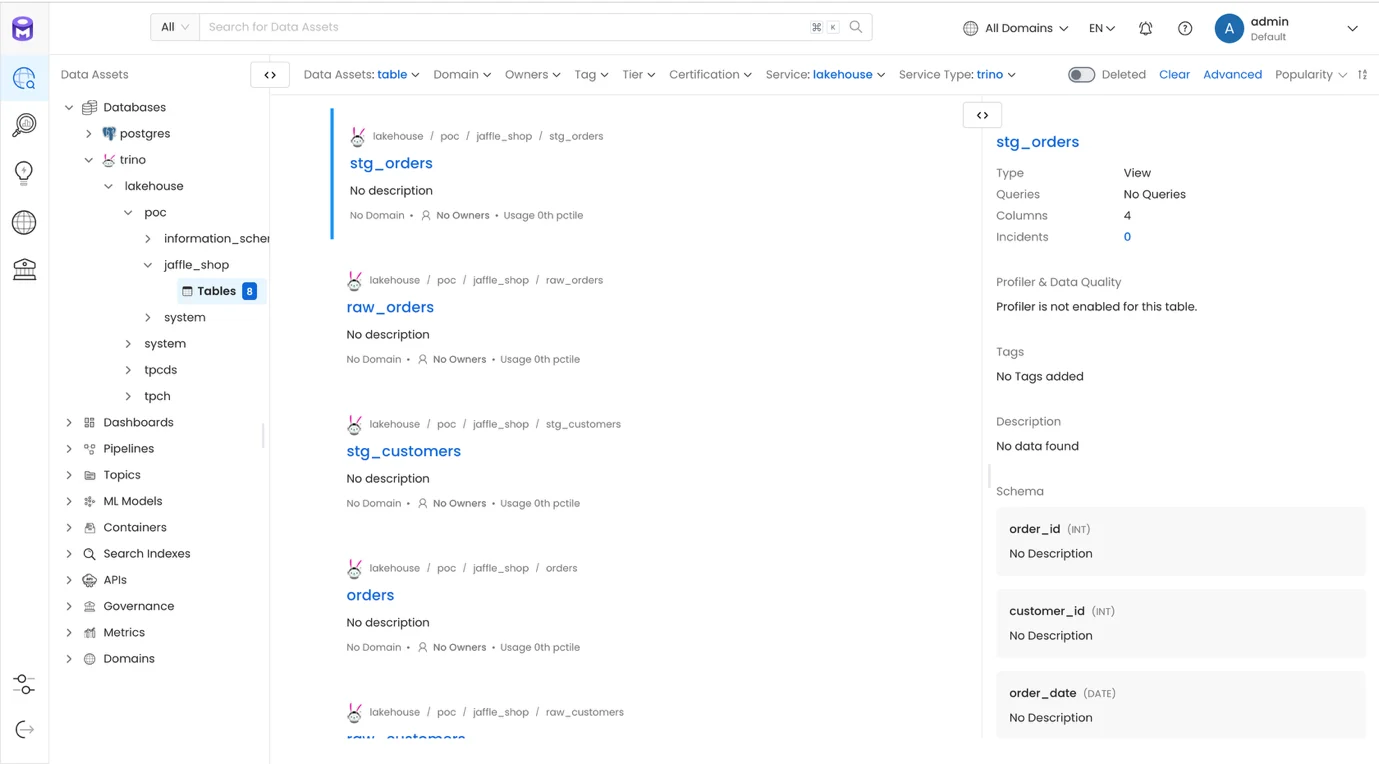
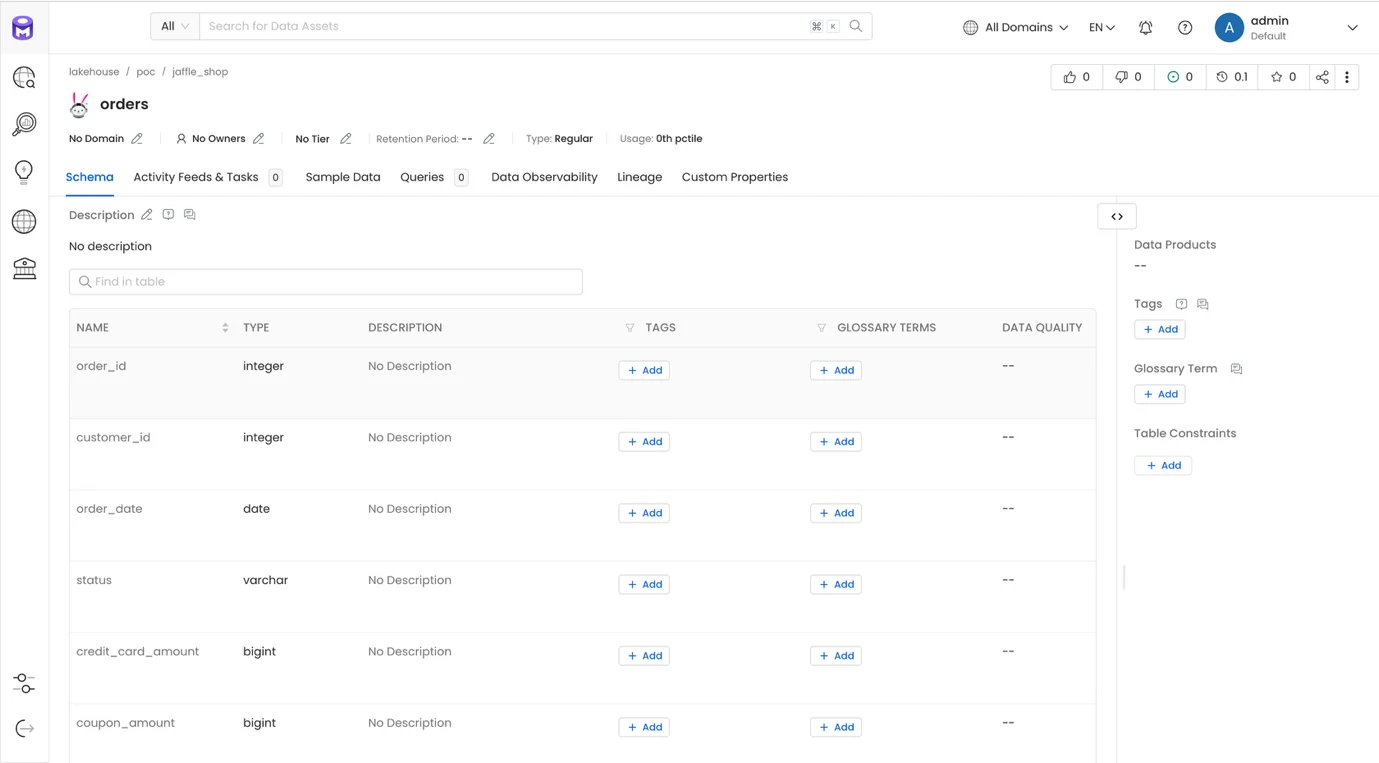
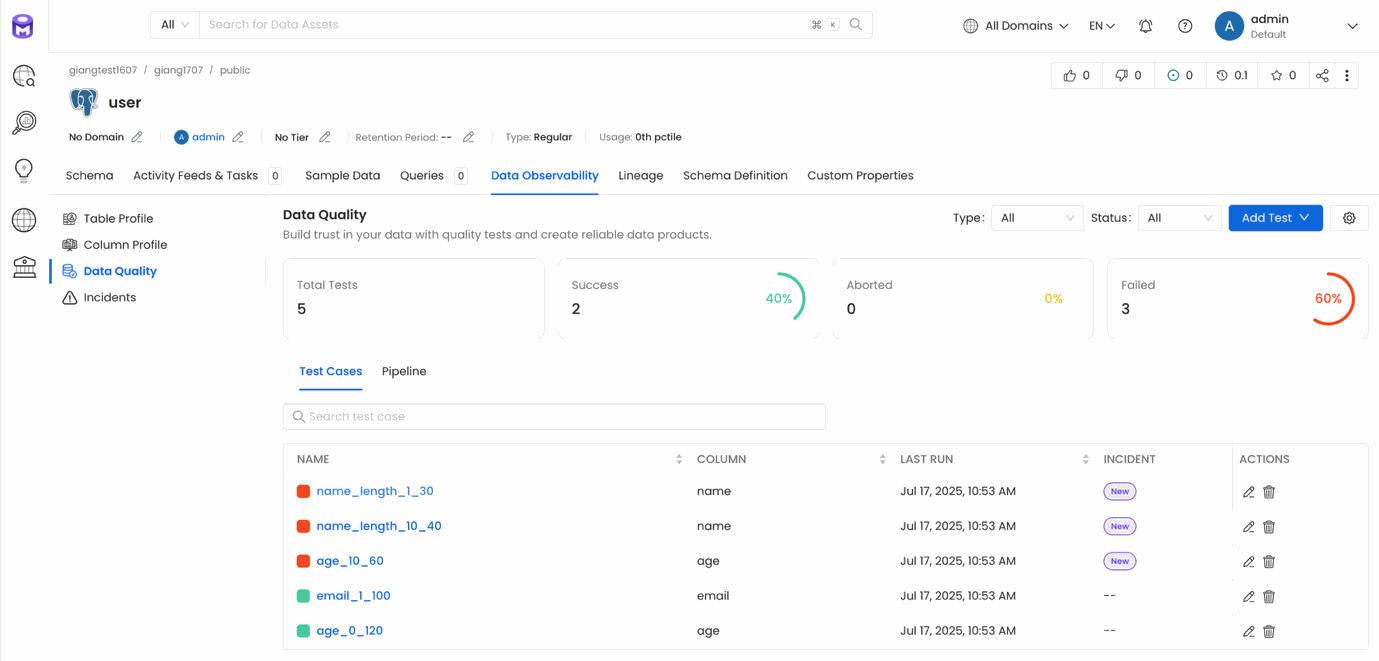
5. Create a Testcase
Check data quality
Step 1. From the Explore screen, select the table you want to create a Testcase for, then click Add Test (Table to test at the table level, Column to test at the column level)
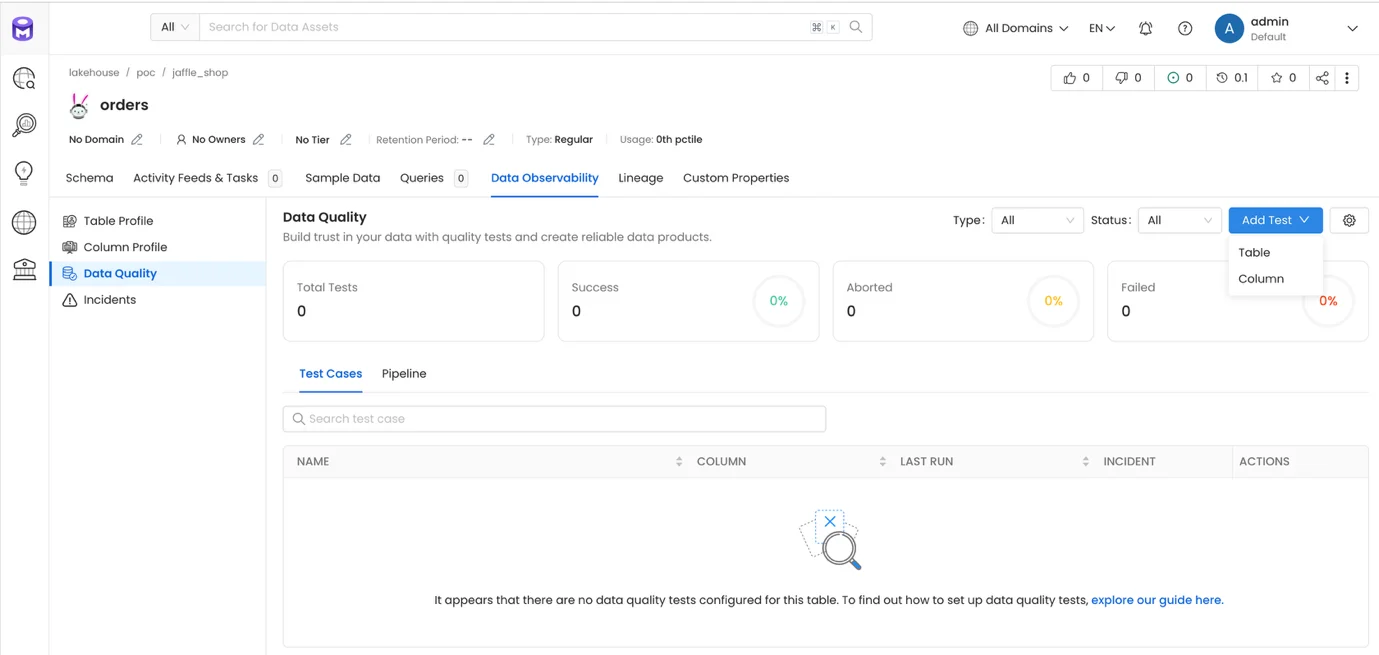
Step 2. Create an Add Column Test
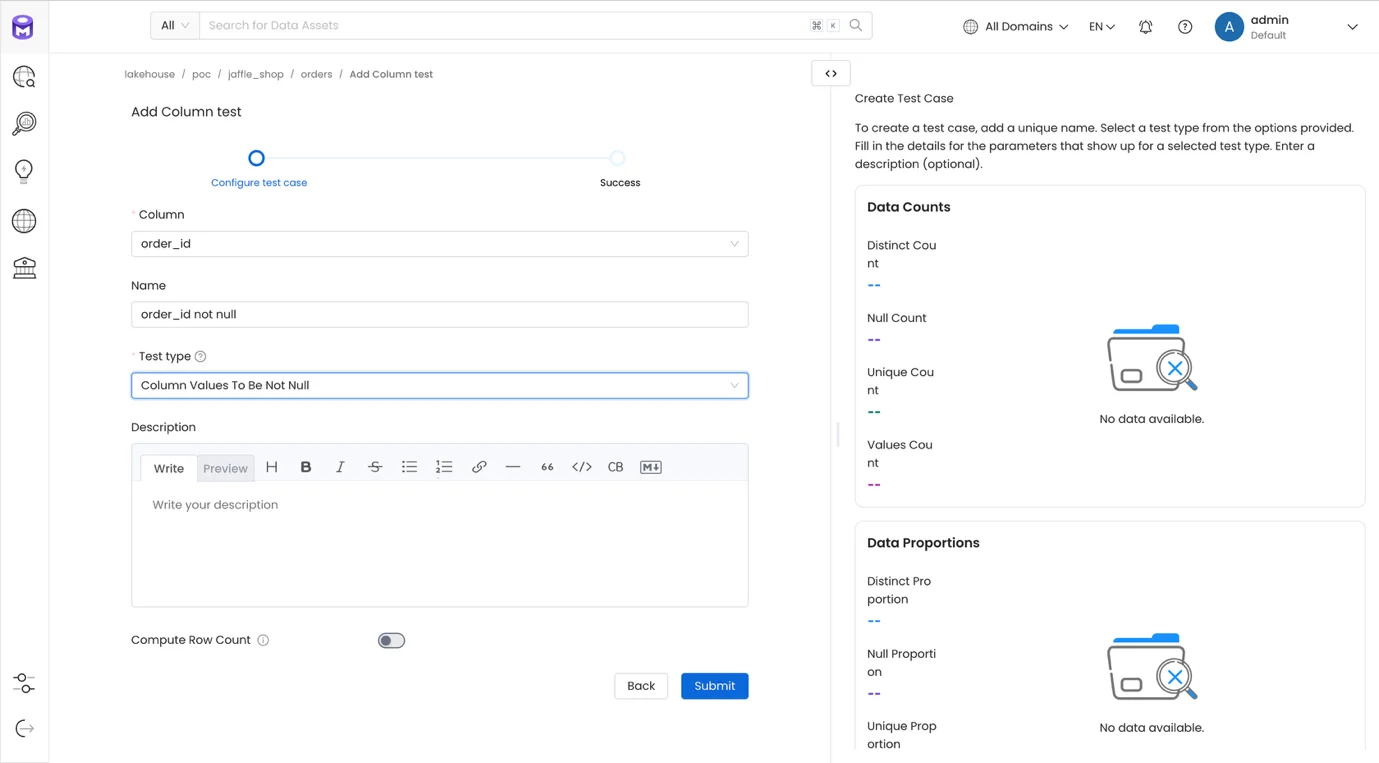
Click Submit to create the Test
6. Create a Pipeline Test
Step 1. From the Explore screen, on the table with the Test case you just created, select the Pipeline tab, then click Add
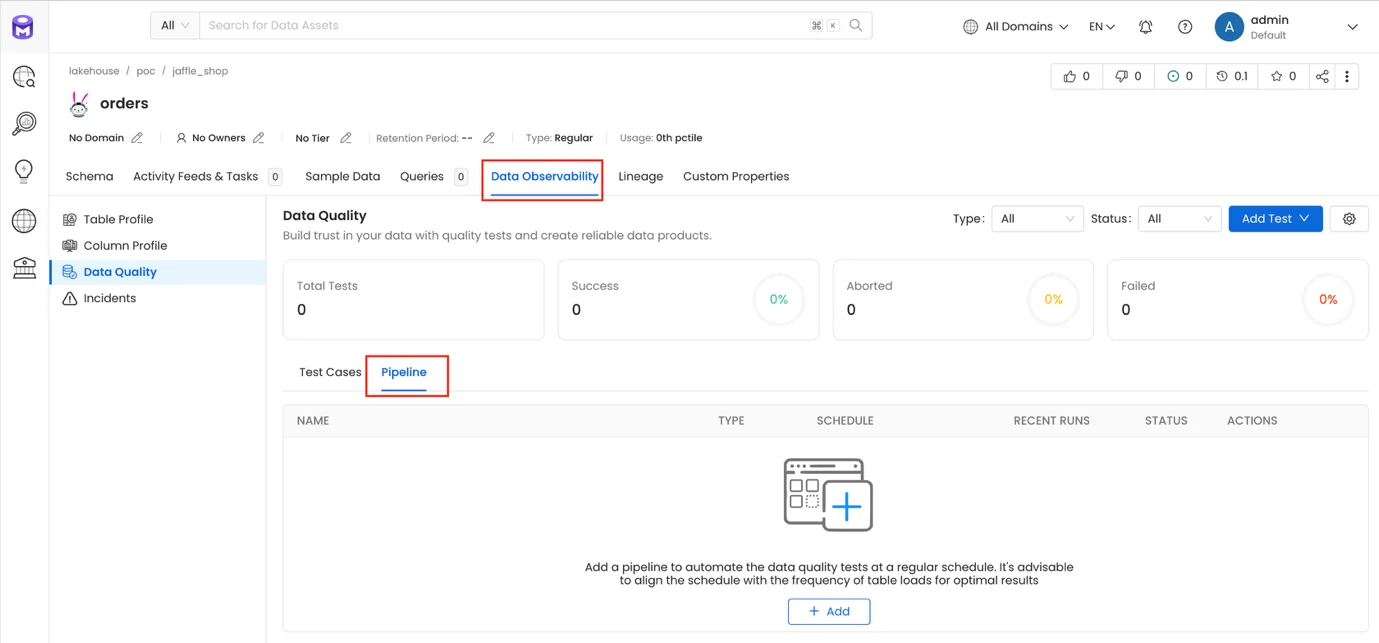
Step 2. Enter the Scheduler for Test Cases information
- Name: Name of the test run schedule
- Select Schedule to set up a recurring run schedule
- Select On Demand to run manually
- Select the testcases to run in the pipeline
Click Submit to complete creating the schedule for the testcase
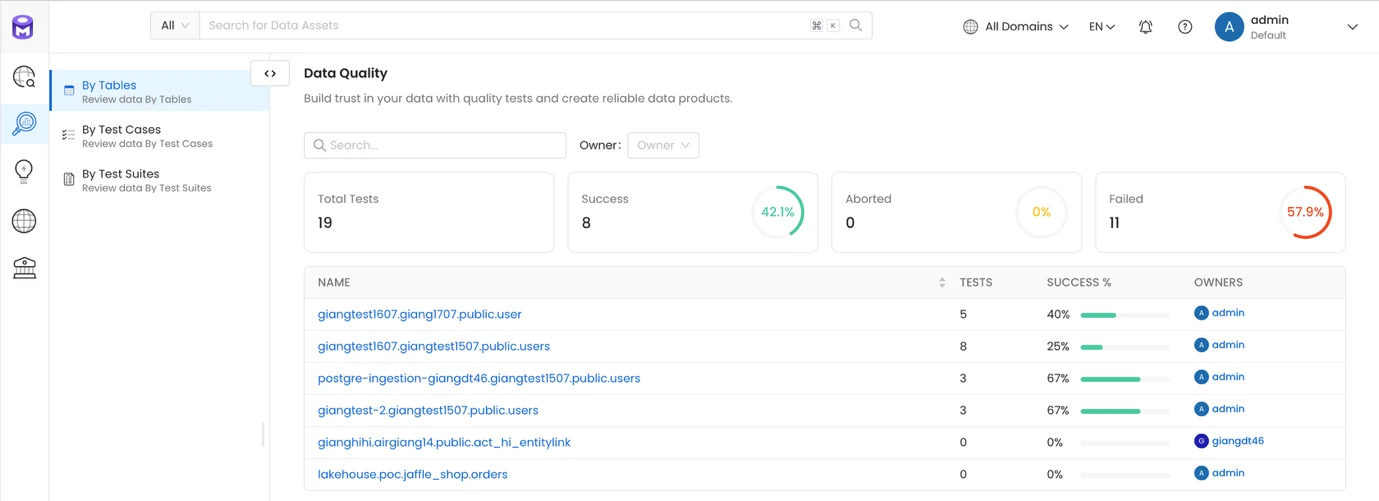
After the test pipeline runs, the system checks the data according to the configured testcases and returns the results both by table and for the overall system