Airflow & Job Submit Guide
Job Submit is a feature that allows users to create and submit data processing jobs (e.g., Spark jobs) directly from the Airflow UI without manually creating a DAG. This feature is especially useful for testing, quickly running analysis scripts, or validating data processing pipelines.
The Job Submit interface supports the following main functions:
- Select the job type (e.g., Spark Python job)
- Configure resources for the driver and executor
- Specify the main script, dependencies, arguments, and environment variables
- Add initialization scripts and custom Spark configurations
Accessing Job Submit
- Step 1: Access the Airflow UI from the created Orchestration service screen
- Step 2: In the menu bar, select Job Management (Beta) > Job Submit
1. Create a New Job on Airflow (Job Submit)
Step 1: Access the Airflow UI, select Job Management (Beta) > Job Submit.

Step 2: Click the Create Job button to open the new job creation interface.
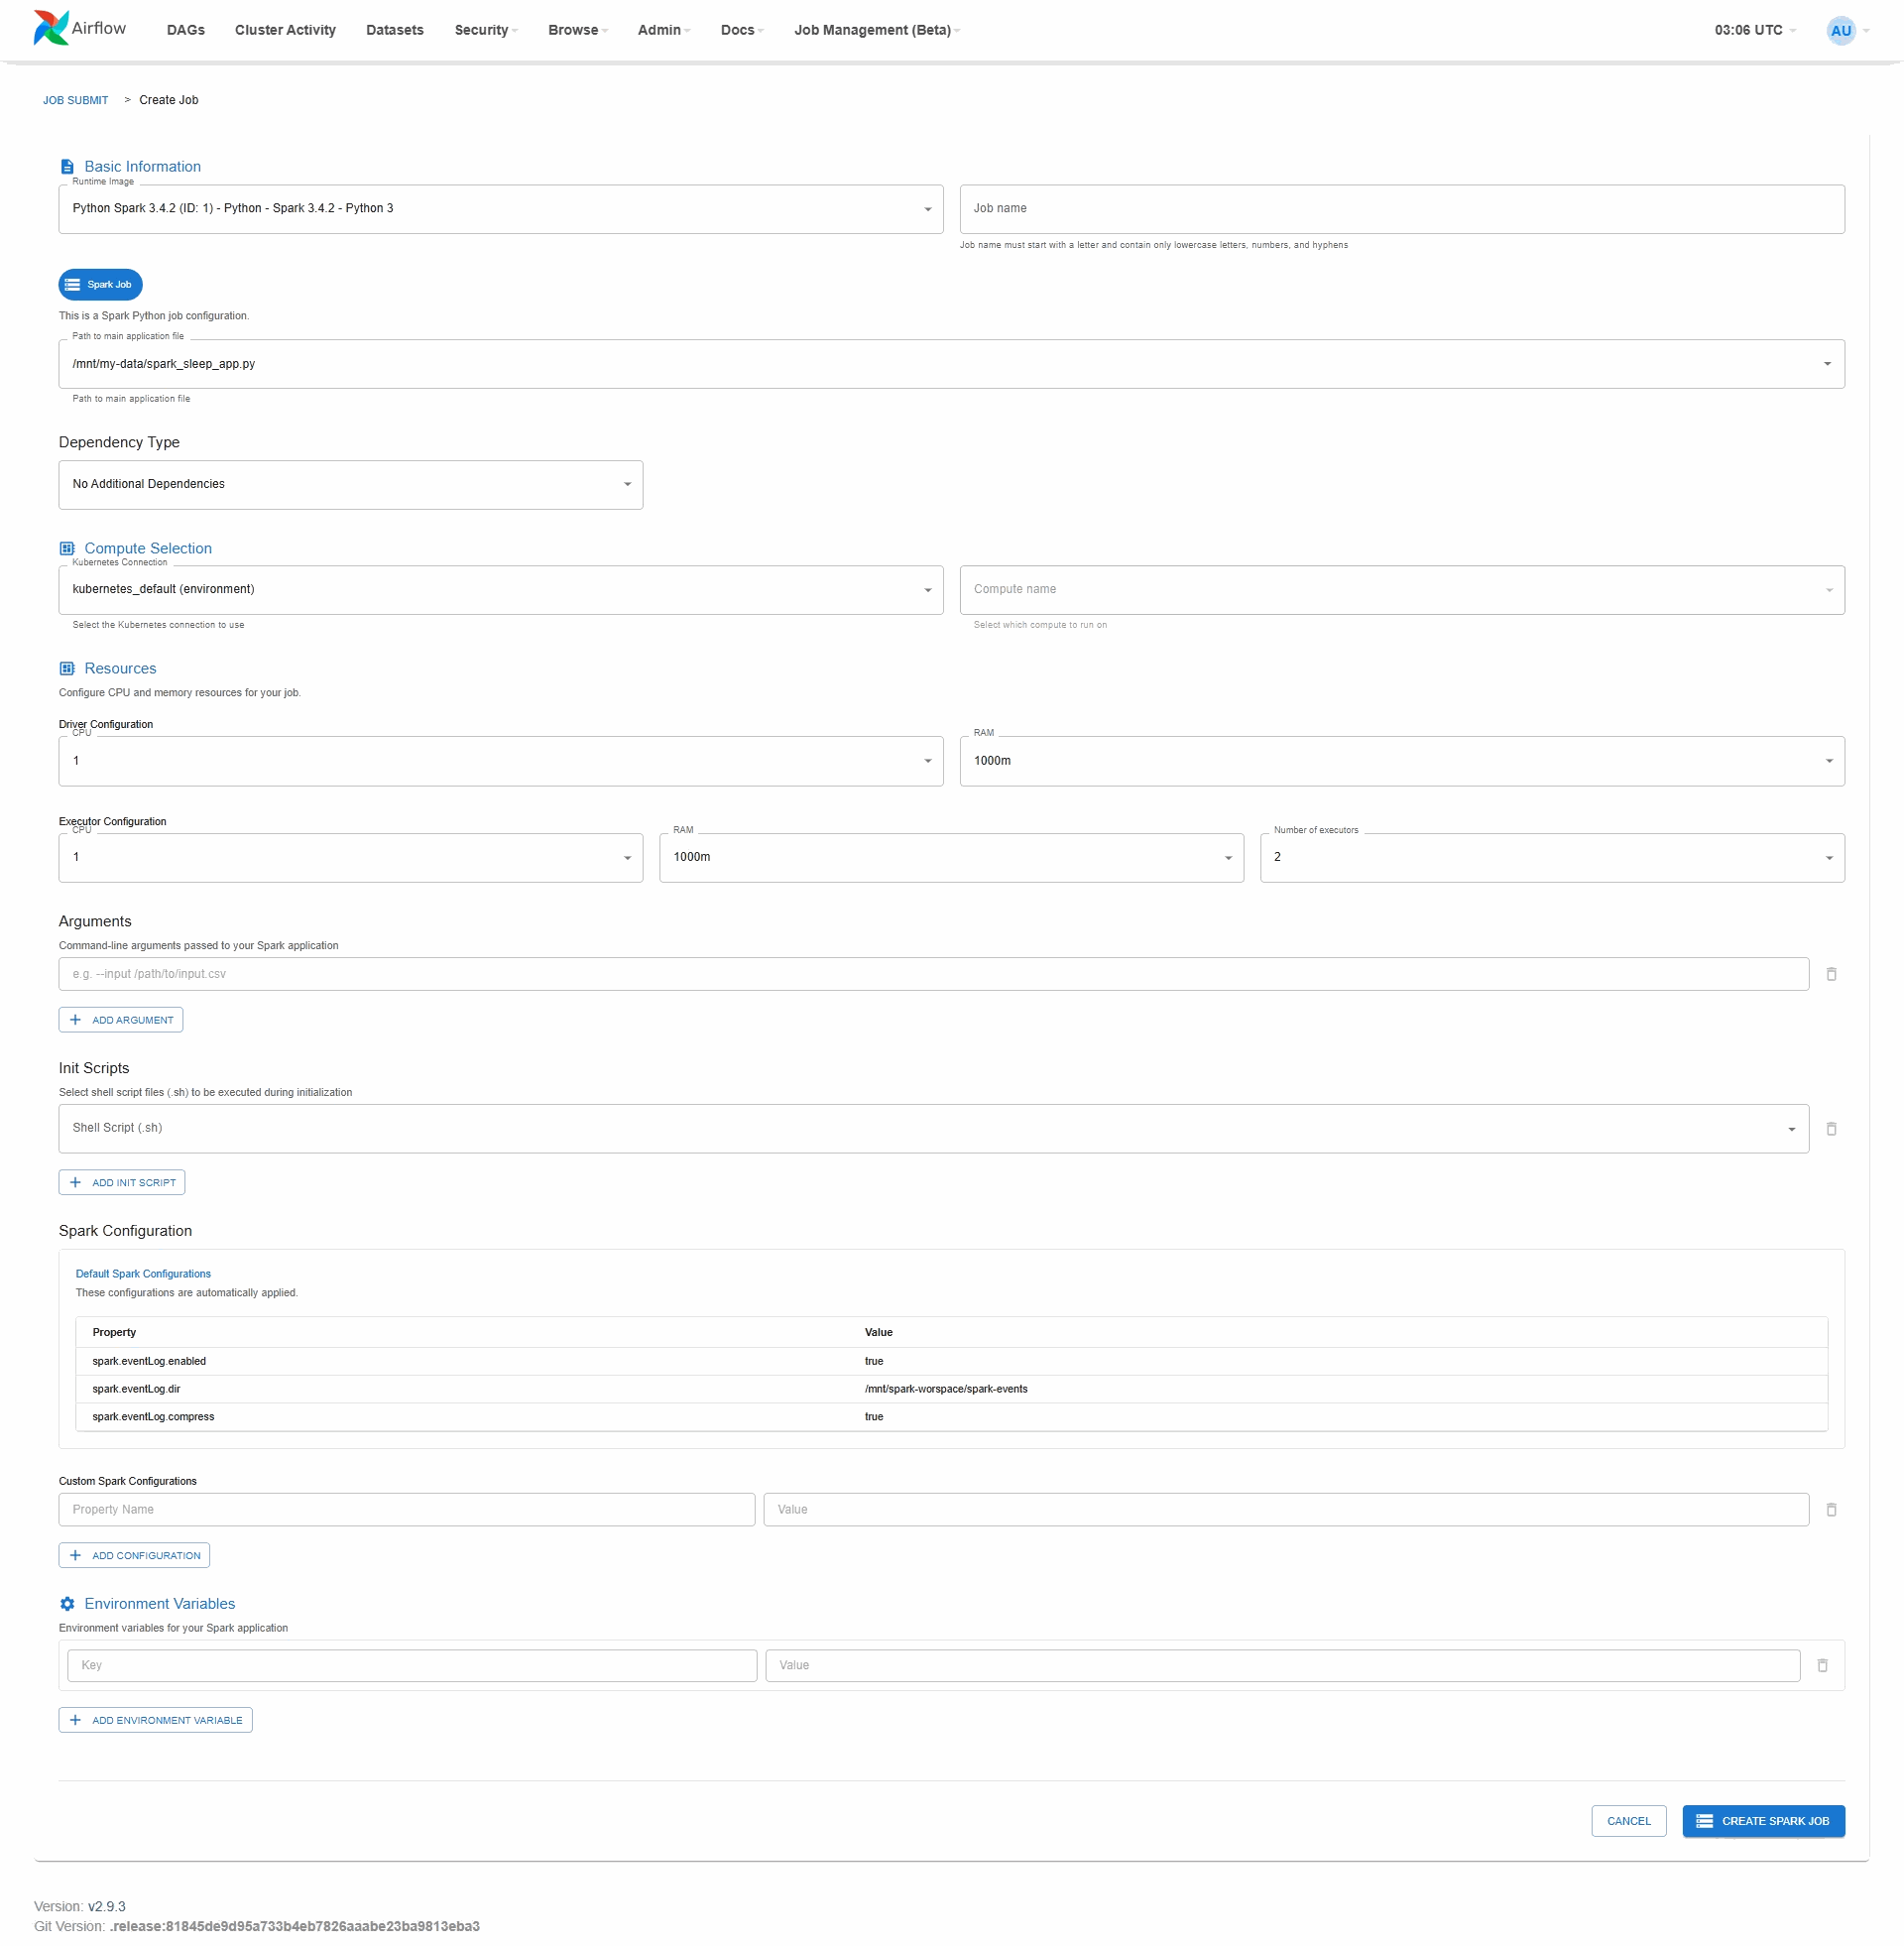
Step 3: Fill in all the configuration information for the job:
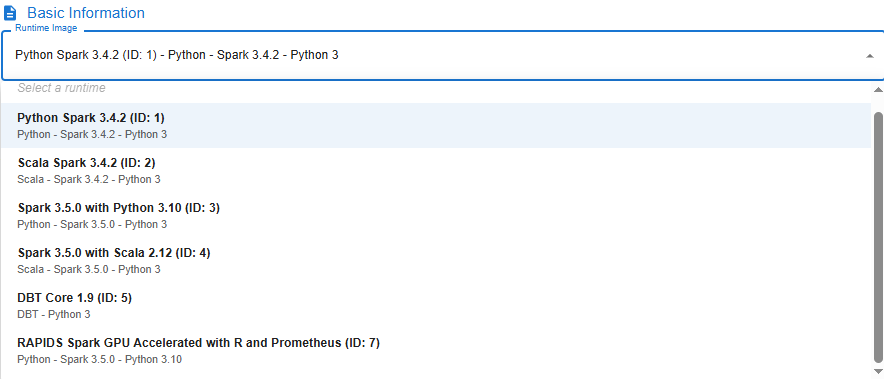
- Runtime Image: Select the image appropriate for the job's purpose
| Image | Description |
|---|---|
| Python Spark 3.4.2 (ID: 1) | Supports Spark library version 3.4.2 with Python version 3 |
| Scala Spark 3.4.2 (ID: 2) | Supports Spark library version 3.4.2 with Scala |
| Spark 3.5.0 with Python 3.10 (ID: 3) | Supports Spark library version 3.5.0 with Python version 3.10 |
| Spark 3.5.0 with Scala 2.12 (ID: 4) | Supports Spark library version 3.5.0 with Scala version 2.12 |
| DBT Core 1.9 (ID: 5) | Supports running DBT Core library version 1.9 with Python version 3 |
| RAPIDS Spark GPU Accelerated (ID: 7) | Supports RAPIDS Spark GPU Accelerated library with Python version 3 |
- Job Name: Set the job name (lowercase, no spaces, only letters, numbers, and "-")
- Dependency Type:
- PyPi Requirements: Select the requirements.txt file from My Workspace
- Packaged Virtual Environment: Select a *.tar.gz file
- No Additional Dependencies: No dependencies to install
- Kubernetes Connection: Select kubernetes_default (environment)
- Compute Name: Select compute
- Check Spark Job
- Path to main application file: Select the main .py file in My Workspace
- Driver Configuration:
- CPU: 1
- RAM: 1000m
- Executor Configuration:
- CPU: 1
- RAM: 1000m
- Number of Executors: 1
- Init Scripts (optional): Add a .sh file if there are initialization steps before running the job
- Arguments (optional): Add command-line arguments, e.g., --input /mnt/data/input.csv
- Environment Variables (optional): Add environment variables if needed
- Custom Spark Configurations (optional): Add key-value Spark configuration entries to override defaults
Step 4: Review all information, then click Create Spark Job to submit the job to the system.
2. Edit a Job on Airflow
Step 1: Access the Airflow UI, select Job Management (Beta) > Job Submit.
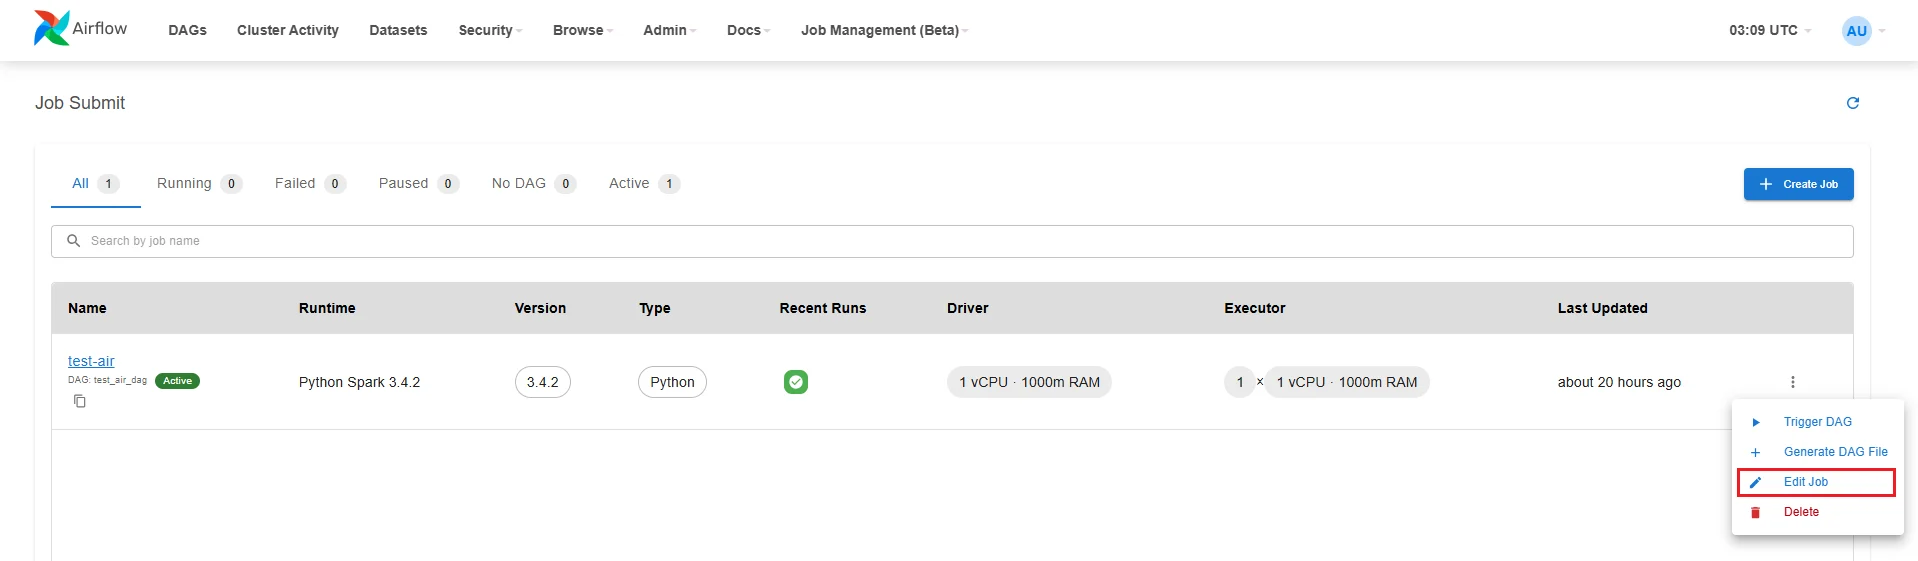
Step 2: Click the Action button for the job you want to update
Step 3: Select Edit Job to open the Edit job interface.
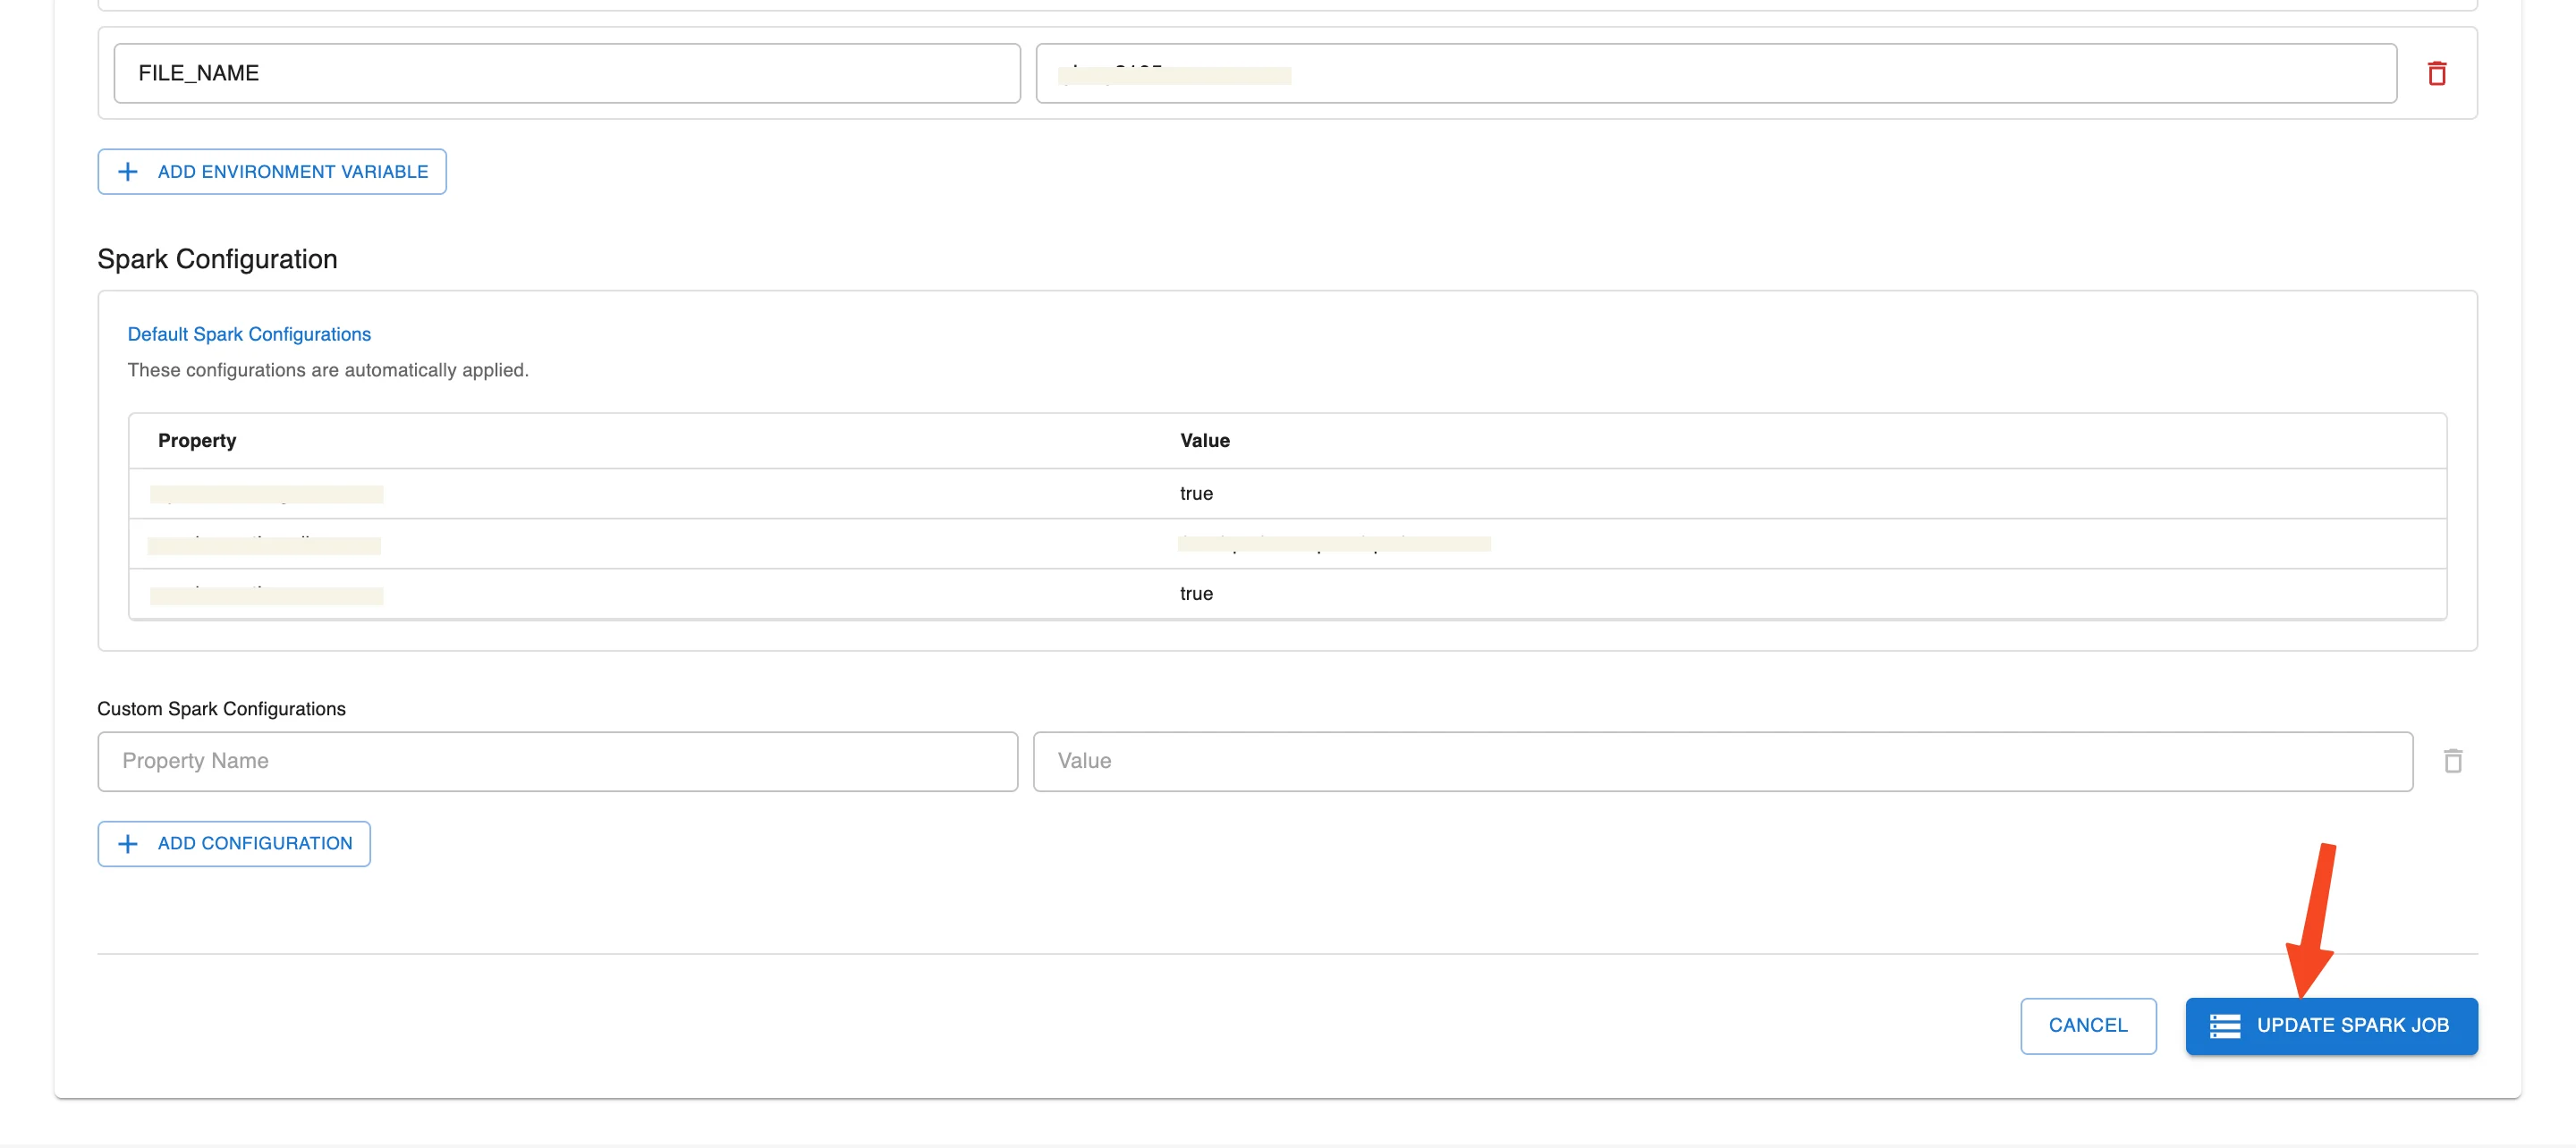
Step 4: Update the Job information
Step 5: Review all information, then click Update Spark Job to save the changes to the system.
3. Delete a Job on Airflow
Step 1: Access the Airflow UI, select Job Management (Beta) > Job Submit.
Step 2: Click the Action button for the job you want to delete
Step 3: Select Delete
Step 4. Enter "delete" in the Confirm Delete Spark Job - Delete job popup
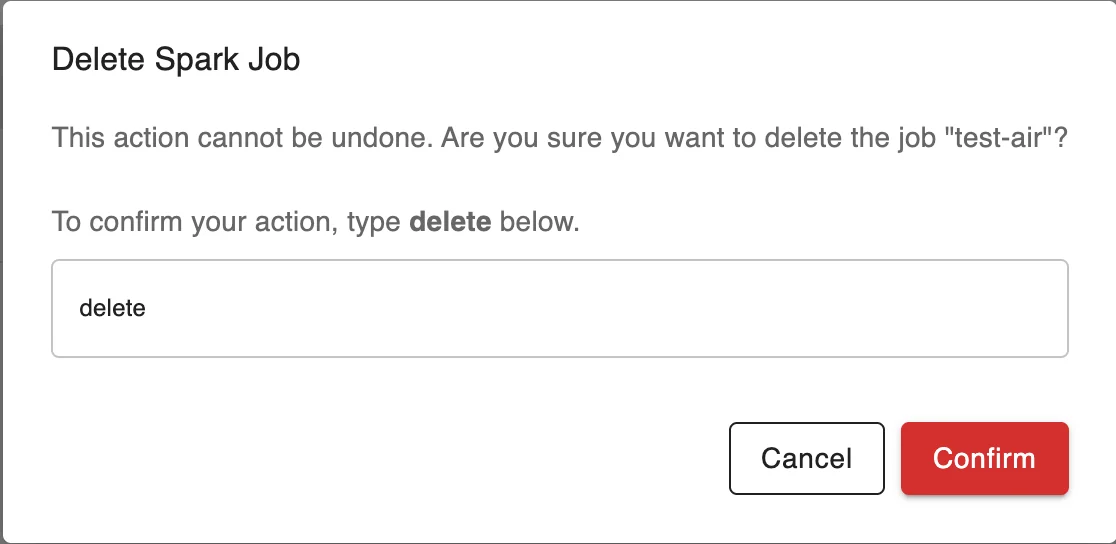
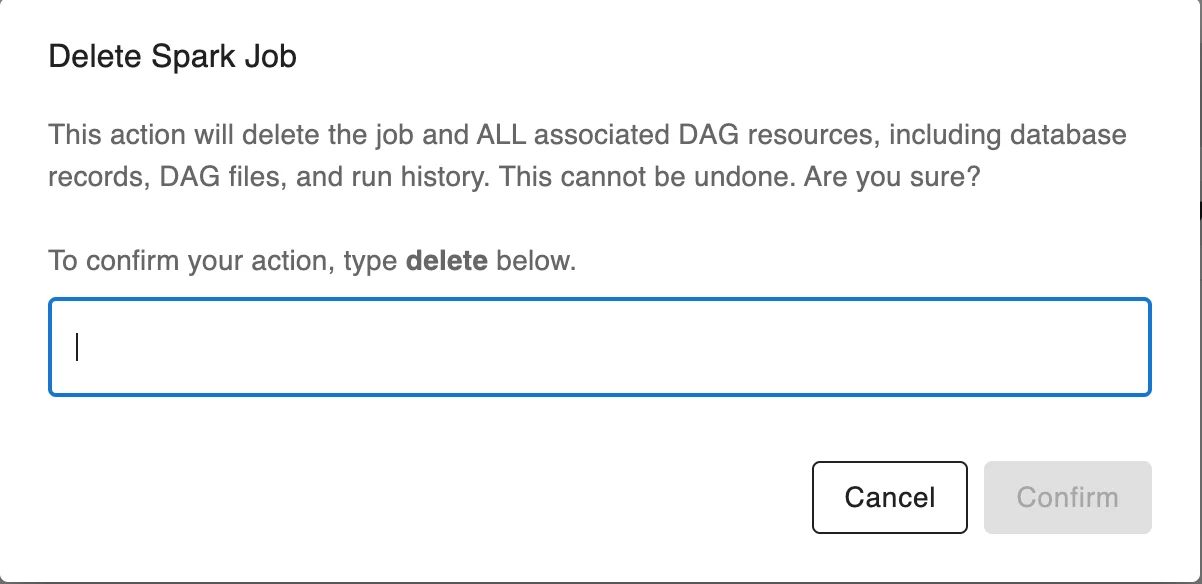
Step 5. Enter "delete" in the Confirm Delete Spark Job popup to delete the job and ALL associated DAG resources, including database records, DAG files, and run history
4. Configure DAG
Step 1: On the Job list page, click the three-dot icon to the right of the job you want to configure. Select Configure DAG
Step 2: Enter DAG information
- DAG ID: Set the DAG name
- Spark Job: Select the corresponding job
- Description: Brief description for the DAG
- Schedule Type: Select the execution type
- To run manually, select None (Manual Trigger)
Step 3: Set up detailed configuration
- Timing:
- Start Date: Select the date when the DAG starts running
- End Date (Optional): Can be left blank for no end date
- Check options:
- Paused on creation: If you want the DAG to not be active immediately after creation
- Uncheck Catchup and Depends on past if you do not need backfill or historical dependency
- Concurrency Settings:
- Max Active Runs: Number of DAG runs that can run in parallel
- Concurrency: Number of tasks allowed to run concurrently
- Retry Settings:
- Retries: Number of retry attempts if the run fails
- Retry Delay (seconds): Wait time between retries in seconds
- Owner & Tags:
- Owner: Name of the DAG owner
- Add Tag: Add tags for classification (e.g., spark submit)
Step 4: Review all information. Click Create DAG to complete DAG creation
5. Trigger DAG
Step 1: On the Job list page, click the three-dot icon to the right of the job you want to configure. Select Trigger DAG
Step 2: In the menu bar, select Job Management (Beta) > Spark UI
Step 3: On the Spark UI screen, select View Logs for the job that just triggered the DAG
Purpose of viewing logs:
- Monitor the detailed execution process of the job
- Check the status of Spark processing steps (e.g., data loading, transformation execution, writing results...)
- Analyze and troubleshoot errors if the job fails
- Confirm the job ran successfully and returned the expected results