Create Orchestration
The Orchestration service is defined as a service that manages and automates workflows within a data system, ensuring that data processing tasks are executed sequentially or in parallel according to schedules or events, while providing effective monitoring and troubleshooting capabilities.
To create an Orchestration service, follow these steps:
Step 1: In the menu bar, select Data Platform > Workspace Management > Workspace name
Step 2: In the My services section, click Create > the New service popup appears, select Orchestration > Create
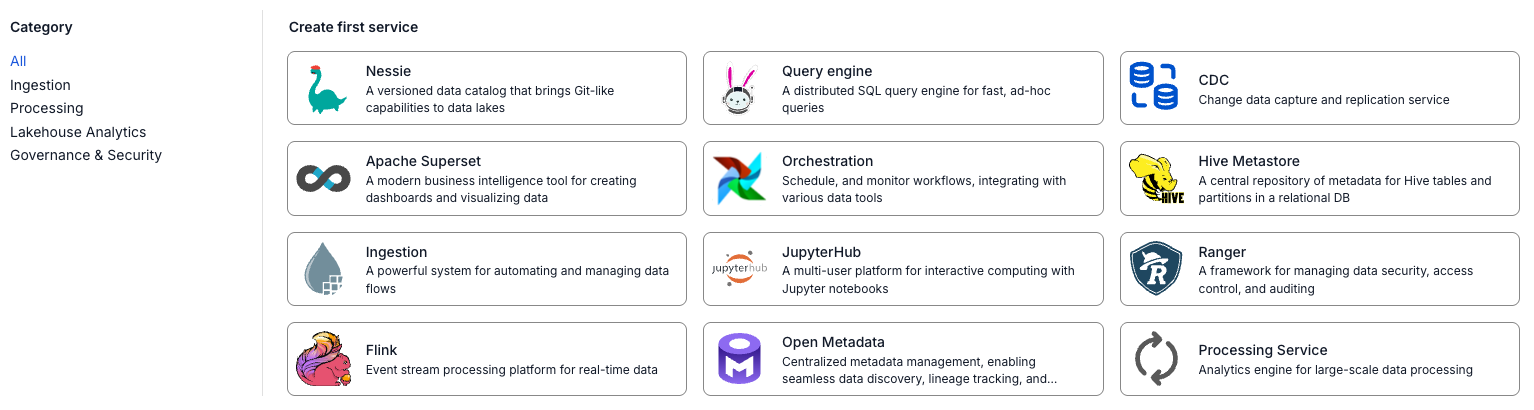
Step 3: In the Orchestration creation form, enter the Basic Information:
- Name (required): Orchestration name
Note: The Orchestration name can contain lowercase letters a-z, uppercase letters A-Z, or digits 0-9. Spaces are not allowed; you can use "-" or "_" instead.
- Description (optional): Description
- Version (required): Select the version
- Size (required): Select the configuration size for Airflow based on the number of DAGs running concurrently
- Dev package: Recommended DAG limit of approximately 20-25 DAGs
- Small package: Recommended DAG limit of approximately 40-50 DAGs
- Medium package: Recommended DAG limit of approximately 70-80 DAGs
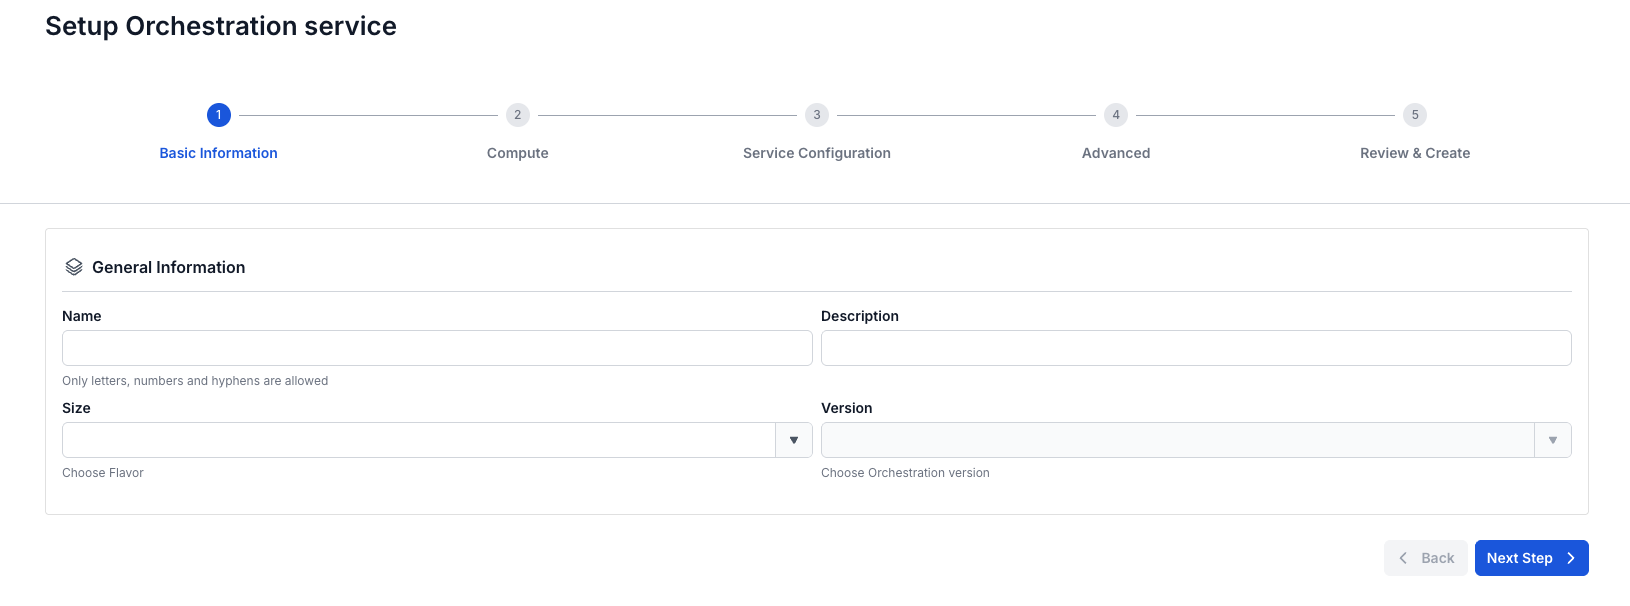
Step 4: Click Next Step to proceed to the Compute information screen
Enter the following information:
- Storage policy (required): Select the Storage Policy
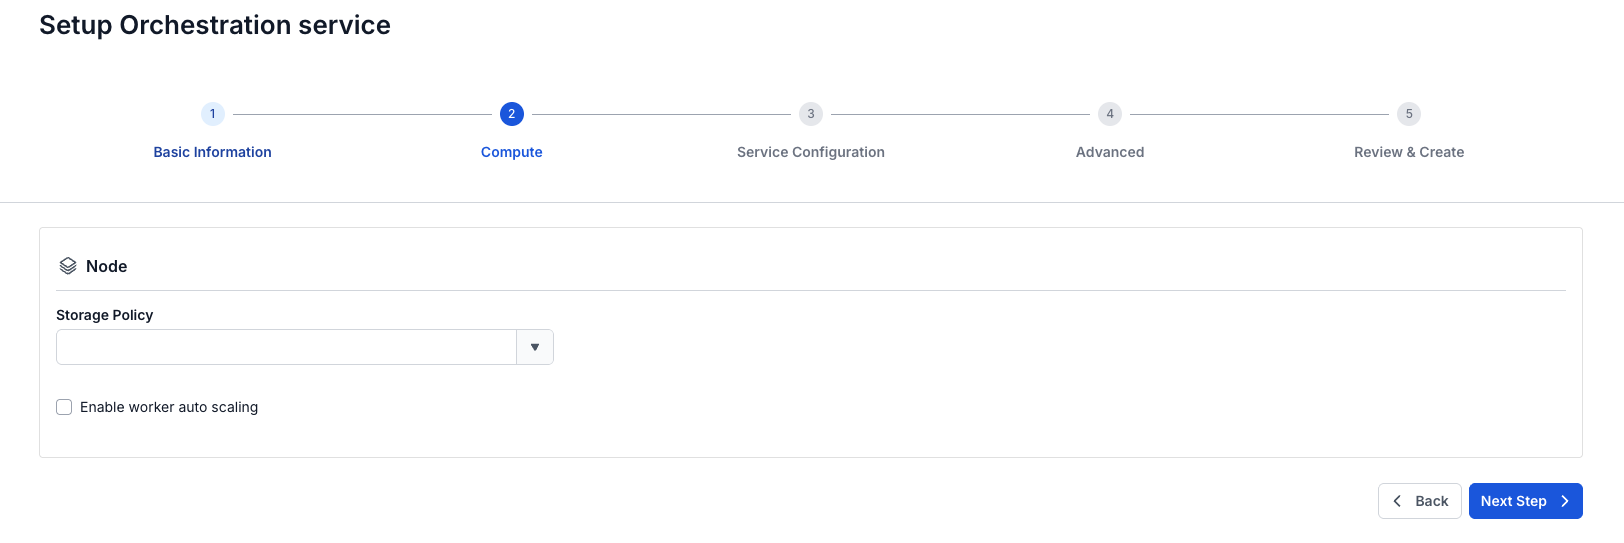
If you want to automatically scale up the Airflow Worker configuration, check Enable worker auto scaling > enter the maximum number of nodes for the Worker
Step 5: Click Next to proceed to the Service configuration screen
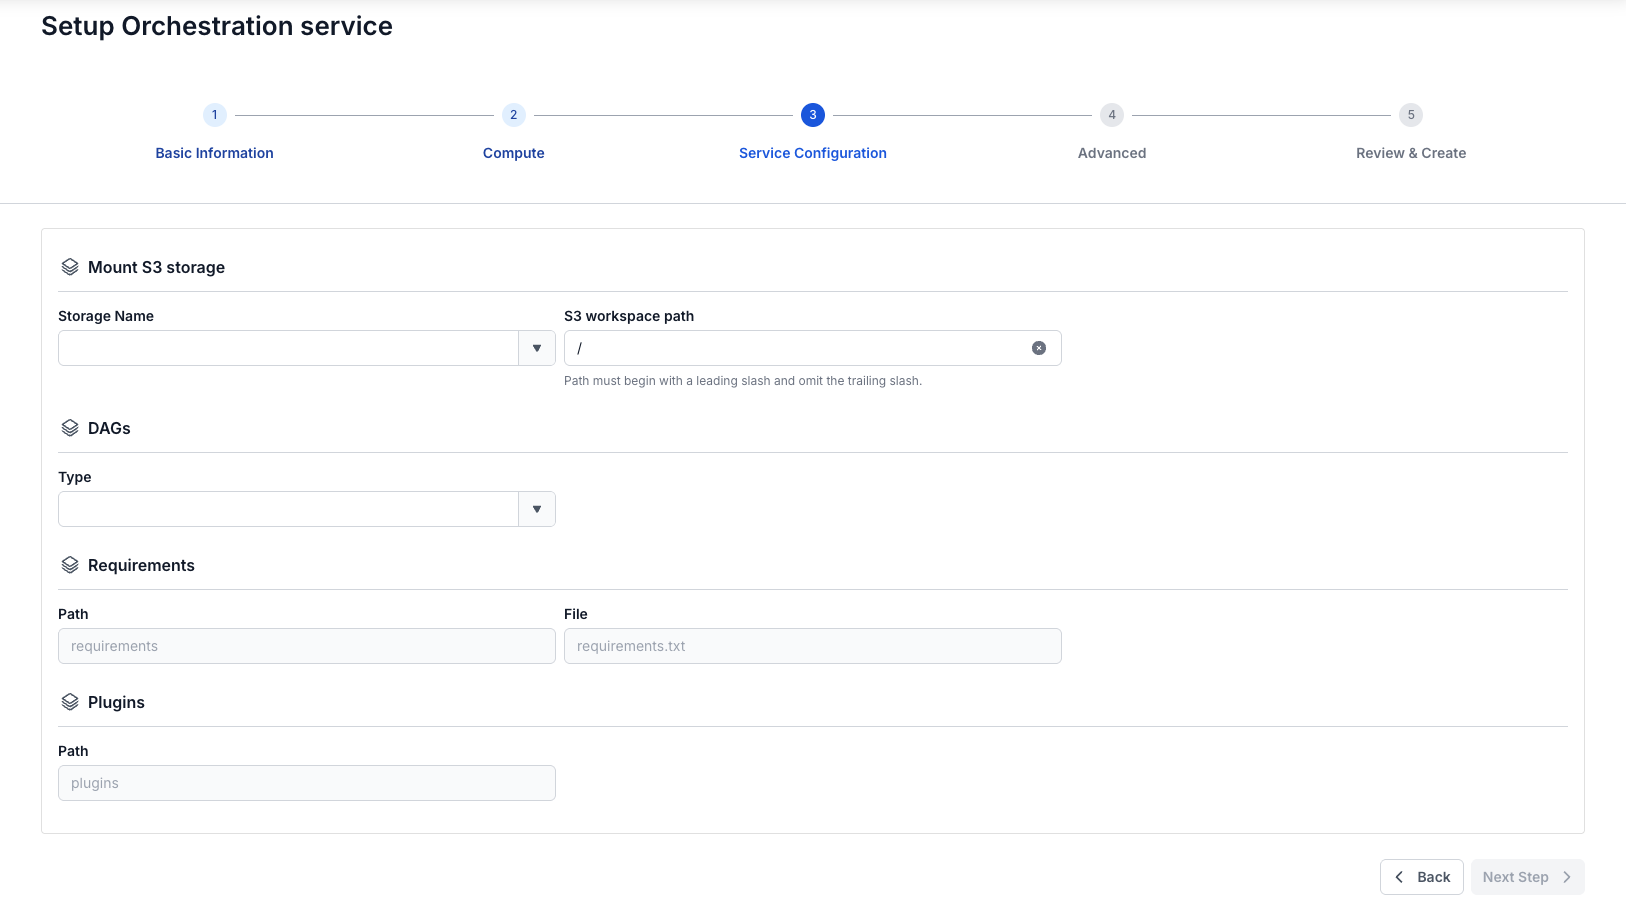
Enter the following information:
- Mount S3 storage
- Storage Name (required): Select the Storage for the S3 mount
- DAGs
- Type (required): Select type as S3/GIT
- If Type is S3, the DAGs information is retrieved from S3 storage
- If Type is GIT, enter the following:
- Repository URL (required): Address storing the DAG files
- Branch (required): Branch connecting to the directory containing the DAG files
- Path (required): Specific path to the directory containing the DAG files
Step 6: Click Next to proceed to the Advanced screen
- Database (Database information used to store data for Data governance — you can use a Database already created on the FPT Database Engine service, or any other Database)
- If type is PostgreSQL:
- Select Database (required): Select Database
- Host name (required): Hostname or IP of the Postgres server
- Port (required): Postgres server port, default is 5432
- Database (required): Database name
- Username (required): Account name used to access the Database
- Password (required): Password used to access the Database
- If Manual configuration is selected:
- Host name (required): Hostname or IP of the Postgres server
- Port (required): Postgres server port, default is 5432
- Database (required): Database name
- Username (required): User account for accessing the Database
- Password (required): Password for accessing the Database
- If type is PostgreSQL:
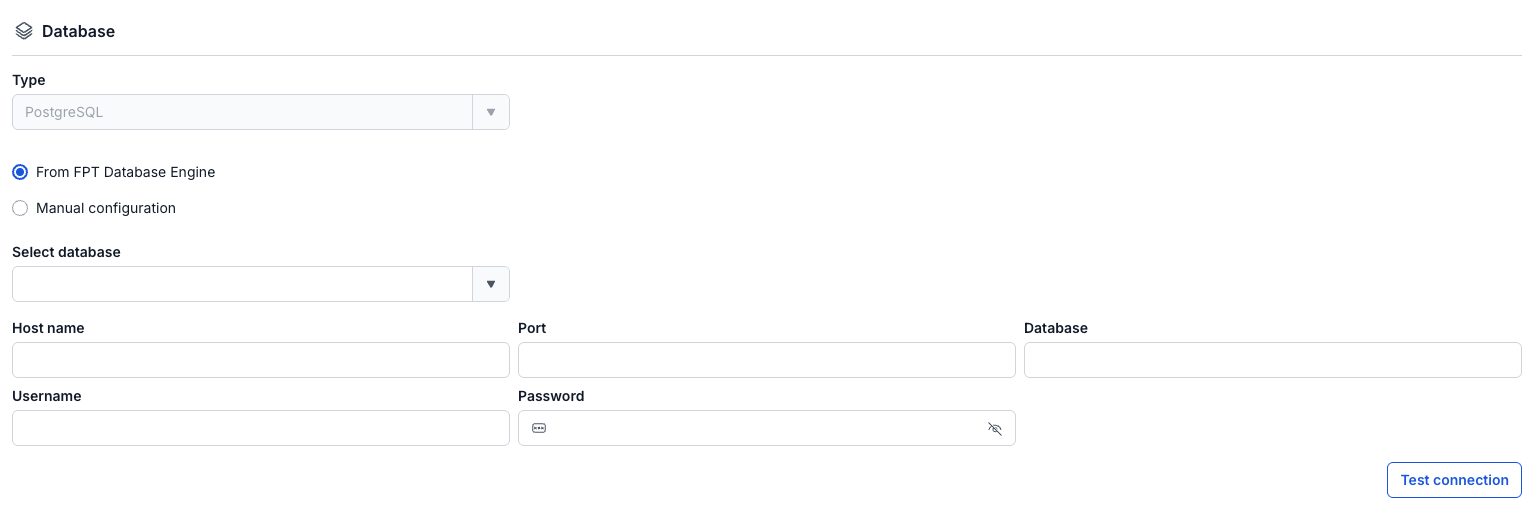
After entering all the Database information, click Test connection to verify the connection from the Workspace to the entered Database
- Redis
- If From FPT Database Engine is selected:
- Select Database (required): Select Database
- Host name (required): Hostname or IP of Redis
- Port (required): Redis port, default is 6379
- Username (required): User account for accessing the Database
- Password (required): Password for accessing the Database
- Logical database (required): Select the logical DB information
- If Manual configuration is selected:
- Host name (required): Hostname or IP of Redis
- Port (required): Redis port
- Username (required): User account for accessing the Database
- Password (required): Password for accessing the Database
- Logical database (required): Select the logical DB information
- If From FPT Database Engine is selected:
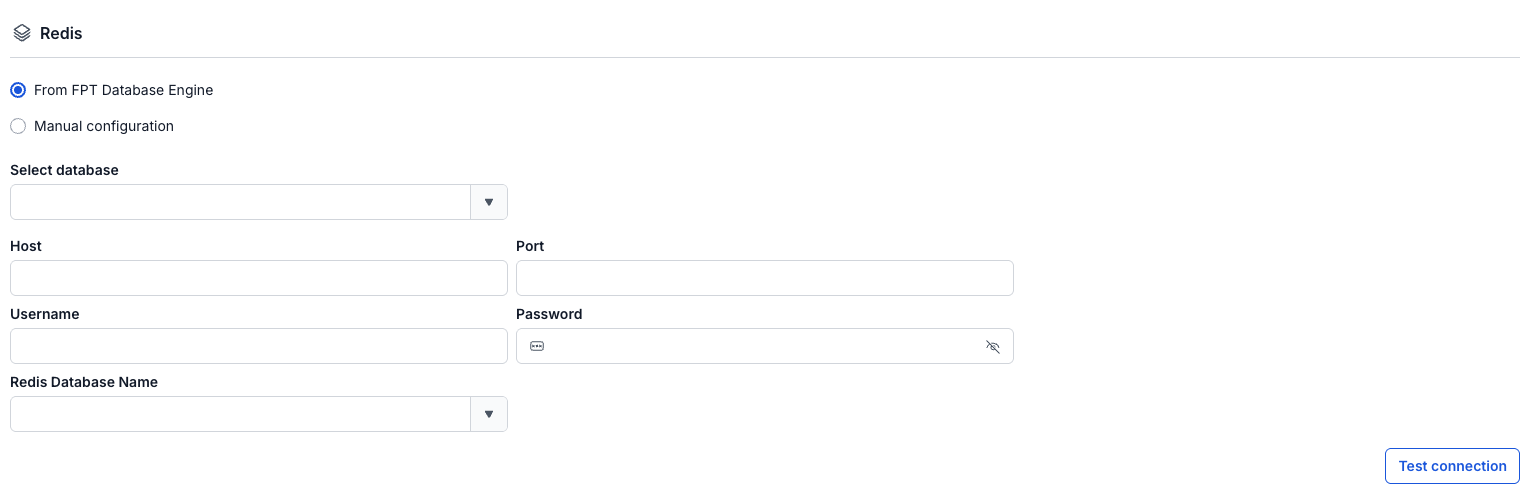
After entering all the Database information, click Test connection to verify the connection from the Workspace to the entered Database
-
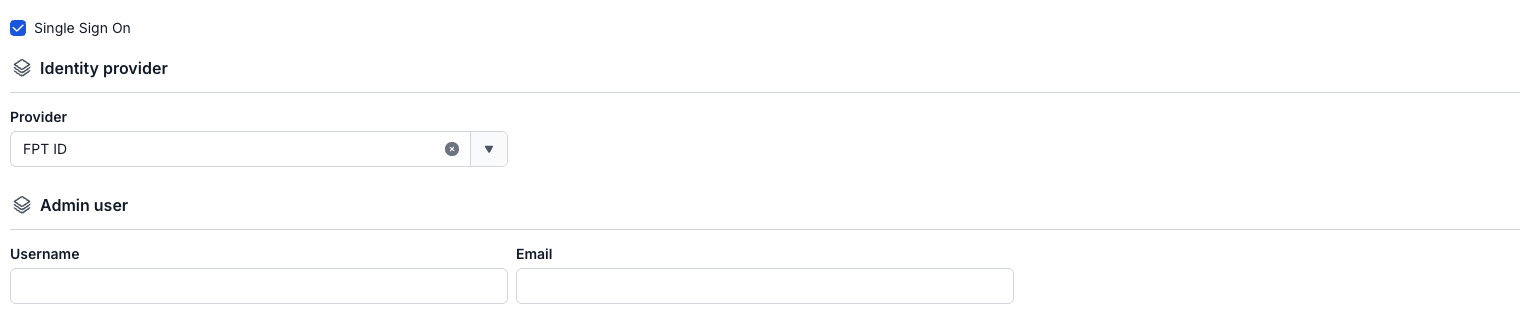
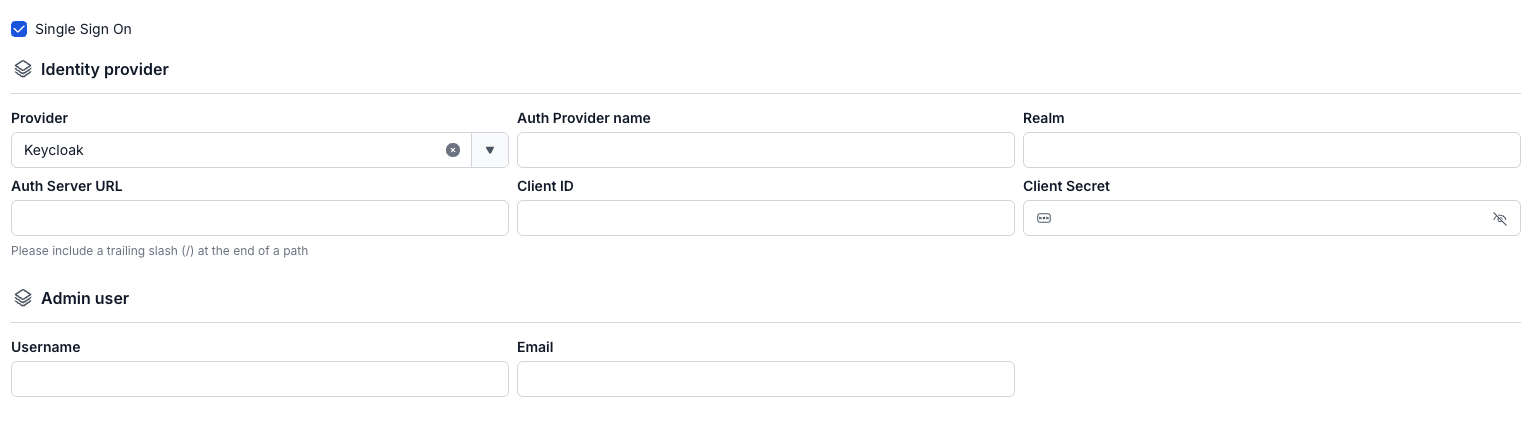
Single Sign On
- If Single Sign On is not enabled, Superset is initialized with Basic authentication
- If Single Sign On is enabled:
- Provider: FPT ID - Enter the following information:
- Username: Username
- Email: FPT email address
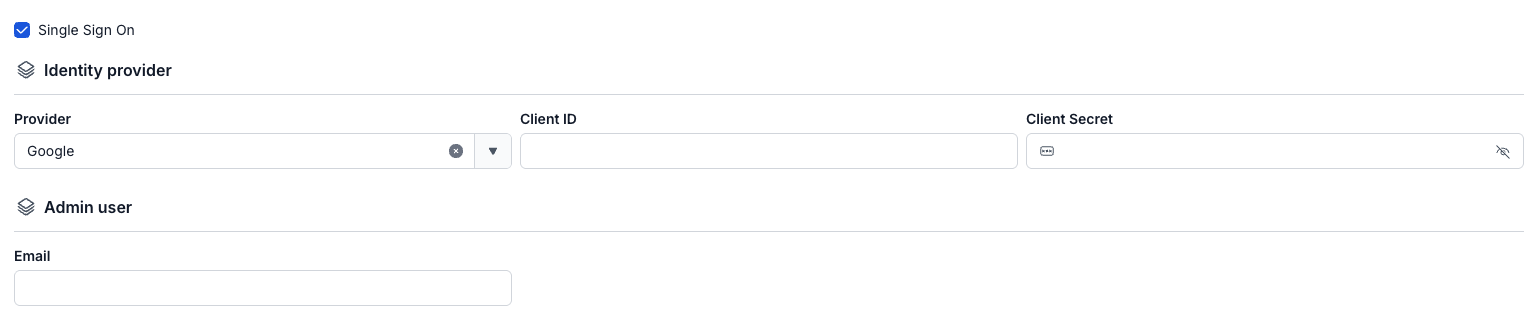
- Provider: Google - Enter the following information:
- Client ID: An ID code used to authenticate the client with Google
- Client Secret: A secret used to authenticate the client with Google
- Email: Email address
- Provider: Keycloak - Enter the following information:
- Auth Provider name: Provider name
- Realm: A management space in which all users, groups, roles, clients, and other objects are managed and secured independently
- Auth server url: The base URL of the Keycloak server, used by clients to perform authentication
- Client ID: An ID code used to authenticate the client with Keycloak
- Client Secret: A secret used to authenticate the client with Keycloak
- Username: Username in Keycloak
- Email: Email address in Keycloak
-
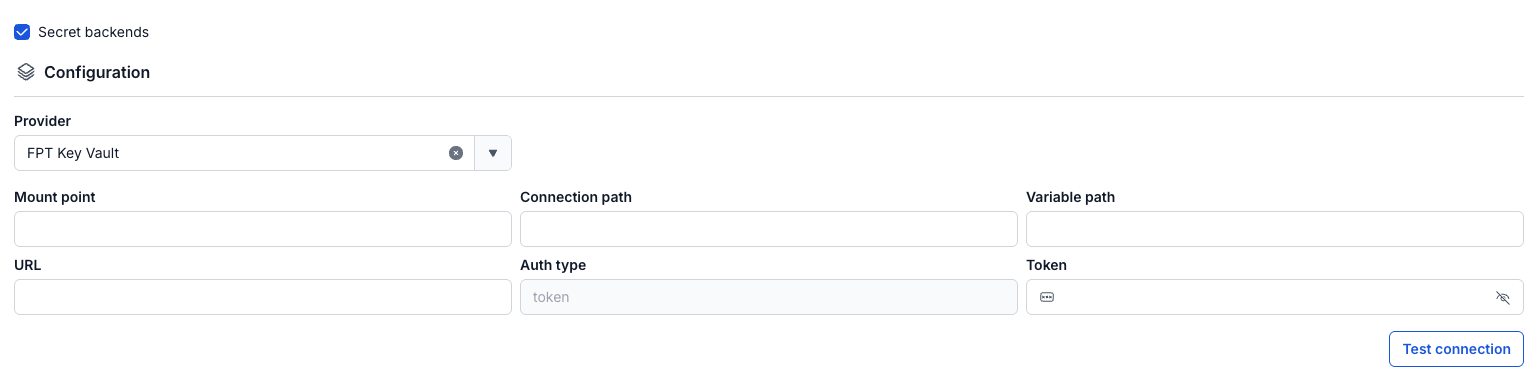
Secret backends
- Provider = FPT Key Vault
- Mount point (required): Mount point path of the secrets backend (e.g., airflow-connections)
- Connection path (required): Path/key used for the Airflow connection
- Variable path (required): Path/key for environment variables or secrets
- URL (required): Vault endpoint address (e.g., http://pickadkf.keyvault.fptcloud.com)
- Auth type: Authentication type with Vault (e.g., token)
- Token(required): Authentication token for the account with Vault
Note: Vault Policy - The token must have "read" and "list" permissions on the paths containing connections and variables, and the policy must be assigned to the token
{
  "path": {
    "/data//*": {
      "capabilities": [
        "read",
        "list"
      ]
    },
    "/data//*": {
      "capabilities": [
        "read",
        "list"
      ]
    },
    "/metadata/": {
      "capabilities": [
        "list"
      ]
    },
    "/metadata/": {
      "capabilities": [
        "list"
      ]
    }
  }
}
Click button Test connection - check the actual connection with the secret backend
- Provider = FPT Key Vault
-
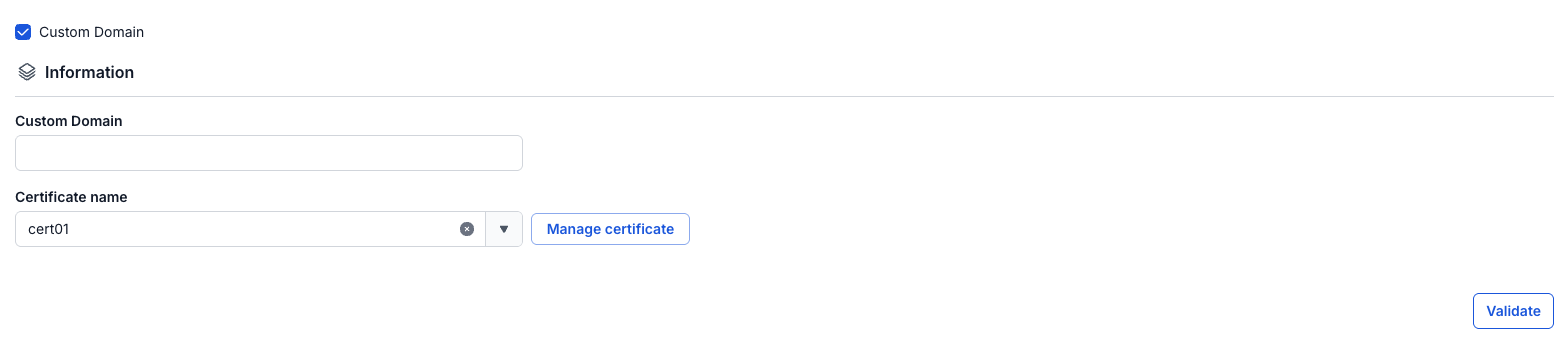
Custom Domain
- Purpose: Allows configuring a custom domain to access services.
- For a Public Workspace: Used to assign a domain and certificate without needing to enable/disable TLS (HTTPS is always available).
- For a Private Workspace: In addition to the domain and certificate, you can choose to enable or disable TLS/SSL to decide whether to use HTTPS or HTTP.
- When the Workspace is Public
- Custom domain: Check to enable a custom domain.
- Domain: Enter the domain name (e.g., abc.local, jupyter.example.com).
- Certificate name: Select from the list of certificates imported in Certificate Manager.
- Buttons:
- Manage certificate: Opens the certificate management screen.
- Validate: Checks that the certificate is valid for the domain.
noteFor a Public Workspace, the TLS/SSL certificate option is not displayed — the system supports HTTPS by default.
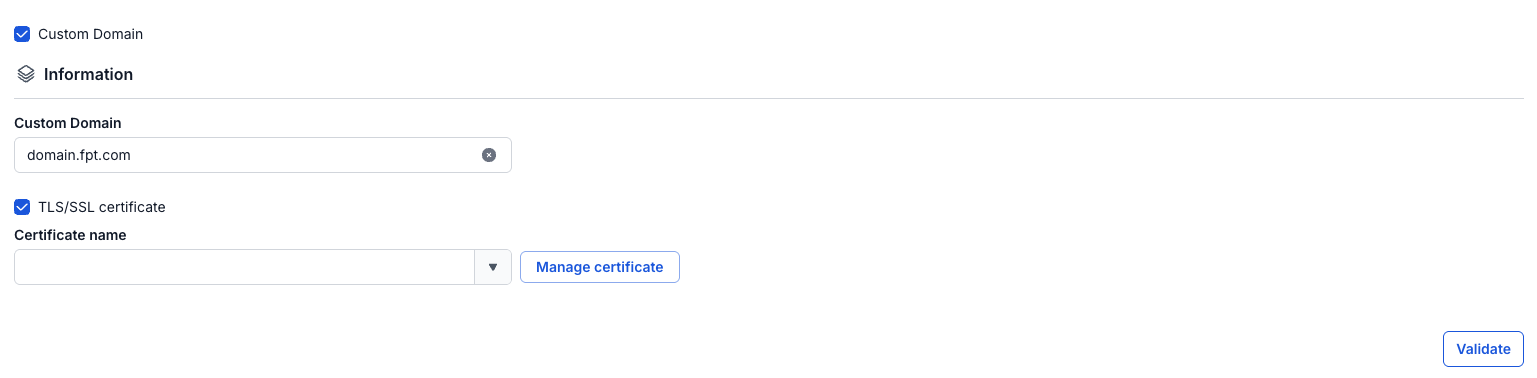
- When the Workspace is Private
- Custom domain: Check to enable a custom domain.
- Domain: Enter the domain name.
- TLS/SSL certificate: Check to enable HTTPS for services.
- Certificate name: Select from the certificate list.
- Buttons:
- Manage certificate: Opens certificate management.
- Validate: Checks the certificate.
noteIf TLS/SSL certificate is unchecked, the service will run over HTTP and no certificate is required.
- Purpose: Allows configuring a custom domain to access services.
Step 7: Click Next to proceed to the Review & create screen
Step 8. Review the entered information, then click Create to complete the Orchestration initialization
Orchestration initialization is complete when Worker Status is Succeeded and the Orchestration Status is Healthy (~10 minutes)