Manage Compute
To view the Compute listing, follow these steps:
Step 1: In the menu bar, select Data Platform > select Workspace Management > select Workspace name
Step 2: In the My Services section, select Processing service > Tab Compute
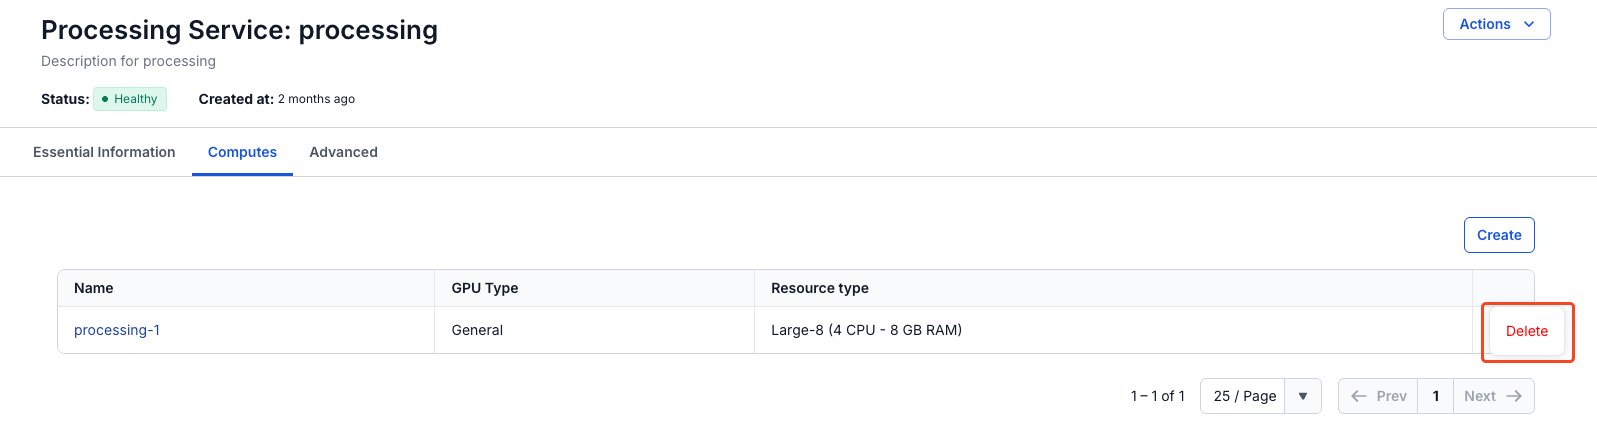
Compute listing - Displays the list of computes created in the Processing Service, allowing users to:
- View the compute name, GPU type, and resource configuration (Resource type)
- Create a new compute using the Create button
- Perform actions on a compute via the Actions menu
- Limit: Each Processing Service can have a maximum of 5 computes
1. Create compute
To create a Compute, follow these steps:
Step 1: On the Processing services screen > select the Compute tab
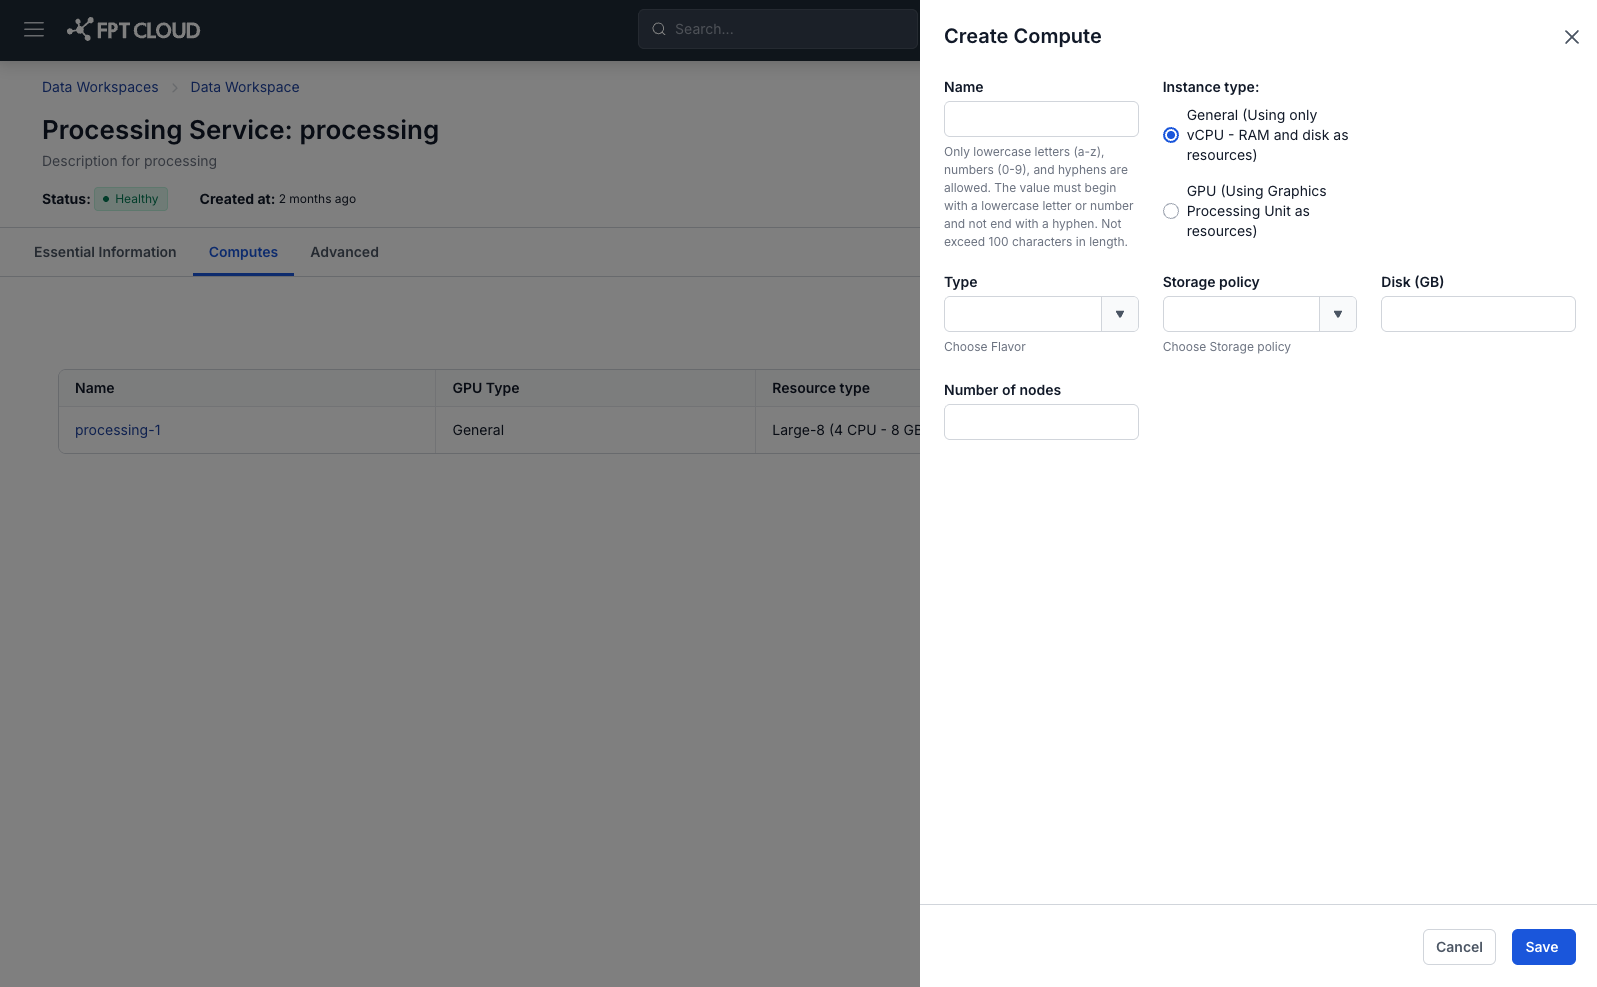
Step 2: In the Compute tab, click Create > the Create Services popup appears
Step 3: In the Compute service creation form, enter the following information
- Instance type = General
Enter the following information:
- Name: (required): compute name
Note: The compute name can contain lowercase letters a-z, uppercase letters A-Z, or digits 0-9. Spaces are not allowed; you can use "-" or "_" instead.
- Storage policy: select the Storage policy
- Disk size: select the Disk configuration size (Disk >=40)
- Type: select the flavor
- Number of nodes: enter the number of nodes
The number of nodes must be greater than or equal to 1 and less than or equal to 10
- Instance type = GPU
Enter the following information:
- Name: (required): compute name
Note: The compute name can contain lowercase letters a-z, uppercase letters A-Z, or digits 0-9. Spaces are not allowed; you can use "-" or "_" instead.
- GPU type (required if GPU is selected)
- GPU driver installation type (required): select the driver installation type
- Select a driver version (required): select the driver version
- GPU sharing type (required): select the GPU sharing type
- If None is selected, the input GPU sharing client is not displayed
- If a value other than None is selected, the input GPU sharing client is displayed
- Policy (required): select the policy
- Storage policy: select the Storage policy
- Disk size: select the Disk configuration size (Disk >=40)
- Type: select the flavor
- Number of nodes: enter the number of nodes
The number of nodes must be greater than or equal to 1 and less than or equal to 10
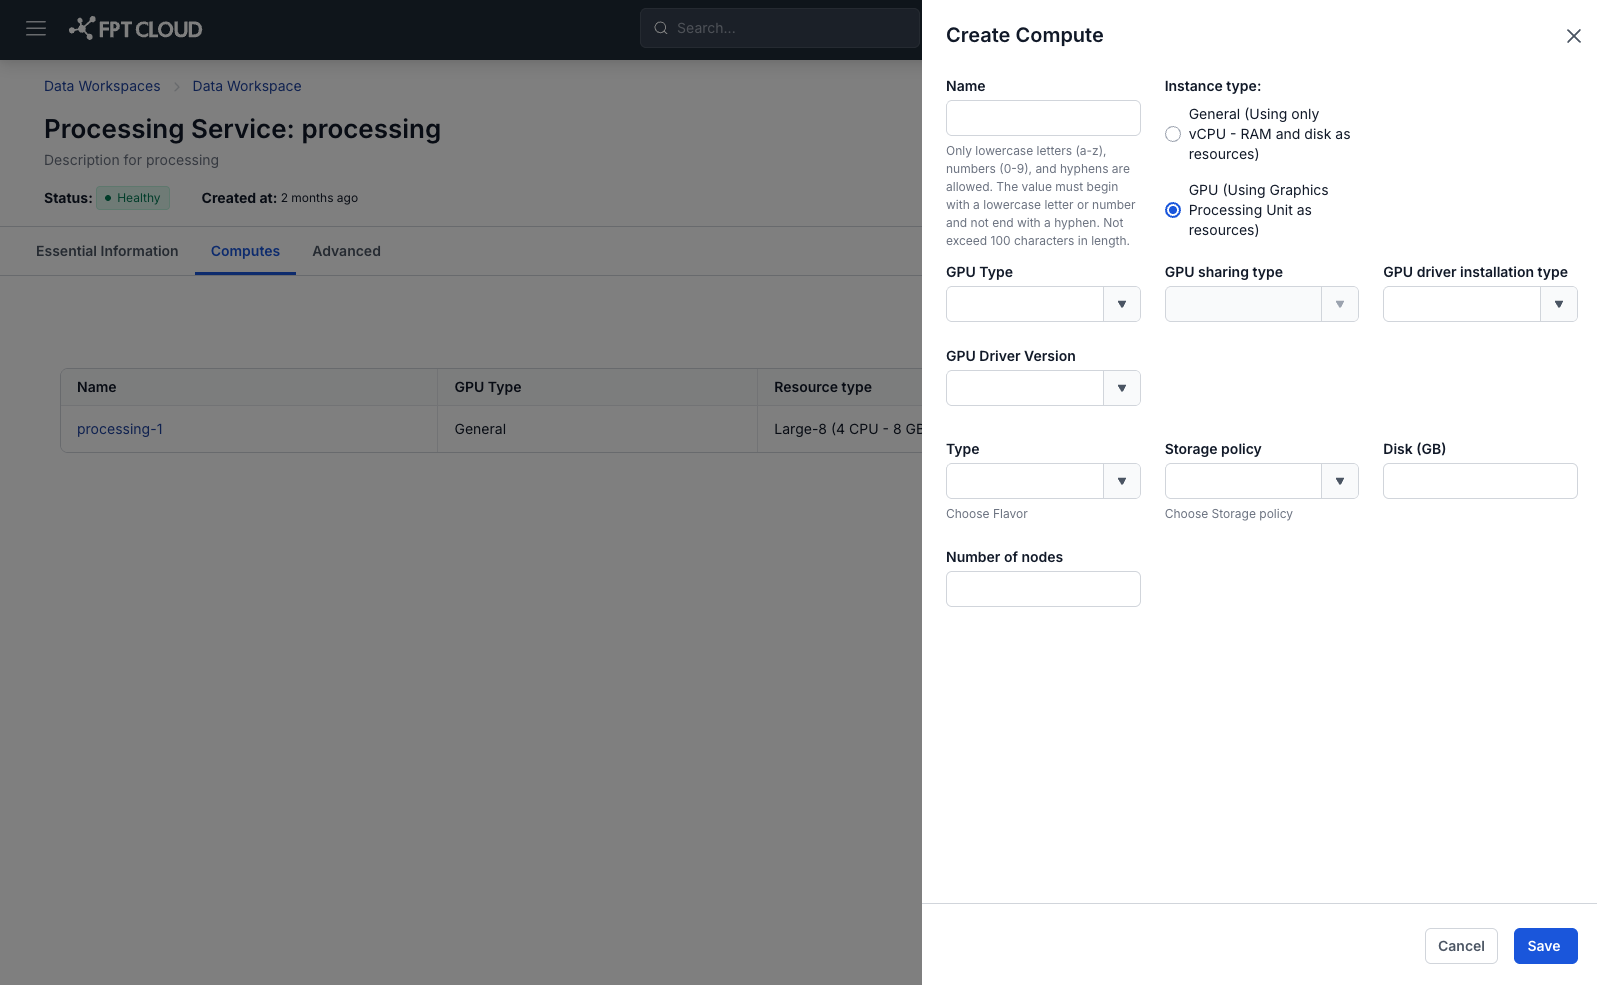
Step 4. Review the entered information, then click Create to complete the Compute creation.
2. Delete compute
Step 1: On the Processing services screen > select the Compute tab
Step 2: In the Compute tab > click Action on the compute to delete > select Delete
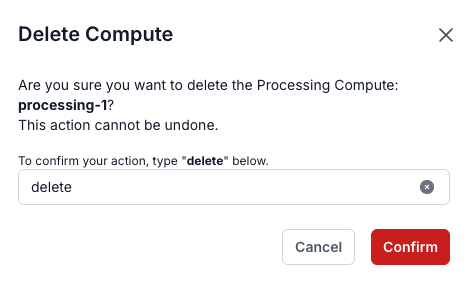
Step 3. The Delete Compute dialog appears > enter delete > click Confirm to complete deleting the compute