Resource Groups
The Resource Groups feature allows the Platform Admin to enable and configure the resource allocation mechanism (resource groups) for the Trino cluster. Once enabled, the system limits concurrency, queue, memory, and CPU for each workload group, preventing any single workload from consuming all of the cluster's resources.
The Resource Groups tab displays Trino's Resource Groups configuration information.
A. Enable Resource Groups
To enable Resource Groups, follow these steps:
-
Step 1: In the menu bar, select Data Platform > select Workspace Management > select the Workspace name > select Trino
-
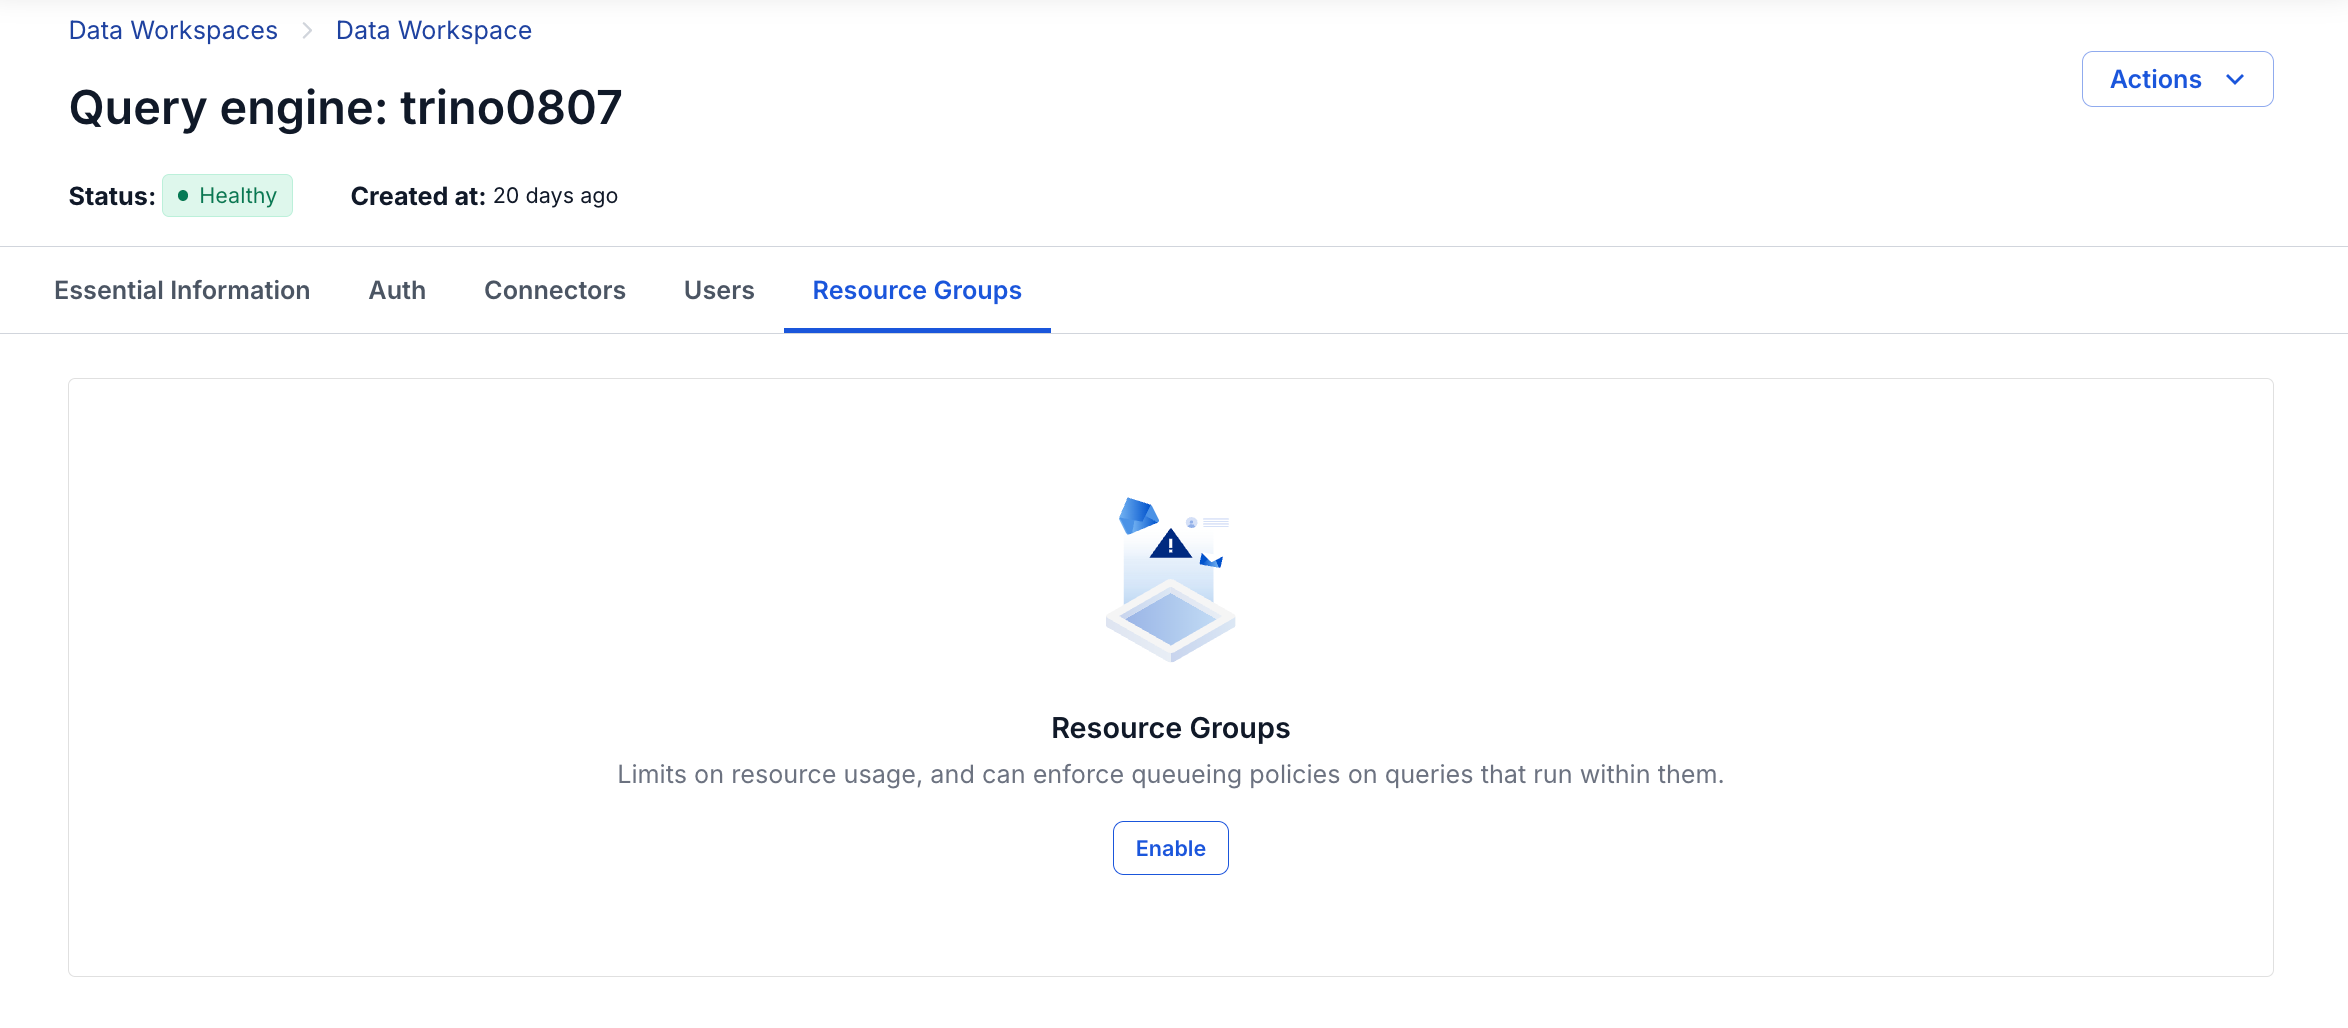
Step 2: On the Trino detail page, select the Resource Groups tab
→ The system displays an empty state screen with the Resource Groups icon
- Step 3: Click the Enable button
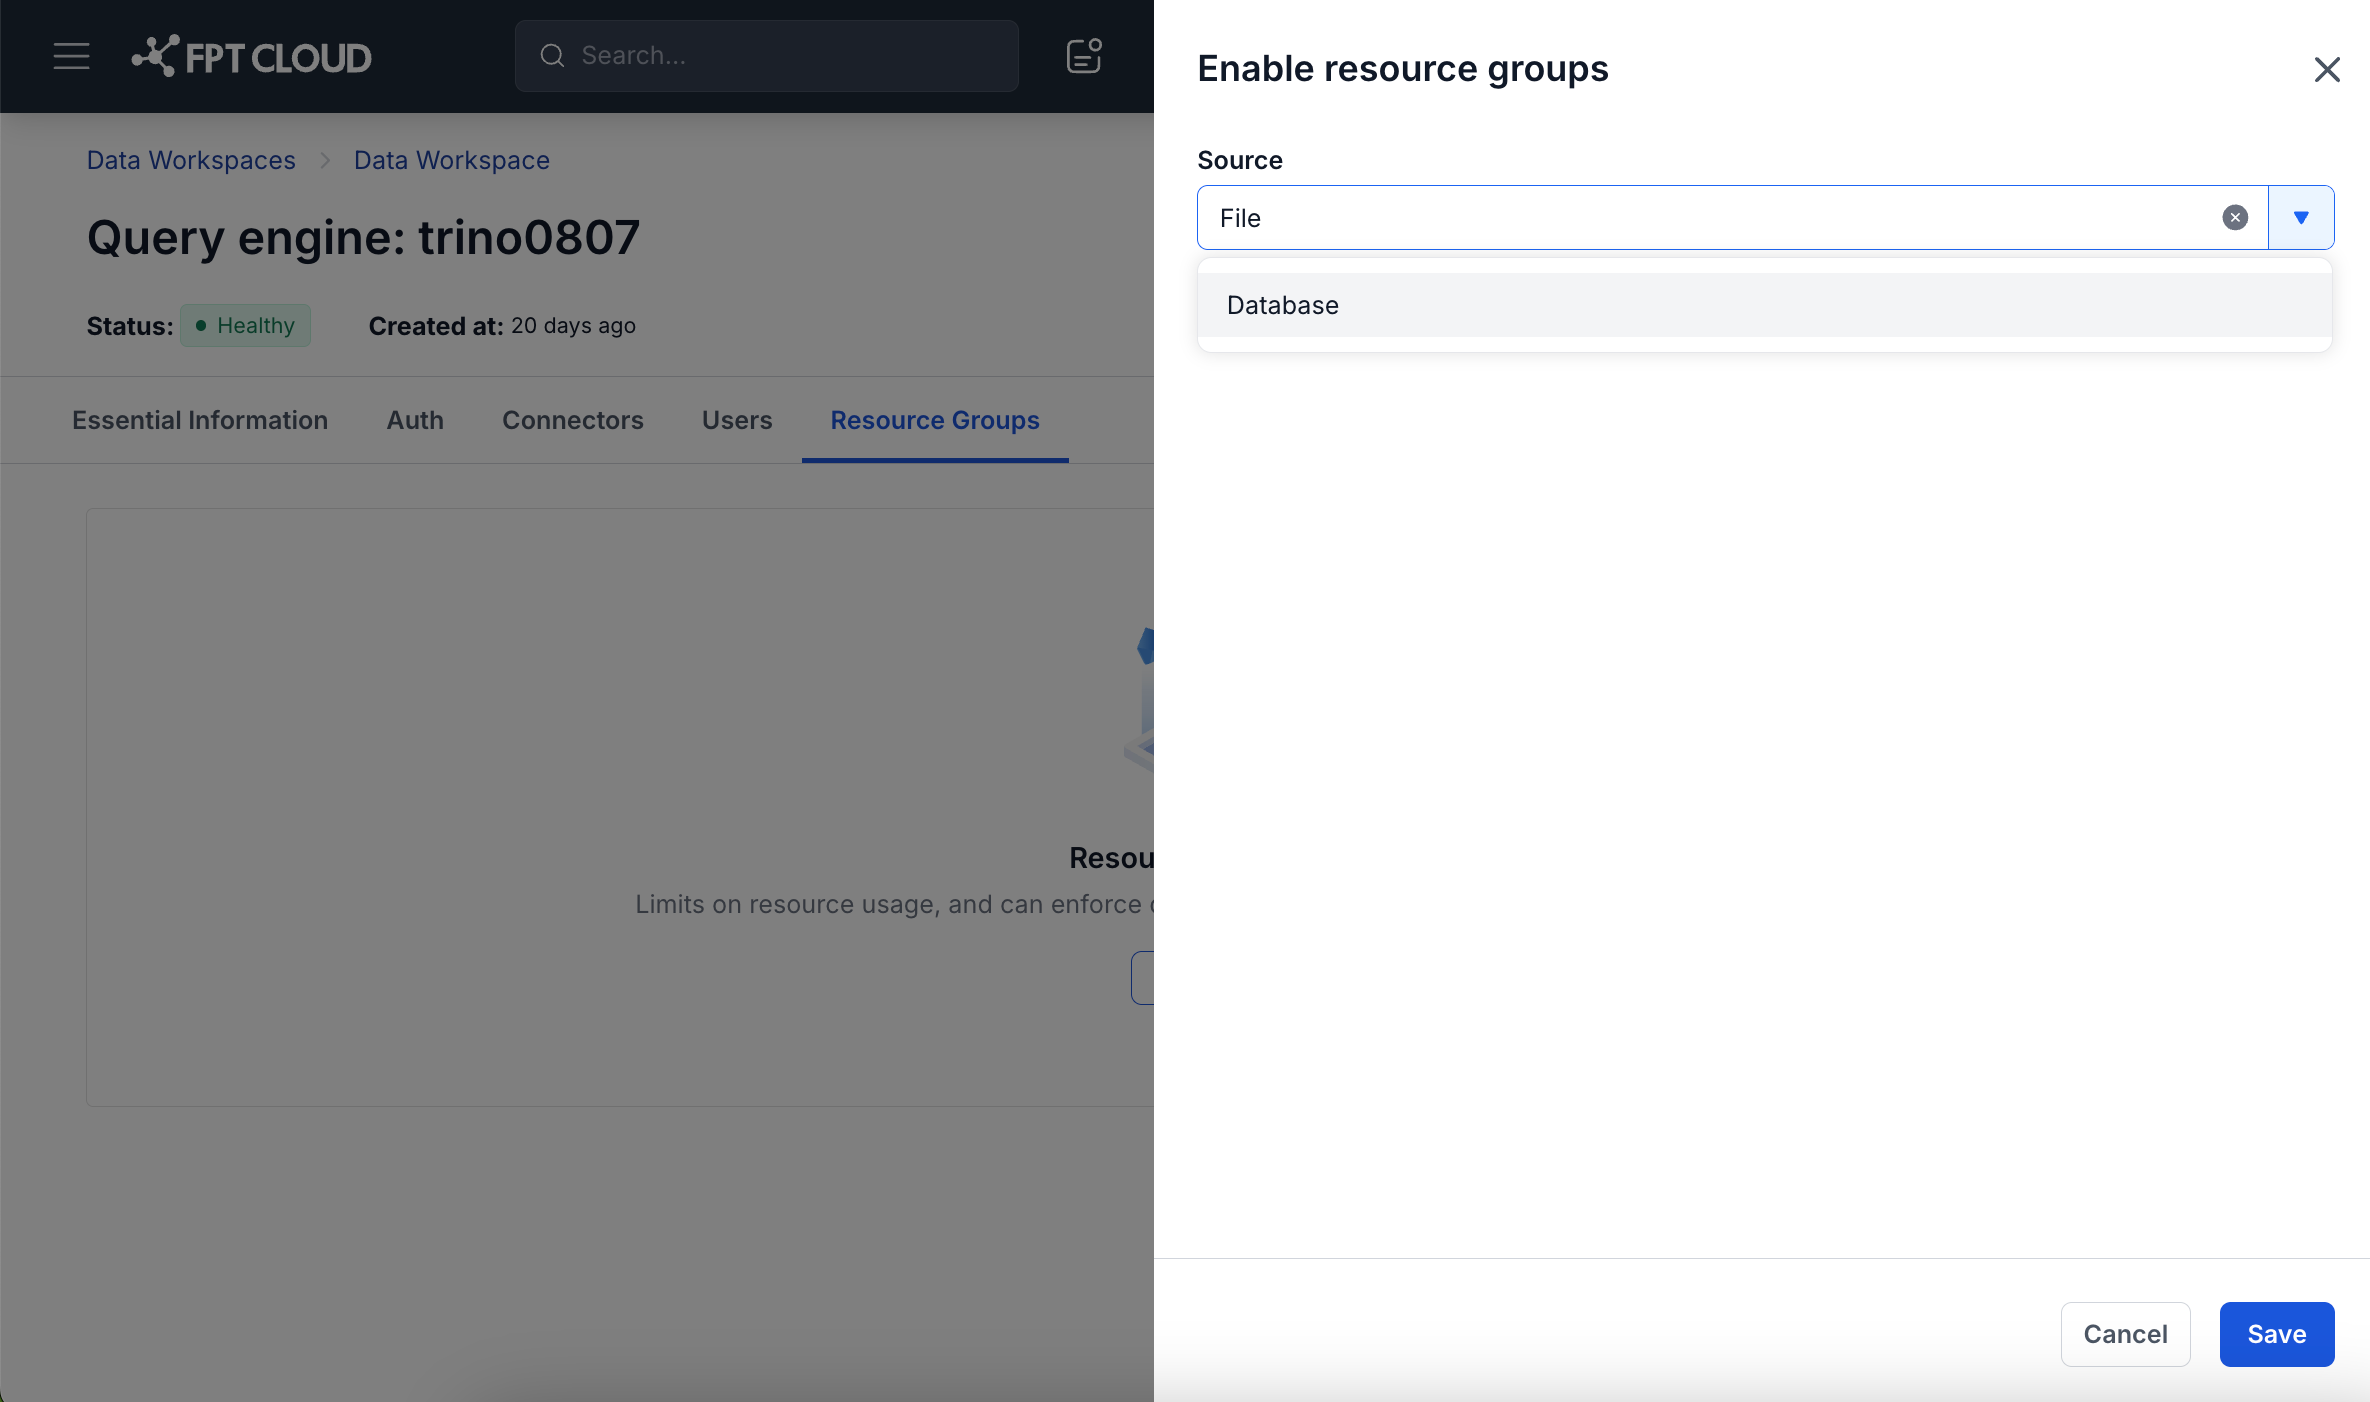
→ The "Enable resource groups" dialog appears with a Source dropdown (default = File).
- Step 4: In the Source dropdown, select the configuration source type:
- File: use a local configuration file on the coordinator (no extra information required).
- Database: use a database to store the configuration (requires additional connection information).
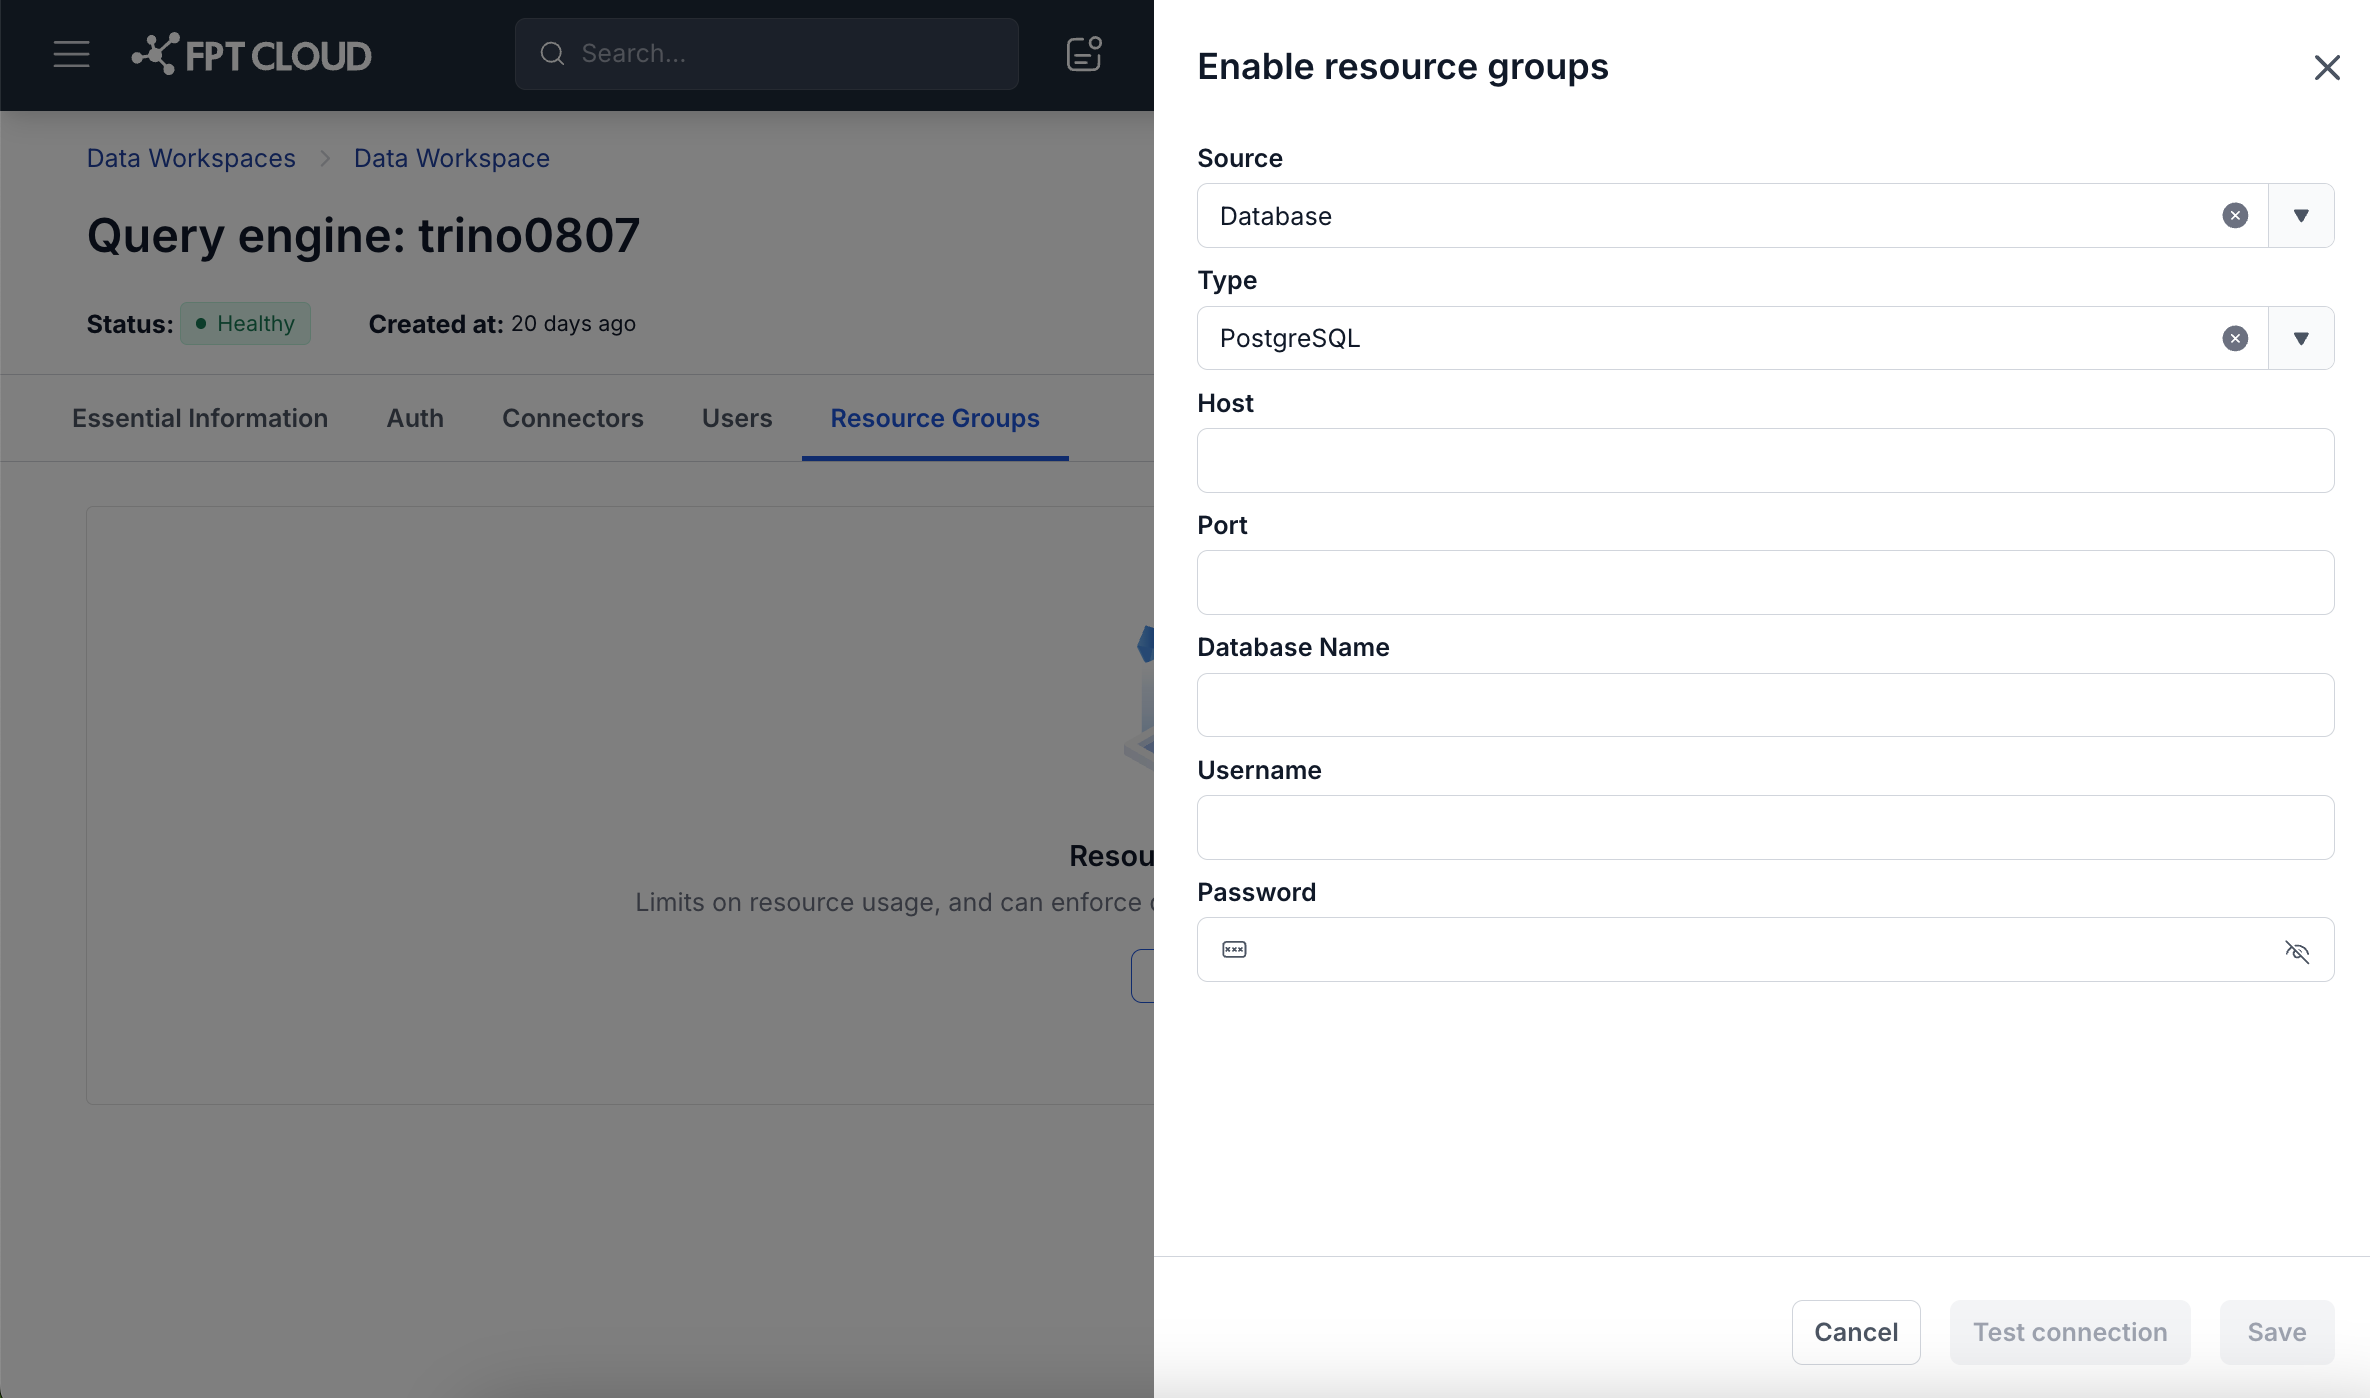
If you select Source = Database, fill in the following information:
-
Type: Database type. Currently supported: PostgreSQL.
-
Host: The IP address or hostname of the database server.
-
Port: The connection port (1–65535).
-
Database Name: The name of the database used to store the Resource Groups configuration.
-
Username: Database login username.
-
Password: Database password. Supports a show/hide toggle.
Note: If you switch from File to Database, the system displays a warning: "Warning: Switching modes involves a 30-90s restart. Active queries will be terminated. Configuration settings will be preserved."
-
Step 5: (Optional) Click the Test connection button to check the database connection before saving. → The system confirms a successful connection or displays a specific error message.
-
Step 6: Click Save to finish.
→ The dialog closes. The Resource Groups tab switches to the Enabled state. The Details tab opens by default with the resource group tree initialized at the root group (root: global → admin).
B. Manage Resource Groups (Details Tab)
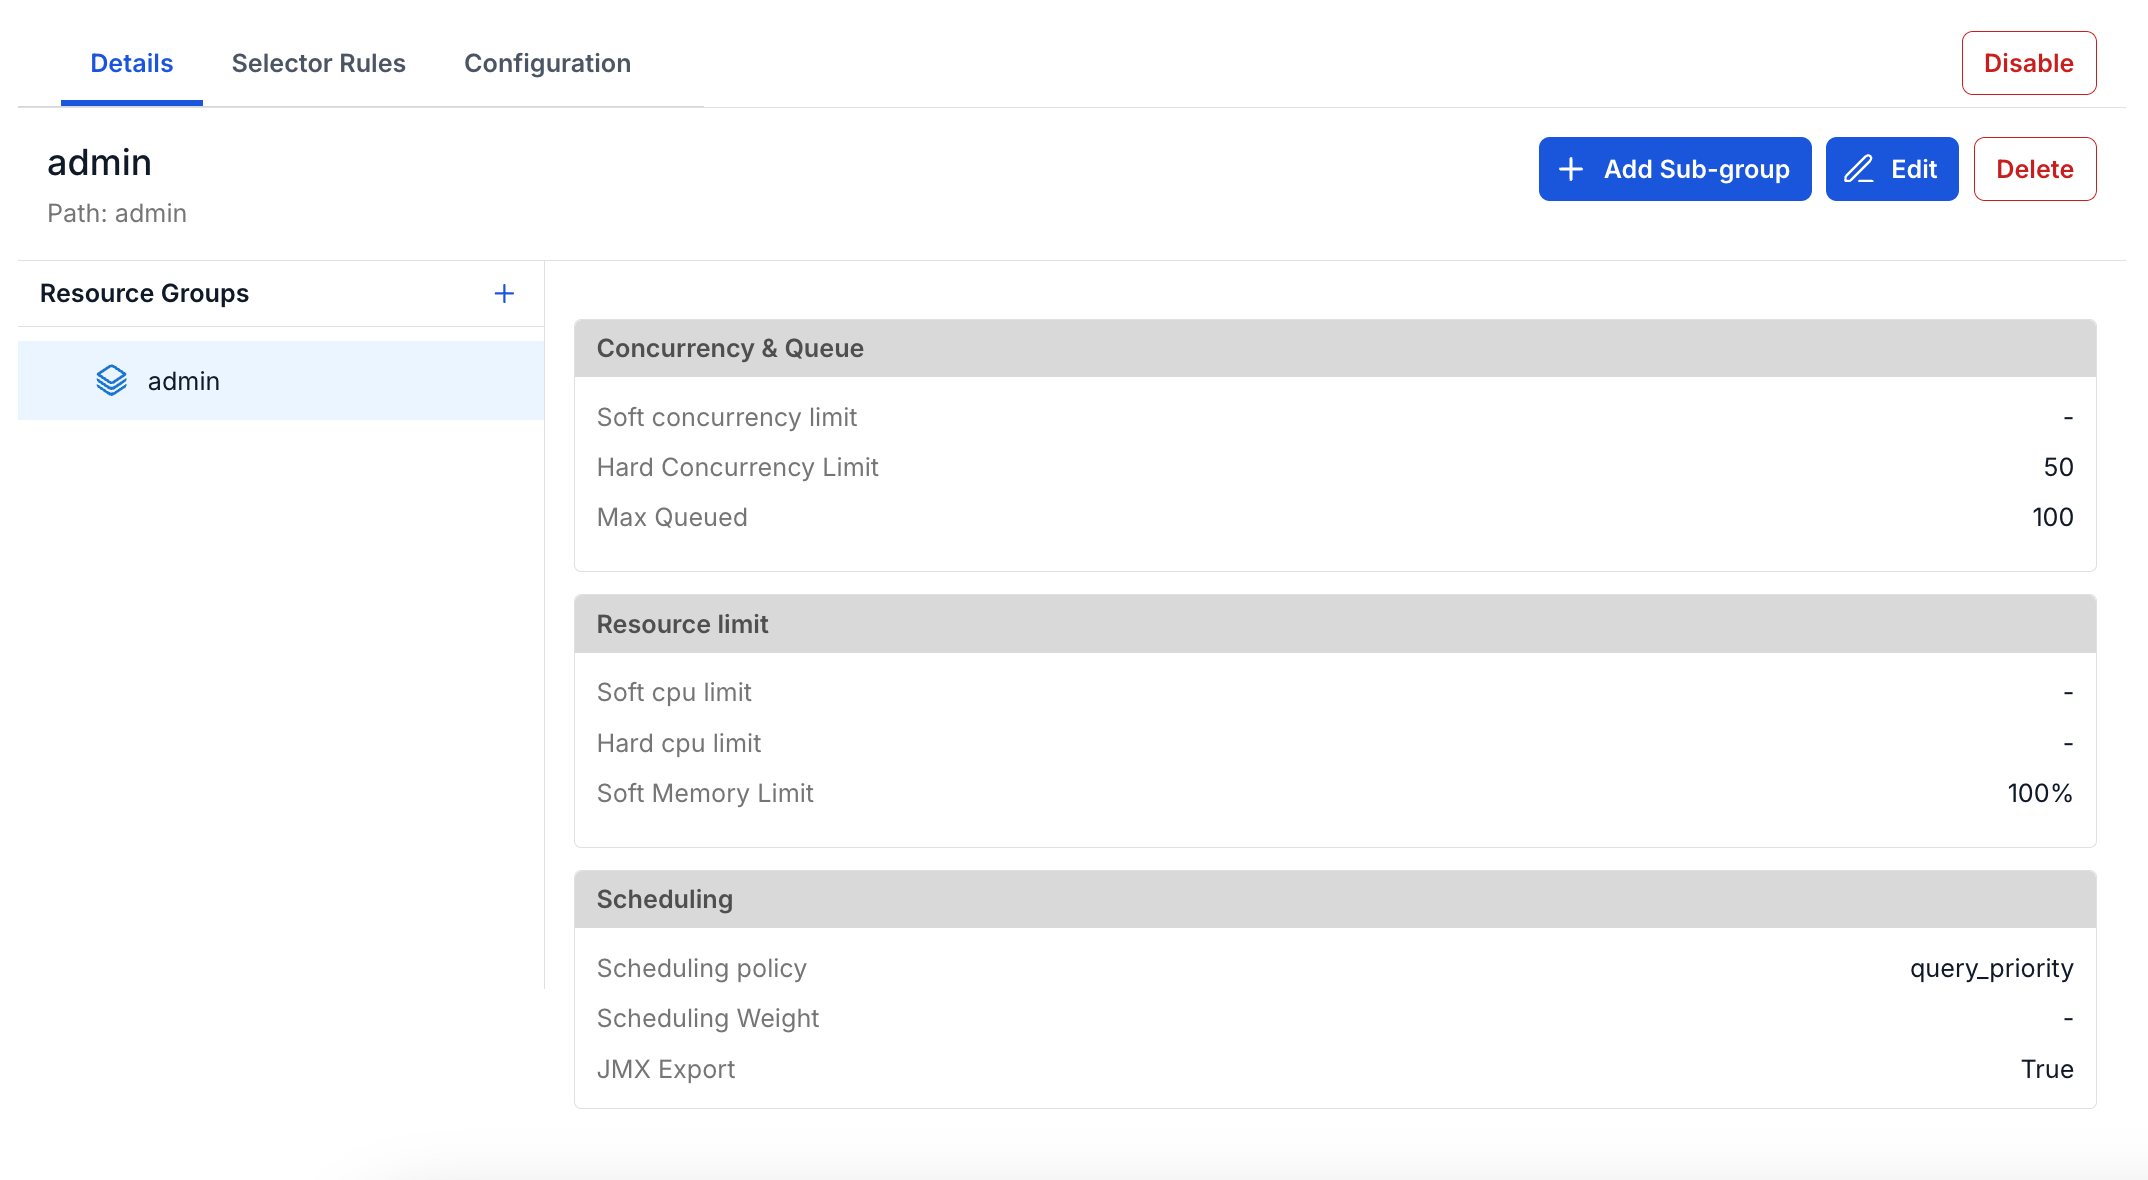
The Details tab has 2 panels:
- Left panel: displays the resource group tree. Click a group (node) to view its details.
- Right panel: displays the details of the selected group (node), consisting of 3 sections:
- Concurrency & Queue: Soft concurrency limit, Hard Concurrency Limit, Max Queued.
- Resource limit: Soft cpu limit, Hard cpu limit, Soft Memory Limit.
- Scheduling: Scheduling policy, Scheduling Weight, JMX Export.
B1. Create a New Resource Group
- Step 1: In the left panel, click the + icon next to the "Resource Groups" heading.
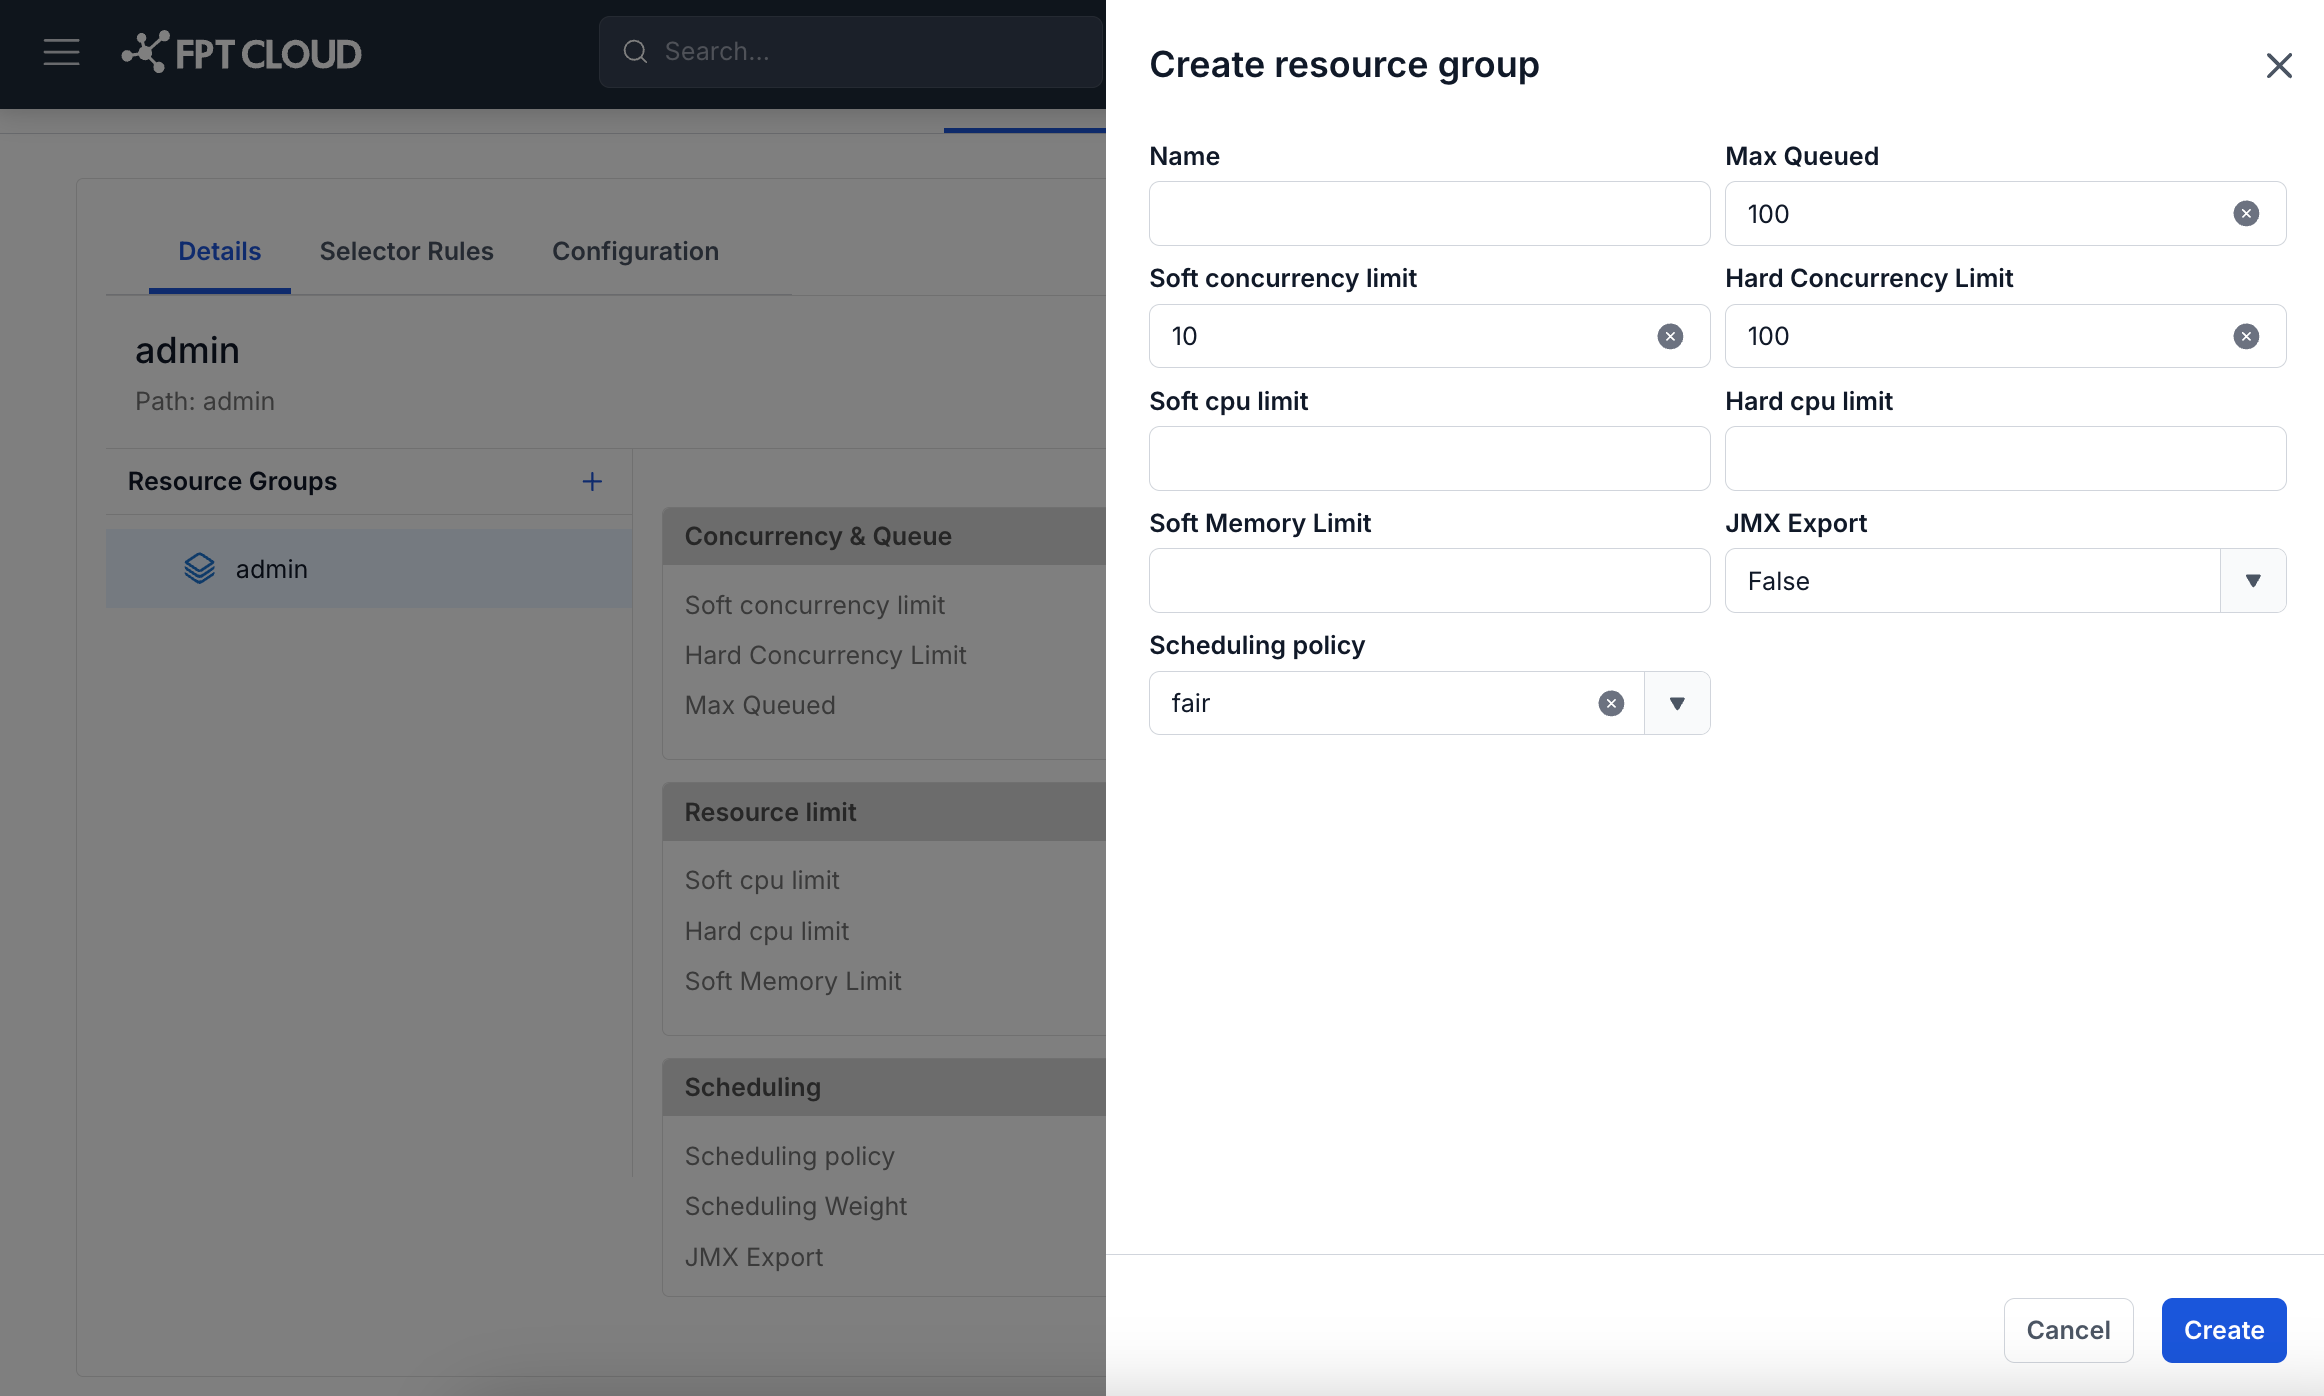
→ The "Create resource group" dialog opens.
-
Step 2: Fill in the required information:
- Name (required): Name of the resource group, up to 250 characters. Supports the templates ${USER}, ${SOURCE}.
- Max Queued (required): Maximum number of queries that can be queued. Minimum value: 0.
- Hard Concurrency Limit (required): Maximum number of queries that can run concurrently. Minimum: 1.
- Soft Concurrency Limit (optional): Must be ≤ Hard Concurrency Limit if entered.
- Soft Memory Limit (required): Percentage format (e.g., 50%) or absolute format (10GB, 500MB).
- Soft cpu limit / Hard cpu limit (optional): Hard cpu limit must be greater than Soft cpu limit if both are entered.
- JMX Export (optional): Boolean. Default: False.
- Scheduling policy (optional): fair / weighted / weighted_fair / query_priority. Default: fair.
- Scheduling Weight (optional): Only takes effect when policy = weighted or weighted_fair.
-
Step 3: Click Create to create it.
→ The new node appears in the tree. The Apply change and Cancel buttons appear in the bottom-right corner.
B2. Create a Sub-group
-
Step 1: Select the parent node in the resource group tree in the left panel.
-
Step 2: Click the + Add Sub-group button in the right panel.
-
Step 3: Fill in the information and click Create.
→ The child node appears indented below the parent node in the tree.
B3. Edit a Resource Group
-
Step 1: Select the node you want to edit in the tree.
-
Step 2: Click the Edit button (pencil icon) in the right panel.
→ The "Edit resource group" dialog opens, pre-filled with the current data.
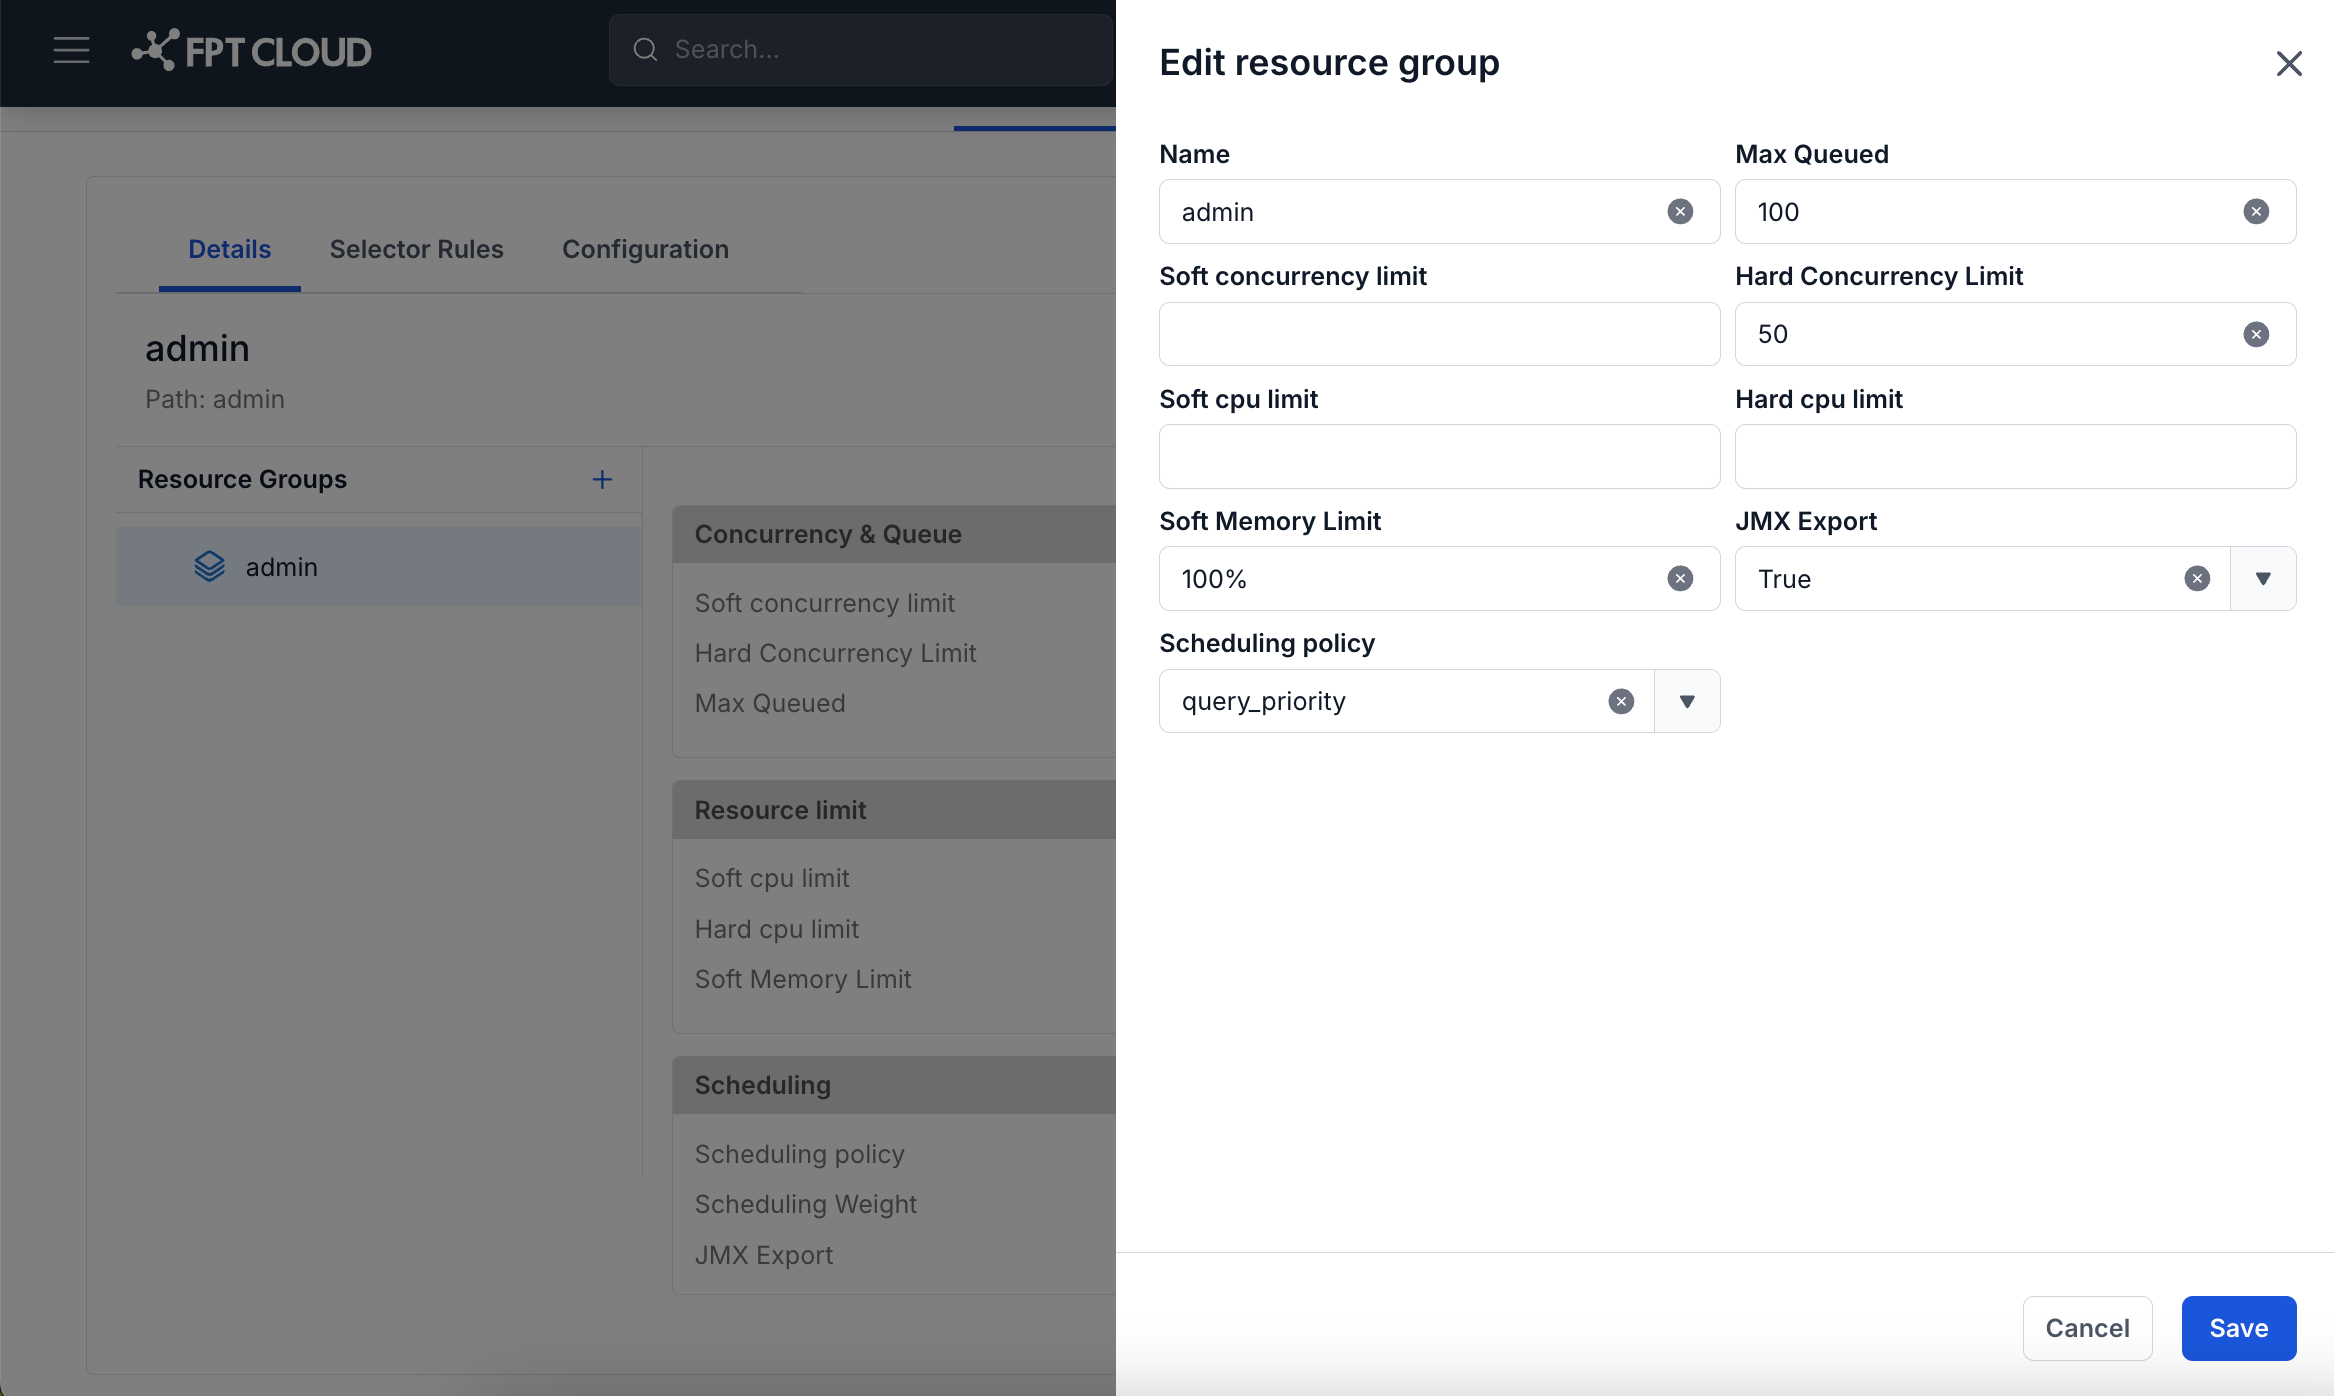
- Step 3: Update the information and click Save
→ The right panel updates with the new values. The Apply change and Cancel buttons appear.
B4. Delete a Resource Group
-
Step 1: Select the node you want to delete in the tree.
-
Step 2: Click the Delete button (trash can icon) in the right panel.
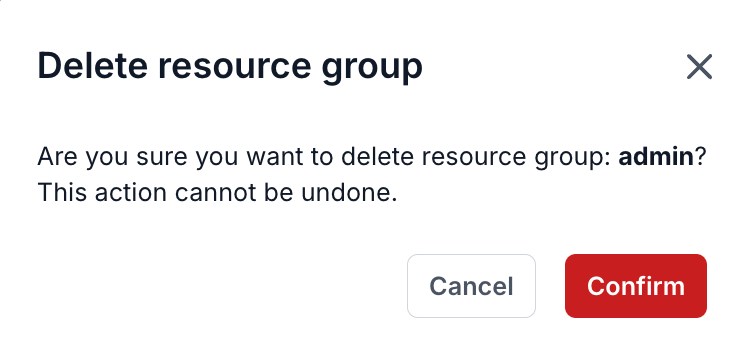
→ A confirmation dialog appears: "Are you sure you want to delete resource group: [name]? This action cannot be undone."
- Step 3: Click Confirm (red) to confirm the deletion.
→ The node (and all of its child sub-groups) is removed from the tree. The Apply change and Cancel buttons appear.
Note: Deleting a parent node deletes the entire subtree beneath it. This action cannot be undone once Apply change is clicked.
B5. Apply Change / Cancel
All changes made to the resource group tree are saved temporarily. Click Apply change to apply them to the Trino cluster:
- Apply change: sends all pending changes to the Trino coordinator. Completes within ≤ 30 seconds.
- Cancel: discards all pending changes, returning the tree to the state from the last apply.
C. Manage Selector Rules (Selector Rules Tab)
The Selector Rules tab displays the list of rules used to route queries to a resource group. Rules are processed in order — the first matching rule is applied (first match wins). All conditions within a single rule use AND logic.
The Selector Rules table has the following columns: User match, Source, Query type, Client tags, Target group, Action.
C1. Create a New Selector Rule
- Step 1: Click the + Add selector rule button in the top-right corner.
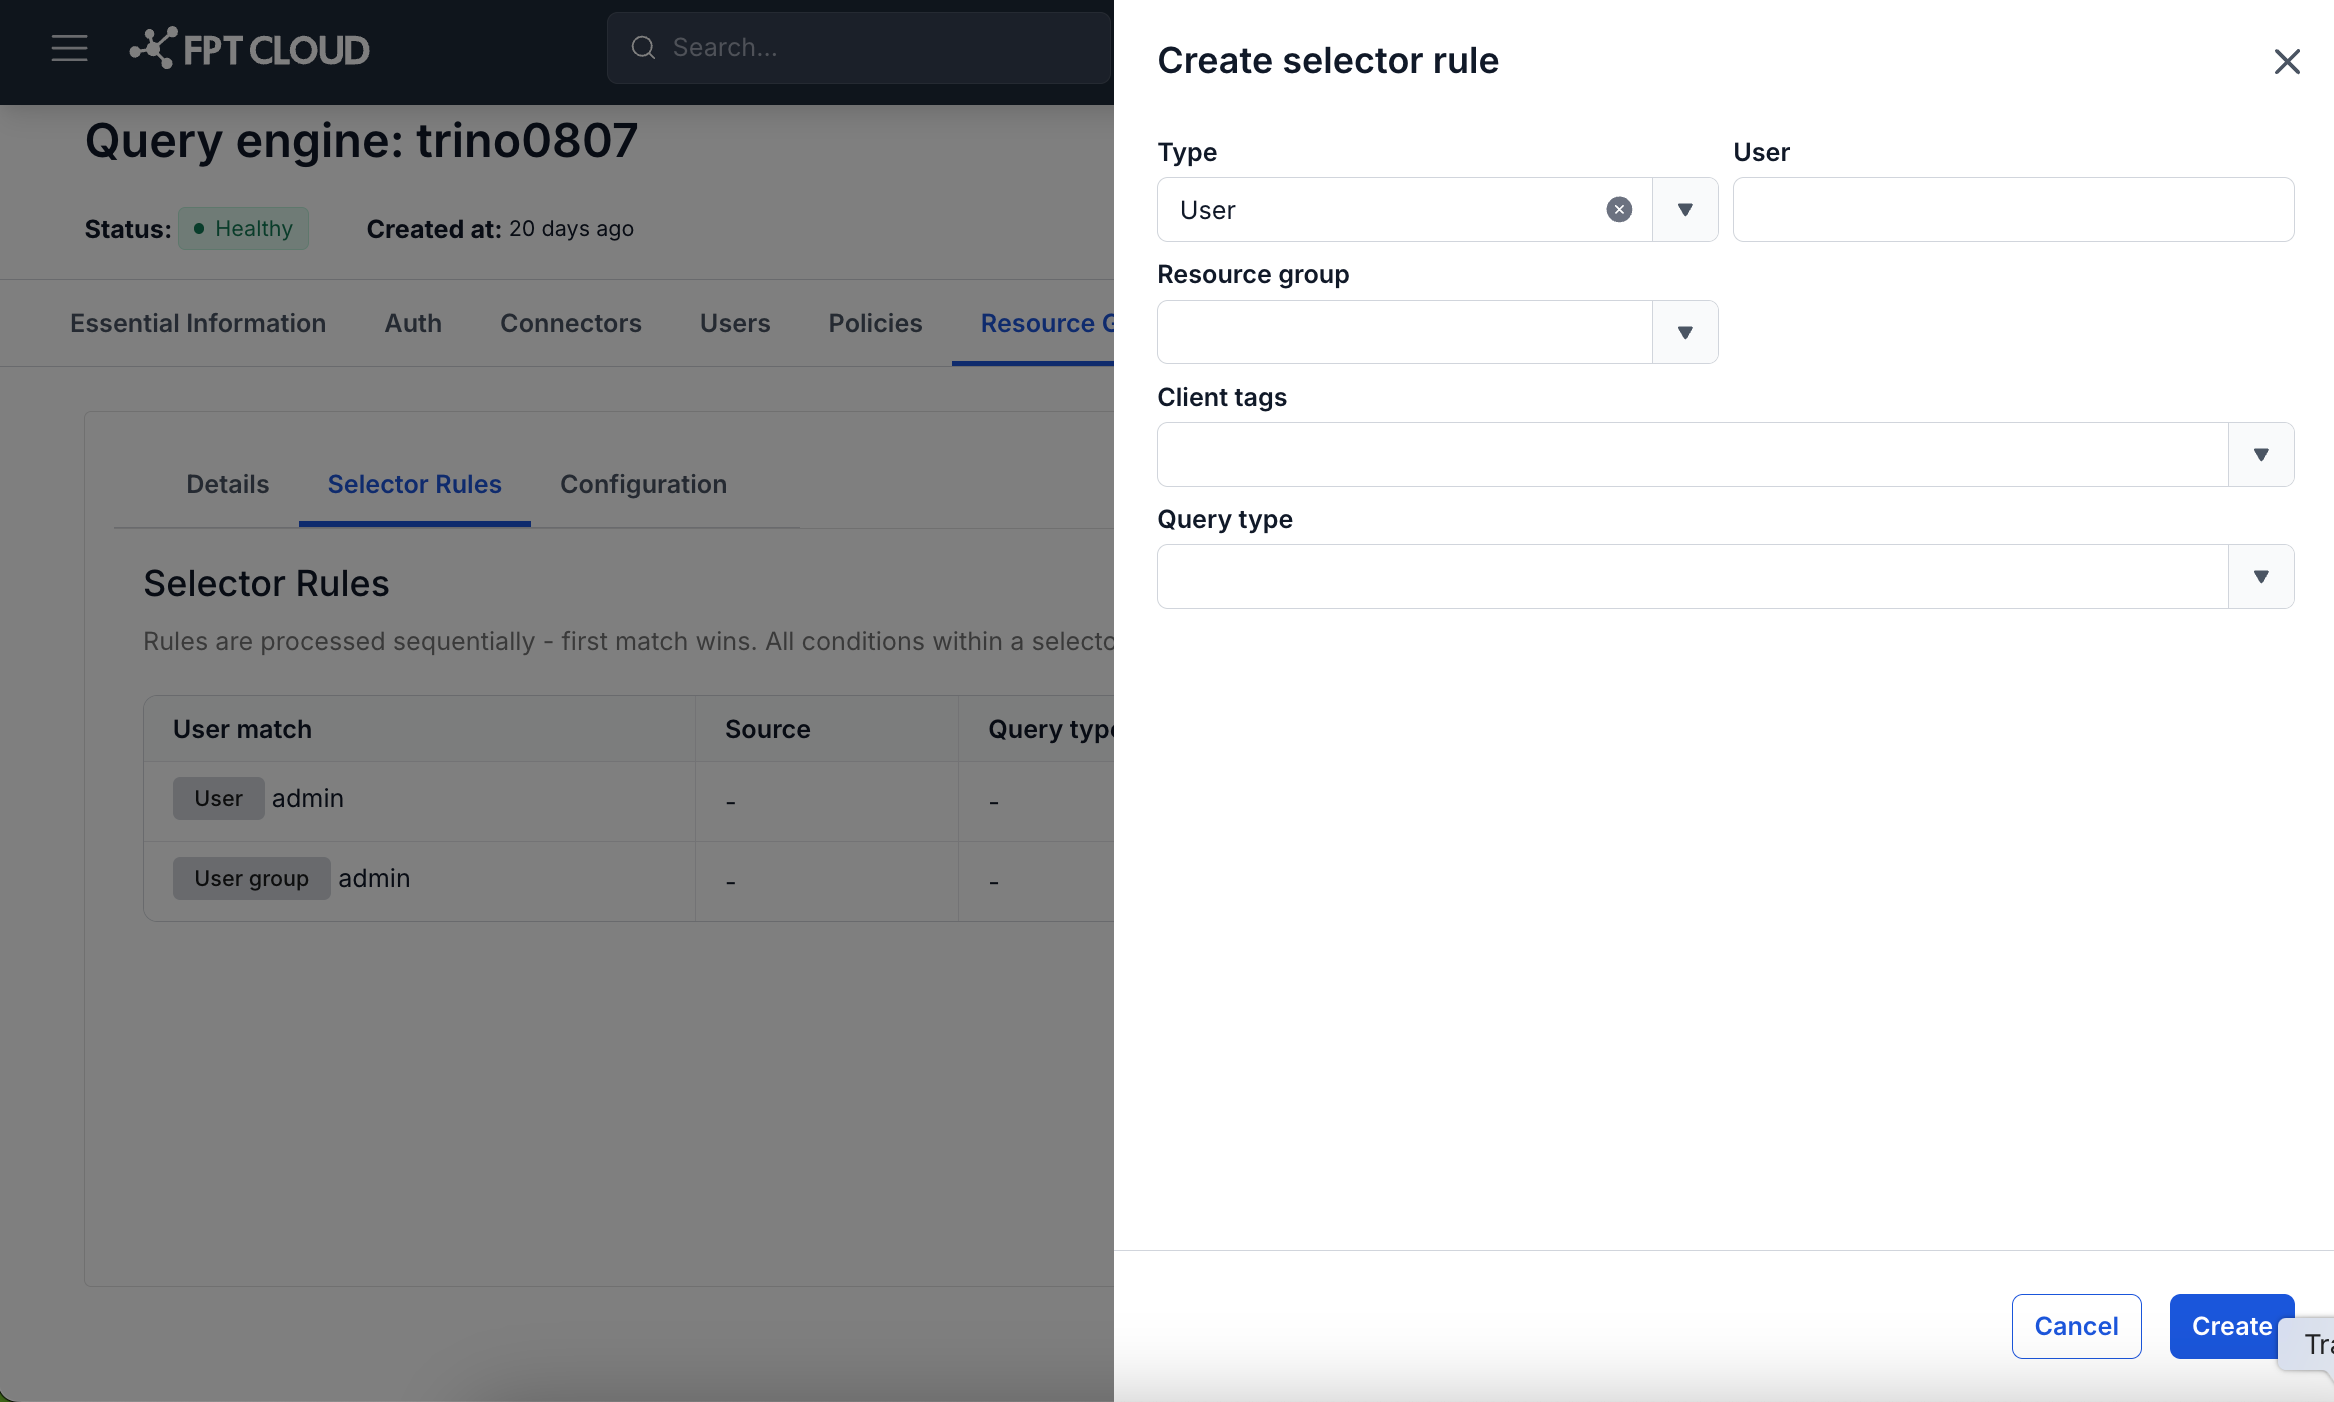
→ The "Create selector rule" dialog opens.
-
Step 2: Fill in at least one condition and select the target Resource group:
- Type: select the condition type — User, Group, or Source. Once selected, the corresponding input field appears next to it:
- User: a regex pattern matched against the username. Up to 512 characters.
- Group: the user group name.
- Source: a regex pattern matched against the connection source. Up to 512 characters.
- Query type: the query type — SELECT, INSERT, DELETE, UPDATE, DATA_DEFINITION, etc.
- Client tags: a list of tags. Up to 20 tags, each up to 128 characters.
- Resource group: the target group that will receive the query.
- Type: select the condition type — User, Group, or Source. Once selected, the corresponding input field appears next to it:
Note: At least one of the condition fields (User, Source, Group, Query type, Client tags) must be filled in.
- Step 3: Click Create to save.
→ The rule appears in the table. The Apply change and Cancel buttons appear.
C2. Edit a Selector Rule
- Step 1: Click the pencil (edit) icon in the Action column of the rule you want to edit.
→ The "Edit selector rule" dialog opens, pre-filled with the current data.
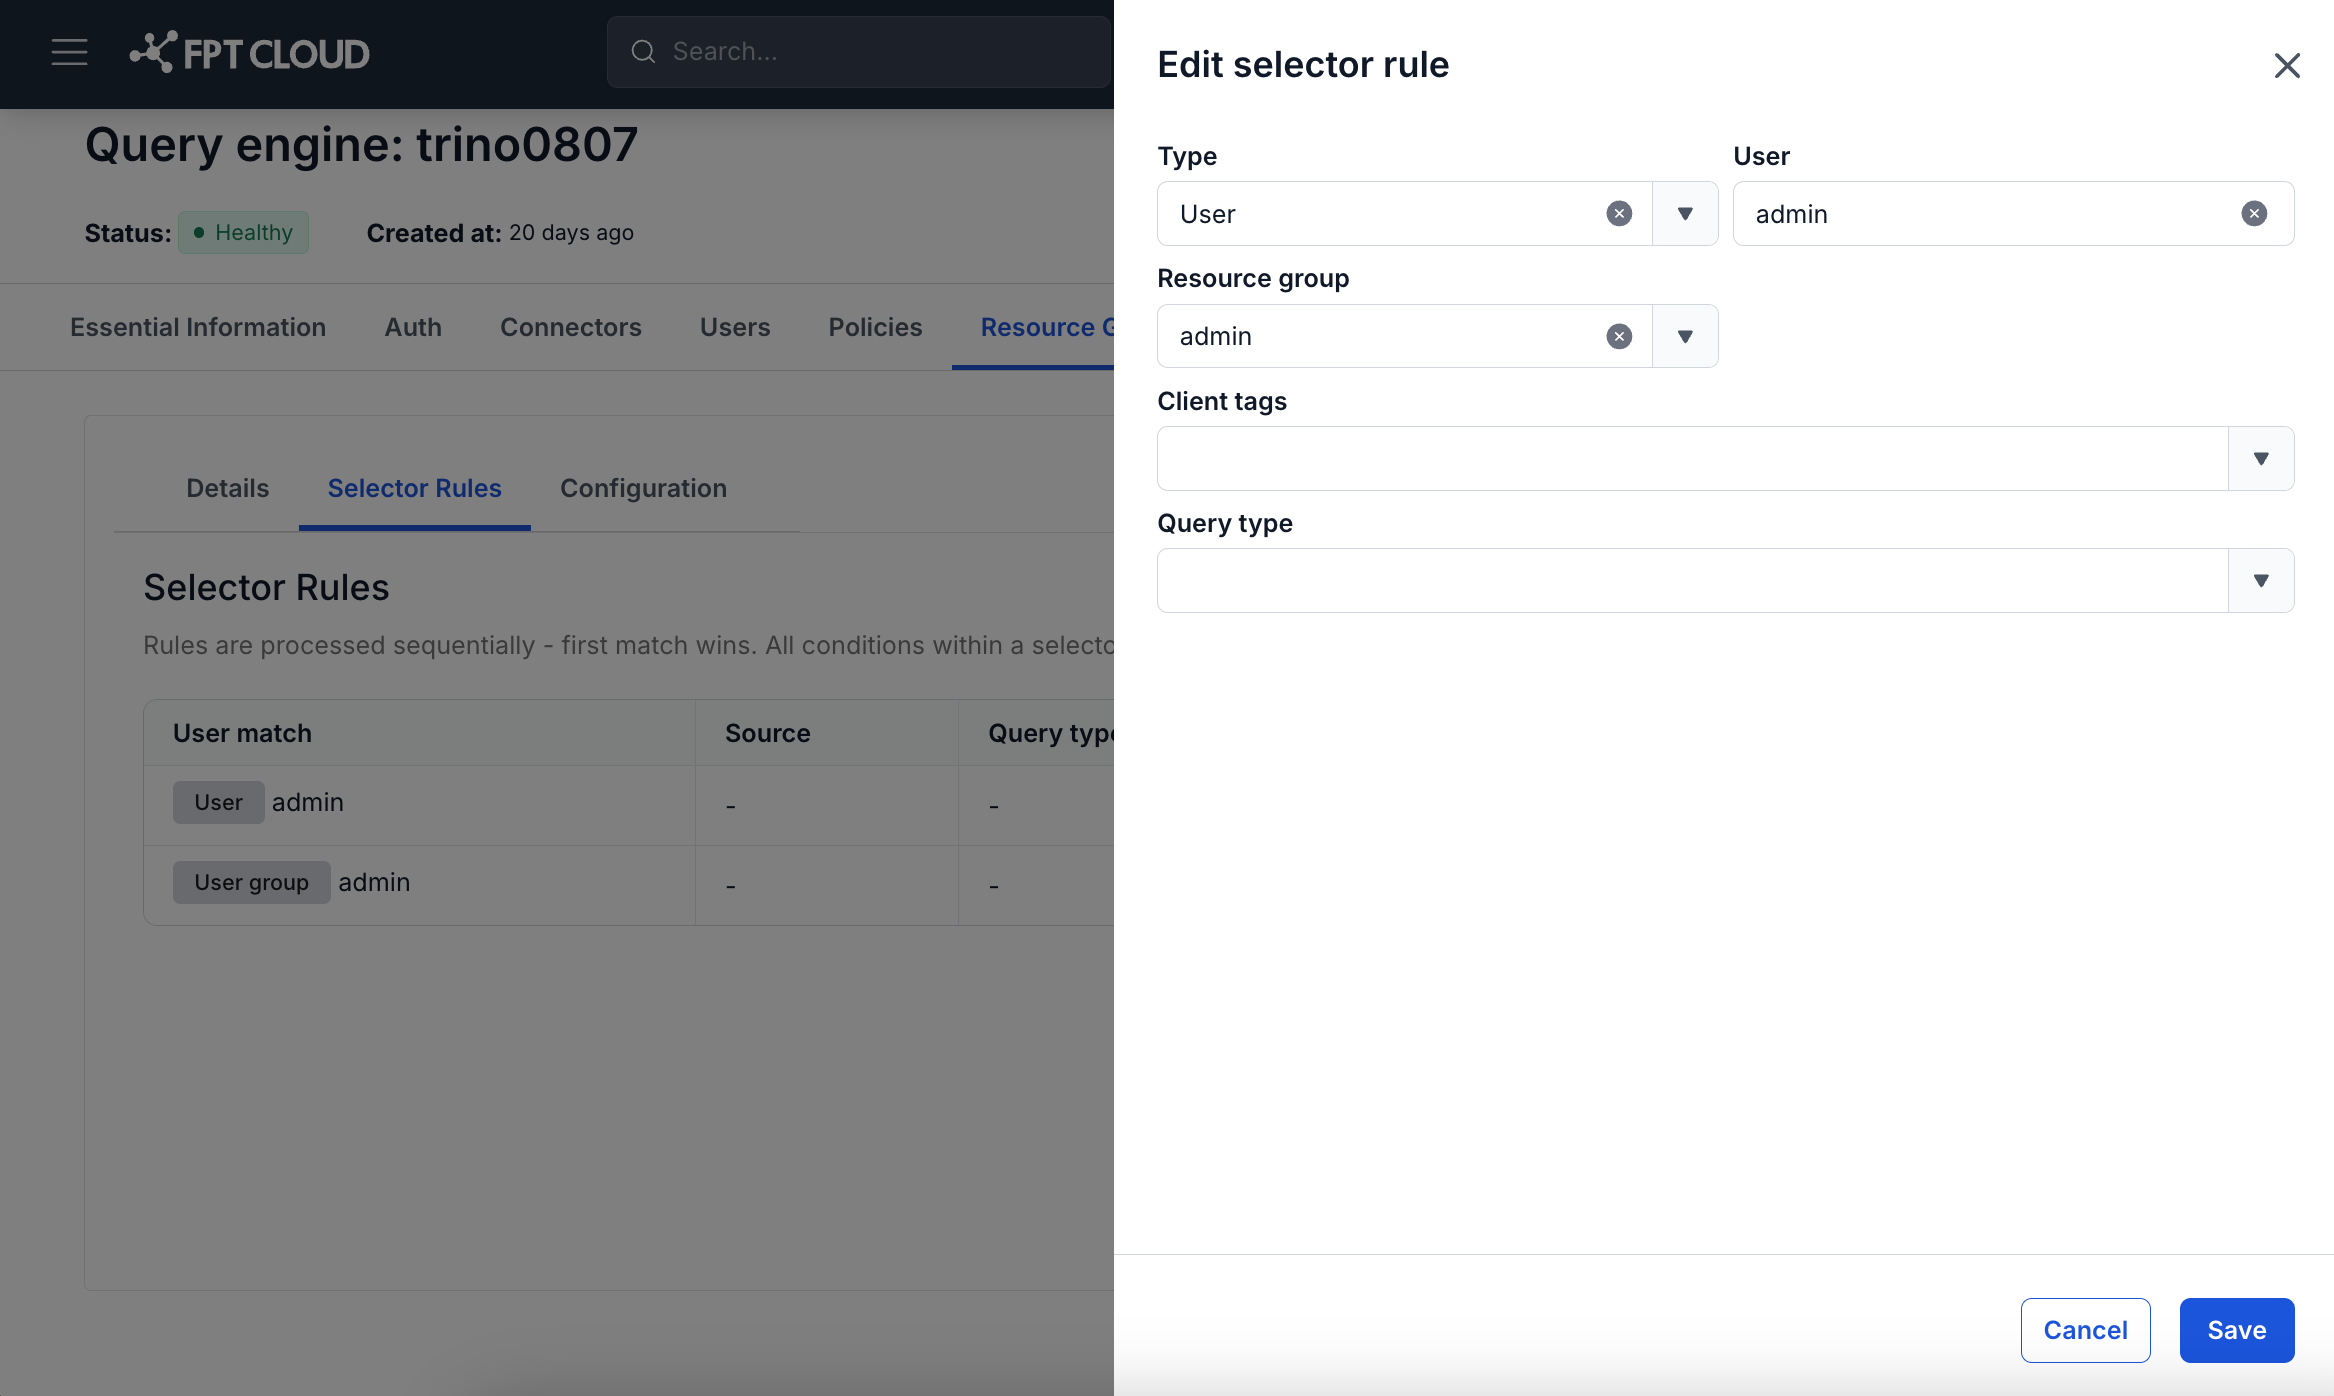
- Step 2: Update the information and click Save.
→ The table updates with the new information. The Apply change and Cancel buttons appear.
C3. Delete a Selector Rule
- Step 1: Click the trash can (delete) icon in the Action column of the rule you want to delete.
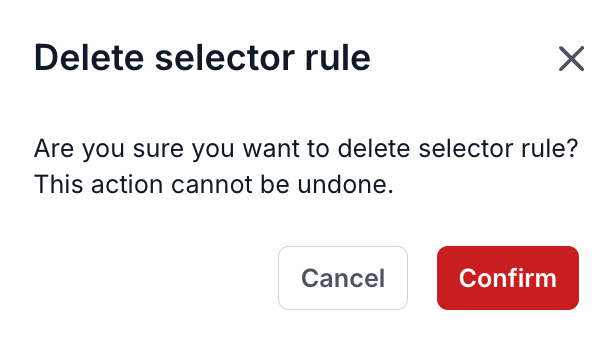
→ A confirmation dialog appears: "Are you sure you want to delete selector rule? This action cannot be undone."
- Step 2: Click Confirm (red) to delete it.
→ The rule disappears from the table. The Apply change and Cancel buttons appear.
D. Configuration Manager (Configuration Tab)
The Configuration tab displays the current Resource Groups configuration source and lets you switch between File mode and Database mode.
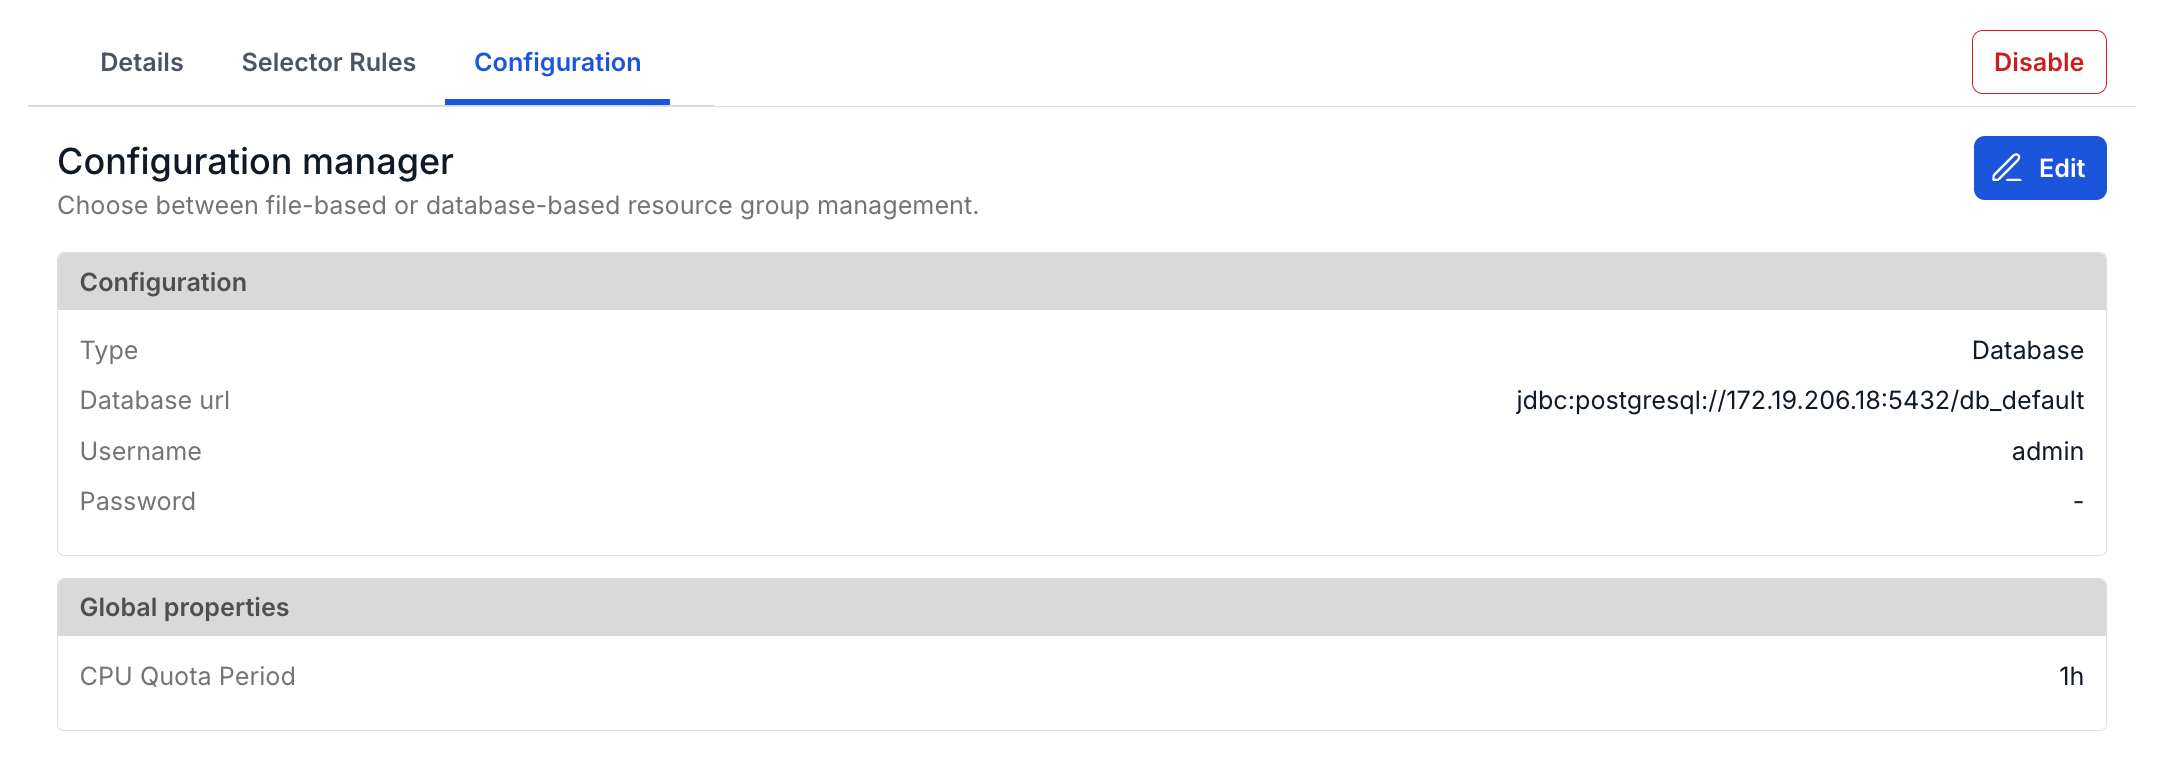
The page displays 2 sections:
- Configuration:
- Type (type: file/db)
- Database path (Database url)
- Username
- Password (shown as ***).
- Global properties:
- CPU Quota Period
To change the configuration source, follow these steps:
- Step 1: Click the Edit button (pencil icon) in the top-right corner.
→ The "Enable resource groups" dialog opens with the current Source already selected.
- Step 2: Change the Source and fill in the corresponding information (see section A).
Note: Switching modes requires restarting the coordinator, which takes about 30–90 seconds. Active queries will be terminated. The resource group and selector rules configuration is preserved.
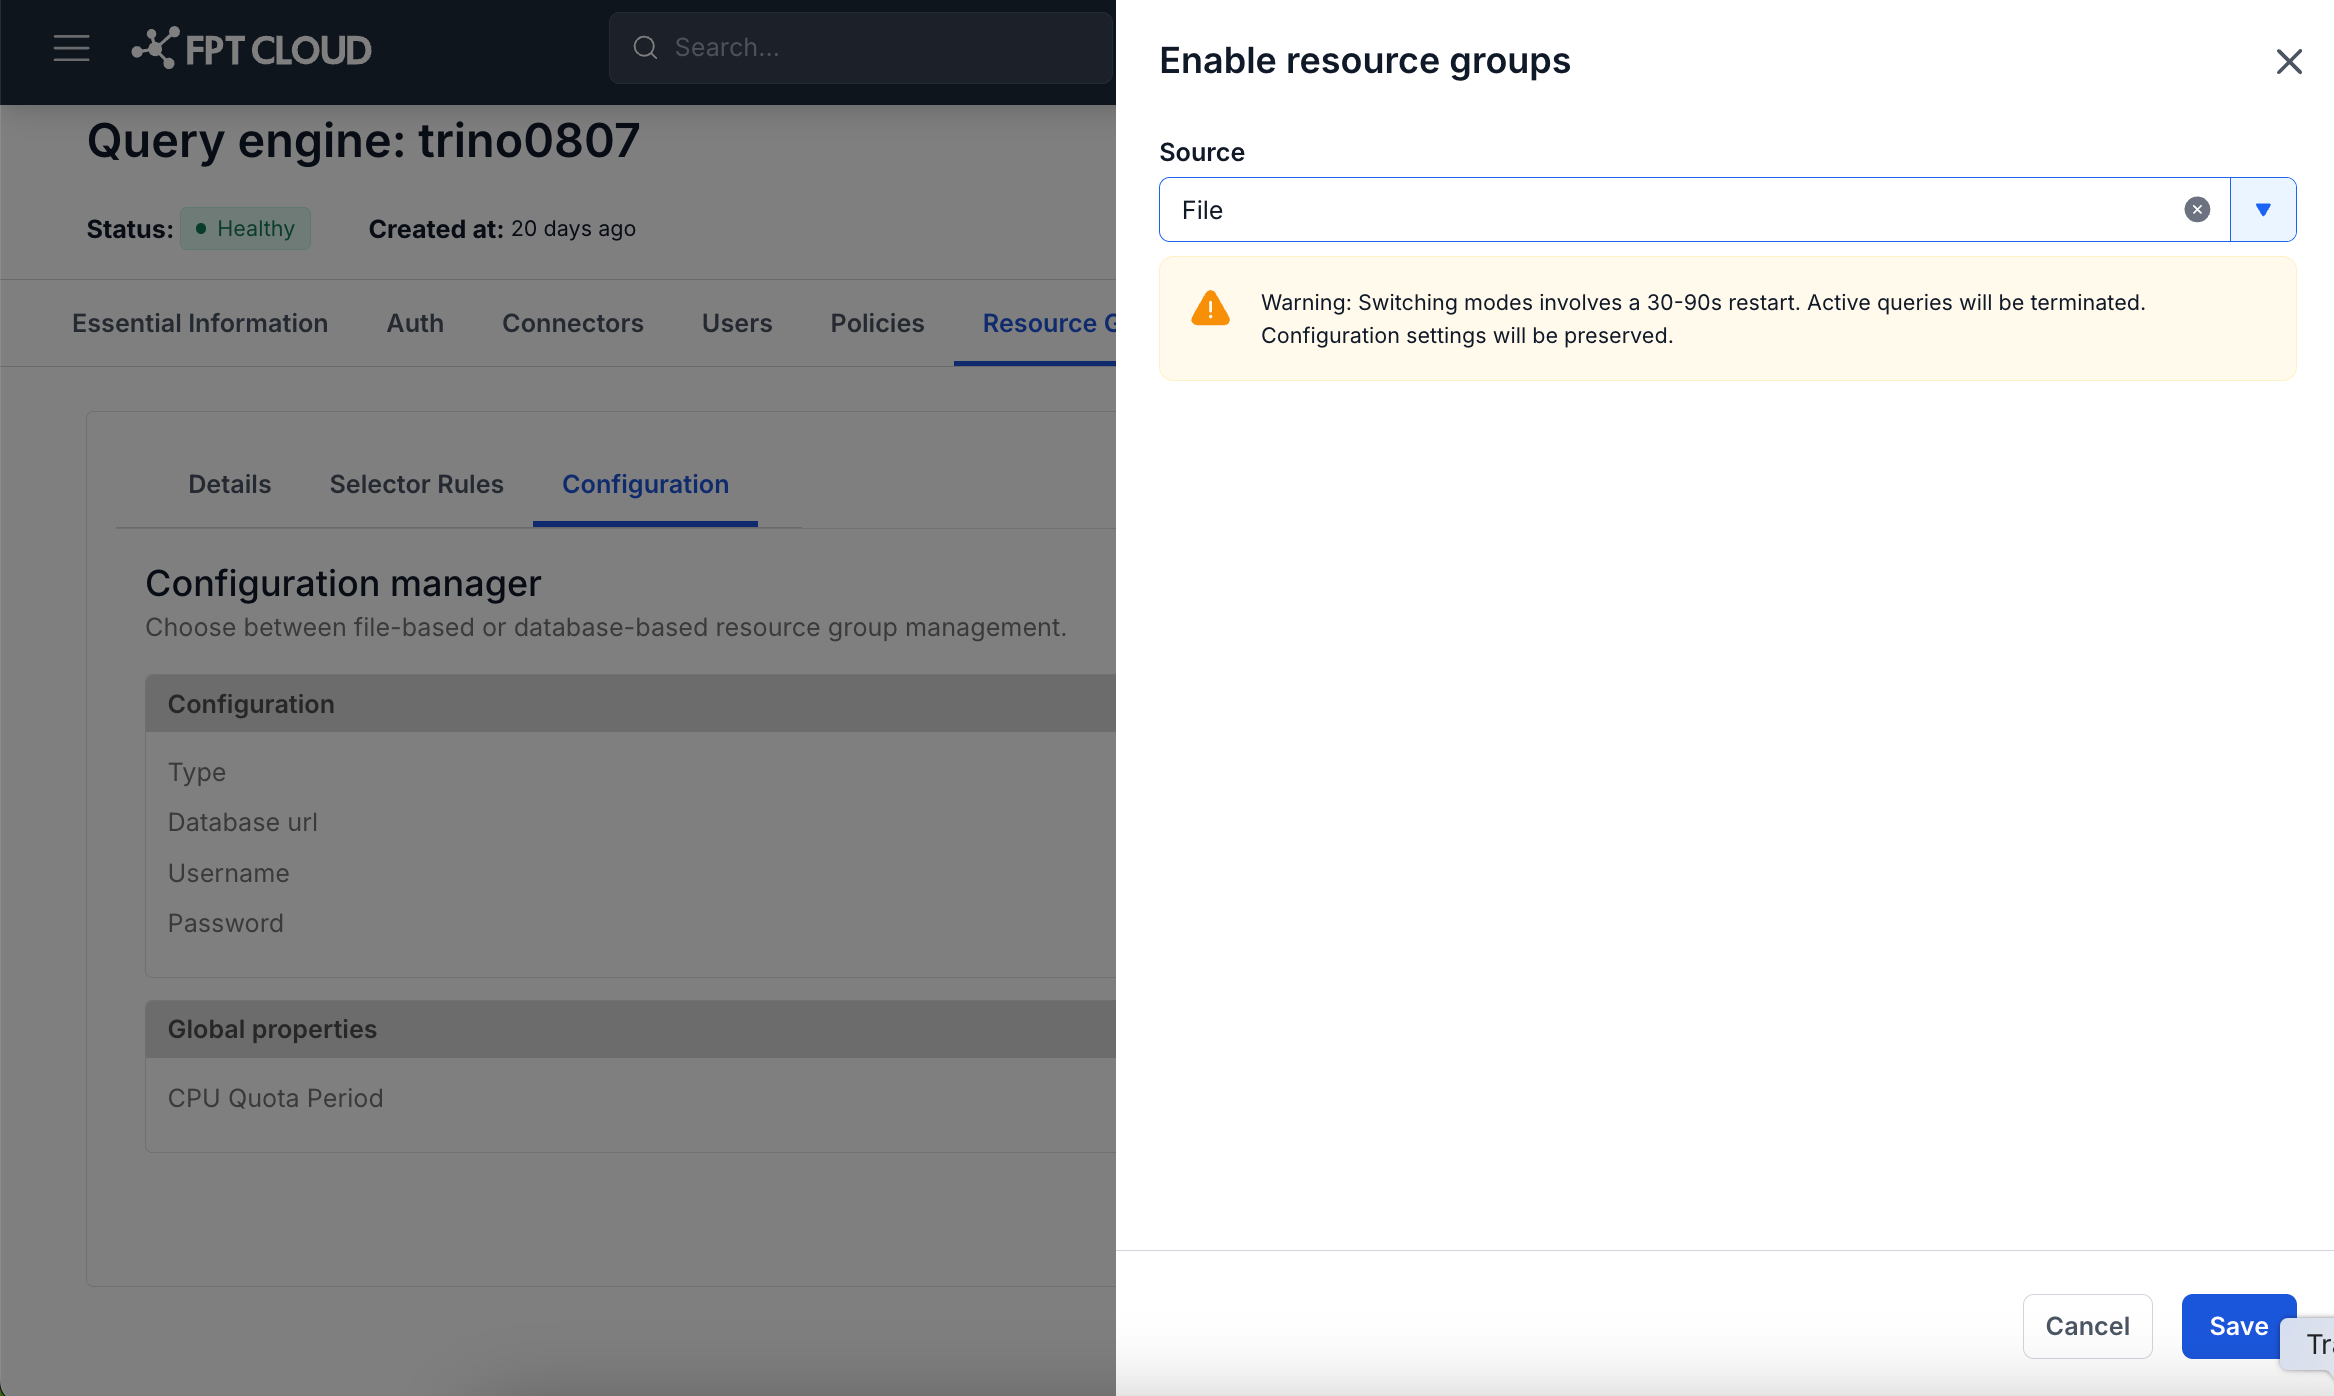
- Step 3: Click Save to confirm.
→ The system migrates the configuration. The Configuration tab shows the new source type once complete.
E. Disable Resource Groups
To disable Resource Groups, follow these steps:
- Step 1: Click the Disable button (red) in the top-right corner — shown on all 3 tabs: Details, Selector Rules, Configuration.
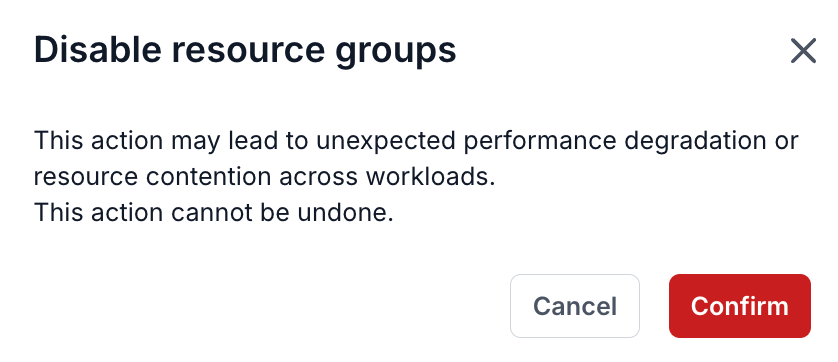
→ A confirmation dialog appears: "This action may lead to unexpected performance degradation or resource contention across workloads. This action cannot be undone."
- Step 2: Click Confirm to confirm.
→ Resource Groups is disabled. The Resource Groups tab returns to the empty state with the Enable button.
Note: The Disable action cannot be undone through the UI. To re-enable it, click Enable and configure everything again from scratch.