Tag Sync (OpenMetadata & Ranger Integration)
The Tag Sync feature synchronizes tags from OpenMetadata to Apache Ranger, extending permission management in Trino to be based on tags (in addition to resources).
Steps
Step 1: Portal
On the Portal, you need to create all 3 components:
- OpenMetadata
- Apache Ranger
- Trino
When creating the Trino cluster, you must check Integrate Ranger to allow Trino to use permissions from Ranger.
Step 2: Create Resource Policies for Trino in Ranger
Go to Ranger > Service Manager > Resource tab → select the Trino service you just created (e.g., trino-msu9test).
Note: The service name must match Trino's cus_app_id.
This is a mandatory condition for Trino to work properly and for OpenMetadata to be able to test the connection successfully. If the basic Resource Policies are missing, when creating the Trino service in OM → Test Connection will fail.
Step 3: Create a Trino Service in OpenMetadata
- Go to OpenMetadata > Settings > Services > Databases → click Add New Service.

-
Select Trino → click Next.
-
Fill in the service information:
Service Name (e.g., trino-tester).
Username, Password, Host, Port (pointing to the Trino cluster you just created on the portal).
-
Click Test Connection → if successful, click Save.
-
Go to the Ingestion tab of the Trino service → click Add Ingestion.
Fill in the Database/Schema/Table Filter Pattern.
Run ingestion.
-
Once ingestion succeeds, the Trino DB is displayed in Explore.
-
Go to Explore > Database Trino → assign a tag to a column (e.g., the tag Sensitive for the custkey column in the customer table).
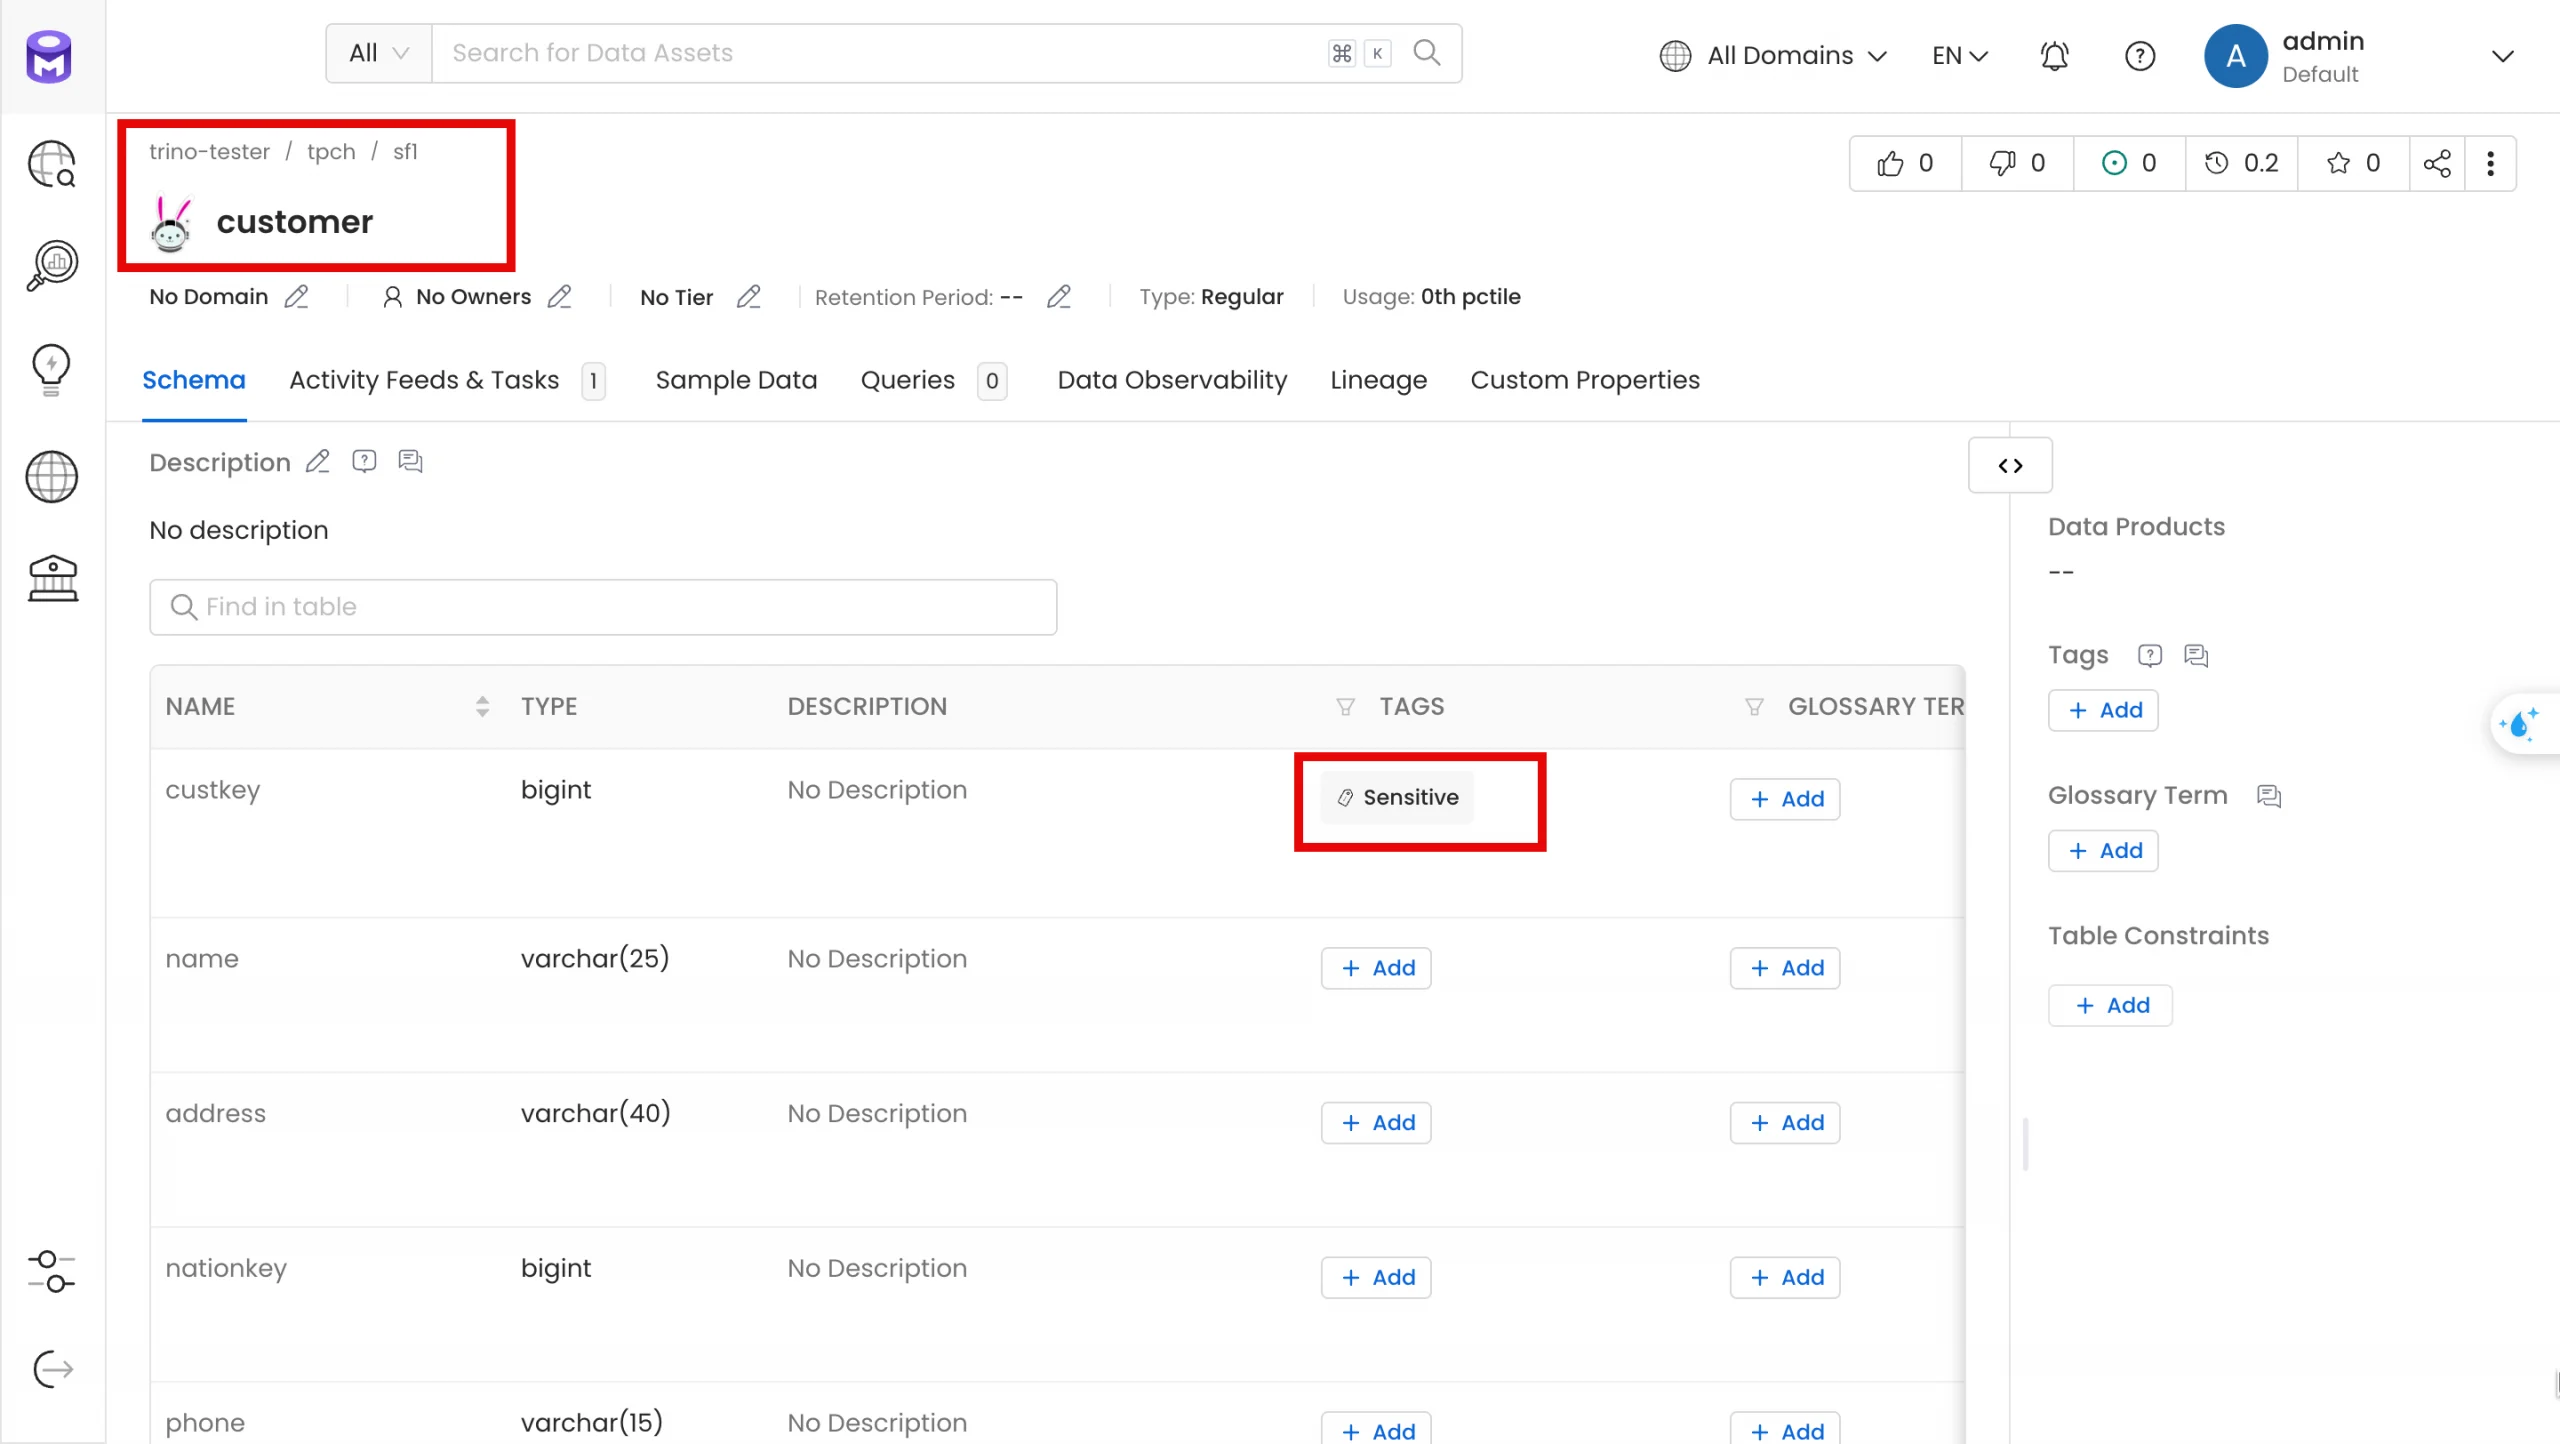
Step 4: Create a Tag Service & Trino Service in Ranger
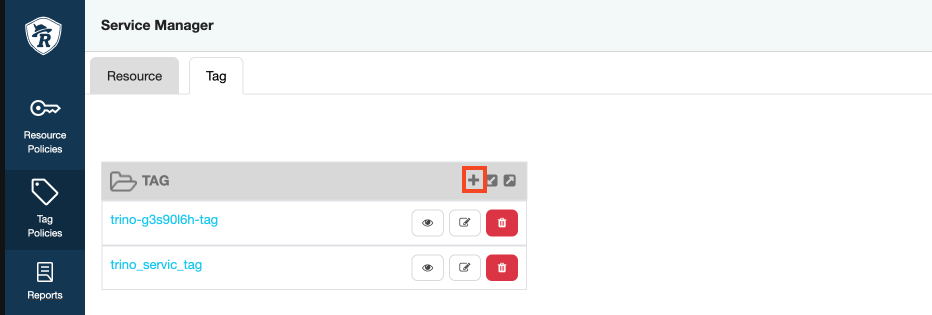
- Go to Ranger dashboard > Service Manager > Tag tab → click Add New Service to create the Tag Service first (e.g., trino-msu9test-tag).
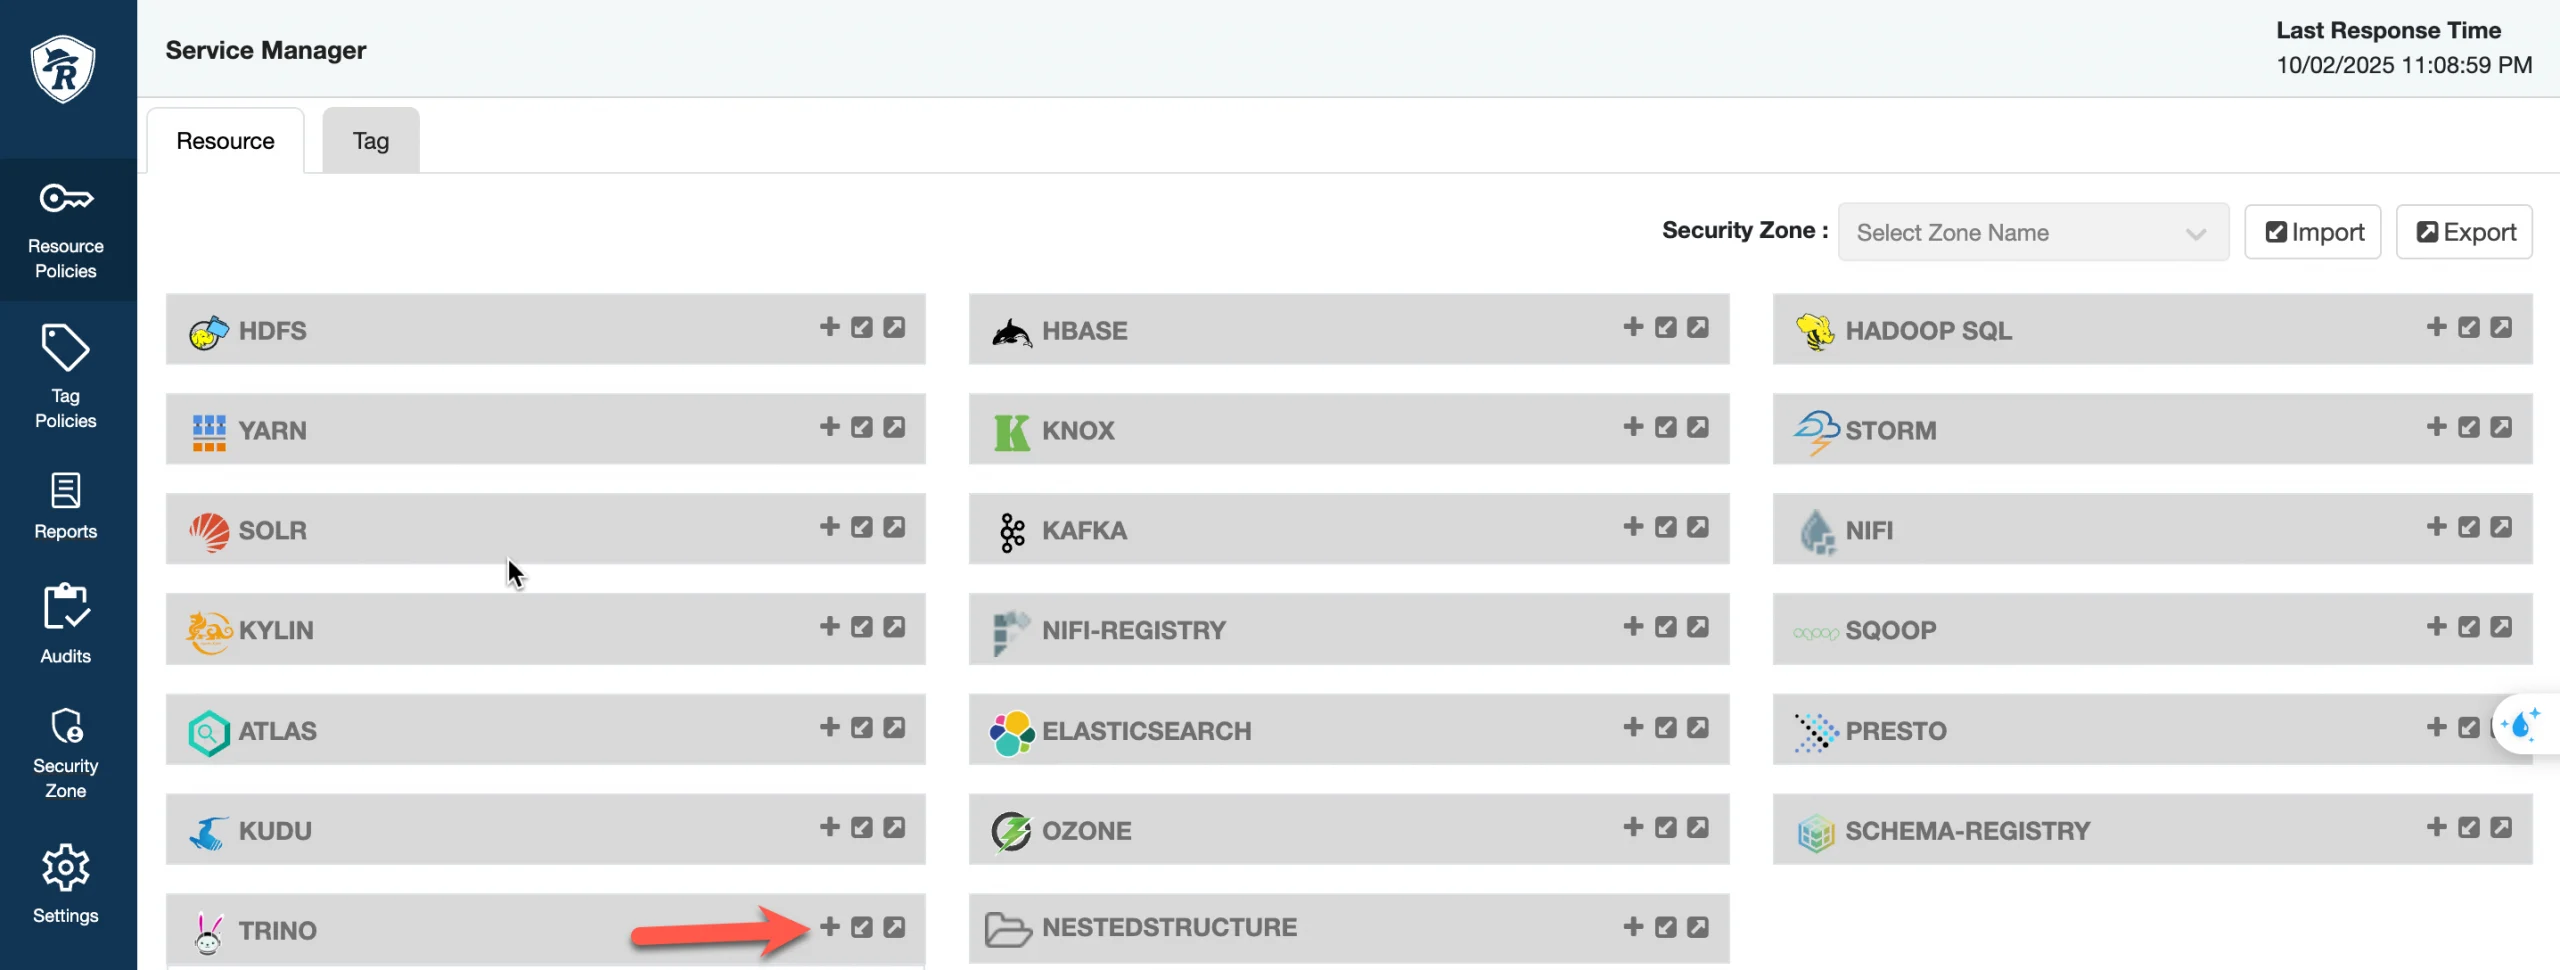
- Go to Service Manager > Resource tab → edit Service Trino (e.g., trino-msu9test).
In the Trino service configuration → set the Select Tag Service field to trino-msu9test-tag.
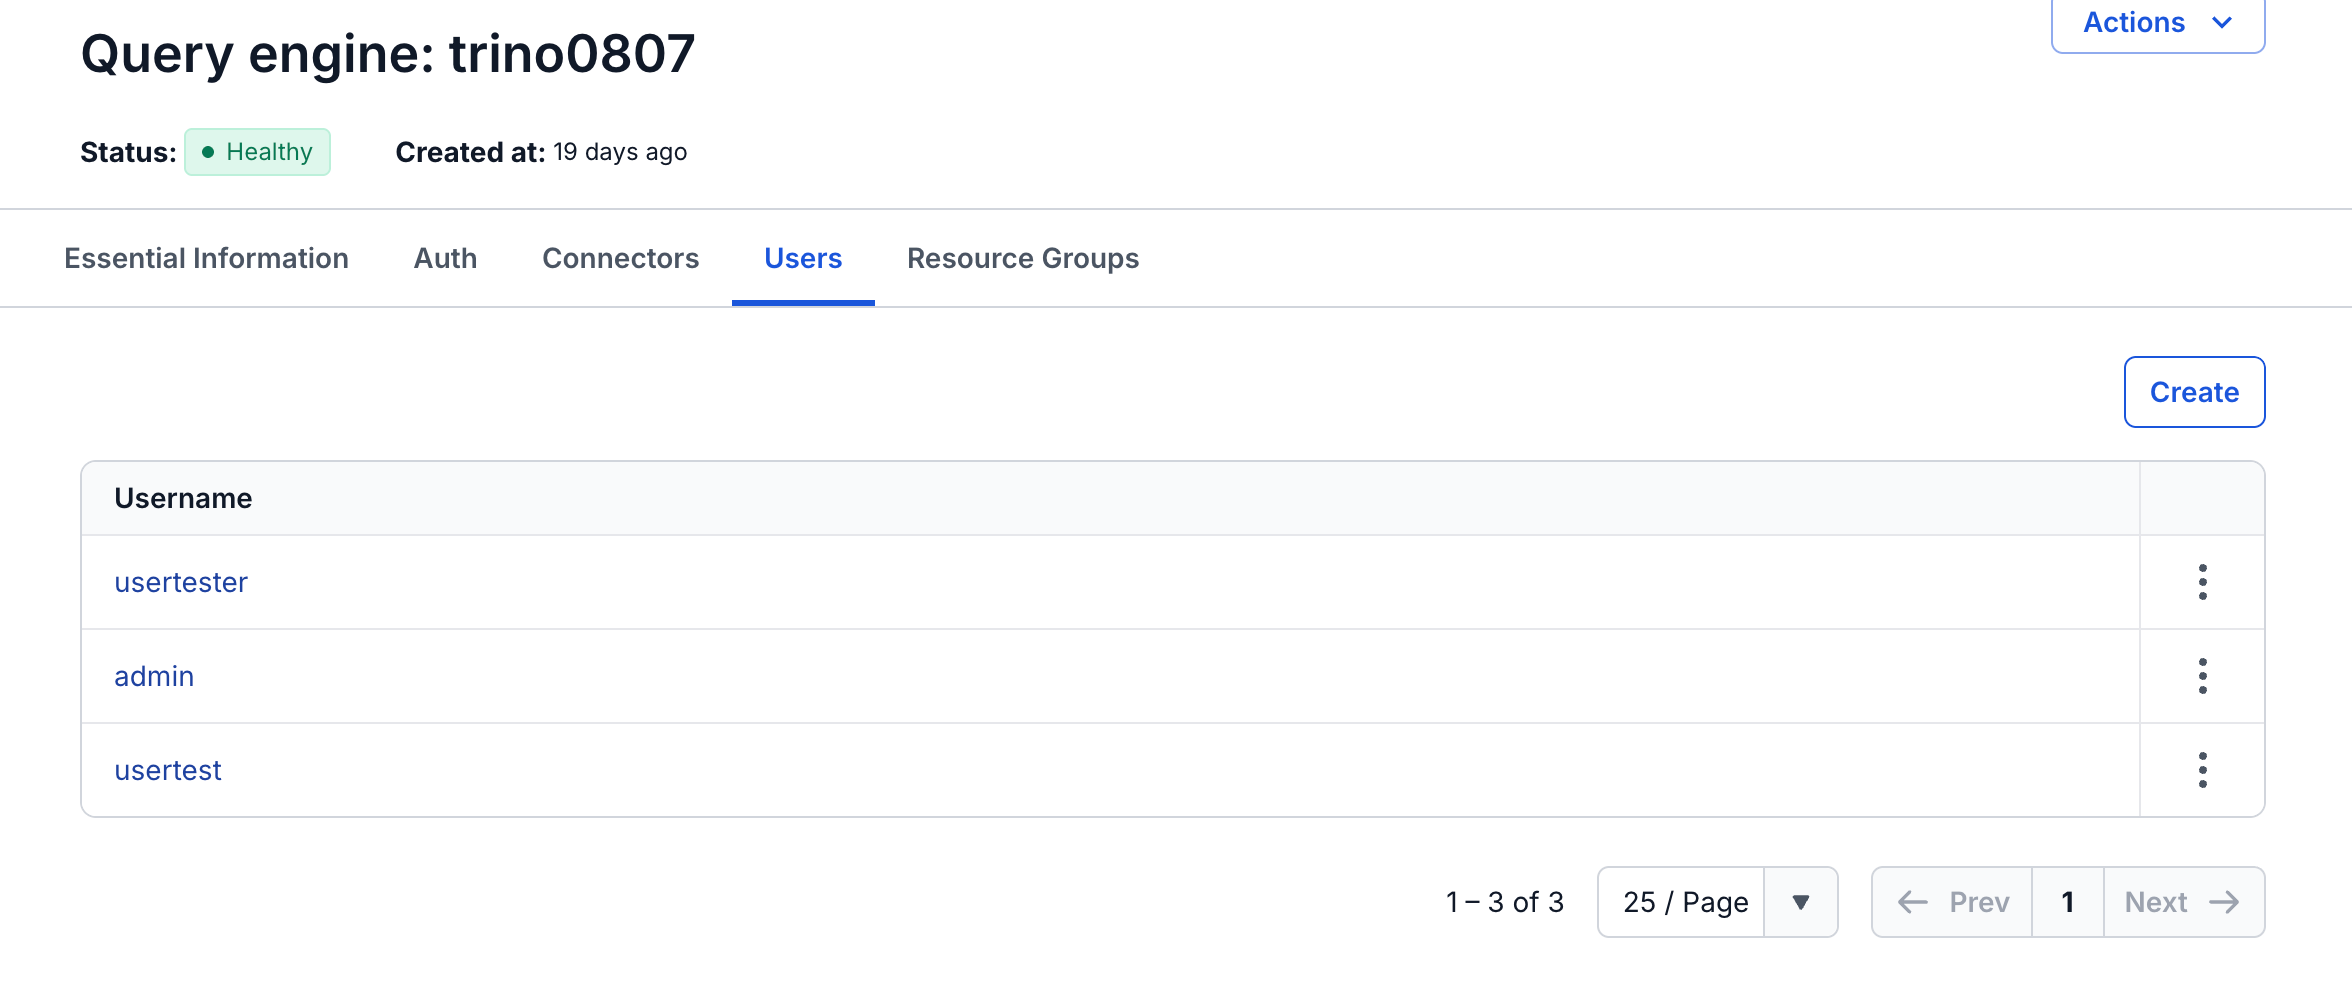
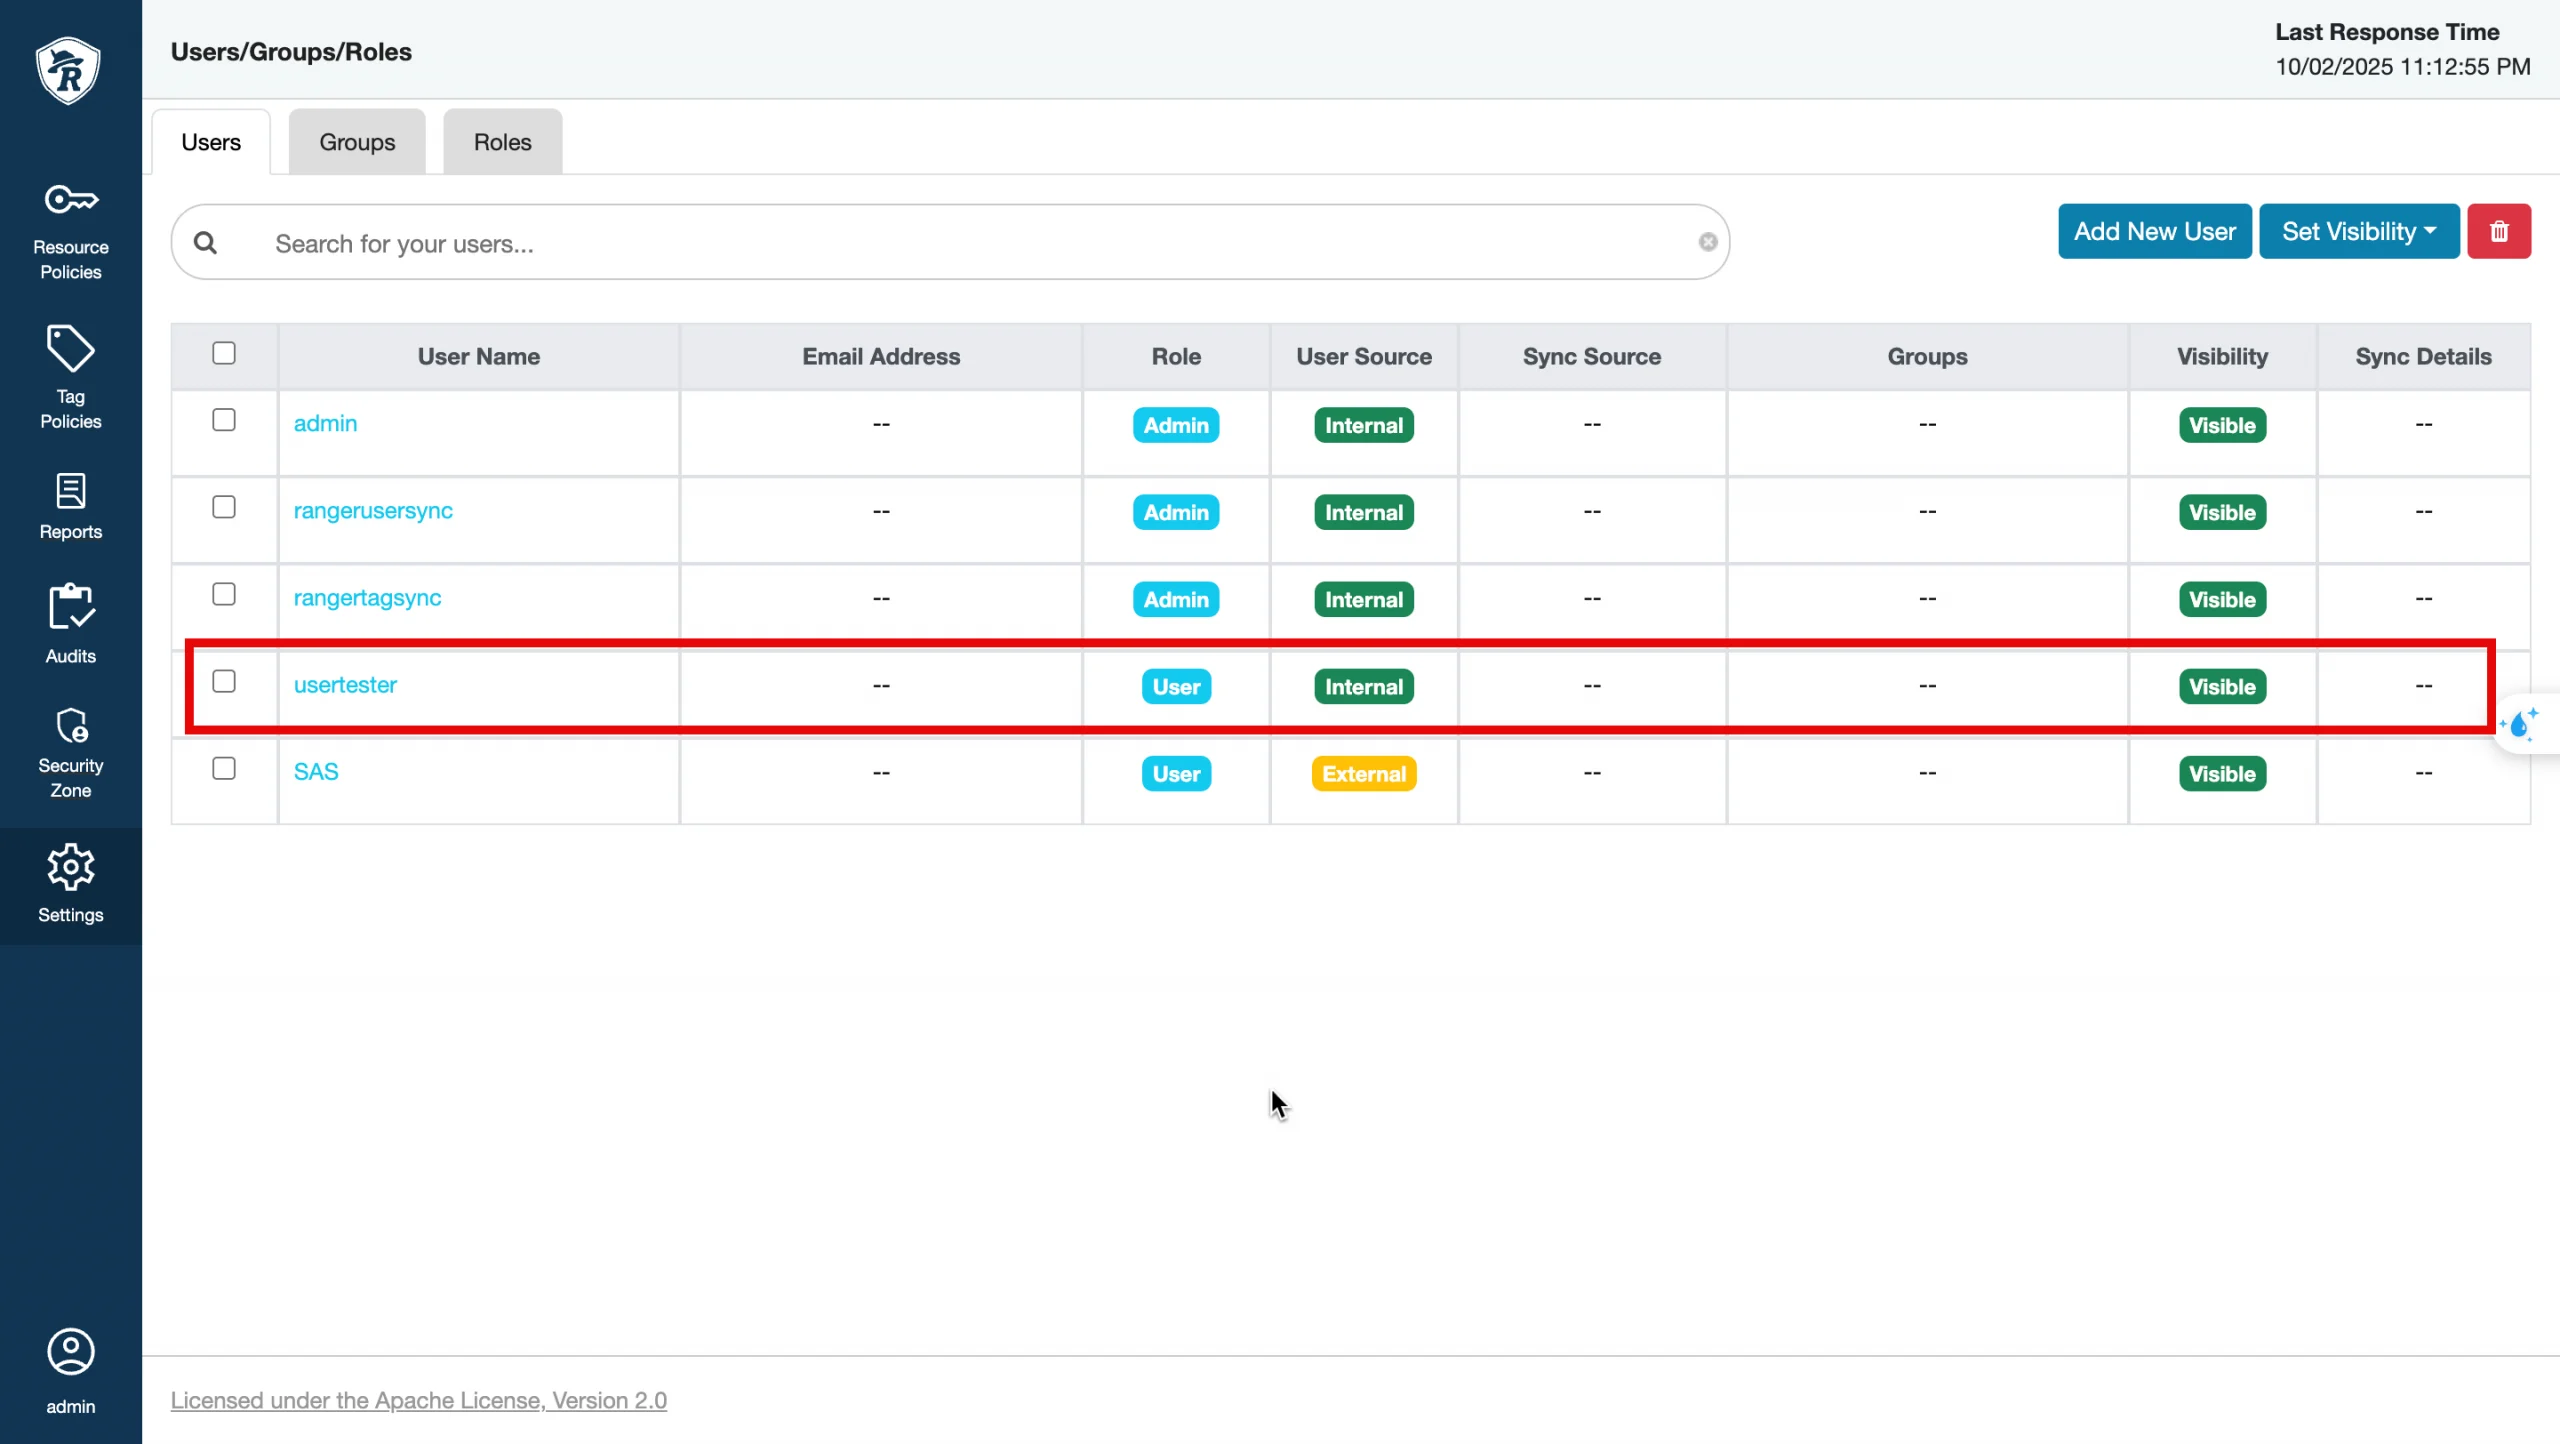
- Go to Settings > Users → click Add New User:
Create a user (e.g., usertest) with role = User.
The username must match the user already created in the Trino portal.
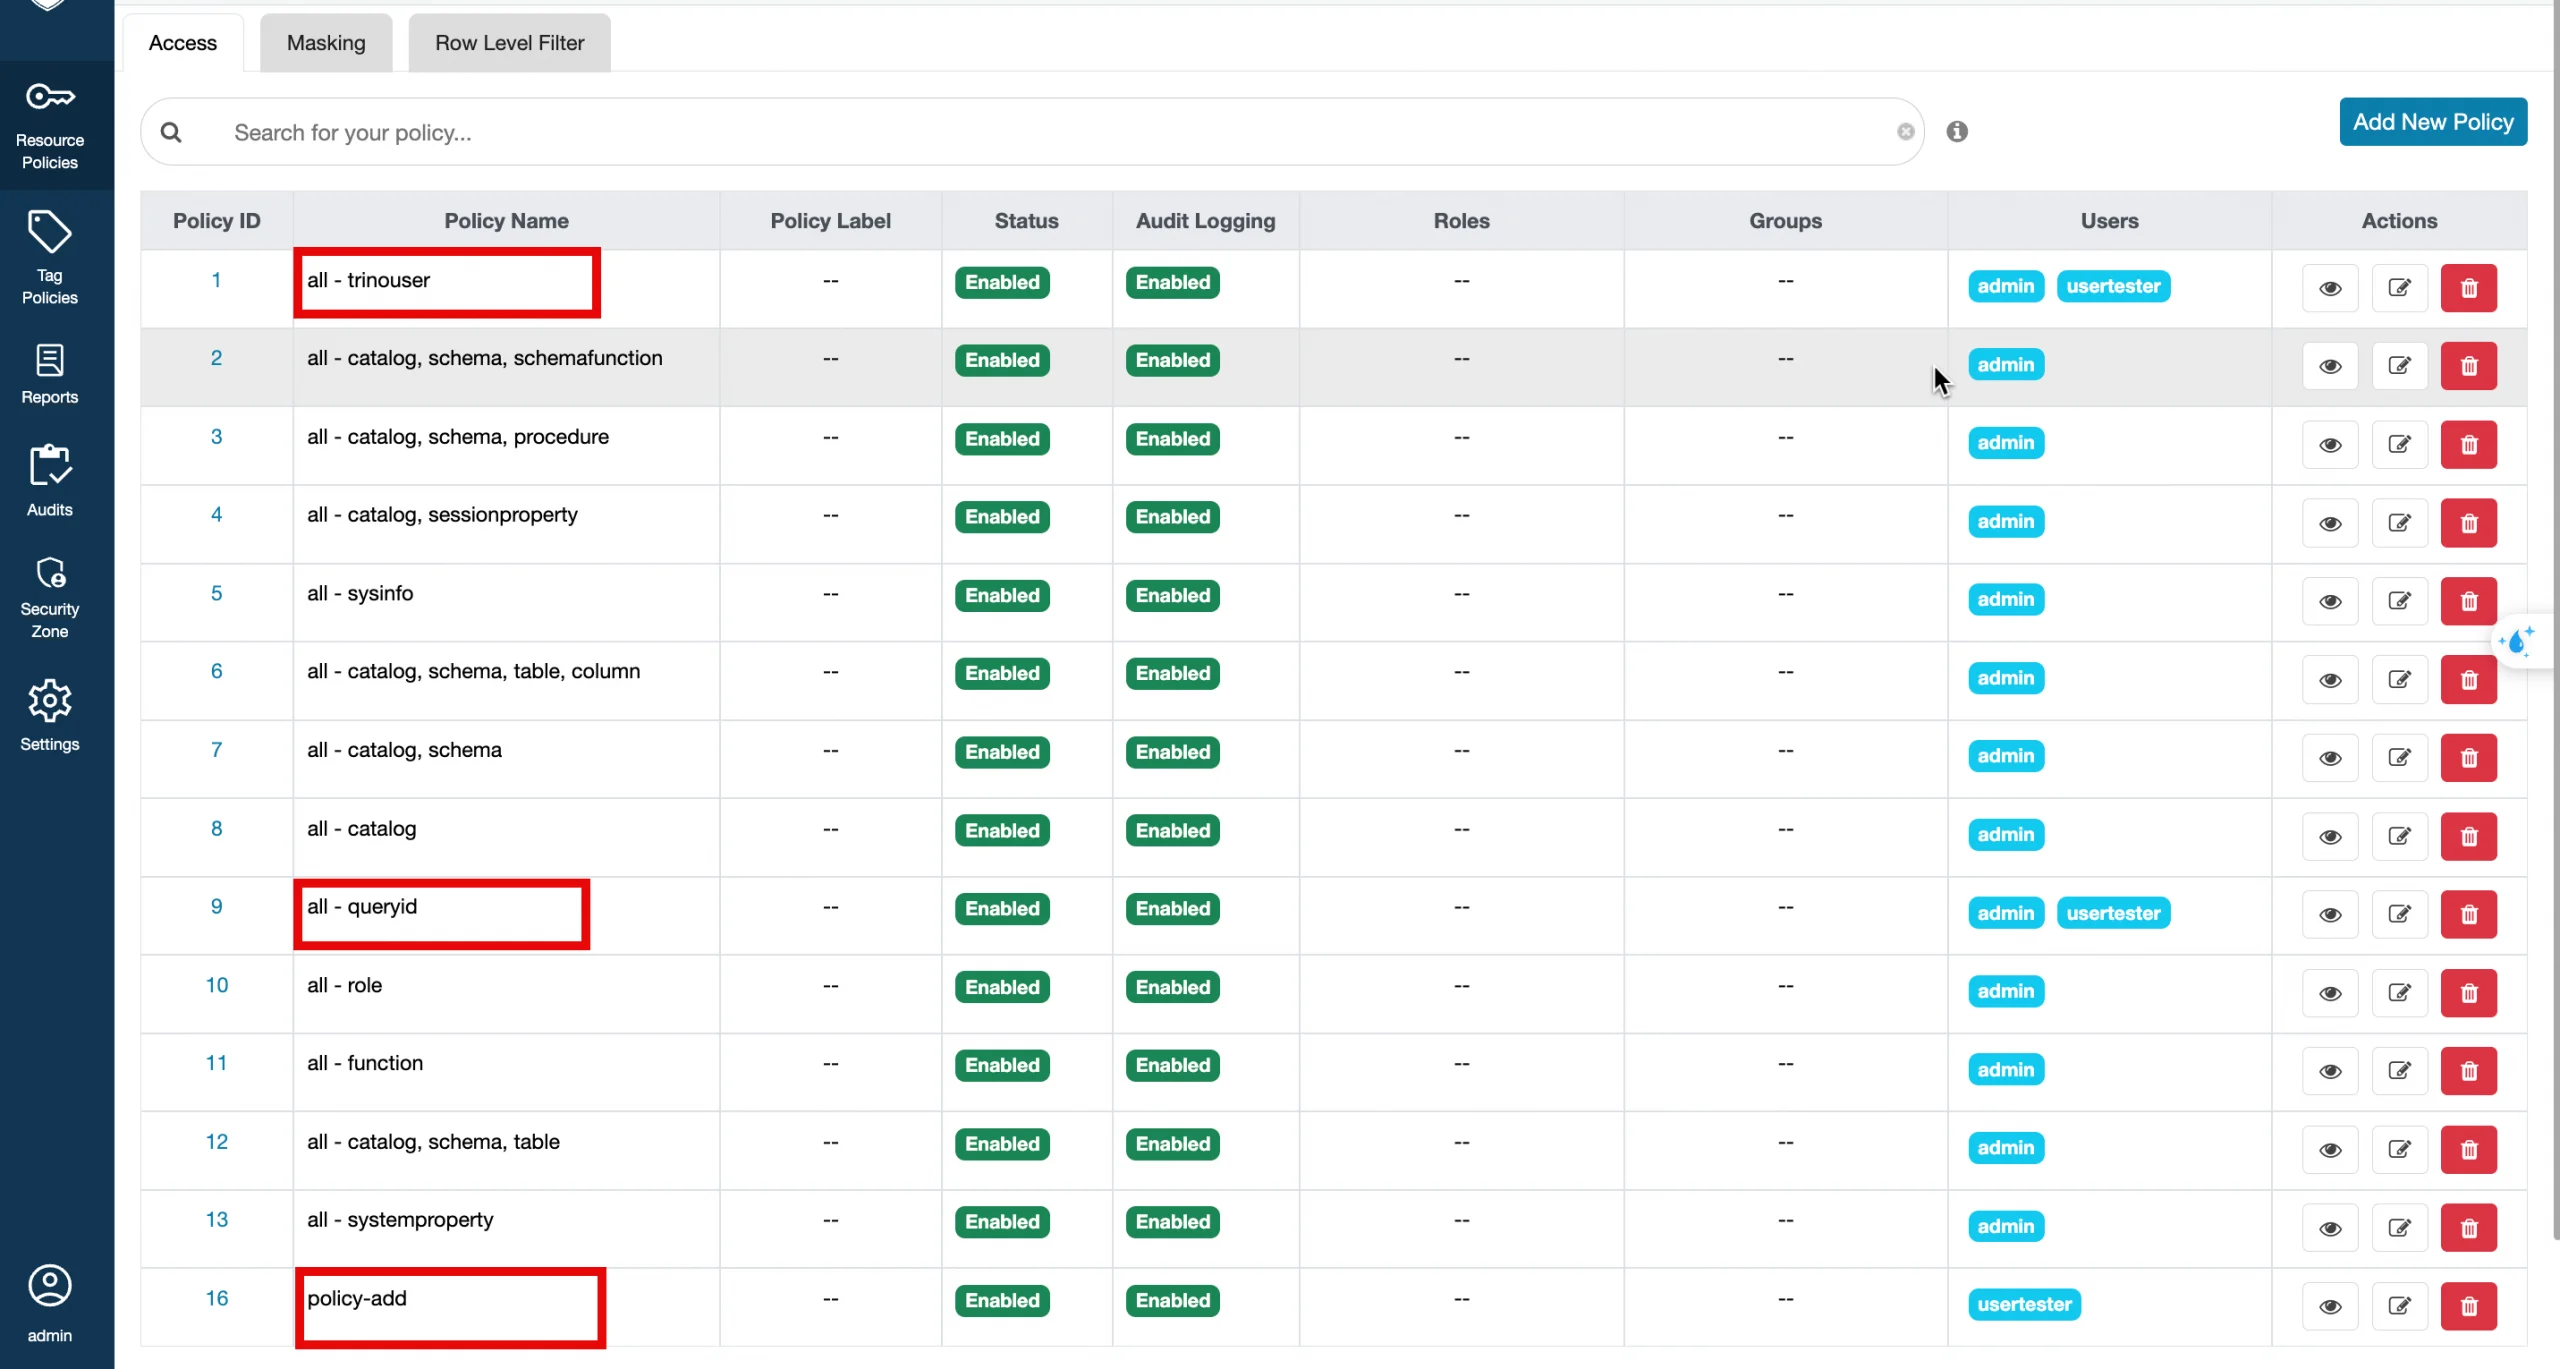
- Go to Resource Policies → add the usertest user to the default policies
a. Check/Add the default policies:
- all – trinouser
- all - queryid
b. Add a new policy (policy-customer-access):
- Catalog = tpch
- Schema = sf1, information_schema
- Table = customer, columns, schemata, tables
- Column = custkey
information_schema, columns, schemata, tables → required for Trino to read metadata (show tables, describe, etc.).
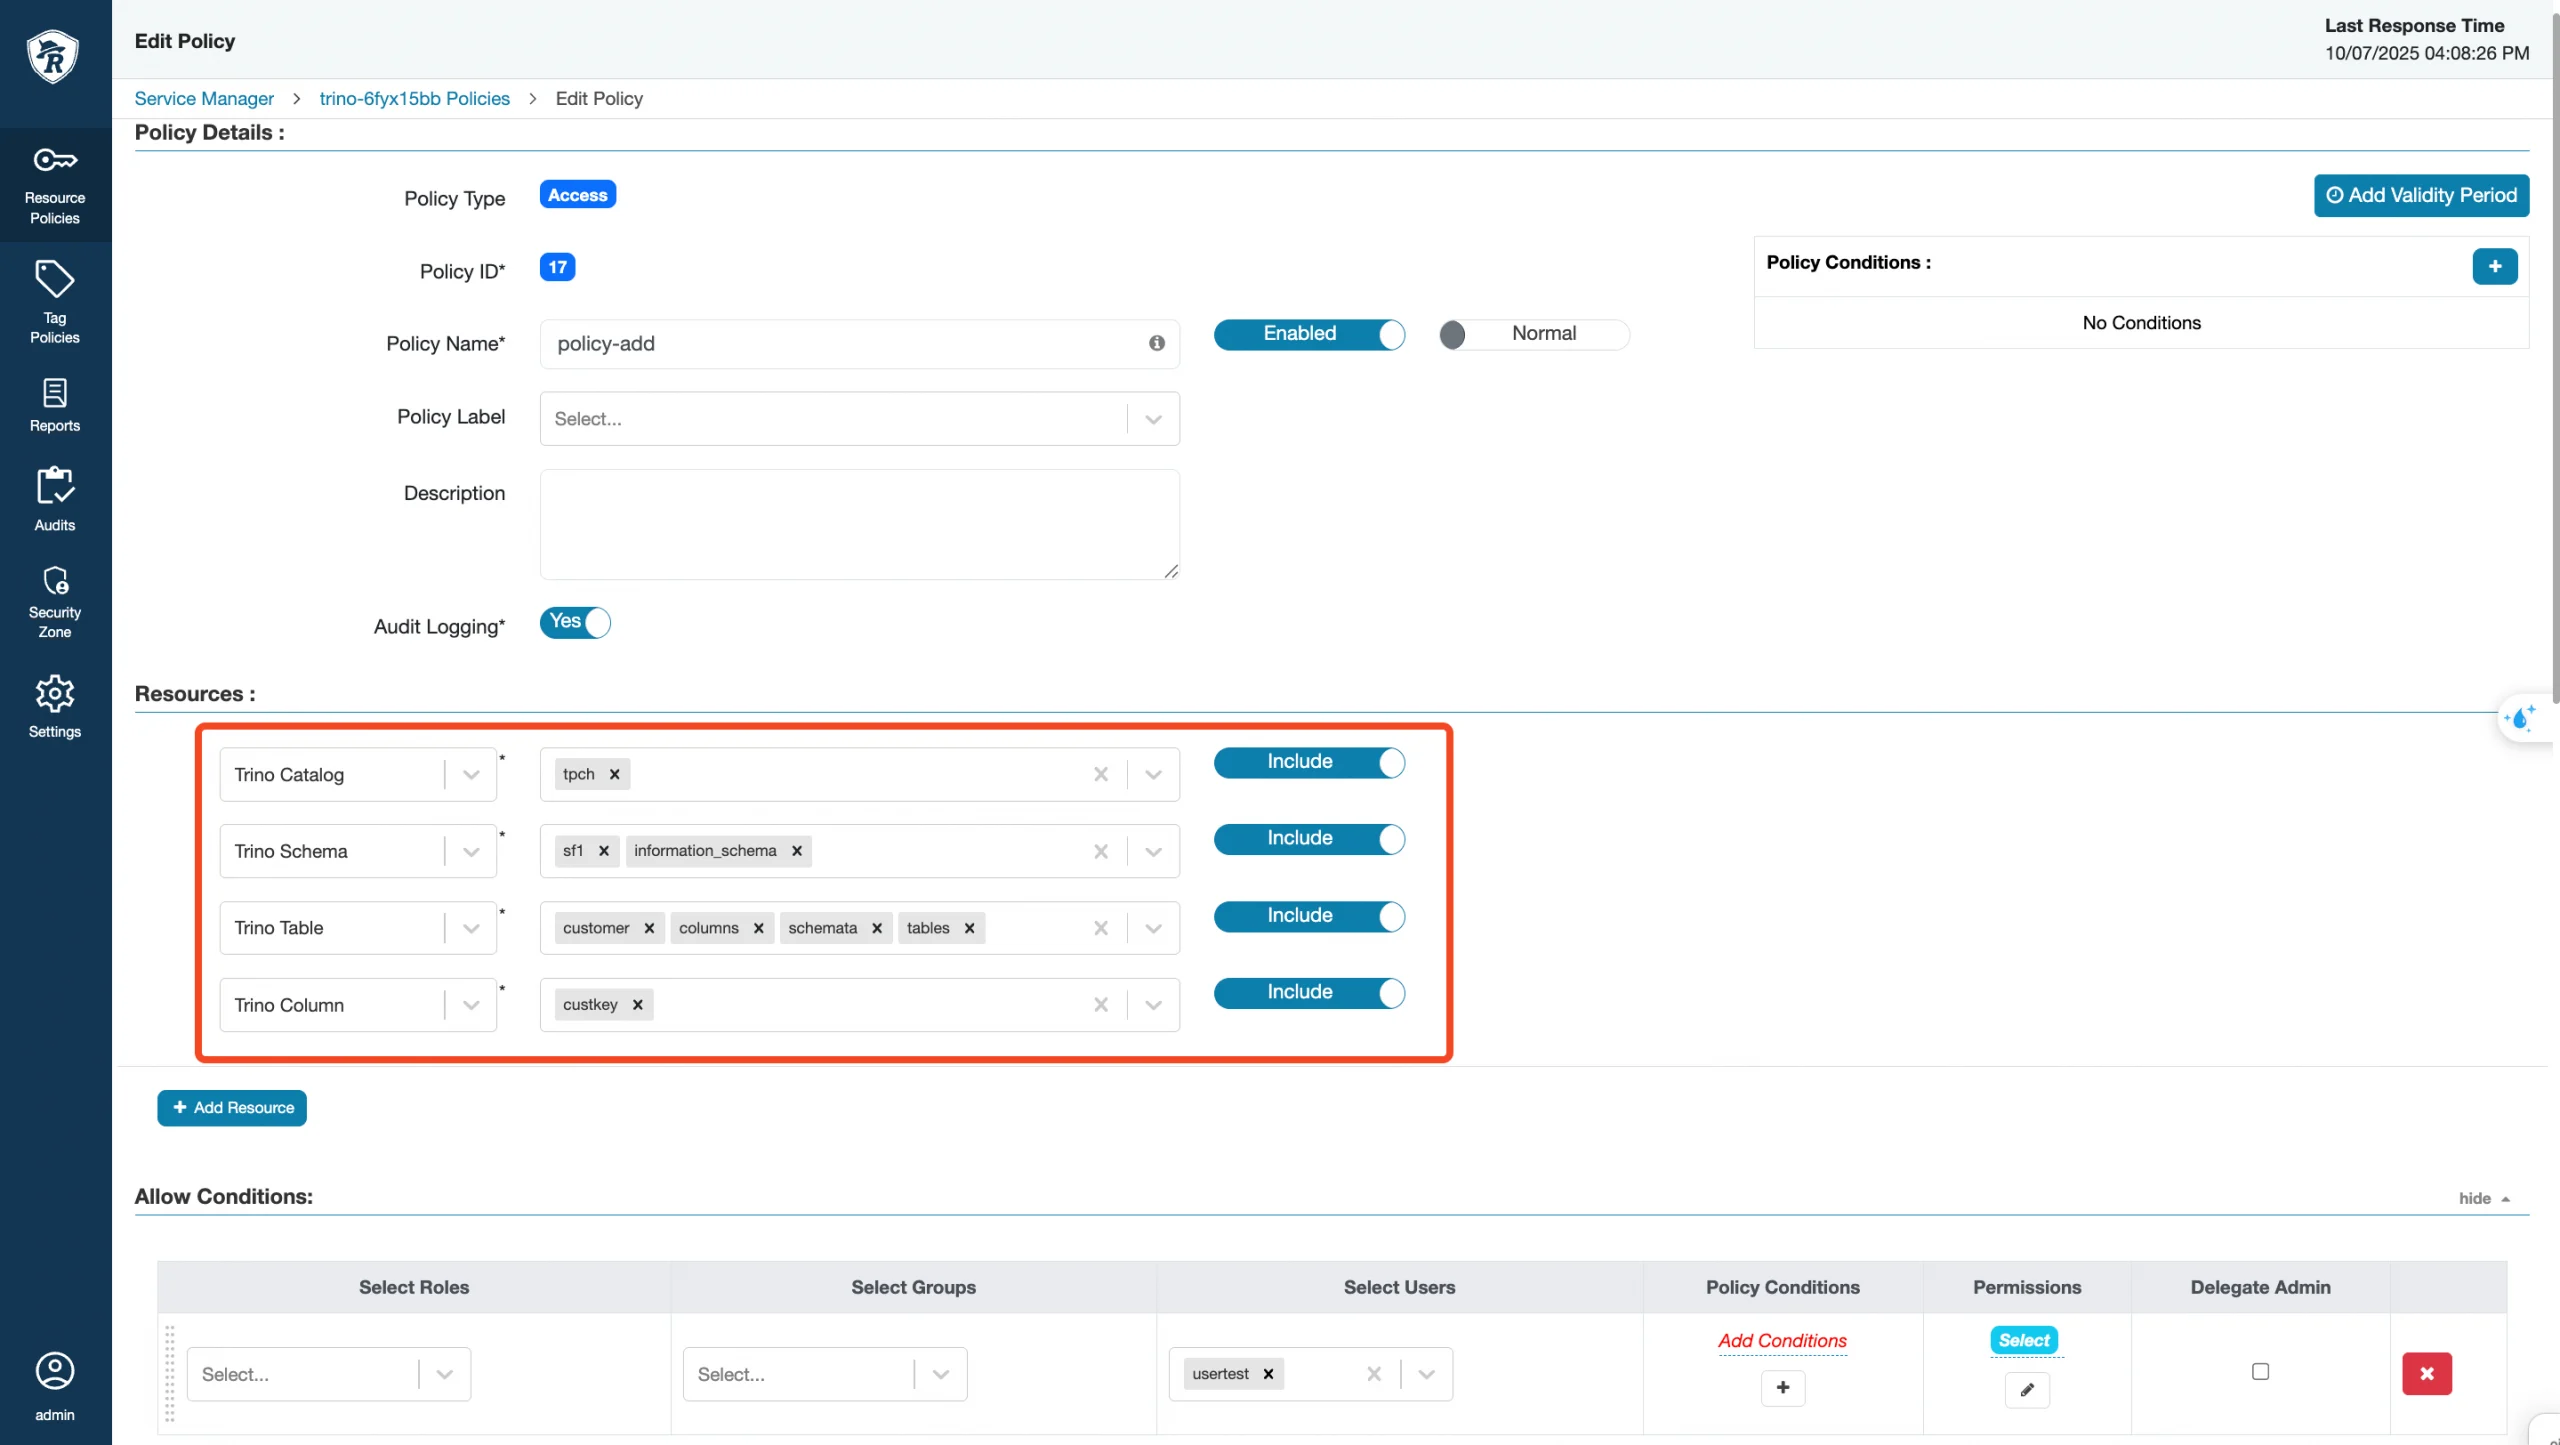
customer → the business table you want to allow access to.
c. In Allow Conditions, add the user (e.g., usertest) → Permission = Select.
d. Save the policy.
Step 5: Configure Tag Sync on the Ranger Service
-
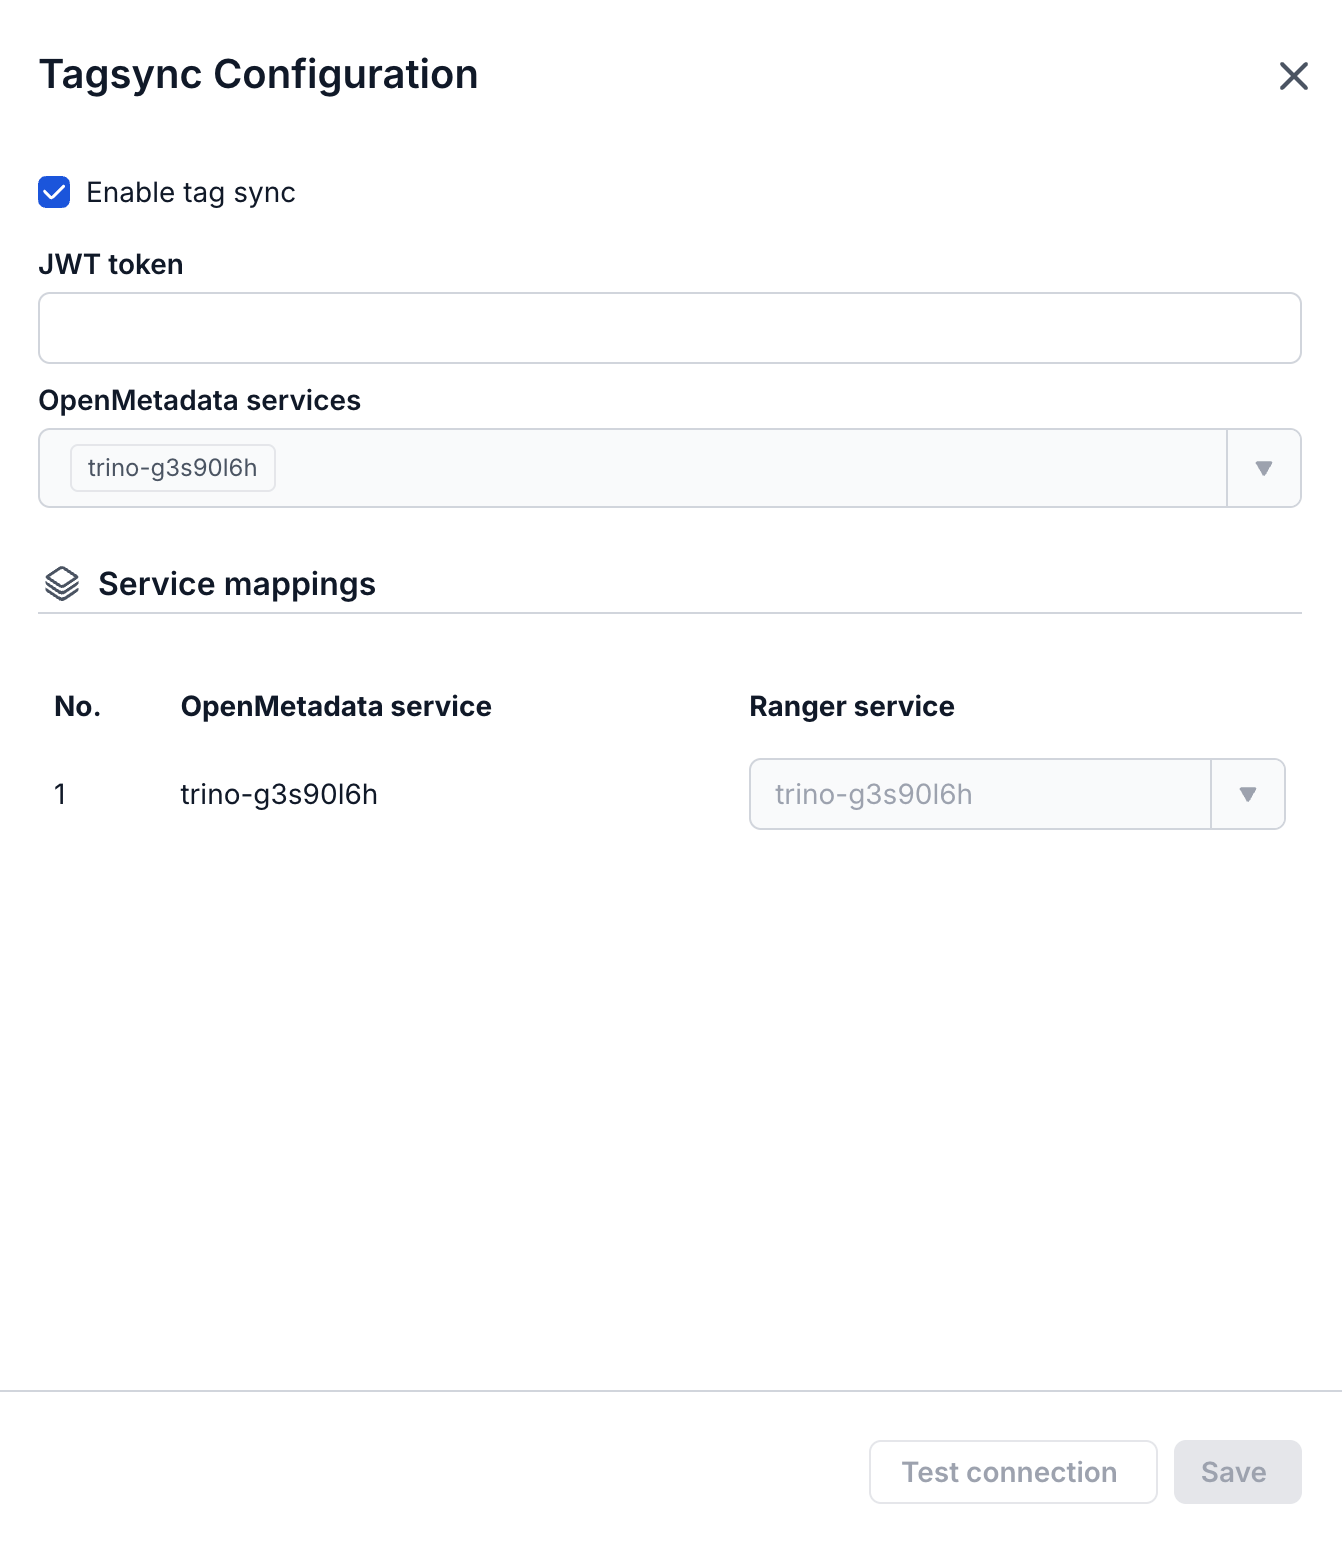
Go to Data Platform > Data Governance (Ranger) > Advanced > Tag Sync.
-
Check Enable Tag Sync.
-
Get the JWT Token from OpenMetadata:
Go to Settings > Bots → select the tagsync-bot bot → Credentials tab → copy the token.
Paste it into the JWT Token field.
- In the Service mappings section, select:
OpenMetadata service = the Trino service you just created in OpenMetadata.
Ranger service = the Trino service you just created in Ranger.
At least 1 mapping is required, up to a maximum of 5 mappings.
- Click Test Connection.
If successful → "Connection successful" is displayed, and the Save button becomes enabled.
If it fails → an error is displayed, and you cannot Save.
- Once Test Connection succeeds, click Save to save the configuration.
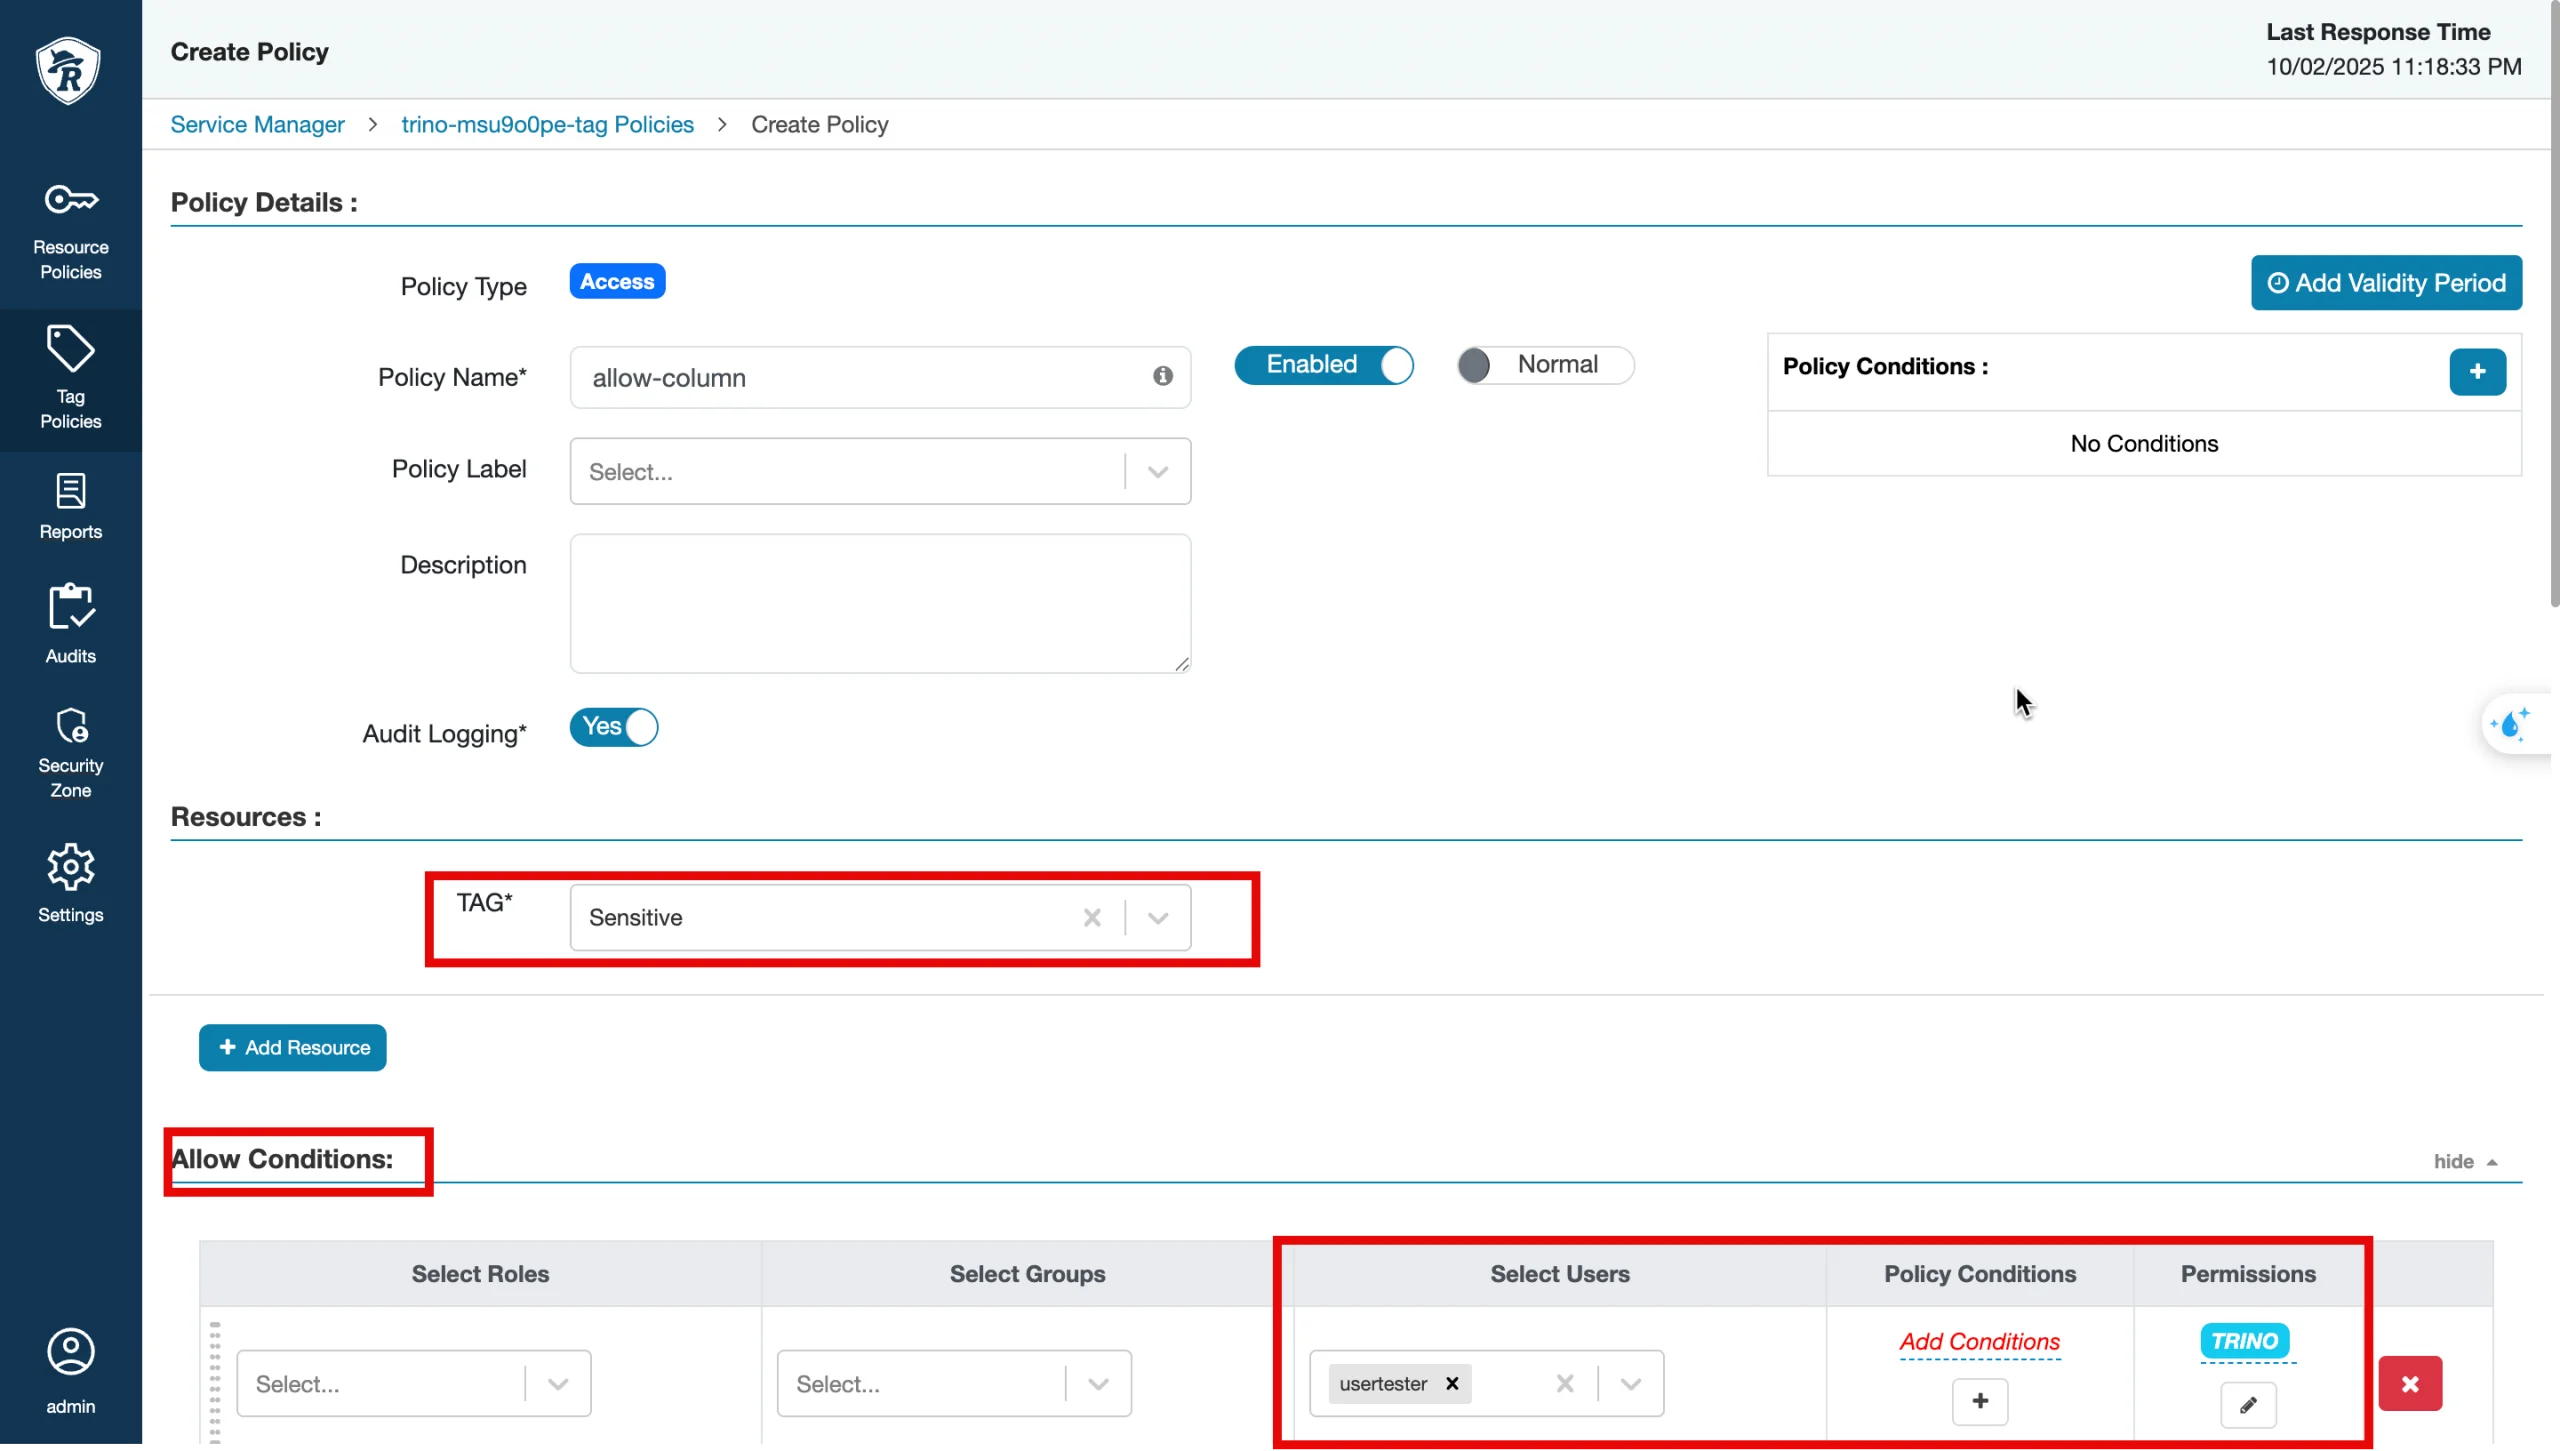
Step 6: Go to Tag Policies → select the Sensitive tag → click Add New Policy:
-
Policy Name: allow-sensitive.
-
Allow Conditions: user = usertest, component = TRINO, check all permissions.
-
Save.
Step 7: Test access permissions using queries
Only usertest is granted access to the customer table; usertest has no permission to query the orders table
Case 1 – User is Allowed & has permission to query the custkey column
-
Use DataGrip to connect to Trino with the usertest user.
-
Run the query:
SELECT custkey FROM tpch.sf1.customer LIMIT 1;
- Expected result: the table data is returned.
Case 2 – User is Allowed & has no permission to query the table
-
DataGrip connects to Trino with the usertest user.
-
Run the query:
SELECT * FROM tpch.sf1.customer LIMIT 1;
- Expected result: the query is rejected with a no permission message.
Case 3 – User is Denied & has no permission to query the custkey column
-
Create another user (e.g., usertest2).
-
Assign the Personal tag to the custkey column.
-
In Tag Policies → create a Deny policy - Personal tag - for user usertest2.
-
Use DataGrip to connect to Trino with the usertest2 user.
-
Run the query:
SELECT custkey FROM tpch.sf1.customer LIMIT 1;
- Expected result: the query is rejected with a no permission message.