Create a workspace
Create a workspace to get an isolated environment for your Data Platform services. The form has three screens: Basic Information, Worker Configuration, and Review & Create.
Prerequisites
- A subnet with a static IP pool, of the same type as the workspace network (Routed or Isolated). If you do not have one, create it while you fill in the form. See Prepare a subnet with a static IP pool.
- Enough quota in your VPC for the workspace. The portal checks it for you when you start.
Open the create form
-
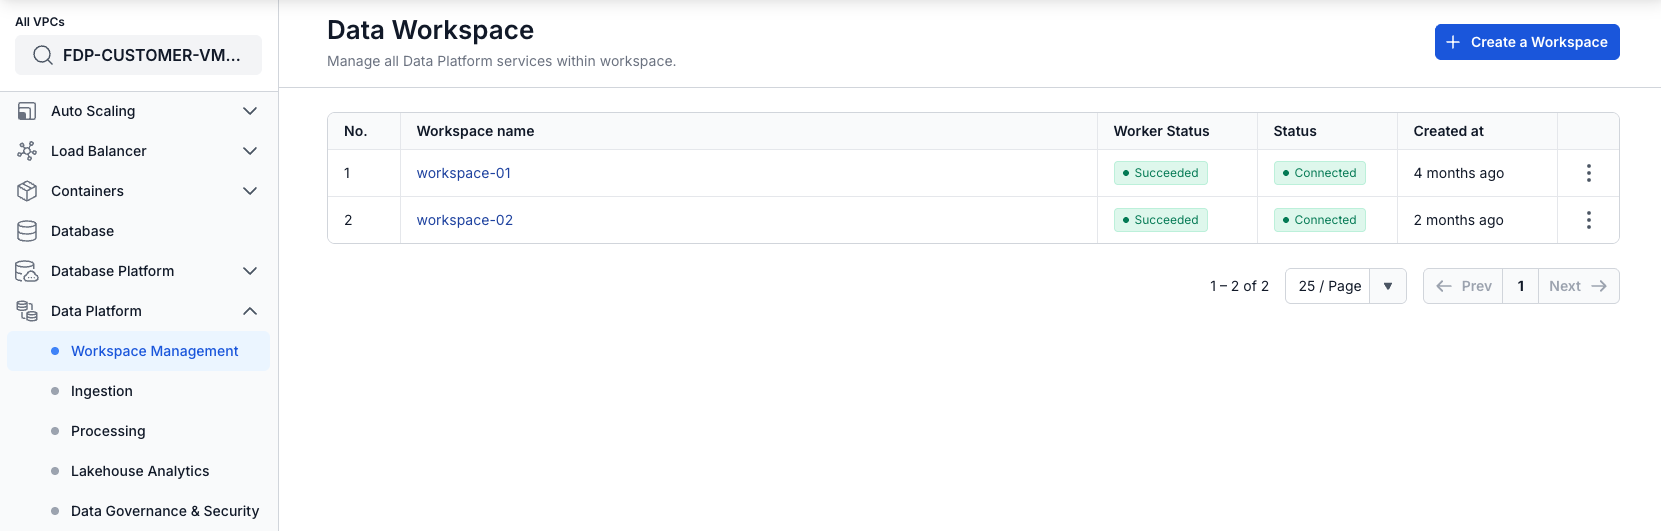
Select Data platform → Workspace management.
-
Select Create a Workspace.
-
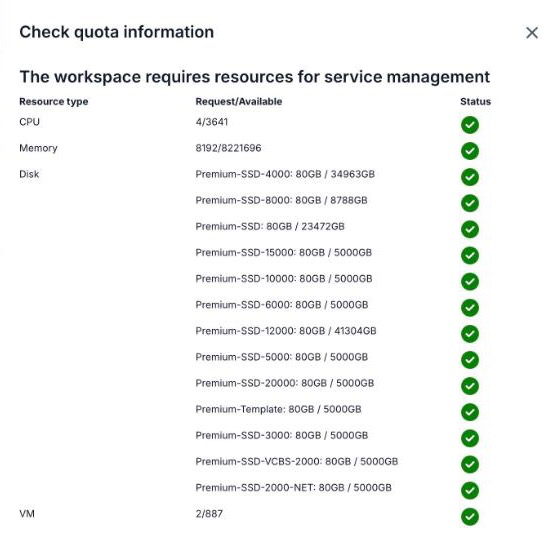
In the Check quota information panel, check that every resource shows a green status.
-
Select Create.
The Check quota information panel lists each resource the workspace needs, with the amount it requests, the amount still available in your VPC (Request/Available), and a Status. The workspace requests:
| Resource type | Request |
|---|---|
| CPU | 4 |
| Memory | 8192 |
| Disk | 80 GB, shown for each storage policy |
| VM | 2 |
The Create Data Workspace form opens on the Basic Information screen.
Prepare a subnet with a static IP pool
The workspace needs a subnet with a static IP pool. Skip this section if you already have one.
- On the Basic Information screen, select Go to Network next to Subnet. The Subnets page opens in a new browser tab. The workspace form stays open in the first tab with the values you entered.
- Select Create subnet.
- Fill in the fields in the table below.
- Select Create subnet.
- Go back to the browser tab with the Create Data Workspace form.
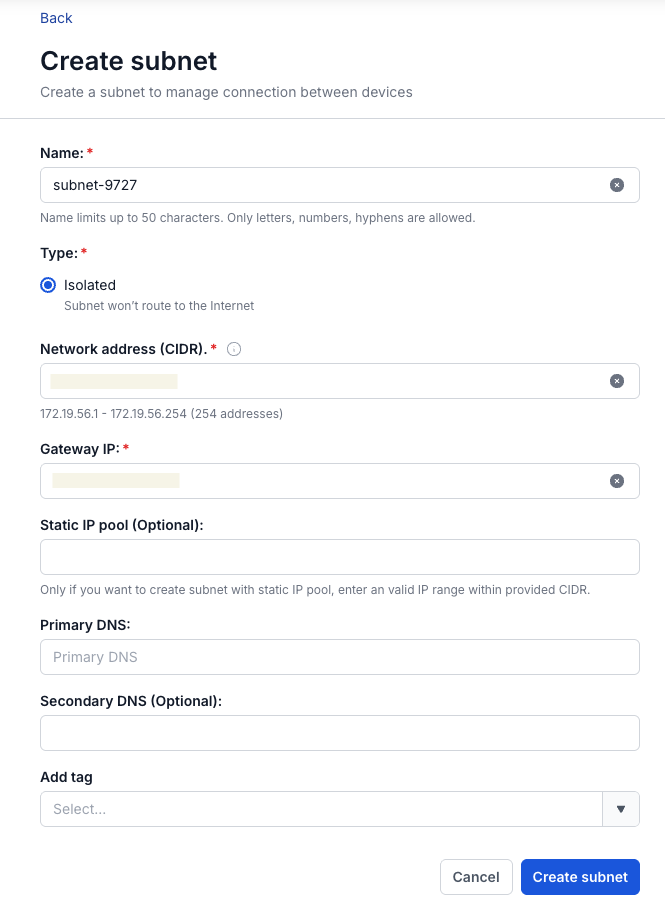
| Field | Description |
|---|---|
| Name | Required. The subnet name. Up to 50 characters. Letters, numbers, and hyphens only. |
| Type | Required. The subnet type. The types you can choose depend on your VPC. Use the same type as the Network type you plan for the workspace. |
| Network address (CIDR) | Required. A valid CIDR. The form shows the IP range and the number of addresses it contains. |
| Gateway IP | Required. The gateway IP address. |
| Static IP pool | Required for a workspace. A valid IP range inside the CIDR. |
| Primary DNS | Optional. The primary DNS address. |
| Secondary DNS | Optional. The secondary DNS address. |
| Add tag | Optional. Tags to attach to the subnet. |
The subnet form marks Static IP pool as optional, but a workspace cannot use a subnet without one. Fill it in.
Enter basic information
- Enter a Name.
- Select a Type.
- Enter a Description (optional).
- Check the Network type. It is Routed by default.
- Select a Subnet.
- Select Next Step.
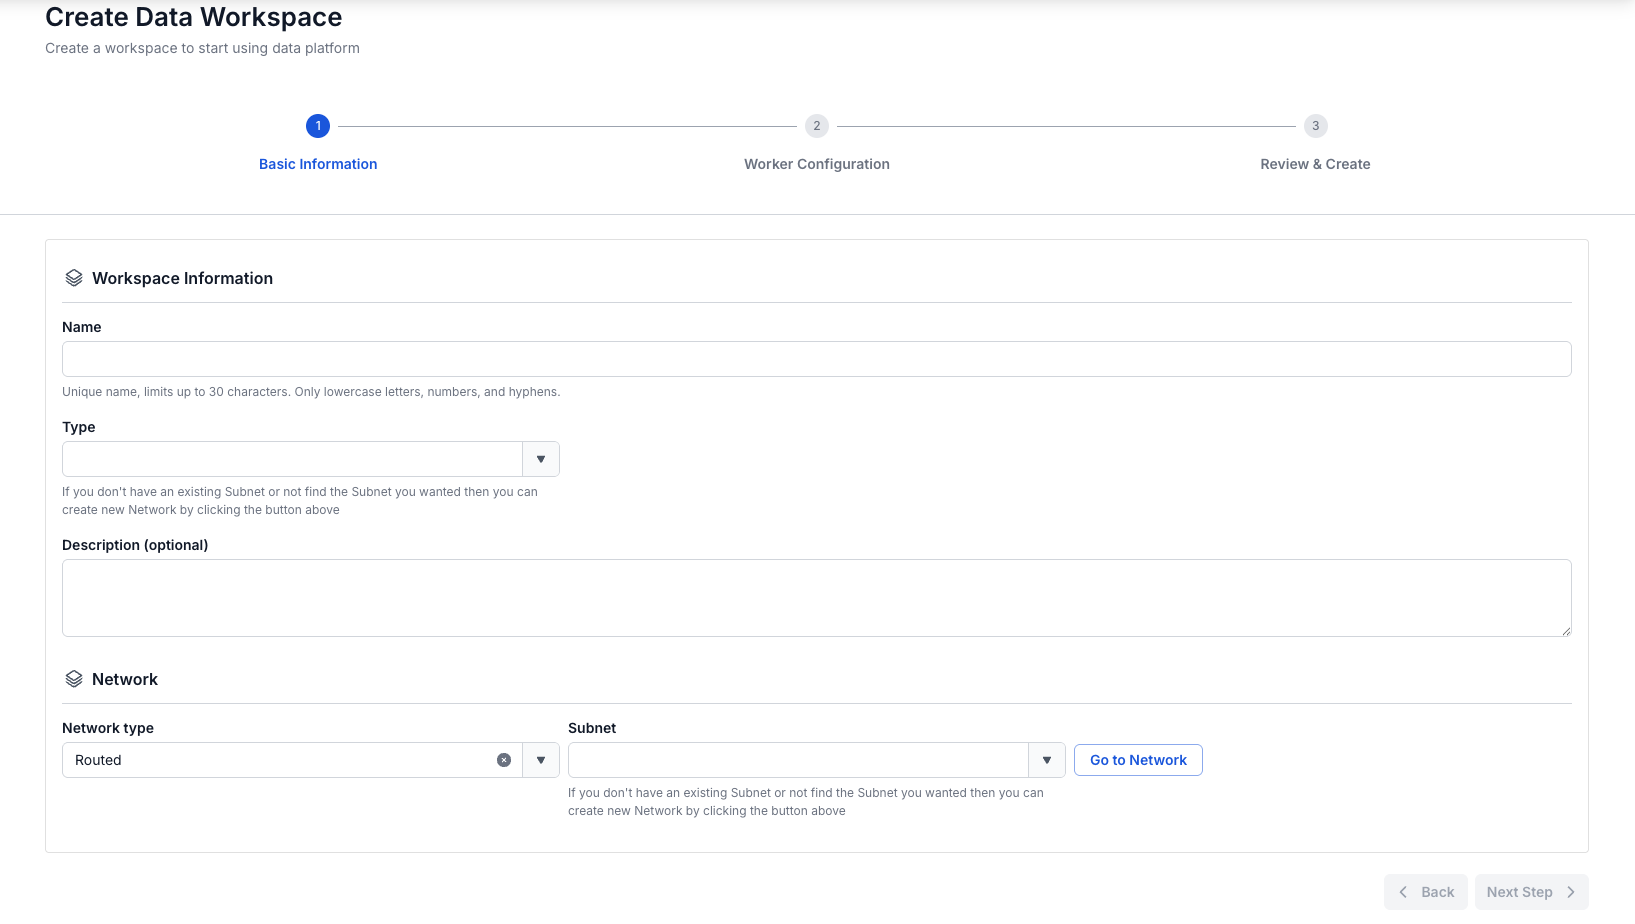
| Field | Description |
|---|---|
| Name | Required. Up to 30 characters. Lowercase letters, numbers, and hyphens (-). Must not match the name of another workspace. |
| Type | Required. Public or Private. |
| Description | Optional. A description of the workspace. |
| Network type | Required. Routed (default) or Isolated. The Subnet list shows only subnets of this type. |
| Subnet | Required. A subnet with a static IP pool. If you pick a subnet without one, the portal shows "Network must be setup as static pool" and you cannot go on. If the list has no suitable subnet, select Go to Network. See Prepare a subnet with a static IP pool. |
If you choose Isolated, the portal warns that an isolated network may affect how the workspace starts and limit its access to the resources it needs. Use Routed unless you need an isolated network.

Configure the worker nodes
- Select a Storage policy.
- Select Next Step.
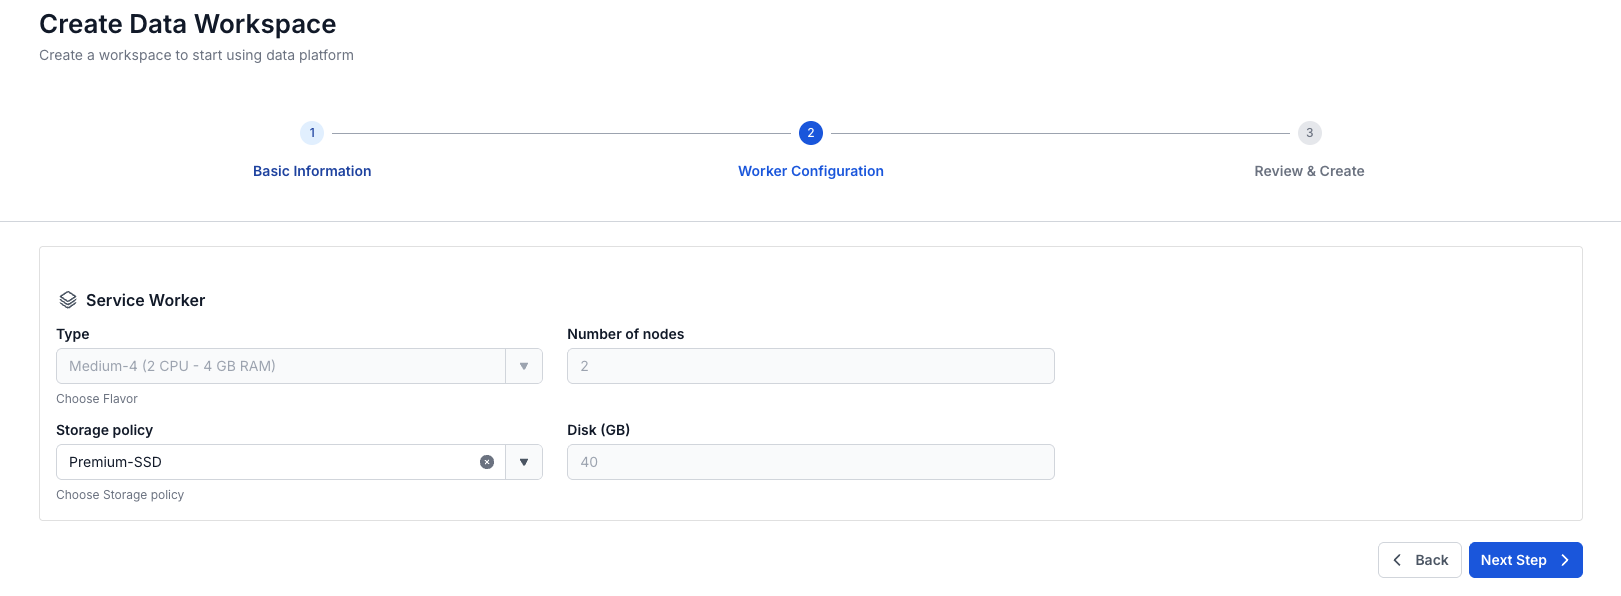
| Field | Description |
|---|---|
| Type | Fixed. The node type of the service worker: Medium-4 (2 CPU - 4 GB RAM). |
| Number of nodes | Fixed. 2 service worker nodes. |
| Storage policy | Required. The storage policy of the service worker disks, for example Premium-SSD. |
| Disk (GB) | Fixed. 40 GB for each service worker. |
Review and create
- Check the settings on the Review & Create screen. It shows the Basic Information and the Worker Details of the new workspace.
- Select Create.
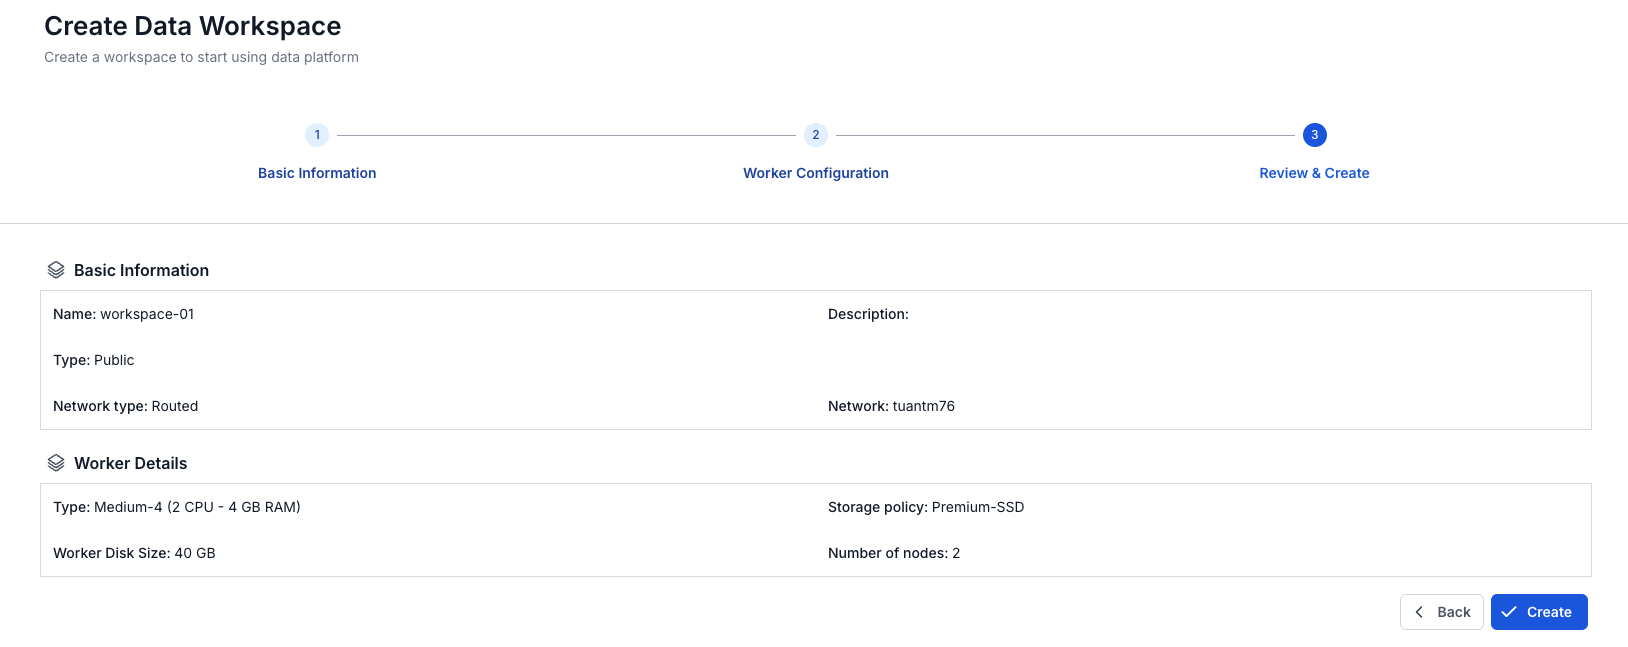
The workspace is ready when Worker Status is Succeeded and Status is Connected. This takes about 10 minutes.