Create workspace
Workspace is a user's working environment on the Data Platform system. The primary purpose of Workspace is to provide an isolated and secure environment where users can perform data-related operations efficiently and conveniently.
To create a workspace, follow these steps:
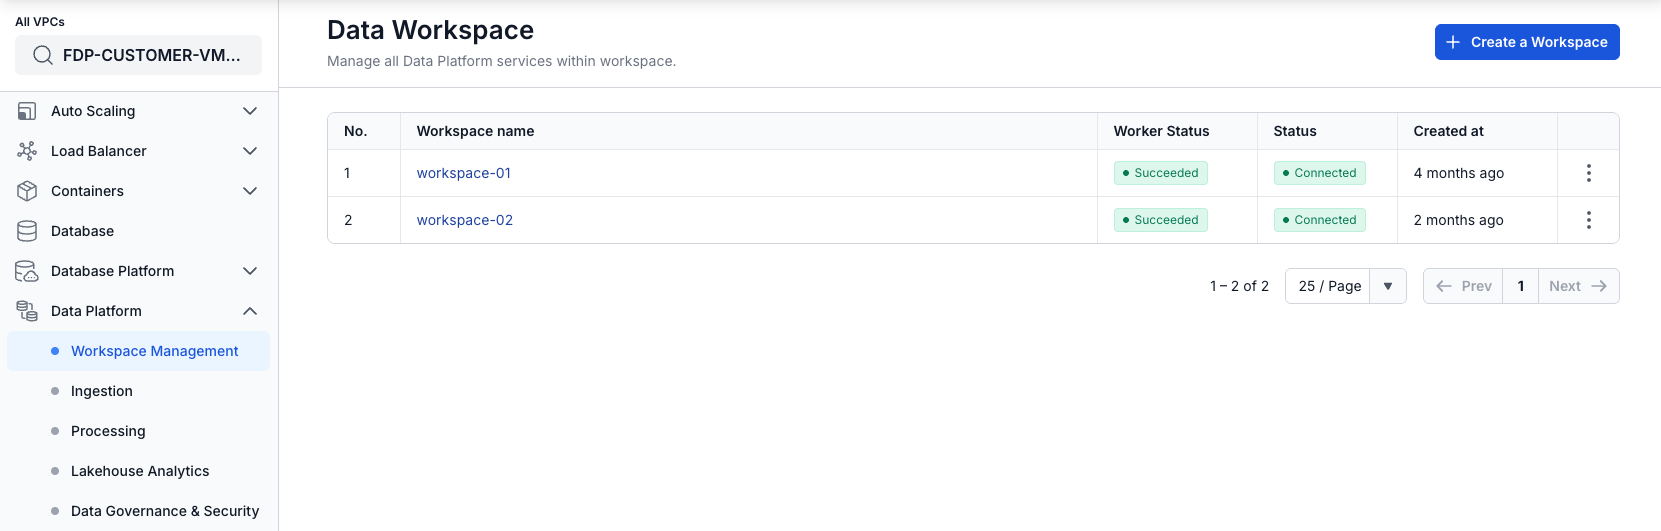
Step 1. In the menu bar, select Data Platform > select Workspace Management > click Create a Data Workspace
Step 2. In the workspace creation form, enter the information on the Basic Information screen:
- Name (required): Workspace name
The workspace name must be between 1 and 30 characters. It can contain lowercase letters a-z, uppercase letters A-Z, or digits 0-9. Workspace names must not be duplicated. In particular, spaces are not allowed — you can use "-" or "_" instead of a space.
- Description (optional): Workspace description
- Type (required): Select Public/Private
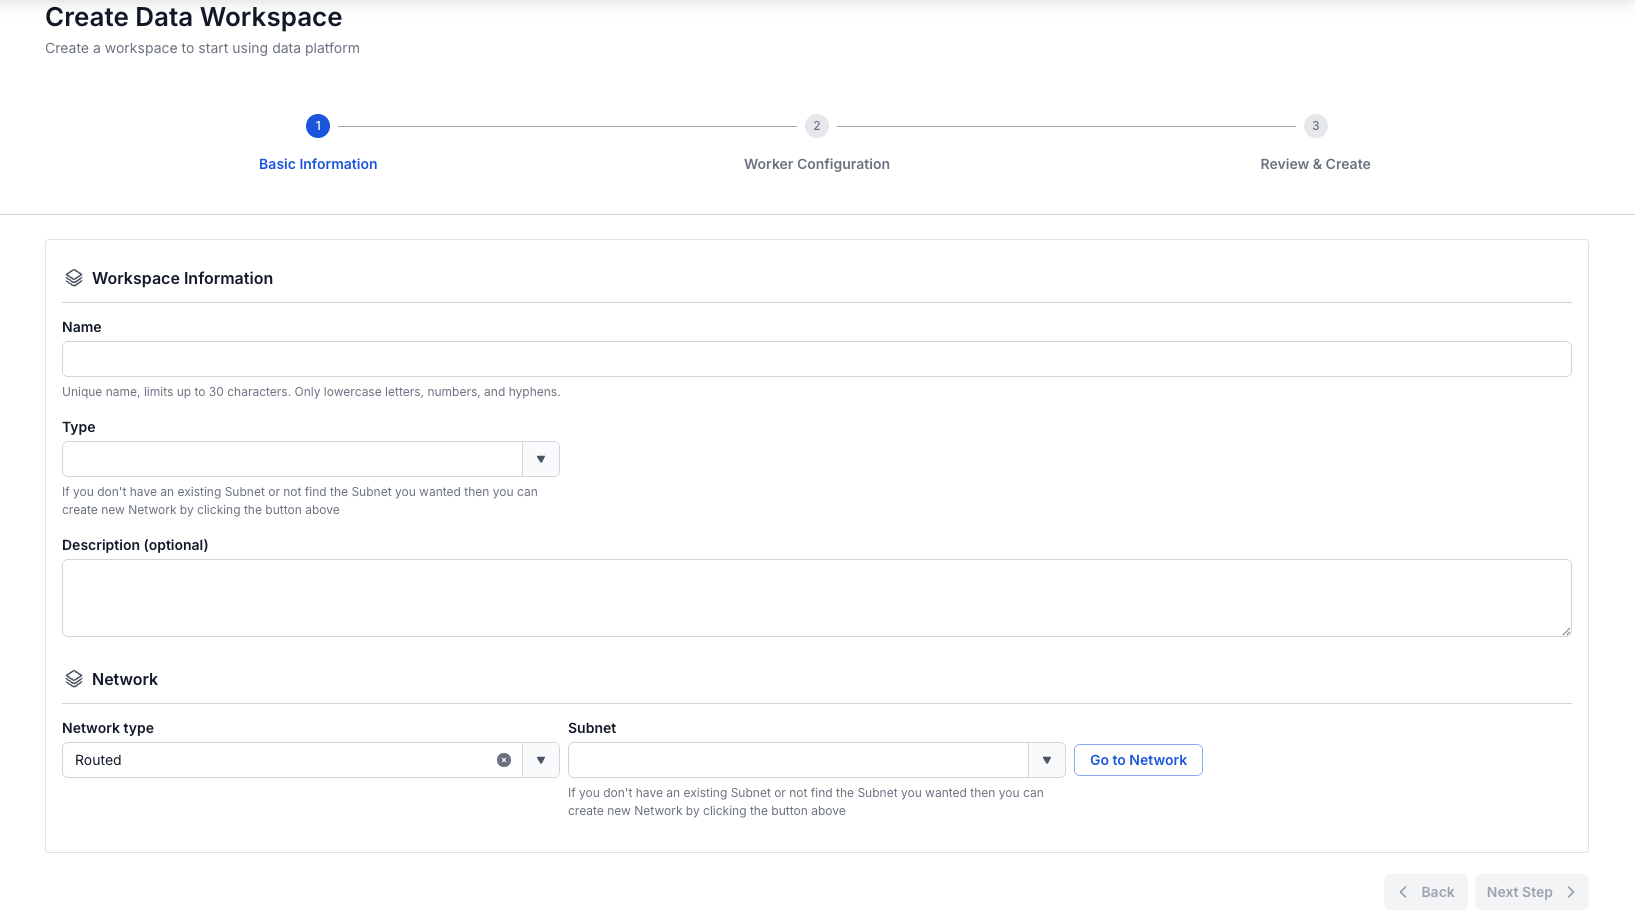
- Subnet (required): Select a network
Workspace only works with Subnets that have the Static Pool option enabled, so you need to create a Subnet with a Static Pool by following these steps:
Click Go to Network
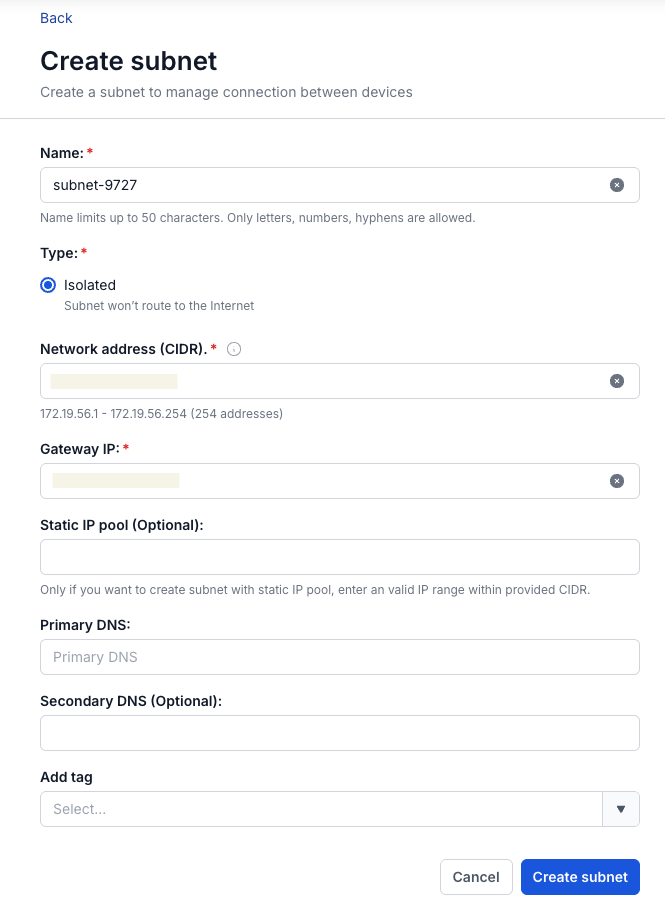
The screen switches to the Subnet creation screen. Click Creat Subnet
In the Subnet creation form, enter the following information:
- Name: Enter the Subnet name
- Type: Select the type for the Subnet
Select Routed as the Type
- Network address (CIDR): Enter a valid CIDR
- Gateway IP: Enter the gateway IP address
- Static IP Pool (optional): Enter a valid IP range taken from the CIDR.
Static IP Pool information is required
- Primary DNS: Primary DNS address
- Secondary DNS (Optional): Secondary DNS address
- Add tag (optional): Tag attached to the subnet
Then click Create subnet to complete the Subnet creation.
- LB Size (required): Select the correct allocated LB
Check your LB quota before creating a Workspace by selecting Dashboard in the menu, then, in the load balancer section, click detail. If you don't have any, contact sales support
Step 3. Click the Next Step button to move to the Worker Configuration screen
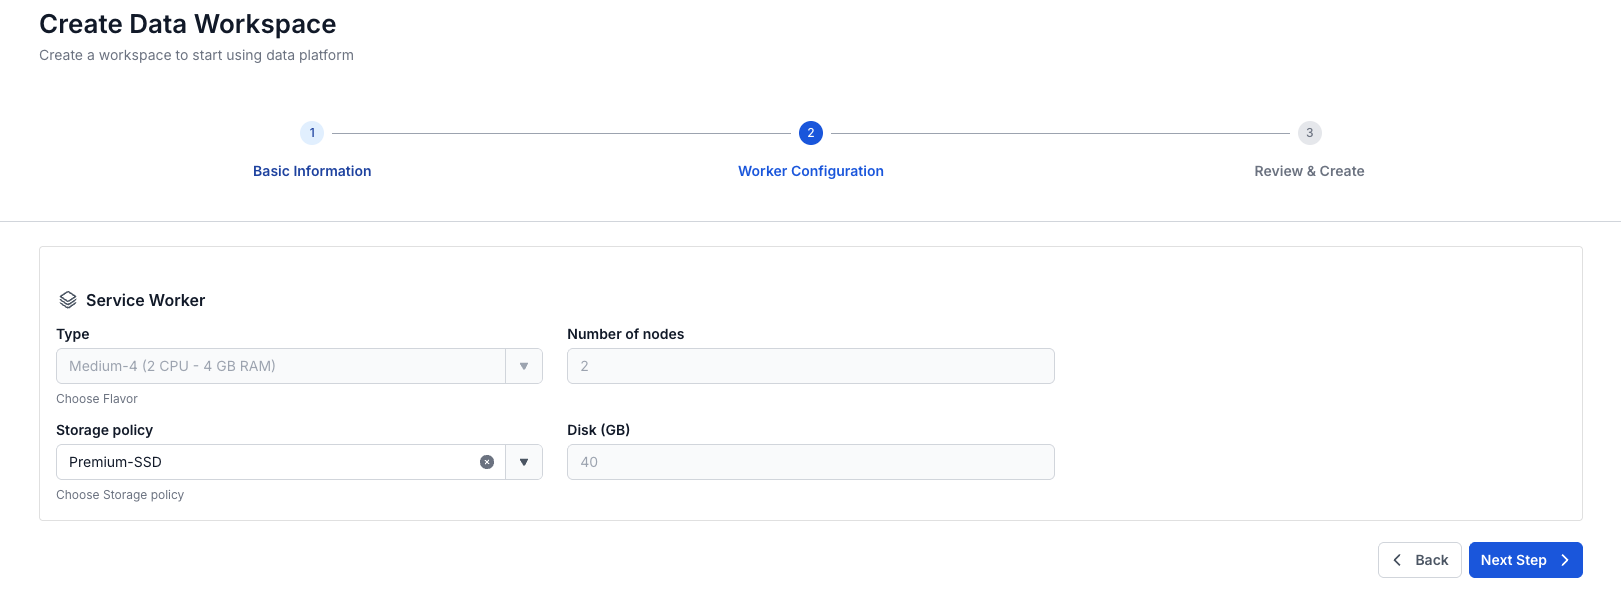
Enter the information on the Worker Configuration screen:
- Policy (required): Select the storage policy for the Service worker
- Type: Default value is Medium-4(2 VCPU – 4 GB RAM)
- Number of nodes: Default value is 2
Disk (GB): Default value is 40
Step 4. Click the Next Step button to move to the Review & Create screen
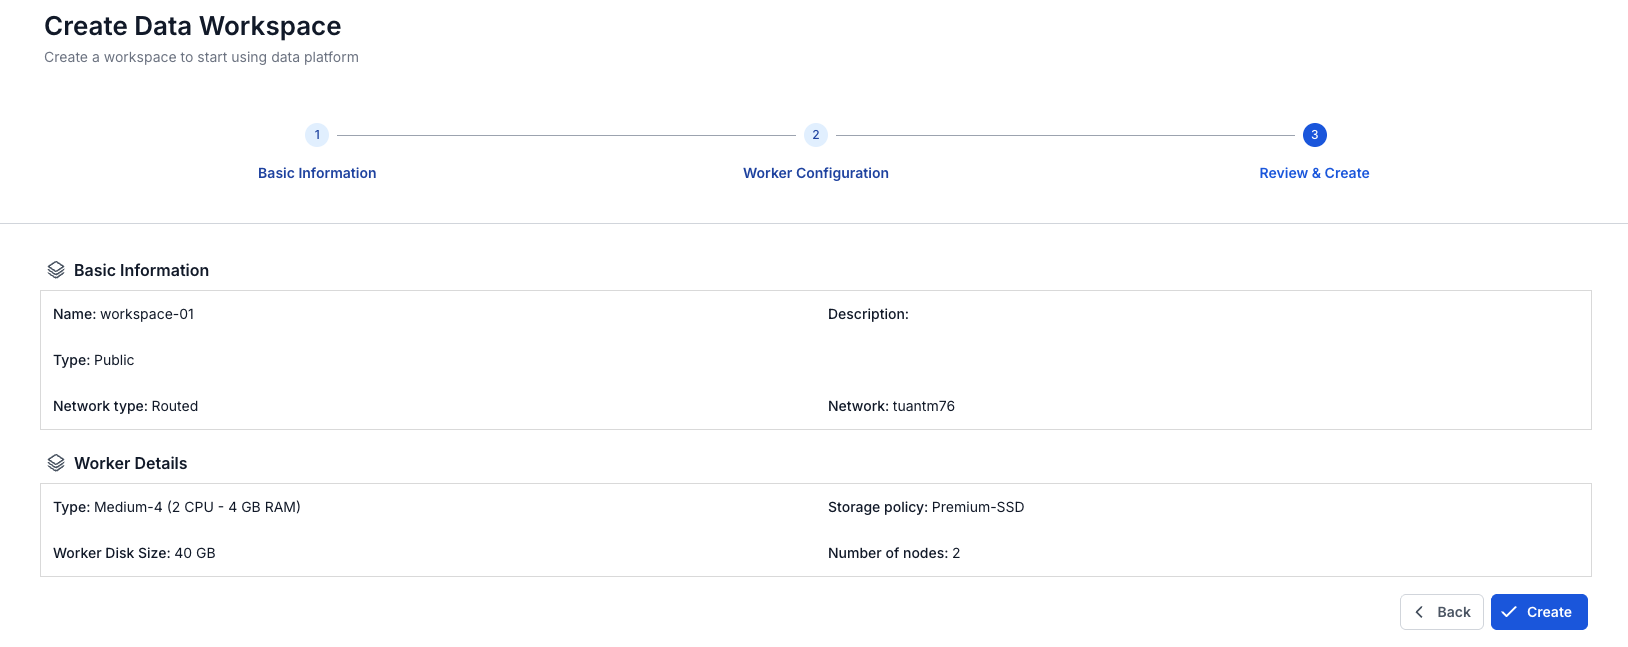
Step 5. Review the information, then click Create to complete the workspace creation
The Workspace finishes initializing when Worker Status is Succeeded and Status is Connected (~10 minutes)