Create your first database
This is the path from an empty VPC to a MongoDB Enterprise cluster in Running status. It takes roughly 15 minutes, most of it waiting on the platform.
Two things happen here: the FPT Database Engine service is activated in your VPC (once per VPC, ever), then you provision a cluster into it.
Prerequisites
- A Project/Tenant and VPC. See Initial setup requirements.
- A subnet for the cluster. See Create a Subnet.
- An IAM role with
manageDatabase:ProvisionBackend, to activate the service.
Step 1. Activate the service in your VPC
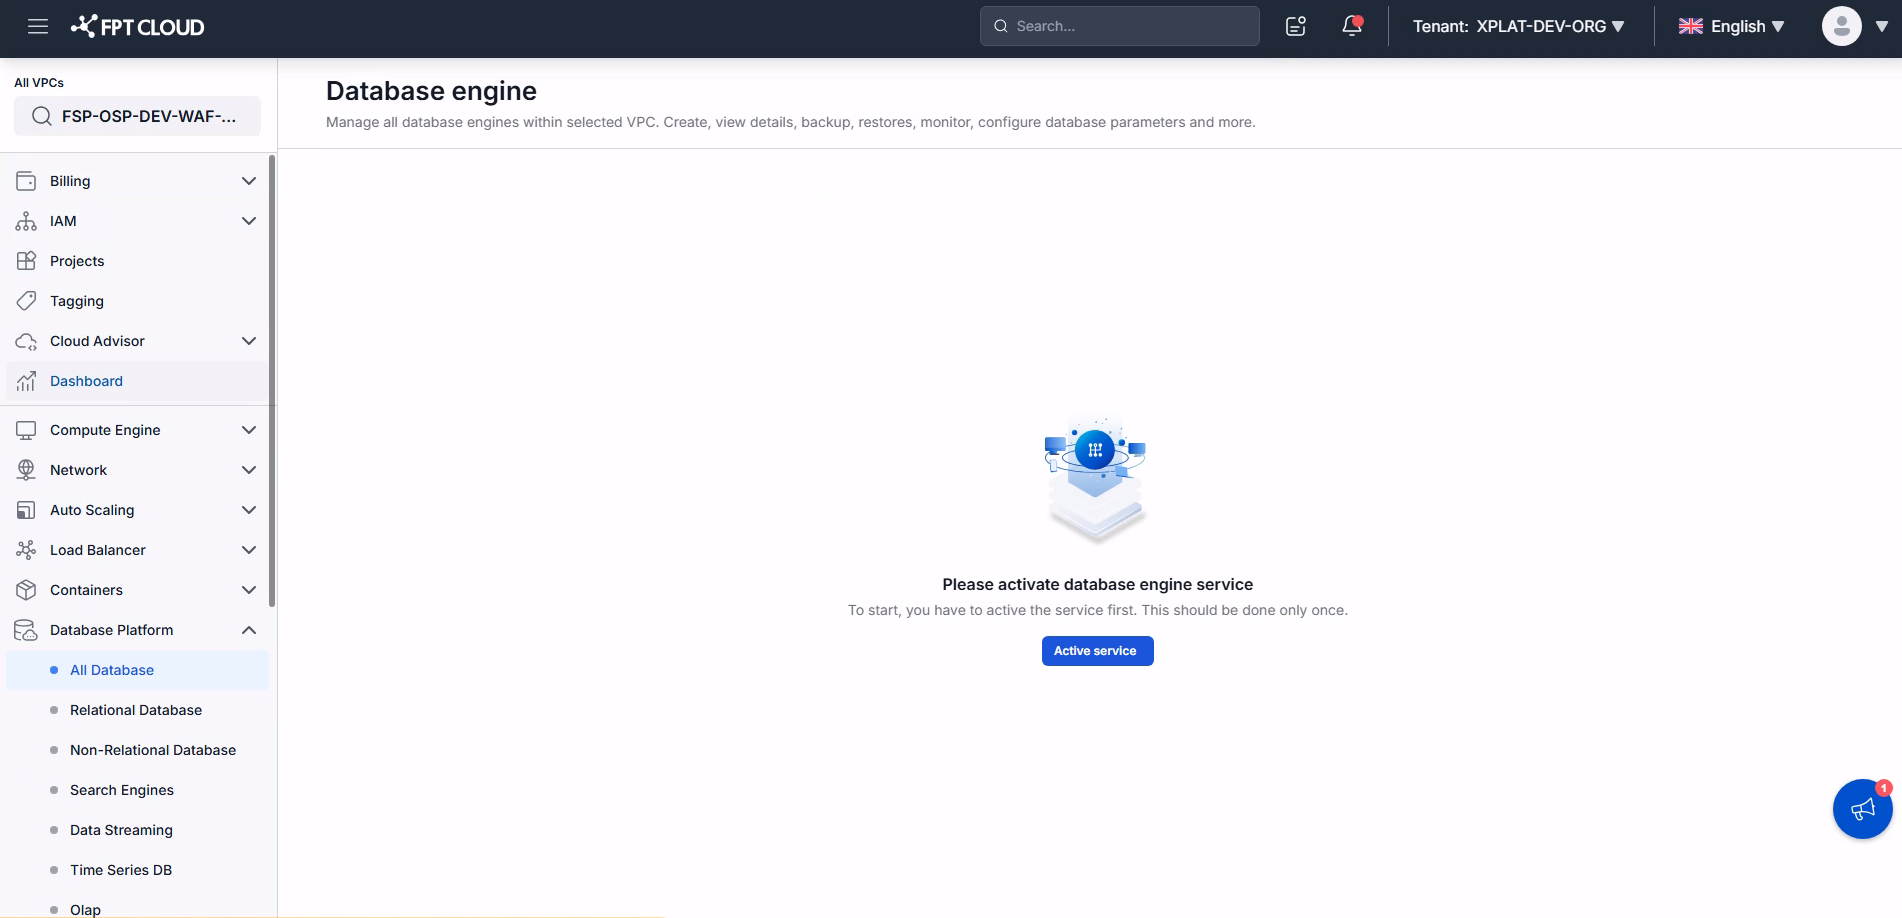
Until the service is activated, the console offers no way to create a database. Activation initializes the backend components and is needed once per VPC.
-
Log in to FPT Cloud Portal.
-
From the main menu, select Database Platform → All Databases.
-
Click Activate Service.
Activation takes about 8–10 minutes. When the status reaches Active, you can provision clusters.
If the service is already Active in this VPC, skip to Step 2. Someone else on your team may have activated it.
Step 2. Open the provisioning wizard
From the Database cluster list page, select Create a Database Engine (or Create). The wizard has three steps: database configuration, additional services, then review.
Step 3. Define the cluster
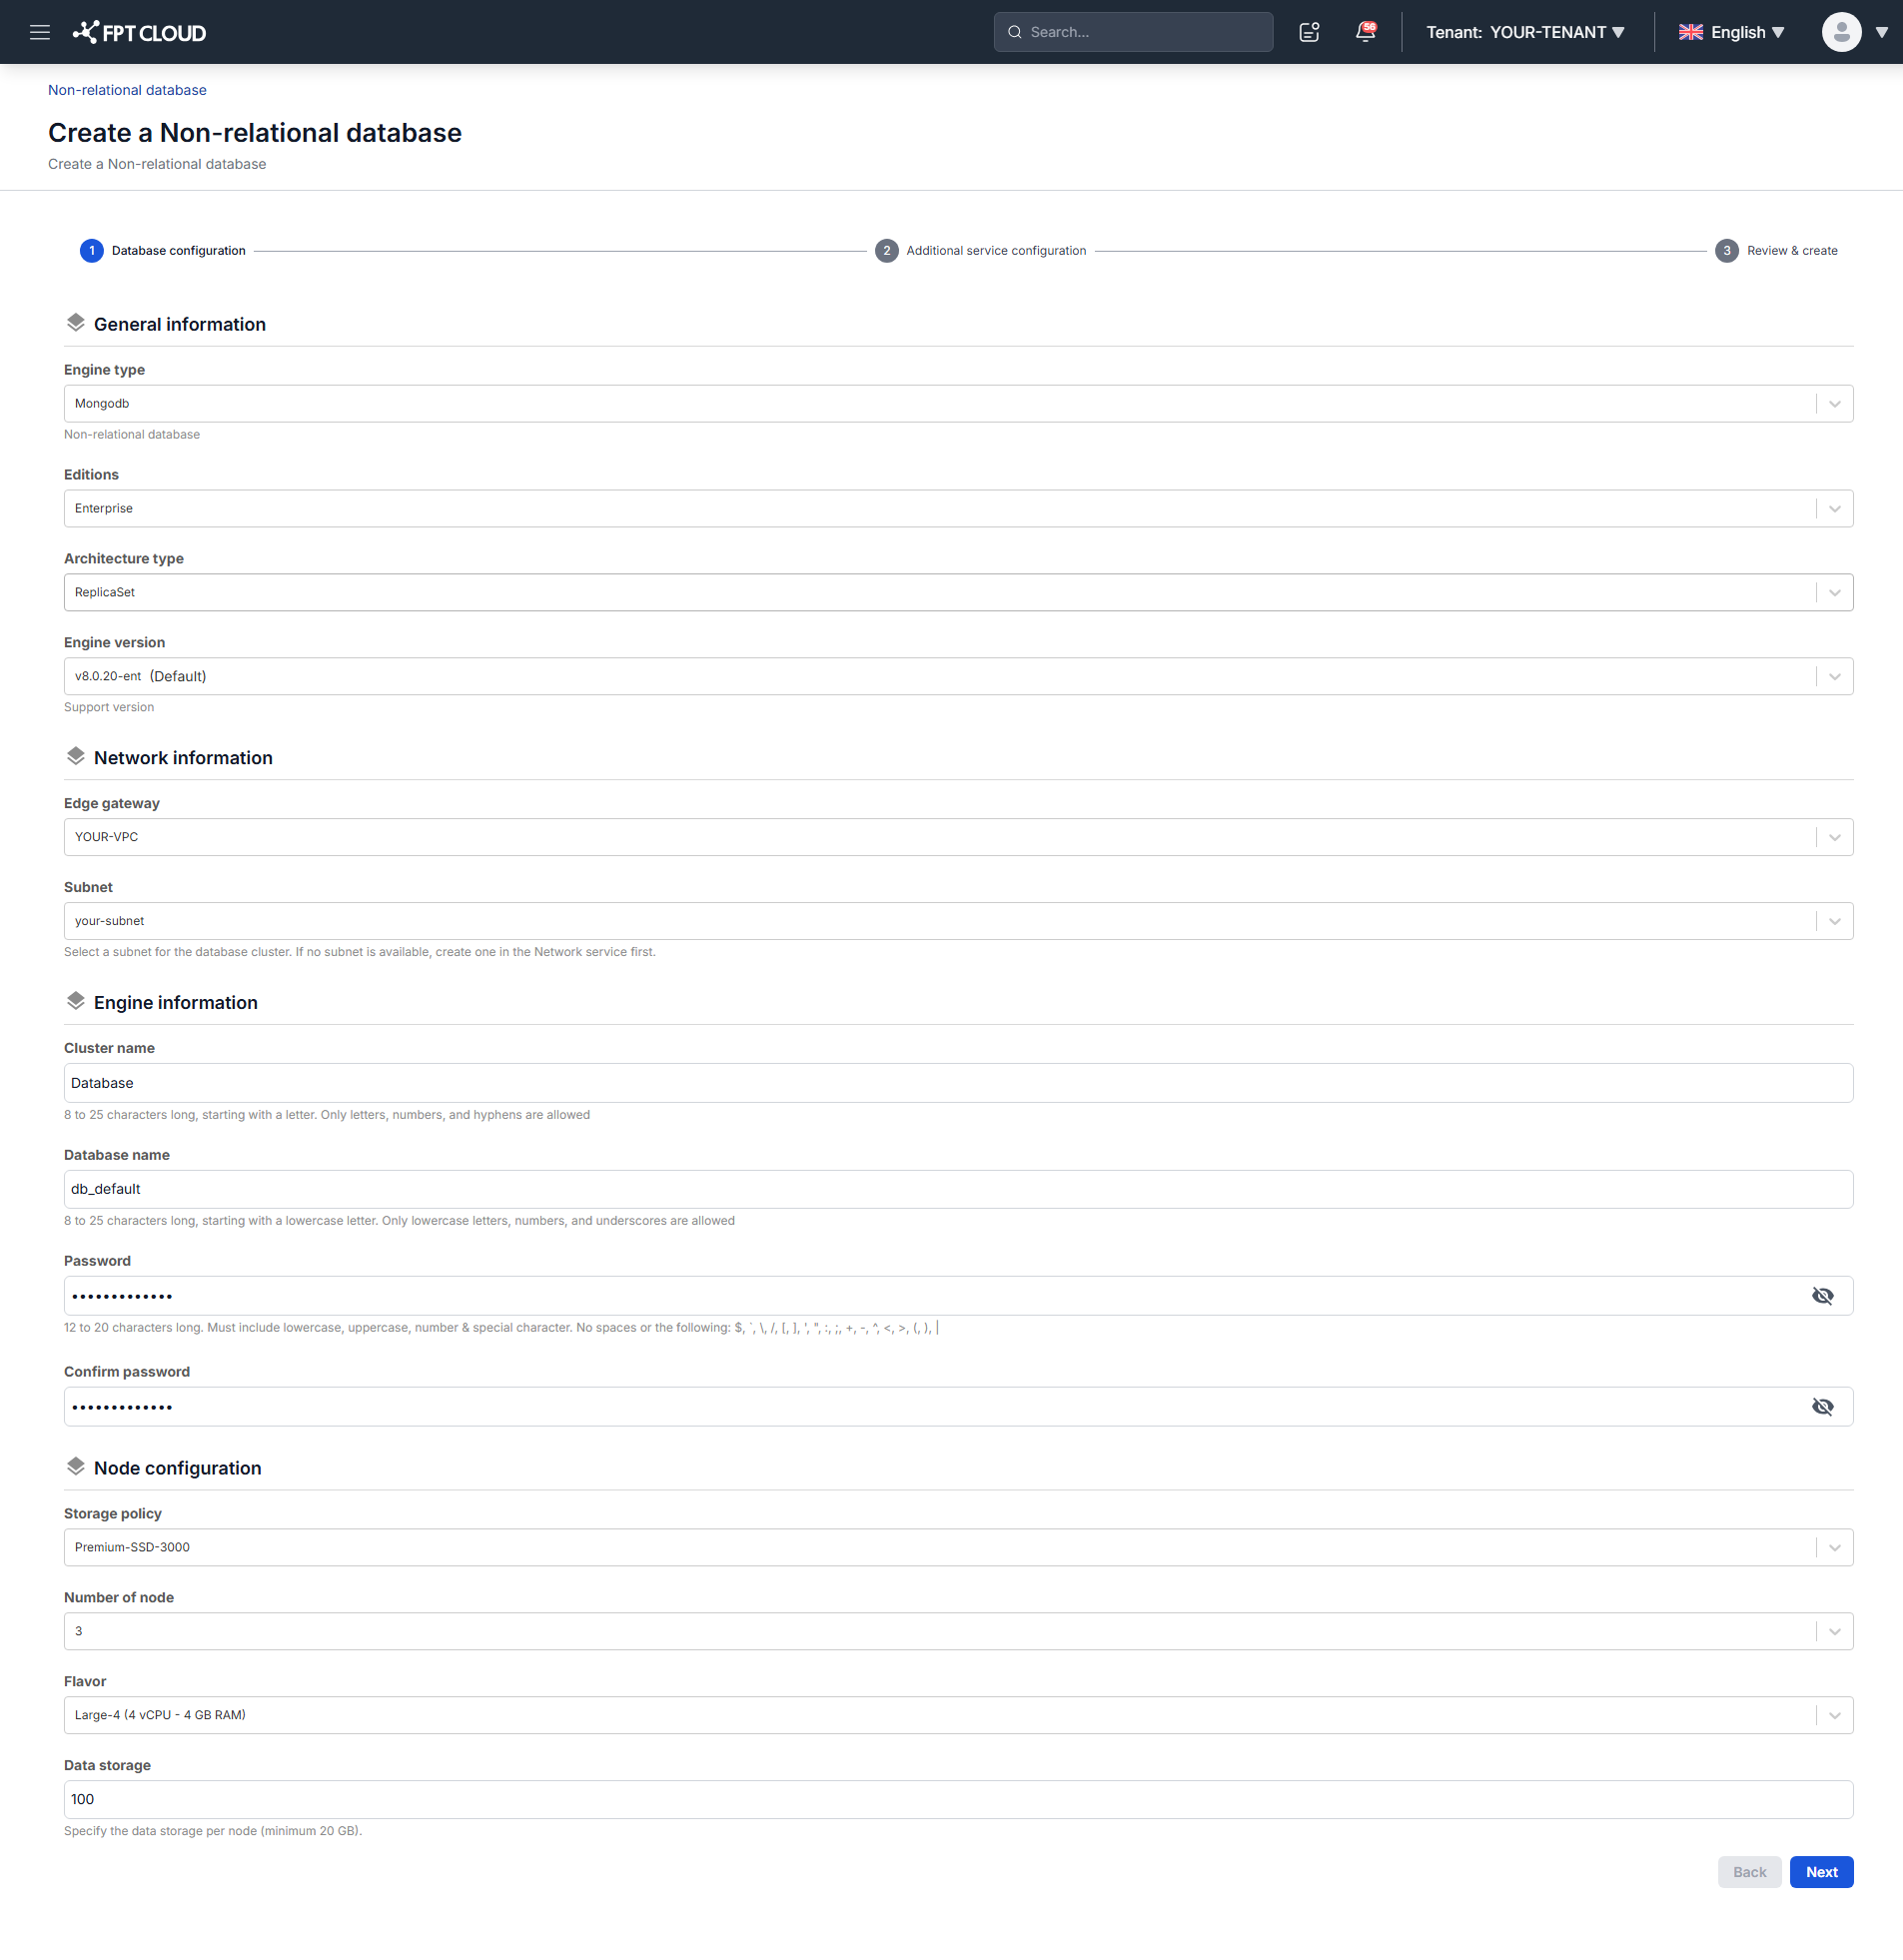
General information
| Field | What to enter |
|---|---|
| Engine Type | MongoDB |
| Edition | Enterprise |
| Architecture Type | Standalone for one node, ReplicaSet for a replicated cluster, Sharded Cluster to partition data across shards |
| Engine Version | A supported version — see Database Engine Versions |
Architecture Type cannot be changed after creation. Choose ReplicaSet if this cluster might ever carry production data — moving later means provisioning a new cluster and migrating. Pick Sharded Cluster only when you already know one replica set will not hold the data; it starts at 11 nodes. See Choosing an architecture.
Network information
| Field | What to enter |
|---|---|
| Edge Gateway | The gateway routing traffic between the cluster and other systems |
| Network | The Network/Subnet the cluster deploys into. This sets access scope and isolation. |
Engine information
| Field | Rules |
|---|---|
| Cluster Name | 8–25 characters, starts with a letter, letters/numbers/hyphens only |
| Database Name | 8–25 characters, starts with a lowercase letter, lowercase letters/numbers/underscores only |
| Password / Confirm Password | 12–20 characters with uppercase, lowercase, a number, and a special character |
Spaces and these characters are rejected in the password: / \ " ' < > ? % ; : $ ! [ ] { } ( ) , & +
Node configuration
| Field | What to enter |
|---|---|
| Storage Policy | Defines IOPS. Use ≥ 4,000 IOPS for production. |
| Number Of Nodes | Node count matching the chosen architecture |
| Flavor | vCPU and RAM per node |
| Data Disk Size (GB) | Minimum 20 GB |
On Sharded Cluster this section splits into three groups — Mongos, Shard, and ConfigServer — each sized on its own. Provision a database cluster has the field-by-field reference.
Click Next Step.
Step 4. Configure additional services
Backup and PITR are enabled by default for MongoDB Enterprise clusters. What you set here is the maintenance window and who gets notified.
- Enable Additional Service — turns add-on services on or off as a group. You can enable them later.
- Maintenance Window — day of week and start time. Maintenance runs for 1 hour from that time.
- Notification Recipients List — email addresses for backup and scaling events. Add more with the + button.
Click Next Step.
Step 5. Review and create
Check the configuration. Back returns you to edit; Create confirms.
The system validates resources, then starts deploying. You are returned to the Database cluster list with the new cluster at the top in Processing status.
Creation typically takes 5–7 minutes. On success the cluster reaches Running.
If creation fails, delete the failed cluster and create it again. A failed cluster cannot be repaired in place.
Next steps
- Connect to database with Floating IP to open network access and connect a client
- Backup & Restore overview — the backup service is on, but no data is protected until a job runs
- View database cluster information for endpoint and credentials