Report schedules
A report schedule generates a backup activity report on a recurring basis and emails it as CSV, so nobody has to remember to export one.
Step 1: Open the schedule list
-
Select Database Platform on the menu bar, then Advanced Features.
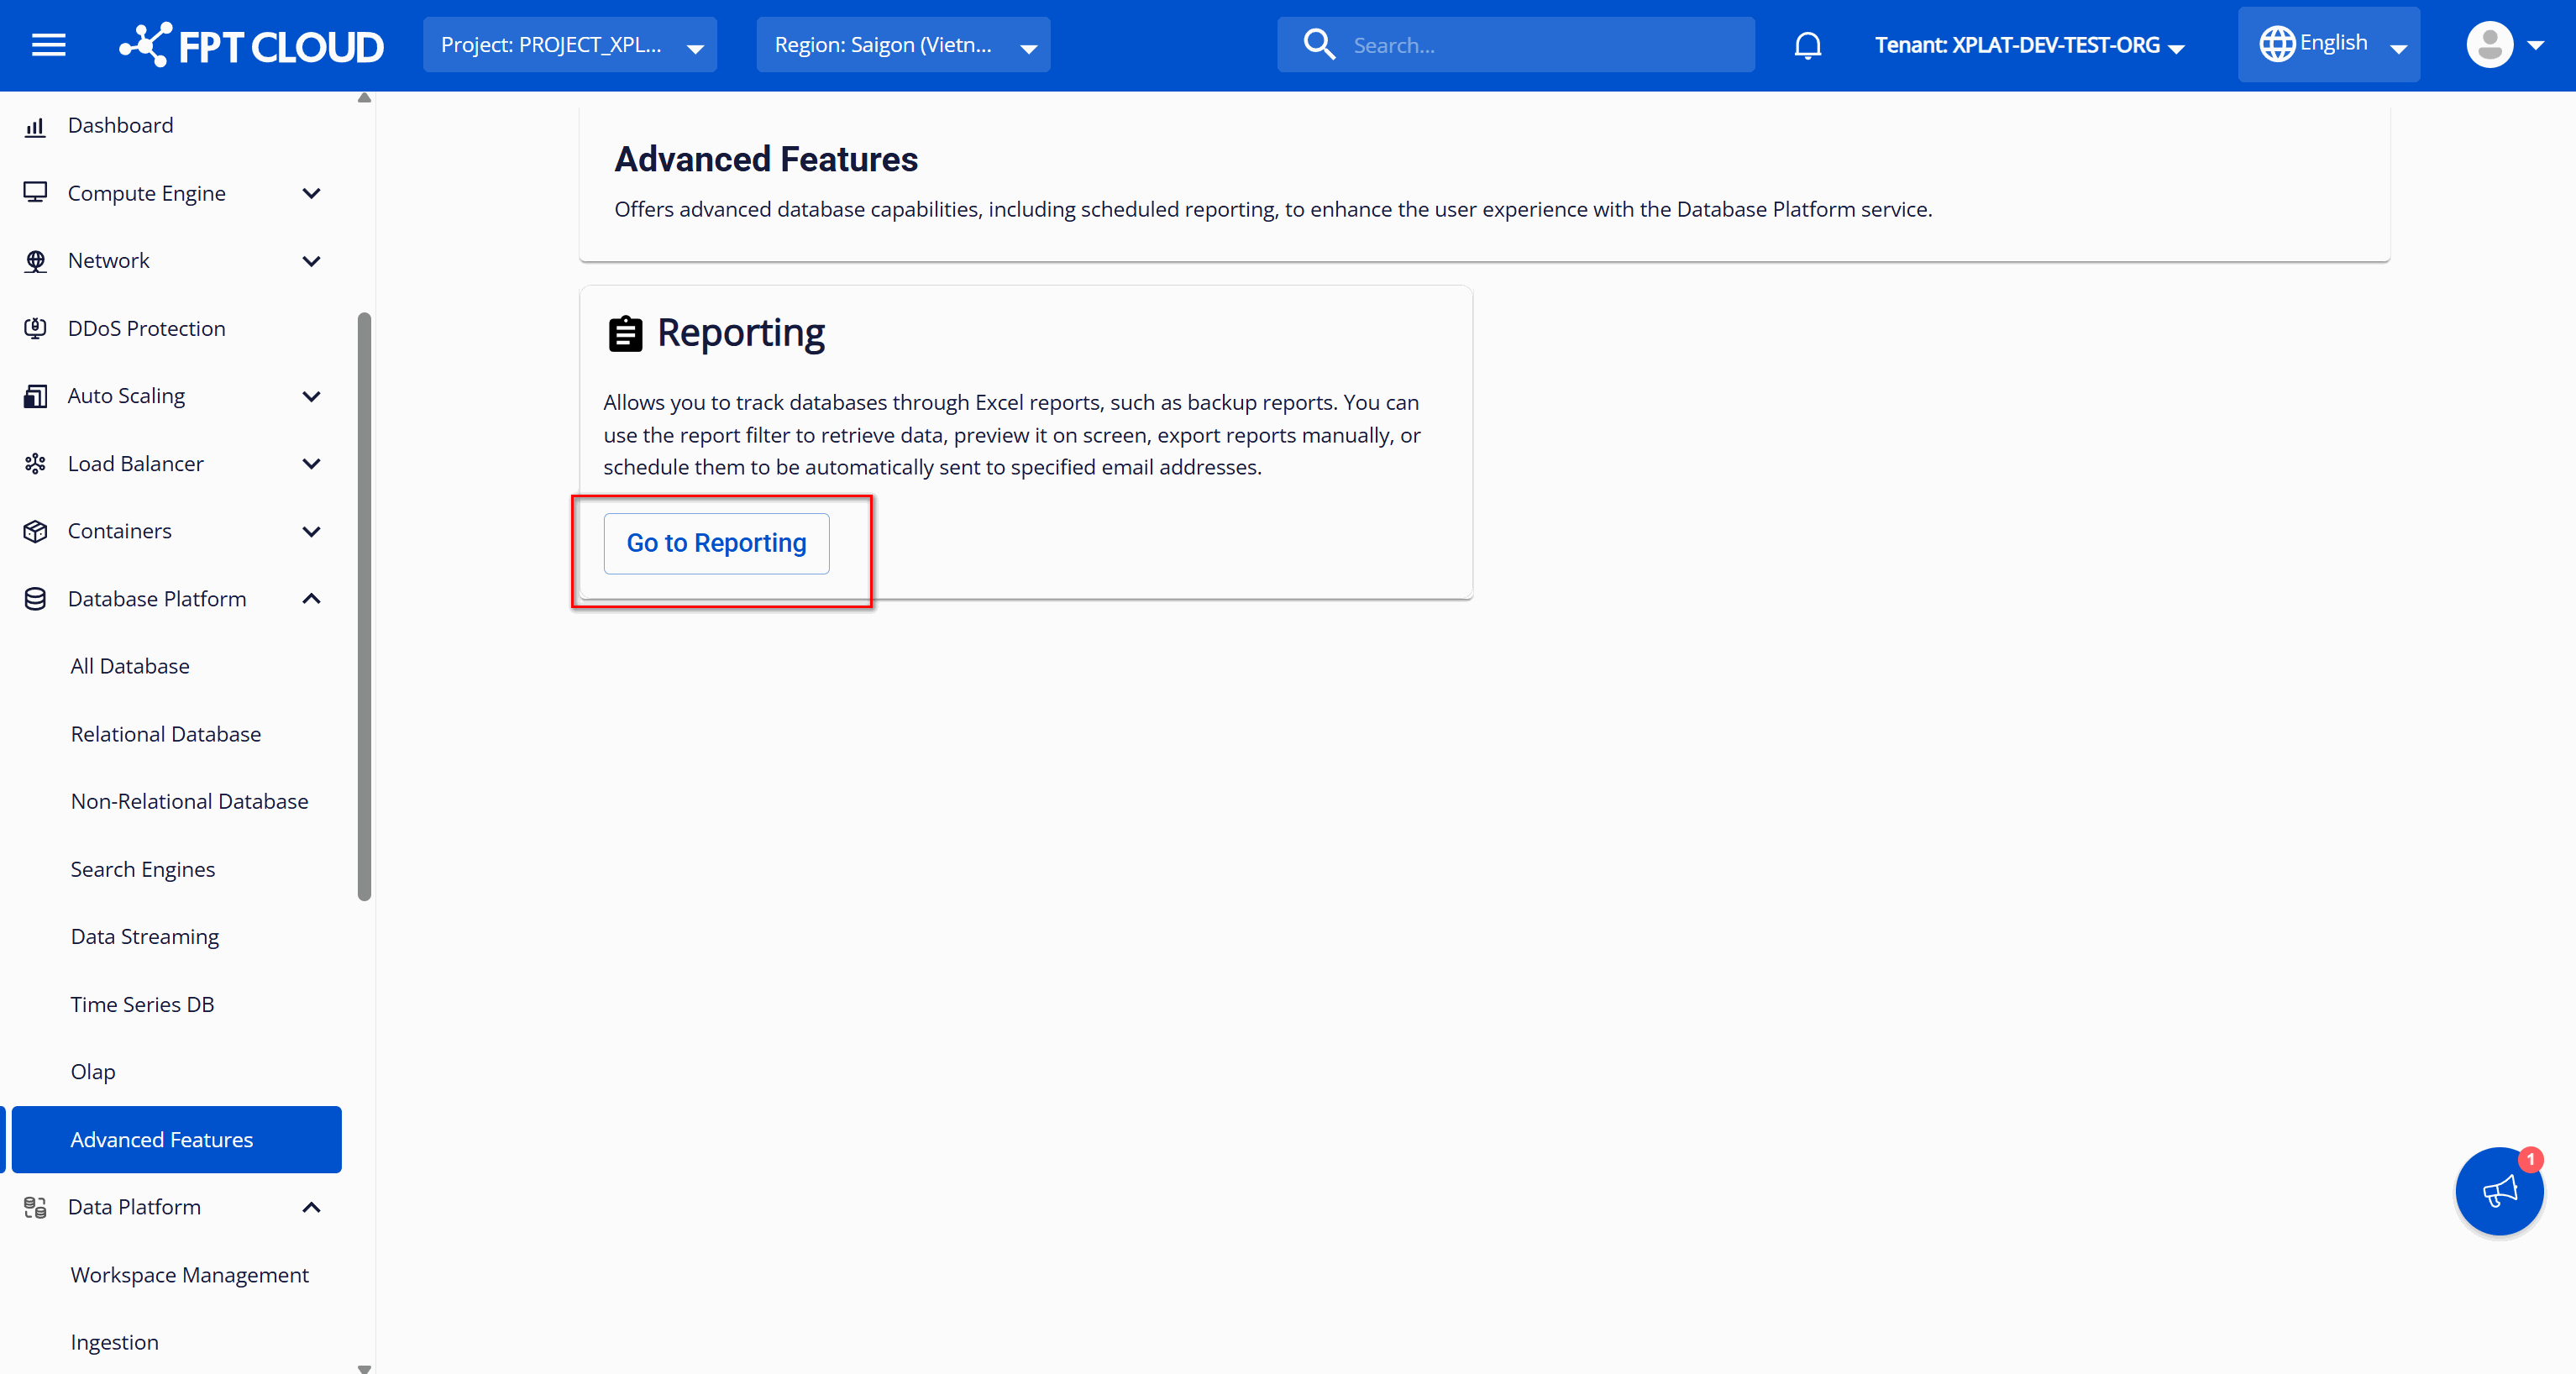
-
Click Go to Reporting, then select the Report Schedules tab. With no schedules yet, the list shows "Nothing Found."
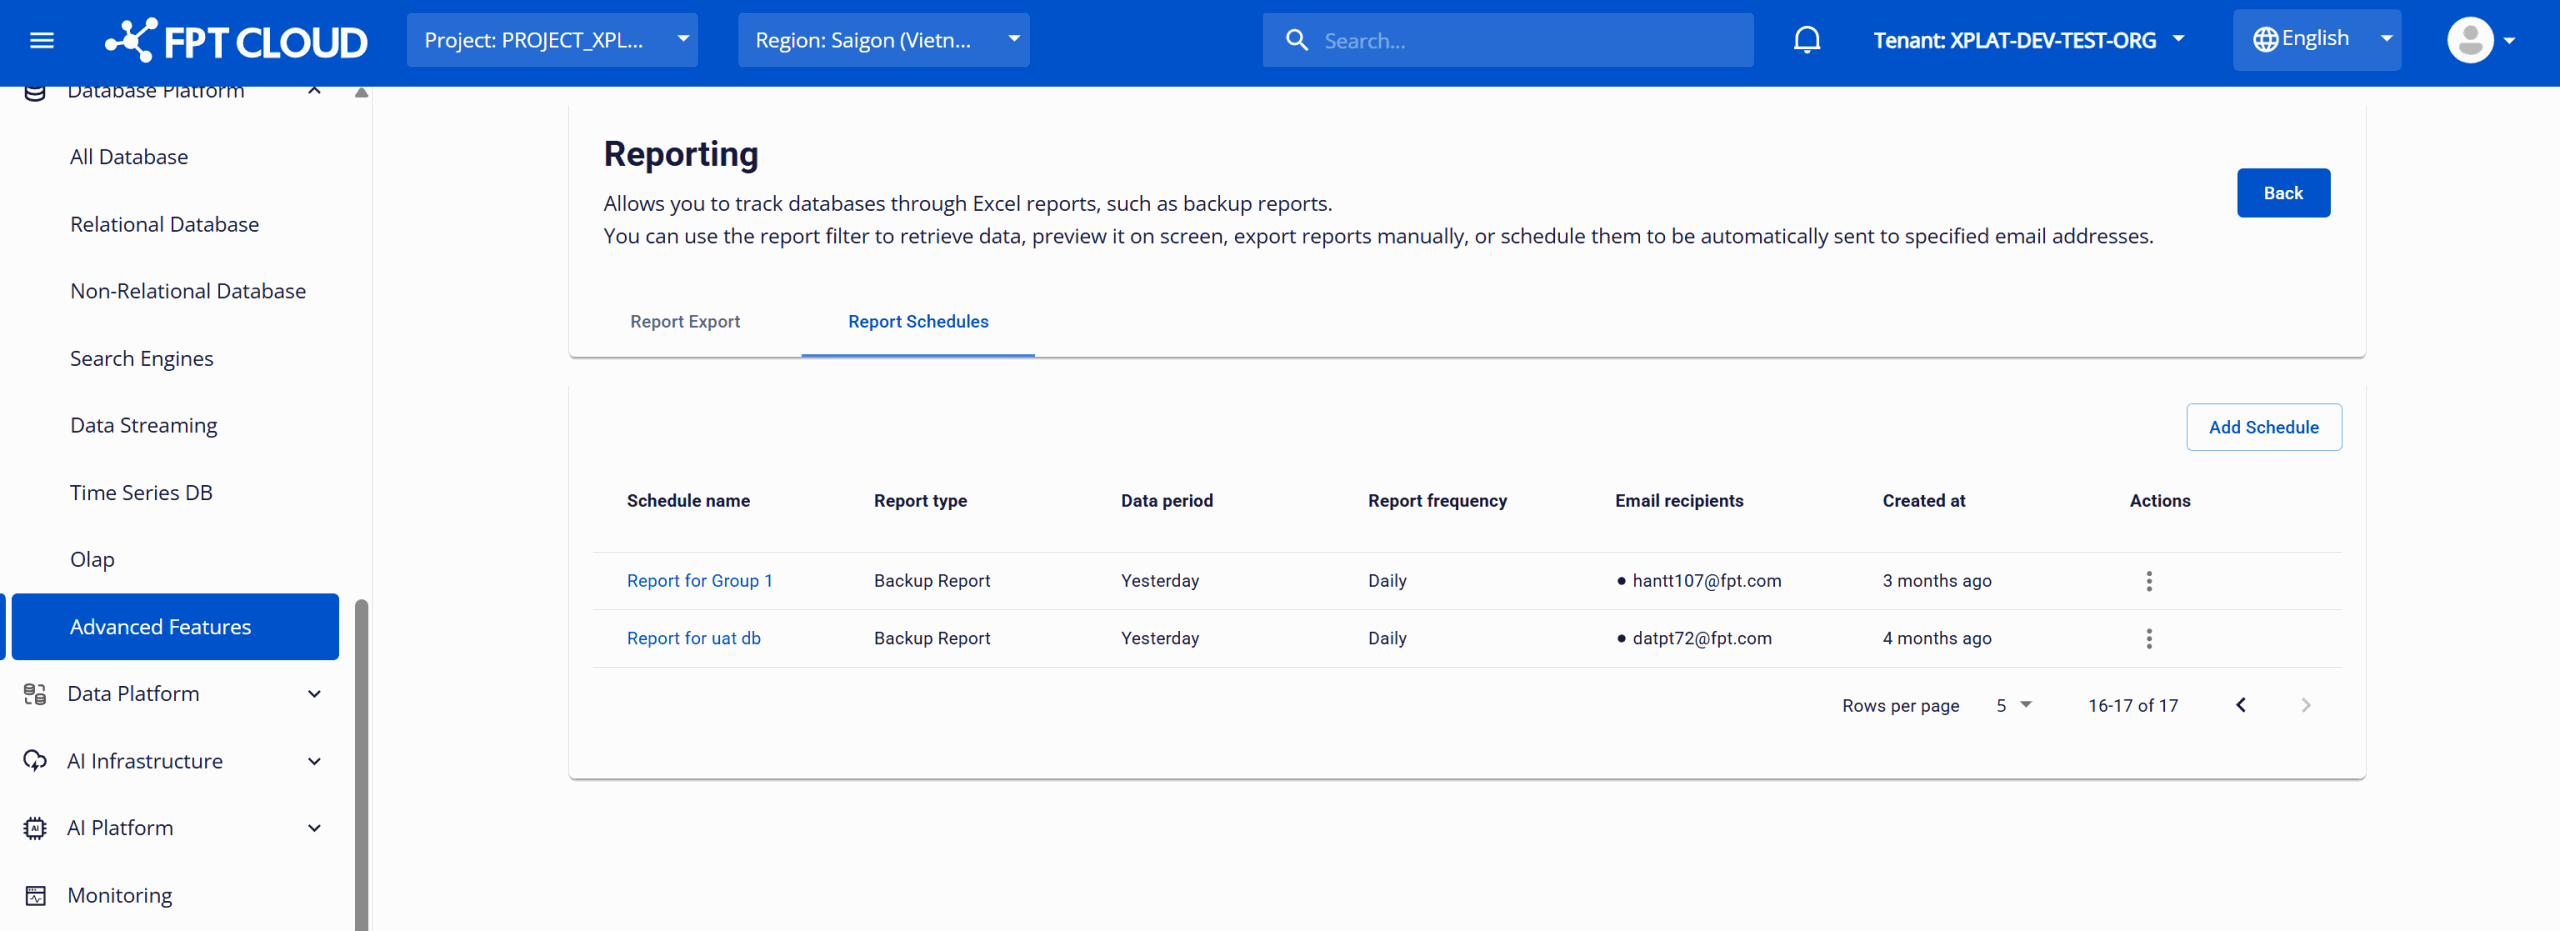
| Column | Shows |
|---|---|
| Schedule name | Name of the schedule |
| Report type | For example, Backup Report |
| Data period | Data window per report |
| Report frequency | How often it sends |
| Email recipients | Who receives it |
| Created at | Creation time |
| Action | Edit or Delete |
Step 2: Create a schedule
Click Add Schedule in the top-right corner.
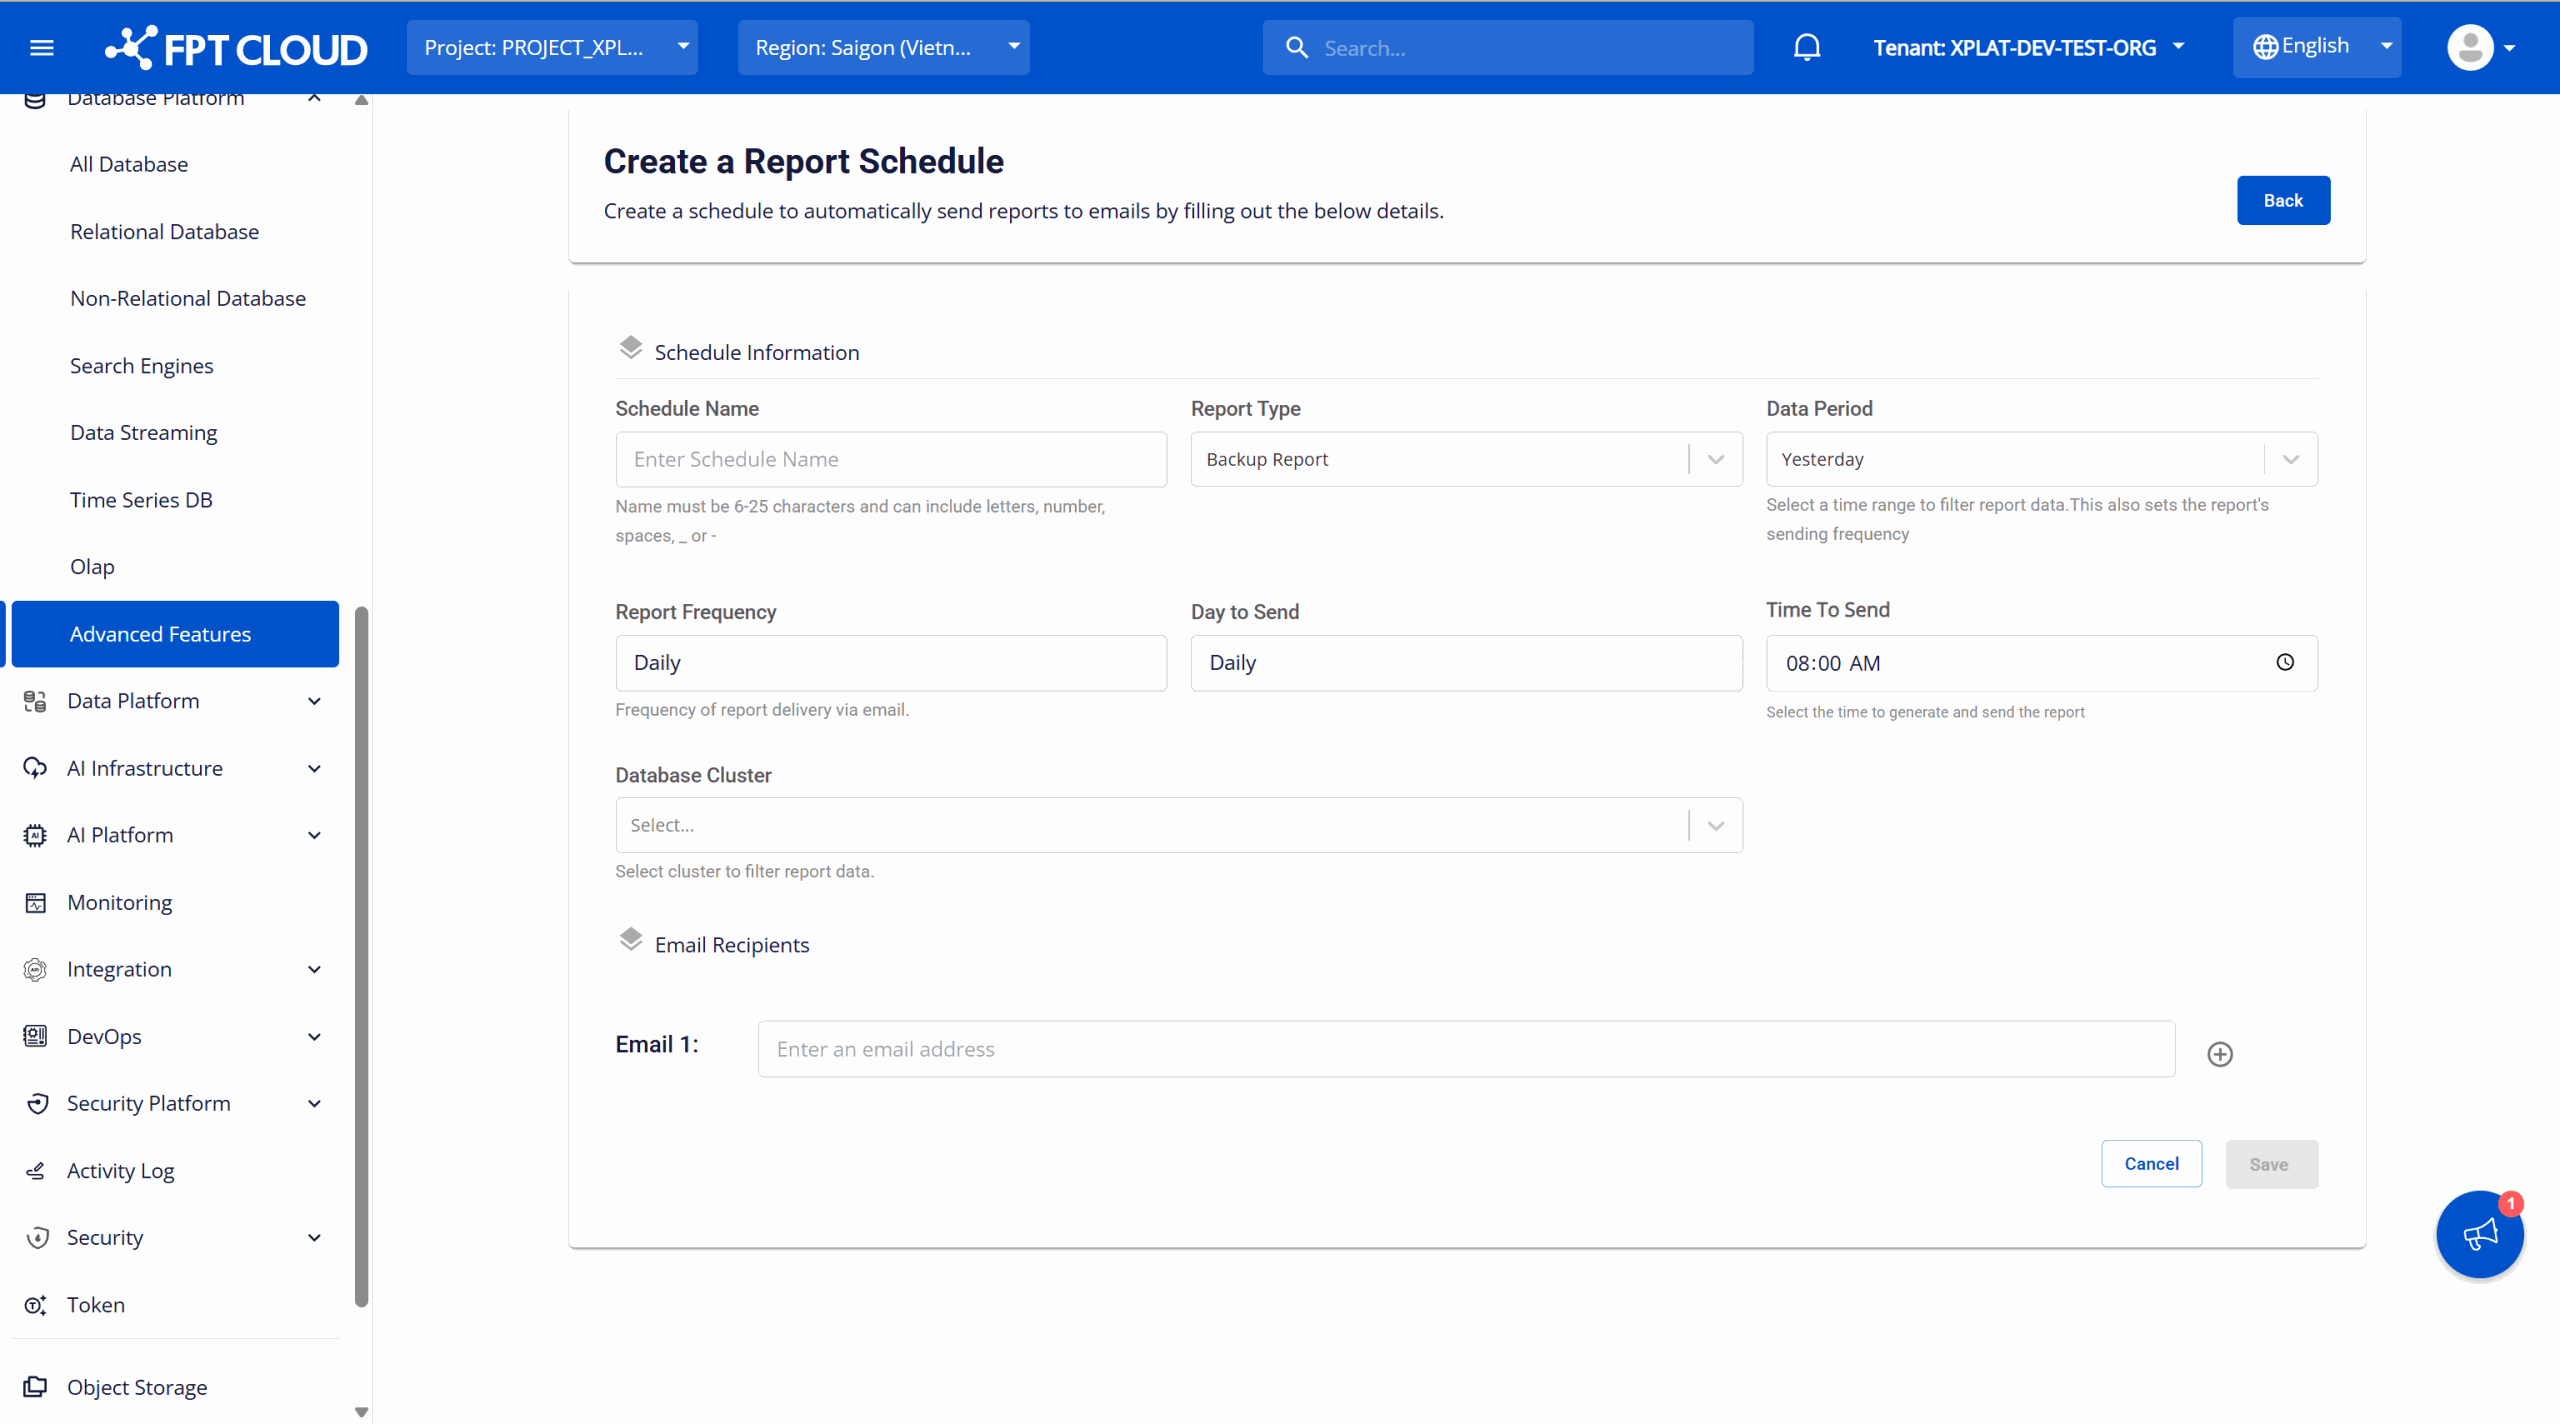
| Field | What to enter |
|---|---|
| Schedule Name | 6–25 characters: letters, numbers, spaces, underscores, hyphens. |
| Report Type | Currently only Backup Report. |
| Data Period | The window each report covers — see below. |
| Report Frequency | Set automatically from Data Period. |
| Day To Send | Set automatically from Data Period. |
| Time To Send | Time of day the schedule runs. |
| Database Cluster | Clusters to include. Select All or pick individually. |
| Email Recipients | Addresses to receive the report. Add with +, remove with –. |
How Data Period drives the other fields
Changing Data Period automatically updates Report Frequency and Day To Send:
| Data Period | Covers | Frequency | Day To Send |
|---|---|---|---|
| Yesterday | The previous day | Daily | Fixed to daily, not editable |
| Last 7 days | today − 7 to today − 1 | Weekly | A weekday of your choice |
| Last 30 days | today − 30 to today − 1 | Monthly | A day 1–31 |
| Last month | The whole previous calendar month | Monthly | A day 1–31 |
If you pick a day that does not exist in a given month, such as 31 in February, the schedule runs on that month's last day instead.
Email addresses must be valid and unique; duplicates are rejected.
Click Save. The new schedule appears at the top of the list.
At the configured time the schedule runs, collects data for the period and selected clusters, generates a CSV, and emails it to the recipients.
Manage a schedule
- View details — click the schedule name to see its configuration and activity log.
- Edit — select Edit in the Action column, change fields as when creating, then click Edit.
- Delete — select Delete, type the confirmation, then Confirm. Delivery to the configured addresses stops immediately.
Next steps
- Manual report export for a one-off report
- Notification for event alerts rather than periodic reports