Scale out a database cluster
Scaling out adds nodes to a cluster, so capacity grows with node count rather than node size. To enlarge the nodes you already have instead, see Change database resource configurations.
The two are driven from different places, which is the thing most people get wrong: resizing lives on the Resource tab, but scaling out lives on the Overview tab.
What each architecture supports
| Architecture | What you can add | Where |
|---|---|---|
| Standalone | Nothing | Not supported — a Standalone cluster is one node by definition. Scale up instead, or migrate to a Replica Set. |
| Replica Set | Data-bearing nodes | Node configuration section |
| Sharded Cluster | mongos routers | Mongos configuration section |
| Sharded Cluster | Shards | Shard configuration section |
The config server of a Sharded Cluster is fixed at 3 nodes. There is no control to change it, on this page or anywhere else.
Find the control
- From the main menu, select Database Platform → All Databases or Non-Relational Database.
- Click the Cluster ID to open the cluster, and stay on the Overview tab.
- Scroll to the node configuration section you want to grow.
- Click the pencil icon next to Quantity.
The icon is easy to miss — it sits inline with the Quantity value, not in a toolbar.
Scale out a Replica Set
The control opens a drawer titled Update Number of Node, with New Number Of Nodes as a dropdown rather than a free-text field.
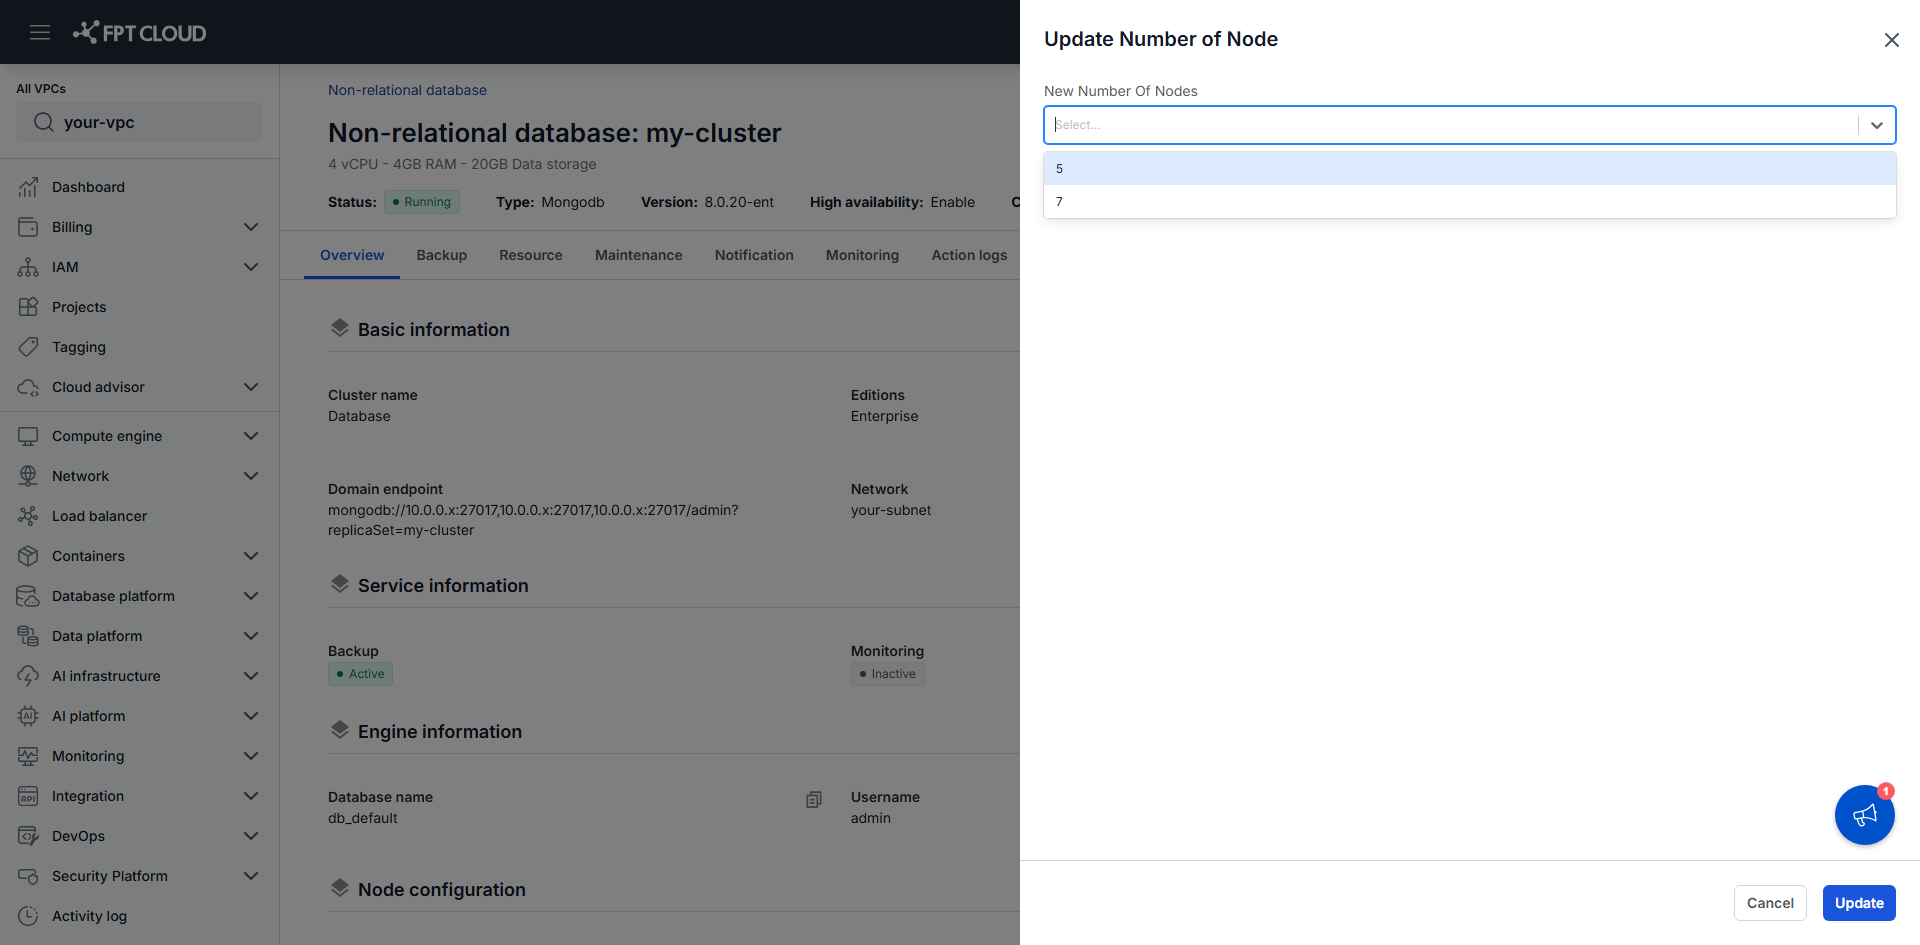
The dropdown only lists counts that keep the replica set healthy. A replica set elects a Primary by majority vote, so an even number of members buys you no extra fault tolerance and risks a split vote — which is why a 3-node cluster is offered 5 and 7, not 4 or 6.
Select a count and click Update.
Scale out a Sharded Cluster
A Sharded Cluster has two independent things to grow, and they solve different problems.
Add mongos routers
Grow this when clients are waiting on the routing layer rather than on the data — many concurrent connections, or routers running hot while the shards are idle.
In the Mongos configuration section, the pencil next to Quantity opens Update Number of Mongos Node. Enter a new count and click Update.
| Field | Rule |
|---|---|
| New Number Of Nodes | An integer between 2 and 32 |
Add shards
Grow this when the data itself has outgrown the current shards — capacity or write throughput, not routing.
In the Shard configuration section, the pencil next to Quantity opens Update Number of Shards.
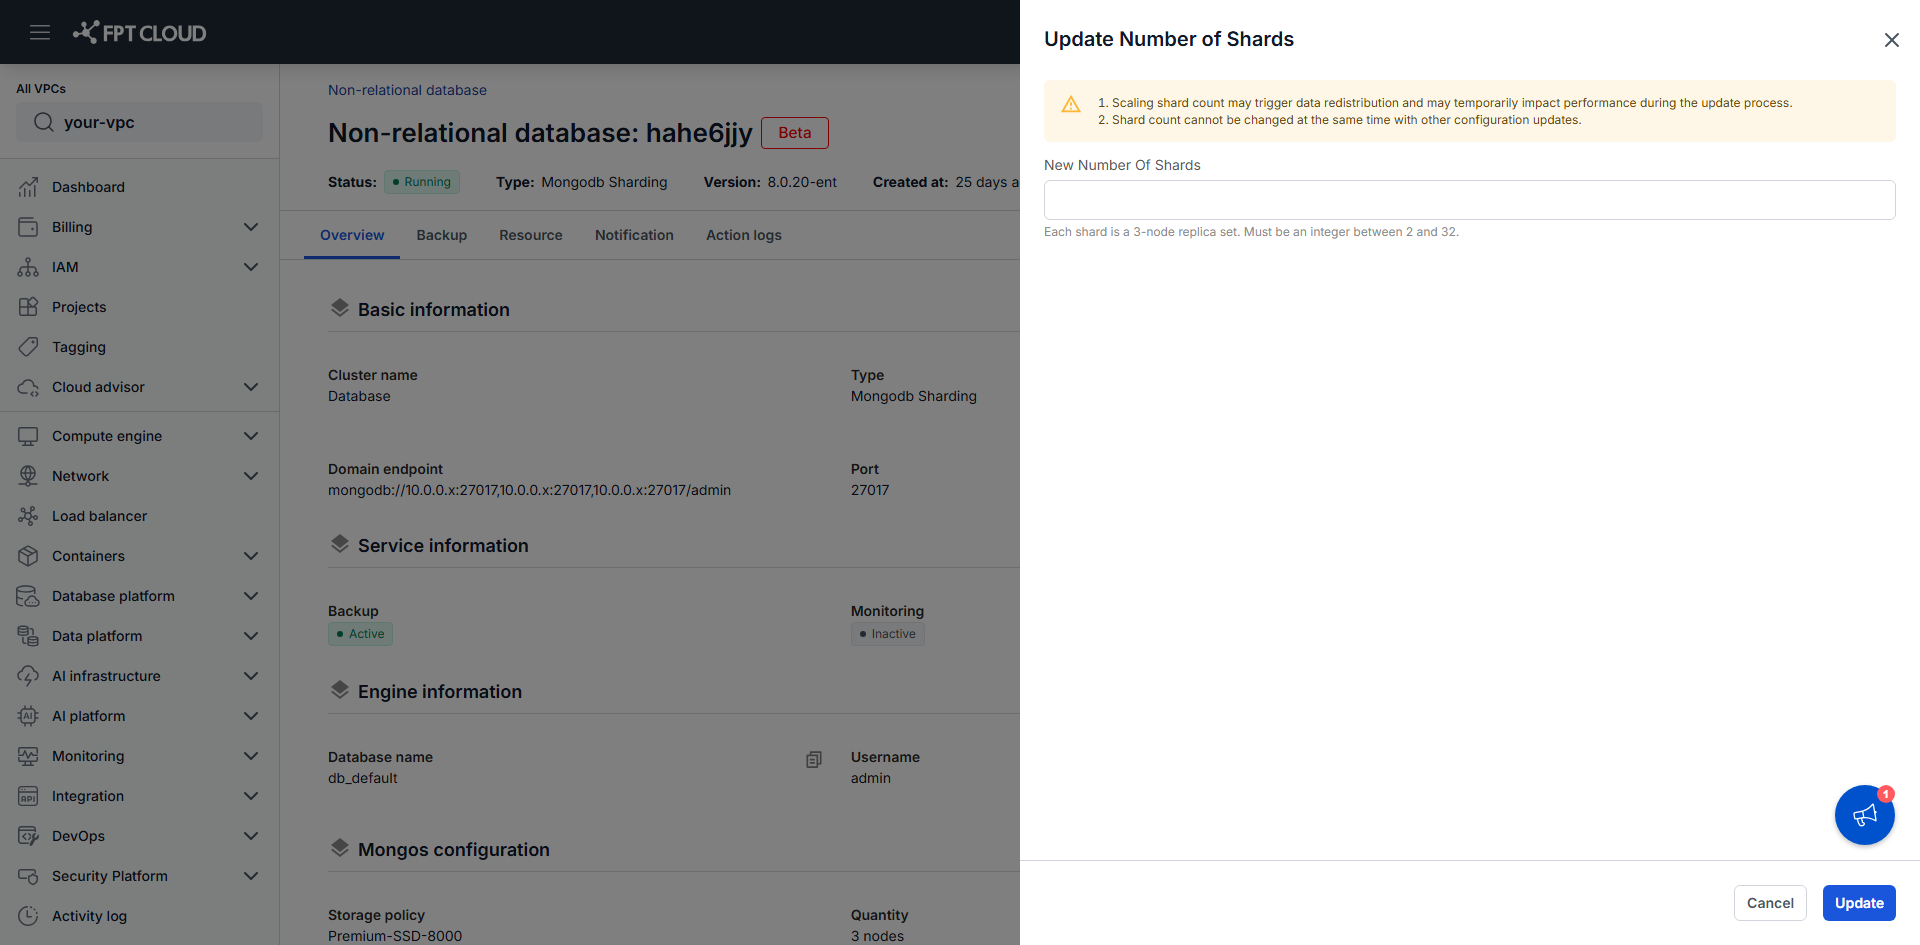
| Field | Rule |
|---|---|
| New Number Of Shards | An integer between 2 and 32. Each shard is a 3-node replica set, so the data node count moves in steps of three. |
Enter a new count and click Update.
What to expect
The two sharded operations are not equally expensive, and the difference should decide when you run them.
| Operation | Impact while it runs |
|---|---|
| Adding mongos routers | Request routing is temporarily affected and latency rises. New routers start serving traffic once they join the cluster. Nothing is moved, because routers hold no data. |
| Adding shards | MongoDB redistributes data across the new shard set. Performance dips for the duration, and on a large dataset that duration is not short. |
Treat adding a shard as a migration you schedule, not a setting you flip. Adding routers is closer to an ordinary rolling change.
Two constraints worth knowing before you start:
- Scaling out is one-way. The service only supports increasing the node and shard count. There is no way to remove a node, a router, or a shard afterwards, and you keep paying for what you added — so step up gradually rather than jumping to a count you are guessing at.
- One change at a time. Node count and shard count cannot be changed in the same operation as any other configuration update. Finish a resize before starting a scale-out, and wait for the cluster to return to Running in between.
Scaling out consumes quota like any other resource change. A new shard is three more nodes, each with its own disk — check Available quota on the Resource tab before you start, or the update is rejected.
Next steps
- Change database resource configurations to scale up instead
- View database cluster information to check the new node and shard layout
- Features and architecture for what each architecture can and cannot grow into