Connect to database with Floating IP
Connecting to a database takes two things: network access and credentials. You open access with a Security Group, and add a Floating IP if the client sits outside the VPC.
Work through the three sections below in order. If your client already runs inside the VPC, you can skip the Floating IP section.
Prerequisites
- A database in Running status. See Create your first database.
- Permission to manage Security Groups and Floating IPs in the VPC.
- A database client, CLI, or driver for your engine.
Create a Security Group
A Security Group is a set of firewall rules controlling inbound and outbound traffic for a database. Each rule names the ports, protocols, and IP addresses or CIDR ranges allowed.
Follow these recommendations, which limit how far a misconfiguration can reach:
- Use a dedicated Security Group for each database.
- Open only the ports you need.
- Avoid sharing one Security Group across databases, and avoid opening all ports. Overly permissive rules widen the attack surface and make a later rule change affect databases you did not intend to touch.
- Review and update the rules on a schedule, not only when the database is provisioned.
For the creation steps and a description of every field, see Create a Security Group.
Then add the rules the database needs:
- Inbound rules control connections into the database. Put the allowed client addresses or CIDR ranges in the Source field, and open the port your engine listens on.
- Outbound rules control connections out of the database, with destinations in the Destination field. A database that only serves internal traffic usually needs no outbound rule.
Rule changes take effect immediately and do not require a database restart.
Deleting a Security Group removes all of its rules at once, which can cut connectivity for every database still using it. Confirm nothing depends on it first.
Assign a Floating IP
A Floating IP is a static public IPv4 address you attach to a database for external access. It only works if your Security Group rules already allow the traffic.
Assign a Floating IP only when you need public access. For traffic that stays inside the VPC, use private addressing and keep the database off the public internet.
Two steps, in this order:
- Allocate an address into the VPC — see Allocate a Floating IP. A freshly allocated address stays in Down status until you attach it.
- Associate it with the port (NIC) of your database instance — see Associate and Disassociate a Floating IP. The status changes to Active and the Private IP column fills in.
To hand an address back, disassociate it and then release it. Both operations are covered in Associate and Disassociate a Floating IP.
If the Floating IP does not work as expected, check the Security Group inbound rules first. The required database port is the usual omission.
Connect with a client
Once network access is open, connect using any standard client for your engine, such as pgAdmin for PostgreSQL or MySQL Workbench for MySQL.
Find the connection details
Open the database detail page and read them from the Overview tab.
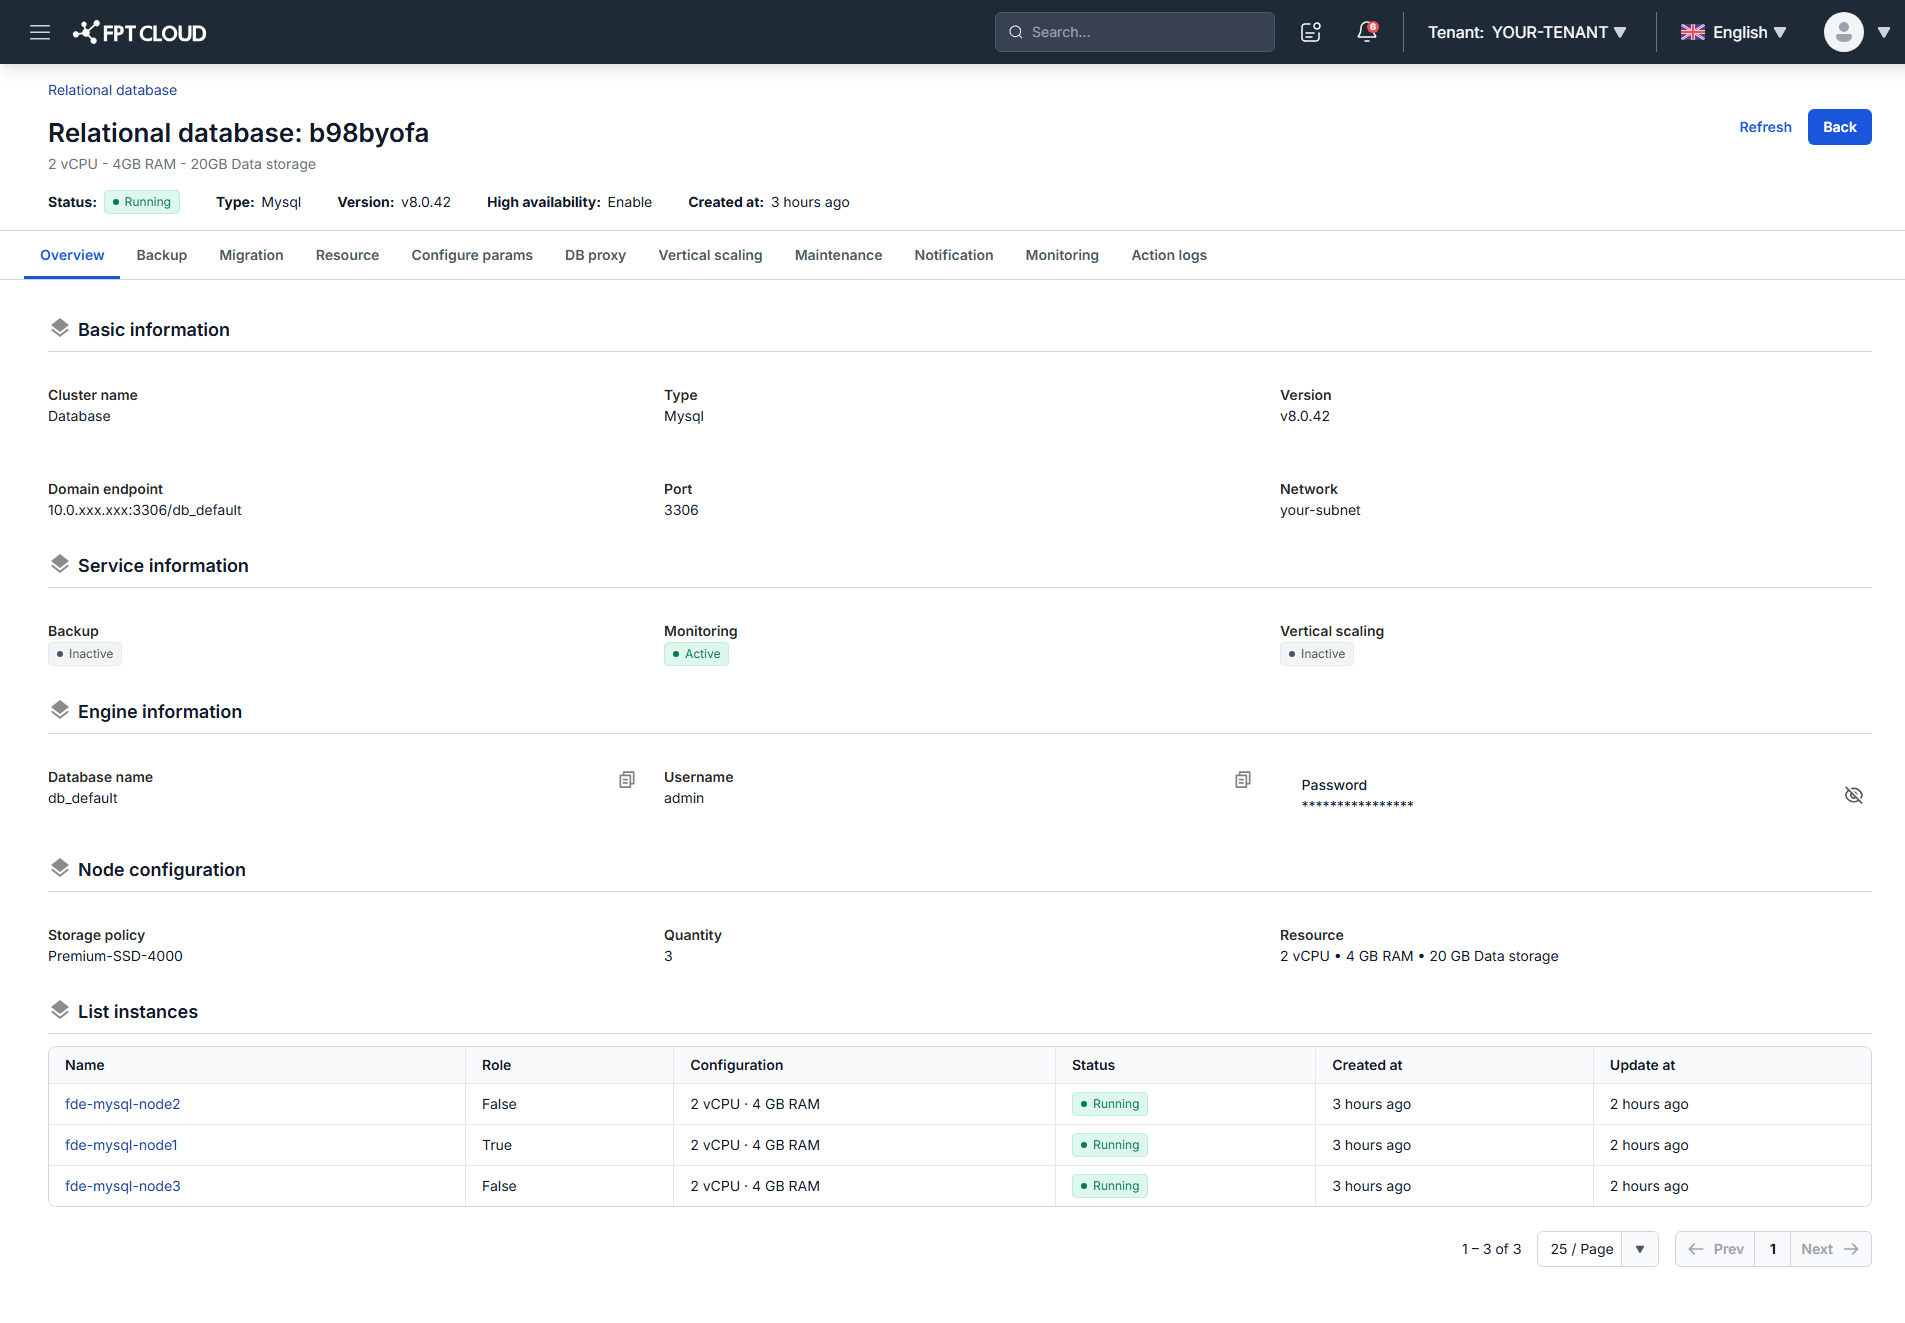
You need:
- Domain endpoint: the address to connect to.
- Port: the port the engine listens on.
- Database name: the default database created during provisioning.
- Username: the administrative account.
- Password: that account's password.
Establish the connection
Connect in whichever way suits your workflow:
- A management tool such as pgAdmin, MySQL Workbench, or SSMS. Supply the endpoint, port, username, password, and database name.
- The command line, using the CLI for your engine from a terminal or application server.
- An application, using the official driver for the engine and a connection string.
Once connected, you can browse the database structure and run queries.
If the connection times out, the cause is almost always network policy rather than credentials. Confirm the Security Group, firewall rules, and network policies all permit traffic to the endpoint and port.
Next steps
- Database proxy overview for connection pooling and load balancing on HA databases
- Stop, start & restart database
- Monitor database with FMON