Create your first database
This walkthrough takes you from an empty VPC to a running database. Each step links to the full guide if you need more detail than the summary gives.
Plan for about 20 minutes. Most of that is waiting: activation runs 8 to 10 minutes and provisioning another 5 to 7, and neither can be shortened.
Before you start
- An FPT Cloud account with a VPC, an Edge Gateway, and a Network or Subnet. See Prerequisites.
- A role that can activate the service and create databases. Activation needs
manageDatabase:ProvisionBackend, normally held by Tenant Admin or Cloud Platform Admin. See Configure IAM. - A database client for the engine you plan to use, such as pgAdmin or MySQL Workbench.
Activate the service
You only do this once per VPC. Until it completes, no one can create a database.
- Log in to FPT Cloud Portal.
- Select Database Platform → All Database.
- Click Activate Service.
Activation takes 8 to 10 minutes. Wait for the status to read Active before continuing.
Full guide: Activate FPT Database Engine service.
Create the database
-
On the database list for your engine category, click Create. The All Database view has no Create button, so open a specific category such as Relational Database first.
-
In step 1, set the engine type and version, the Edge gateway and Network, then the cluster name, database name, and administrative password.
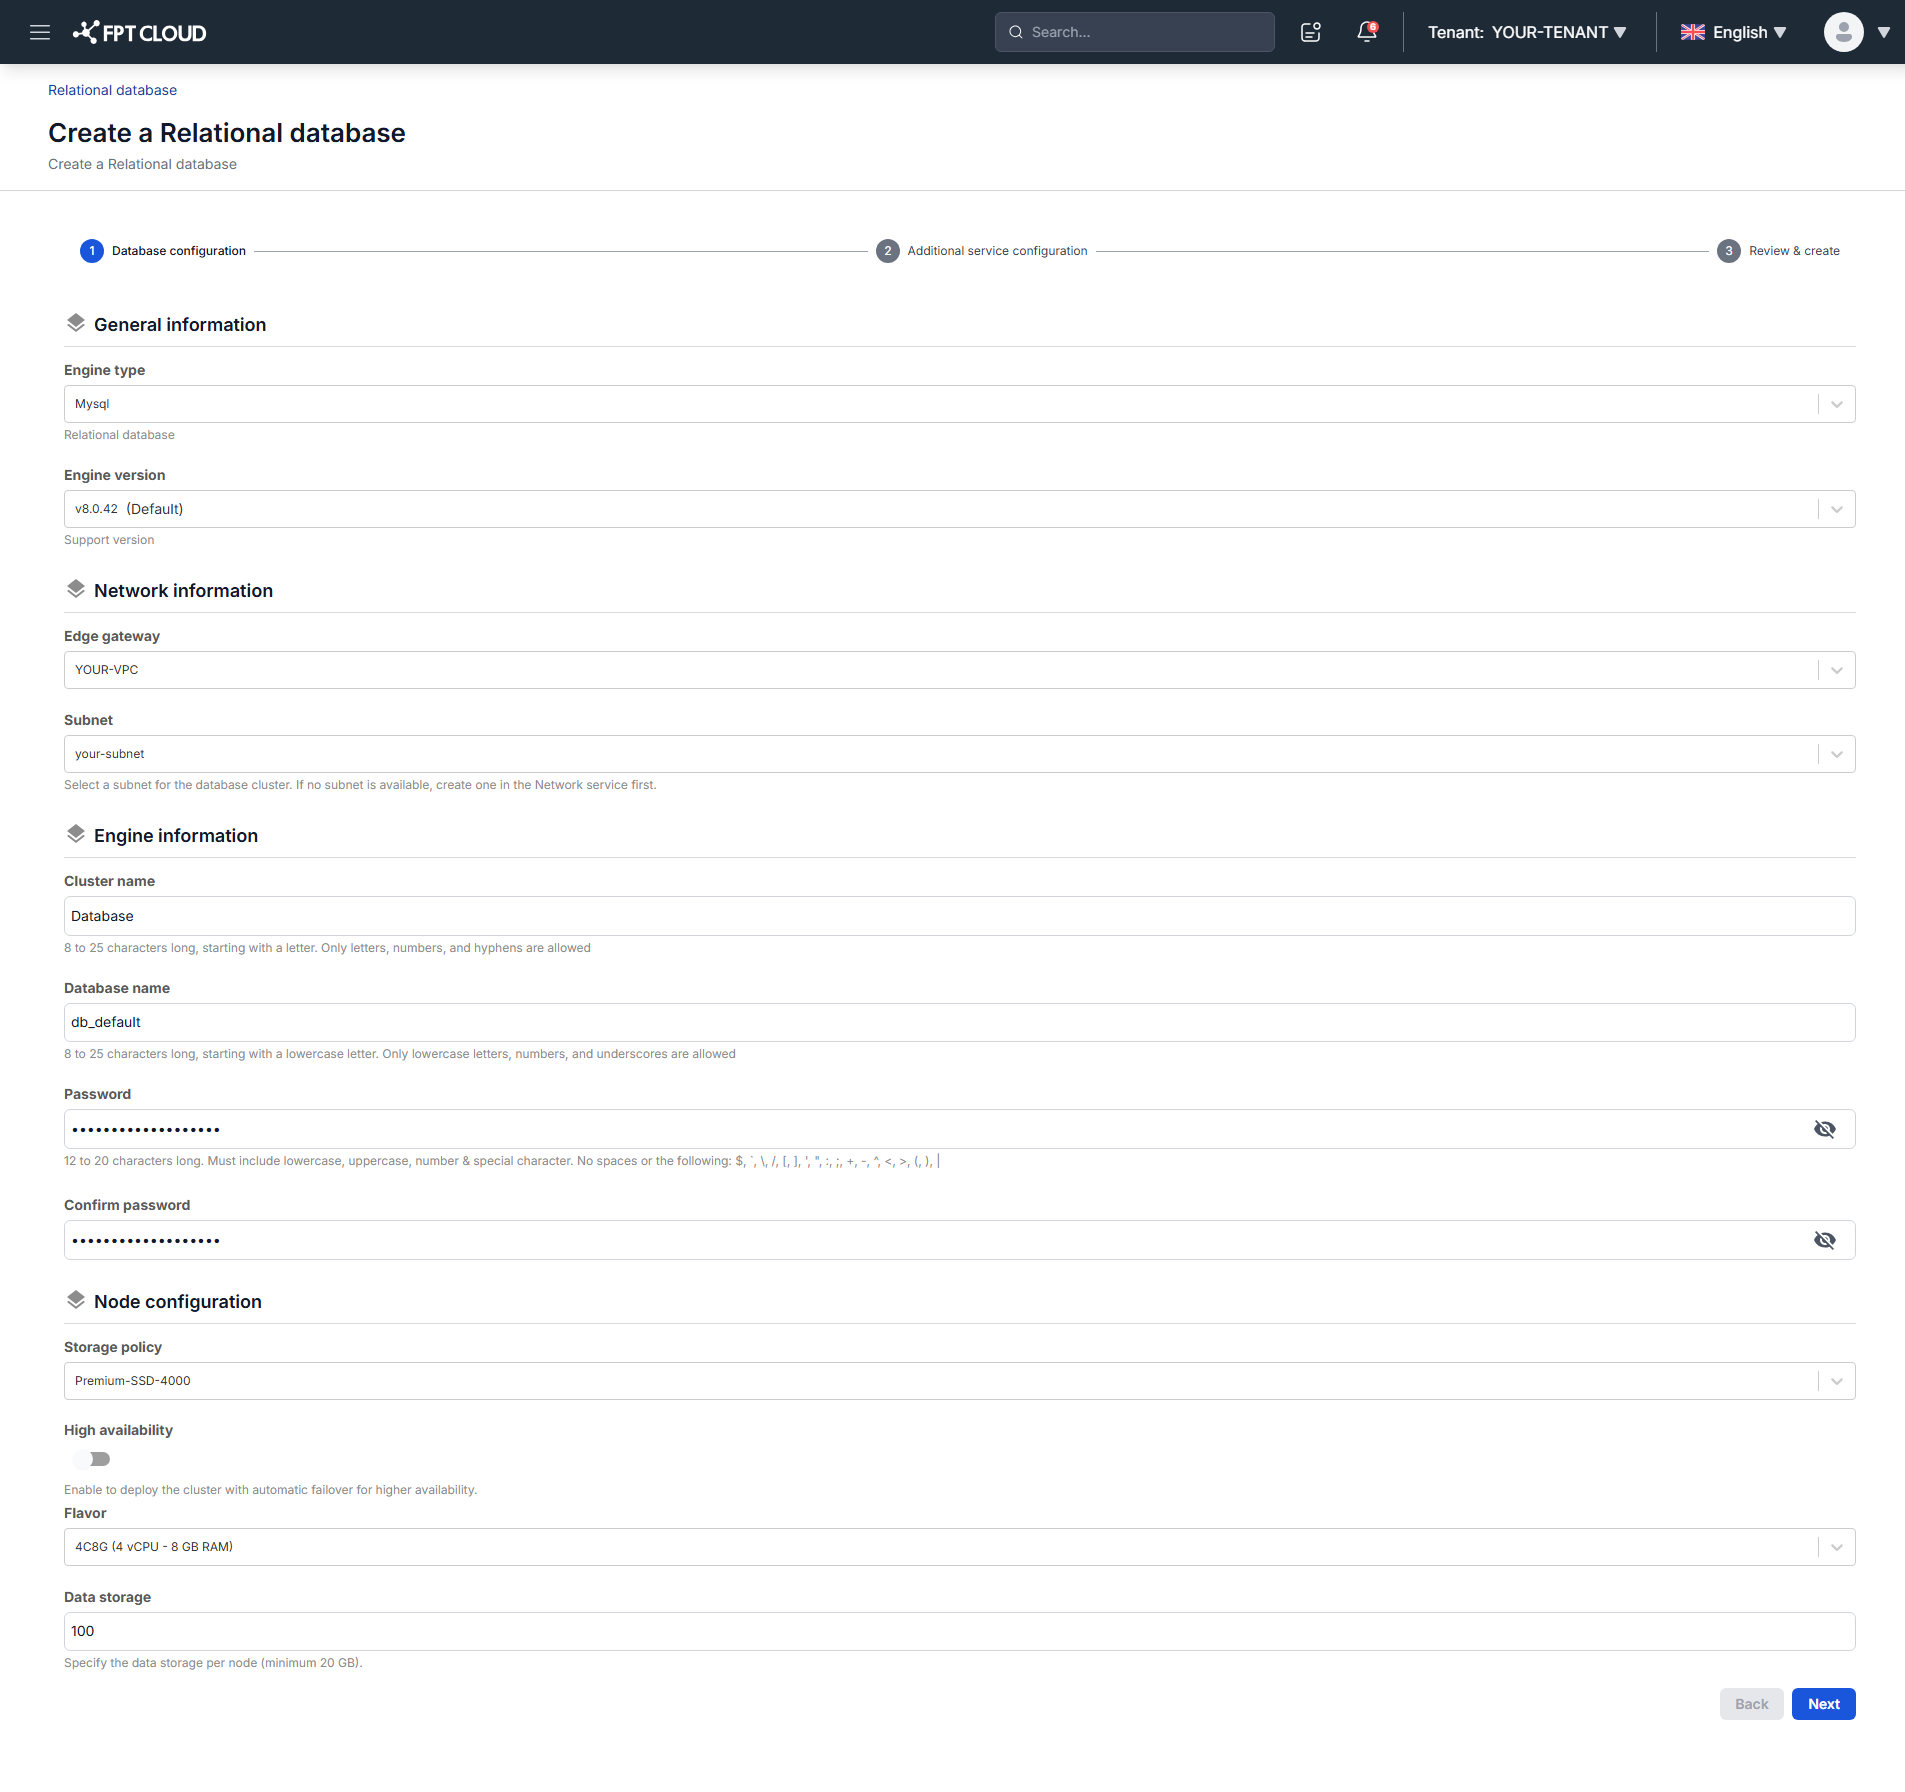
Two values are worth getting right the first time. The cluster name must be 8 to 25 characters starting with a letter, and the password must be 12 to 20 characters with uppercase, lowercase, a number, and a special character. Choose a Storage Policy of 4,000 IOPS or higher if this database will carry production load.
-
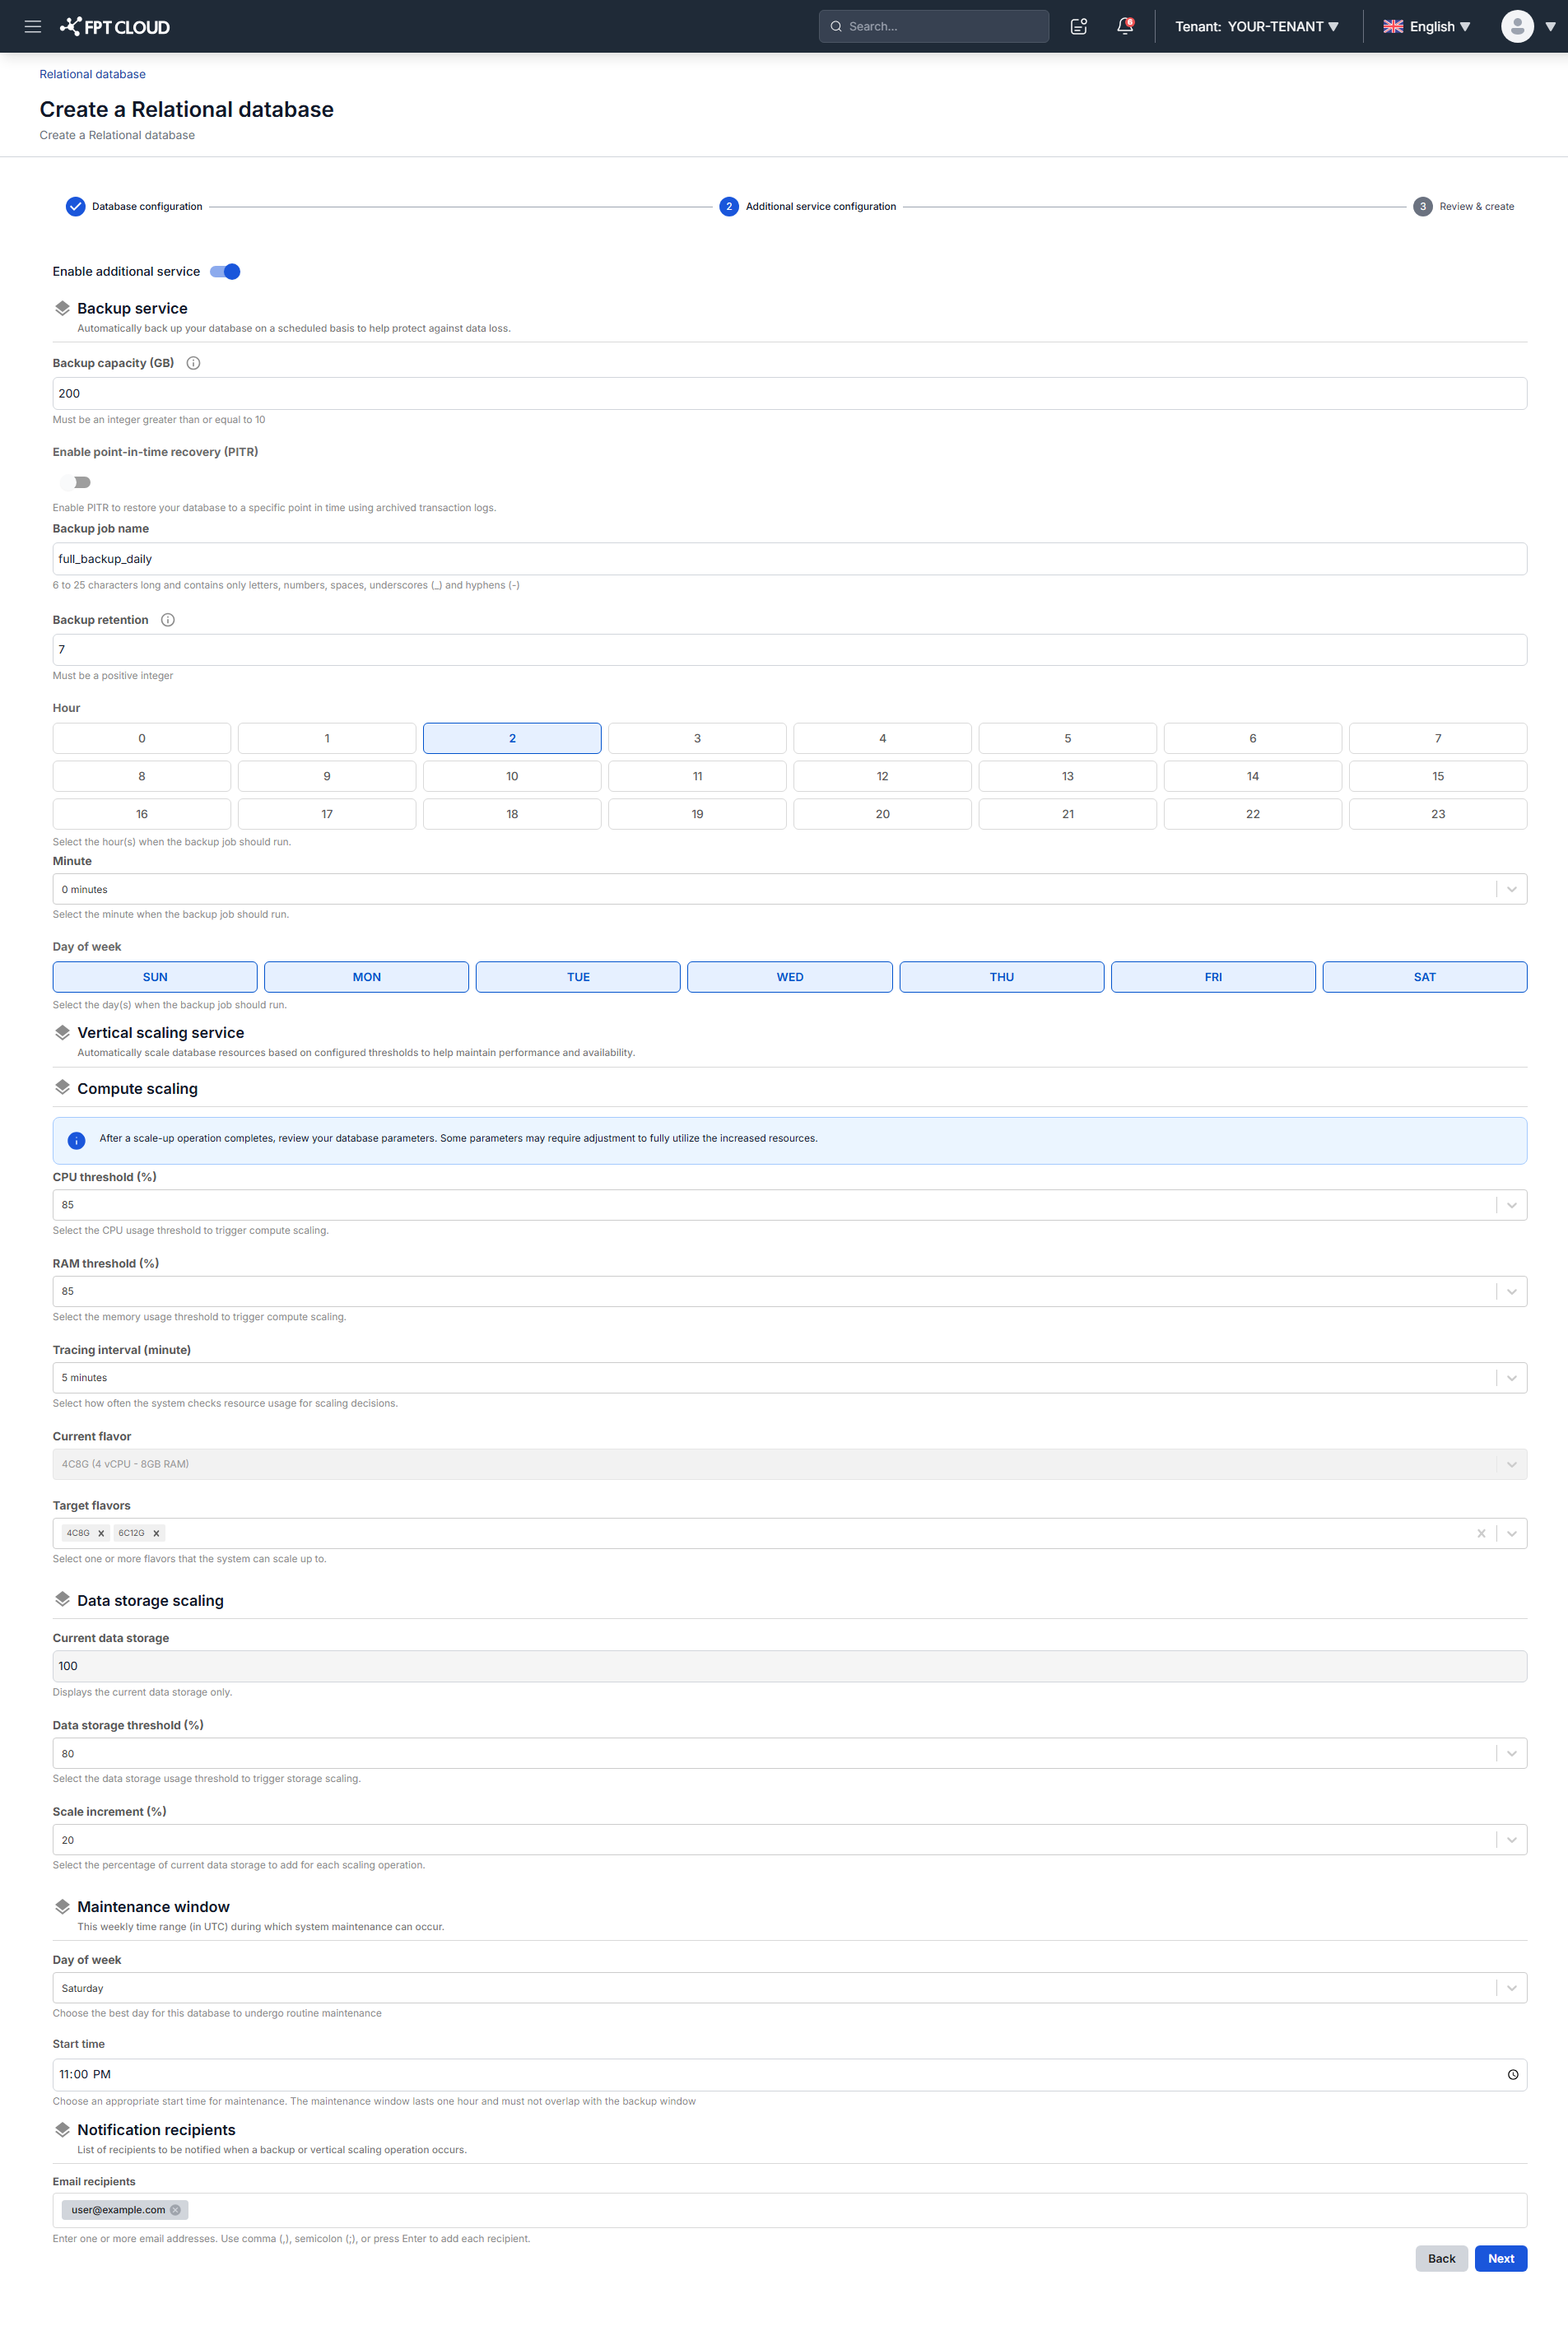
In step 2, enable the additional services you want.
-
In step 3, review the configuration and click Create.
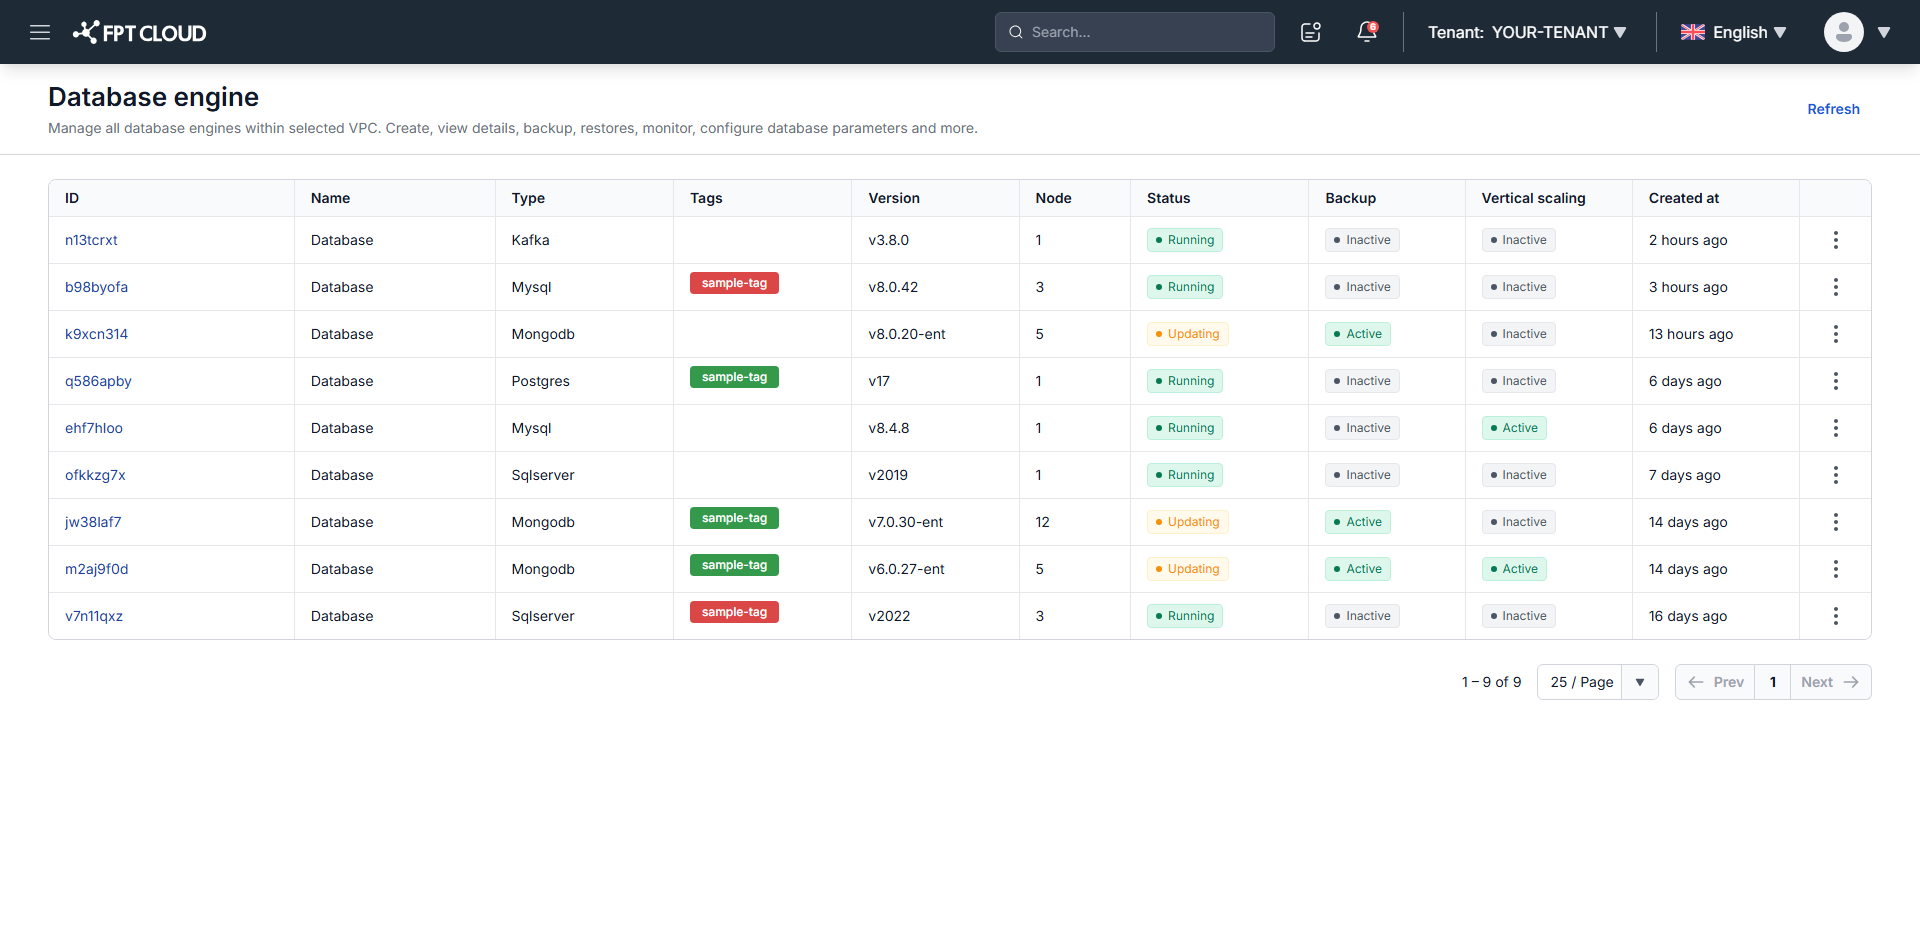
Provisioning takes 5 to 7 minutes. The database moves from Processing to Running and appears in the list with its status and service columns.
Full guide: Create a database.
Next steps
- Connect to database with Floating IP to open network access and query the database you just created
- Configure auto scaling so the database grows with its load
- Monitor database with FMON to see metrics and logs in Grafana
- Product Introduction for how the service is put together