Restore from backup
Restoring recovers your data as it stood at a chosen restore point. Every successful backup job run produces one, so what you can recover to is decided by how often your backup jobs run.
Restore works on every supported engine except Kafka and RabbitMQ. If you need the state at an exact moment rather than at the last backup, use Recover to point in time instead.
Restore is no longer available on Kafka or RabbitMQ. Backup on those engines was removed on 15 September 2026, and the backup files that existed were permanently deleted.
Restoring creates a new database. It does not overwrite the existing one, so plan for the additional quota and update your application's connection details afterward.
Prerequisites
- At least one successful backup exists, giving you a restore point. See Configure backup schedule.
- Enough remaining quota for a second database alongside the original.
Restore a database
-
From the main menu, select Database Platform → All Database, or your engine category.
-
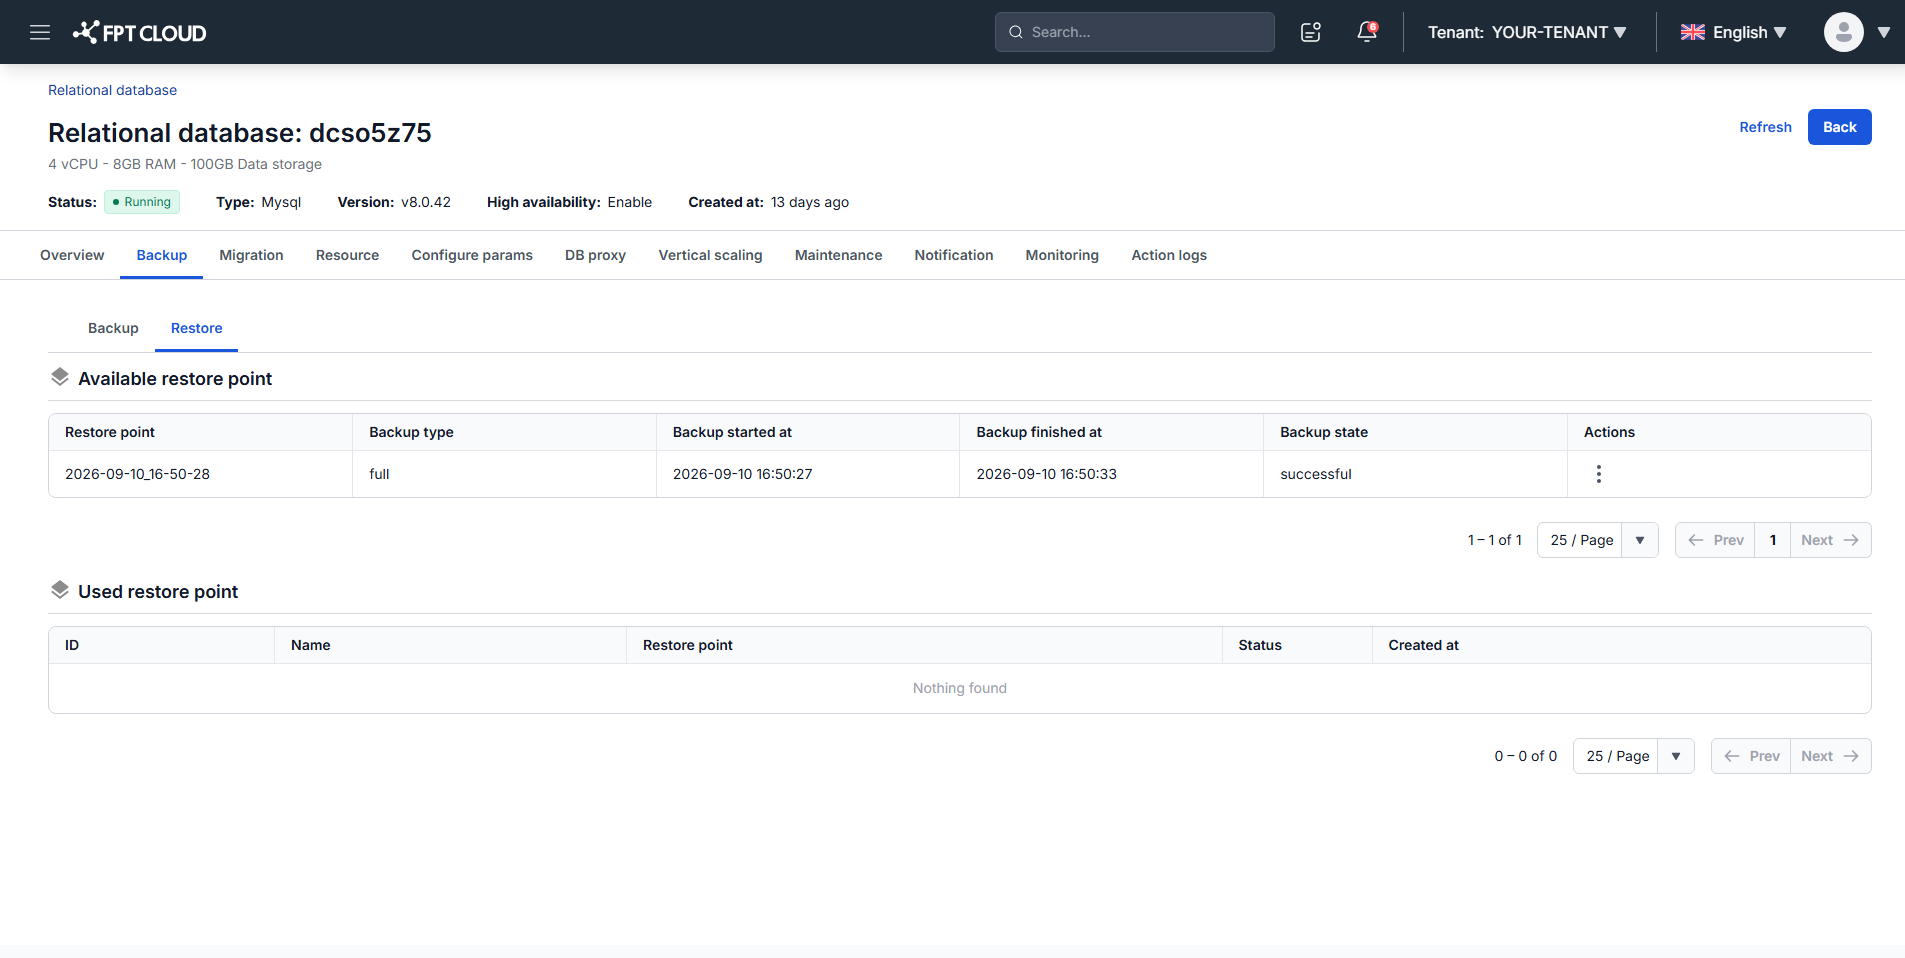
Click the database ID, open the Backup tab, then the Restore sub-tab. The page lists Available restore point with each backup's type, full or differential.
-
In the Actions column, click the ellipsis icon for your restore point, then select Restore.
-
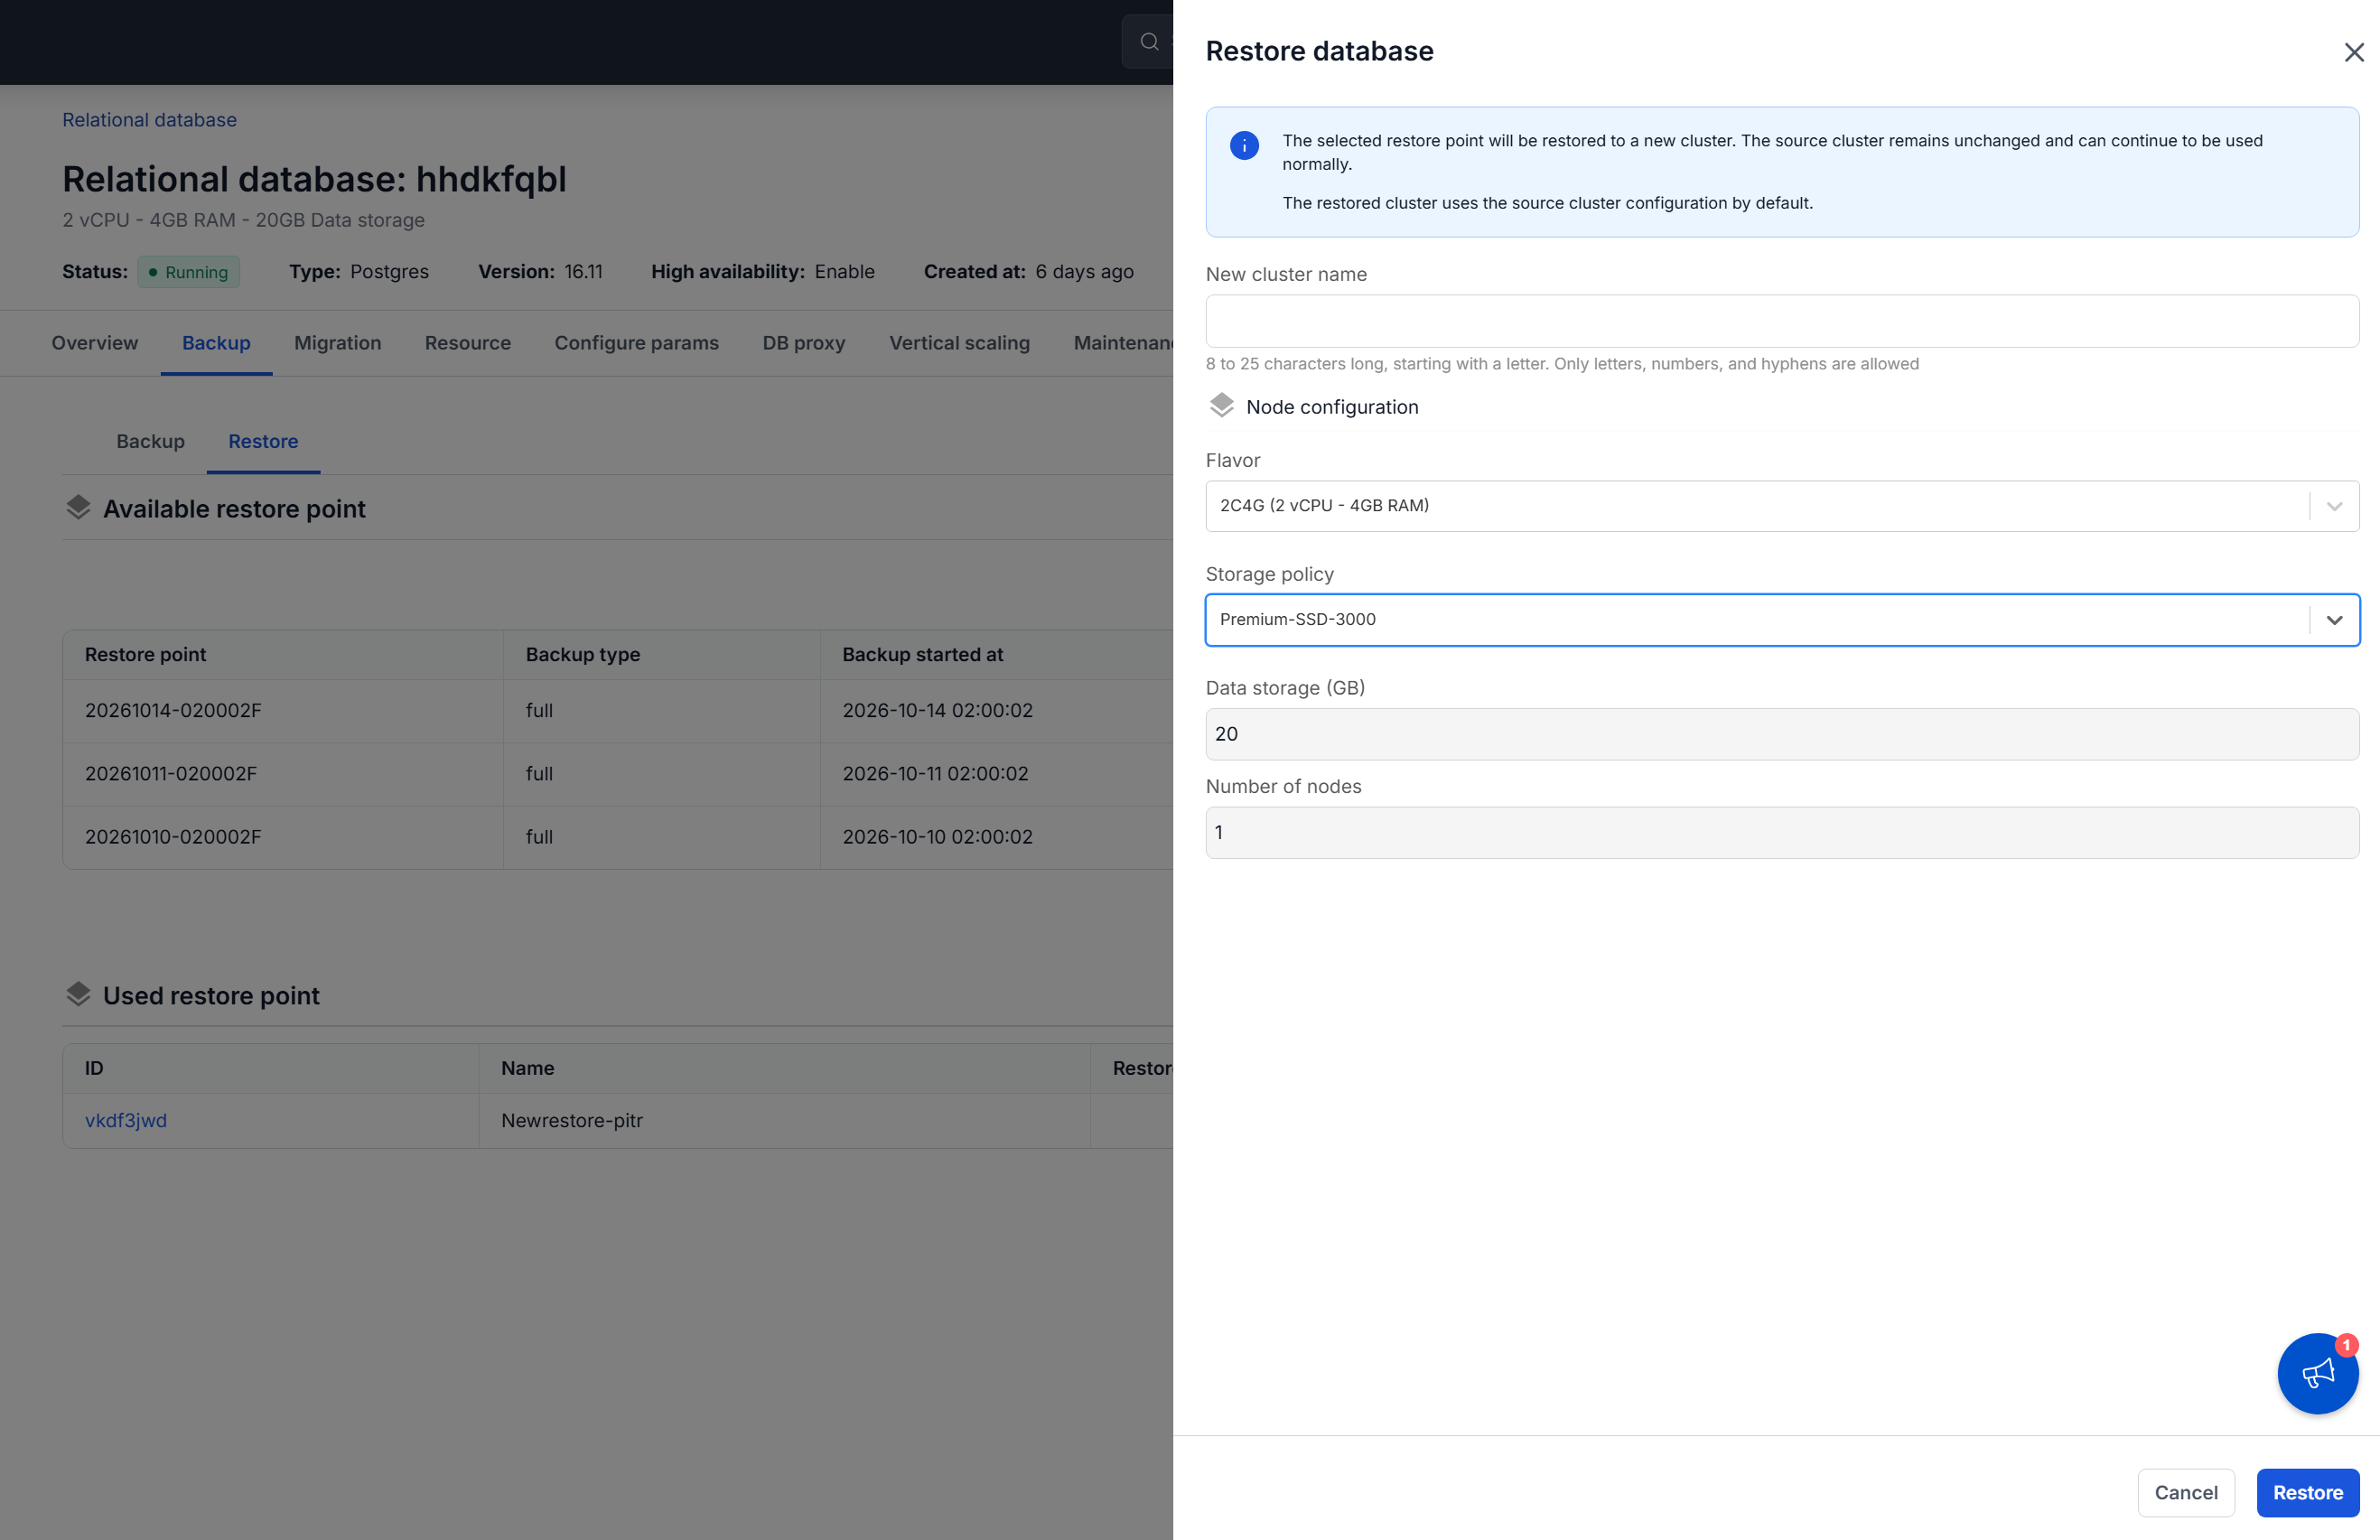
The dialog opens on the source database's configuration. Change what you need:
- New cluster name: the name for the new database. 8 to 25 characters, starting with a letter, and only letters, numbers, and hyphens.
- Flavor: the compute configuration for the new database.
- Storage policy: the policy that sets IOPS performance.
- Data storage (GB) and Number of nodes are inherited from the source database and shown read-only. To change them, resize the new database after it is running.
-
Click Restore.
The new database appears in the database list holding the data from that backup.
After restoring
The restored database is independent of the original. Nothing is carried over automatically, so before you cut traffic across:
- Point your application at the new endpoint. The old connection string still reaches the original database.
- Set up the backup service and backup jobs again on the new database.
- Delete the database you replaced once you are satisfied with the restore, so it stops consuming quota.
Next steps
- Recover to point in time when the last backup is not recent enough
- Connect to database with Floating IP to point your application at the restored database
- Stop, start & restart database to remove the database you replaced