Configure ACL
Create the user first, then grant it an ACL. For why both steps are needed and what each operation permits, see Overview ACL.
Create a Kafka user
-
Log in to FPT Cloud Console and select Database Platform → Data Streaming.
-
Click the Kafka database ID, open the Configure Params tab, then the Kafka ACL sub-tab.
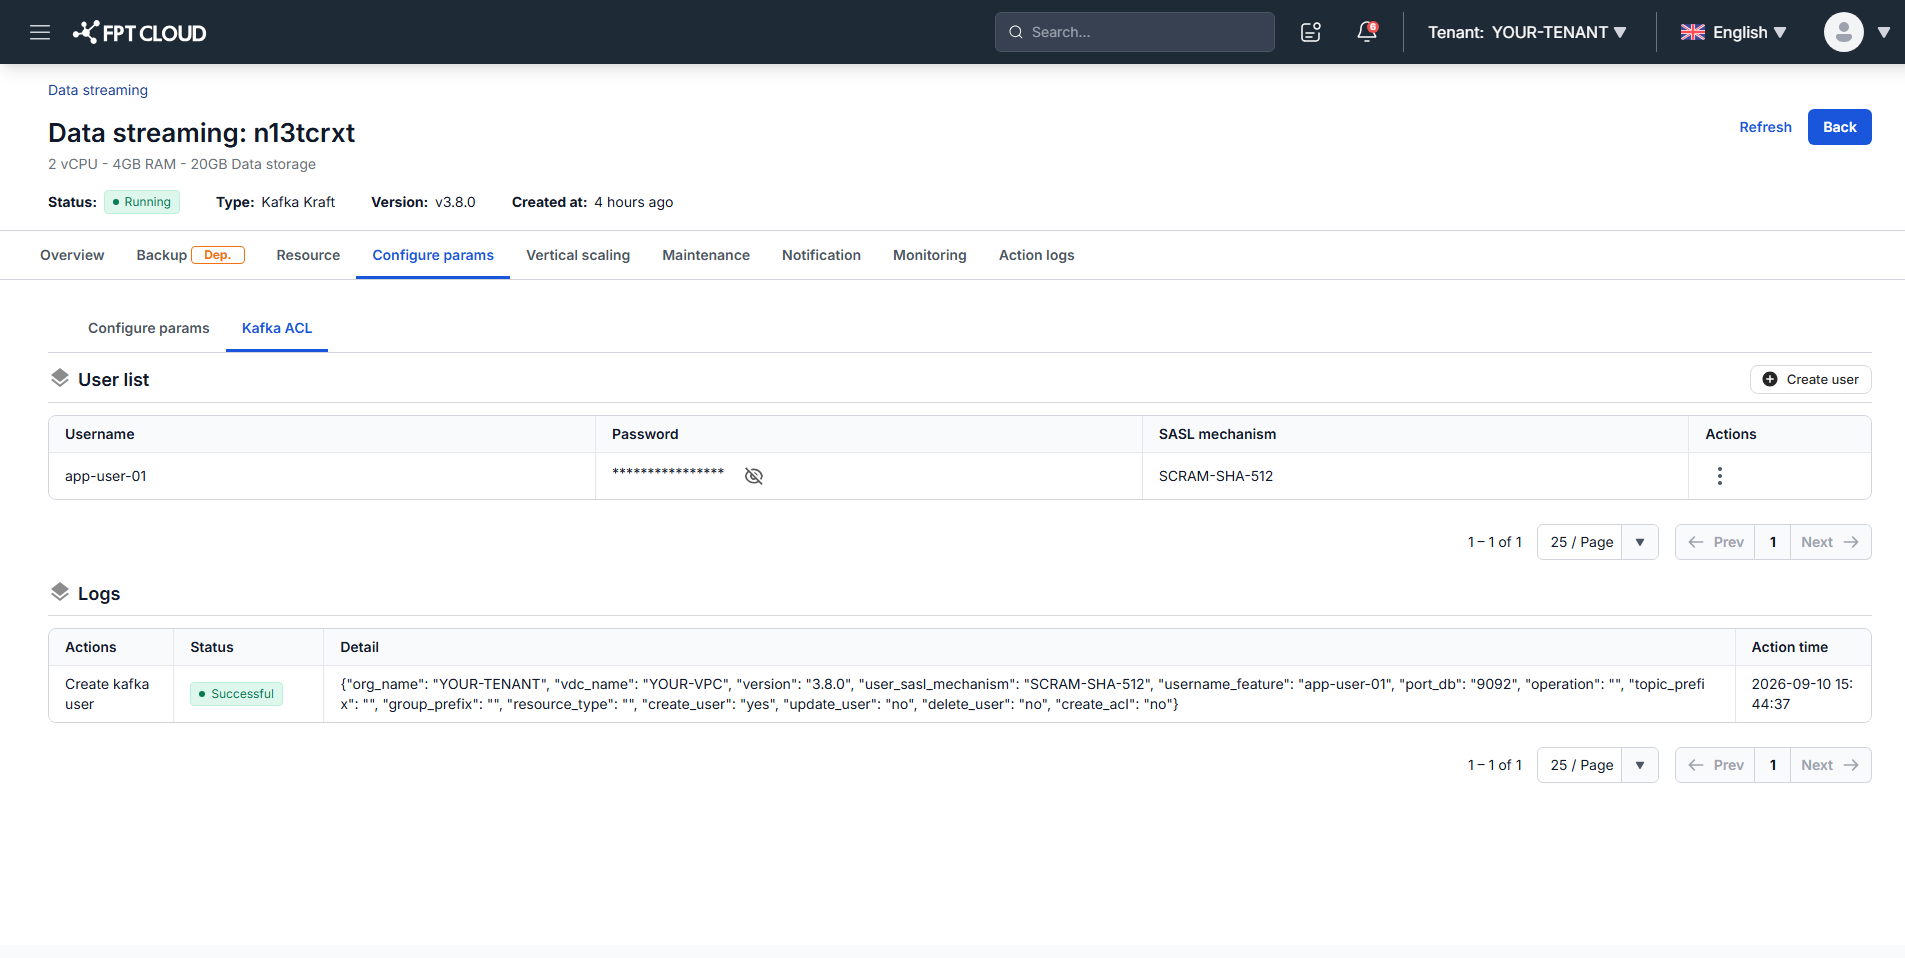
The User List shows each user's Username, its masked Password, and its SASL mechanism.
-
In the User List section, click the Add user plus icon.
-
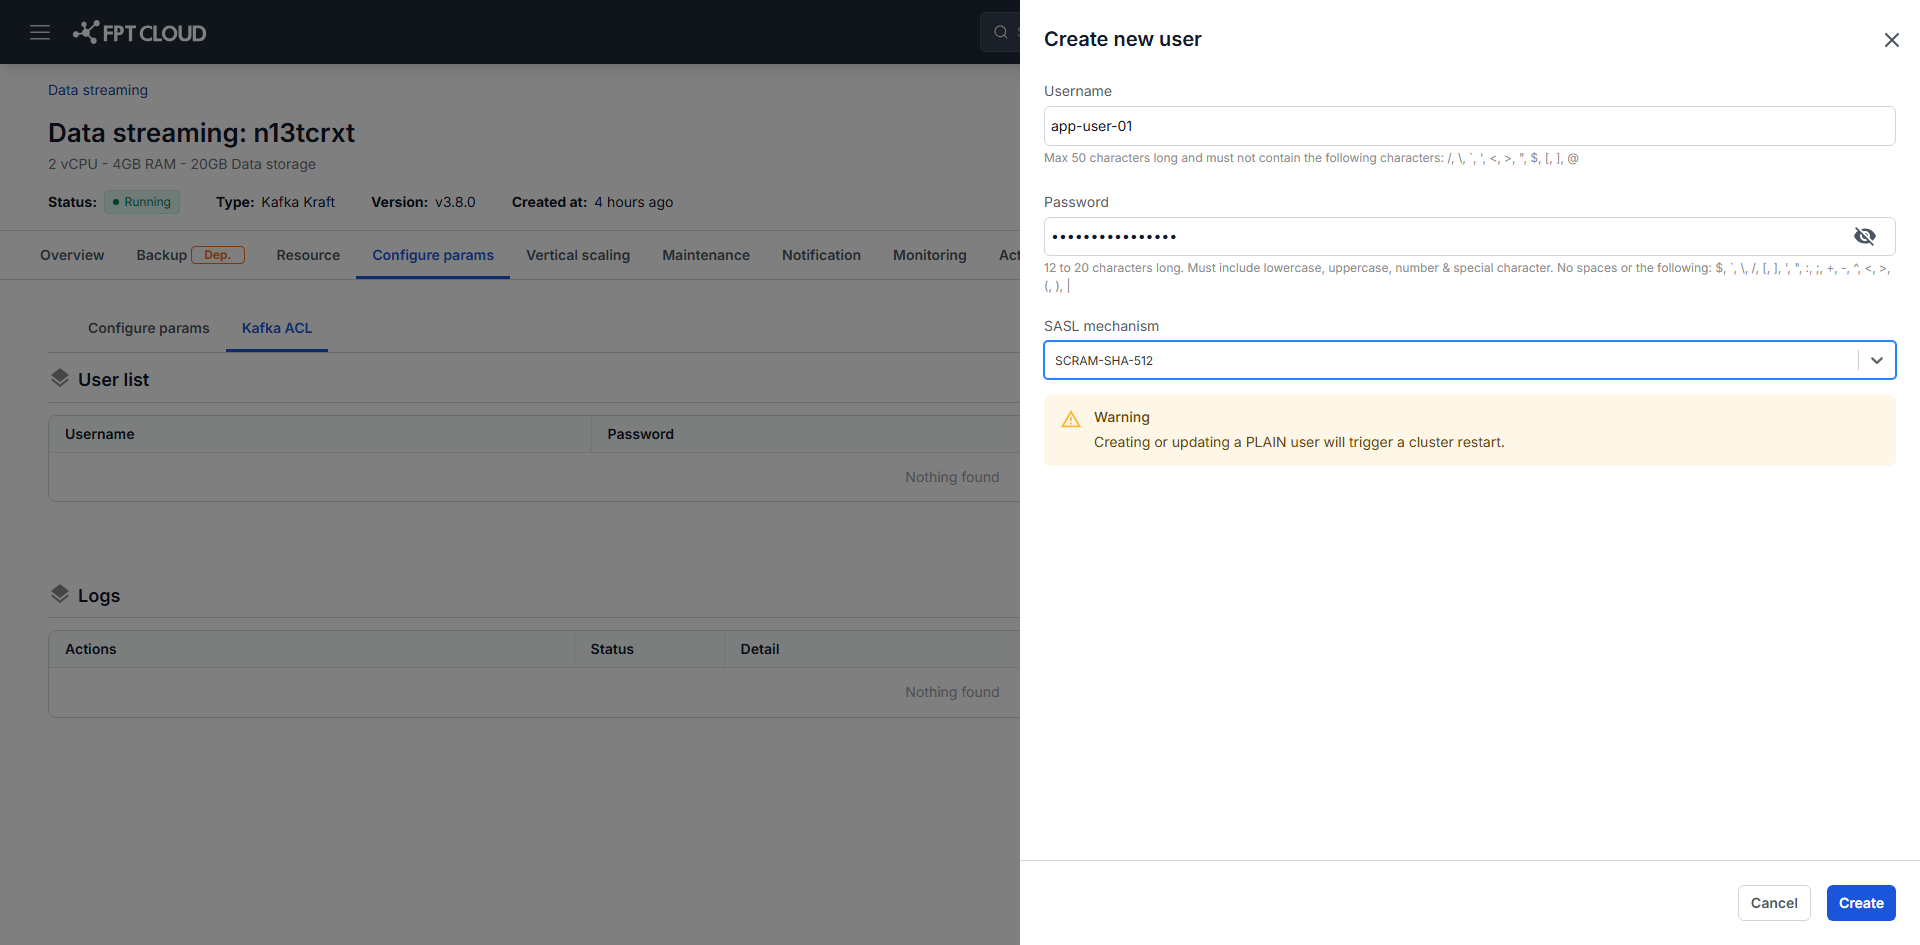
Fill in the fields:
- Username: the Kafka principal. Maximum 50 characters, excluding
/ \ : * ? " < > | [ ]. - Password: 12 to 20 characters, with at least one lowercase letter, one uppercase letter, one number, and one special character. No spaces, and not these characters:
$ \ / [ ] ' " : ; + - ^ < > ( ) | ` - SASL mechanism:
PLAIN,SCRAM-SHA256, orSCRAM-SHA512.
- Username: the Kafka principal. Maximum 50 characters, excluding
-
Click Create.
Creating or updating a user with SASL/PLAIN restarts the Kafka database, which disrupts producers and consumers. Prefer a SCRAM mechanism, or schedule PLAIN changes for off-peak hours.
The user is now available for Kafka client configuration, Kafka Connect, and ACL assignment.
Update or delete a user
In the User List, click Update Password for a user to change its password, or Delete to remove it. Confirm in the dialog.
Grant an ACL
-
In the User List, select Grant ACL for the user.
-
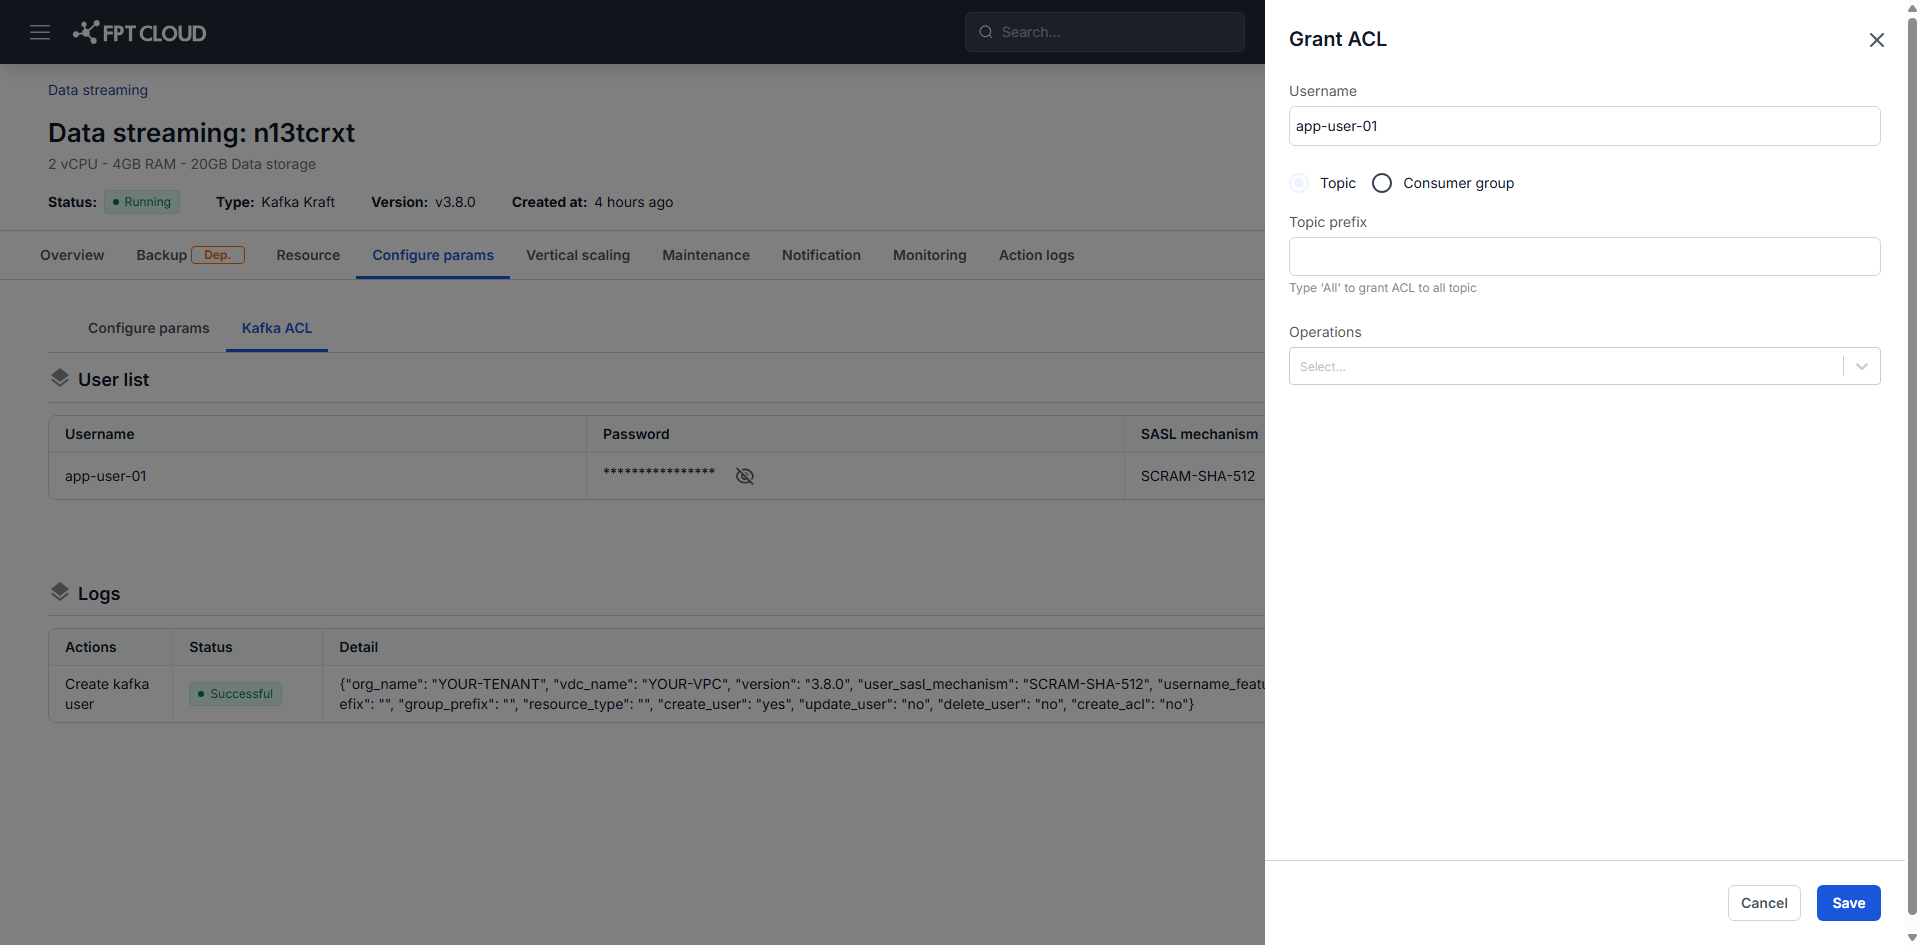
Fill in the fields:
- Username: the selected user, shown read-only.
- Resource Type: Topic for topic access, or Consumer group for consumer group access.
- Topic prefix / Group prefix: the resource prefix the permission covers. Enter
Allto cover every topic or every consumer group. - Operations: the permitted operations, which differ by resource type. See Overview ACL for what each one grants.
-
Click Save.
The ACL takes effect immediately, with no restart. A user can hold multiple ACLs.