Manage database tags
Tags label a cluster so you can group, filter, and account for database resources alongside the rest of your cloud estate. You assign them from the cluster list, choosing from tags that already exist in the Tagging service.
Tagging is a cluster-level operation. Whatever you assign or remove applies to the cluster and to every node inside it, in one action.
Individual nodes cannot be tagged on their own. Node tags always follow the cluster, so there is no way to give one node a tag its siblings do not have.
Prerequisites
- Permission to manage the database cluster.
- A cluster that finished provisioning.
- The tags you want to assign, already created in the Tagging service. See Create a tag.
Open the Manage tags dialog
- From the main menu, select Database Platform → All Database.
- Find the cluster, then click the ⋮ (More actions) icon in the Action column.
- Select Manage tags.
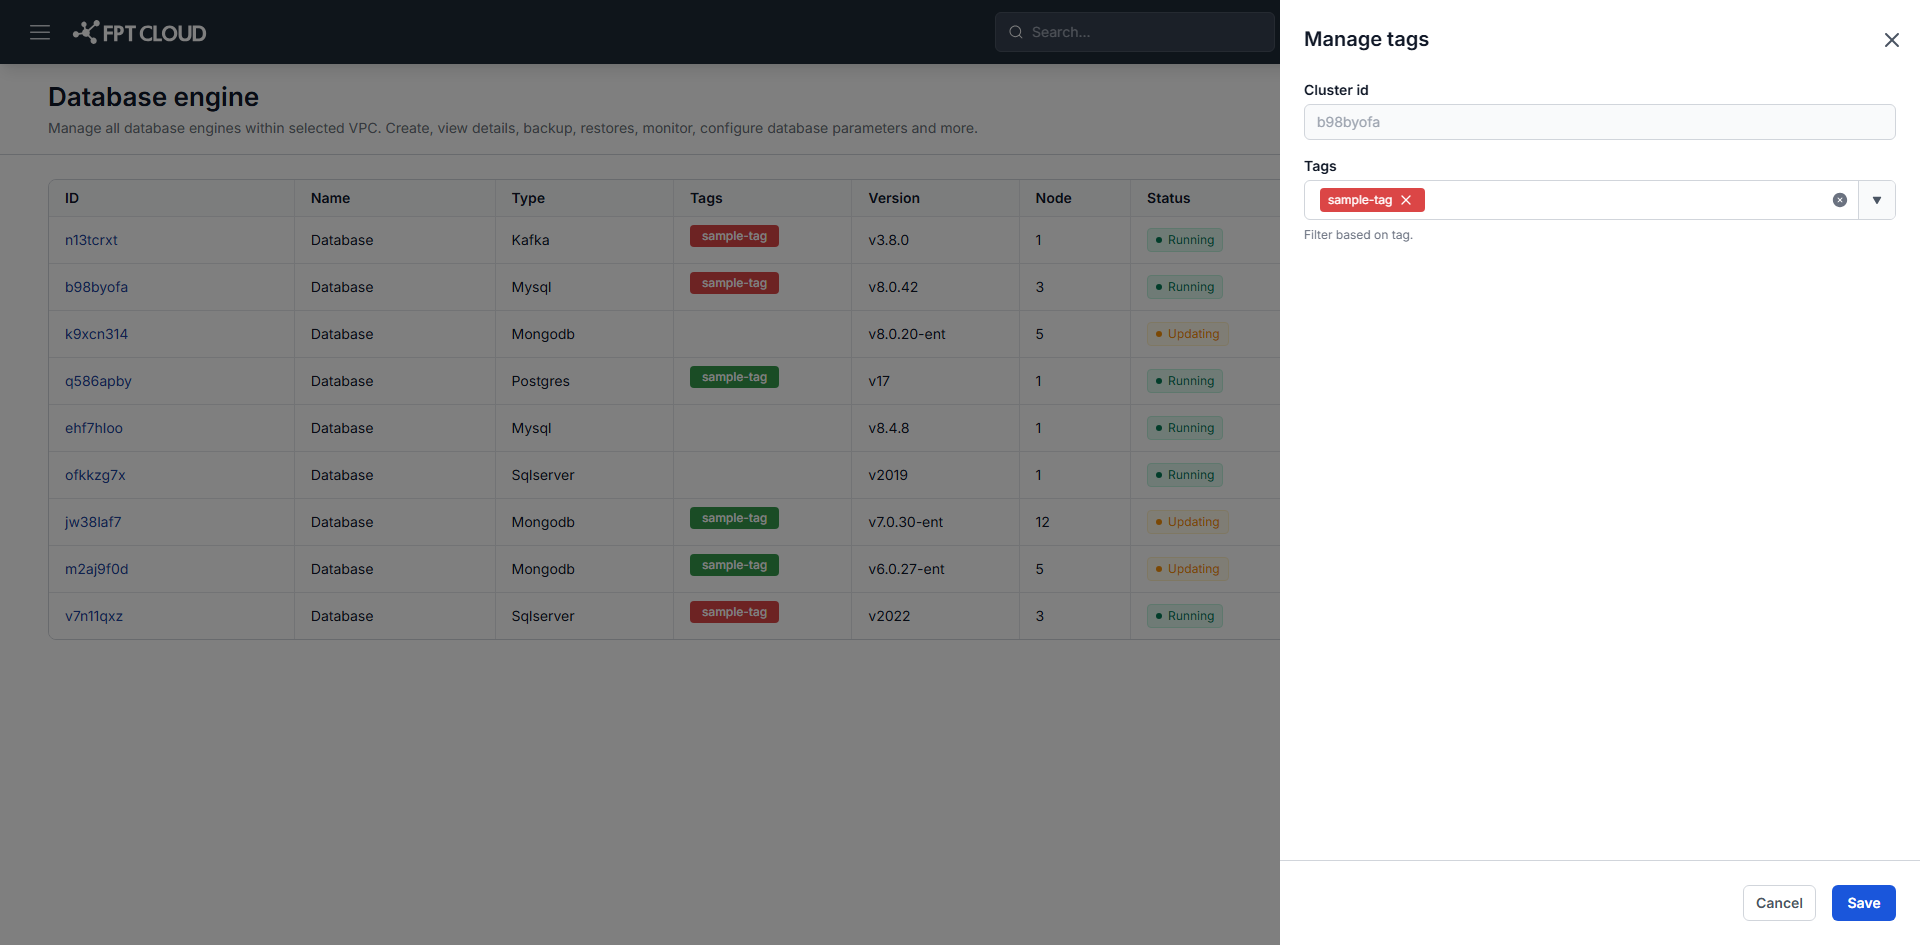
The dialog holds two fields.
| Field | What it does |
|---|---|
| Cluster ID | The cluster you are tagging. Read-only. |
| Tags | The tags assigned to the cluster. Select one or more existing tags, or clear ones you want to remove. |
Assign or remove tags
Both directions use the same dialog, and both take effect the moment the change succeeds.
- Open the Manage tags dialog as above.
- Click the Tags field, then select the tags to assign or clear the ones to remove.
- Click Save. To back out instead, click Cancel, which closes the dialog without changing anything.
Your changes apply to the cluster and propagate to every node in it. Only tags that already exist in the Tagging service appear in the field, so create a tag there first if the one you want is missing.
Next steps
- Tagging Overview for how tags work across FPT Cloud
- View database list, whose Tag column shows what each cluster carries
- Change database resource configuration