Configure triggers
An Auto Trigger starts your Pipeline automatically when a GitLab event happens, instead of you clicking Run Pipeline every time — configuration lives inside the Pipeline Source settings, not a separate step. This tutorial configures a Trigger, then shows how to manage it afterward.
Prerequisites
- You have an account on the FPT Cloud DevOps Platform.
- At least one Pipeline has been created and saved. See Create and configure a pipeline.
- A GitLab Connection is configured.
- You have administrator access to the repository on GitLab.
Auto Trigger currently supports GitLab only. GitHub and Bitbucket support is coming soon.
Enable Auto Trigger
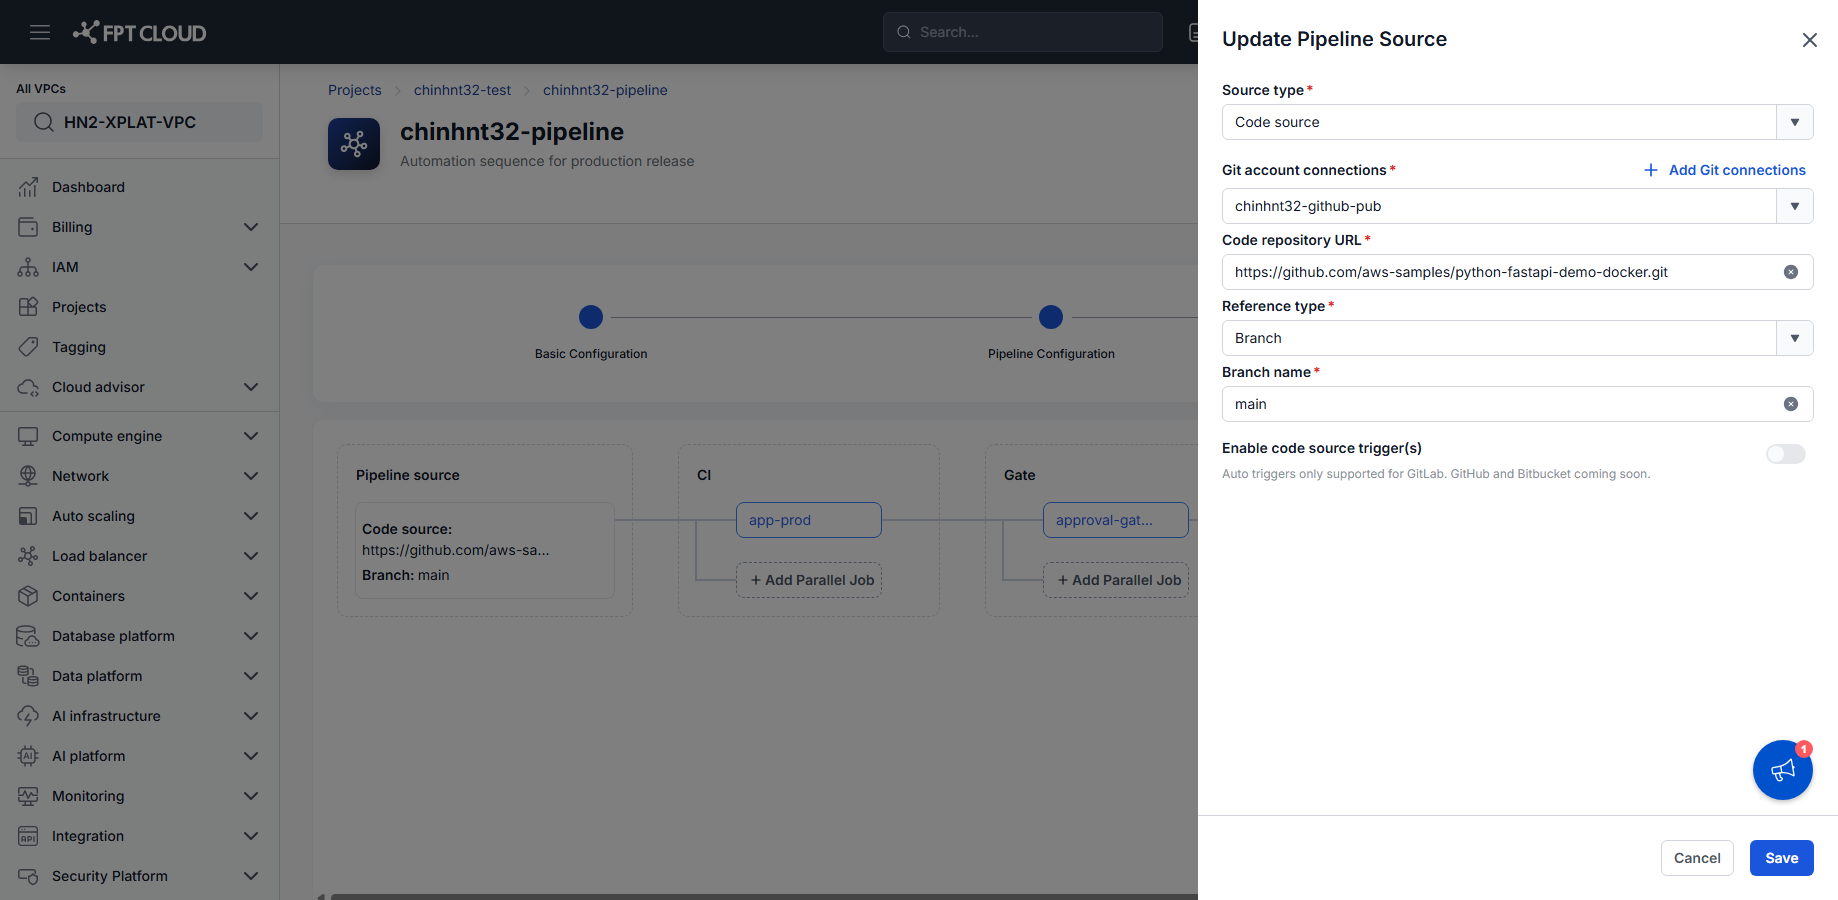
- While configuring the Pipeline, open the Pipeline Source card, or click the Edit icon on the Triggers step summary.
- In Update Pipeline Source, confirm the Git account connection uses a GitLab repository.
- Turn on Enable code source trigger(s).
The toggle stays disabled with a "coming soon" note when the connected repository is GitHub or Bitbucket. Once enabled, the event and branch filter options appear in the same panel.
Select event types
You must select at least one event type under Enable triggers for. See Triggers reference for the full table.
The Pipeline runs whenever the selected event occurs — for example, a Push for continuous integration, or a Tag push for a release Pipeline.
Configure a Branch Filter
After you select an event type, choose how the Trigger applies to branches under Applied to branches:
-
All branches — the default. Every branch matching the selected events triggers the Pipeline.
-
Filtered branches by name — add branch names under Name included and Name excluded (press Enter after each name). Leave Name included empty to match all branches except those under Name excluded.
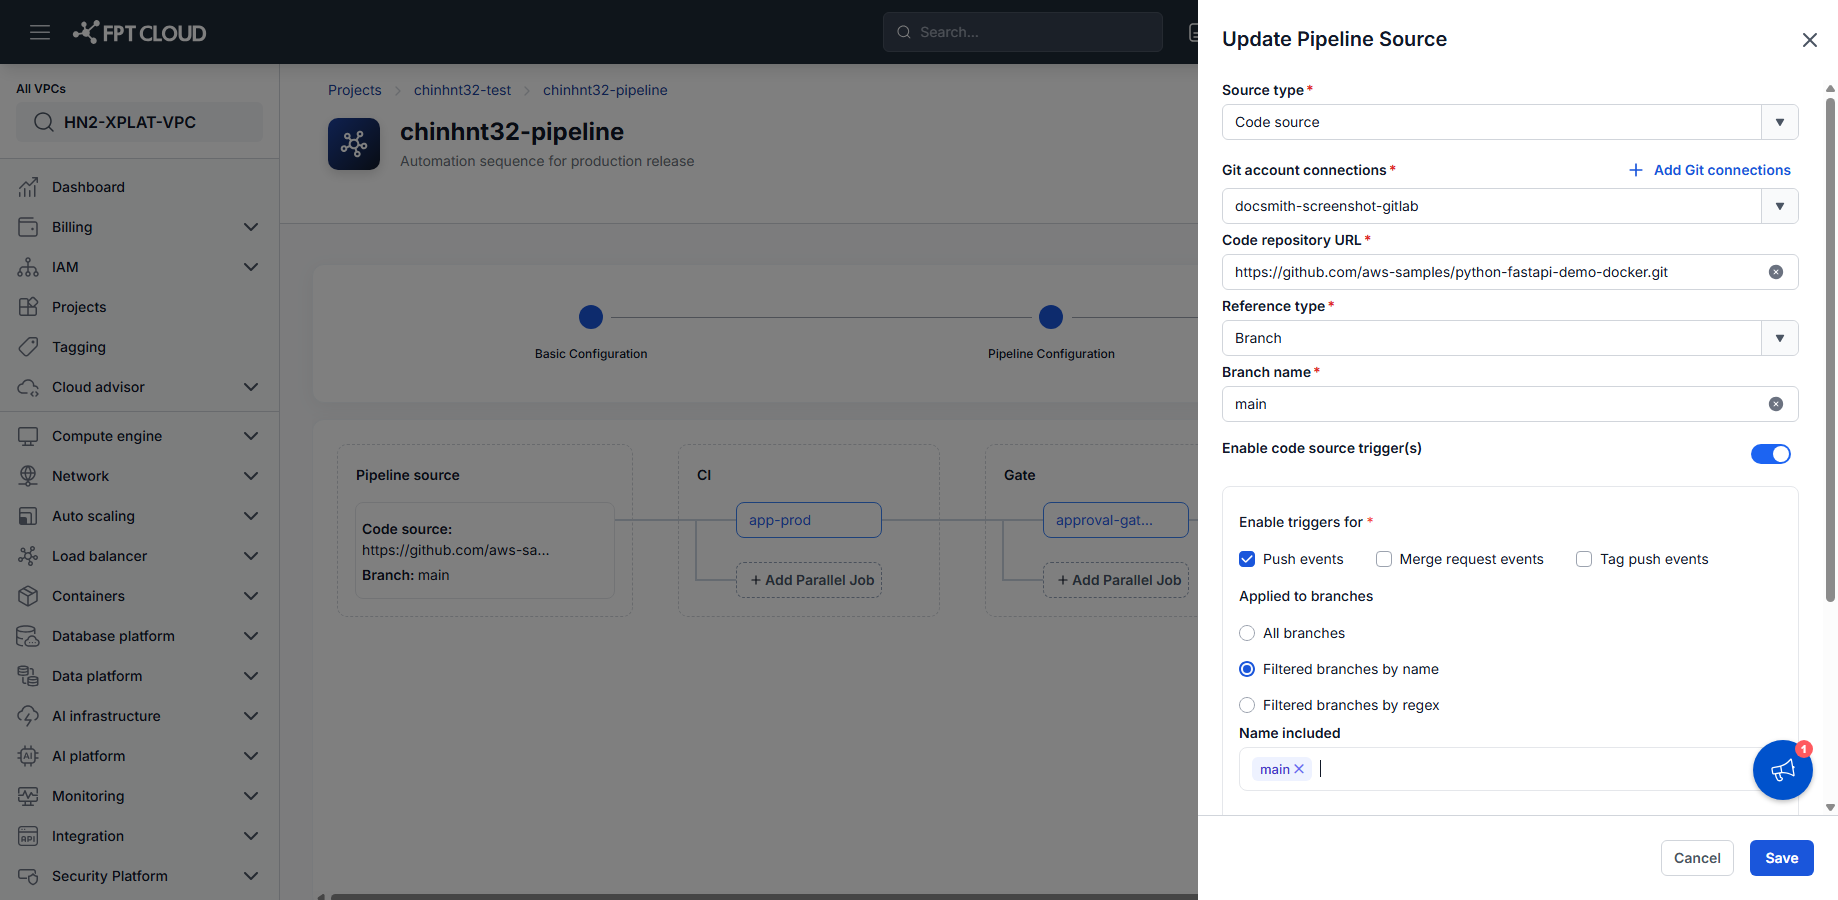
-
Filtered branches by regex — enter a pattern in Source Branch Regex and, if needed, Target Branch Regex. See Triggers reference for pattern examples.
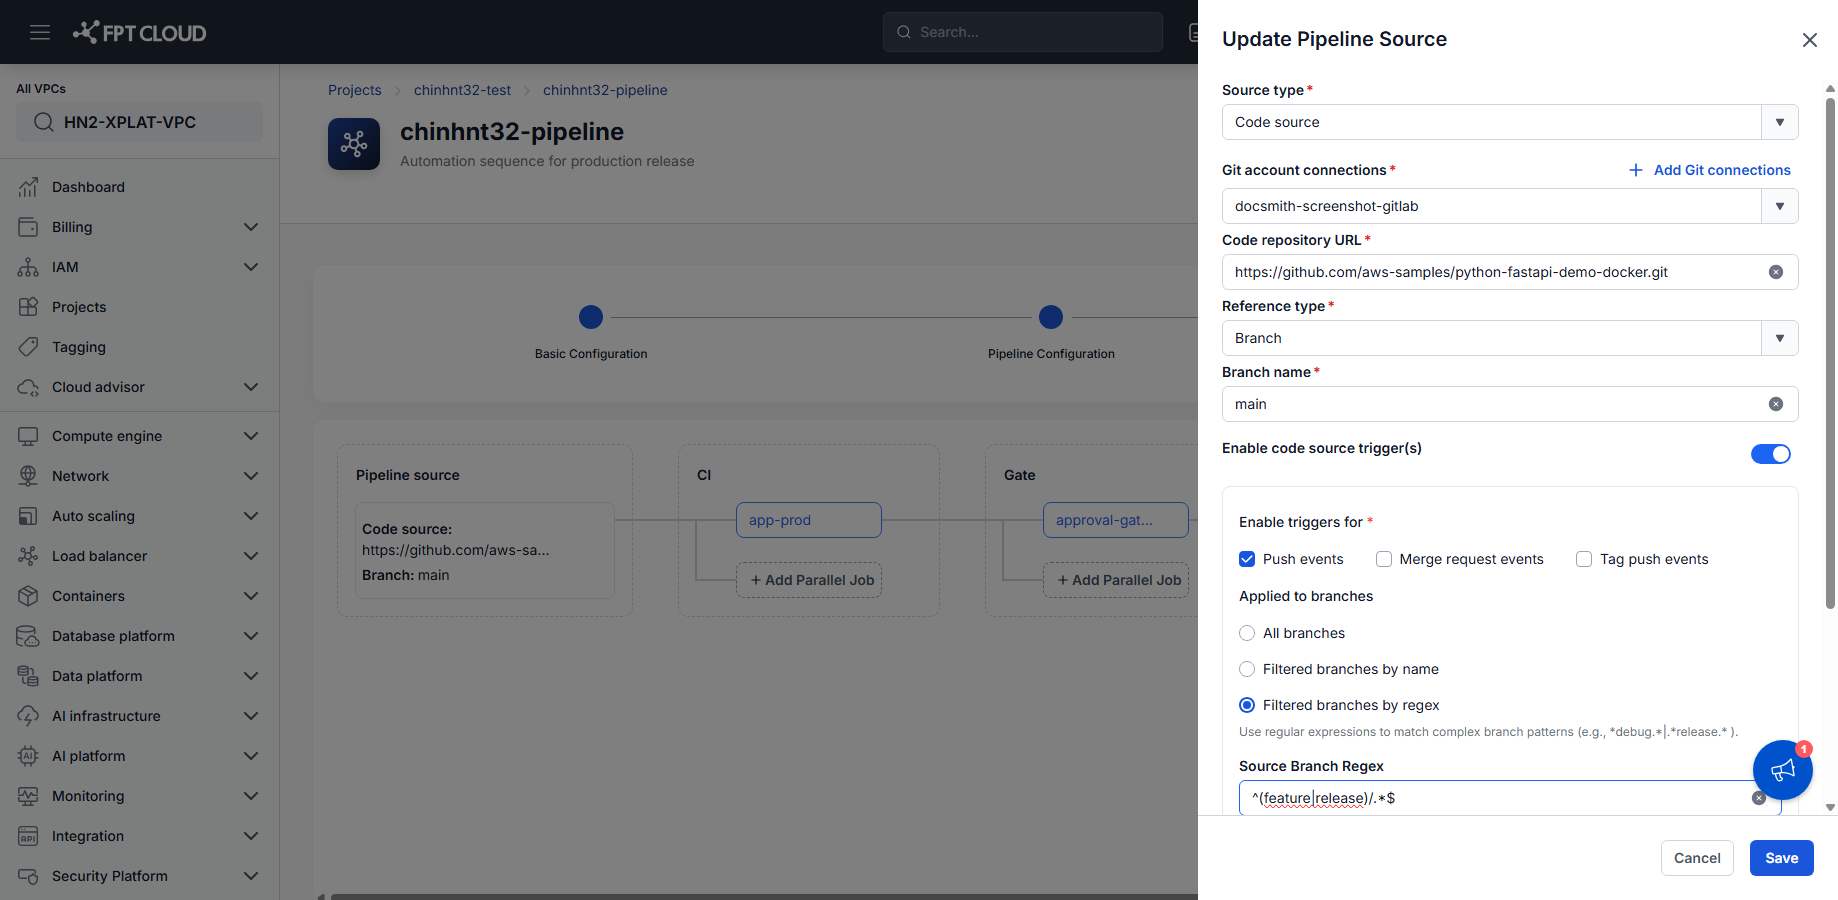
Only one option applies at a time — switching to a different one replaces the current filter.
The regex fields don't validate the pattern as you type. Double-check the syntax before saving.
Register the Webhook in GitLab
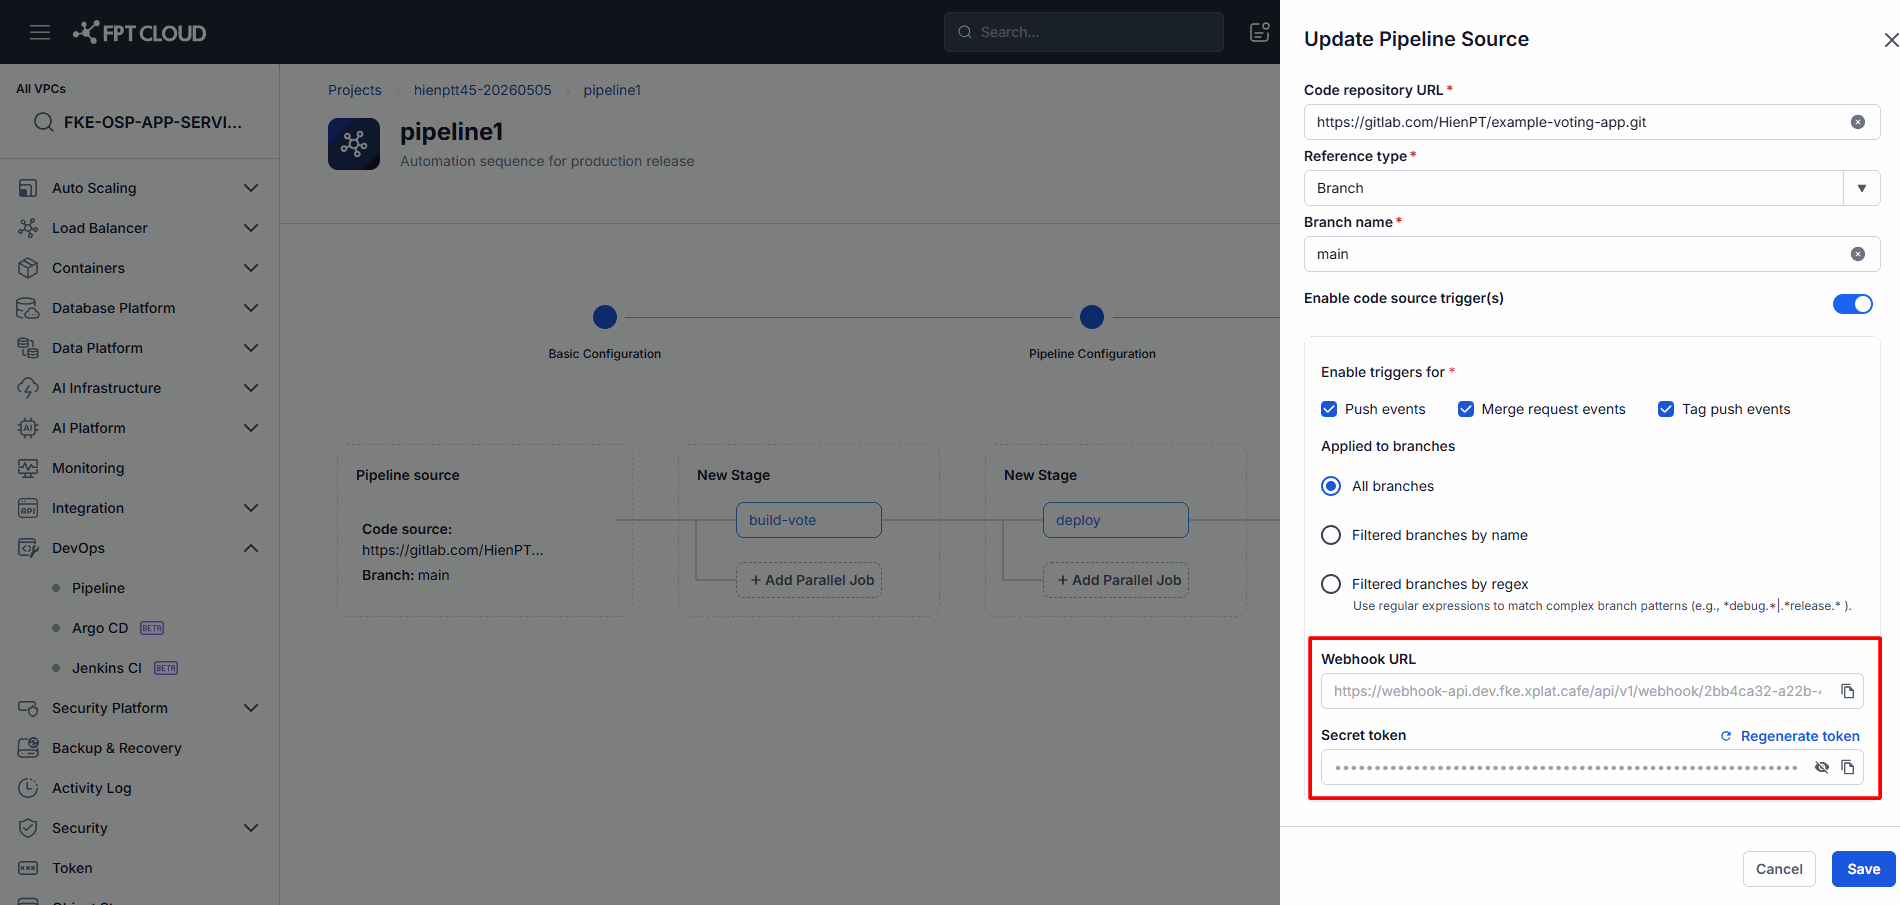
The system generates a Webhook URL and Token automatically in the same panel — you cannot edit these directly.
- Copy the Webhook URL.
- Copy the Token.
- Open the GitLab repository, then go to Settings → Webhooks.
- Create a new Webhook and paste the URL and Token.
- Select the relevant events.
- Click Add Webhook.
GitLab can now send events to FPT Cloud DevOps Platform, and the Pipeline triggers automatically on a matching event.
Manage an existing Trigger
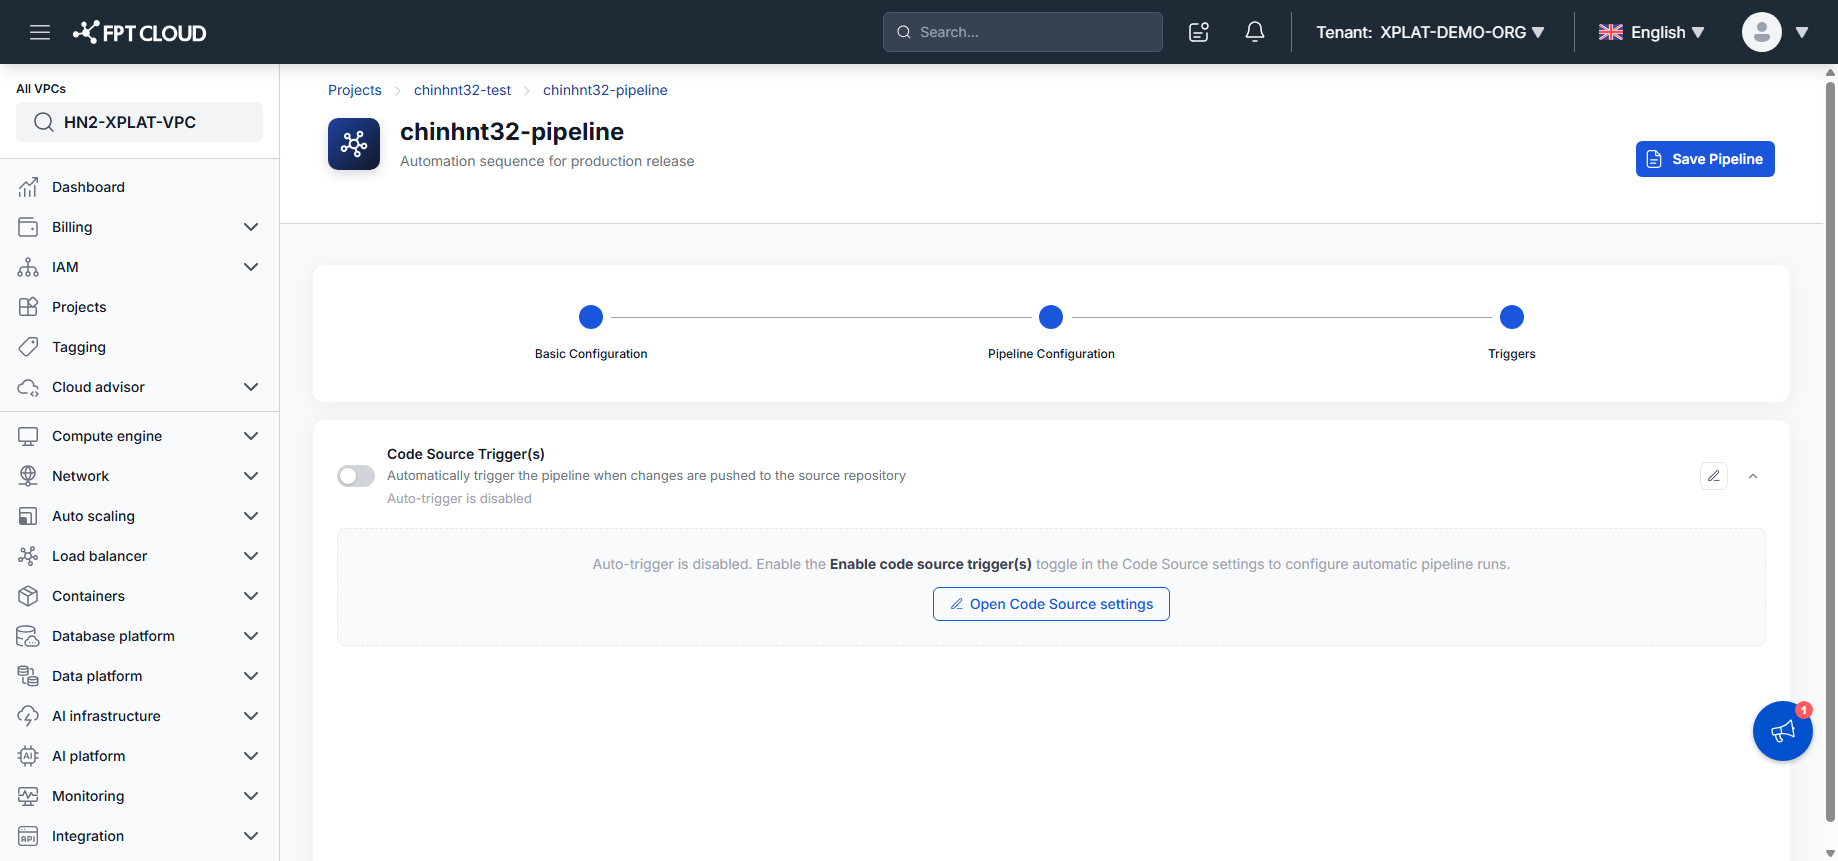
The Triggers step shows a read-only summary of the current configuration — whether Auto Trigger is enabled, plus a shortcut to change it.
Edit a Trigger
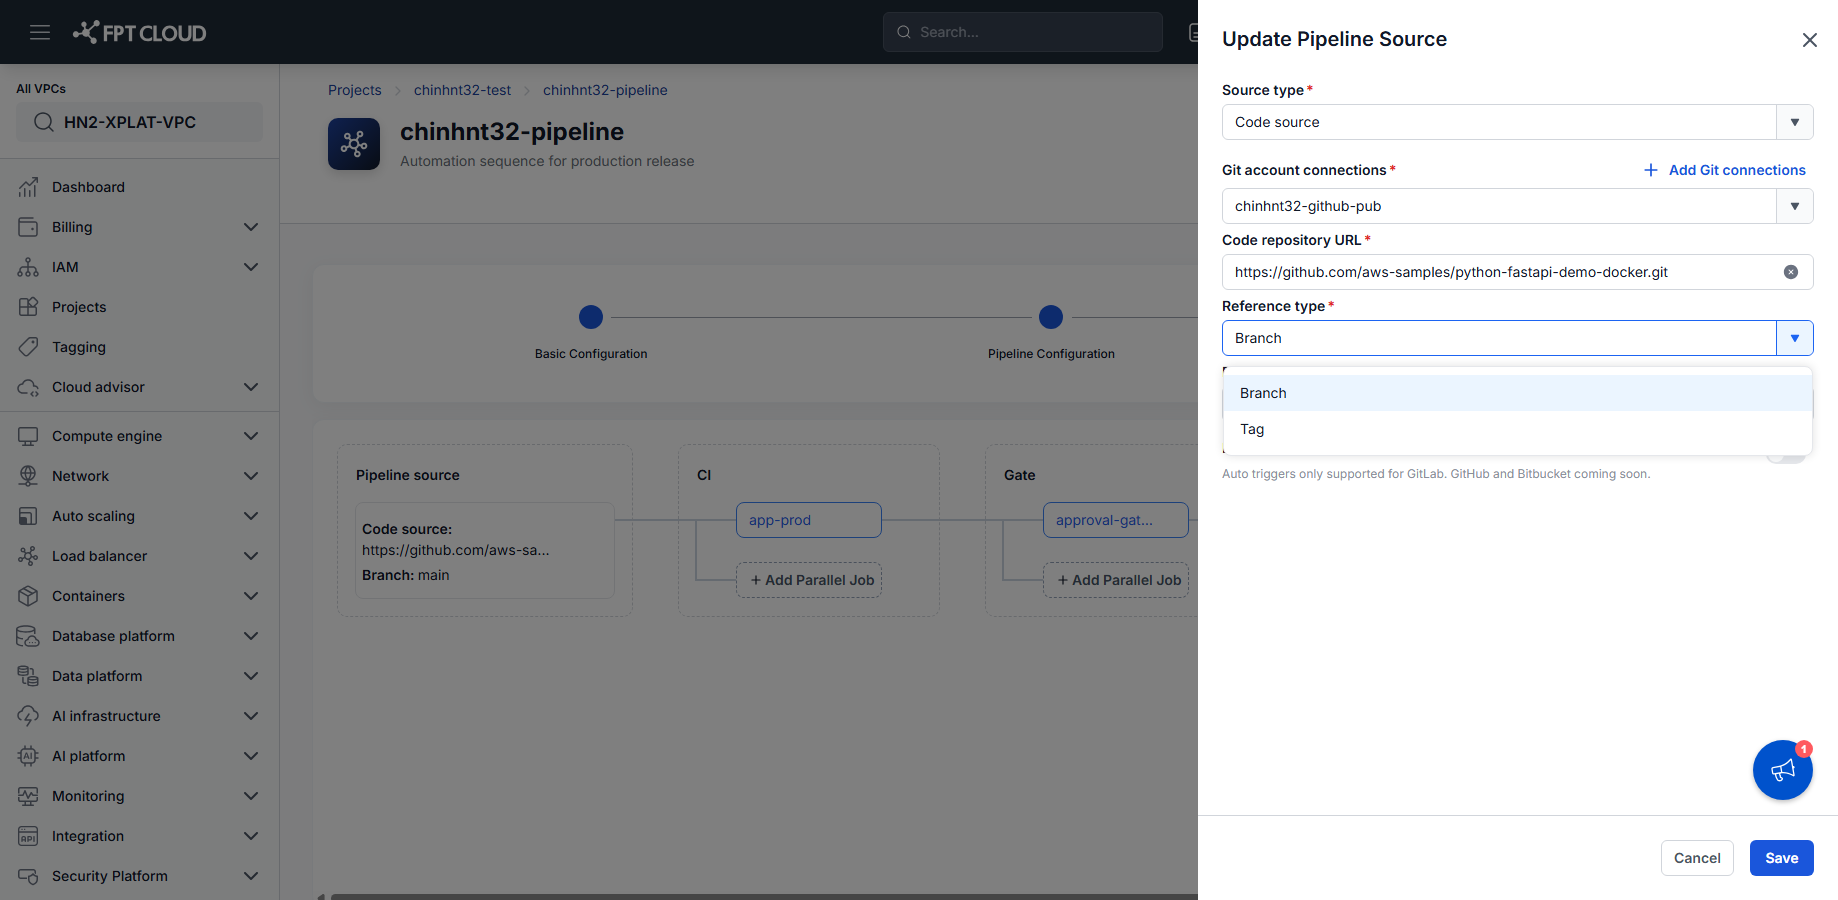
- On the Triggers step, click the Edit icon to reopen the same Update Pipeline Source panel used for initial configuration.
- Update the event types, branch filter, or toggle.
- Click Save, then Save Pipeline.
Regenerate the Token
- Open Update Pipeline Source via the Edit icon on the Triggers step.
- Click Regenerate token next to the Secret token field, then confirm if prompted.
The old Token is invalidated immediately. Update the new Token in the GitLab Webhook right away, or the Webhook stops working.
Next steps
- Run and monitor a pipeline — see a Trigger-started run in progress.
- Triggers reference — event type, Branch Filter, and Webhook field reference.