Deploy config & deploy application
This tutorial configures a Kubernetes deploy Job — the Deploy job type from the Add Job catalog — that deploys an application to a Kubernetes environment using a Rolling Update strategy. Once configured, you select an image version, trigger the deployment, monitor progress, and re-deploy when needed.
Prerequisites
- You have permission to edit the Pipeline.
- The Pipeline has been created and saved. See Create and configure a pipeline.
- The Pipeline already has a Build Job or uses a Registry Source.
- An Environment (Kubernetes cluster) is configured, and you have access to it. See Manage environments if you don't have one yet.
Deployment currently supports the Rolling Update strategy only.
Add a Deploy Job
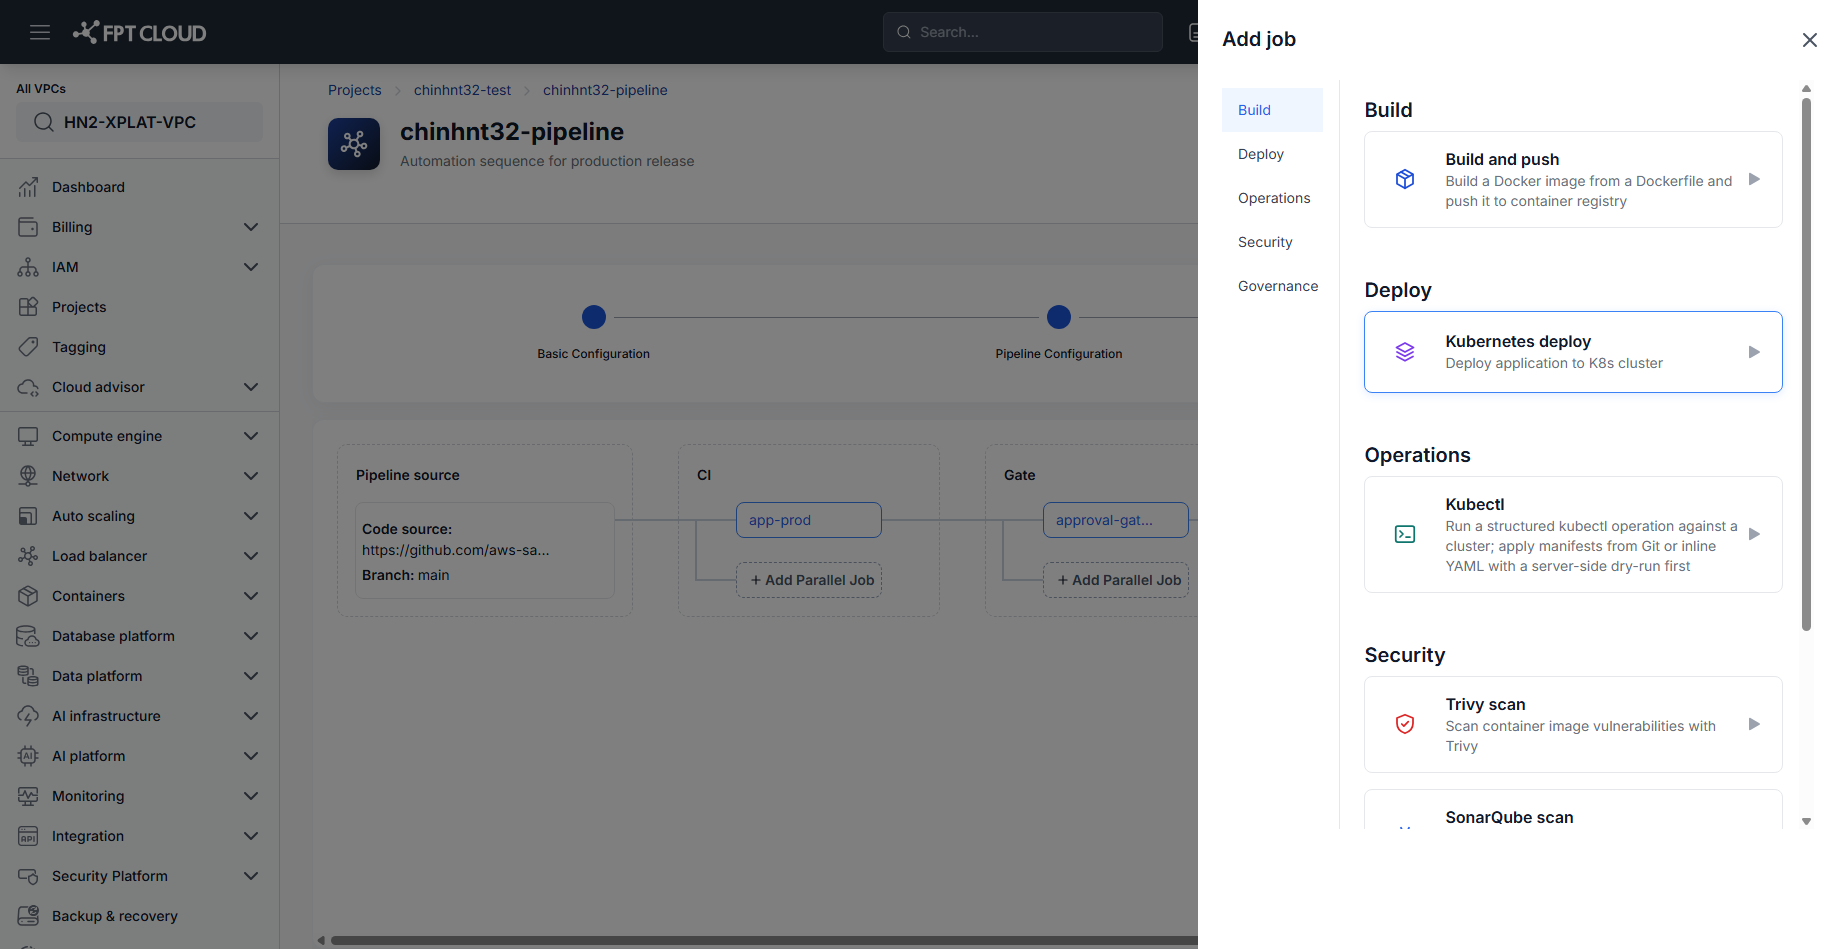
- Open the Pipeline Editor.
- Click Add Job.
- Under Deploy, select Kubernetes deploy.
The Edit Job Deploy panel opens. Every setting for the Deploy Job — basic info, environment, strategy, Values YAML, ConfigMaps, and Secrets — lives in this single panel, not a series of separate screens.
Fill in the basic settings
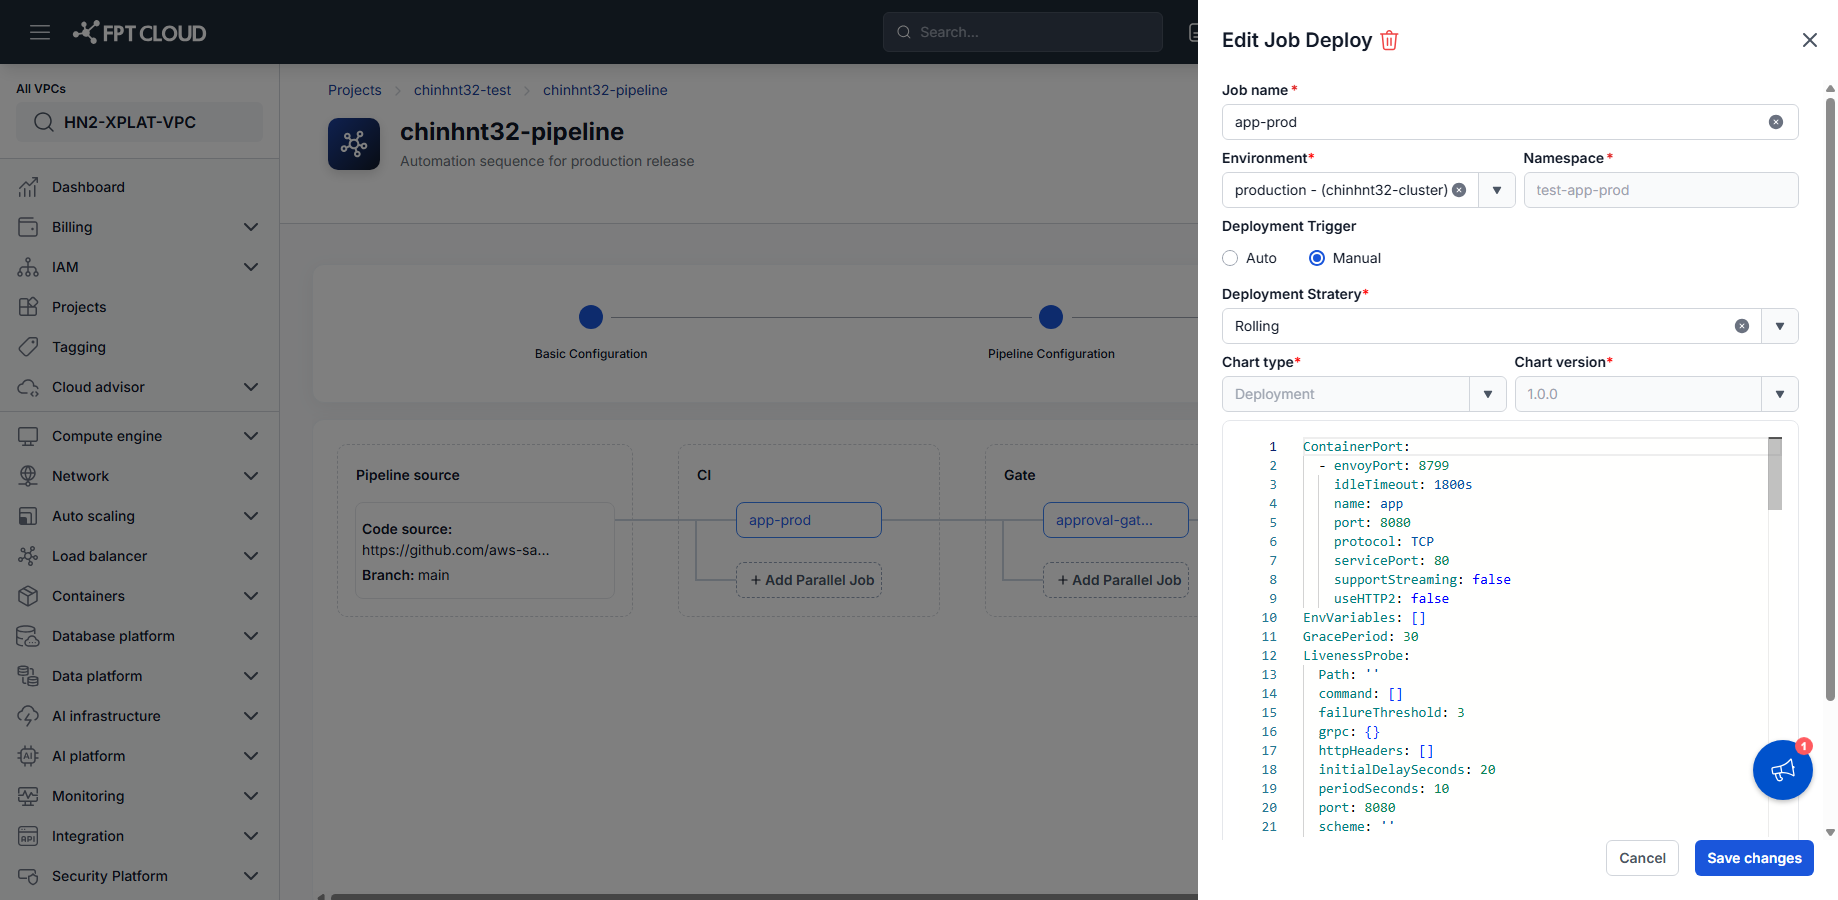
- Enter the Job name.
- Select the target Environment and its Namespace.
- Select the Deployment Trigger: Manual (you start the deploy) or Auto (the system deploys automatically when the Pipeline completes successfully). See Deploy configuration reference for both values.
- Select Rolling as the Deployment Strategy — the only strategy currently supported.
- Select the Chart type and Chart version.
Only Environments that have been configured for the Project appear in the list. Chart versions are pulled from the configured Helm Chart Repository.
Configure the Values YAML
- Enter or edit the Values YAML.
- Review the configuration content.
- Confirm the YAML is valid.
The editor starts pre-filled with a default schema covering container ports, environment variables, and a liveness probe. See Deploy configuration reference for the full field list.
Invalid YAML cannot be saved.
Configure a ConfigMap (optional)
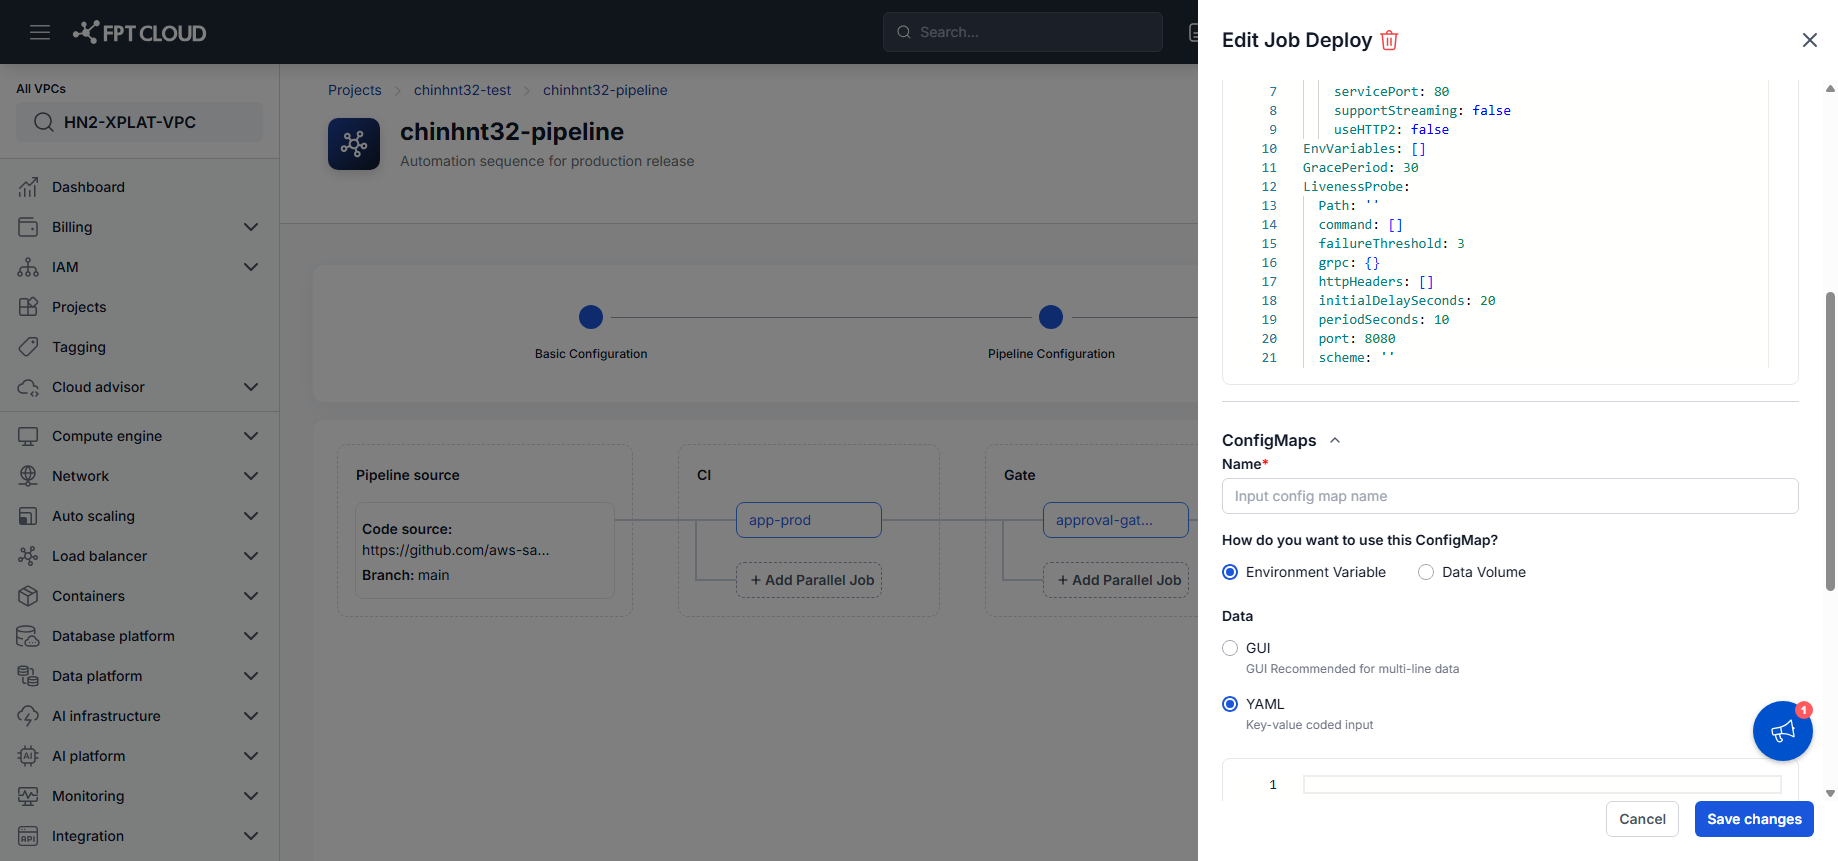
- Open the ConfigMap section.
- Enter the ConfigMap name.
- Select the ConfigMap usage method and data input format. See Deploy configuration reference for the available types.
- Enter the configuration data.
The ConfigMap links to the Deployment.
You can add multiple key/value pairs within a single ConfigMap.
Configure Secrets (optional)
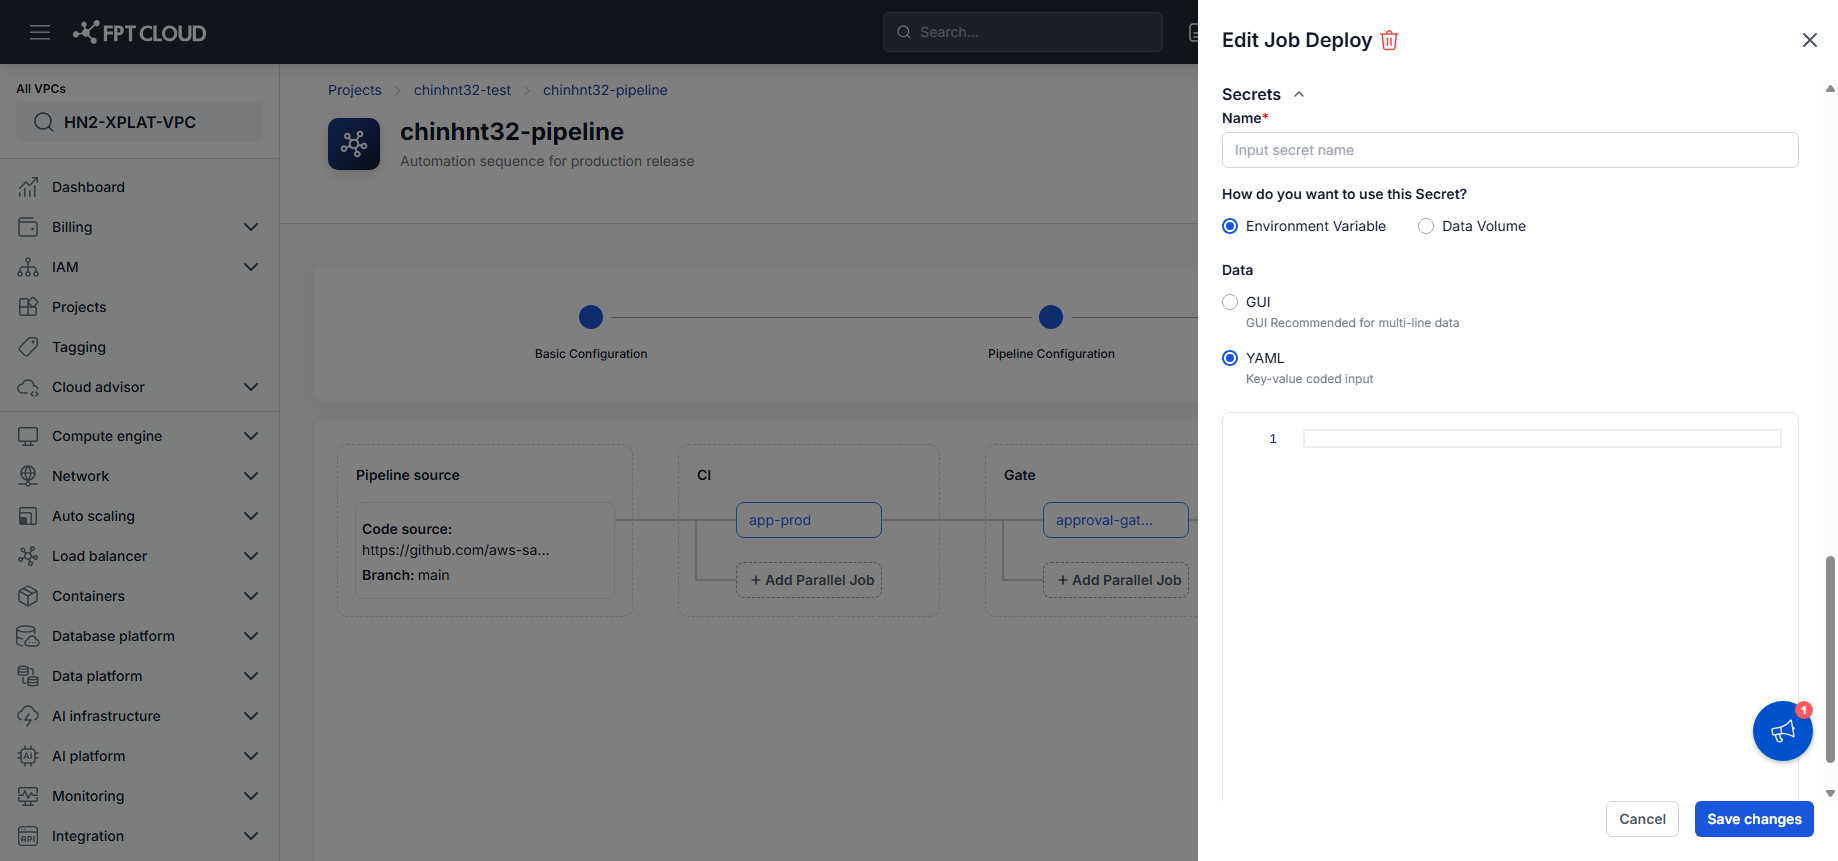
- Open the Secrets section, directly below ConfigMaps.
- Enter the Secret name.
- Select how to use the Secret and its data format — the same options as ConfigMap. See Deploy configuration reference for the available types.
- Enter the secret data.
Secrets work the same way as ConfigMap, but are intended for sensitive values (passwords, tokens, keys) instead of regular configuration.
You can add multiple key/value pairs within a single Secret, same as ConfigMap.
Save the deployment configuration
- Review all configuration details.
- Click Save changes.
The Deploy Job appears in the Pipeline, ready to execute a deploy.
Deploy the application
Open the Deploy Job
- Go to the Project.
- Open the Pipeline to deploy.
- Select the configured Deploy Job.
The Deployment information is displayed, and you can now start a deploy.
Select the image version
- Select the Image Repository.
- Select the Image Version to deploy.
Confirm the correct Image Version before deploying.
Start the deployment
- Click Deploy.
- Confirm the action if prompted.
A new Deployment Run is created and begins executing.
Monitor deployment progress
While deploying, you can track Deployment Status, Environment, Namespace, Image Version, Start Time, and Duration. See Deploy configuration reference for what each status value means.
Re-deploy an application
- Open a completed Deployment.
- Click Re-deploy.
- Confirm the version to deploy.
A new Deployment Run is created and the deployment process repeats.
Re-deploy is useful when you need to redeploy the current version, or after resolving a temporary environment issue.
Automatic deployment
Auto Deploy lets the system deploy your application automatically when the Pipeline completes successfully, with no manual action. Configure it in the basic settings above by setting Deployment Trigger to Auto. When the Pipeline is triggered and its build and processing steps complete successfully, the system creates a new Deployment Run, deploys to the configured Environment, and records the Deploy status in the Pipeline Run.
Auto Deploy is recommended for Development or Staging environments.
Consider carefully before enabling Auto Deploy on a Production environment — it may deploy a new version without any manual action.
Next steps
- Run and monitor a pipeline — track this deployment's Pipeline Run.
- Pipeline history & logs — review past deployments.
- Deploy configuration reference — Deployment Trigger, ConfigMap/Secret Type, Values YAML fields, and Deployment Status field reference.
- Troubleshooting — fixes for common Deploy Config and deployment issues.
- Add an approval gate — require review before this Deploy Job runs.