Manage credentials
Before a Pipeline can pull source code, push images, or run a quality scan, the Project needs a connection to the corresponding service. Credentials are configured once per Project and reused by any Pipeline inside it.
Prerequisites
- You have access to the Project.
- You have permission to manage Project credentials.
Connect a Git account
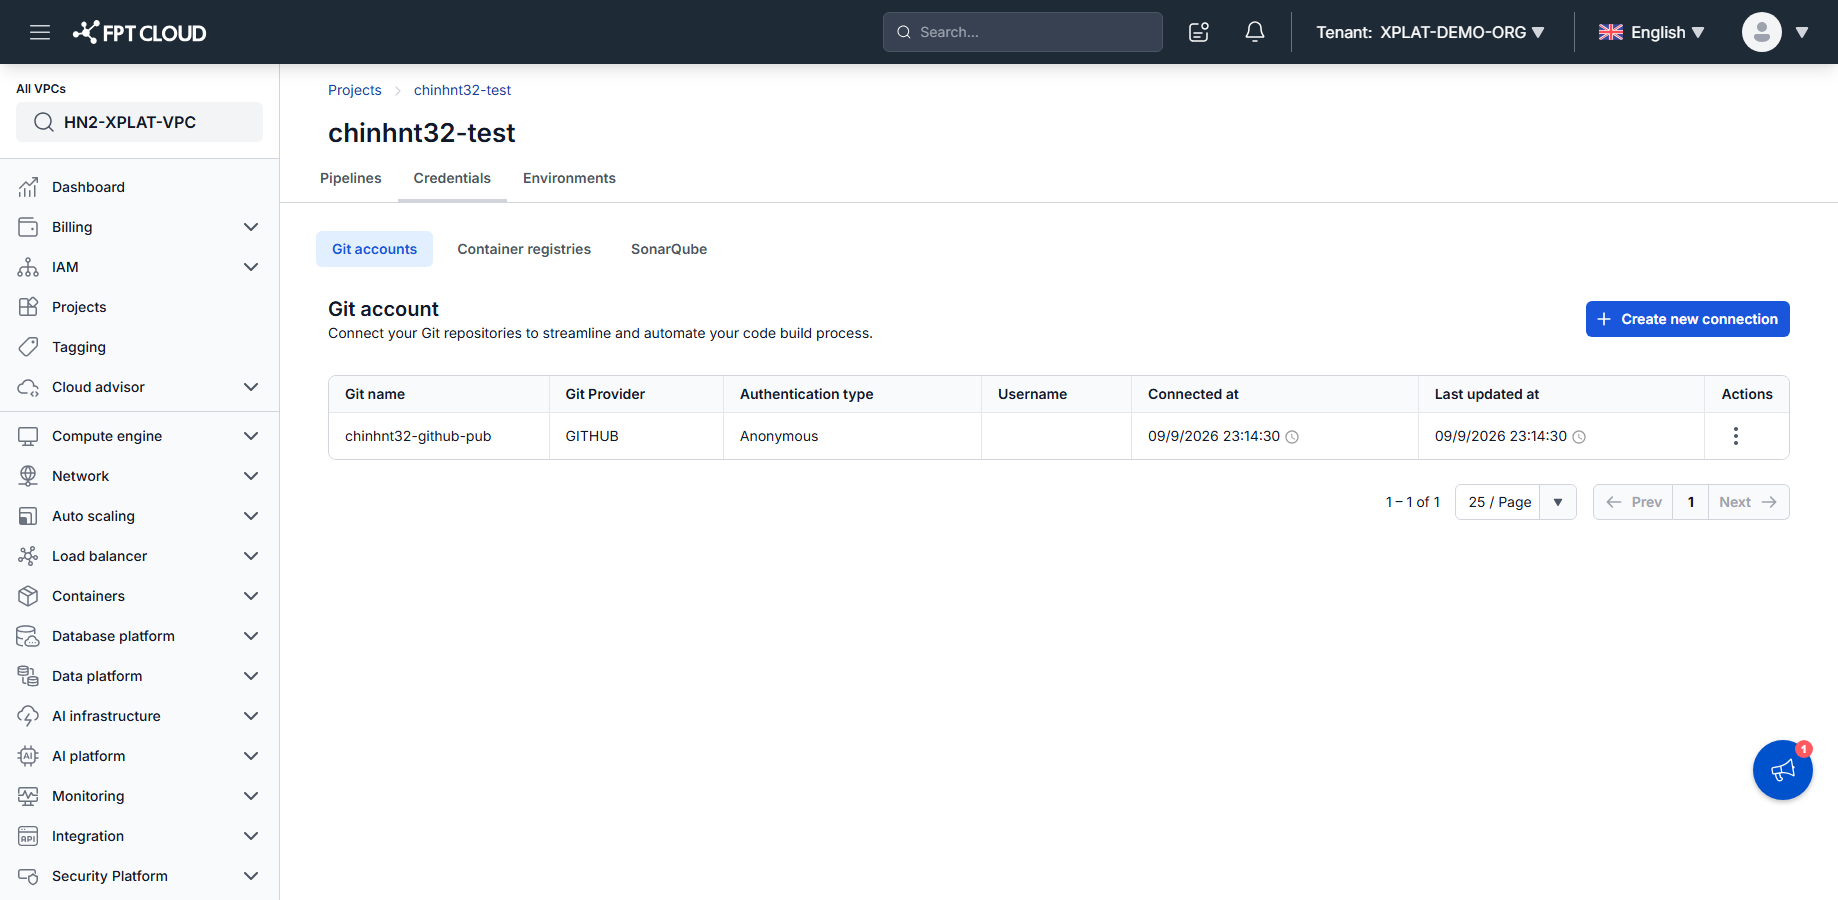
- Open the Project, then go to the Credentials tab.
- On Git accounts, click Create new connection.
- Select the Git provider (GitHub, GitLab, or Bitbucket) and complete the authentication flow.
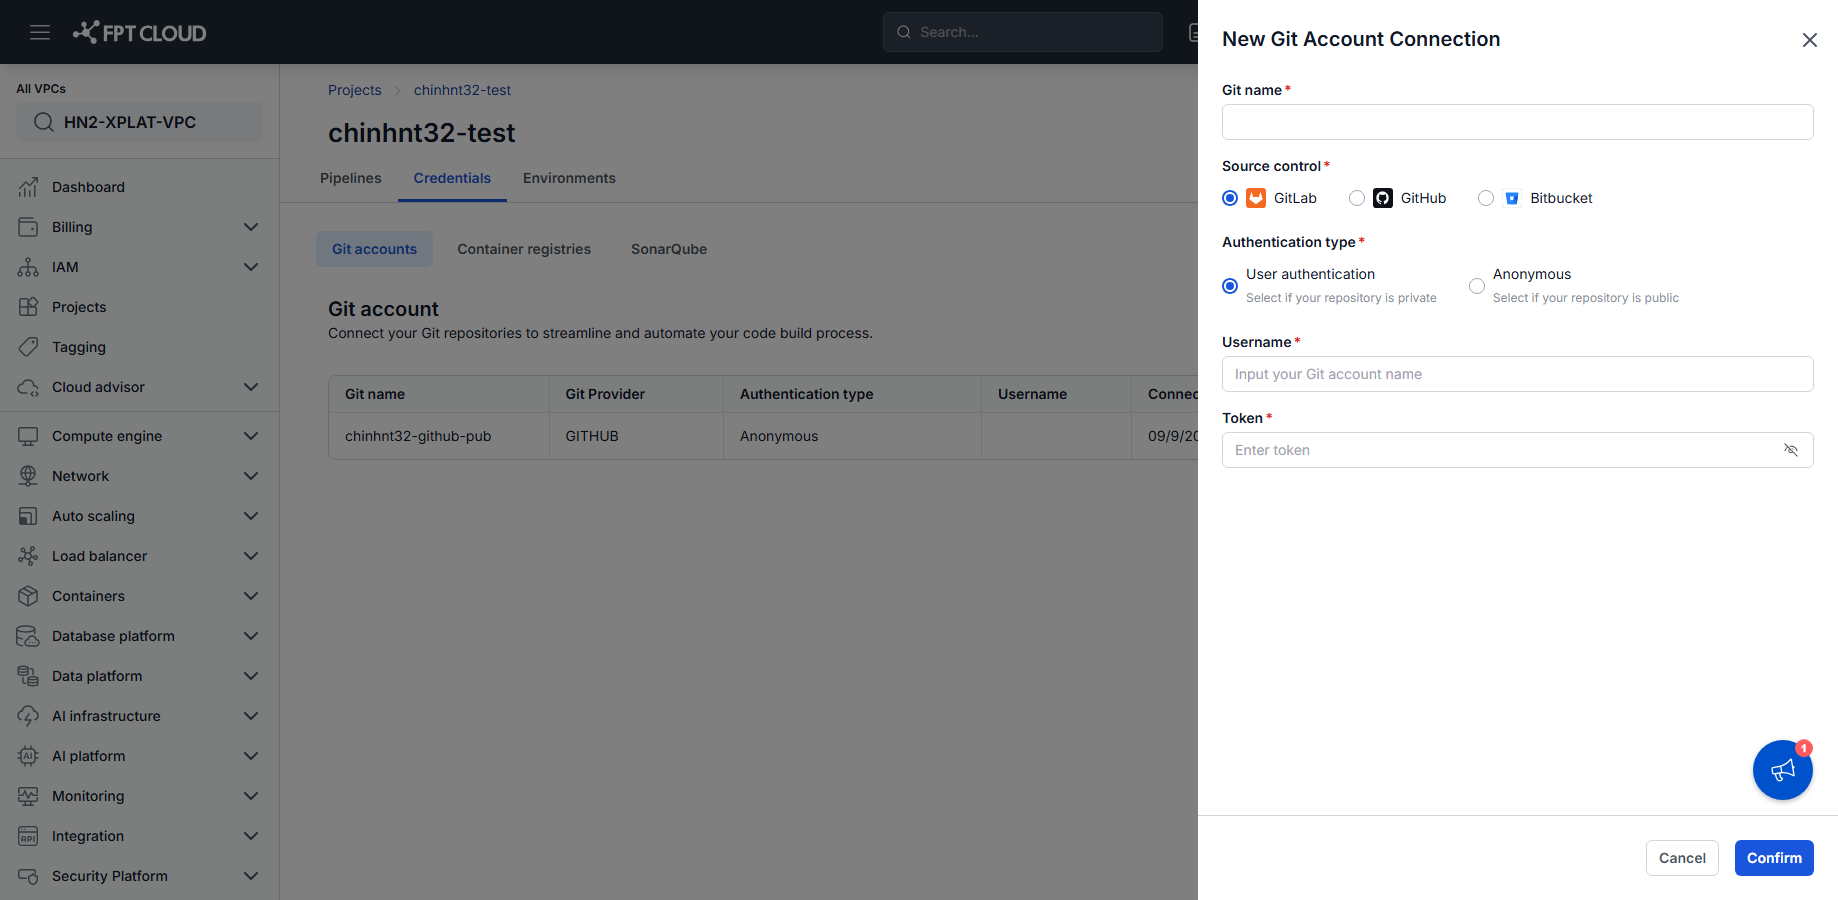
The connection appears in the Git accounts list and becomes available when configuring a Pipeline Source.
tip
Auto Trigger currently supports GitLab only — a GitHub or Bitbucket connection still works for manual and scheduled runs. See Configure triggers.
Connect a container registry
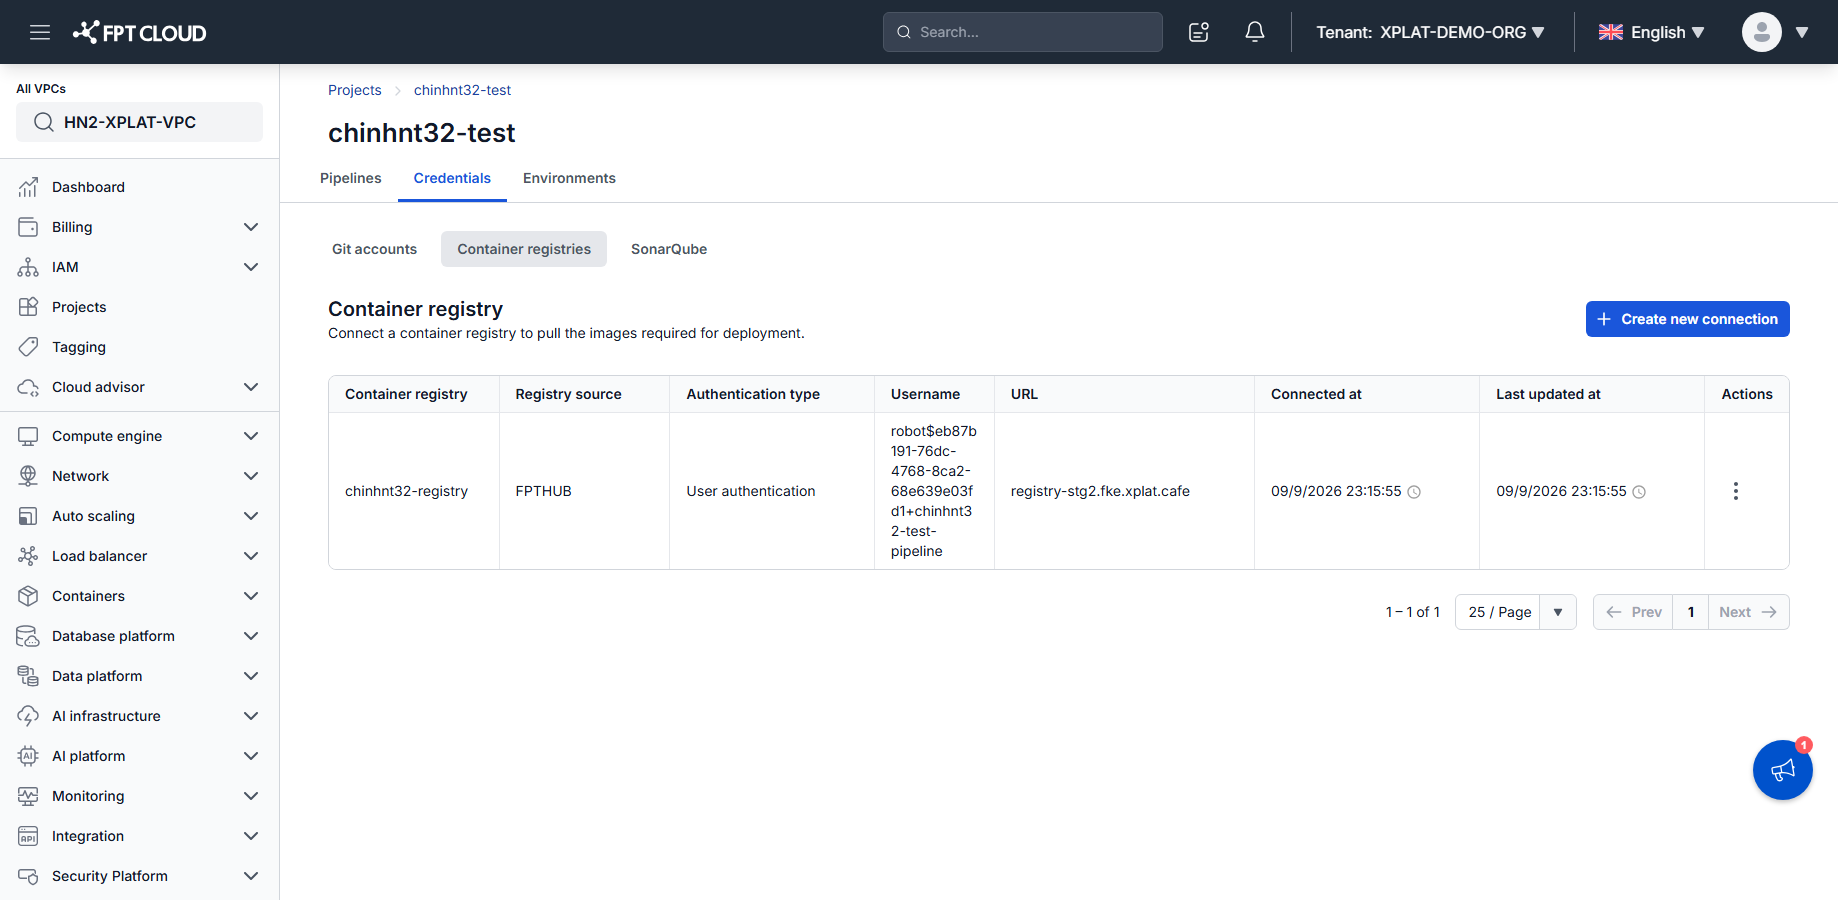
- On the Credentials tab, switch to Container registries.
- Click Create new connection.
- Select the registry source and enter its URL and authentication details.
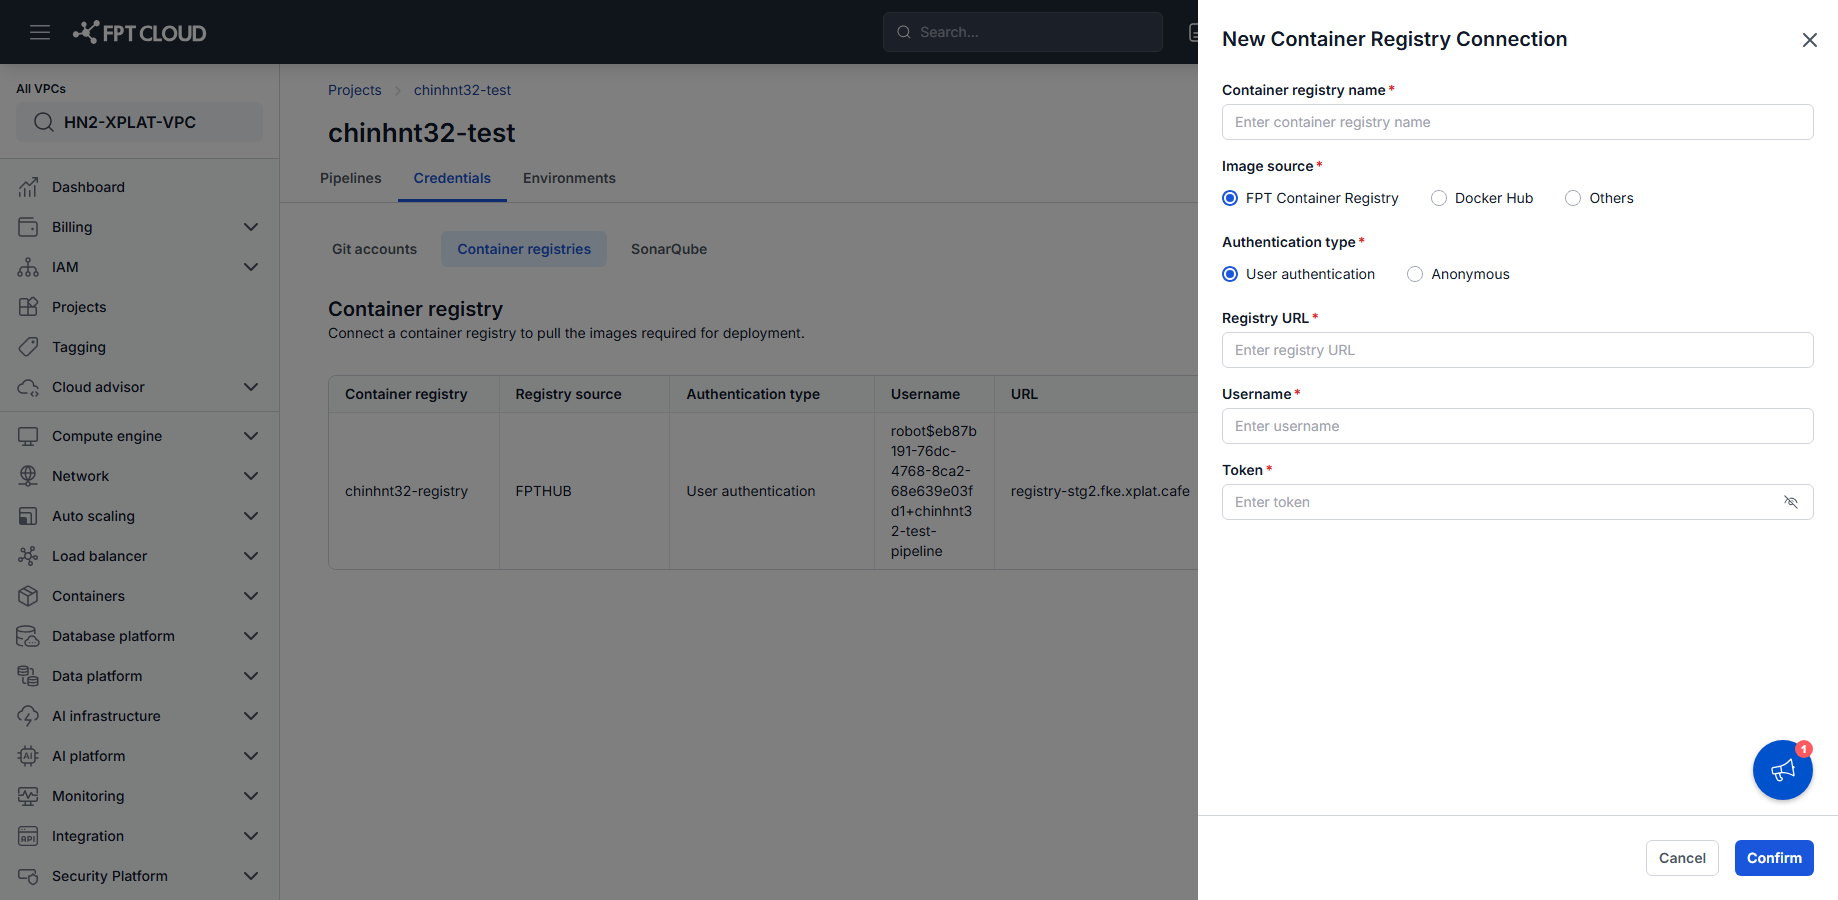
Use this connection when a Pipeline pulls a base image or pushes a built image. See Understanding pipeline components for how a Registry Source fits into a Pipeline.
Connect SonarQube
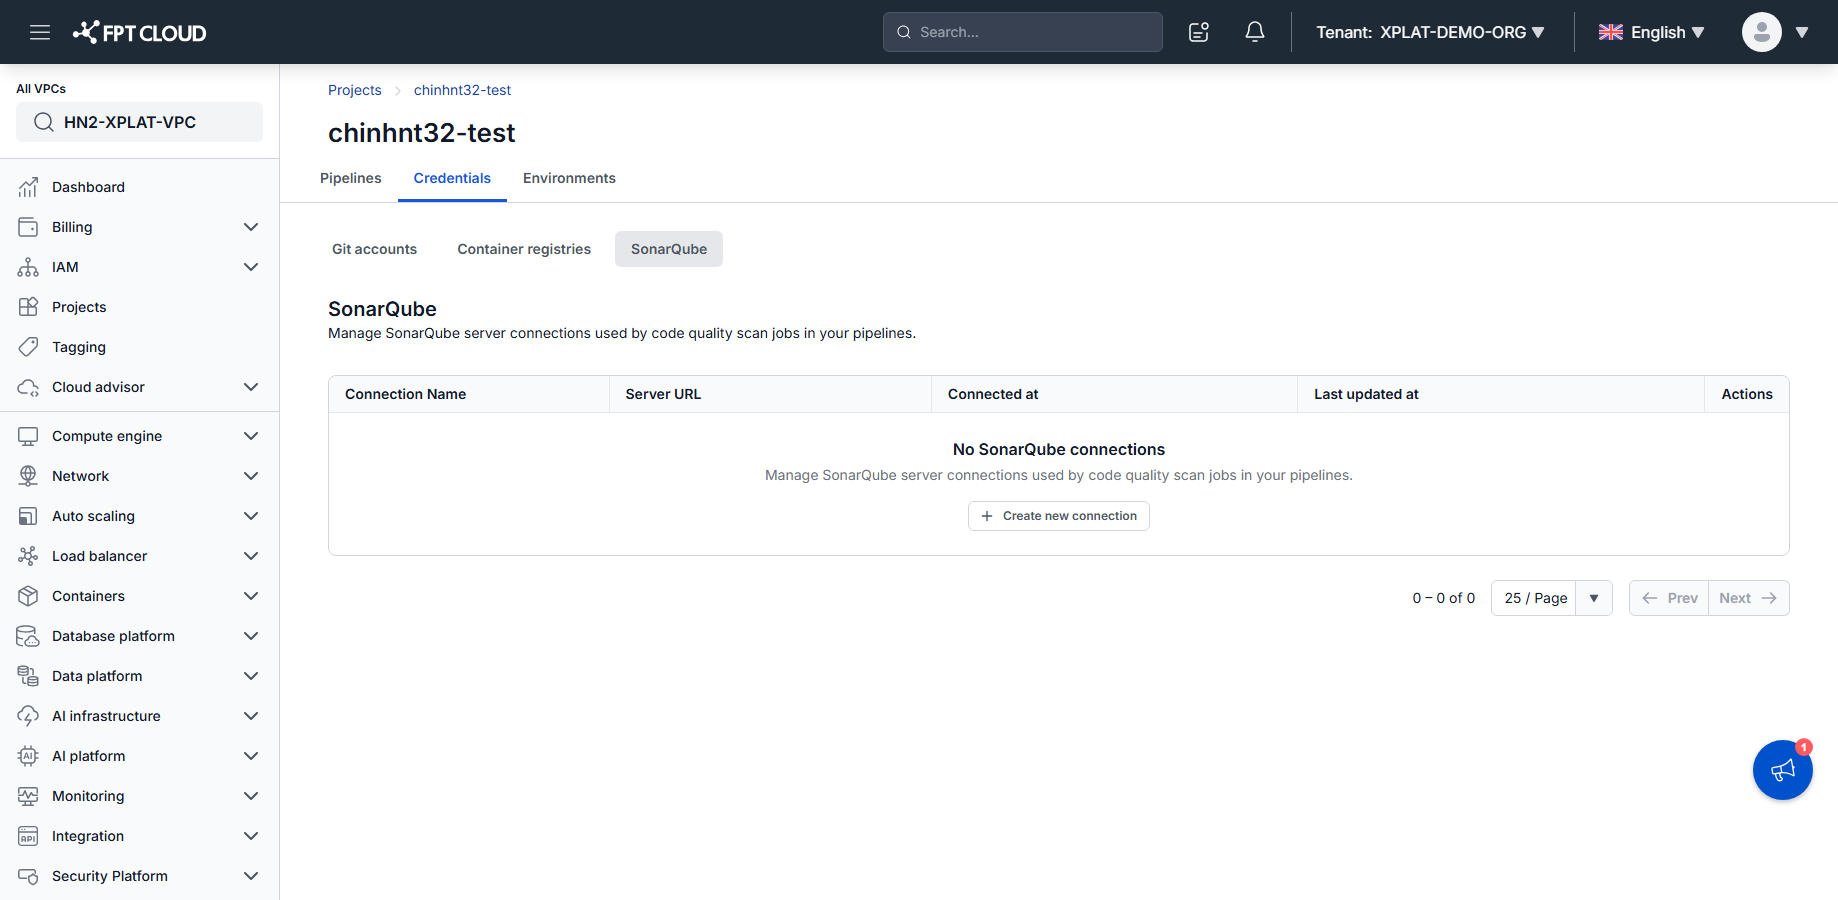
- On the Credentials tab, switch to SonarQube.
- Click Create new connection.
- Enter a connection name, the SonarQube server URL, and an authentication token generated in SonarQube (My account → Security → Tokens).
- Click Verify & Save — the connection is checked before it's saved.
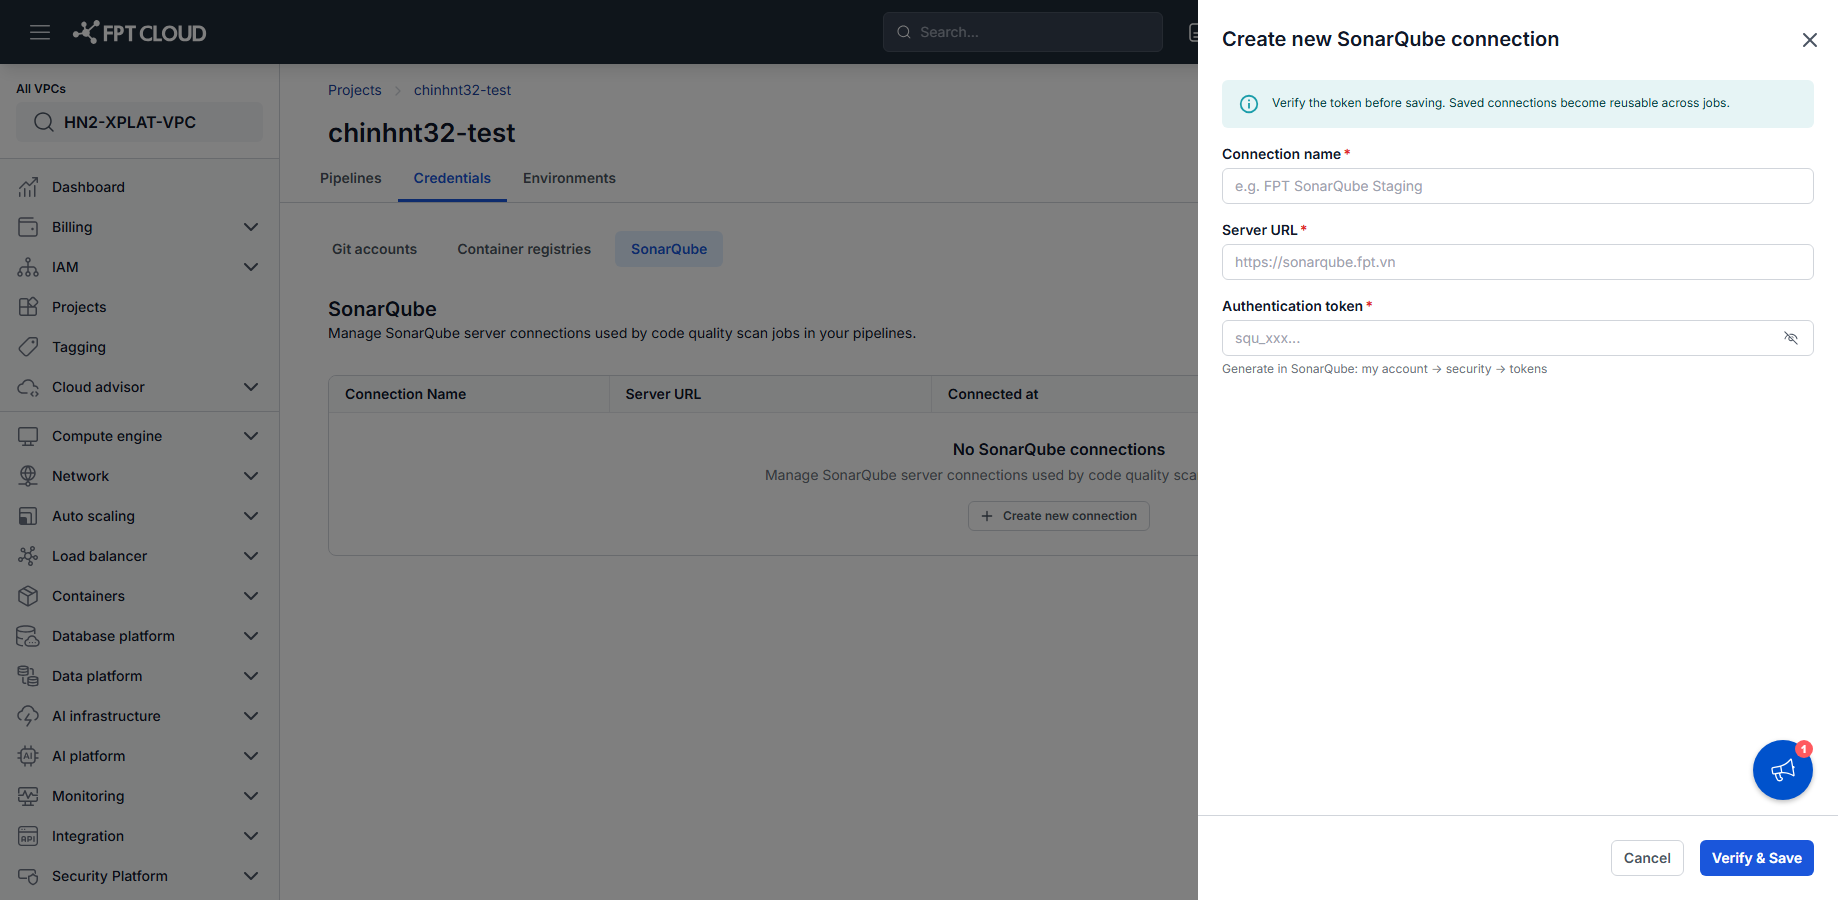
Once saved, this connection is reusable across any SonarQube scan job in the Project. See Add a security scan job.
Next steps
- Add a security scan job — use a SonarQube connection in a Test stage.
- Create and configure a pipeline — use a Git connection as a Pipeline Source.
- Manage environments — the other setup step a Pipeline needs before it can deploy.
- Credentials reference — field reference for all 3 connection types.