Create an API Catalog
The API Catalog is the list of API definitions of your organization, where you register an API with just a name or together with an OpenAPI specification (spec) from a file or a URL. The API Catalog is at the tenant level and does not belong to any API Gateway, so every API Gateway can use it: create a Route with the Method and Path pre-filled from the endpoints in the spec, or create an Upstream with the Target pre-filled from the server list in the spec.
Click the image to zoom in.
Create an API Catalog
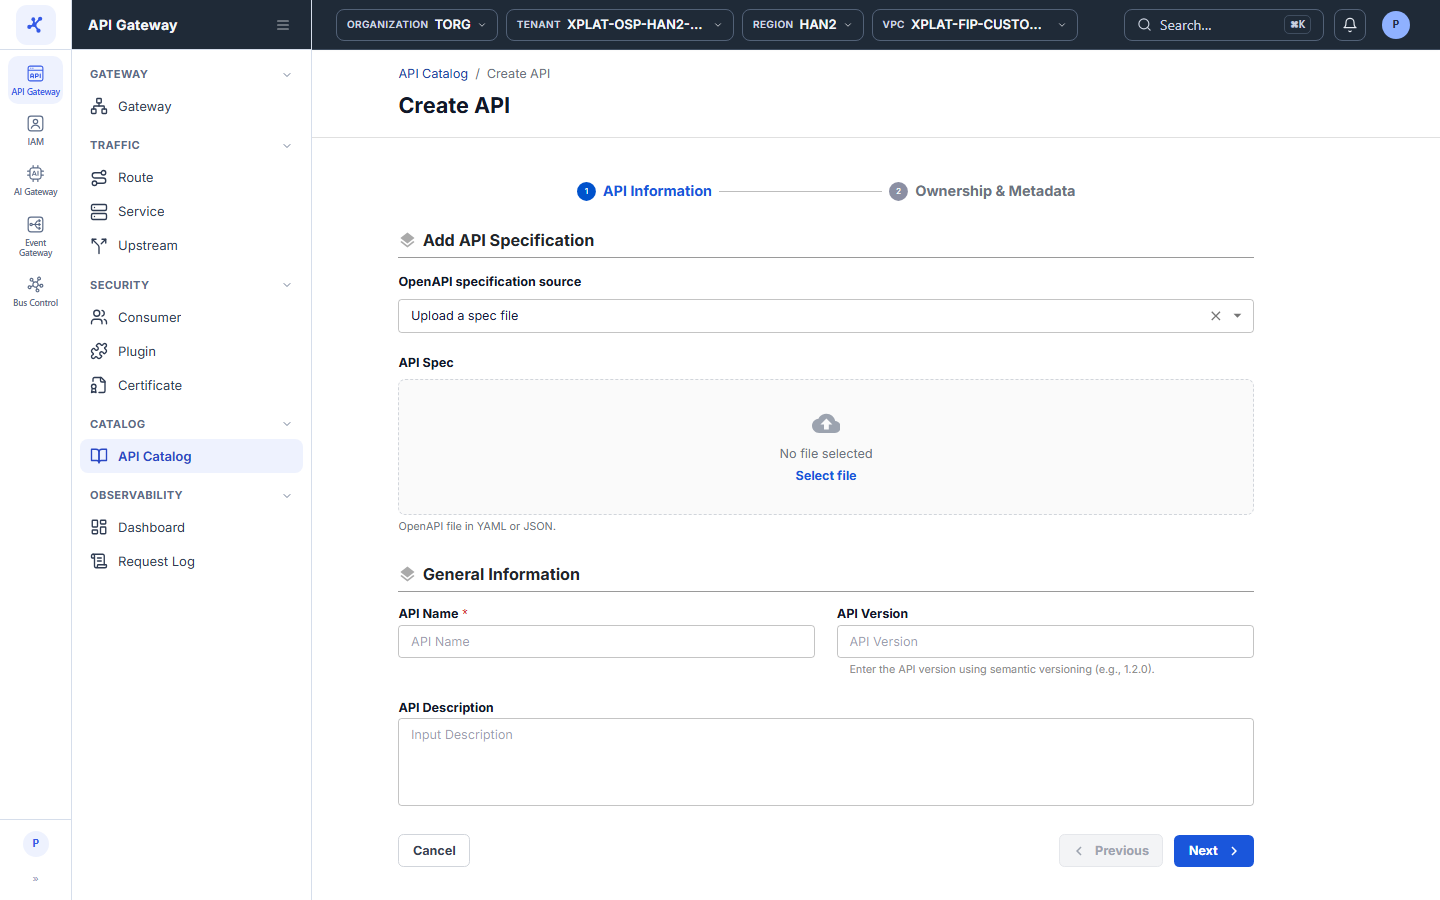
The API creation screen is a 2-step wizard: API Information → Ownership & Metadata. To create an API Catalog, follow these steps:
-
In the left menu, select API Gateway → API Catalog → click Create API Catalog.
-
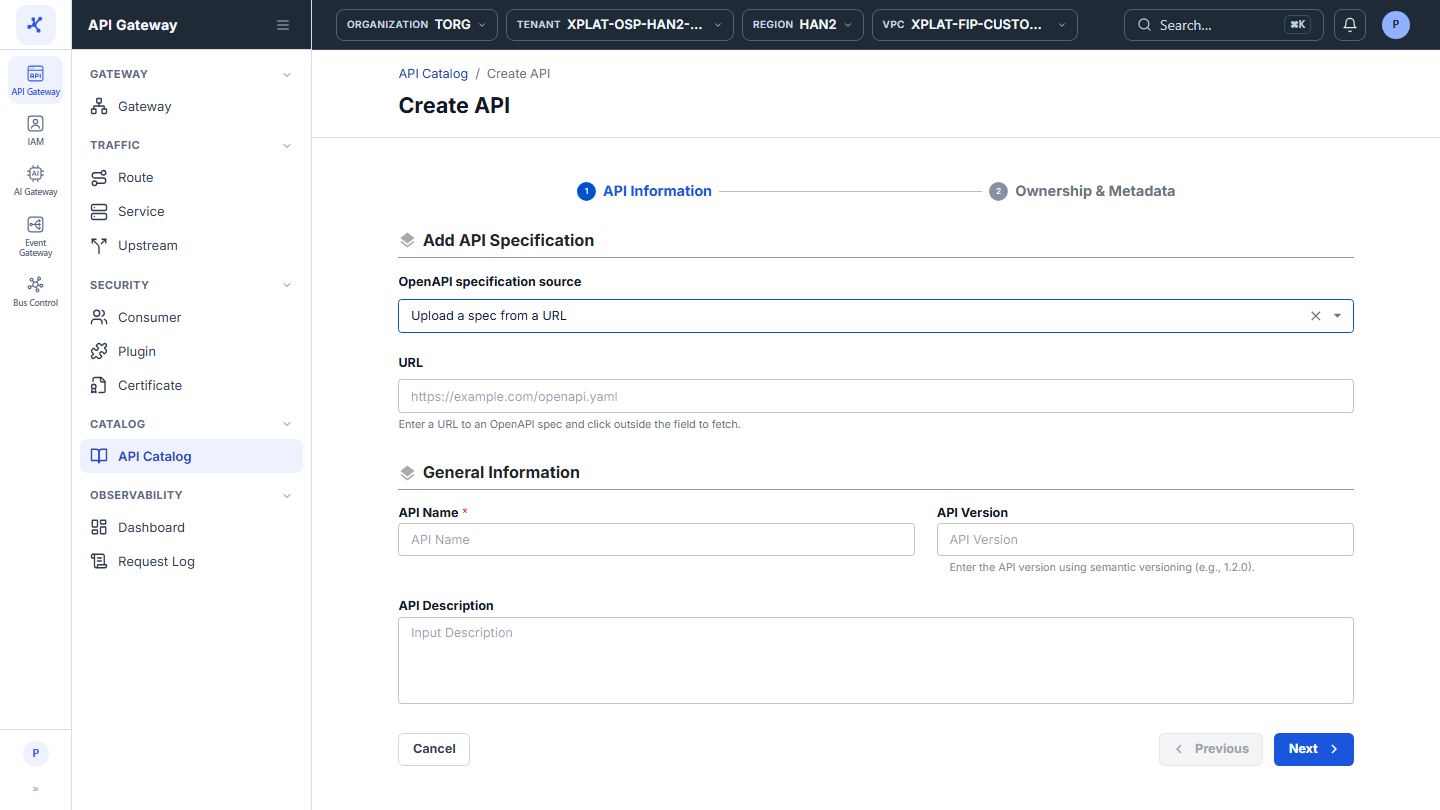
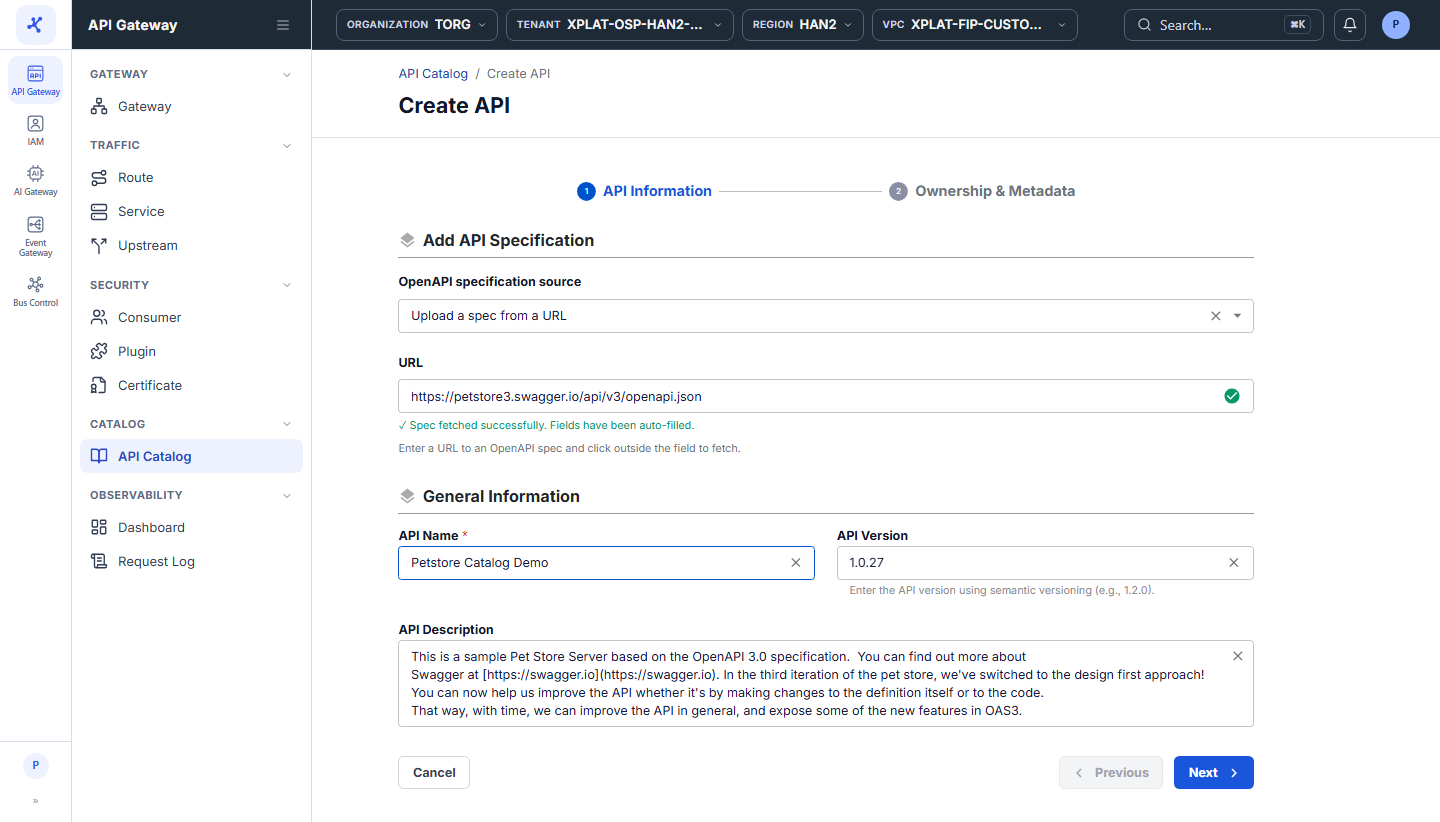
On the API Information screen, in the Add API Specification section, choose how to provide the spec:
| Field | Required | Description |
|---|---|---|
| OpenAPI specification source | N | Source of the API spec. Upload a spec file (default): select a file from your computer. Upload a spec from a URL: get the spec from a public URL. Leave it empty to register the API by name only. |
| API Spec | N | Shown when you select Upload a spec file. Click Select file or drag and drop an OpenAPI file in YAML or JSON format into the box. |
| URL | N | Shown when you select Upload a spec from a URL. URL of a public spec file, for example https://petstore3.swagger.io/api/v3/openapi.json. |
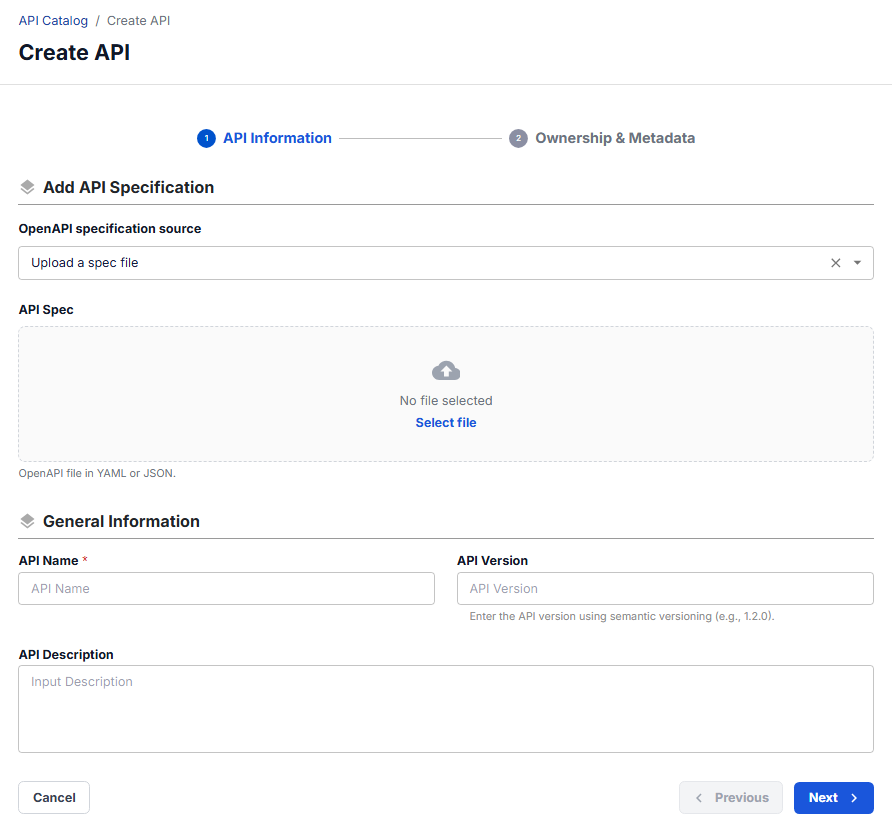
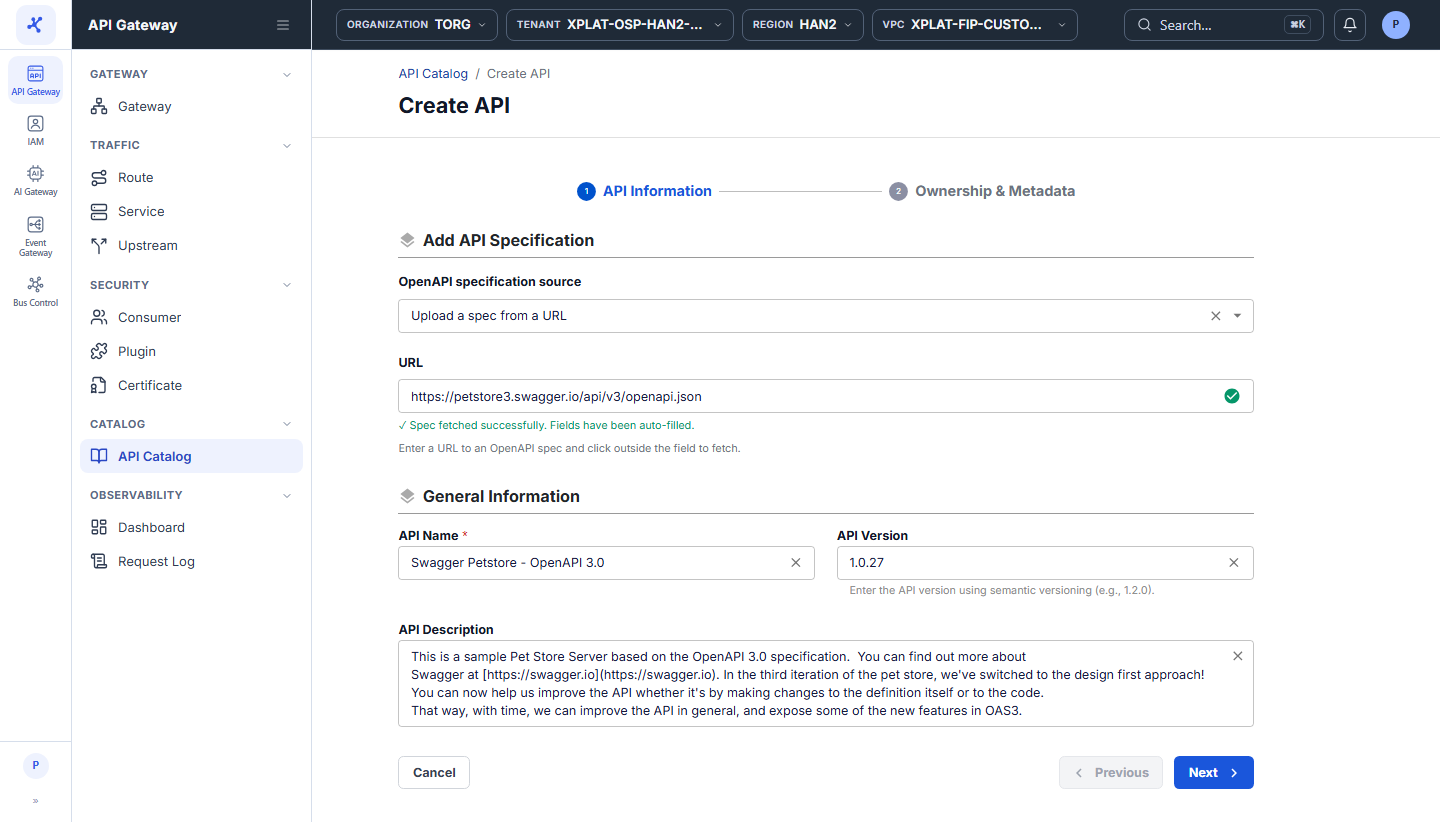
When you select Upload a spec from a URL: enter the URL, then click outside the field. The system downloads the spec, shows the message Spec fetched successfully. Fields have been auto-filled., and fills in API Name, API Version, and API Description from the info.title, info.version, and info.description fields of the spec.
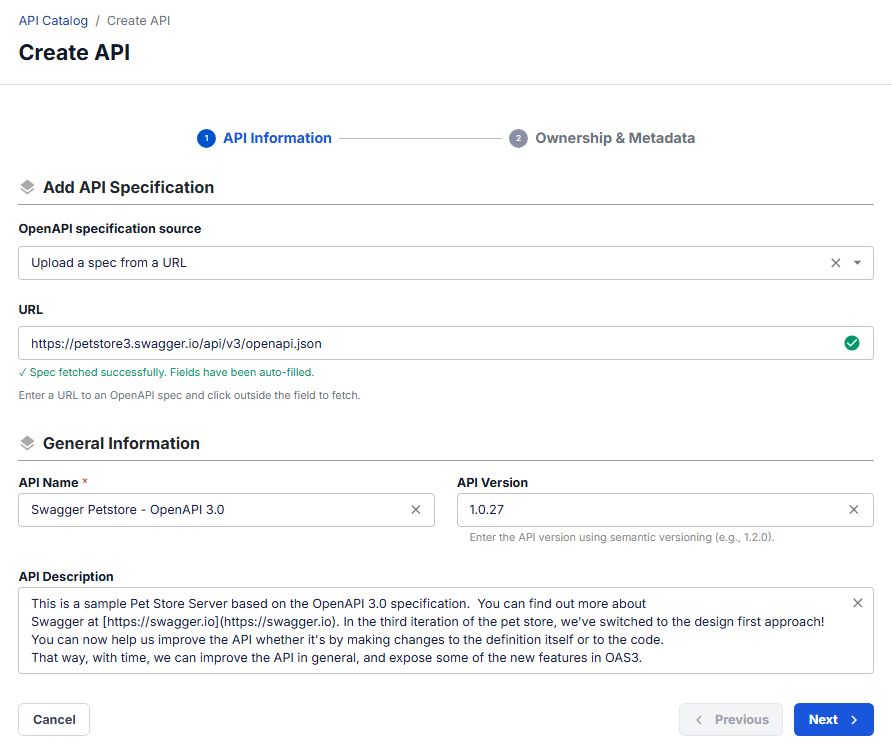
- In the General Information section, enter or check the following information:
| Field | Required | Description |
|---|---|---|
| API Name | Y | API name in the catalog, shown in the list and used to select the API when you create a Route or an Upstream from the API Catalog. |
| API Version | N | API version. Use semantic versioning, for example 1.2.0. |
| API Description | N | Purpose of the API. |
You can change the auto-filled values, for example rename API Name so the API is easy to find in the catalog.
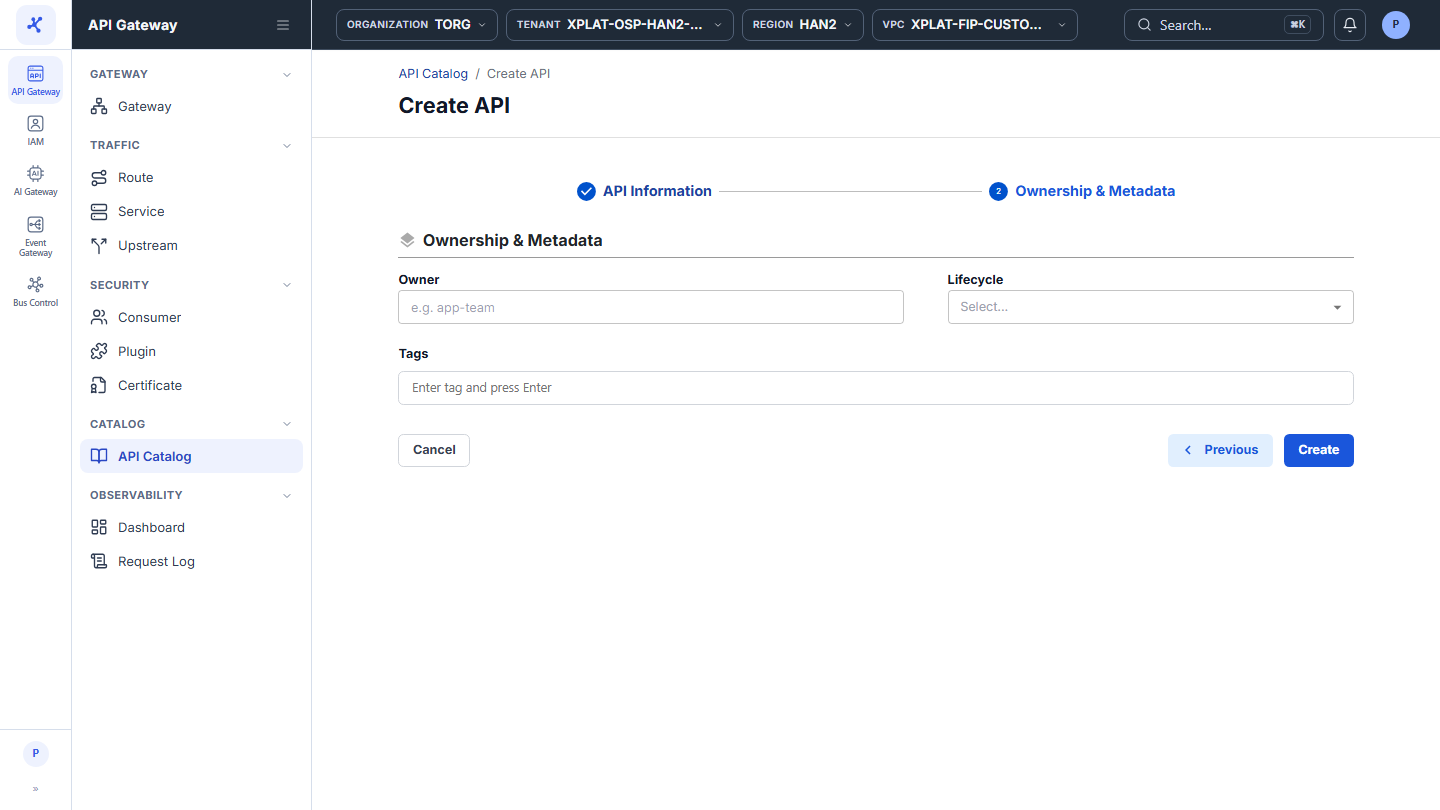
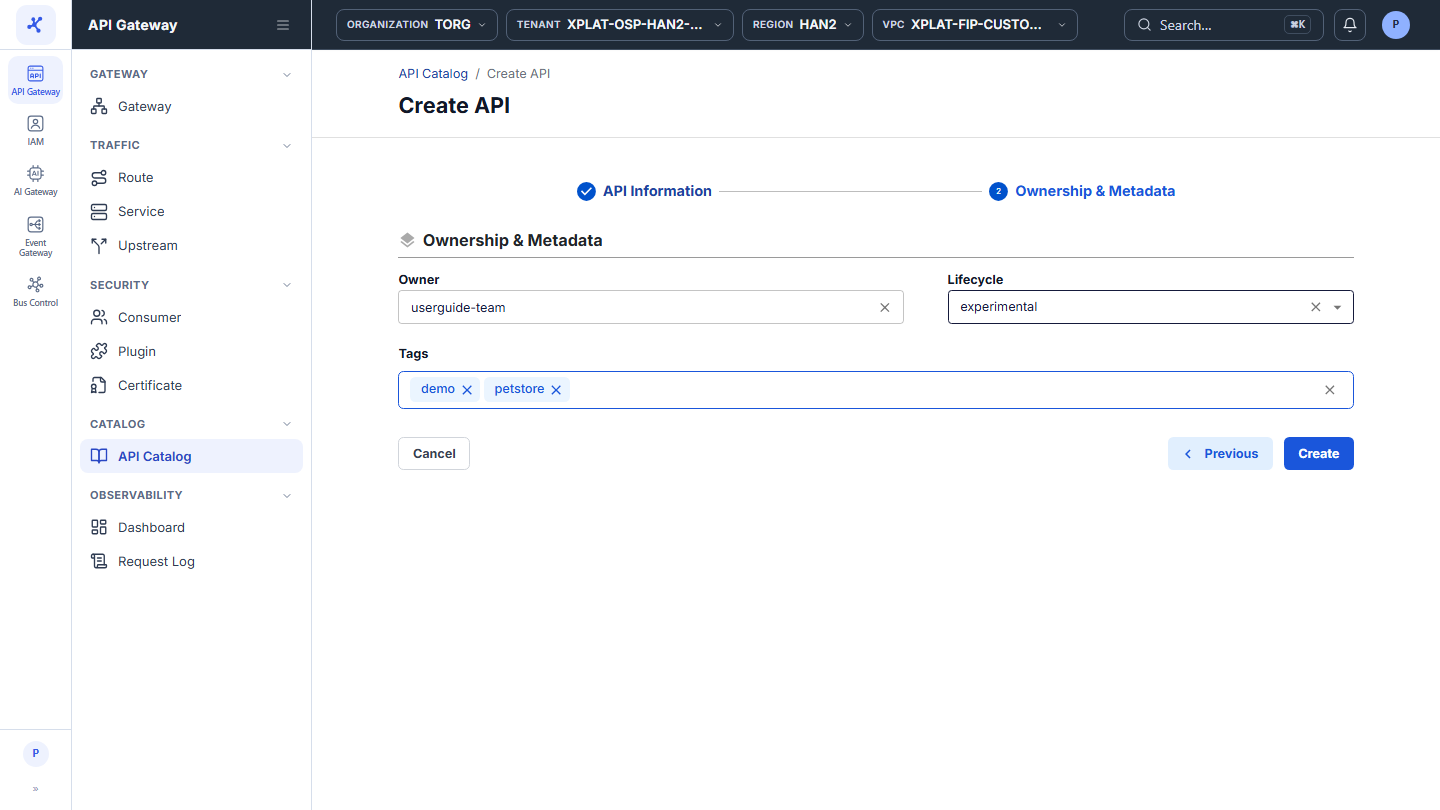
- Click Next to go to the Ownership & Metadata screen, then enter the following information:
| Field | Required | Description |
|---|---|---|
| Owner | N | Group or team that owns the API, for example app-team. Helps make management responsibility clear when the catalog has many APIs. |
| Lifecycle | N | Lifecycle stage of the API: experimental (trial), production (officially in use), deprecated (not recommended, to be removed). Shown as a tag in the list and on the detail screen so you can quickly see which APIs are safe to use. |
| Tags | N | Labels to classify the API. Enter a keyword and press Enter to add it. You can add several tags. Use them to find and filter related APIs. |
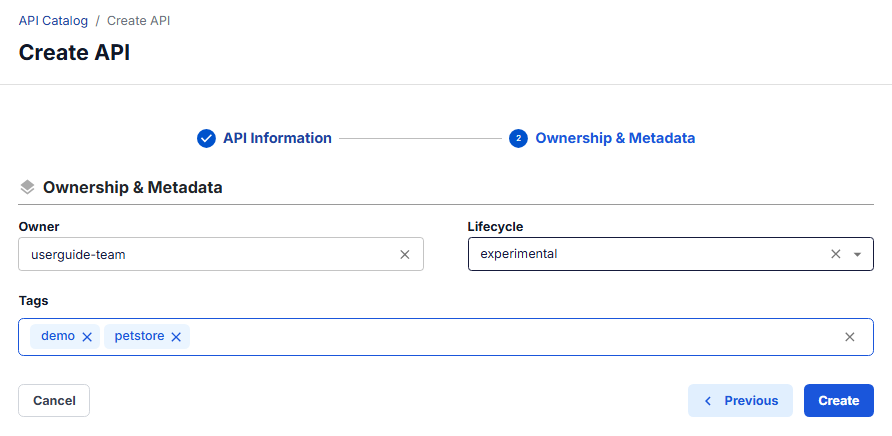
- Click Create to finish. To change the previous screen, click Previous.
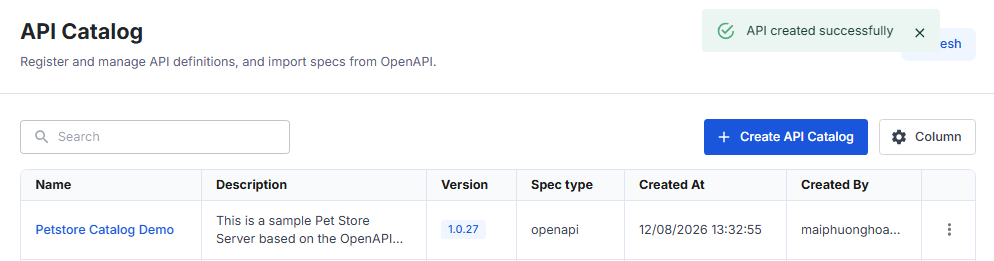
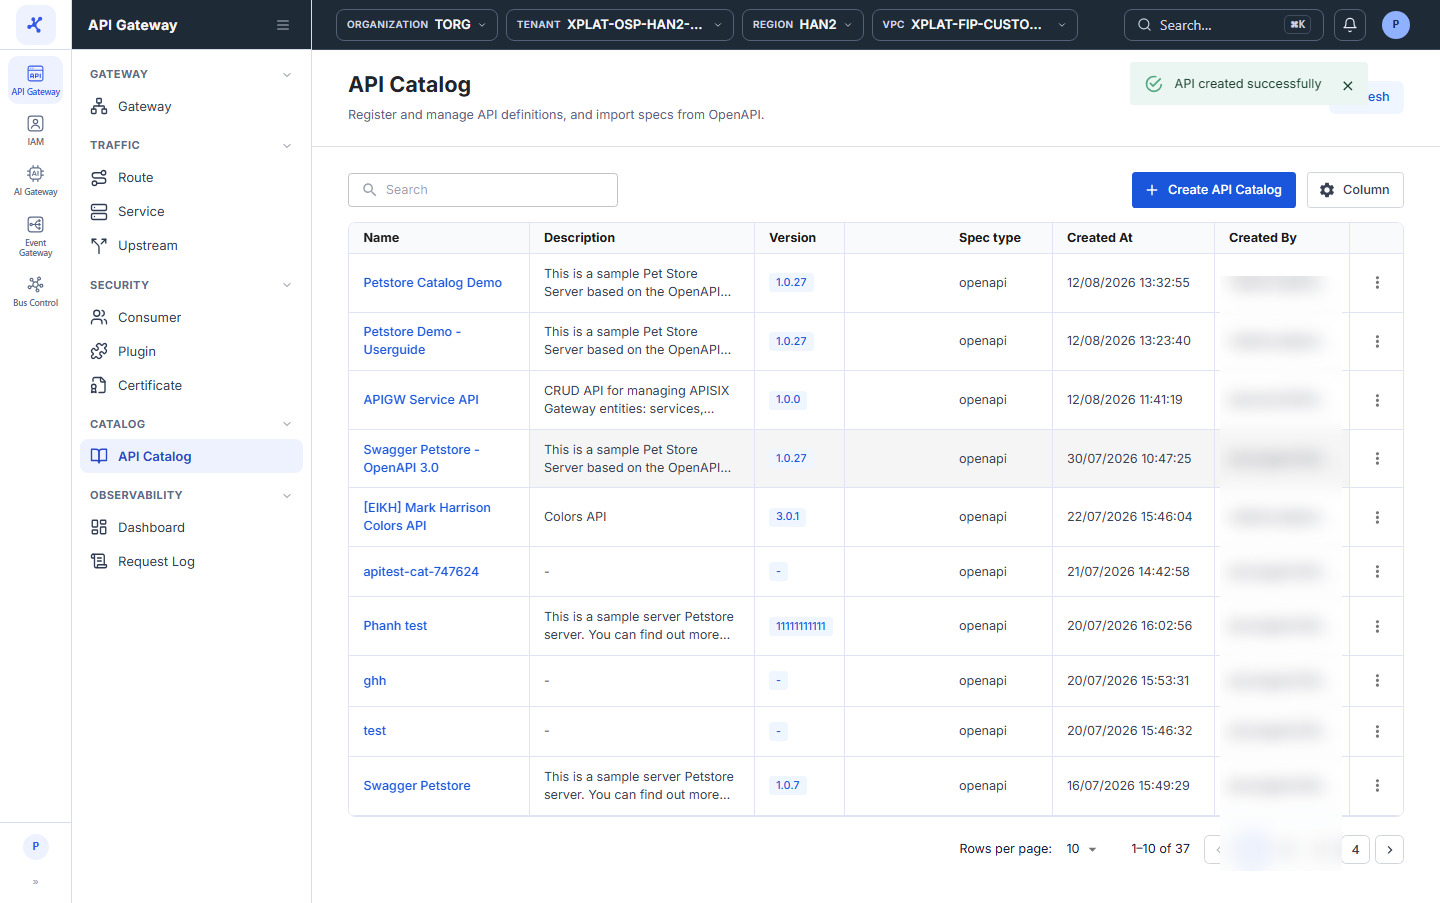
The message API created successfully appears, the system takes you back to the API Catalog screen, and the new API is at the top of the list.