Add a plugin
You can add a plugin in one of 2 ways. Both use the same Add plugin popup and Create Plugin screen.
| Way | Use when |
|---|---|
| From the Plugin screen | You create a new plugin and choose any Scope (Global or several Routes / Services; the Rate Limiting plugin can also be assigned to Consumers). |
| From the Route / Service detail screen | You attach a plugin to the Route / Service you are viewing, reusing an existing plugin or creating a new one. |
For the Scope and direct / inherited plugin concepts, see Plugin overview.
Add from the Plugin screen
To add a Plugin from the Plugin screen, follow these steps:
-
In the left menu, select API Gateway → Plugin, select the API Gateway in the top-right corner, then click New plugin.
-
In the Add plugin popup, select the plugin type. Type in the Search plugins by name... box to find it quickly.
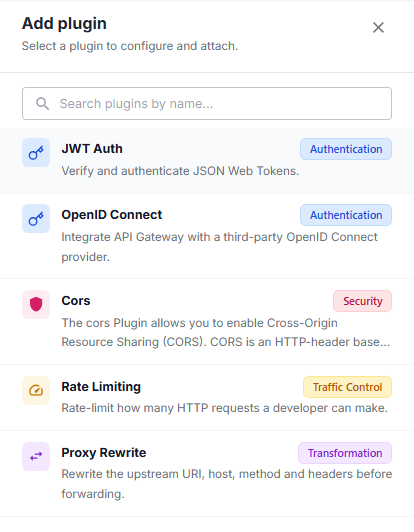
- Enter the information on the Create Plugin screen, where the selected plugin type is shown next to the title. See Enter the plugin information.
Add from the Route or Service detail screen
To add a Plugin to a Route or Service, follow these steps:
-
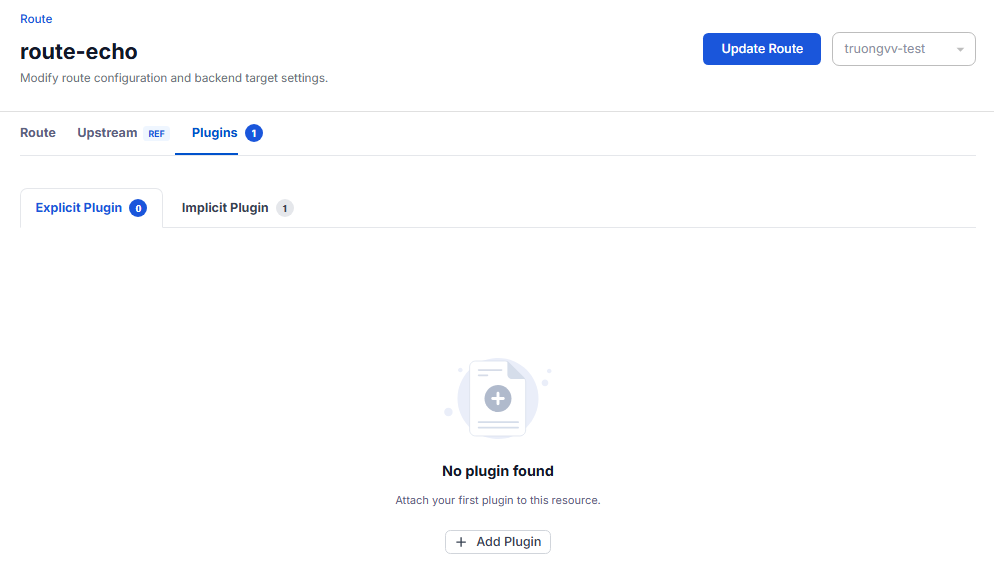
Open the Route detail screen (API Gateway → Route → click the Route name) or the Service detail screen (API Gateway → Service → click the Service name).
-
Select the Plugins tab. The Explicit Plugin sub-tab (default) lists directly attached plugins, and the Implicit Plugin sub-tab lists inherited ones. On Explicit Plugin, click Add Plugin.
- In the Add plugin popup, select the plugin type. In the Select policy section, choose one option:
| Option | Description |
|---|---|
| Select existing plugin (default) | Reuse a plugin of the same type that you created before. Select it in the drop-down list. |
| Create new plugin | Create a new plugin and attach it to this Route / Service. |
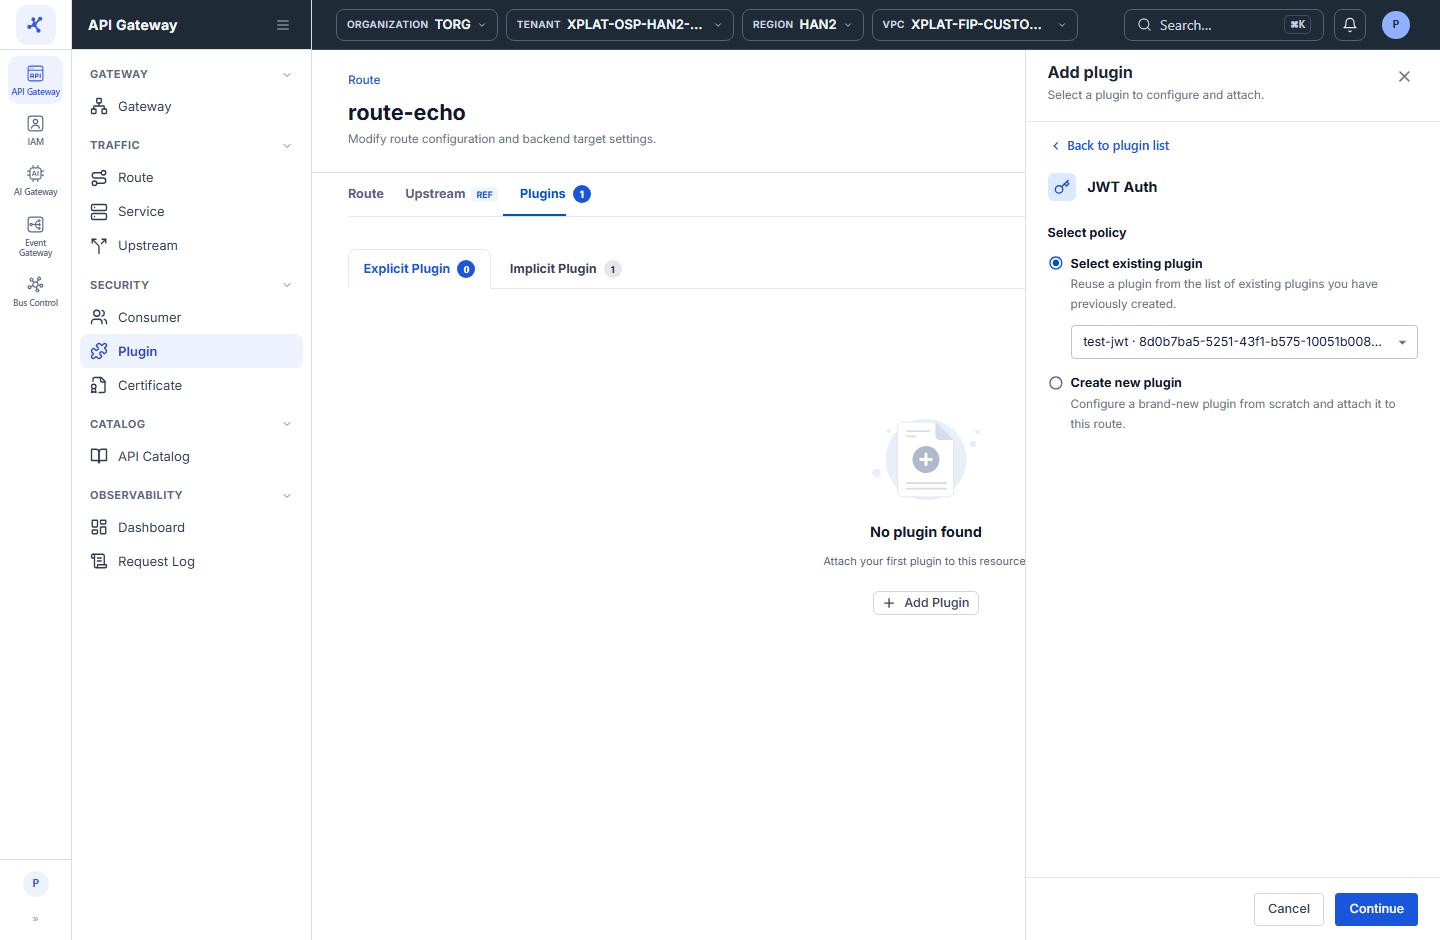
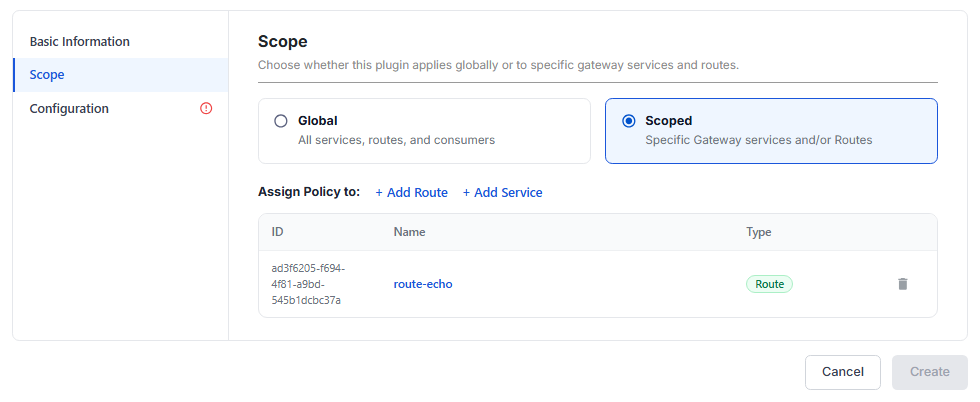
- Click Continue. If you chose Create new plugin, the Create Plugin screen opens with the Scope section already set to the Route / Service you are viewing. Continue as described in Enter the plugin information.
Enter the plugin information
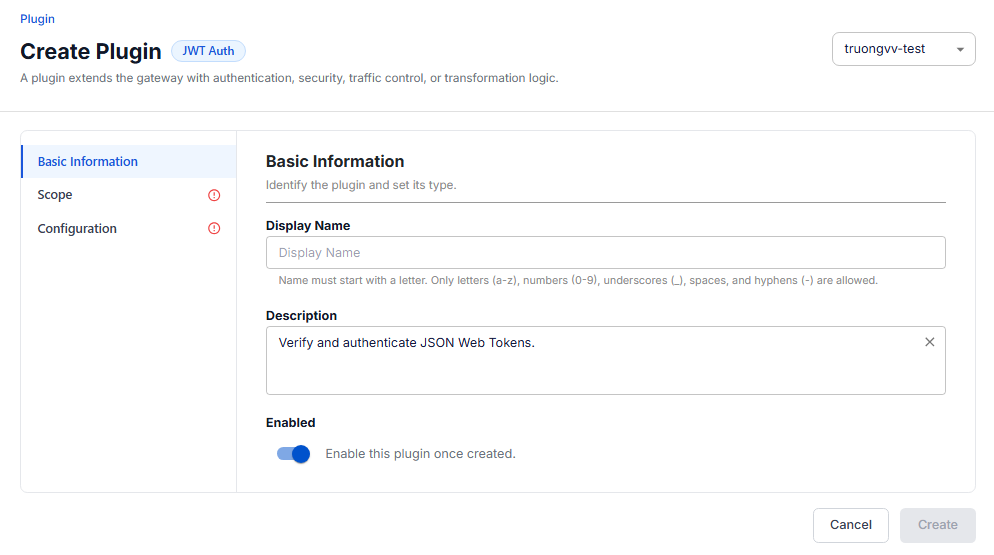
The Create Plugin screen has 3 sections in the navigation on the left: Basic Information, Scope, and Configuration. A section with missing required data shows a red ⓘ icon, and the Create button is enabled only when all 3 sections are valid.
Basic Information
| Field | Required | Description |
|---|---|---|
| Display Name | N | Your name for this plugin, different from the plugin type name (for example JWT Auth). Starts with a letter and uses only letters a-z, numbers 0-9, _, spaces, and -. |
| Description | N | Plugin description, pre-filled from the plugin type description. You can change it. |
| Enabled | N | Enable the plugin as soon as it is created. On by default. |
Scope
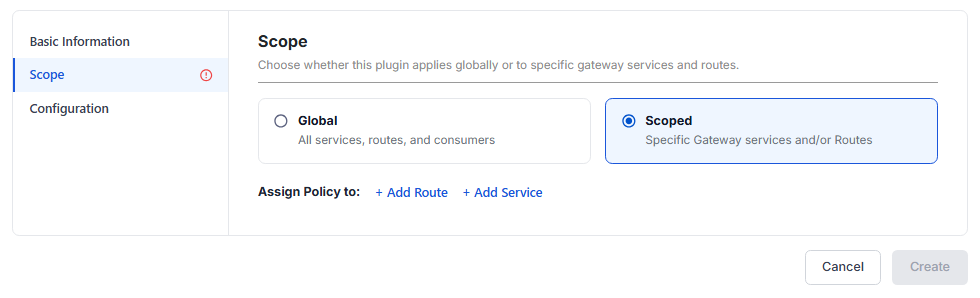
| Option | Description |
|---|---|
| Global | Applies to every Service, Route, and Consumer of the API Gateway. |
| Scoped | Applies only to specific Routes / Services. Under Assign Policy to, click + Add Route or + Add Service, select the targets, then click Apply. The selected targets appear in an ID / Name / Type table. Click the trash icon to remove one. |
Configuration
The Configuration section has a form with the attributes of the plugin type, and a JSON panel on the right that shows the matching configuration (read-only). The JSON panel has a Copy button to copy the JSON and a Reset button to return to the defaults.
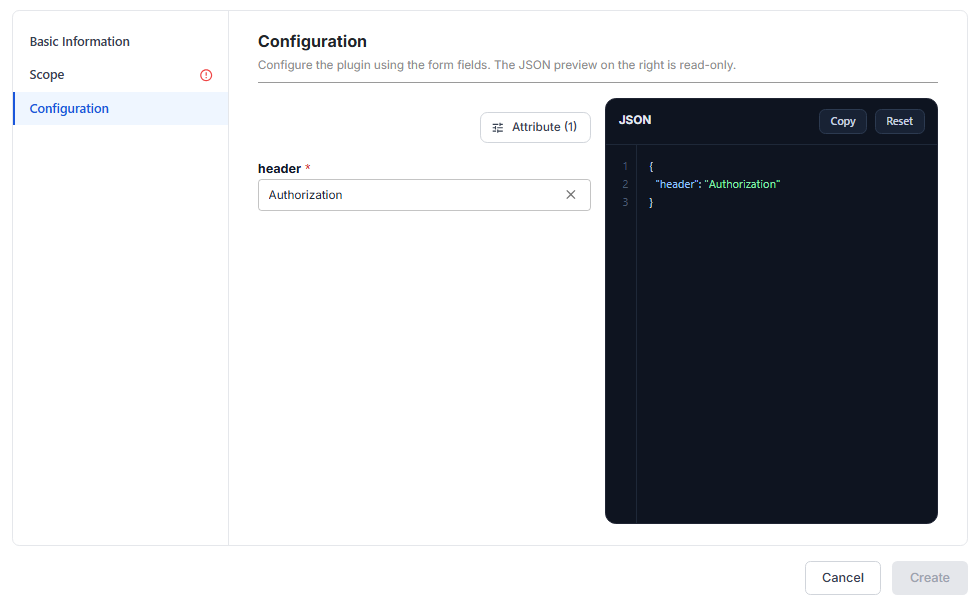
- Attribute (N): opens the Manage Attribute panel to choose which attributes appear on the form. Selected Attributes are shown on the form (the R label means required), and Available Attributes can be added. Click + to add one.
- Quick Start Templates (only for some plugins): click Use Template on a card to fill in a sample configuration. Templates only fill in placeholder values, so replace them with real values before you create the plugin.
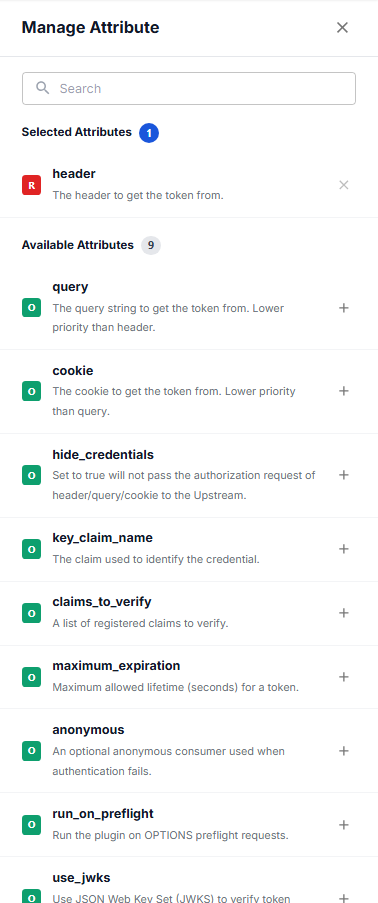
For the attributes of each plugin type, see its guide, listed in Plugin overview.
Finish
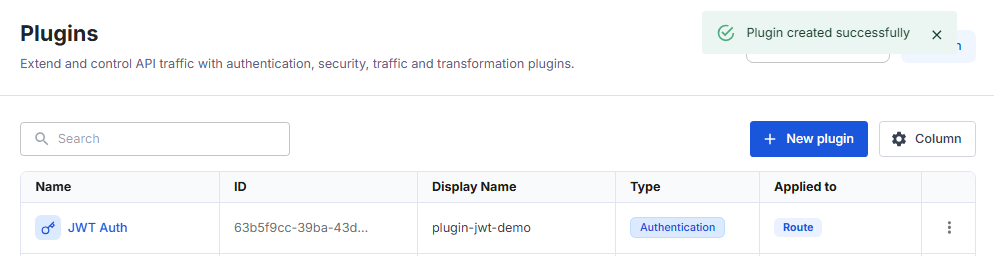
Click Create. The message Plugin created successfully appears, the system takes you back to the Plugins screen, and the new plugin appears with the Applied to column matching the selected scope.
If you selected Scoped, check the Plugins tab of the matching Route / Service.