Create a Route
A Route tells an API Gateway which requests to handle (matched by protocol, HTTP method, and path) and which backend to forward them to, through a Service or an Upstream. Every Route belongs to one API Gateway. You can enter the Routing Rules manually, or take them from the endpoints of an API in the API Catalog.
The API Gateway must be Active before you can create a Route. See View API Gateway details.
Create a Route manually
The Create Route screen has 5 sections in the navigation on the left: Basic Information → Routing Rules → Backend Target → Timeout → Review. Basic Information, Routing Rules, and Backend Target are required. A section that is not valid yet shows a red ⓘ icon, and the Create button is enabled only when all 3 sections are valid.
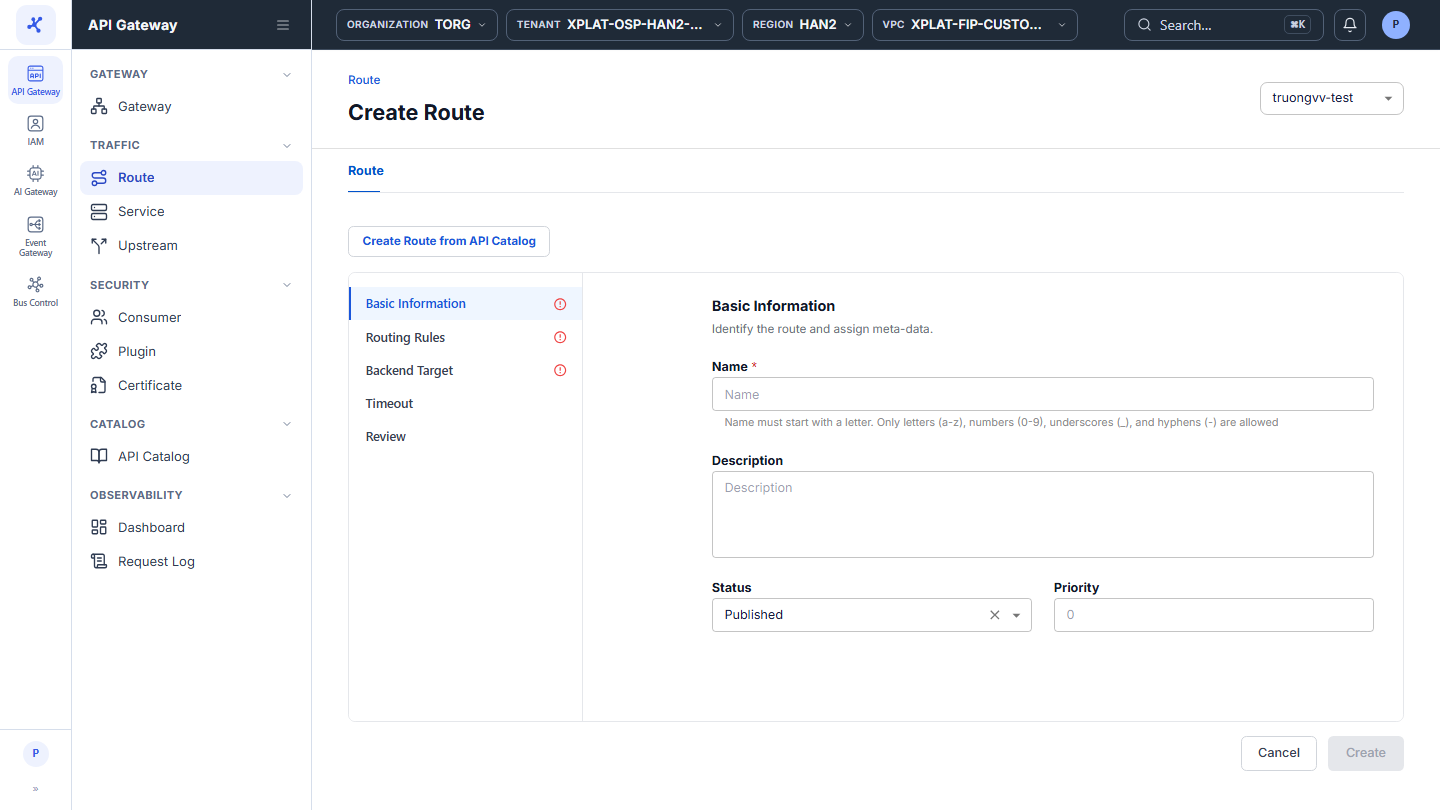
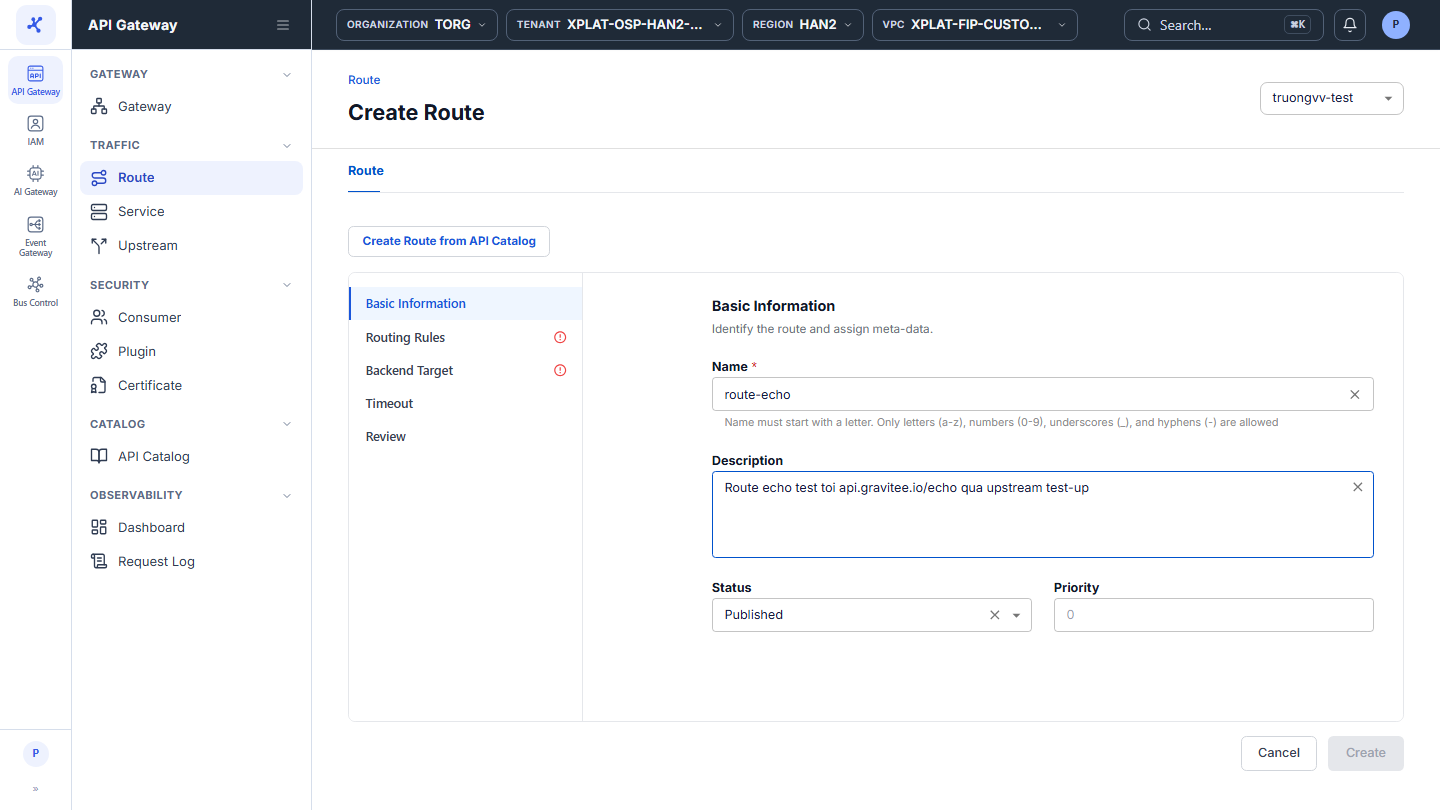
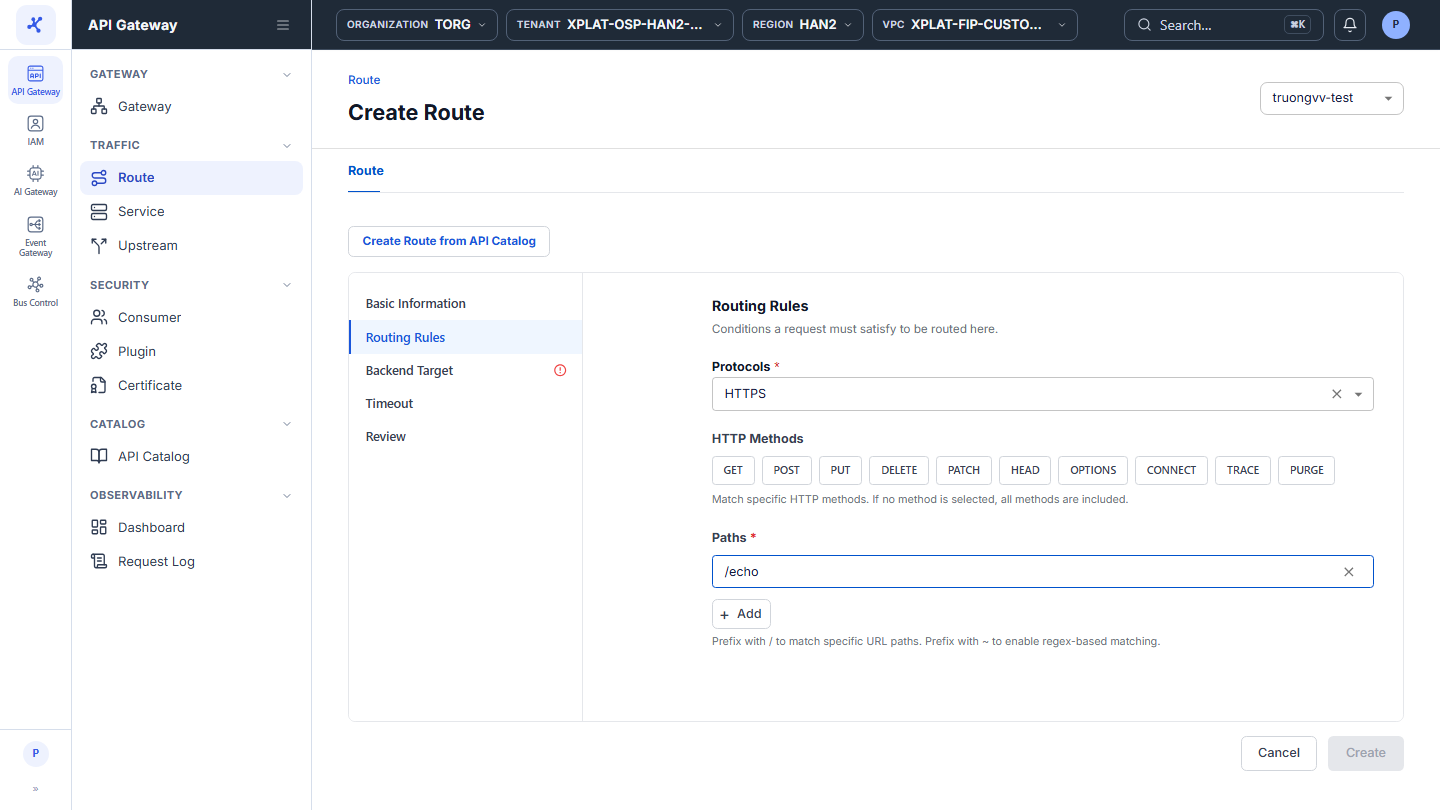
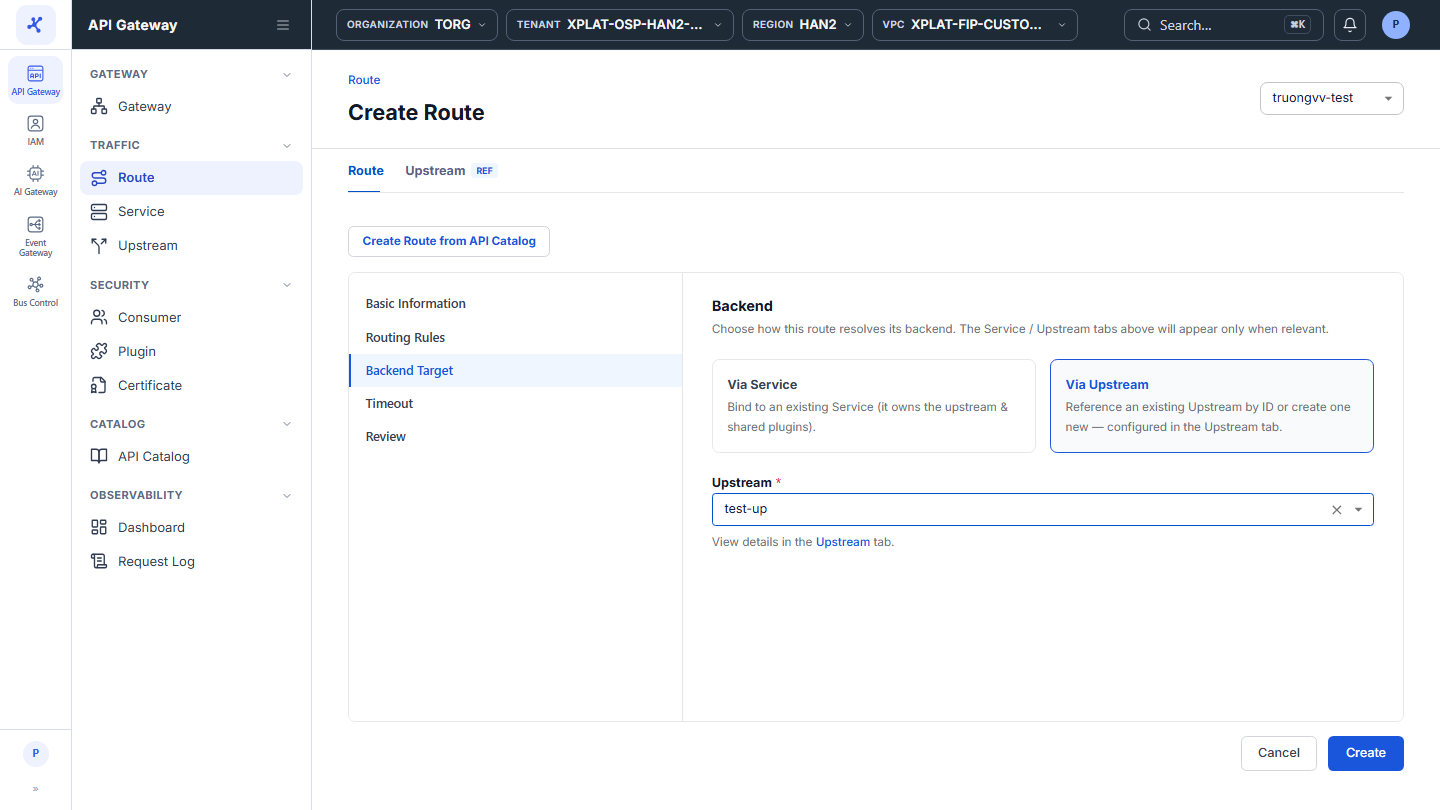
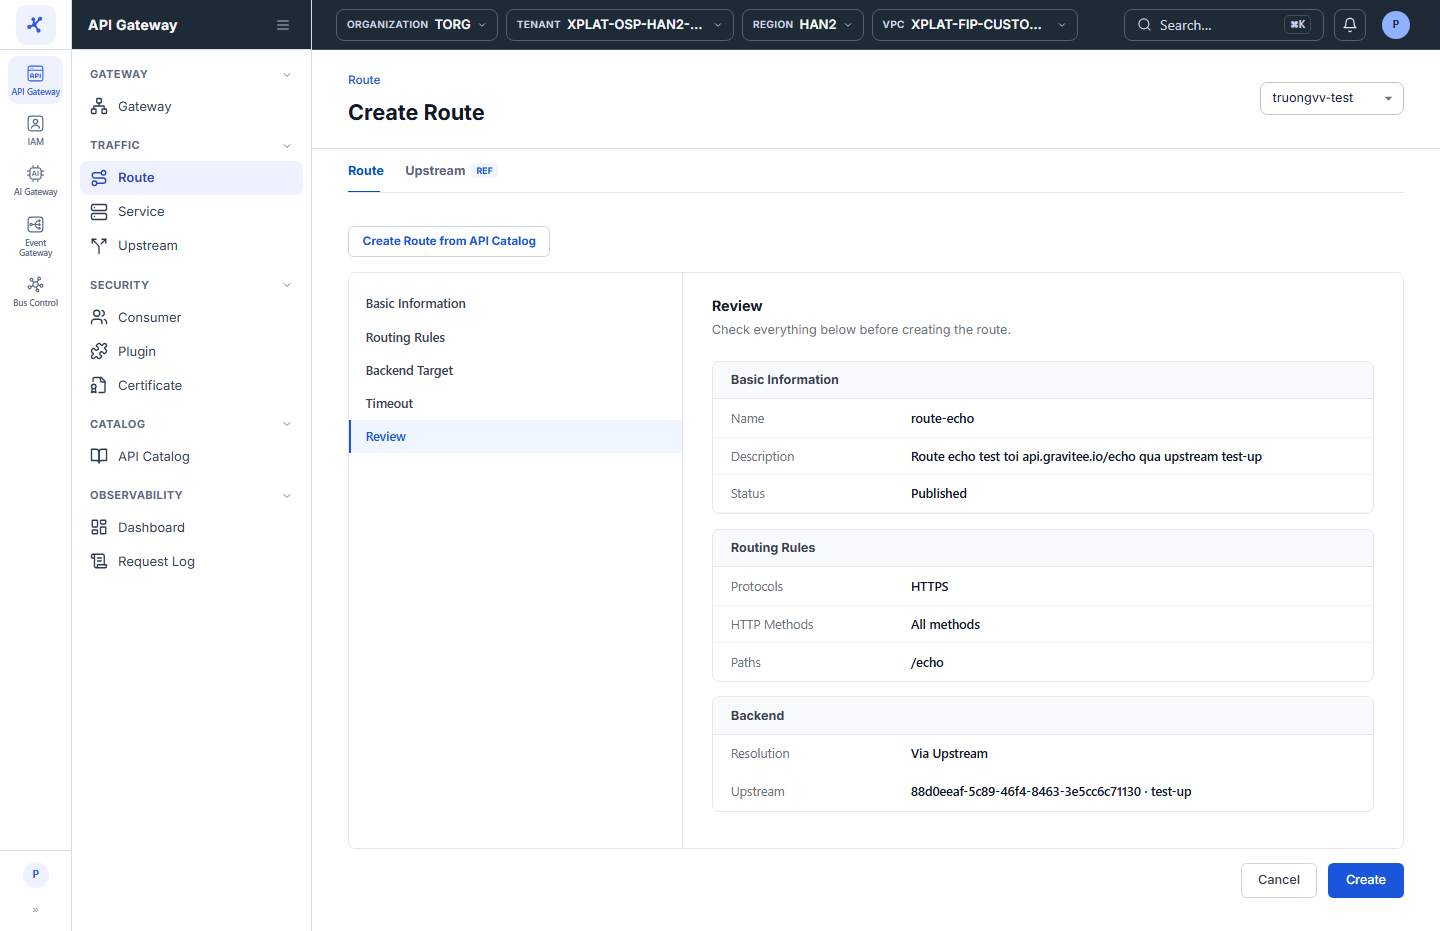
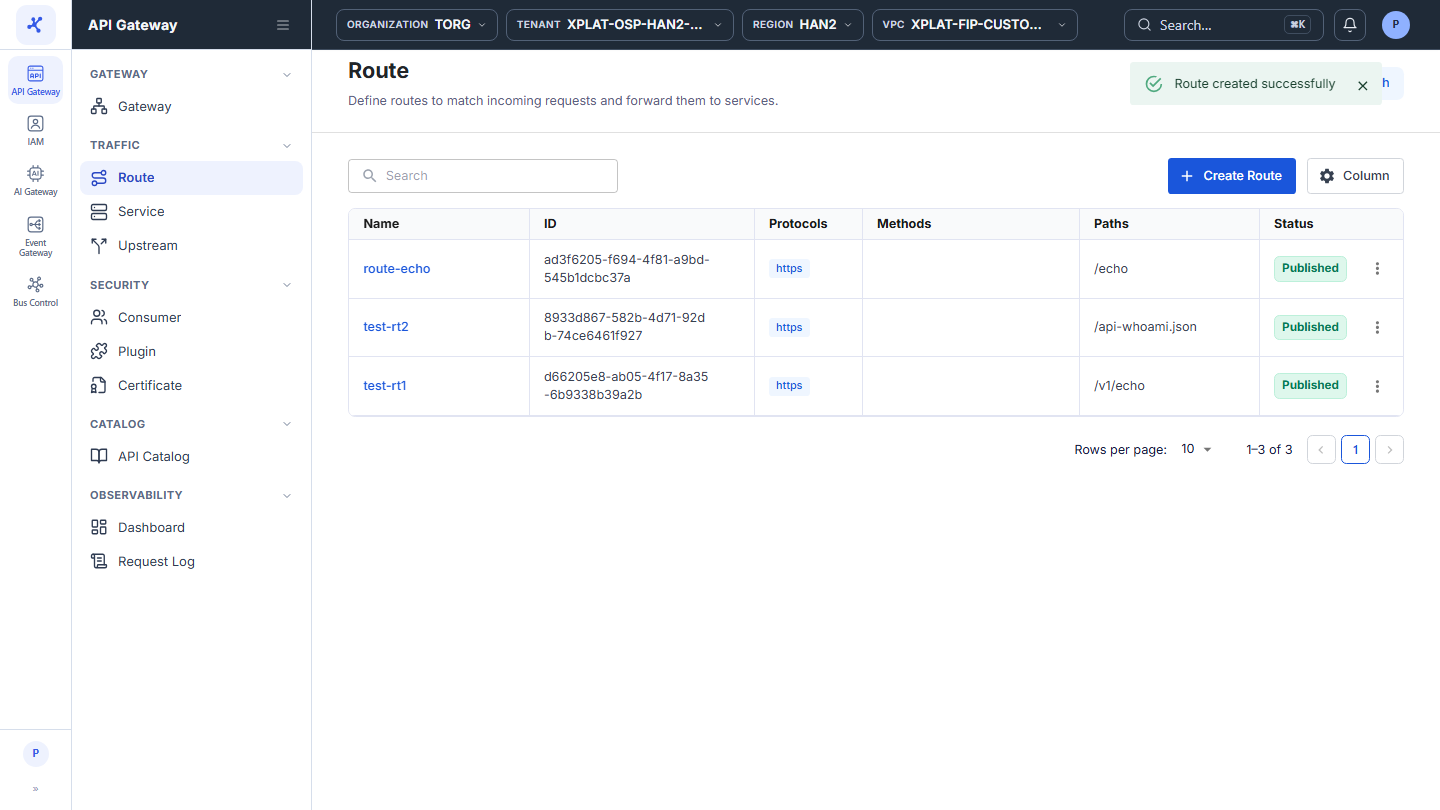
Click the image to zoom in.
To create a Route manually, follow these steps:
-
In the left menu, select API Gateway → Route, select the API Gateway in the top-right corner, then click Create Route.
-
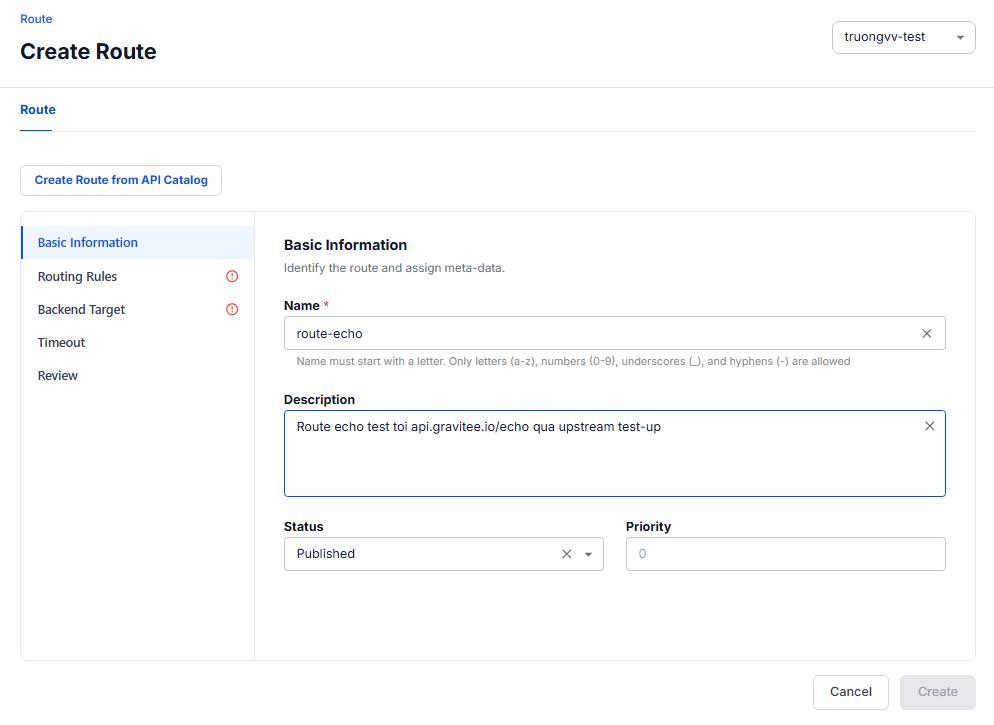
In the Basic Information section, enter the following information:
| Field | Required | Description |
|---|---|---|
| Name | Y | Route name, shown in the list and used for search. Starts with a letter and uses only lowercase letters a-z, numbers 0-9, _, and -. The name must be unique within the API Gateway. |
| Description | N | Purpose of the Route, for example which API or feature group it serves, so others understand it later. |
| Status | Y | Published (default): the Route is active and receives matching traffic. Unpublished: the Route keeps its configuration but receives no traffic. Use it to pause a Route for maintenance or testing without deleting it. |
| Priority | N | Precedence when a request matches several Routes at once (for example overlapping paths): the Route with the higher Priority is chosen first. Integers only, default 0. |
- Select the Routing Rules section, then enter the conditions a request must meet to match the Route:
| Field | Required | Description |
|---|---|---|
| Protocols | Y | Protocols the Route accepts: HTTP, HTTPS, HTTP,HTTPS, GRPC, GRPCS, GRPC,GRPCS. This field is empty when the form opens, so you must select a value. |
| HTTP Methods | N | Click to select the methods the Route matches: GET, POST, PUT, DELETE, PATCH, HEAD, OPTIONS, CONNECT, TRACE, PURGE. If you select none, the Route matches all methods, which suits proxying a whole API. |
| Paths | Y | Paths the Route matches, for example /api/v1. Start with / to match an exact path, or with ~ to match by regex. Click + Add to add another path to the same Route. |
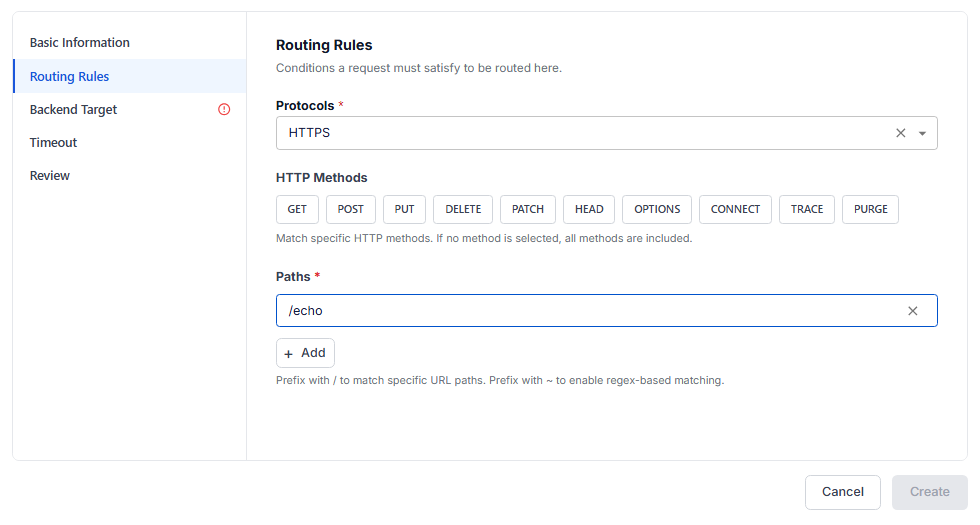
The first Paths field takes the value as you type, so you do not need to click + Add. If you click + Add and leave the new row empty, the Create button stays disabled. Remove the empty row.
- Select the Backend Target section, then choose where the Route forwards requests. The two options are mutually exclusive, and switching clears the selection of the other option.
| Option | Description |
|---|---|
| Via Service (default) | Select an existing Service. A Service groups a backend and plugins shared by many Routes, so you configure them once and reuse them. The Upstream is inherited from the Service, so you do not select an Upstream. The Service and Upstream tabs (labeled REF) appear at the top so you can view the referenced configuration. |
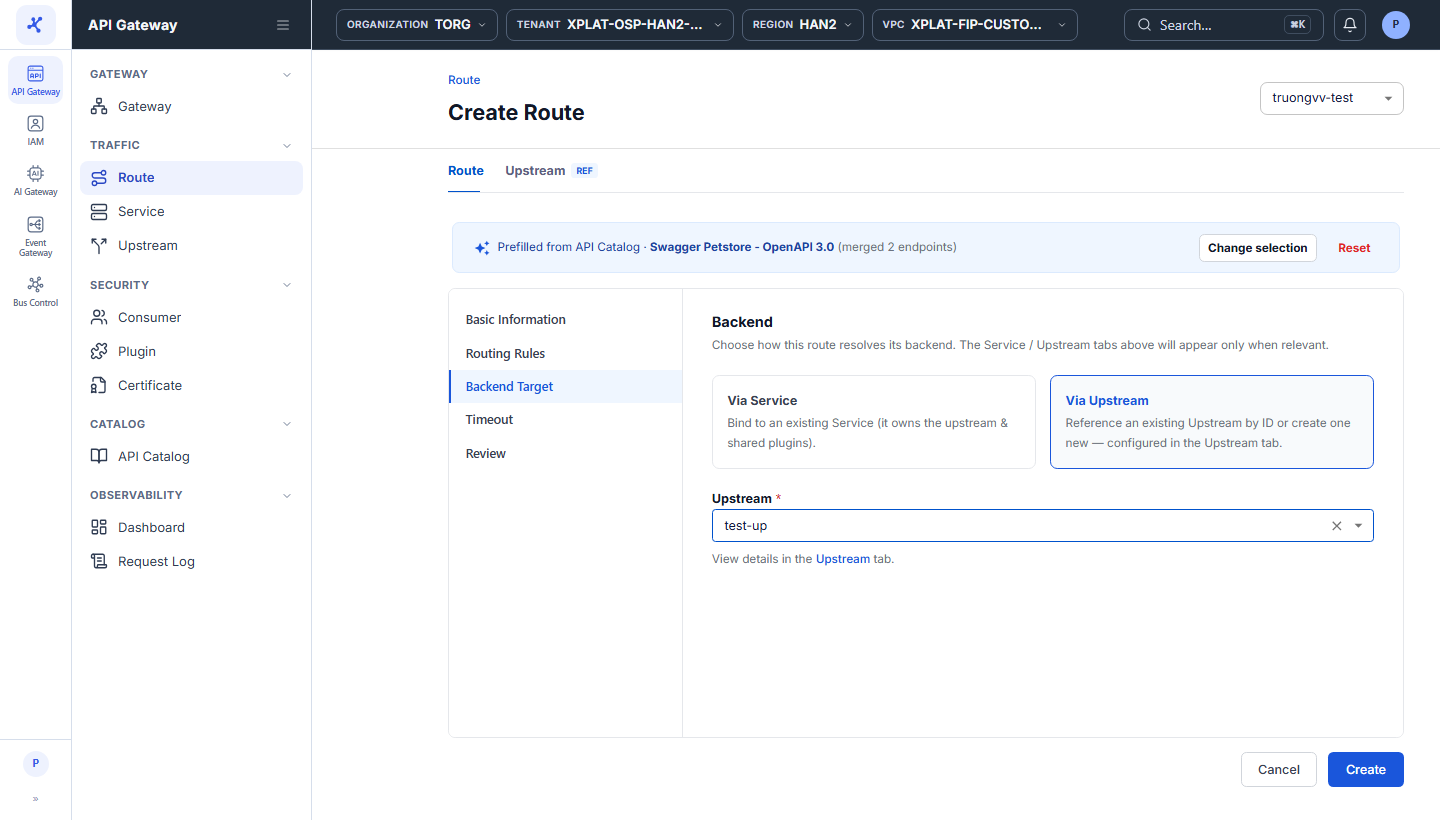
| Via Upstream | Select an Upstream in the Upstream field. The Route points directly to the targets of that Upstream. Use it when the backend serves only this Route. The Upstream tab (labeled REF) appears at the top so you can view the referenced configuration. |
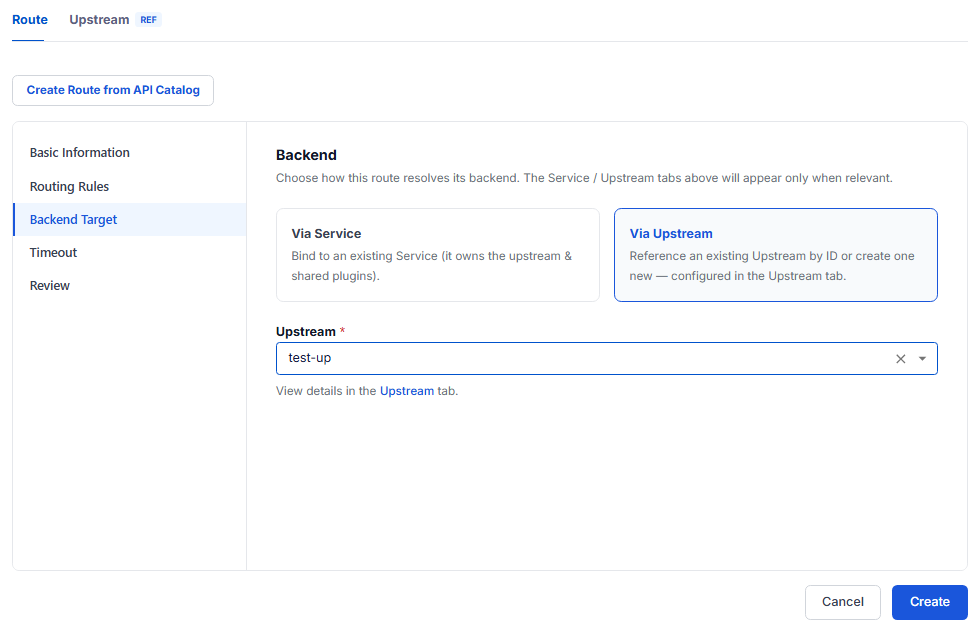
No suitable Service or Upstream yet? Select + Create new Service or + Create new Upstream in the list. The system adds a tab labeled NEW so you can create it right on this screen without leaving it. The fields are the same as on Create a Service and Create an Upstream.
- Select the Timeout section if the Route needs its own timeouts. Any field you leave empty uses the default configuration of the API Gateway.
| Field | Required | Description |
|---|---|---|
| Connect Timeout (s) | N | Maximum time (seconds) to establish a connection to the backend. |
| Send Timeout (s) | N | Maximum time (seconds) to finish sending the request to the backend. |
| Read Timeout (s) | N | Maximum time (seconds) to wait for the response from the backend. This sets how long clients wait when the backend is slow. |
The fields accept positive numbers only.
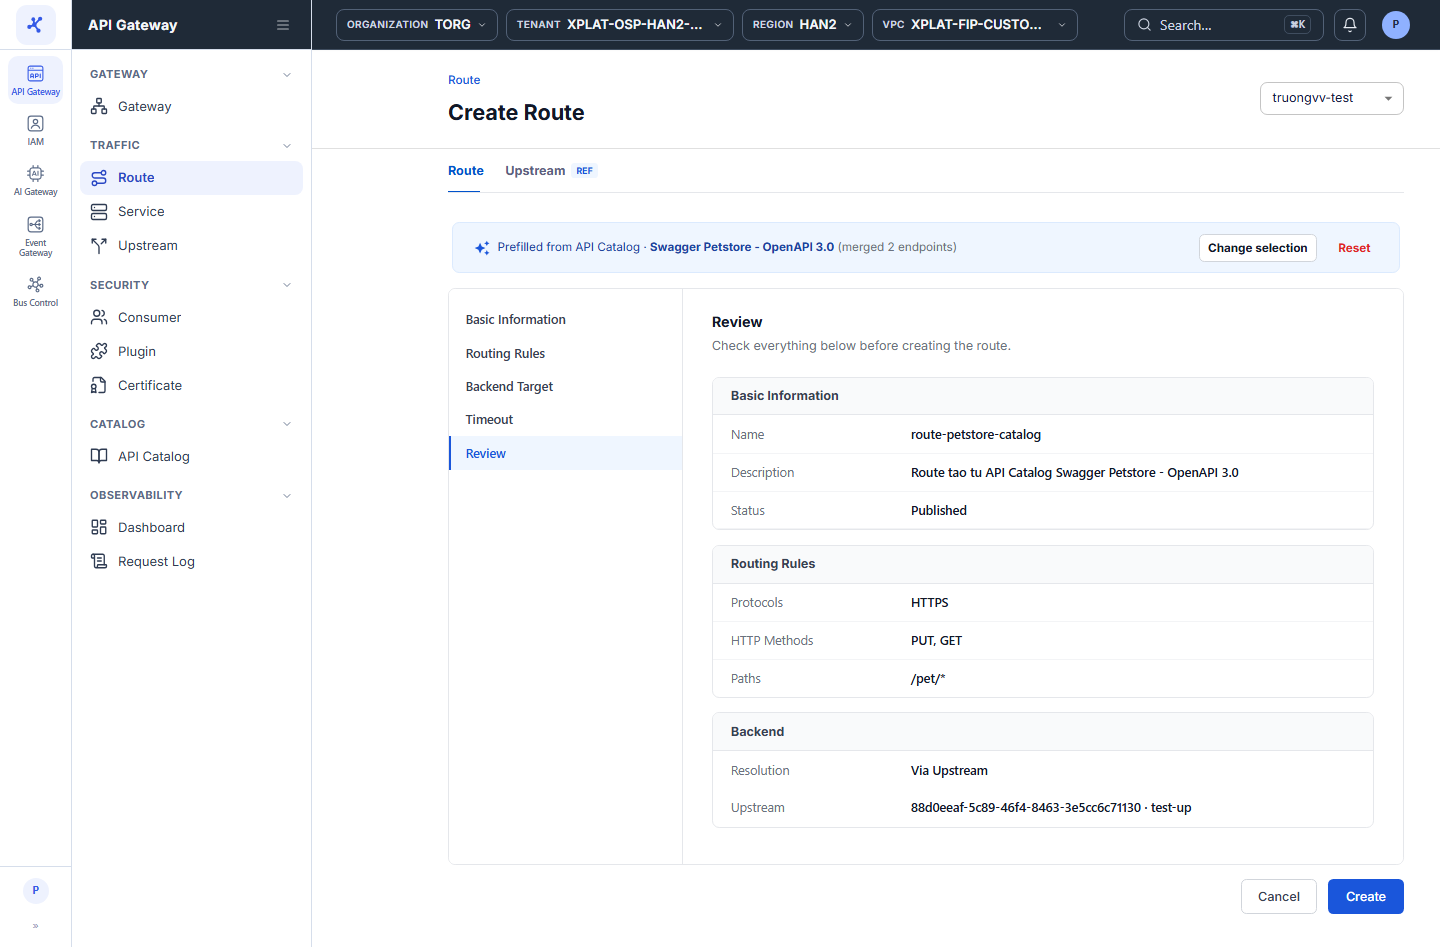
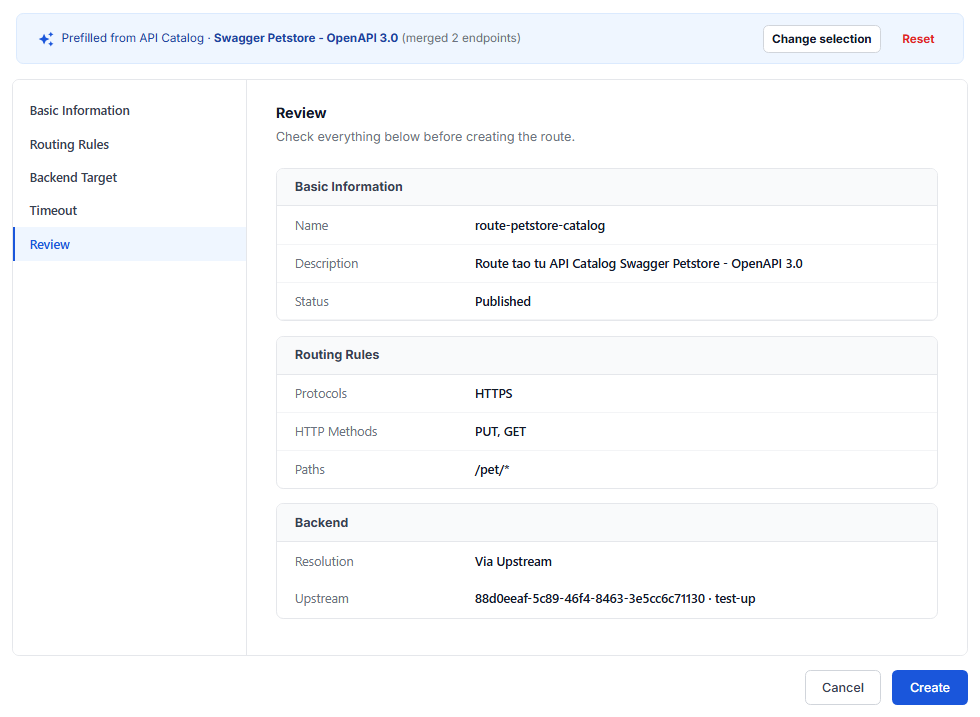
- Select the Review section to check the whole configuration, grouped by Basic Information, Routing Rules, and Backend. You cannot edit here. To change something, select the corresponding section.
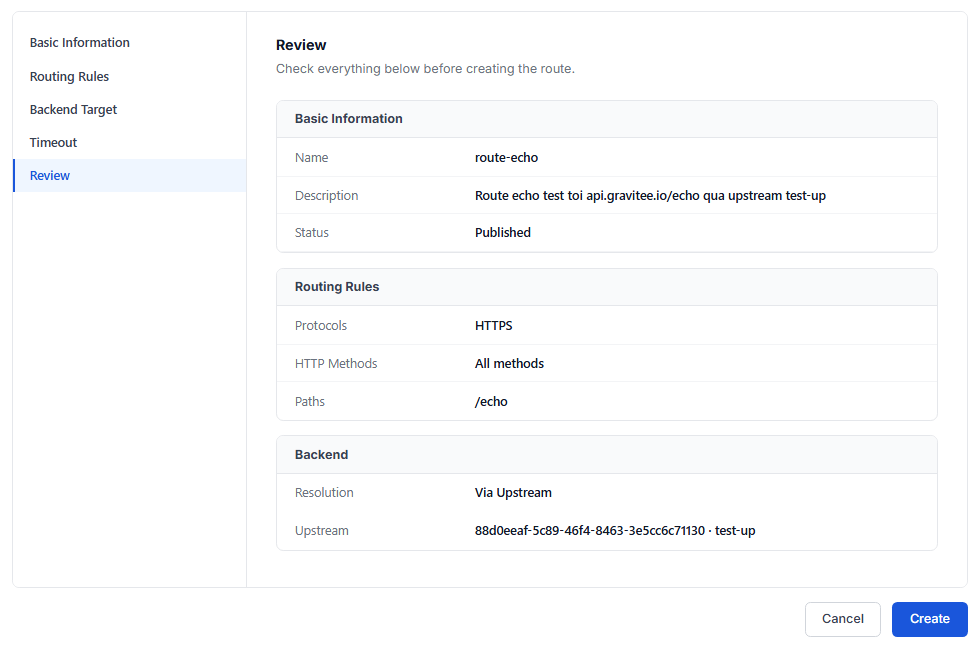
- Click Create to finish.
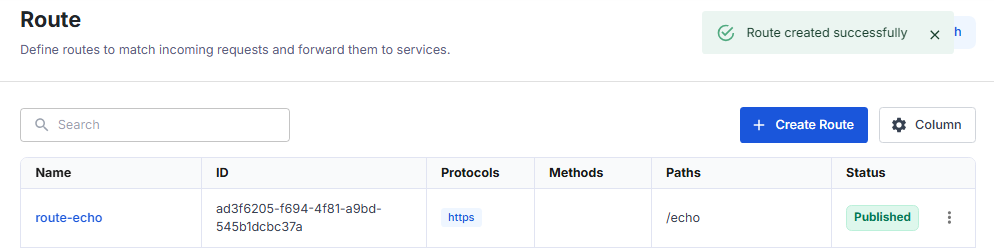
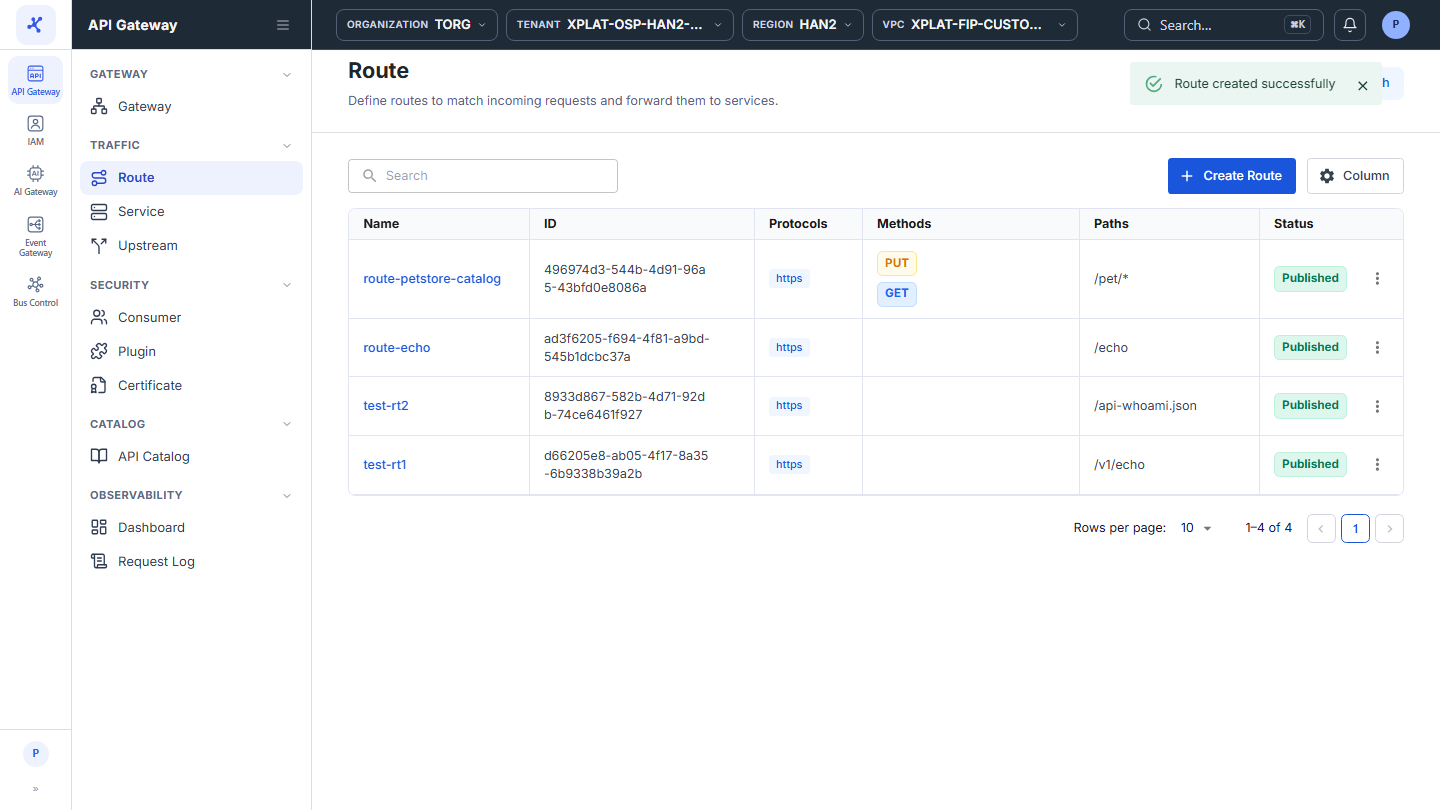
The message Route created successfully appears, the system takes you back to the Route screen, and the new Route is at the top of the list.
Create a Route from the API Catalog
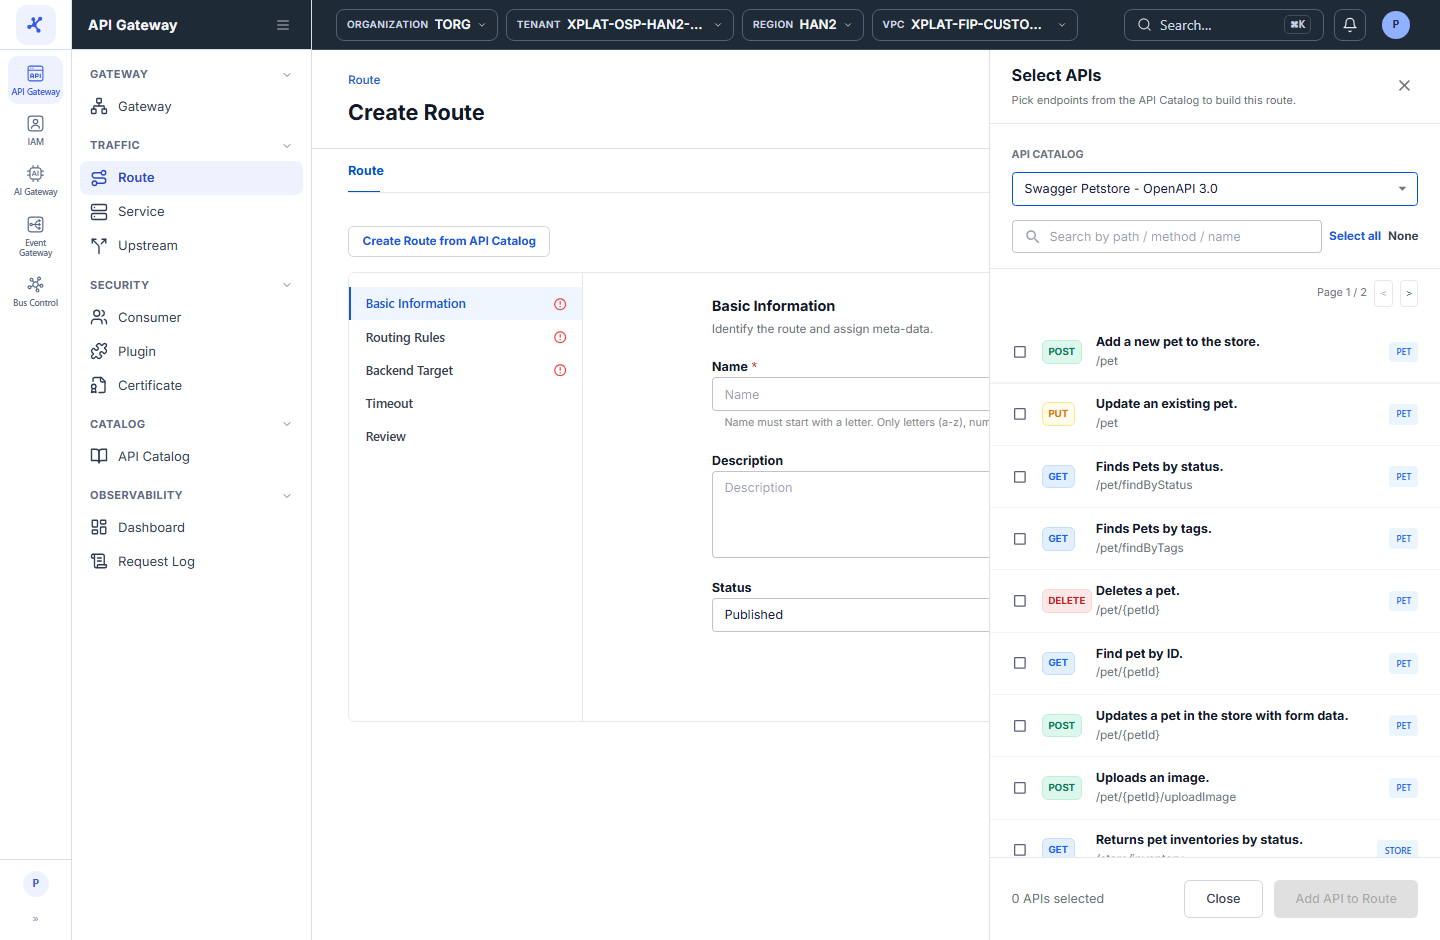
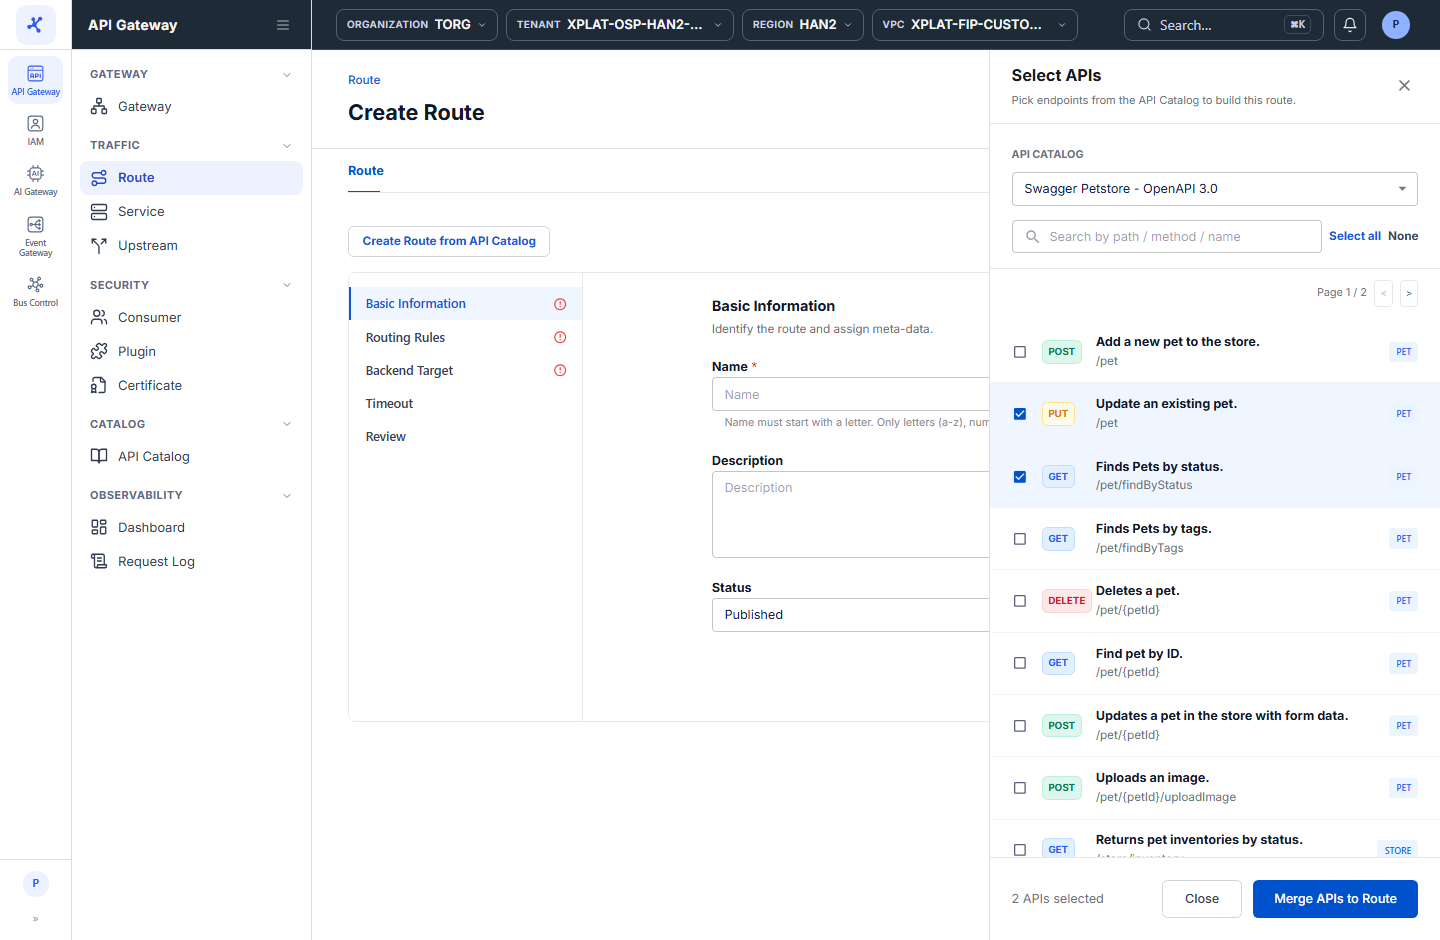
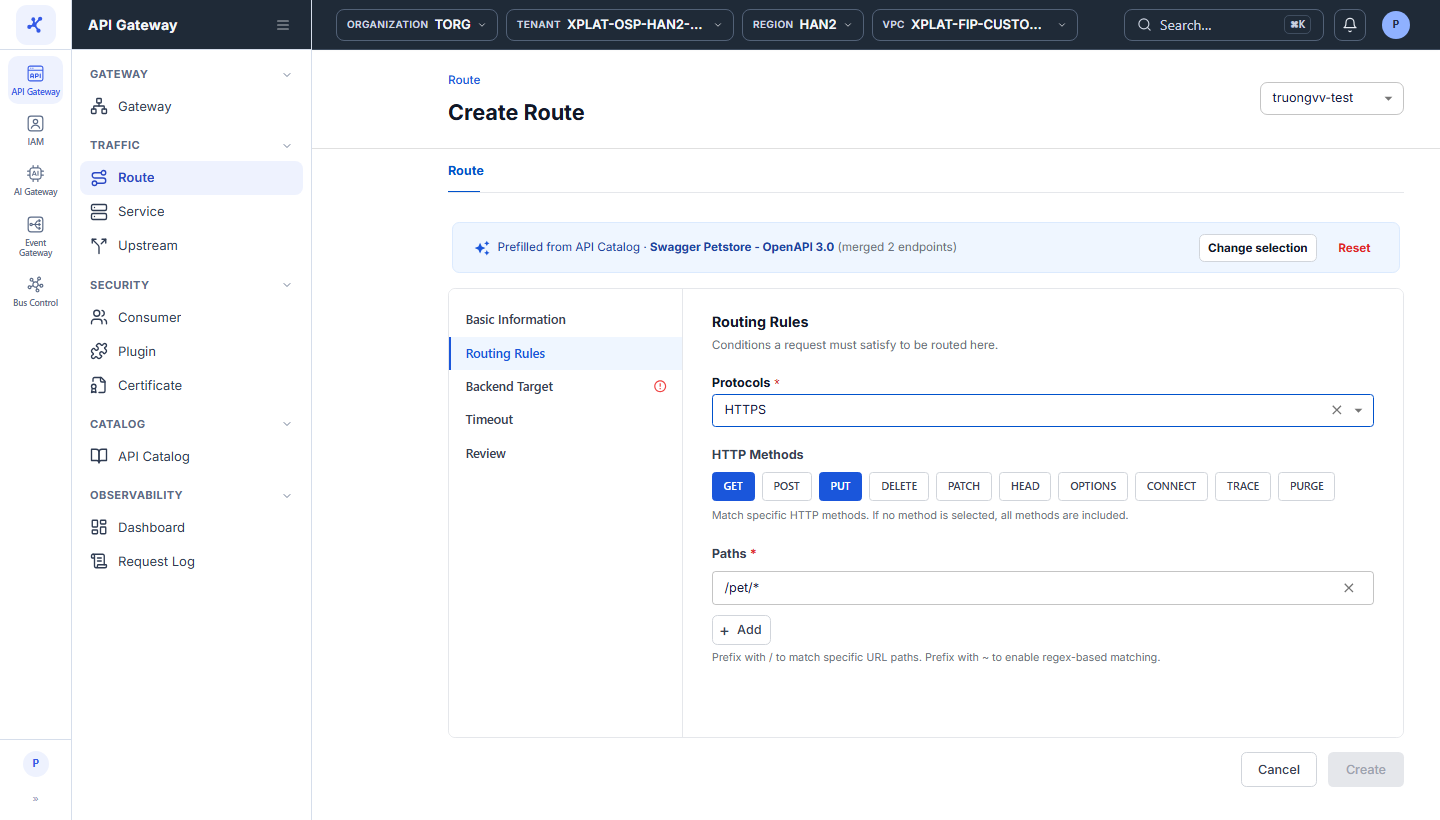
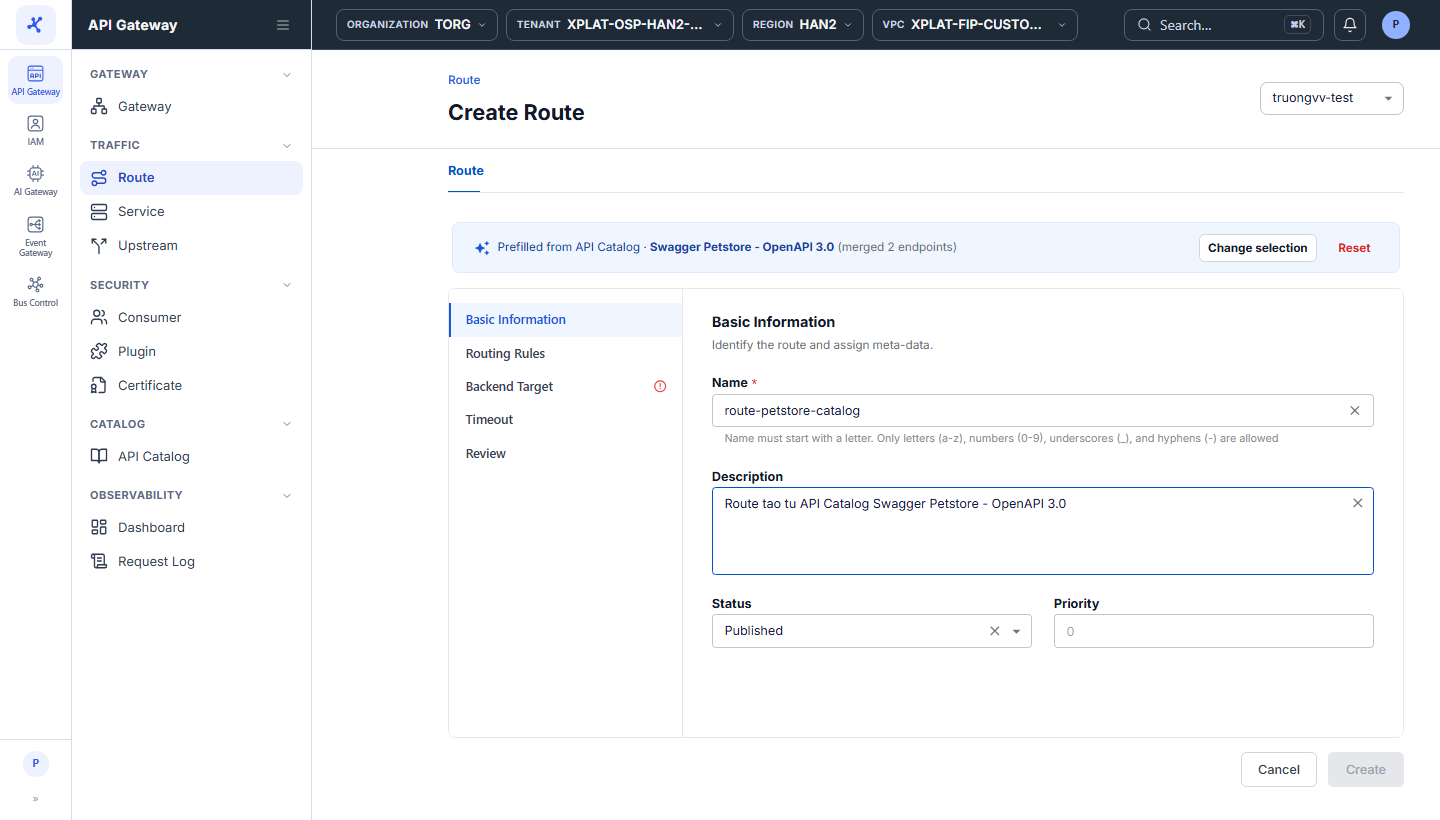
Click the image to zoom in.
Use this when the API is already registered in the API Catalog with a spec. The system pre-fills HTTP Methods and Paths from the endpoints you select, so you do not type them.
To create a Route from the API Catalog, follow these steps:
-
In the left menu, select API Gateway → Route, select the API Gateway in the top-right corner, then click Create Route.
-
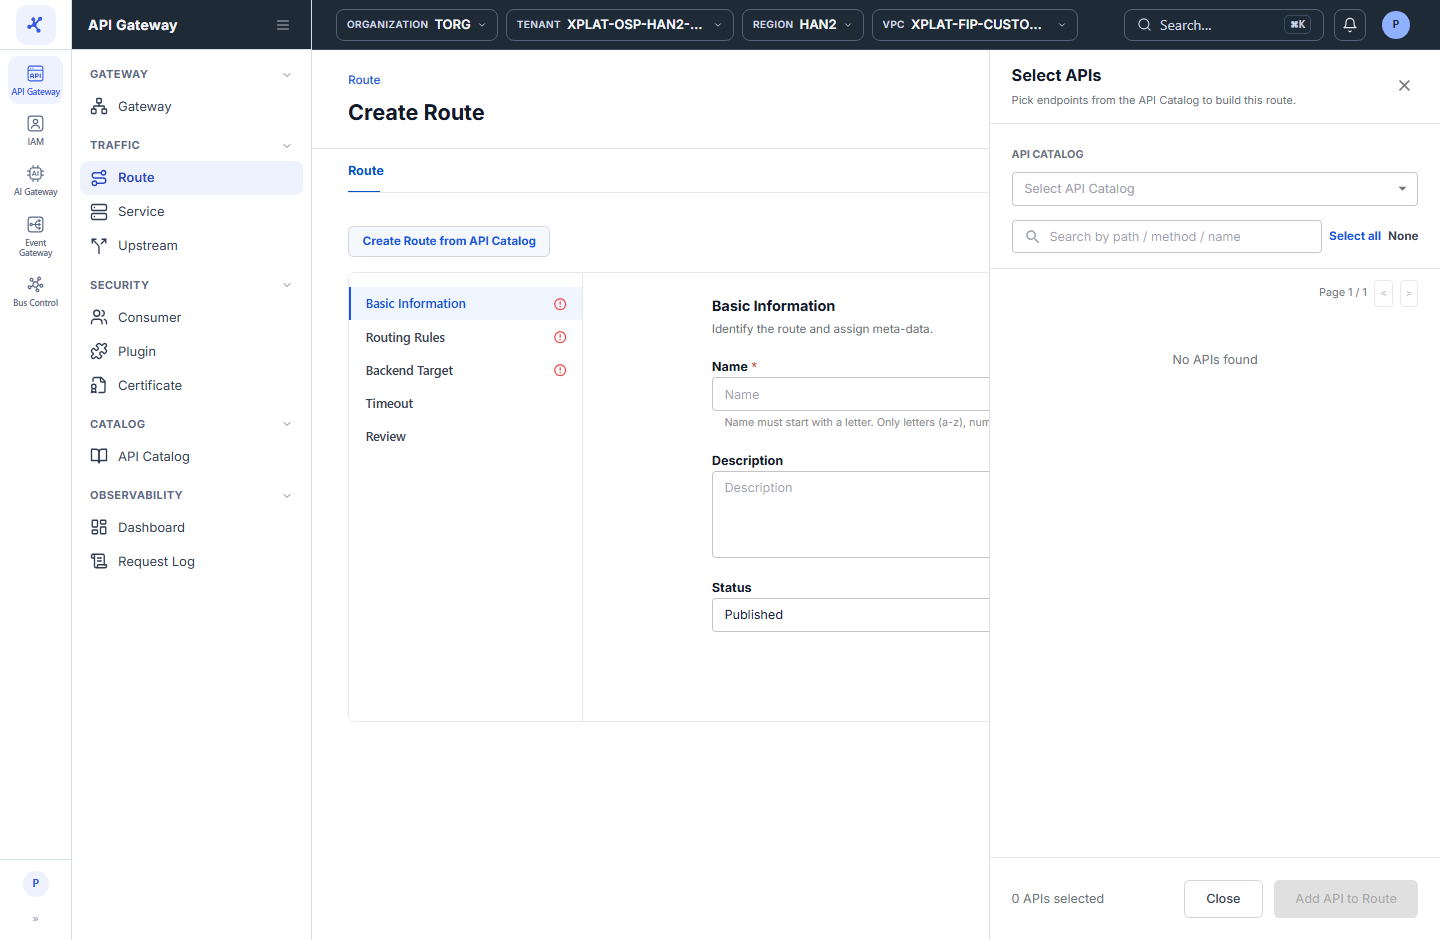
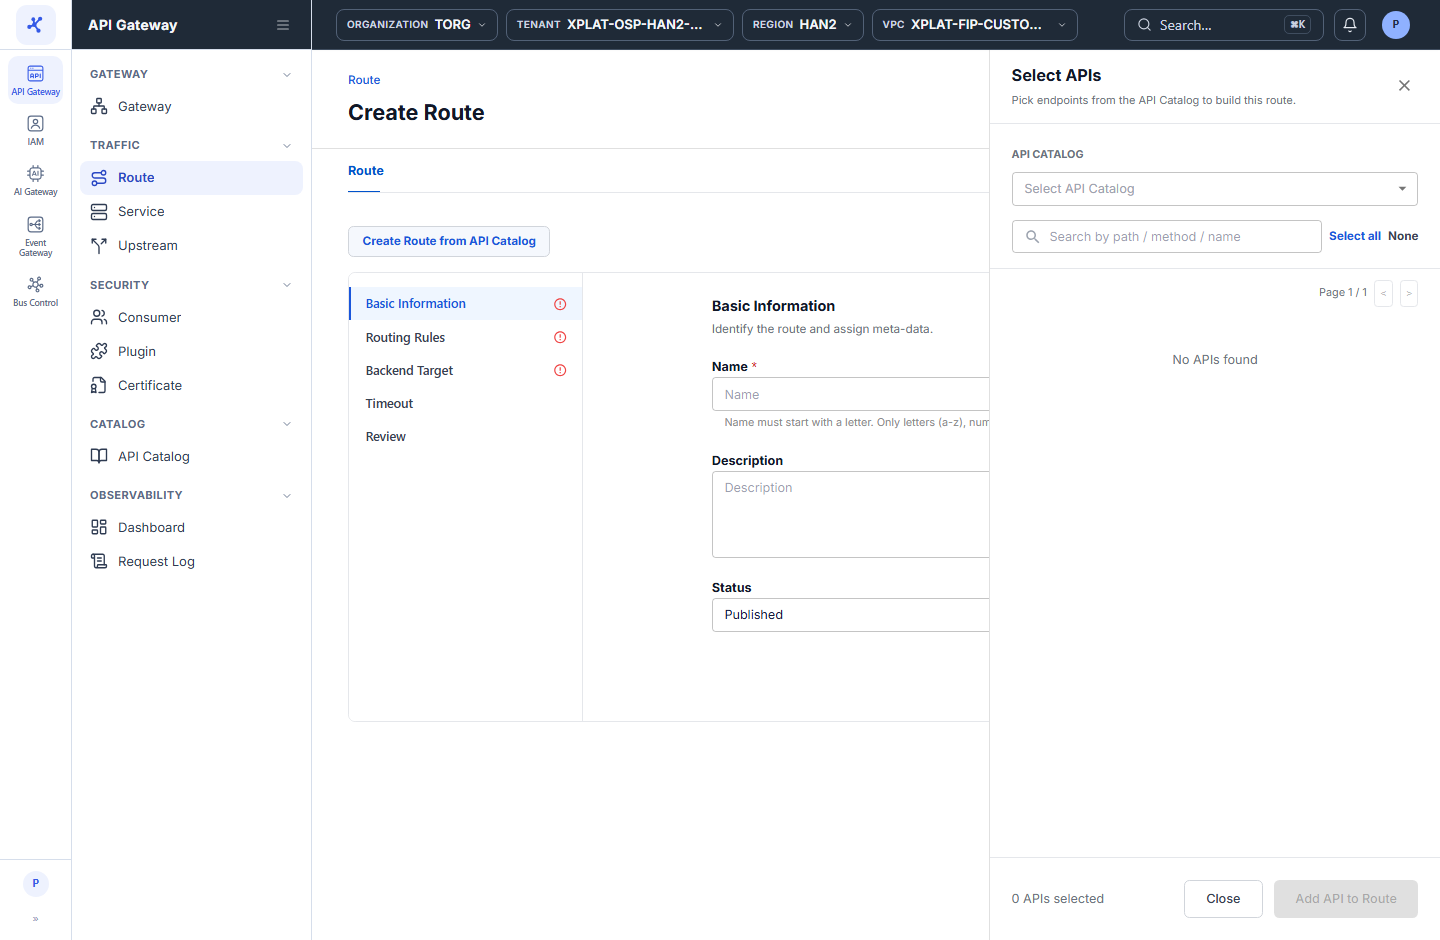
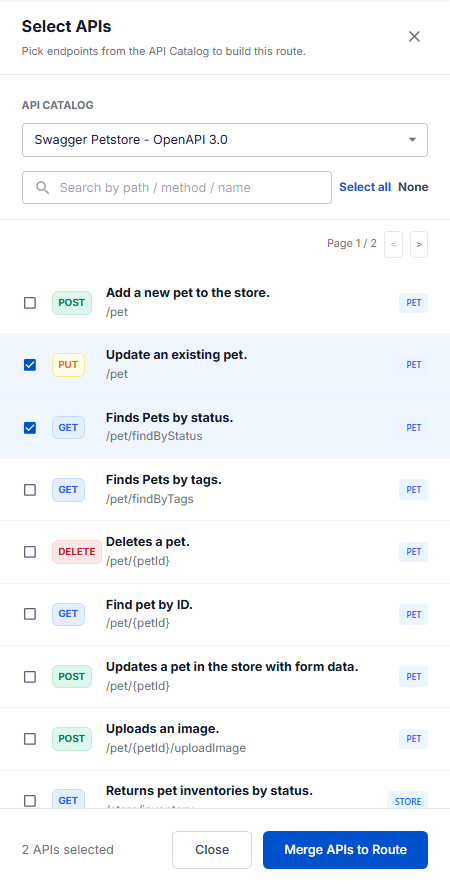
Click Create Route from API Catalog to open the Select APIs form.
-
In the API CATALOG field, select the source API. The endpoints of the API appear, with paging. Type in the Search by path / method / name box to find endpoints quickly, or click Select all / None to select or clear all.
-
Select the endpoints you need, then click Merge APIs to Route. The number of selected endpoints is shown at the bottom of the form.
- Check the pre-filled Routing Rules section. A Prefilled from API Catalog bar at the top shows the API name, the number of merged endpoints, and 2 buttons: Change selection to pick endpoints again, and Reset to discard the pre-filled data.
| Field | How it is filled |
|---|---|
| HTTP Methods | Set to the methods of the selected endpoints. |
| Paths | Paths in the same group are merged into 1 pattern, for example /pet and /pet/findByStatus become /pet/*. |
| Protocols | Not filled. You must select it, otherwise Routing Rules stays invalid. |
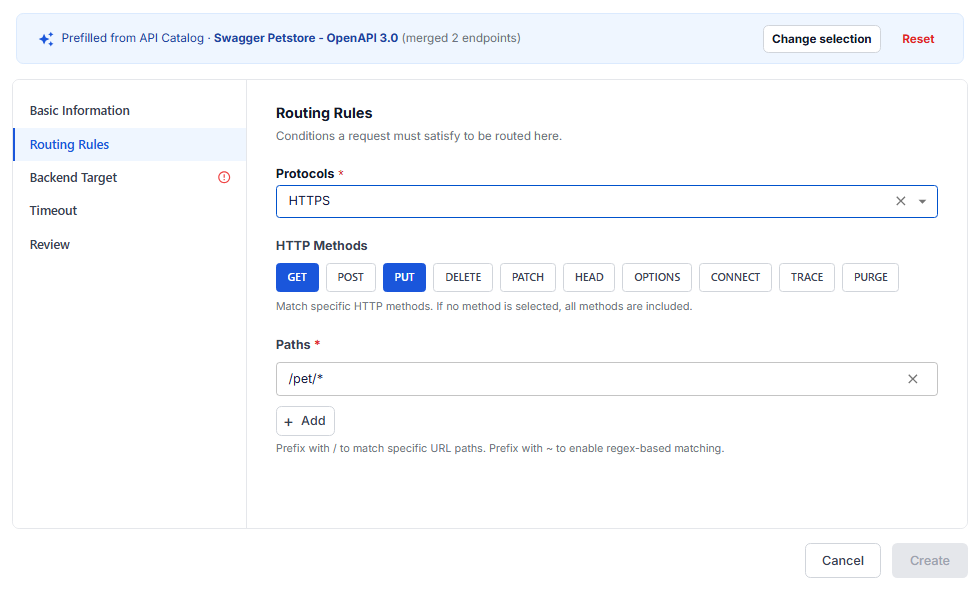
If the selected endpoints do not share a common path prefix (for example a mix of /pet, /store/order, and /user), the system cannot merge them into one Path and asks you to enter Paths manually.
-
Enter Basic Information and choose Backend Target and Timeout as in Steps 2–5 of the manual method.
-
Select the Review section to check, then click Create. The Prefilled from API Catalog bar still shows in Review so you know which API the Route came from.
You can also start from the API Catalog screen with Map to Route or Deploy to gateway. See Deploy an API Catalog to an API Gateway.
Common issues
| Error | Cause | Solution |
|---|---|---|
| Name has invalid characters | Name does not start with a letter, or contains uppercase letters or special characters | Change the name to follow the rule in Step 2. |
| Route name already exists | A Route with the same name already exists in this API Gateway | Use another name. |
| The Create button is disabled | A section still shows the red ⓘ icon, usually because Protocols is not selected or a Paths row is empty | Open the section with the ⓘ icon and fill in the required fields. |
| Something went wrong. Please try again later. | System error. The form data is kept | Click Create again after a few minutes. |