Create a Service
A Service groups many Routes so they share one backend (Upstream) and the same plugins: each Service is bound to exactly 1 Upstream, and a Route that uses Via Service as its Backend Target inherits that Upstream. To change the backend of many Routes, you then edit one place, the Service, instead of every Route.
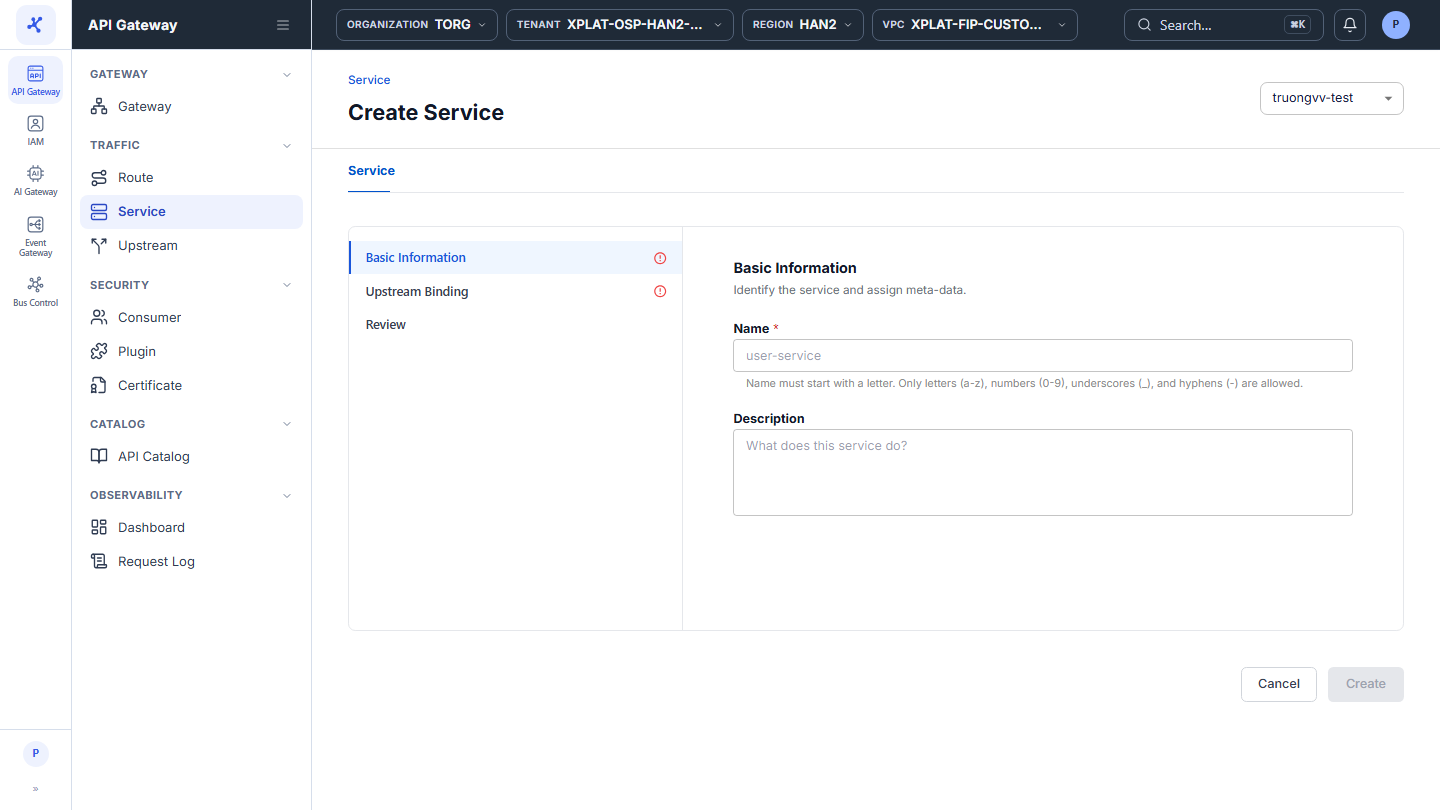
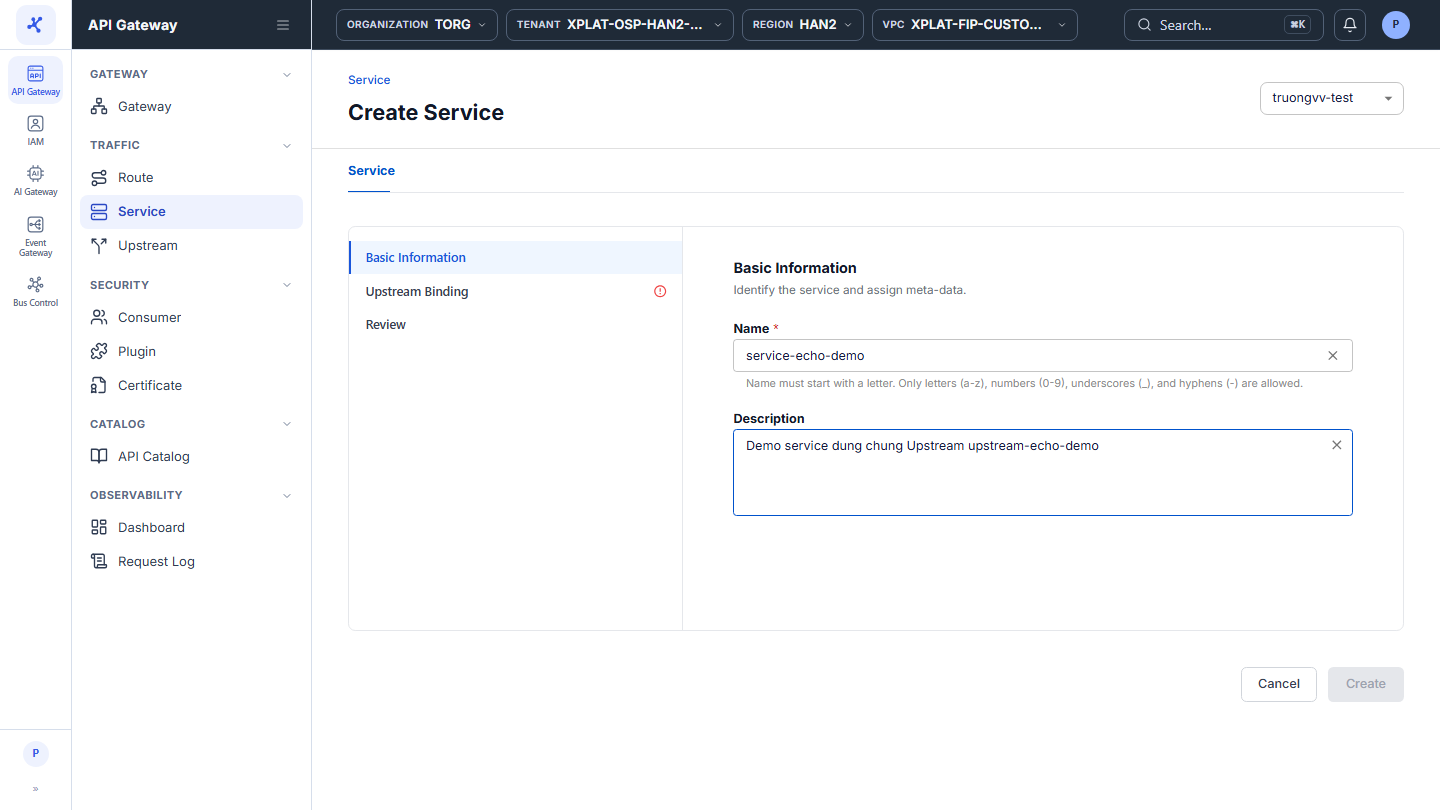
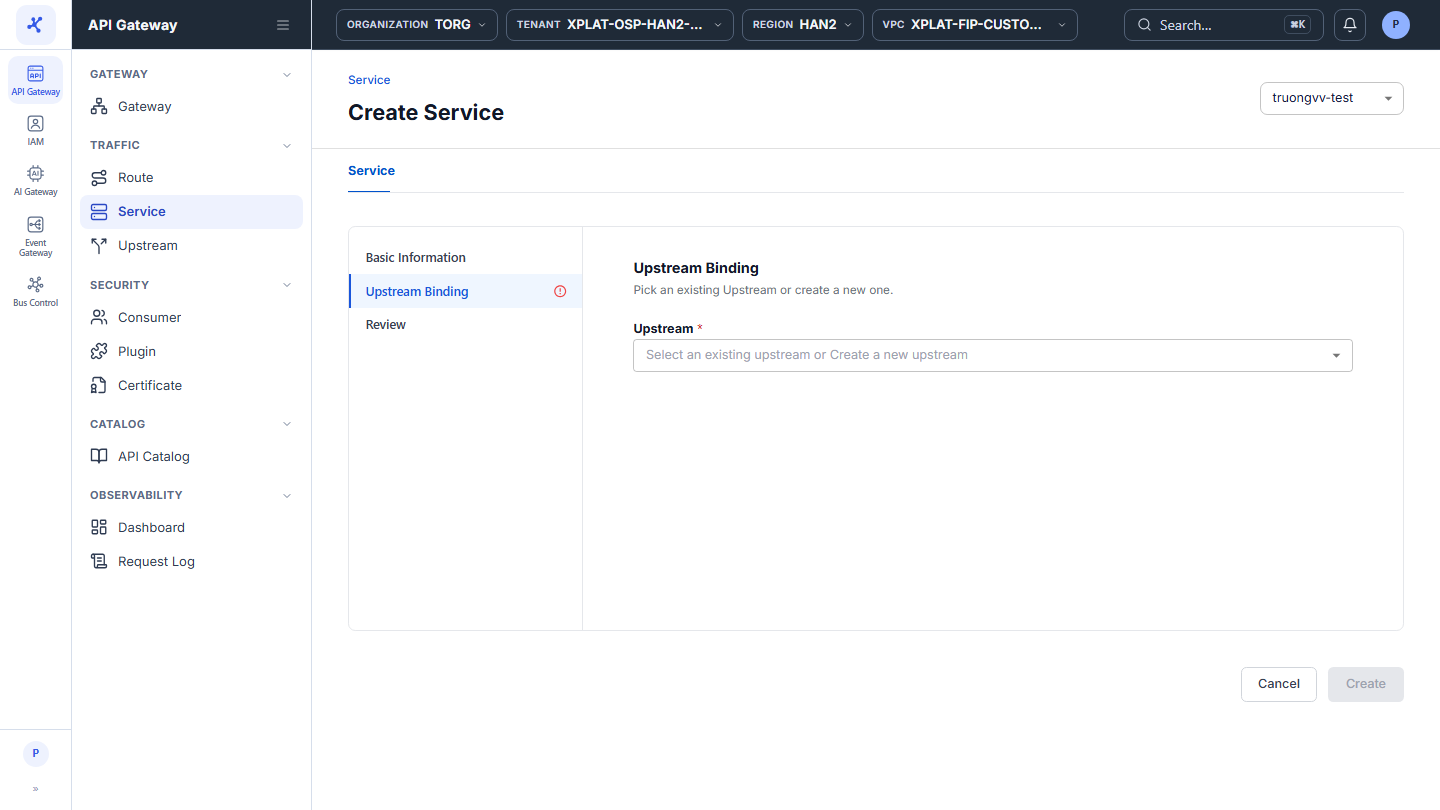
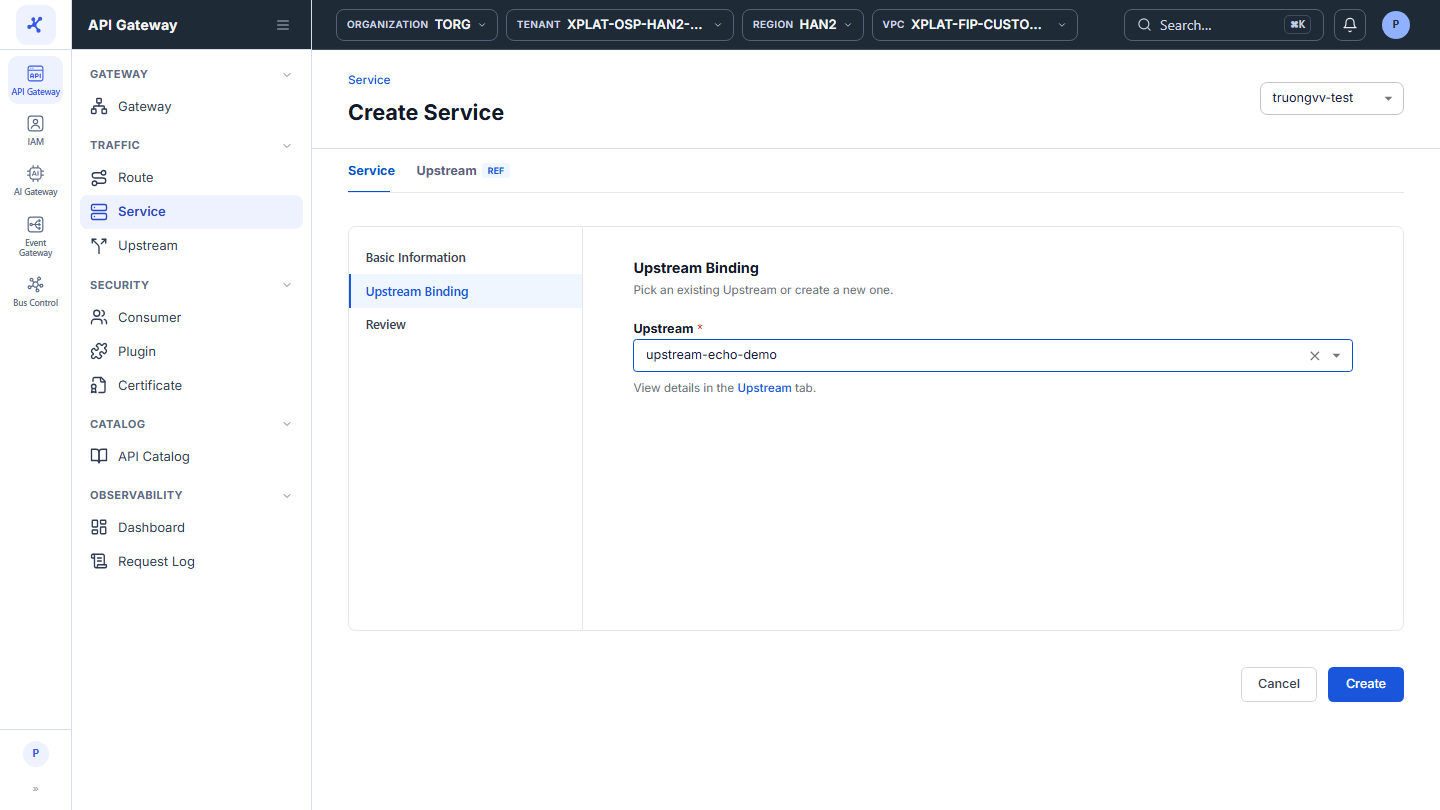
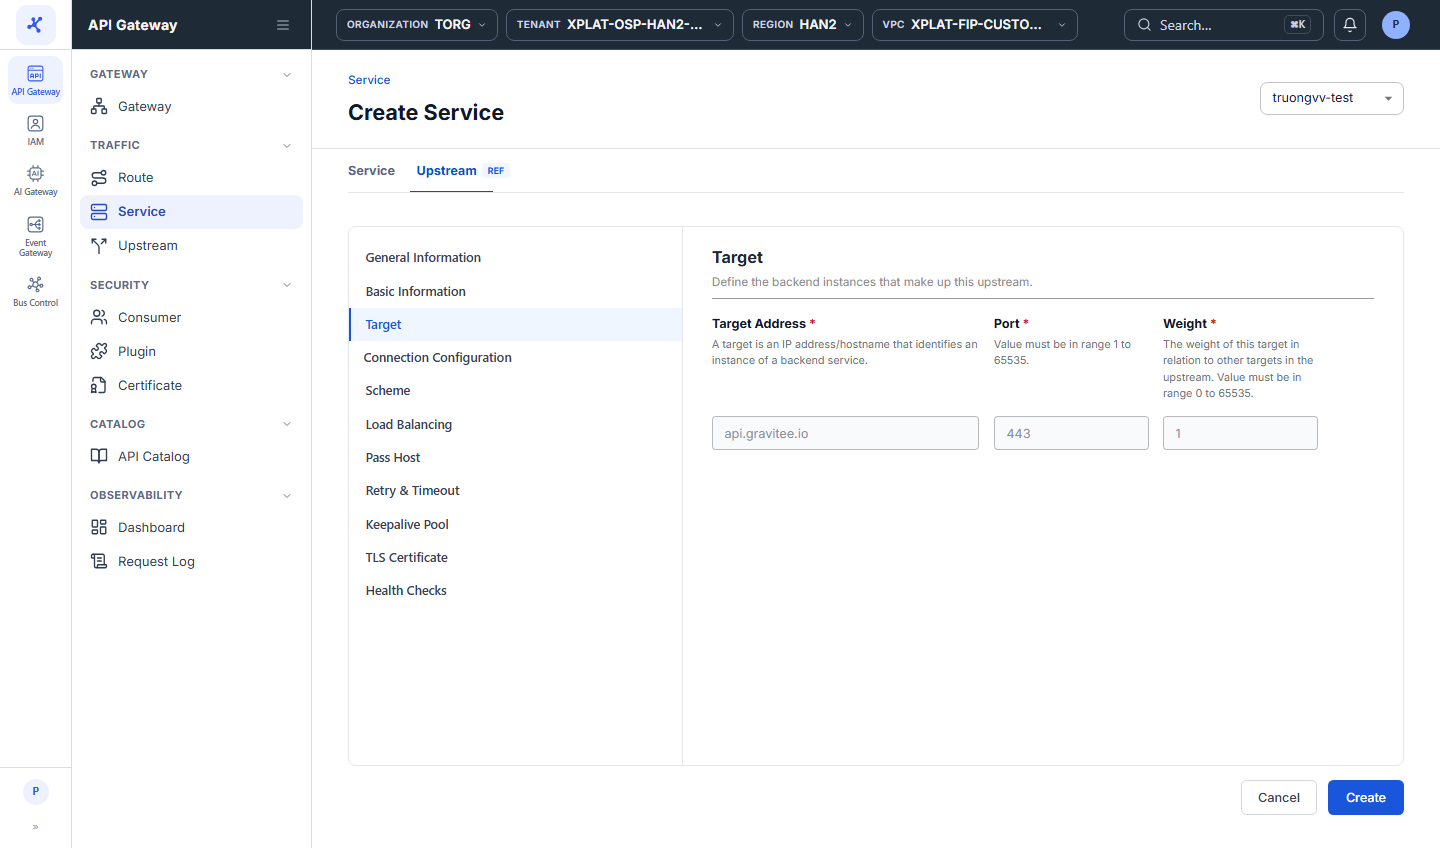
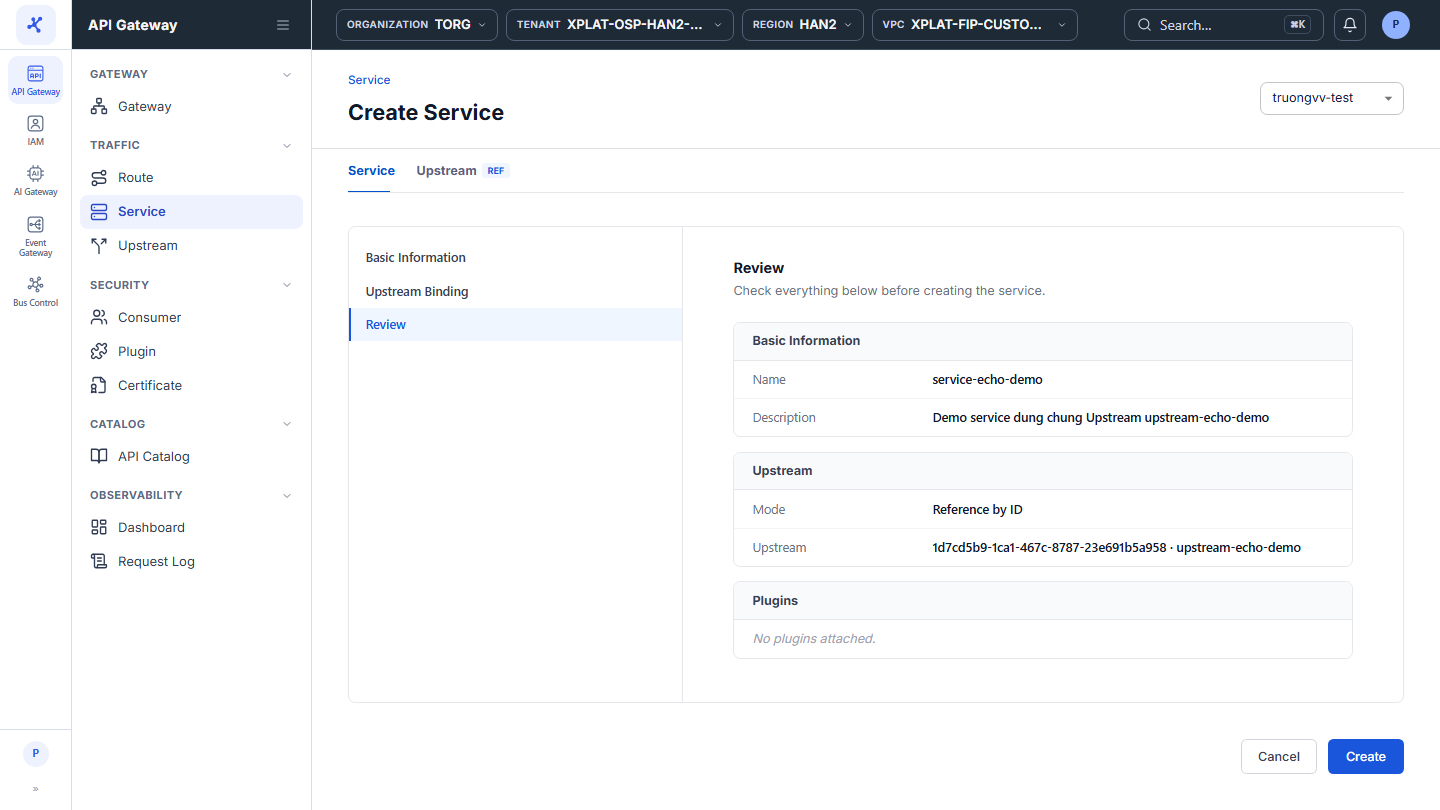
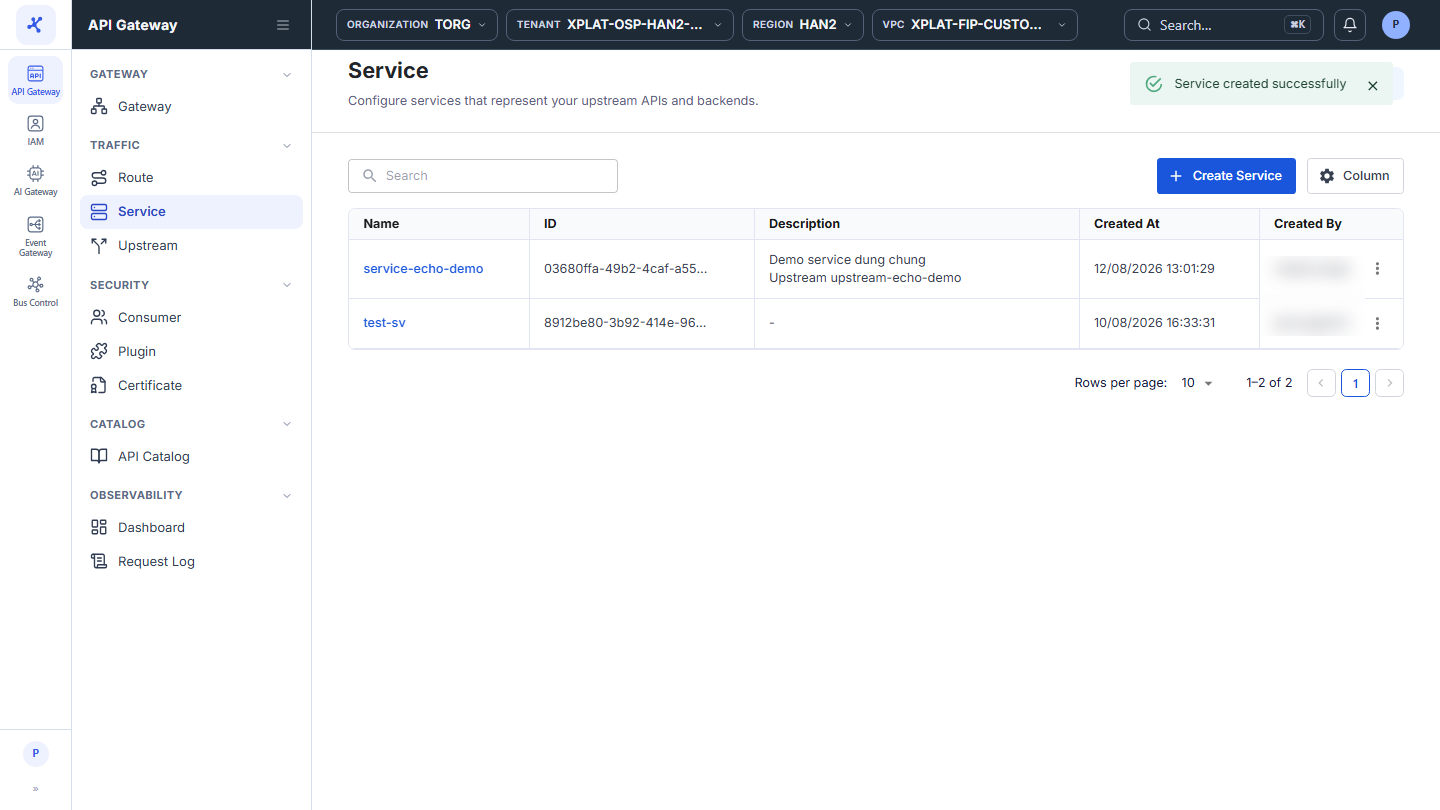
Click the image to zoom in.
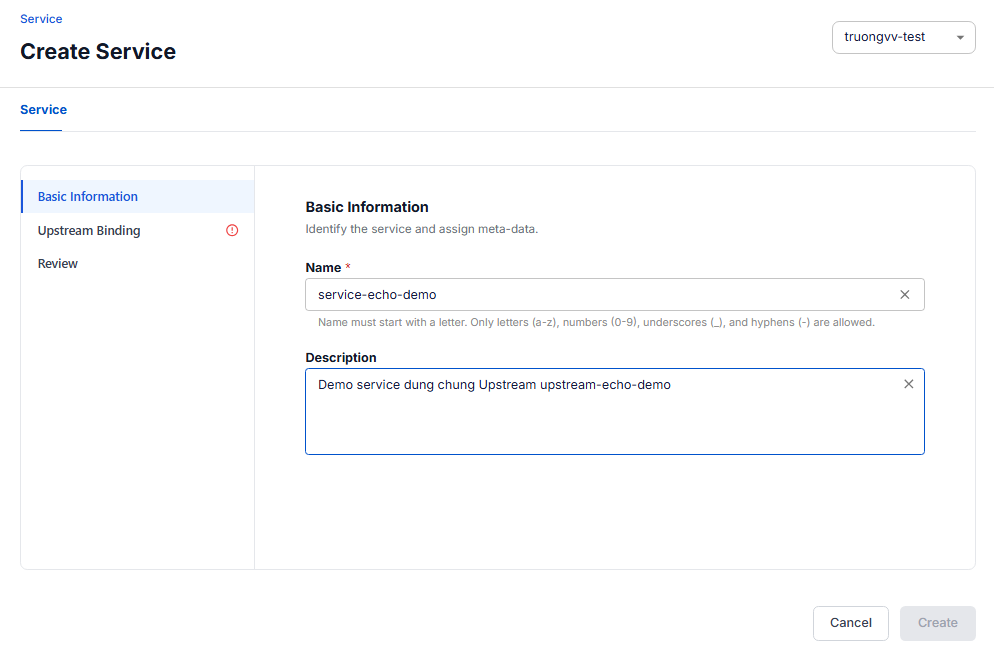
The Create Service screen has 3 sections in the navigation on the left: Basic Information → Upstream Binding → Review. Basic Information and Upstream Binding are required. A section that is not valid yet shows a red ⓘ icon, and the Create button is enabled only when both sections are valid.
Create a Service
To create a Service, follow these steps:
-
In the left menu, select API Gateway → Service, select the API Gateway in the top-right corner, then click Create Service.
-
In the Basic Information section, enter the following information:
| Field | Required | Description |
|---|---|---|
| Name | Y | Service name, shown in the list and used to select the Service when a Route uses Via Service. Starts with a letter and uses only lowercase letters a-z, numbers 0-9, _, and -. The name must be unique within the API Gateway. |
| Description | N | Purpose of the Service, for example which Routes it groups and which backend it uses, so it is easy to manage many Services. |
- Select the Upstream Binding section, then choose the Upstream for the Service:
| Field | Required | Description |
|---|---|---|
| Upstream | Y | Upstream used as the shared backend of every Route that points to this Service. Select an existing Upstream in the API Gateway, or select + Create a new upstream to create one right on this screen (same fields as Create an Upstream). The Service only references the Upstream by ID and does not copy its configuration. |
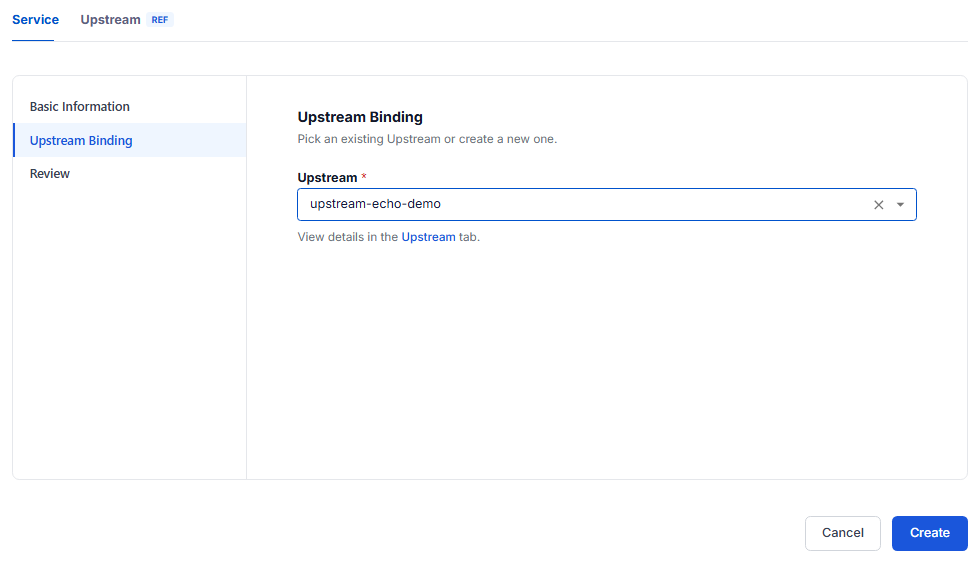
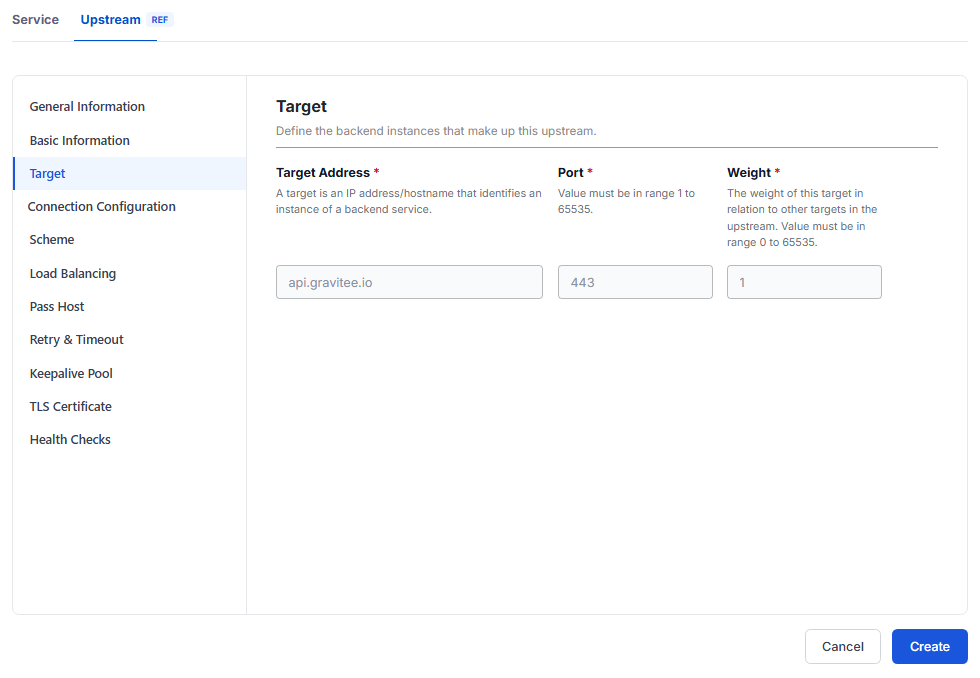
After you select an Upstream, the Upstream tab (labeled REF) appears at the top. Select it to view the configuration of the selected Upstream (Target, Connection Configuration, Health Checks, and so on) in read-only mode, without opening another screen.
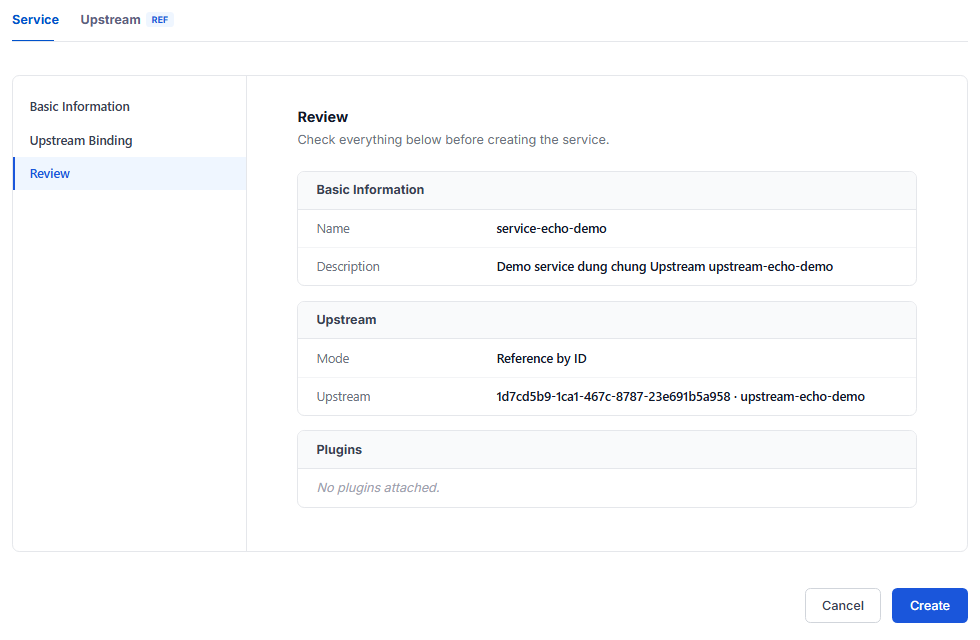
- Select the Review section to check the configuration: Basic Information, Upstream (Mode is Reference by ID, and the selected Upstream), and Plugins.
- Click Create to finish.
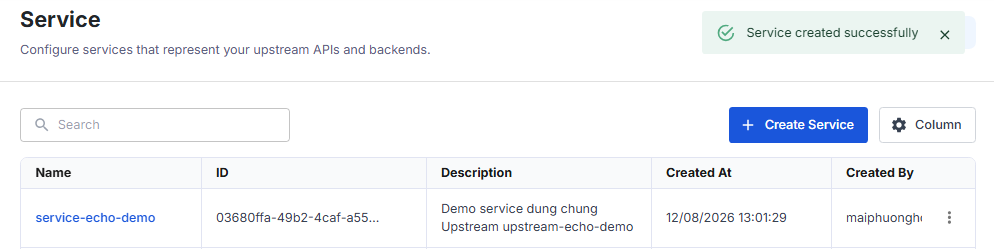
The message Service created successfully appears, the system takes you back to the Service screen, and the new Service is at the top of the list.
To make a Route use this Service, select Via Service as the Backend Target when you create or edit the Route. See Create a Route.
Common issues
| Error | Cause | Solution |
|---|---|---|
| Service name already exists | A Service with the same name already exists in this API Gateway | Use another name. |
| The Create button is disabled | Name is empty or no Upstream is selected (the section shows the red ⓘ icon) | Open the section with the ⓘ icon and fill in the required fields. |