Create an Upstream
An Upstream represents a group of backend targets (host and port of each backend instance). The API Gateway load balances requests across these targets, following the connection, timeout, and health check settings of the Upstream.
Other modules reference Upstreams:
| Module | How it uses the Upstream |
|---|---|
| Route | Backend Target set to Via Upstream: the Route points directly to the Upstream. |
| Service | Upstream Binding section: the Service is bound to exactly 1 Upstream, and Routes that use Via Service inherit it. |
You can also create an Upstream right from the Route creation screen (+ Create new Upstream) or the Service creation screen (+ Create a new upstream), without leaving it.
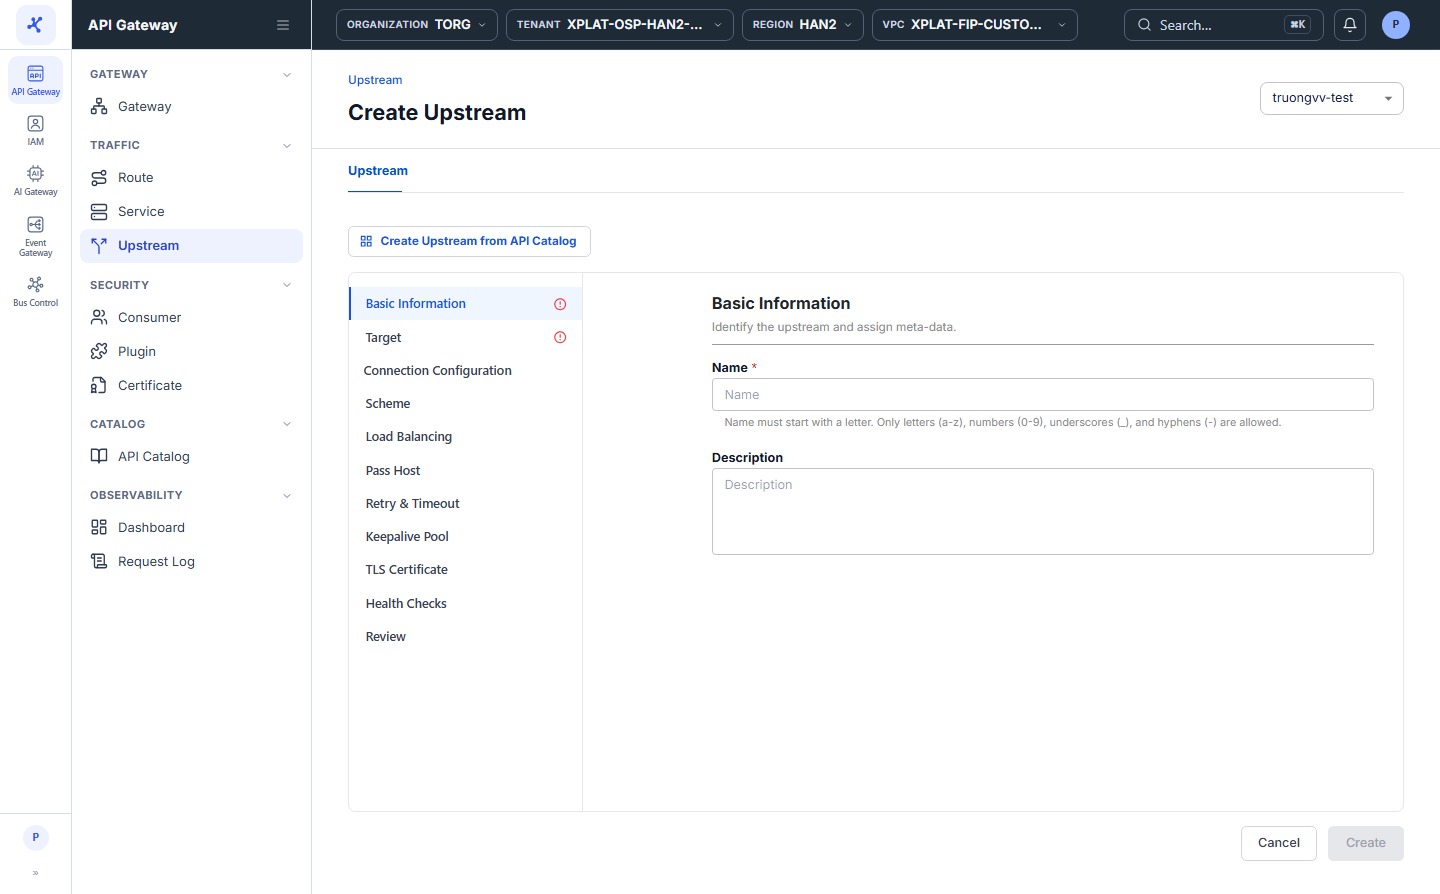
The Create Upstream screen has sections in the navigation on the left: Basic Information → Target → Connection Configuration (Scheme, Load Balancing, Pass Host, Retry & Timeout, Keepalive Pool, TLS Certificate) → Health Checks → Review. Basic Information and Target are required, and the Create button is enabled only when both are valid. The other sections have default values.
You can enter the Targets manually, or take them from the server list of an API in the API Catalog.
Create an Upstream manually
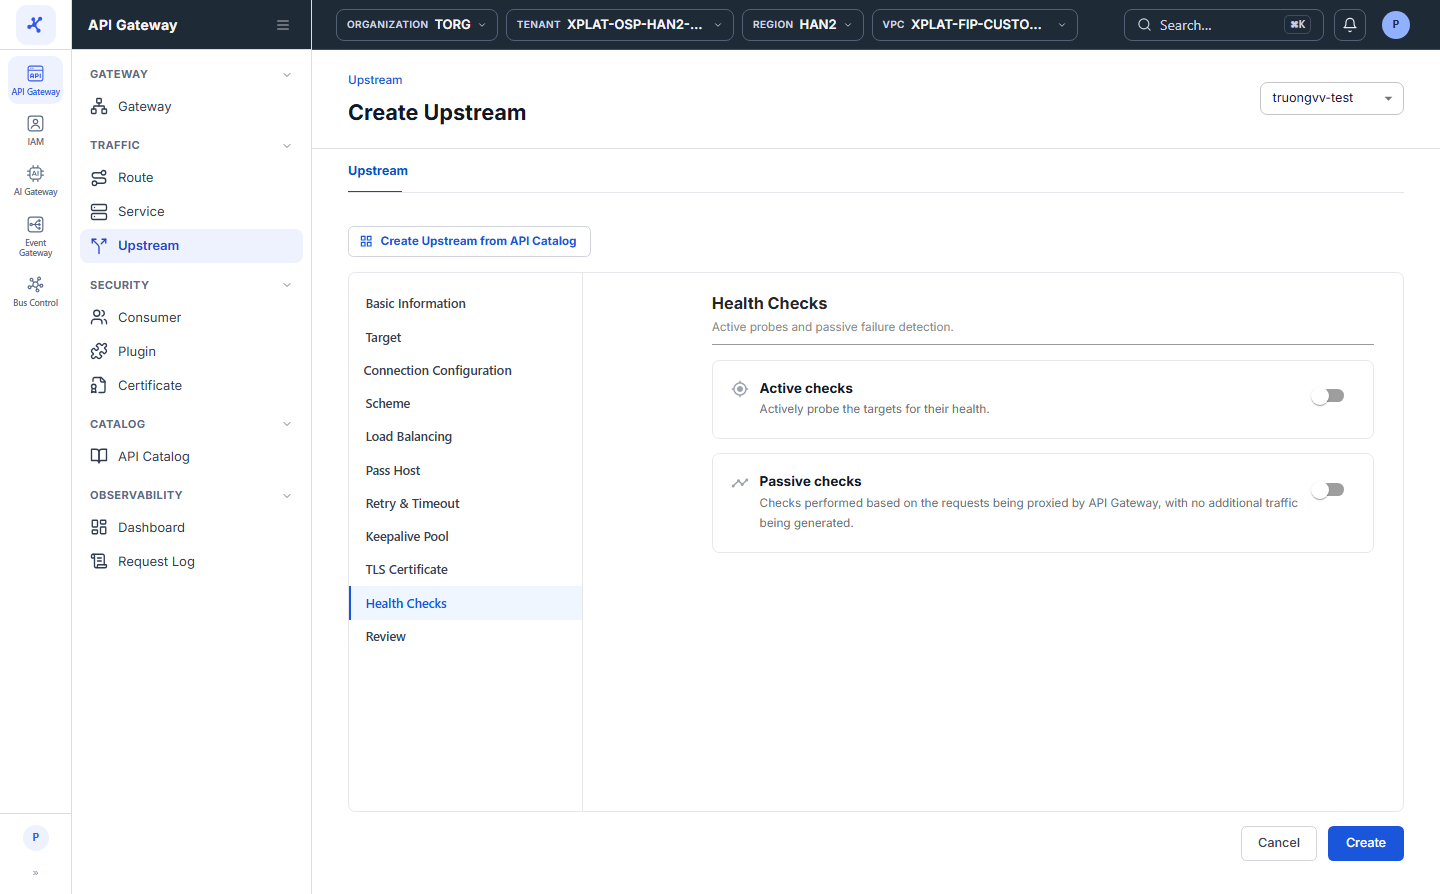
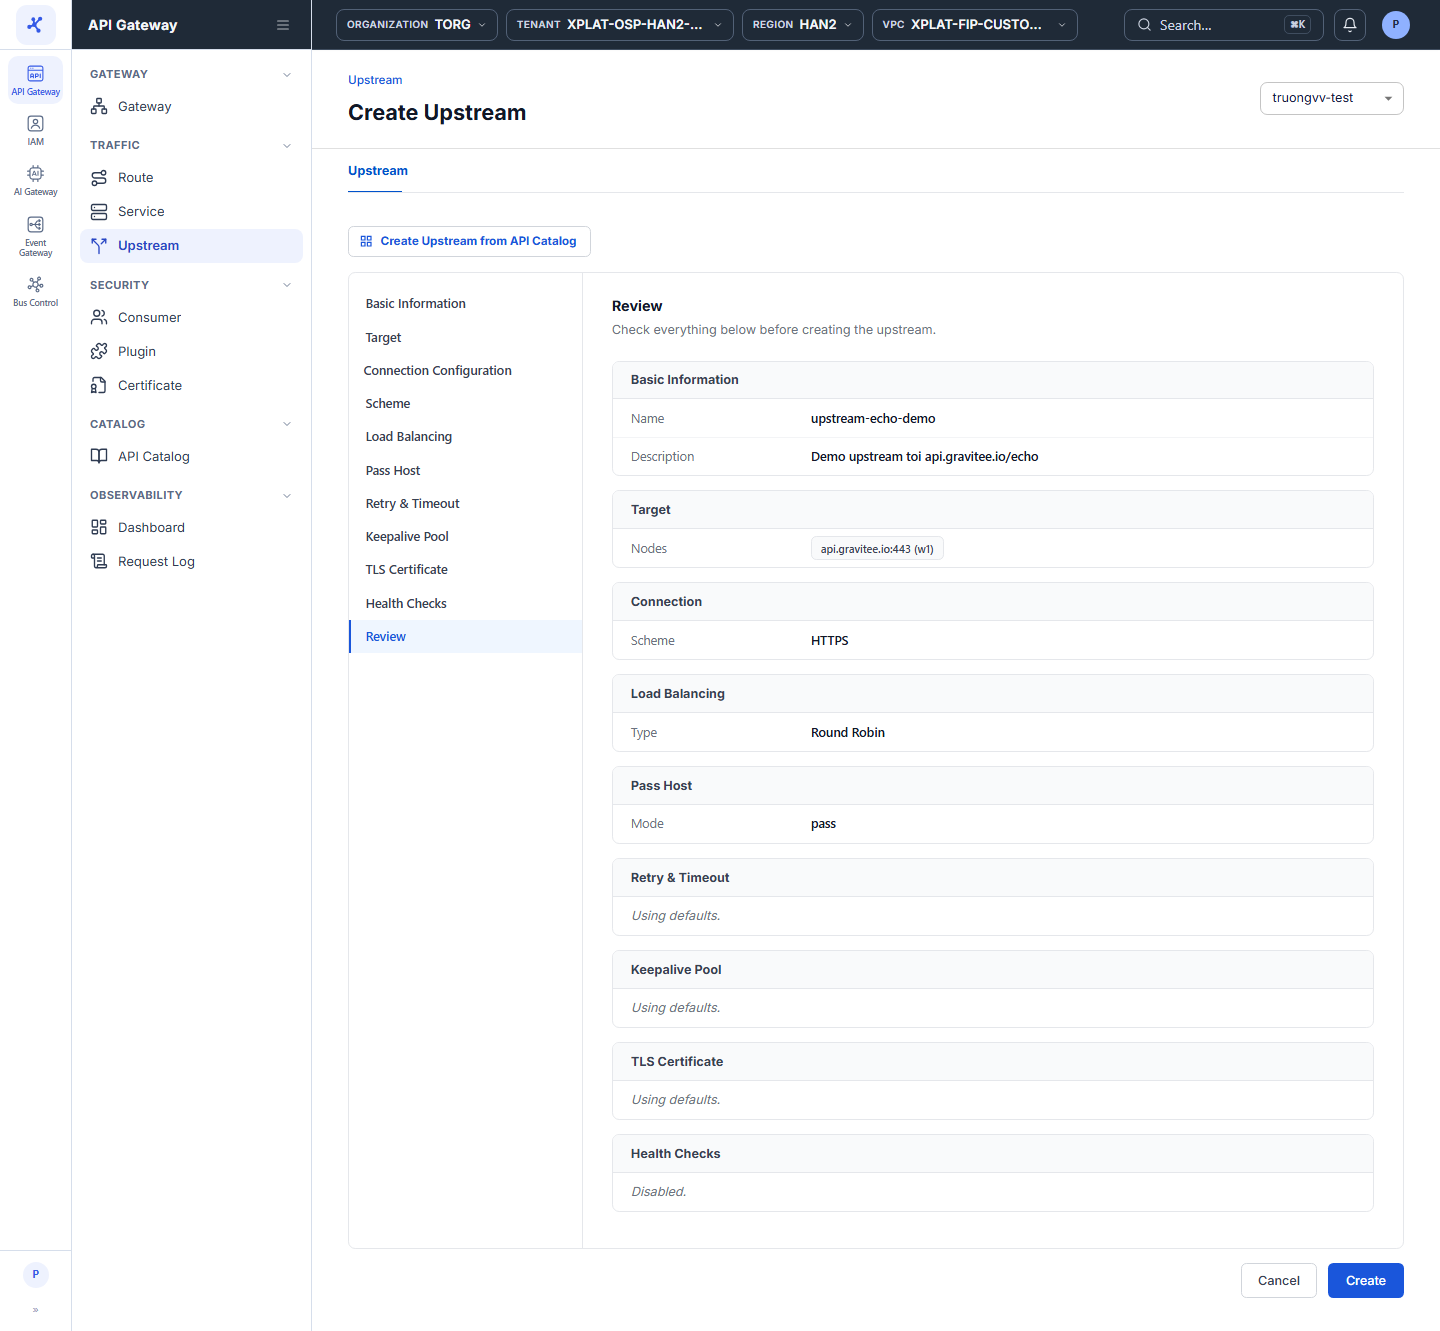
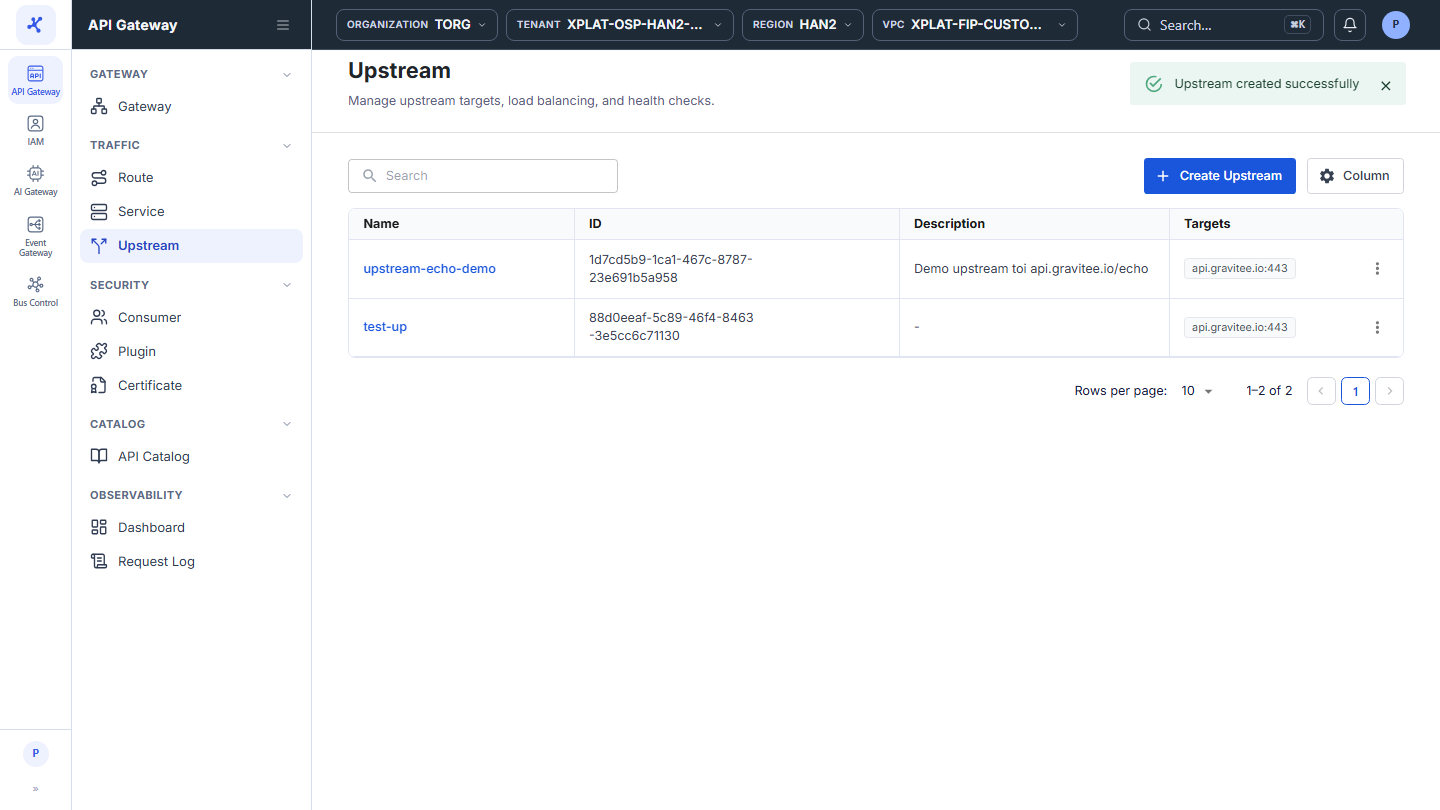
Click the image to zoom in.
To create an Upstream manually, follow these steps:
-
In the left menu, select API Gateway → Upstream, select the API Gateway in the top-right corner, then click Create Upstream.
-
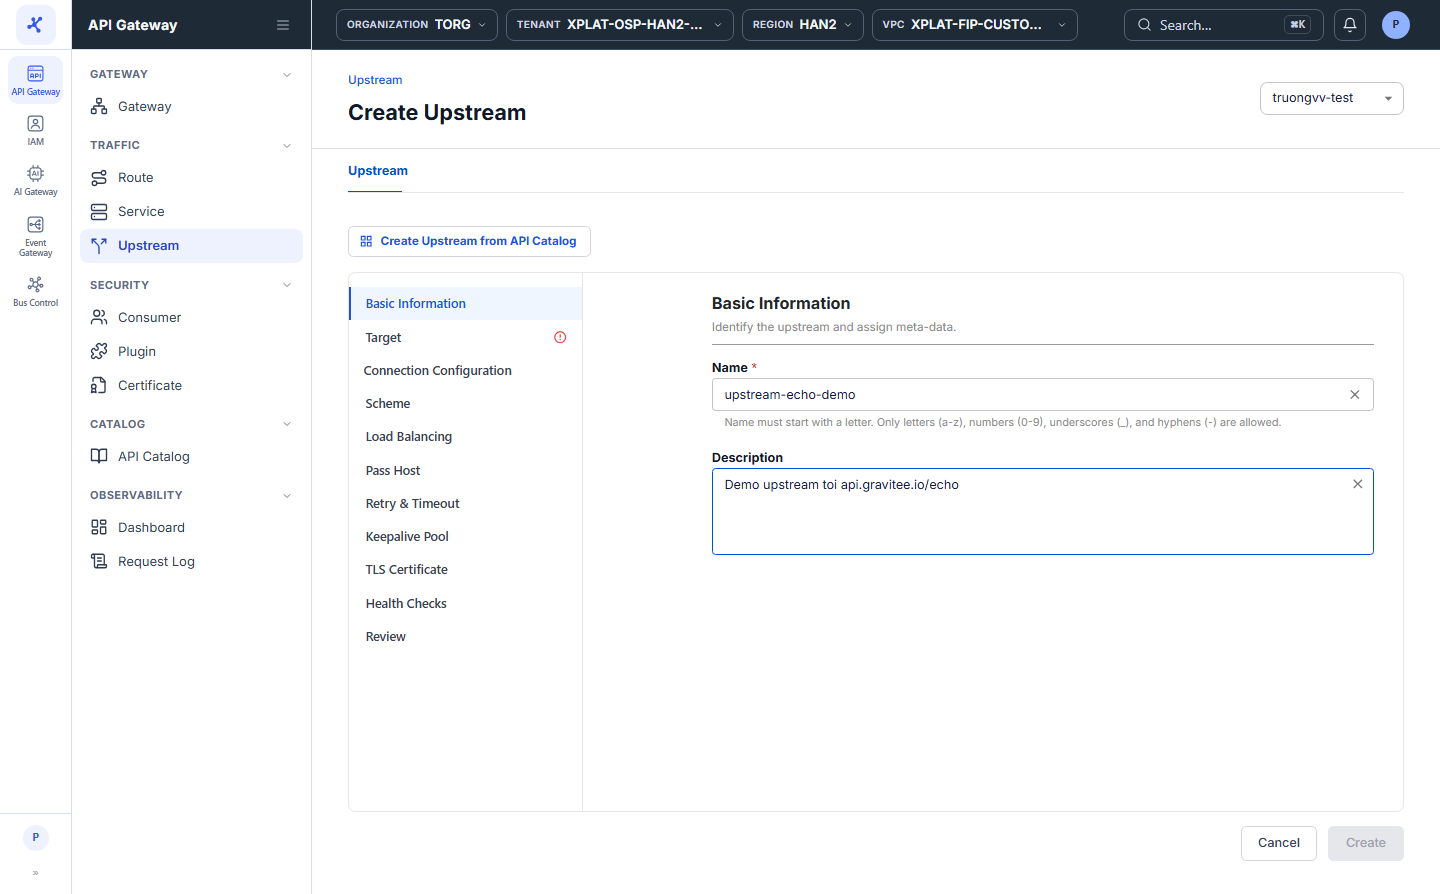
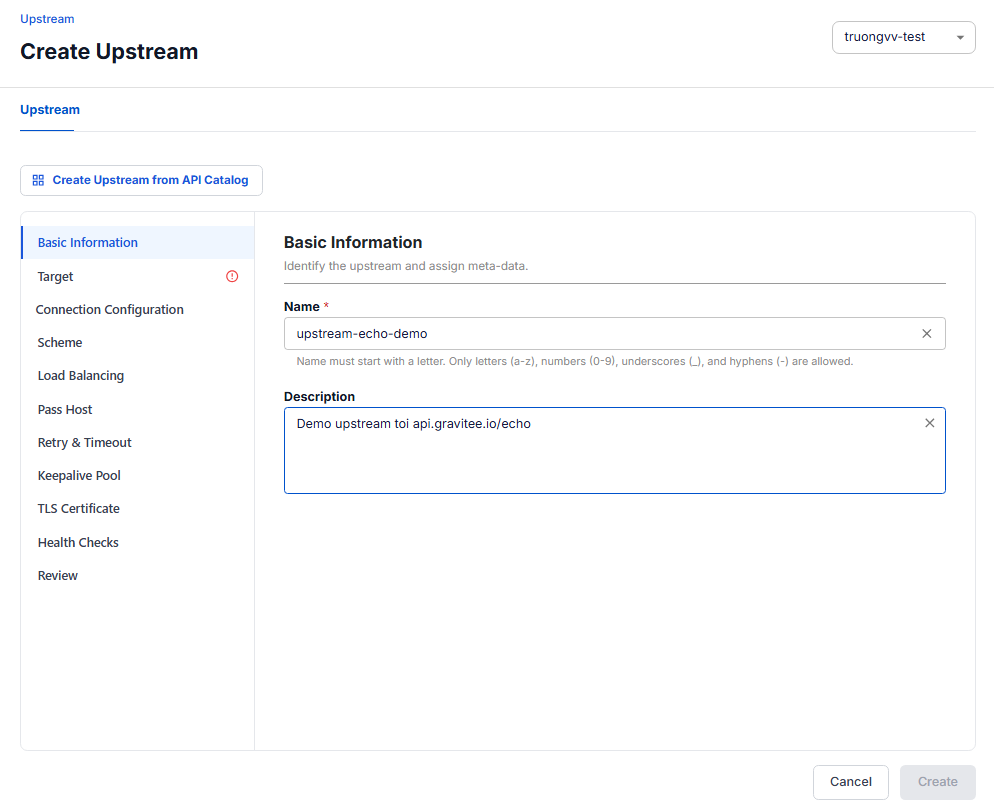
In the Basic Information section, enter the following information:
| Field | Required | Description |
|---|---|---|
| Name | Y | Upstream name, shown in the list and used to select the Upstream on the Route and Service screens. Starts with a letter and uses only letters a-z, numbers 0-9, _, and -. The name must be unique within the API Gateway. |
| Description | N | Purpose of the Upstream, for example which backend or environment, so others understand it later. |
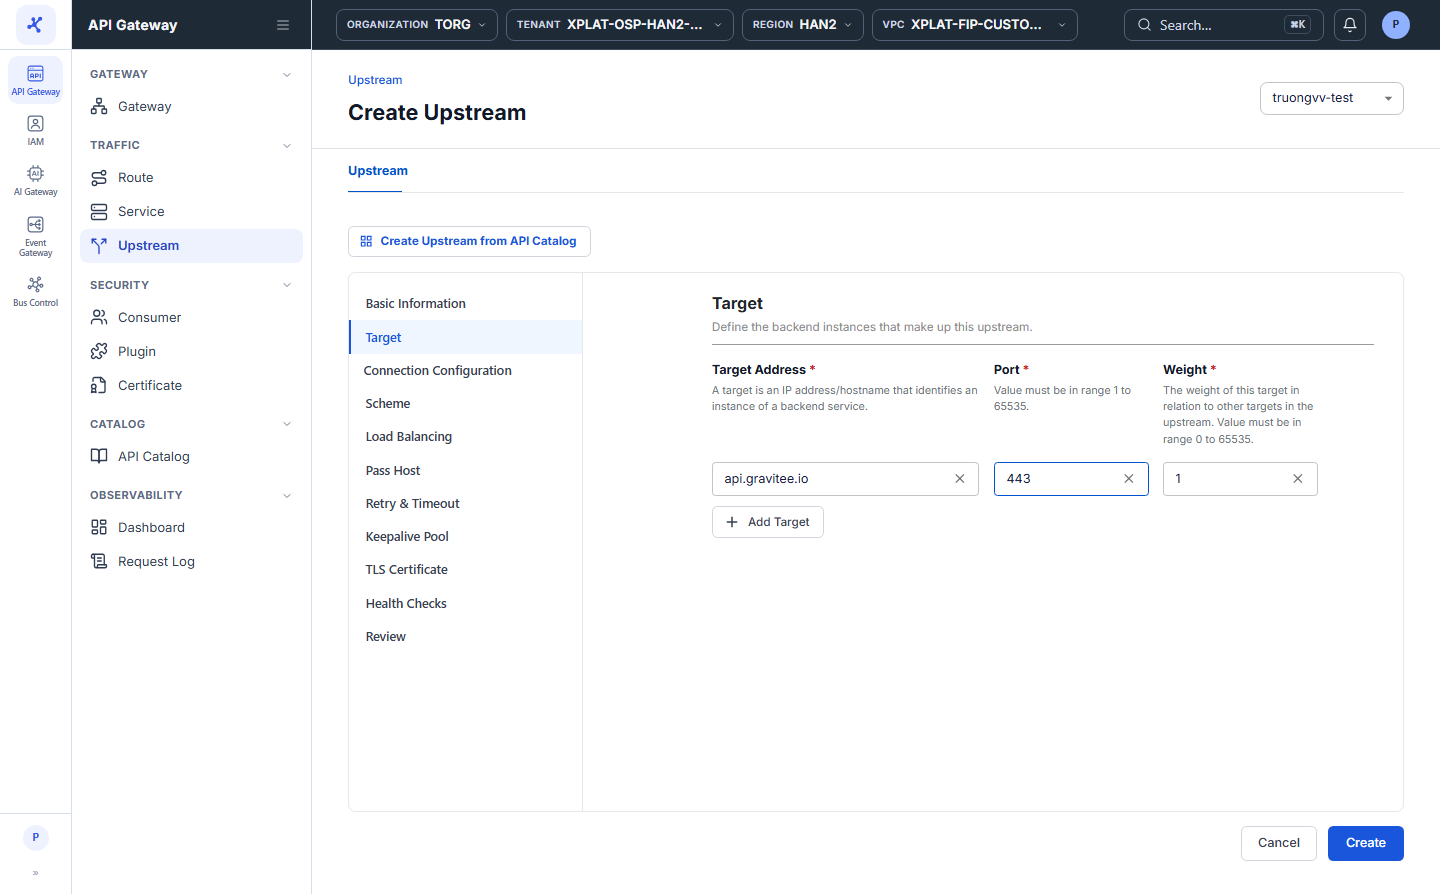
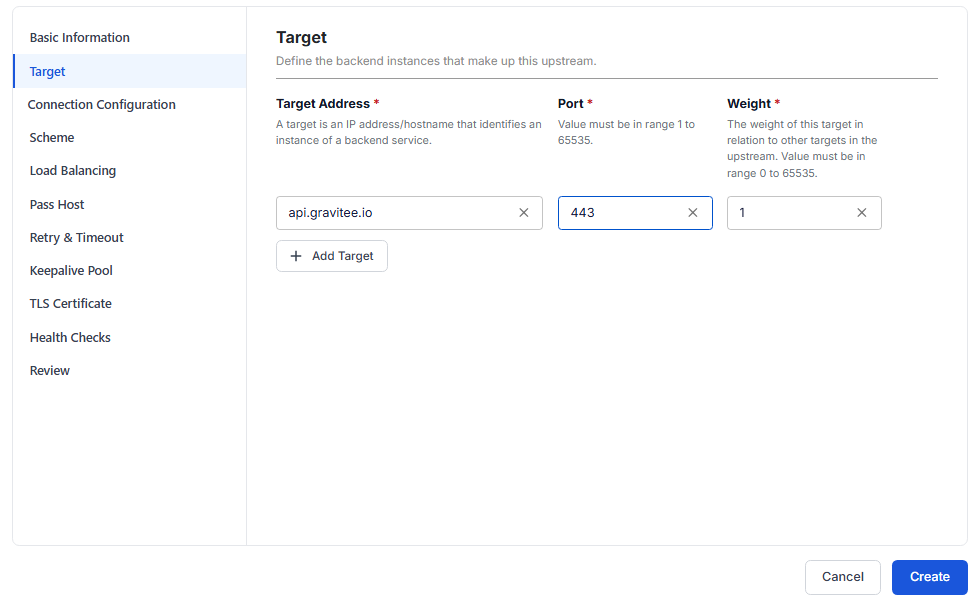
- Select the Target section, then declare the backend instances that receive traffic:
| Field | Required | Description |
|---|---|---|
| Target Address | Y | IP address or hostname of a backend instance, for example api.gravitee.io. Each row is one target in the load balancing pool. |
| Port | Y | Backend port, from 1 to 65535. |
| Weight | Y | Weight of the target, from 0 to 65535, default 1. A target with a higher Weight receives more traffic. Set it to 0 to take the target out of the pool without deleting it, for example during backend maintenance. |
Click Add Target to add a target when the backend has several instances, and click × at the end of a row to remove a target. The Upstream must keep at least 1 target.
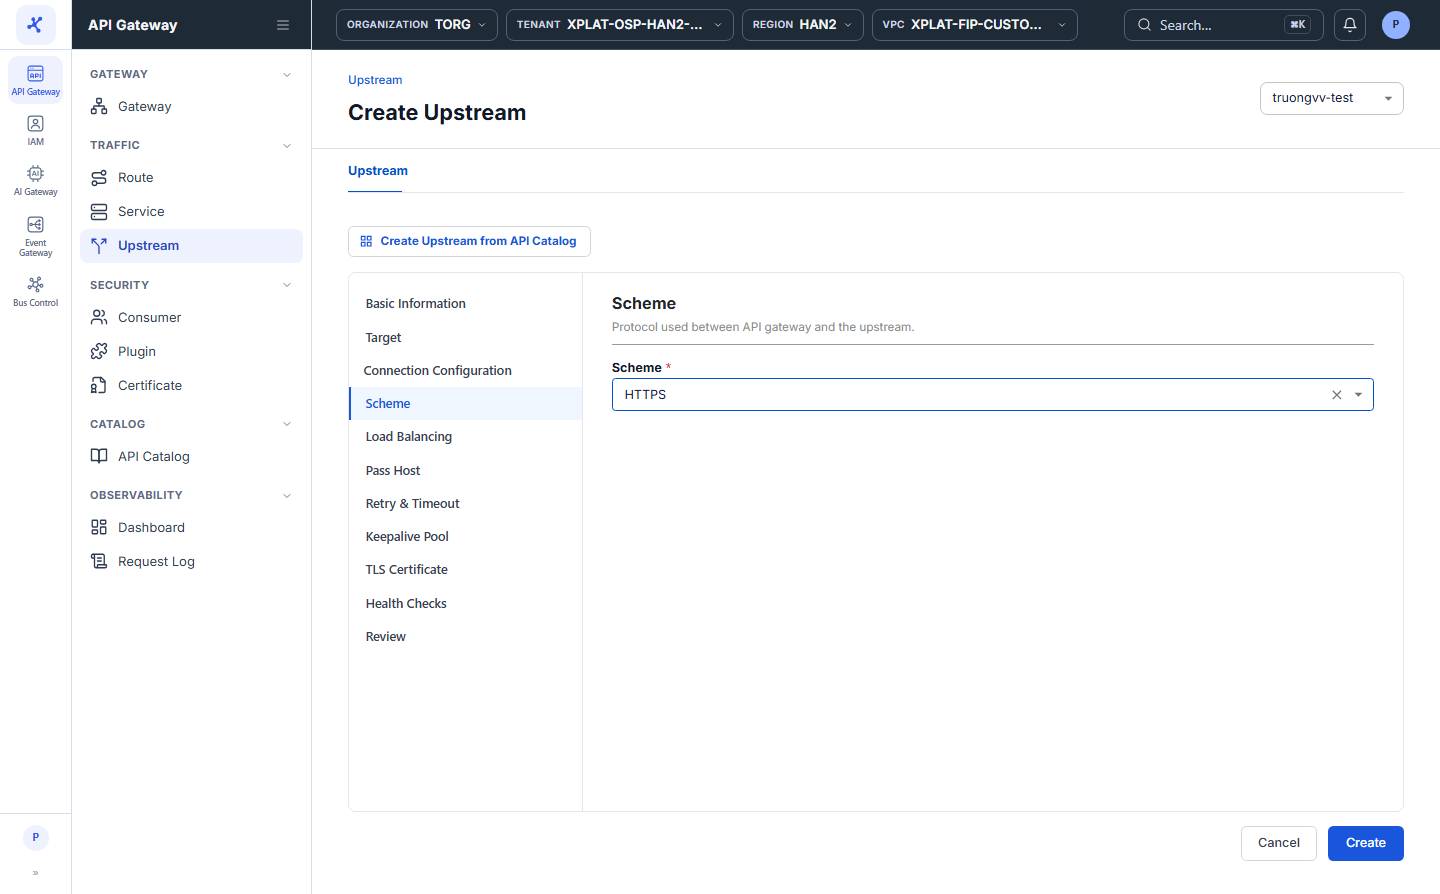
- To customize how the API Gateway connects to the targets, select the sub-sections of Connection Configuration one by one. Every field has a default value, so you can skip this step.
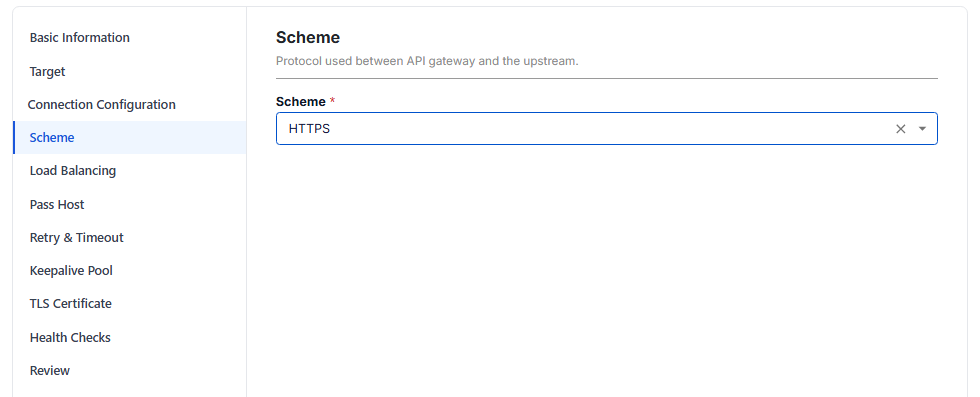
Scheme: protocol between the API Gateway and the Upstream, default HTTP.
| Value | Use when |
|---|---|
HTTP / HTTPS | The backend is a REST API. Select HTTPS when the API Gateway must connect to the backend over TLS. |
gRPC / gRPCs | The backend is a gRPC service over HTTP/2. gRPCs is gRPC over TLS. |
Load Balancing: algorithm that picks the target for each request.
| Value | Use when |
|---|---|
| Round Robin (default) | Requests are spread in turn by Weight. Suits independent targets where a client does not need to stay on one target. |
| CHash | Consistent Hashing: the same client always reaches the same target. Suits backends that need caching or session affinity. |
| EWMA | Prefers the target with the lowest average latency and avoids slow targets automatically. |
| Least conn | Picks the target with the fewest active connections. Suits requests with uneven processing times. |
Pass Host: Host header value when the API Gateway forwards requests to the Upstream.
| Value | Meaning |
|---|---|
| Pass (default) | Keeps the Host header from the client request. |
| Node | Uses the domain or IP of the target as the Host header. |
| Rewrite | Uses a custom host. When you select it, the Upstream Host field appears and is required. |
Retry & Timeout: retries and timeouts when calling a target.
| Field | Required | Description |
|---|---|---|
| Retries | N | Number of times the API Gateway tries another target when a request to one target fails. Default 3. |
| Retry Timeout (s) | N | Total maximum time for the retries. Default 5. |
| Connect Timeout (s) | N | Maximum time to connect to the target. Default 60. |
| Send Timeout (s) | N | Maximum time to finish sending the request to the target. Default 60. |
| Read Timeout (s) | N | Maximum time to wait for the response from the target, which is how long clients wait when the backend is slow. Default 60. |
Routes also have their own Timeout section. See Create a Route.
Keepalive Pool: keeps and reuses connections to the targets to reduce the cost of opening new ones.
| Field | Required | Description |
|---|---|---|
| Size | N | Maximum number of idle connections kept for reuse. Default 320. |
| Idle Timeout (s) | N | How long an idle connection is kept before it is closed. Default 60. |
| Requests | N | Maximum number of requests on one connection before it is replaced. Default 1000. |
TLS Certificate: TLS verification when the API Gateway connects to the Upstream. Applies only when Scheme is HTTPS or gRPCs.
| Field | Required | Description |
|---|---|---|
| Verify Upstream Cert | N | Turn on to make the API Gateway verify the TLS certificate of the backend, which protects against spoofing. Default Disable. |
| Client Cert | N | Public certificate in PEM format that the API Gateway presents to the backend for mutual TLS (mTLS). |
| Client Key | N | Private key in PEM format that matches Client Cert. |
- Select the Health Checks section if you want the API Gateway to detect failing targets and take them out of the pool temporarily. There are 2 independent mechanisms, both off by default.
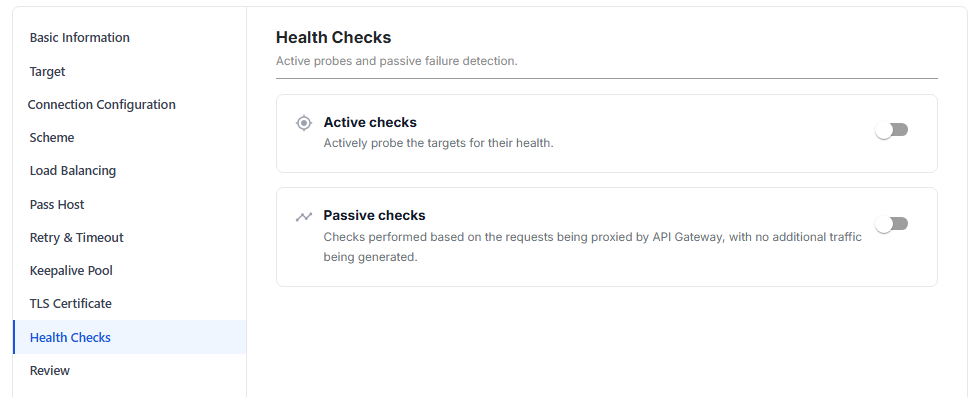
When Active checks is on: the API Gateway periodically sends check requests (probes) to each target. A target that fails too often is taken out of the pool, and it comes back when the probes succeed again.
| Field | Required | Description |
|---|---|---|
| Type | N | Probe protocol: HTTP or HTTPs. Default HTTP. |
| HTTPs Verify Certificate | N | Verify the TLS certificate when probing over HTTPs. Default Disable. |
| Timeout (s) | N | Maximum wait time for each probe. Default 1. |
| Concurrency | N | Number of probes sent at the same time. Default 10. |
| Host, Port, HTTP Path | N | Address and path that receive the probes. HTTP Path defaults to /. |
| Healthy Status: Interval, Successes | N | Probe interval (seconds) and number of consecutive successful probes to consider the target healthy. Defaults 1 and 2. |
| Unhealthy Status: Interval, HTTP Failures | N | Probe interval (seconds) and number of failed probes to consider the target unhealthy. Defaults 1 and 5. |
When Passive checks is on: the API Gateway judges targets from the real traffic passing through, without sending extra check requests.
| Field | Required | Description |
|---|---|---|
| Healthy Successes | N | Number of successful responses to consider the target healthy. |
| Unhealthy HTTP Failures | N | Number of HTTP errors to consider the target unhealthy. |
| Unhealthy TCP Failures | N | Number of TCP errors to consider the target unhealthy. |
- Select the Review section to check the whole configuration. Sections left at their defaults show Using defaults., and Health Checks that are off show Disabled. To change something, select the corresponding section.
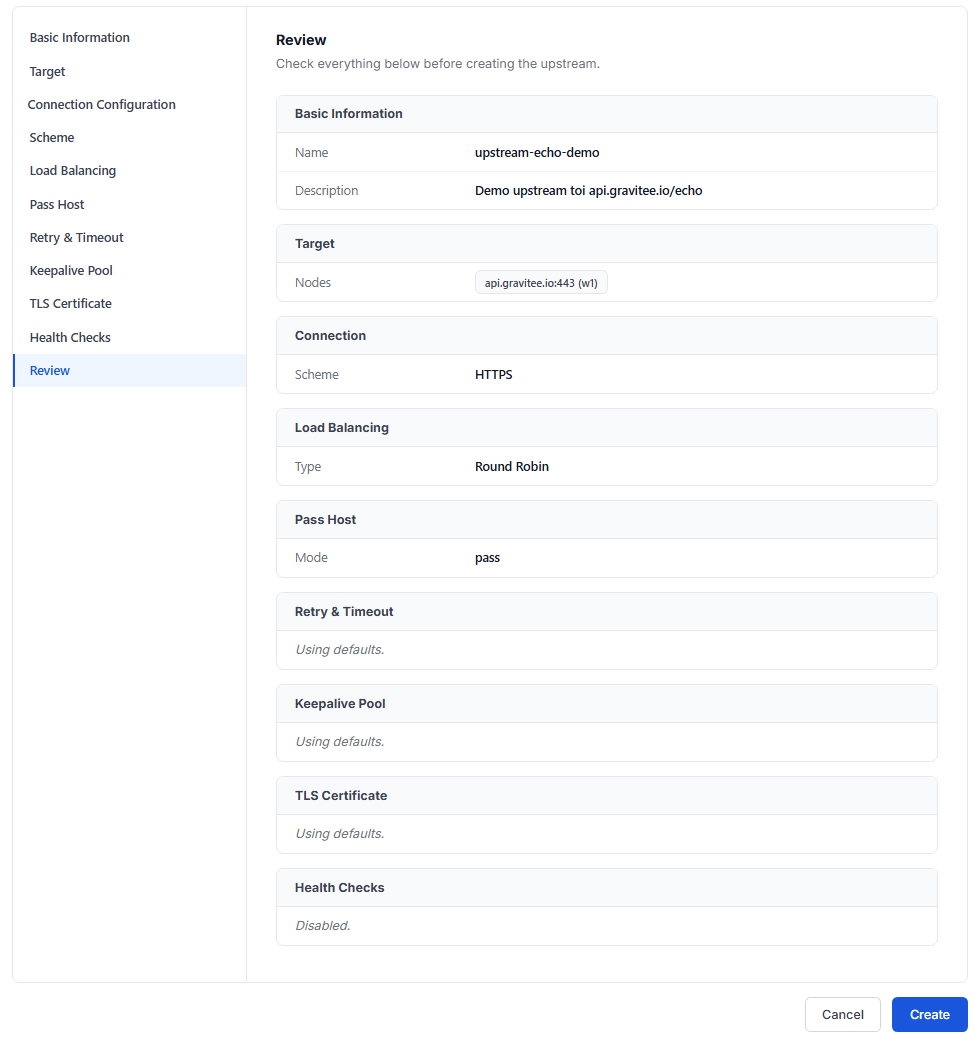
- Click Create to finish.
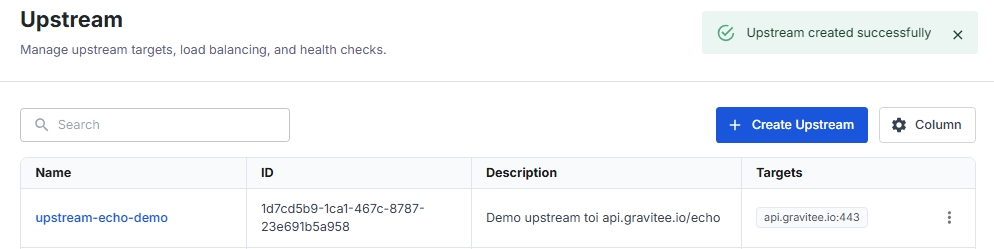
The message Upstream created successfully appears, the system takes you back to the Upstream screen, and the new Upstream is at the top of the list.
Create an Upstream from the API Catalog
Use this when the API is already registered in the API Catalog with a spec that declares servers. The system pre-fills the Target from the server list of the API, so you do not type it.
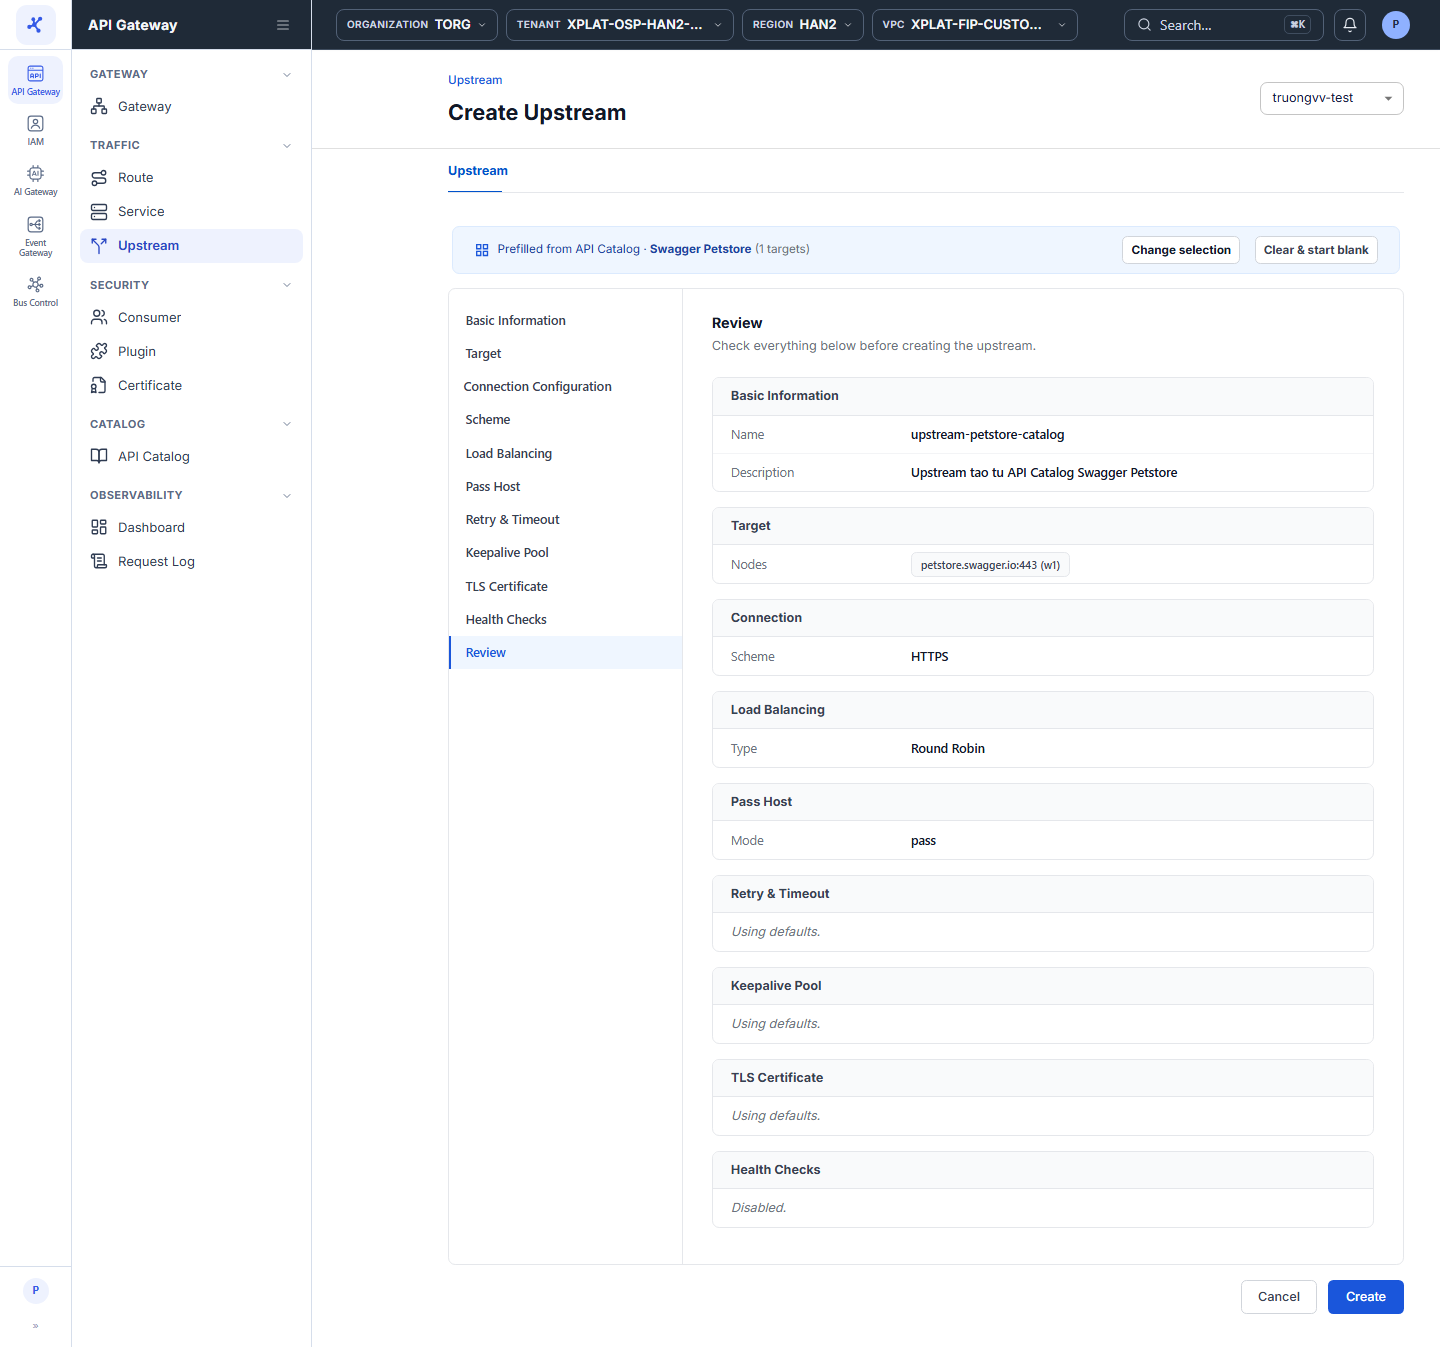
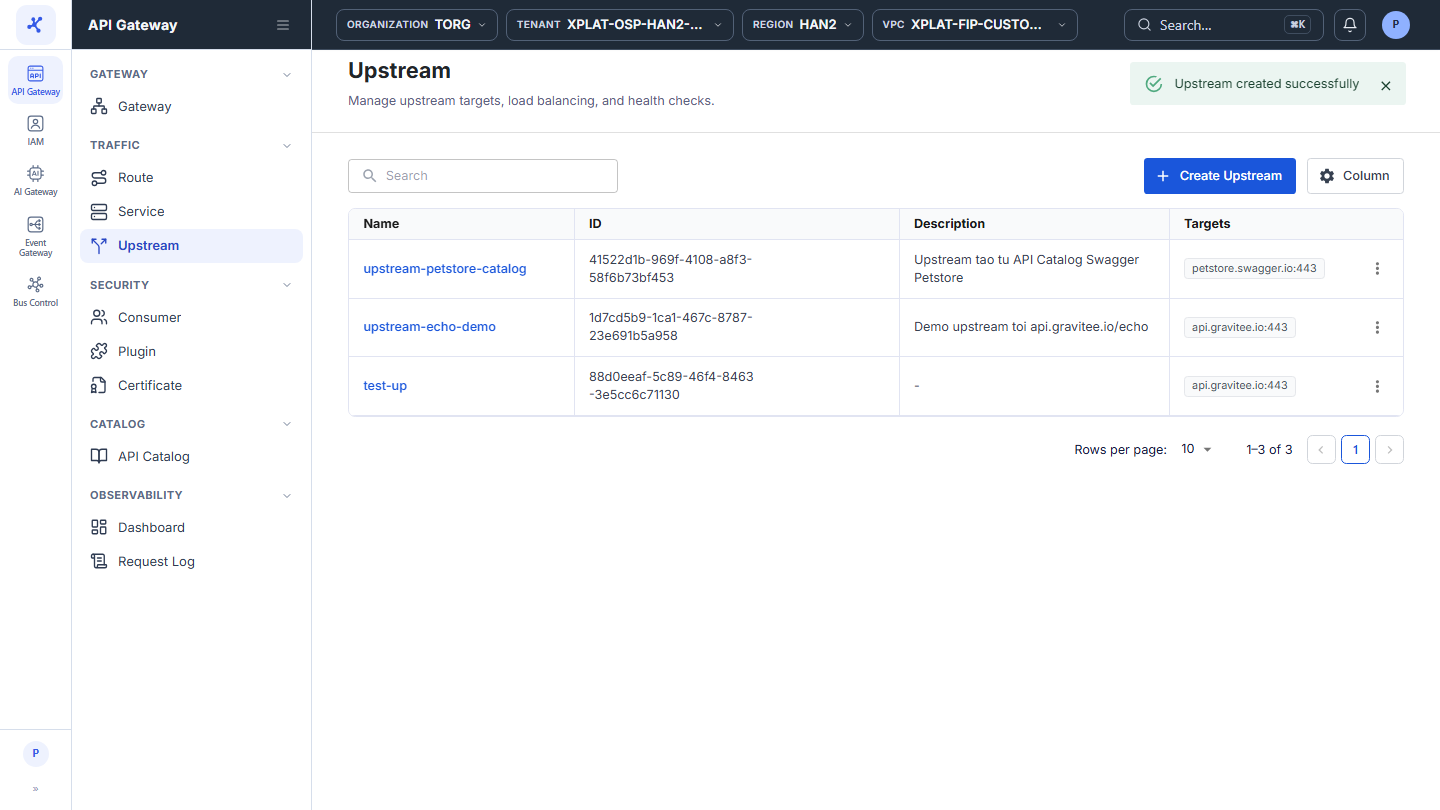
Click the image to zoom in.
To create an Upstream from the API Catalog, follow these steps:
-
In the left menu, select API Gateway → Upstream, select the API Gateway in the top-right corner, then click Create Upstream.
-
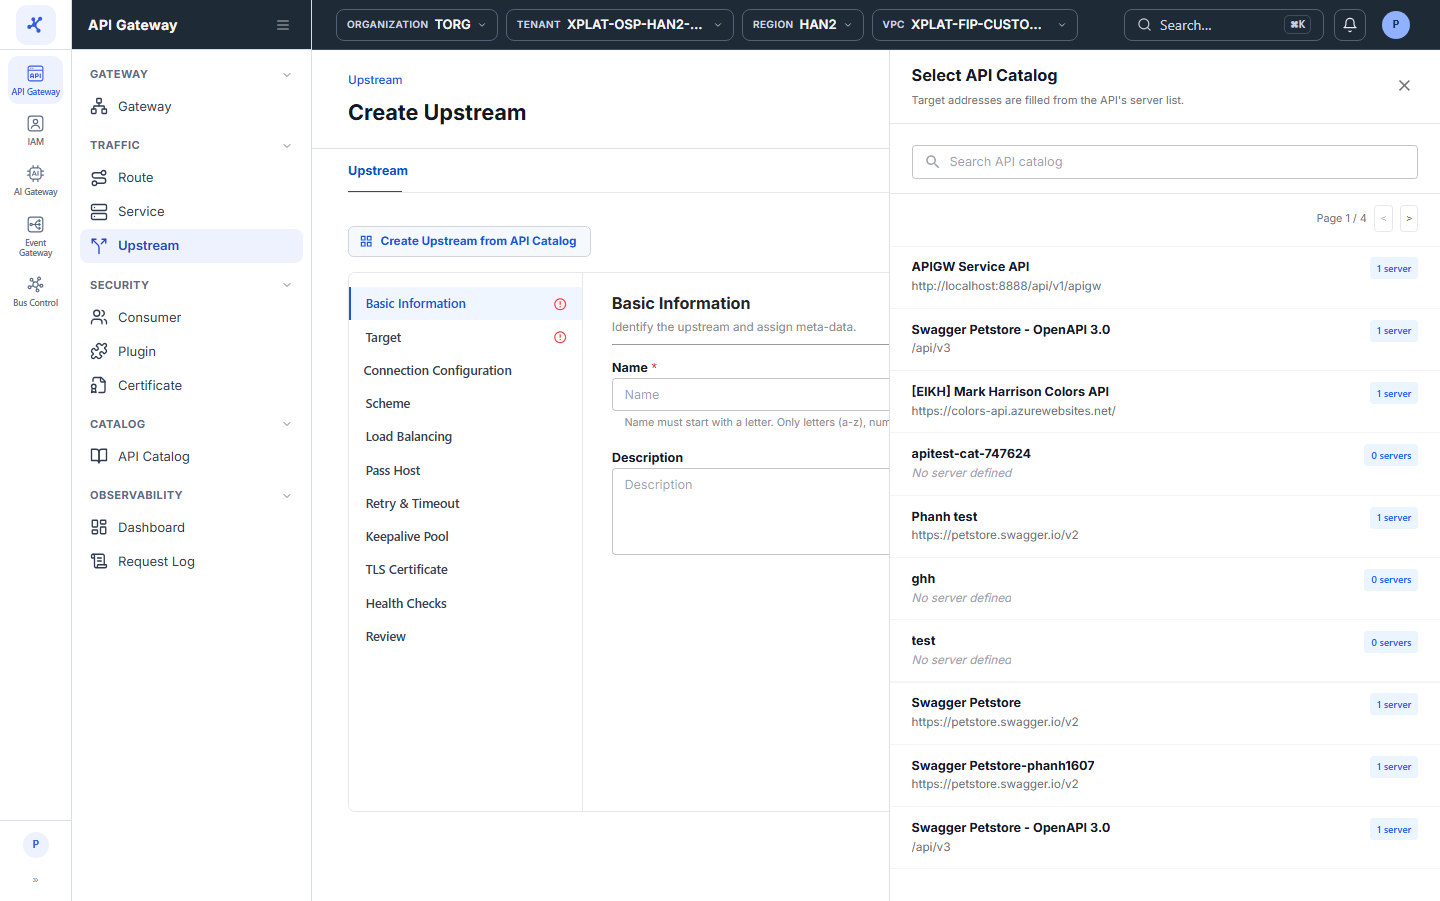
Click Create Upstream from API Catalog. The Select API Catalog form opens and lists the APIs in the catalog with the number of servers and the server address declared in each spec. Enter a keyword in the Search API catalog box to find an API quickly.
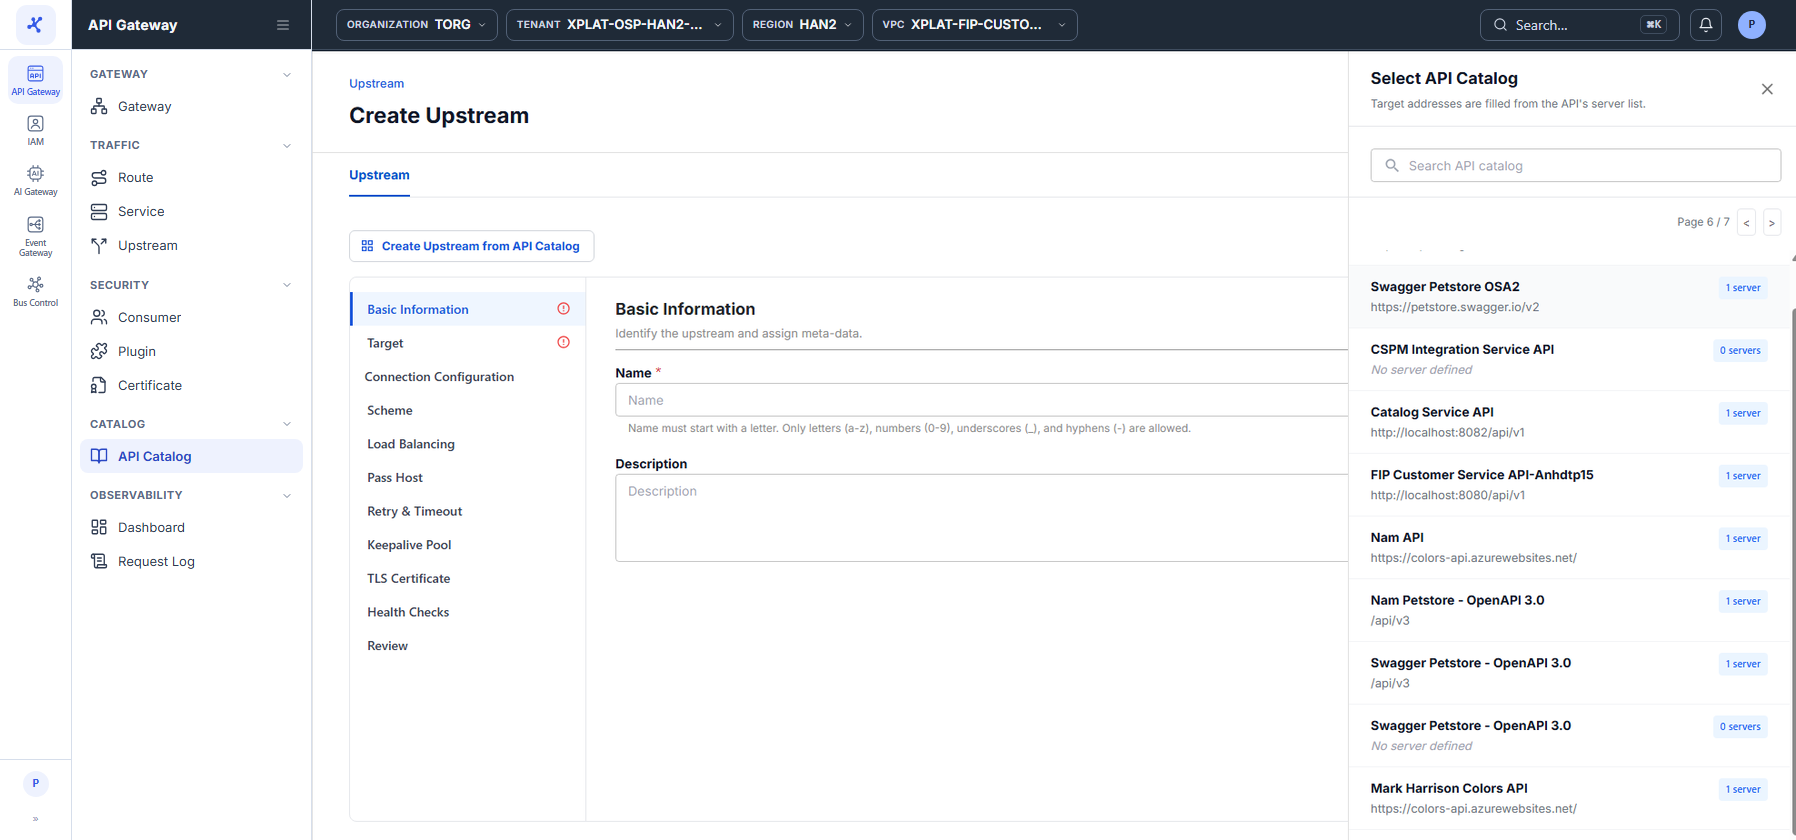
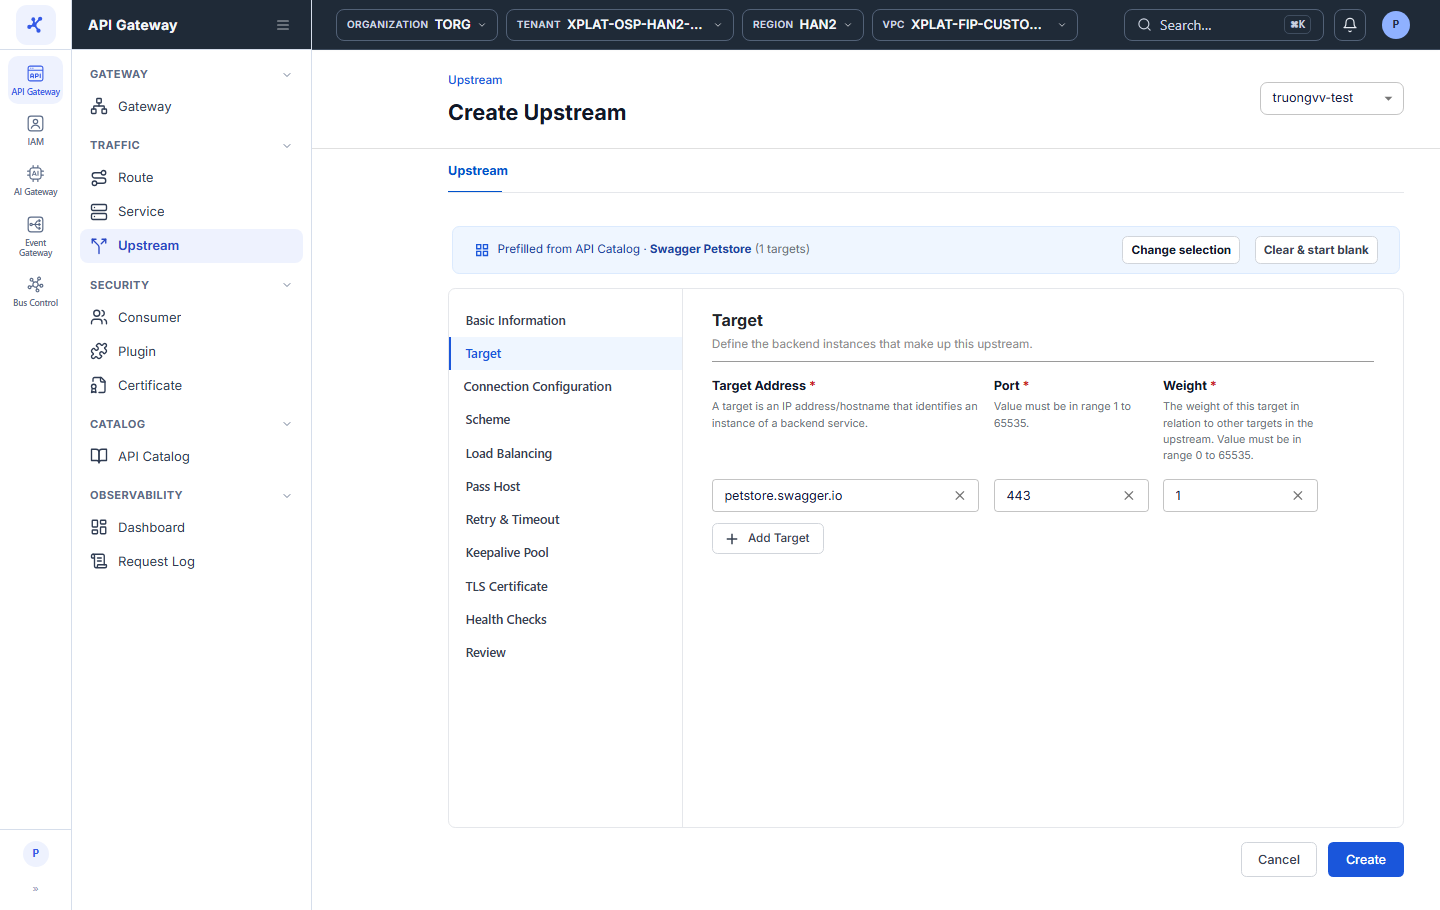
- Select an API. The form closes, the Target section is pre-filled from the server list of the API, and Scheme is set from the protocol of the server URL (for example, a
https://...server sets Scheme to HTTPS). A Prefilled from API Catalog bar at the top shows the API name, the number of targets, and 2 buttons:
- Change selection: select another API.
- Clear & start blank: discard the pre-filled data and start over manually.
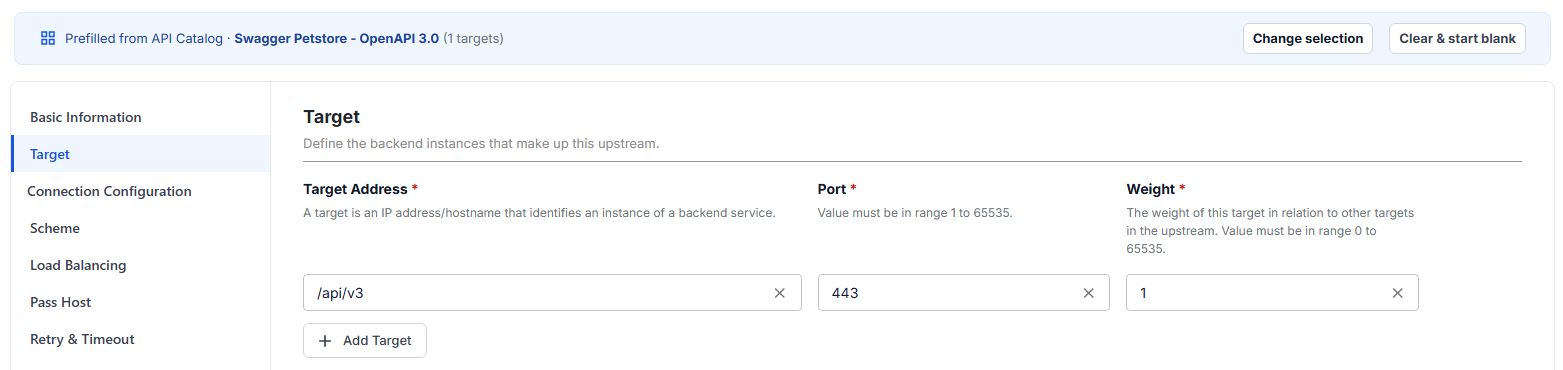
Target Address is copied as-is from the server URL in the spec. If the spec declares a relative path (for example /api/v3, as in the image above) instead of a full URL, change Target Address to the backend host. Prefer APIs whose server is a full URL (https://host:port).
-
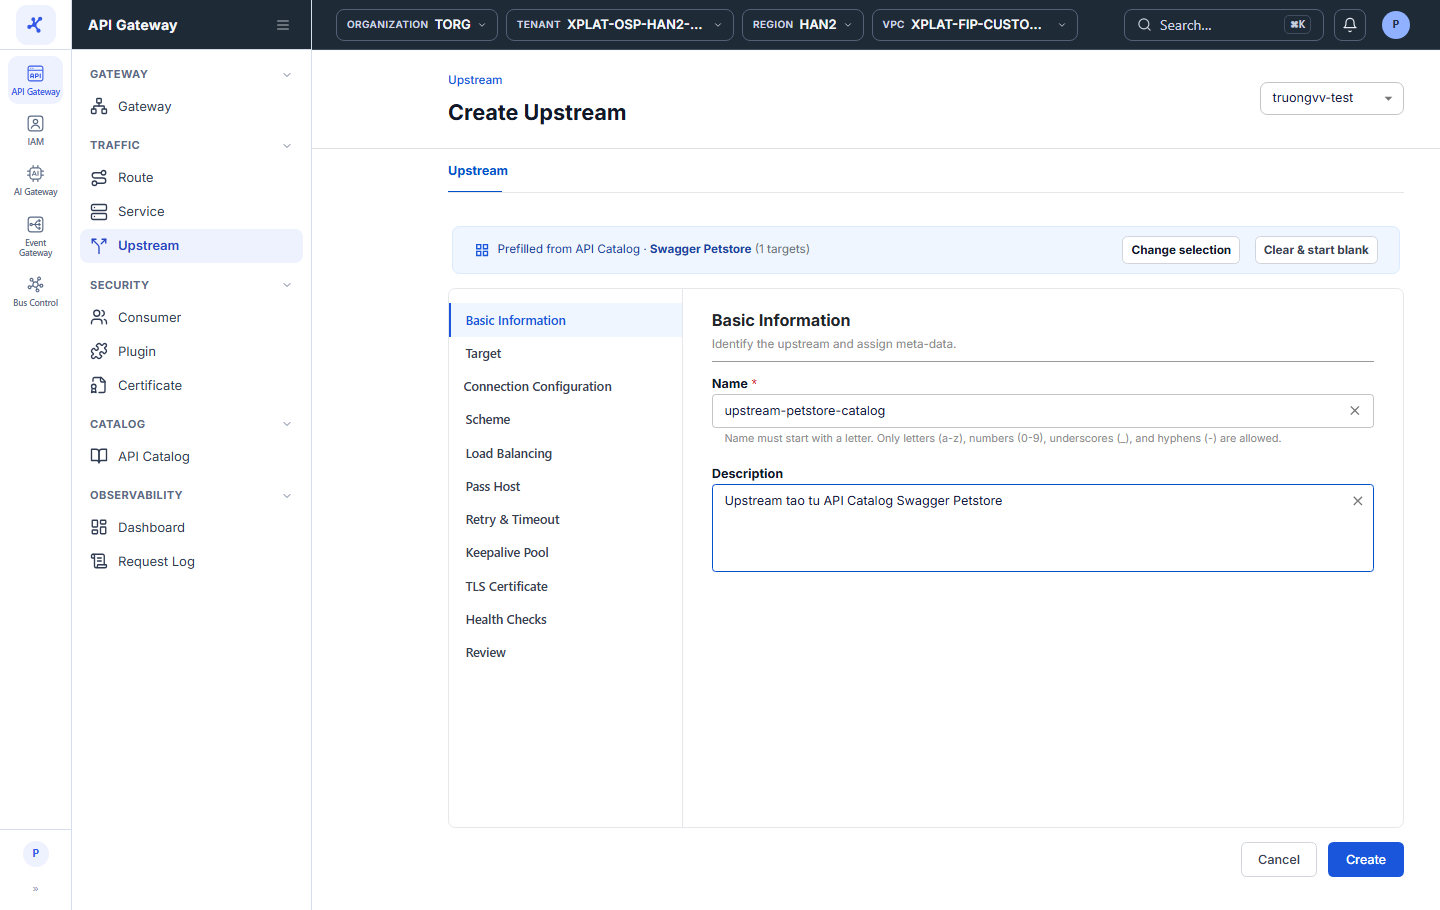
Enter Basic Information and customize the other sections if needed, as in Steps 2–5 of the manual method.
-
Select the Review section to check, then click Create.
Common issues
| Error | Cause | Solution |
|---|---|---|
| Creation is rejected because the name already exists | An Upstream with the same name already exists in this API Gateway | Use another name. |
| The Create button is disabled | Name is empty or there is no valid target (the section shows the red ⓘ icon) | Open the section with the ⓘ icon and fill in the required fields. |
Next steps
- View Upstream details
- Create a Route with Via Upstream
- Create a Service bound to the Upstream
- Edit an Upstream