Create a Custom Workspace
Creating a Workspace with the Custom package lets you set every quota to match your workload from day one. The wizard has three stages: Information, Plan, and Confirmation.
Prerequisites
- ✅ You are the tenant owner of the tenant. Only the tenant owner can create a Workspace in the Portal.
Enter Workspace information
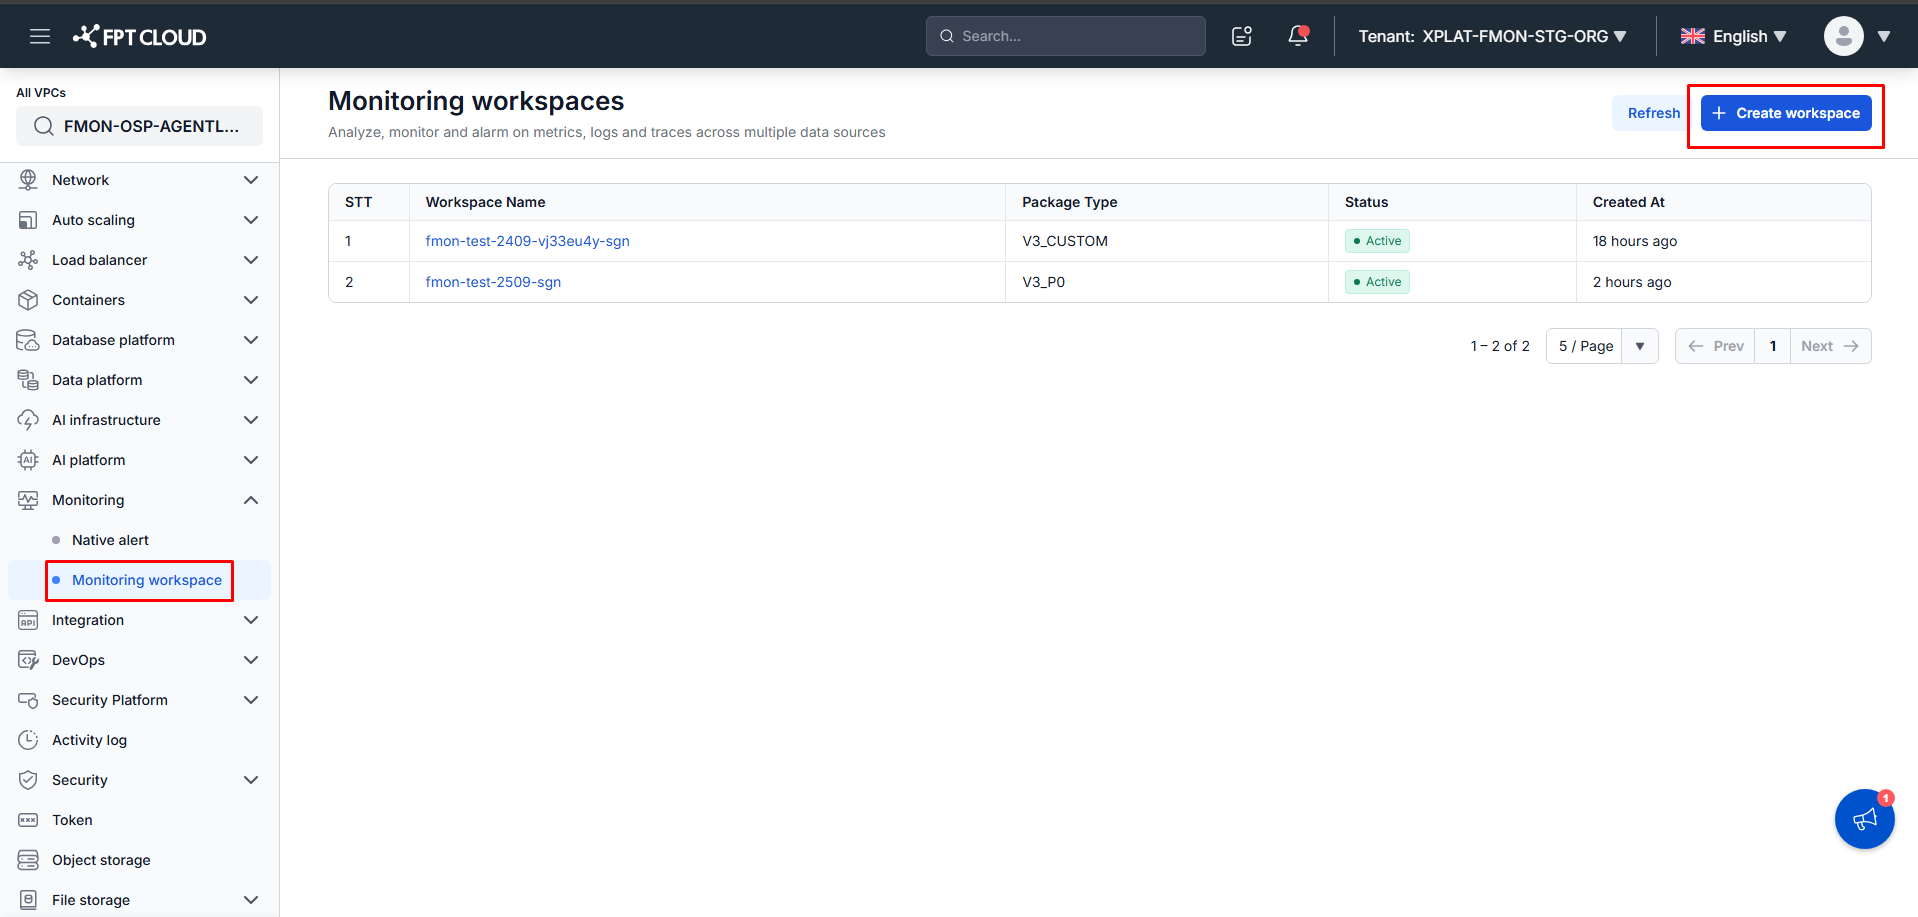
- Go to Monitoring → Monitoring workspace, then click Create workspace.
- Enter a Workspace name. The name must be valid and not empty.
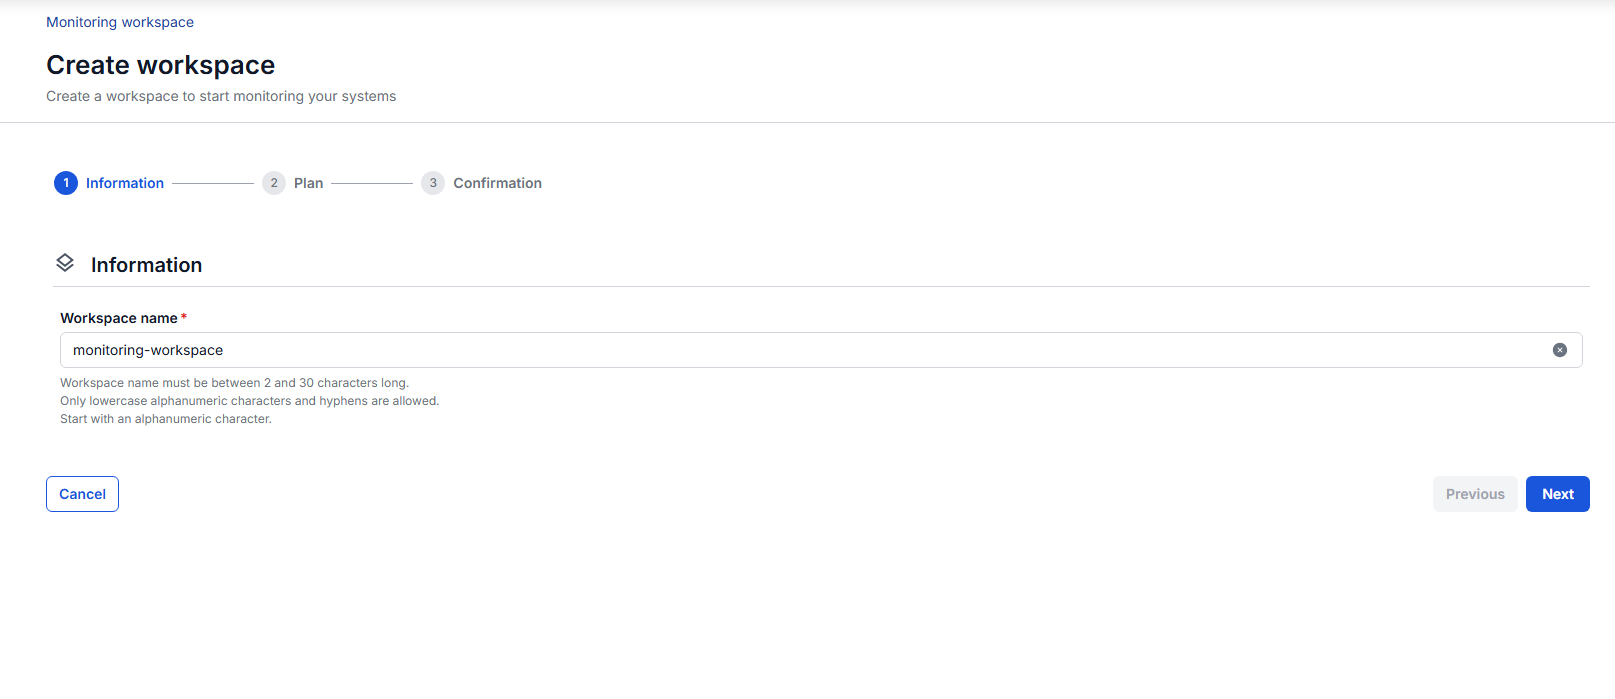
- Click Next to go to the package step.
Choose the Custom package
- In the package list, find the V3_CUSTOM column.
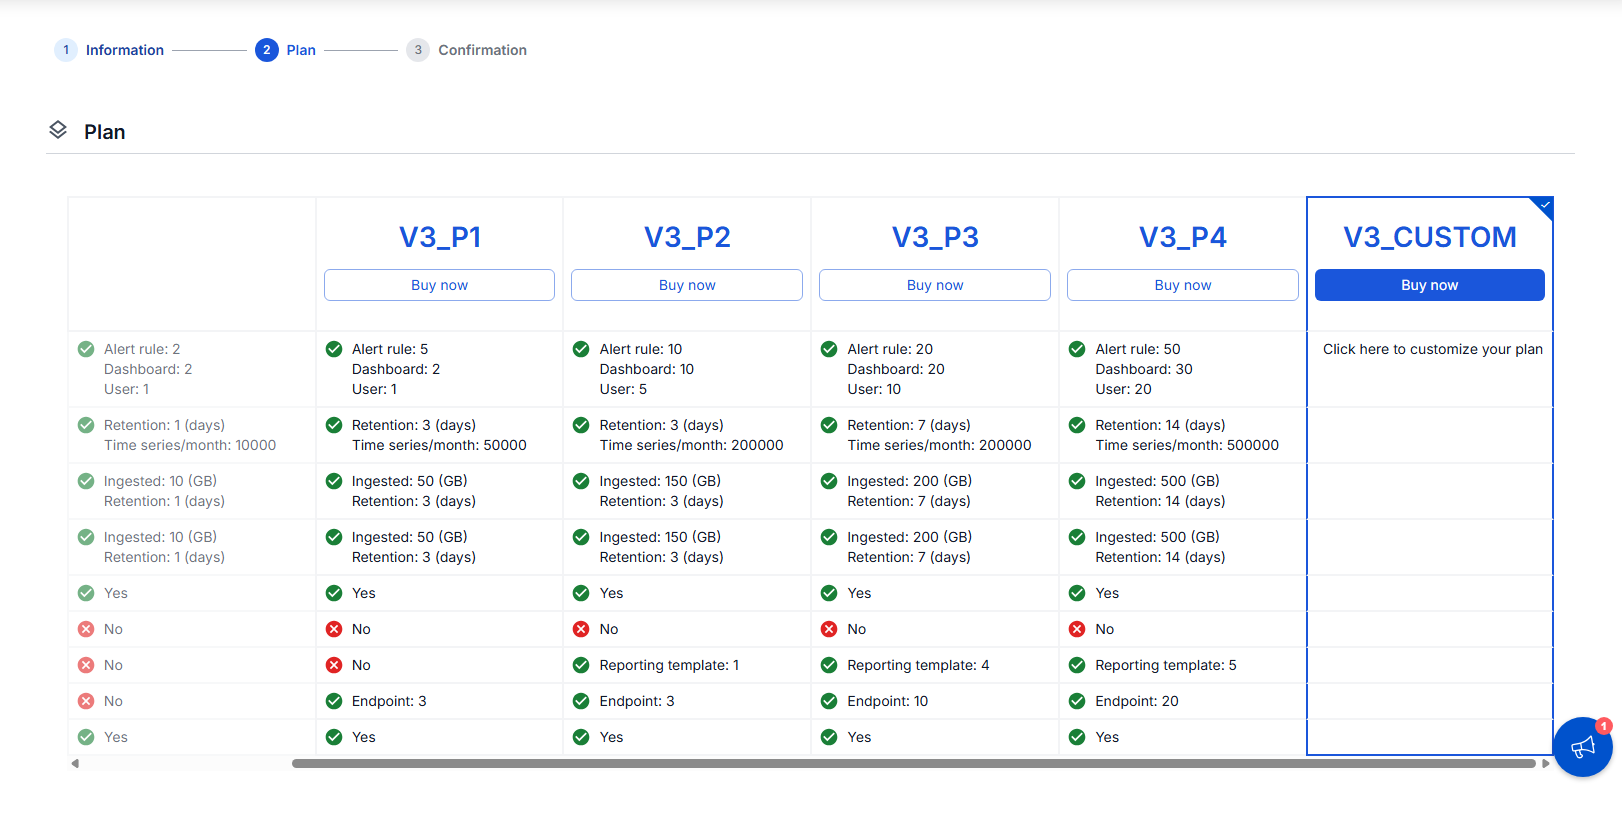
- Click Click here to customize to open the Custom configuration screen.
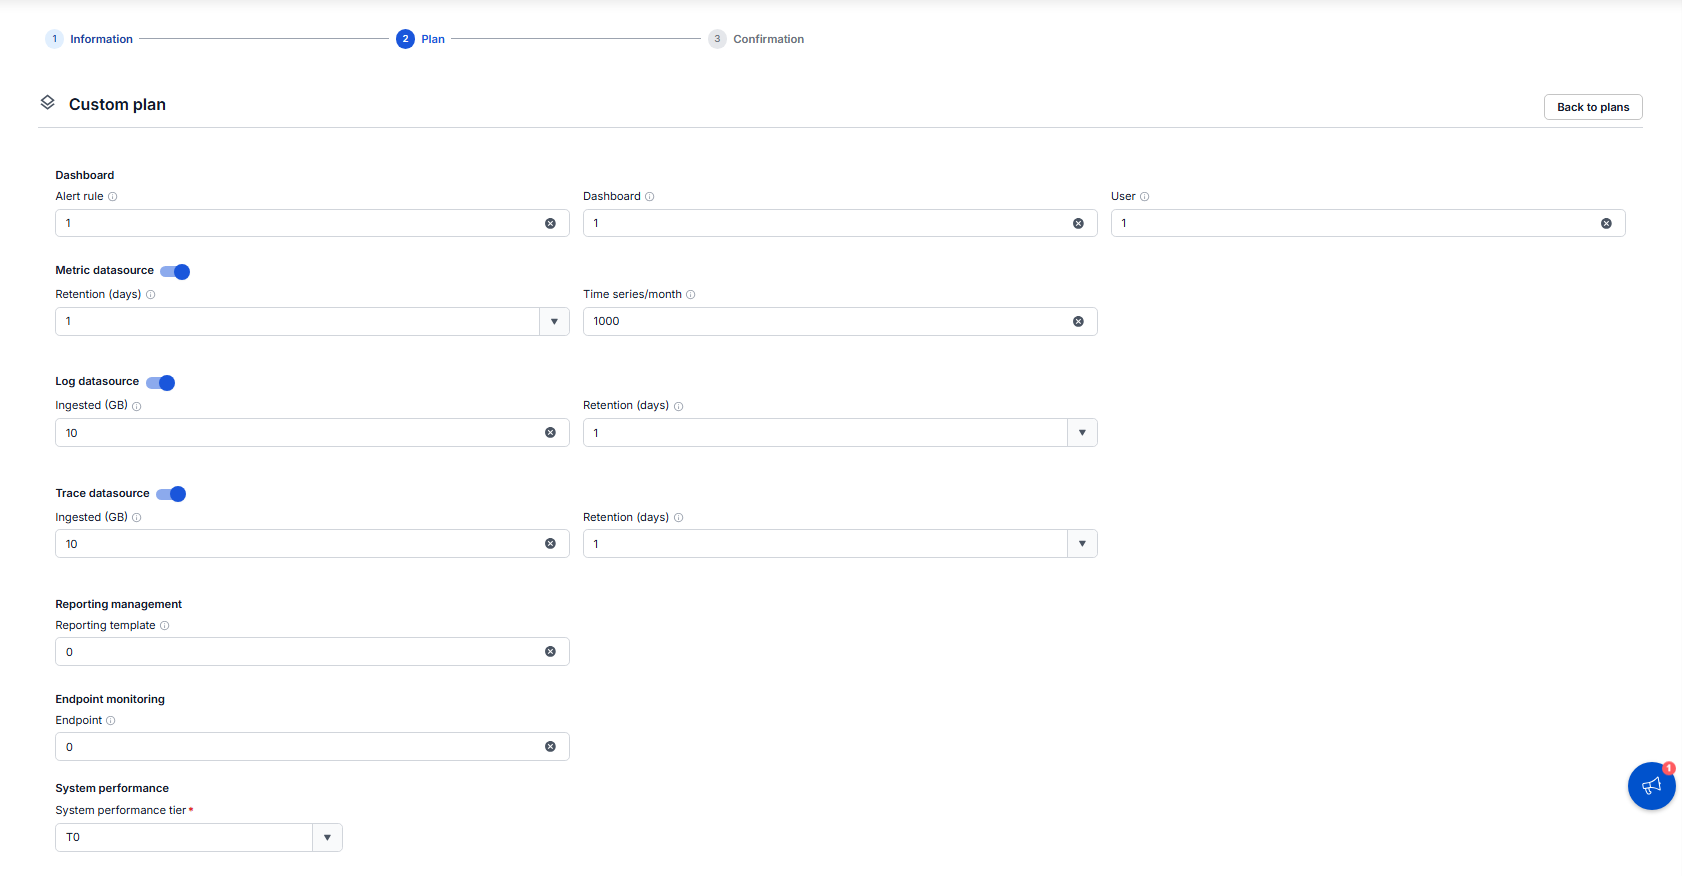
Configure the quotas
- Set Dashboard, User, and Alert rule to the values you need, within the ranges in Custom package overview.
- For each datasource (Metric, Log, Trace), toggle it on or off. When it is on, choose Retention and enter Time series (Metric) or Ingested (Log/Trace).
- Enter Endpoint monitoring and Reporting template in multiples of 5. Leave them at 0 if you do not use them.
- Review the System performance tier the system suggests. You can raise it if you want.
- Click Next. If any field is highlighted red, fix the errors and click again.
Confirm and create
- On the Confirmation screen, review the Pre-check resource table and check every quota. Datasources you turned off do not appear here.
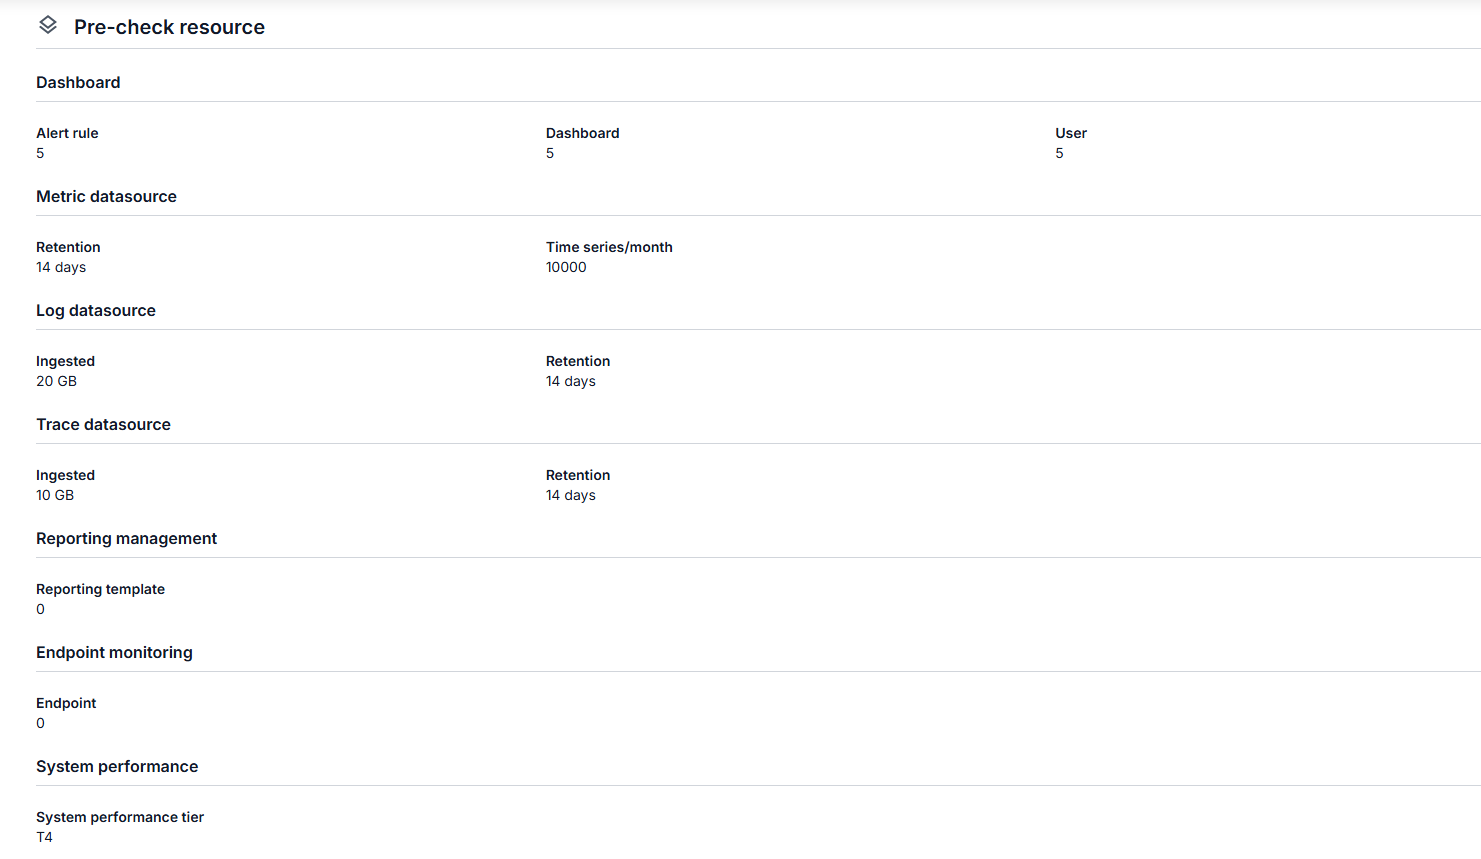
- To change anything, click Previous.
- Click Save to finish creating the Workspace.
The Workspace appears in the list with the Active status.
tip
Click Cancel at any step to exit without creating the Workspace.